 Ahmed Elsaggan
In this project i draw a countdown timer on 1sheeld GLCD shield ,the user of this project can Determines the duration of the timer using drawn button on the GLCD, when the timer reach 0 there will buzzer sound and vibration.
Step 1: About 1Sheeld and Arduino
Arduino is an open-source platform based on flexible, easy-to-use hardware and software. It is intended for anyone who has an idea for a project and wants to bring it to the real life. To make a project with Arduino you need to buy some accessories to connect your Arduino to the real world, these accessories are called shields. 1Sheeld is a shield that allows you to use your smartphone as an Arduino shield like GSM, WIFI, Gyroscope, etc. The main advantage of 1Sheeld is that it replaces all other shields with just your smartphone and saves you a fortune. It connects the Arduino to your smartphone using the Bluetooth and it gives you the ability to use more than shield at a time like GSM, WIFI, Accelerometer, Gyroscope etc.

1Sheeld
Step 2: Adjust 1Sheeld
If you use an Arduino that works with 3.3 V like Arduino Due you must switch your 1Sheeld to operate on 3.3V since it may damage your board. If you use an Arduino that works with 5 V like Arduino Uno then switch your 1Sheeld to operate on 5V.

Place your 1Sheeld on your Arduino board then plug the Arduino to your laptop or PC.

If you use an Arduino Mega then connect your 1Sheeld to the Mega as shown in the image:

Step 3: Download the 1Sheeld application
For Android smartphones, download the application from here.
For iOS, smartphones download the application from here.
Step 4: Download 1Sheeld library to your computer
Download the library from here.
Then, after you successfully downloaded the library, add the library .ZIP file to your Arduino program.

Step 5: Write your code inside Arduino sketch
/*

This project uses a GLCD shiled of the one shiled to creat a count down counter using a smartphone and arduino with 1sheeld.
*/

#define CUSTOM_SETTINGS
#define INCLUDE_GLCD_SHIELD
#define INCLUDE_BUZZER_SHIELD
#define INCLUDE_VIBRATION_SHIELD

/* Include 1Sheeld library. */
#include <OneSheeld.h>


/* GLCD Setup */

GLCDRectangle border1(0,0,255,127);
GLCDRectangle border2(2,2,251,123);

/* The  Buttons.*/
GLCDButton  startButton(37,87,97,122,"Start");
GLCDButton  hm(77,4,94,21,"+")  ;
GLCDButton  hl(77,66,94,83,"-") ;
GLCDButton  mm(119,4,136,21,"+");
GLCDButton  ml(119,66,136,83,"-");
GLCDButton  sm(162,4,179,21,"+");
GLCDButton  sl(162,66,179,83,"-");
/*Text boxs */
GLCDTextBox hourTextbox(75,30,"0");
GLCDTextBox minutesTextbox(120,30,"0");
GLCDTextBox secondsTextbox(165,30,"0");

int hours=0,minutes=0,second=0;
int hour_counter,minutes_counter,second_counter;
bool countDownState=false;

void setup() {

/* Start communication with 1Sheeld. */
  OneSheeld.begin();
/* Clear the GLCD. */
  GLCD.clear();

/* Draw all shaps. */
  GLCD.draw(border1);
  GLCD.draw(border2);
  GLCD.draw(startButton);
  GLCD.draw(hm);
  GLCD.draw(hl);
  GLCD.draw(mm);
  GLCD.draw(ml);
  GLCD.draw(sm);
  GLCD.draw(sl);
  GLCD.draw(hourTextbox);
  GLCD.draw(minutesTextbox);
  GLCD.draw(secondsTextbox);

/* Change the styles of the buttons to 3D. */
  startButton.setStyle(STYLE_3D);
  hm.setStyle(STYLE_3D);
  hl.setStyle(STYLE_3D);
  mm.setStyle(STYLE_3D);
  ml.setStyle(STYLE_3D);
  sm.setStyle(STYLE_3D);
  sl.setStyle(STYLE_3D);

/* Set the button dimensions. */
startButton.setDimensions(64,30);
hm.setDimensions(32,17);
hl.setDimensions(32,17);
mm.setDimensions(32,17);
ml.setDimensions(32,17);
sm.setDimensions(32,17);
sl.setDimensions(32,17);

/* set the size of the numbers*/
 hourTextbox.setSize(MEDIUM);
 minutesTextbox.setSize(MEDIUM);
 secondsTextbox.setSize(MEDIUM);

/* Set the button handlers. */


}

void setButtonTasks()
{
  hm.setOnChange(&hmtask);
  hl.setOnChange(&hltask);
  mm.setOnChange(&mmtask);
  ml.setOnChange(&mltask);
  sm.setOnChange(&smtask);
  sl.setOnChange(&sltask);
  startButton.setOnChange(&startButtontask);

}

/*Increase the hourse */
void hmtask(bool state)
{
  if (state){
  hours++;
  if (hours>23)
  {
  hours=0;
  }

/* converting from interger to char array as setText just take char array*/
  char charArray[4];
  String(hours).toCharArray(charArray,4);
  hourTextbox.setText(charArray);
}

//decrease hours
}
void hltask(bool state)
{
  if (state){
  hours--;
  if (hours<0)
  {
  hours=23;
  }
/* converting from interger to char array as setText just take char array*/
  char charArray[4];
  String(hours).toCharArray(charArray,4);
  hourTextbox.setText(charArray);
  }
}

/*Increase the minutes */
void mmtask(bool state)
{
  if (state){
  minutes++;
  if (minutes>59)
  {
  minutes=0;
  }
  /* converting from interger to char array as setText just take char array*/
  char charArray[4];
  String(minutes).toCharArray(charArray,4);
  minutesTextbox.setText(charArray);
}

//decrease minutes
}
void mltask(bool state)
{
  if (state){
  minutes--;
  if (minutes<0)
  {
  minutes=59;
  }
  /* converting from interger to char array as setText just take char array*/
  char charArray[4];
  String(minutes).toCharArray(charArray,4);
  minutesTextbox.setText(charArray);
  }
}

/*Increase the seconds */
void smtask(bool state)
{
  if (state){
  second++;
  if (second>59)
  {
  second=0;
  }
  /* converting from interger to char array as setText just take char array*/
  char charArray[4];
  String(second).toCharArray(charArray,4);
  secondsTextbox.setText(charArray);
}

//decrease seconds
}
void sltask(bool state)
{
  if (state){
  second--;
  if (second<0)
  {
  second=59;
  }
/* converting from interger to char array as setText just take char array*/
  char charArray[4];
  String(second).toCharArray(charArray,4);
  secondsTextbox.setText(charArray);
  }
}

void startButtontask(bool state)
{
   if (state)
  {
      hm.setVisibility(false);
      hl.setVisibility(false);
      mm.setVisibility(false);
      ml.setVisibility(false);
      sm.setVisibility(false);
      sl.setVisibility(false);
      startButton.setVisibility(false);
      hour_counter=hours;
      minutes_counter=minutes;
      second_counter=second;

    for ( hour_counter;hour_counter>=0;hour_counter--)
    {
      for (minutes_counter;minutes_counter>=0;minutes_counter--)
      {
        for (second_counter; second_counter>=0;second_counter--)
        {
          char charArray[3];
          String(second_counter).toCharArray(charArray,3);
          secondsTextbox.setText(charArray);


          String(minutes_counter).toCharArray(charArray,3);
          minutesTextbox.setText(charArray);


          String(hour_counter).toCharArray(charArray,3);
          hourTextbox.setText(charArray);
          delay(1000);// delay one second


        }
        second_counter=59;
      }
      minutes_counter=59;
    }
    /* Vibrate  and buzzer on for 1 second. */
      Buzzer.buzzOn();
      Vibration.start(1000);
      hm.setVisibility(true);
      hl.setVisibility(true);
      mm.setVisibility(true);
      ml.setVisibility(true);
      sm.setVisibility(true);
      sl.setVisibility(true);
      startButton.setVisibility(true);
      Buzzer.buzzOff();
      /* Stop the vibration. */
      Vibration.stop();

  }
  hours=0,minutes=0,second=0;
}


/*start button function to countdown */
void loop() {

 setButtonTasks();
}
Step 6: Compile and Upload your sketch to your Arduino board
Switch 1Sheeld to the uploading-mode before you upload your sketch to the Arduino board to avoid serial conflicts between 1Sheeld and Arduino.
Upload mode is turned on when the UART switch is pushed away from the 1Sheeld logo.

And then press the Upload button in the IDE, and upload your code to Arduino.

After you completed your upload you need to switch 1Sheeld back to the operating mode.

Step 7: Connect 1Sheeld to your Smartphone using 1Sheeld Application

You will be required to enter the pairing code (the default pairing code is 1234) and connect to 1Sheeld via Bluetooth.
Step 8: Access Shields
- GLCD shield
- buzzer shield
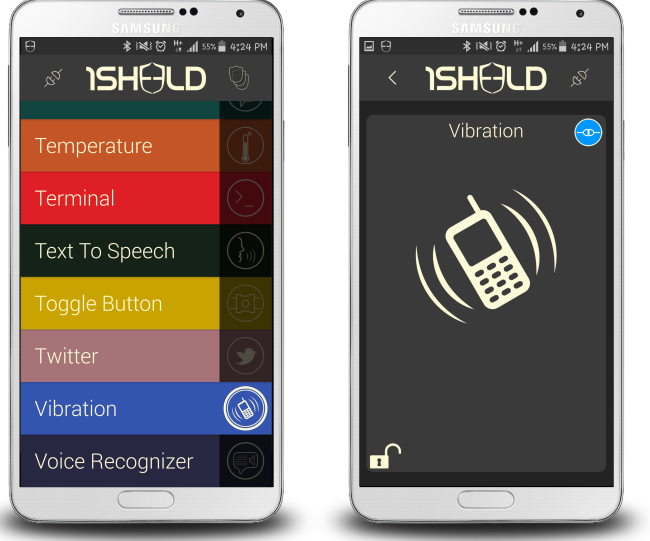
- vibration shield


Press on the multiple shields icon at the top right of the app.
Step 9: push the reset button of the Arduino to start drawing.
all images are from 1sheeld.com