Close
0%
0%

A '90s Robot Hacked Back

The ‘92 Marcraft RS2200 ProArm is hacked back to life by enabling it to be programmed from any everyday laptop.

Similar projects worth following
The once state-of-the-art Marcraft RS2200 ProArm boasted great capability and purpose. It was used as an educational tool around the world, even making various appearances in several research papers. But where is it now?

In this project the Marcraft RS2200 ProArm is hacked back by creating a solution which enables the ProArm to be programmed from any everyday laptop without requiring a change to the robot internally. This required creating a solution which can emulate the old parallel port connection flawlessly.

With this solution, now this robot can literally be almost anything! I have chosen to program this robot to be a bartender…. for now 😎

Presented for 2022 Hackaday Prize: Hack It Back

Some Background 

The ProArm was originally programmed through a bidirectional, parallel port interface with a MS-DOS program called PK Teach. As technology advanced, the ProArm was left behind. Like its fellow parallel-port friends, it was abandoned to collect dust in storage closets.

I encountered a ProArm being sold online and was compelled to attempt to hack it back. However, there were too few resources online to easily find guidance. After tirelessly searching, I discovered that sending precise 8-bit combinations of 1’s and 0’s could operate the ProArm. With the right handshake protocol and 8bit commands, the ProArm could finally shake off its dust and recapture its purpose. 

Some helpful links

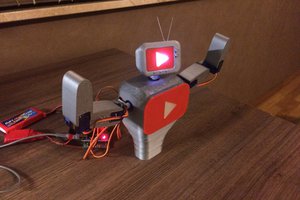
A brief look at the ProArm:

Other Links:

Notes on licensing 

  • I use an Arduino Mega to be the power behind translating commands into 8bit messages and thus emulating the parallel port. Arduino is an open source platform.
  • Marcraft International, the business who once produced the ProArm, is no longer around. However, I do not produce an evasive solution to their product design. My project focuses on creating a totally external solution for reviving this old robot and enabling it to be programmed from any everyday computer. Albeit hard to find, there are several ProArm's out there. My hope is that with this published solution, more ProArms will be brought back to life! 
  • All other components (wires, connections, cables, etc.) are not brand specific nor are they altered from their off the shelf nature. 

InterfaceAndHandshakeProtocolNotes.pdf

Diagrams for wiring to the ProArm programming interface, bypassing the need for a parallel port

Adobe Portable Document Format - 1.41 MB - 07/22/2022 at 02:11

Preview
Download

RobotPlacement.JPG

Brainstorming content for using the ProArm as a bartender

JPEG Image - 70.69 kB - 07/22/2022 at 01:47

Preview
Download

ProjectSchematic.JPG

The high level systems diagram for the parallel port emulator as well as additions for turning the ProArm into a bartender

JPEG Image - 57.95 kB - 07/22/2022 at 01:46

Preview
Download

CS113_RobotInfo.pdf

A research paper for the international version of the ProArm. This project used a desktop computer with a parallel but, but nonetheless gave me some motivation

Adobe Portable Document Format - 516.73 kB - 07/22/2022 at 01:42

Preview
Download

RS-2200_Pro-Arm_Robotics.pdf

The old instruction for using the ProArm with an IBM computer

Adobe Portable Document Format - 18.80 MB - 07/22/2022 at 01:39

Preview
Download

View all 6 files

  • 1 × Marcraft RS2200 ProArm (or Sciento CS113) Including its power cables and power adapters
  • 1 × Arduino Mega
  • 1 × USB-A to USB-B Cable Or whatever cable works for you to program an arduino from your computer
  • 1 × 20pin Ribbon Cable
  • 2 × Female connector for 20pin Ribbon Cable

View all 10 components

  • Turning the ProArm Into a Bartender

    LmBlueJay07/24/2022 at 05:33 0 comments

    With the parallel port emulator hooked up, the possibilities for this robot are wide open. Which is amazing!! 

    I have chosen to program this robot to be a bartender. I have included some photos of the  conceptual representations of this idea. 

    My ultimate goal is to be able to send drink orders to the robot through the internet. In other words, people could order their drink from a website on their phone and the robot will prepare it for them. 

    Connecting this ProArm to the internet raises some complexity. To achieve this I will connect the Arduino to a RaspberryPi. The RaspberryPi will host a website locally on my wifi. More scripts will be needed to initiate a specific set of moves for the robot to make to prepare the wifi-ordered drink. 

    To start I will just have the robot pour sodas. To do this, the following hardware is necessary: a drink preparation table, a sensor to detect the presence of a cup, a trash can for waste, and of course the sodas!

  • Creating the Parallel Port Emulator

    LmBlueJay07/23/2022 at 15:44 0 comments

    Reference the Interfaces and Handshake protocol file on this project. 


    The base of the ProArm houses all the drivers for the stepper motors, a microcontroller (TI Z80), power interface, programming interface, and some other extra interfaces (you can read more in the manual). 

    The microcontroller comes preprogrammed with the robot. It holds the logic for executing commands and for acknowledging/initiating the handshake protocol for the system. As detailed in the manual, the microcontroller expects to receive 8bit combinations of numbers and specific ascii characters.

    Because my hack-it-back solution is non-invasive to the robot control system, the old manual for the ProArm still remains relevant. In other words, the manual can be referenced to create the commands I would like to send to the ProArm. 

    Knowing that I could use the manual to understand what commands to send, I just needed to create a script to translate the ascii characters and numbers into 8bit packages. 

    In my script, sets of commands are stored in an array. Then a function within the script translates the commands to binary, 8bit lines. Lastly the handshake protocol is initialed and the translated array is sent line by line to the ProArm. That’s a high level explanation. You’ll be able to diver deeper into this Arduino script. 

    The last important piece I had to develop was the handshake protocol. I was unable to find the specifics for this in the manual. However, I eventually found the specifics on the website of a Spanish professor. His website was all about the ProArm and how to develop MS-DOS and C++ programs for this robot with its originally intended parallel port.

    In this case, the handshake protocol relied on the STROBE pin of the programming interface. It with the right timing sequence, the Arduino was able to perform the right handshake protocol. 

View all 2 project logs

Enjoy this project?

Share

Discussions

rich.quackenbush wrote 09/23/2022 at 15:26 point

Nice! Thanks for giving me the heads up on this project. Is that the original parallel cable that came with the arm? I'm working on putting one together because mine doesn't have one. It looks like I'll have to wire up an adapter cable. I just need to find the robot side connector.

Oh wait - it looks like you built your own. Do you have a part number for that connector?

  Are you sure? yes | no

Similar Projects

Does this project spark your interest?

Become a member to follow this project and never miss any updates