 Roni Bandini
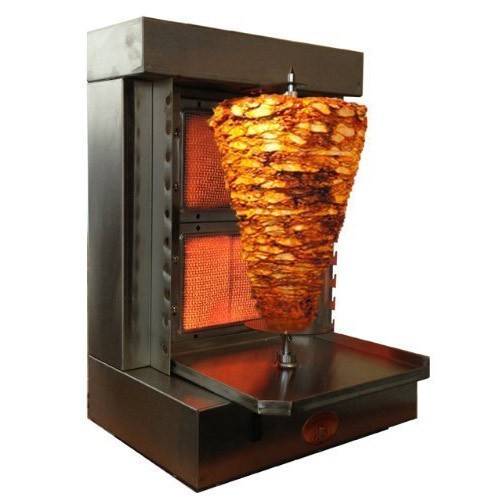
What is a Shawarma Machine
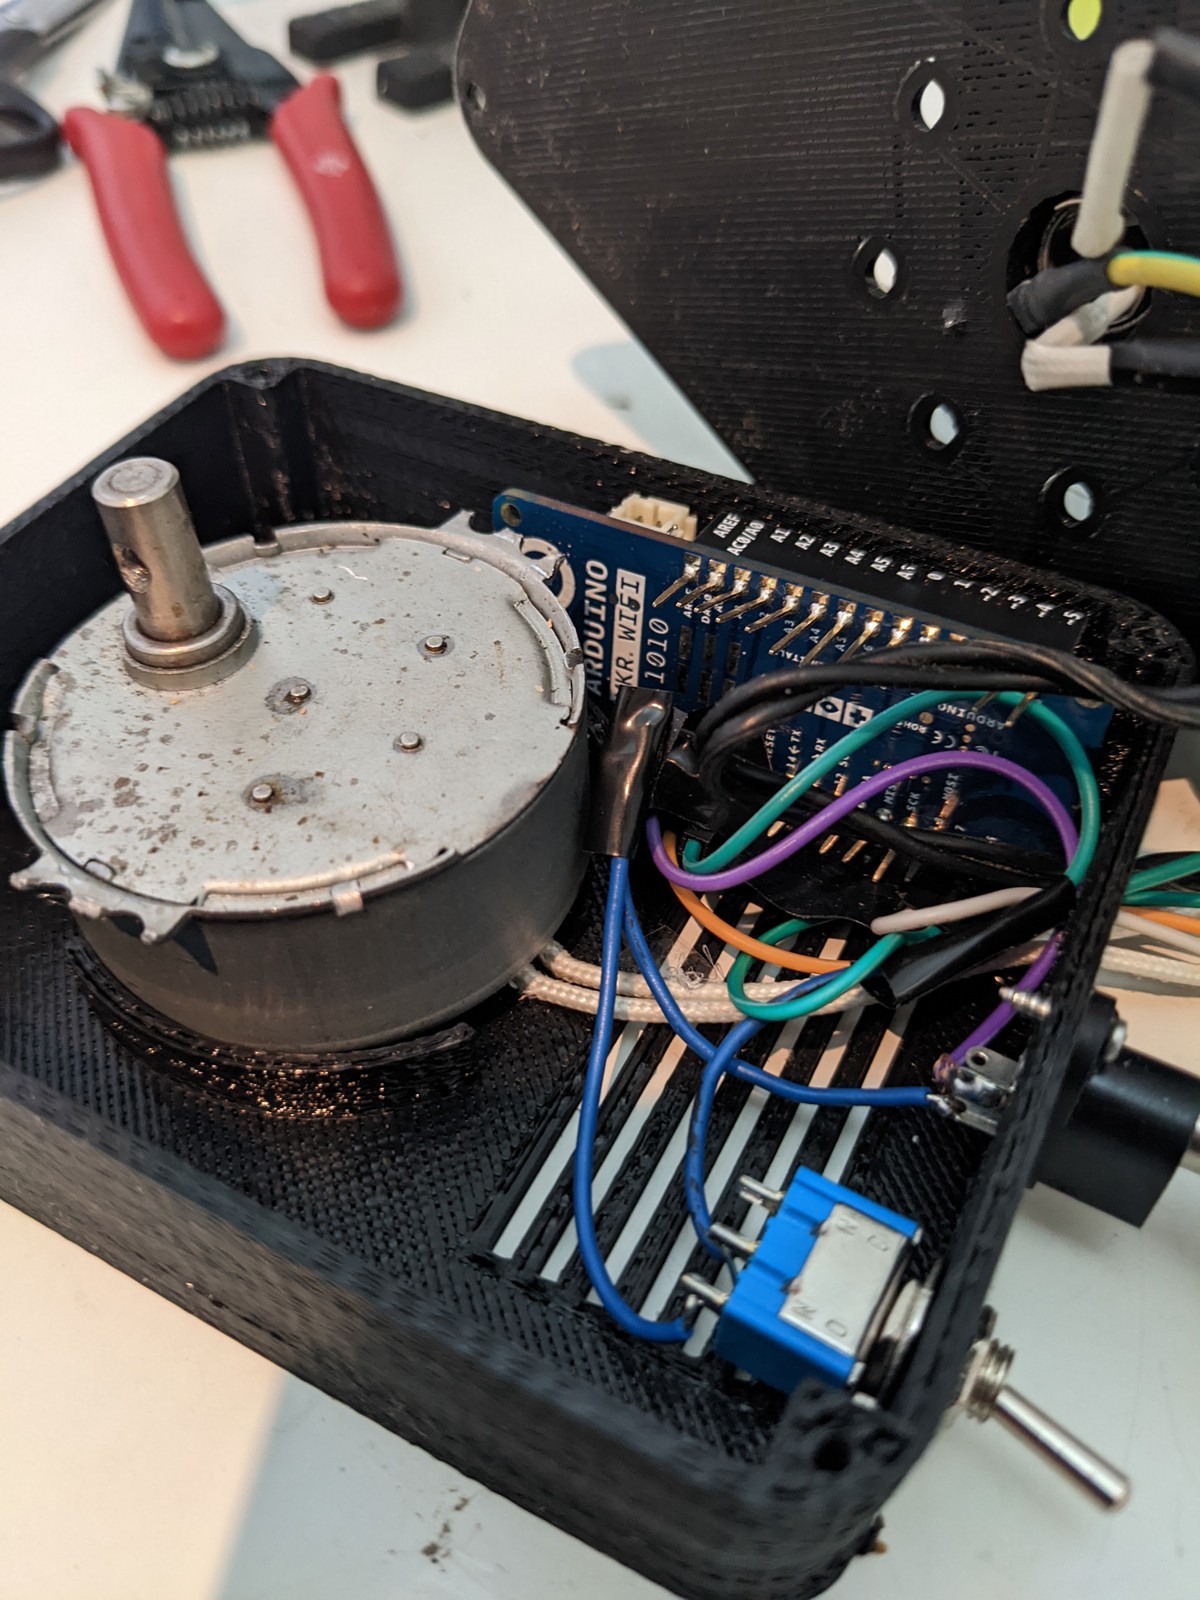
A Shawarma machine has 2 main parts: a slow rotation base and a heat source. For the rotation base, an old AC spiedo oven motor is used but it can still be obtained new from places like this one https://es.made-in-china.com/co_greatup/product_Long-Life-Time-AC-Electrical-Synchronous-Motor-for-Indoor-Monitor_eiisgrgug.html
For the heat source I’ve considered several options but a solder iron was enough and it also works with 220 AC as the motor. To replicate a standard Shawarma machine 2 switches could be used but that is not fun, so I’ve decided to include a web server and control the machine through WiFi.
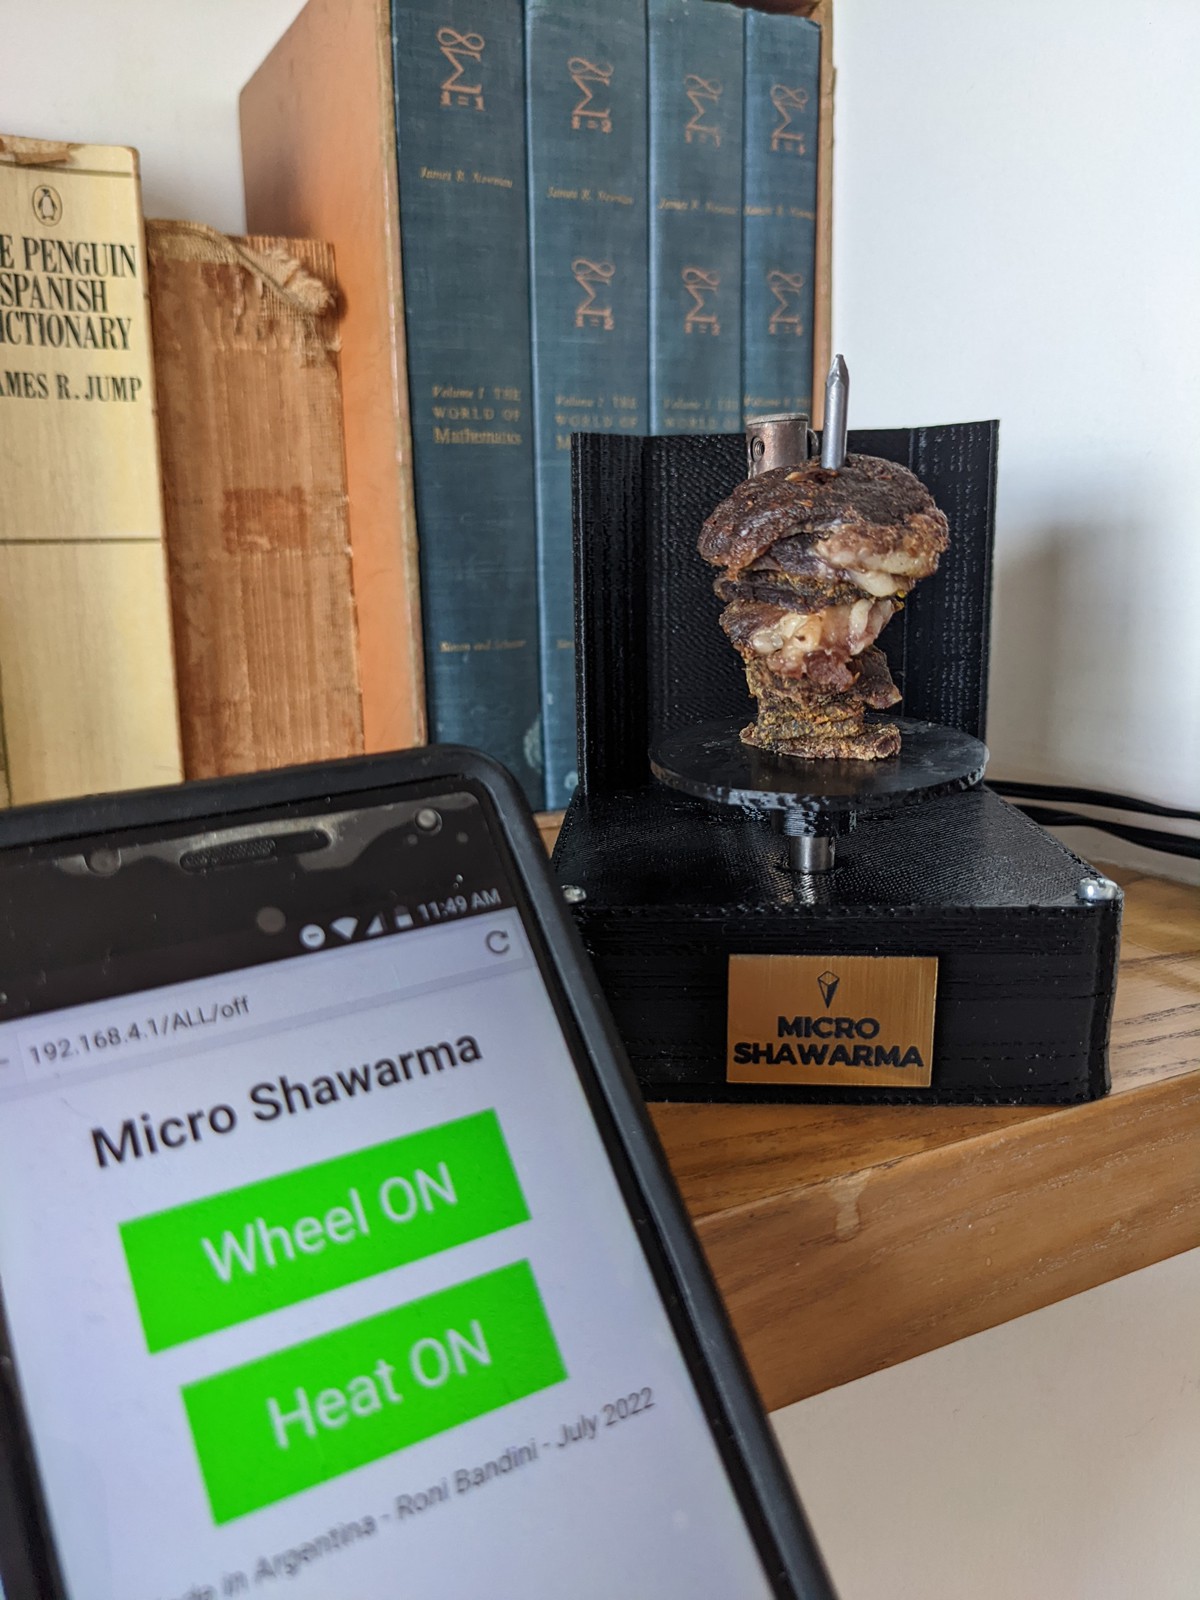
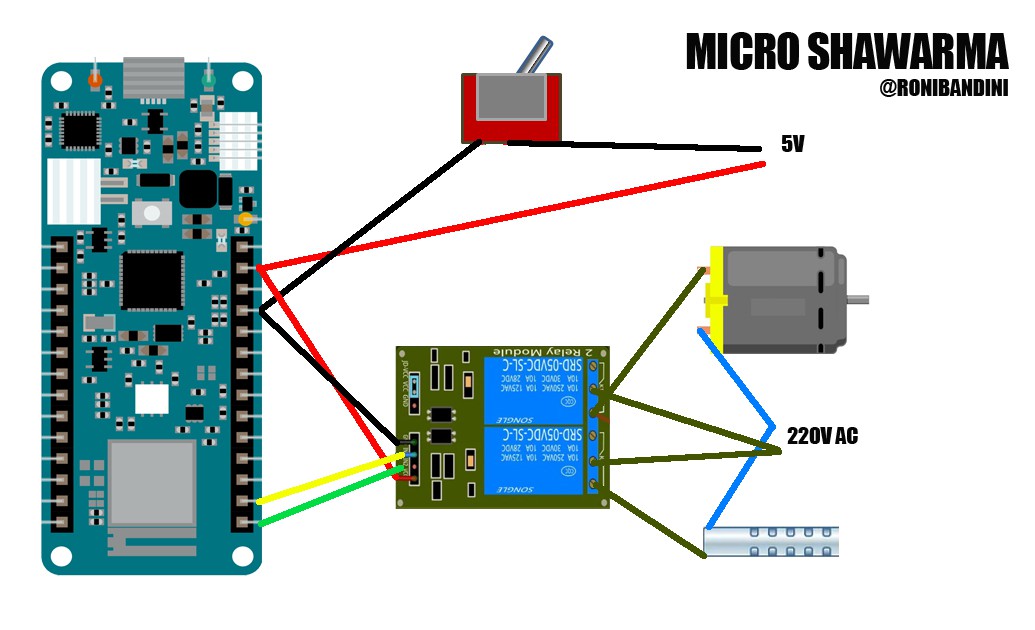
At this point a 2 channel relay and Arduino MKR WiFi 1010 were included into the project. Basically, the machine will announce a SSID named Micro Shawarma with a password and the management page will be served at 192.168.4.1 local IP. There 2 buttons are provided for the heat and the motor.

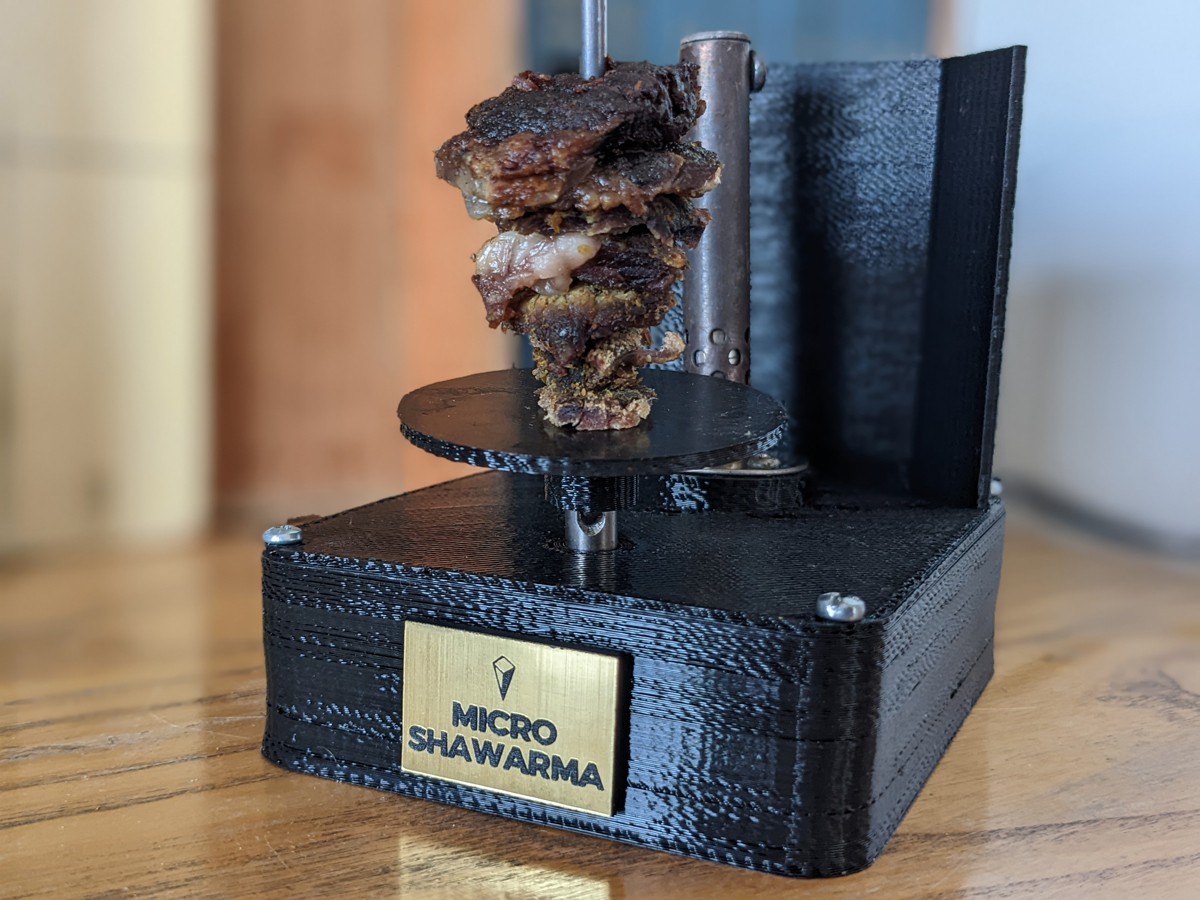
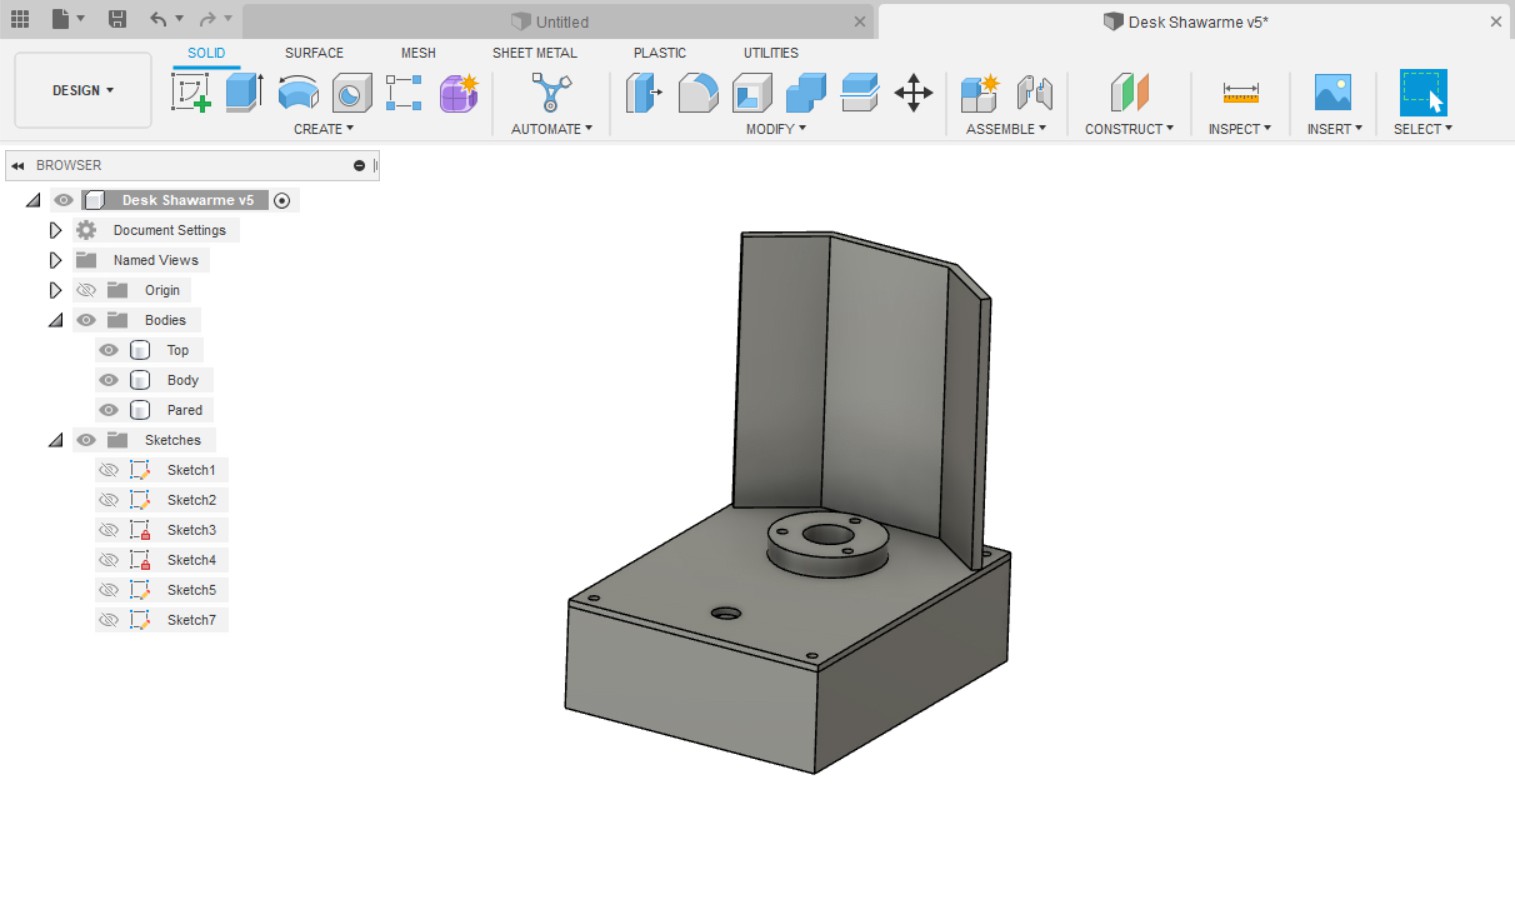
3d parts
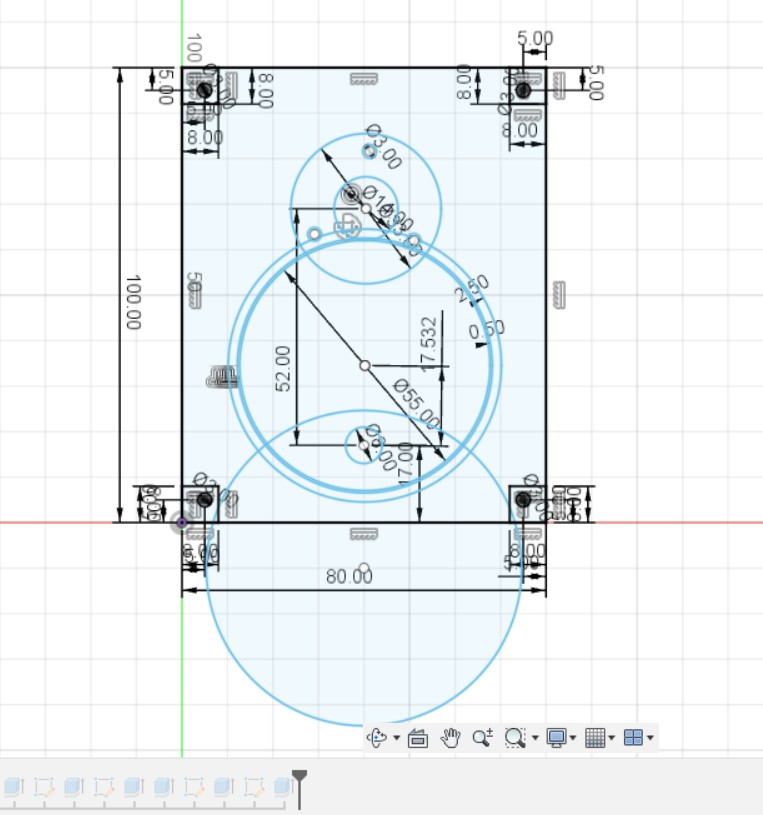
Using Fusion 360 I’ve designed the case using just 3 simple parts: the enclosure, the cover and the rotating base.
You should use thick Aluminium foil to cover the wall if the machine will be turned on for several minutes.

Using the Micro Shawarma Machine
After turning on the machine with back switch wait for a minute or so, then connect to Micro Shawarma SSID with your Smartphone, Tablet or Computer. Now enter 192.168.4.1 with a browser and you will reach the management utility page. There you can turn on the heat, turn on the rotation wheel and turn off everything.
Code details
Here you can change your SSID name and credentials
char ssid[] = "Micro Shawarma";
char pass[] = "1234567890";
Here you can change D6 and D7 relay pins
int relayPin1=6;
int relayPin2=7;
Web page buttons are presented according to current machine state
 if (wheel==0){
                client.println("<p><a href=\"/WHEEL/on\"><button class=\"button\">Wheel ON</button></a></p>");
              }
            if (heat==0){
                client.println("<p><a href=\"/HEAT/on\"><button class=\"button\">Heat ON</button></a></p>");
              }

            if (wheel==1 or heat==1){
                client.println("<p><a href=\"/ALL/off\"><button class=\"button button2\">OFF</button></a></p>");
              }
Relay on/off is just a matter of sending HIGH or LOW to the relay pin
void wheelOn(){
    digitalWrite(relayPin1, LOW);
    Serial.println("Wheel on");
    wheel=1;
}
Demo video
Turn on English subtitles.
 Fraens
 Capt. Flatus O'Flaherty ☠
 sjd.aliyan
 Joseph Eoff
Whu don't the 3D printed parts melt?