 Zachary Marlow
Alot was learned in the first version, the main lesson was the overall lighting degrees available while using fiber optics. This issue forced me to step away from positioning the fiber optics around the objectives and luckily my microscope uses drop in plates to fit different samples such as petri dishes or slides.
As with the first design I stuck with using Tinkercad , I mostly due this for simplicity and easy access computer to computer.
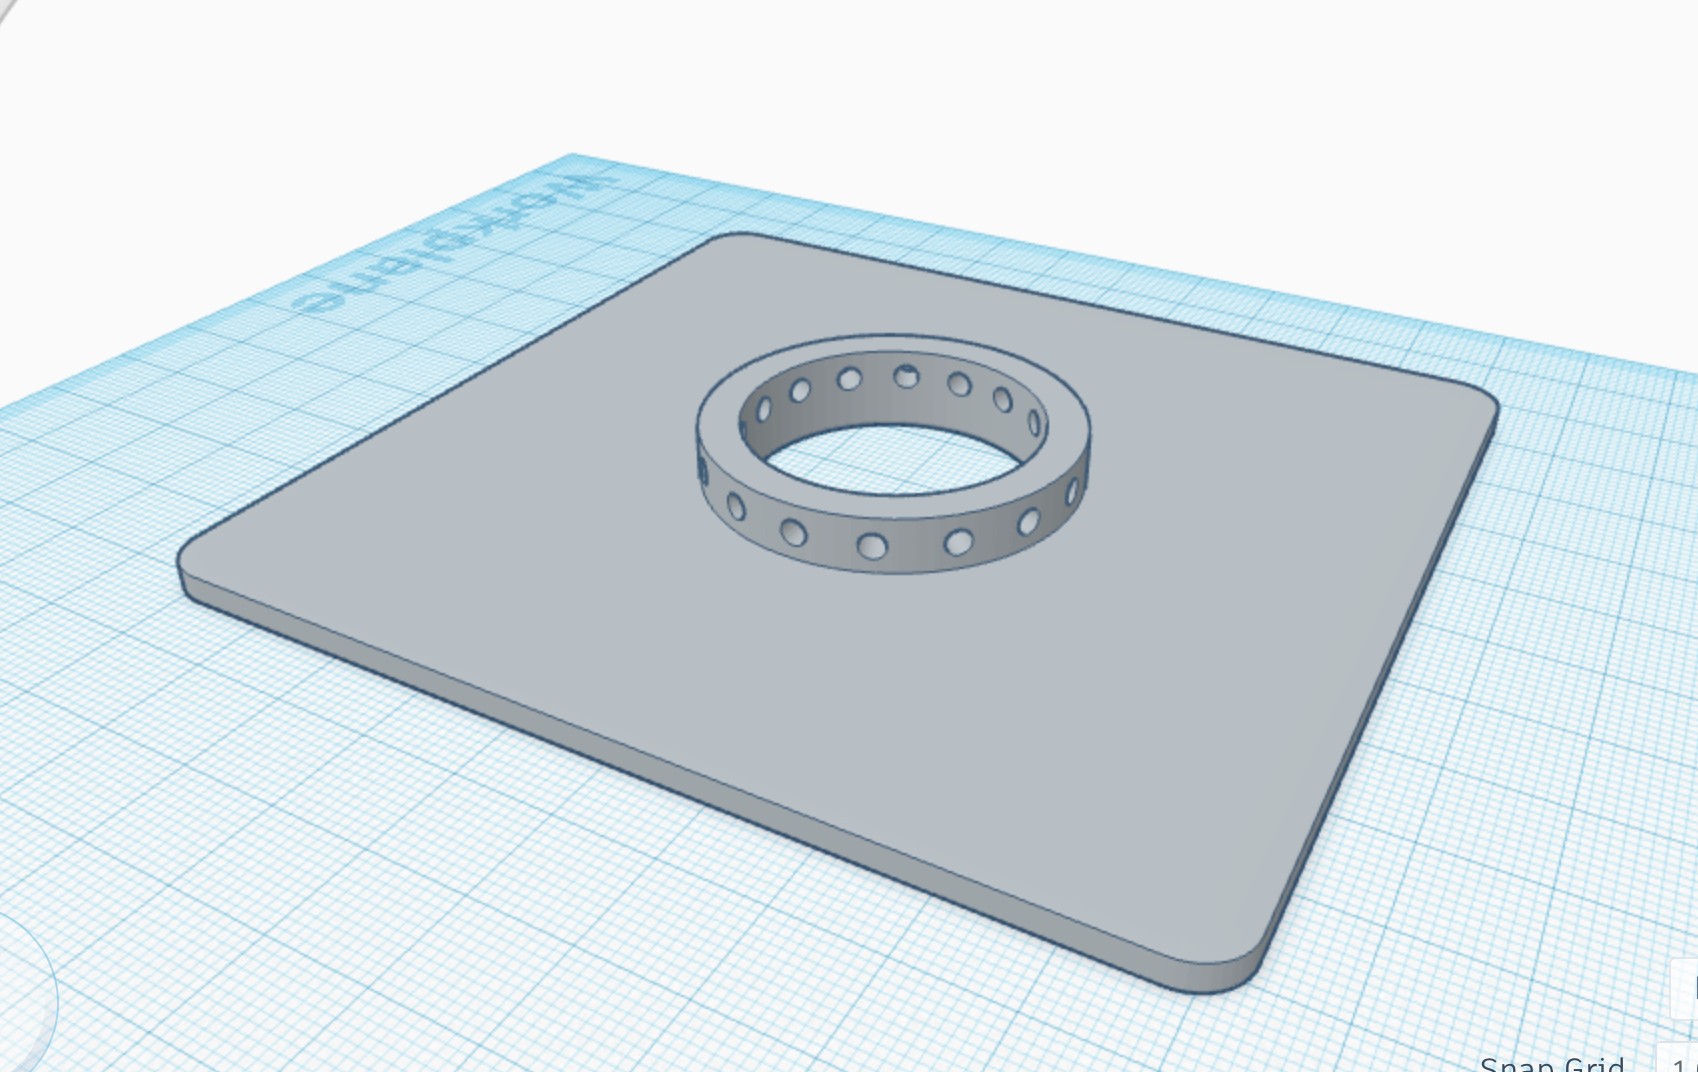
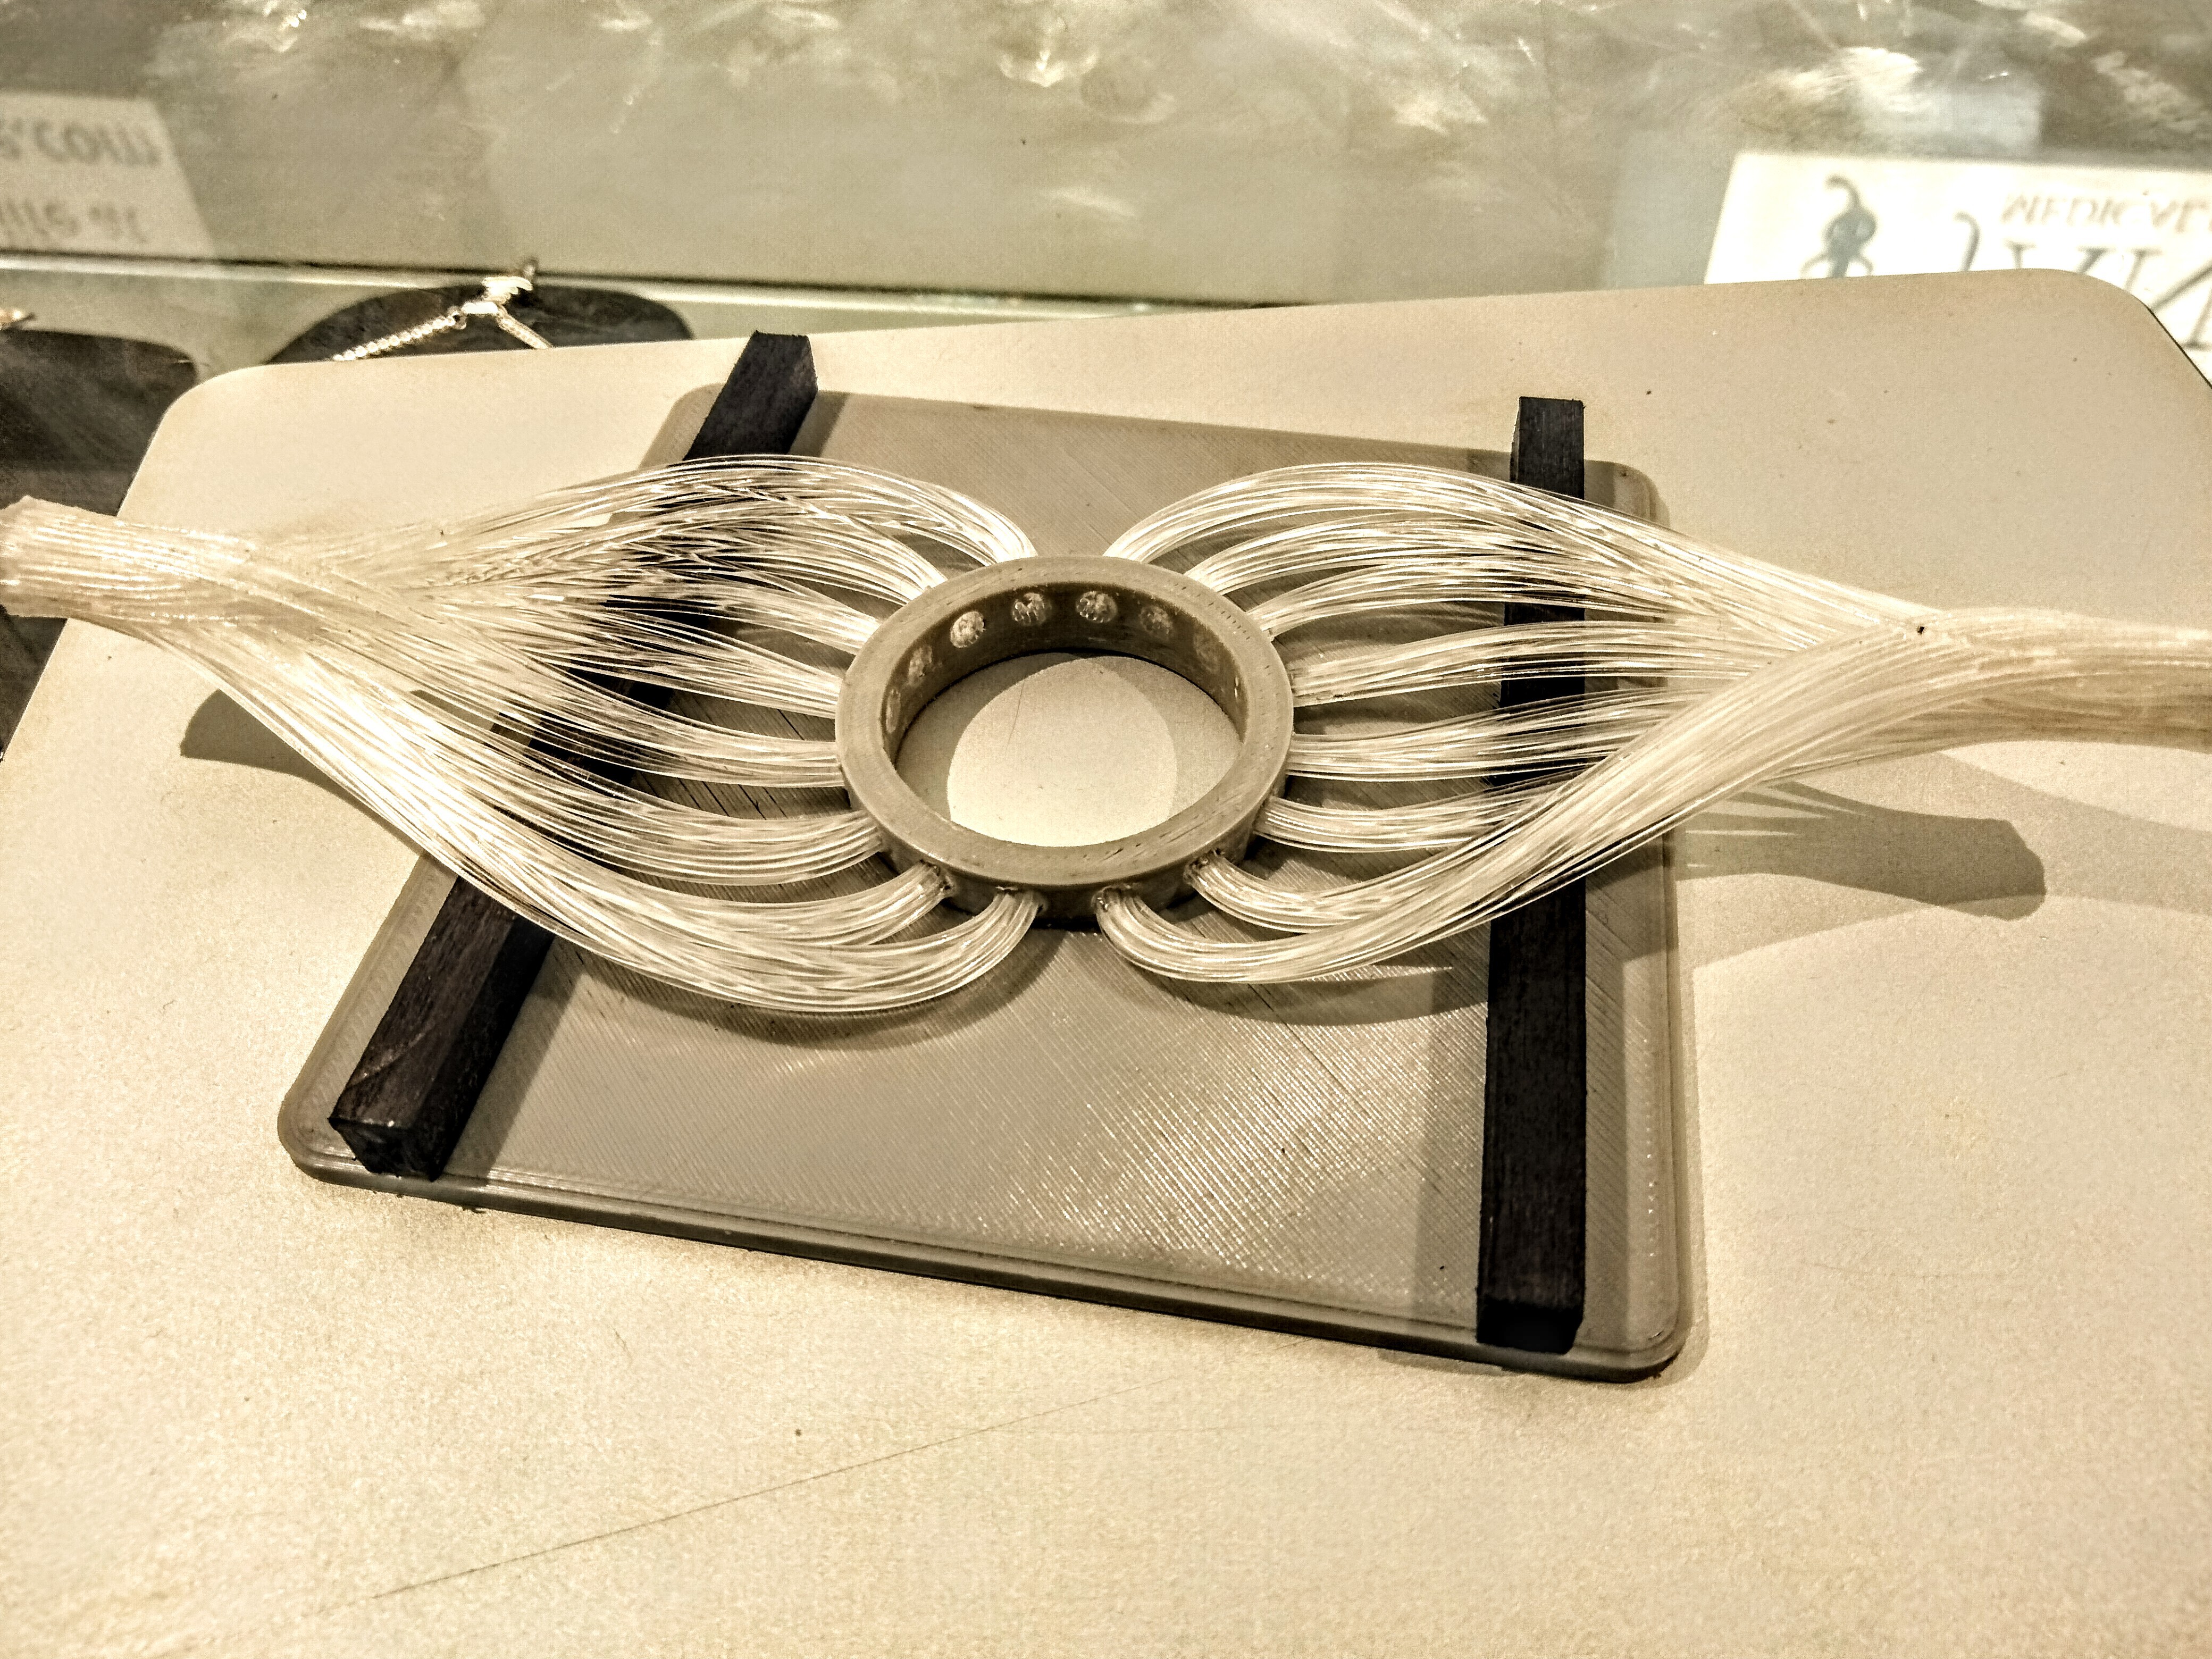
The print is about 100*106 an overall easy print for the Ender 3. From here it's goes straight into wiring all the fiber optics. Each hole has a diameter of 3mm which with a .75 mm fiber leads to 16 individual fibers per hole. I cut each of these to 6 inches long to allow for further trimming while progressing in the design.
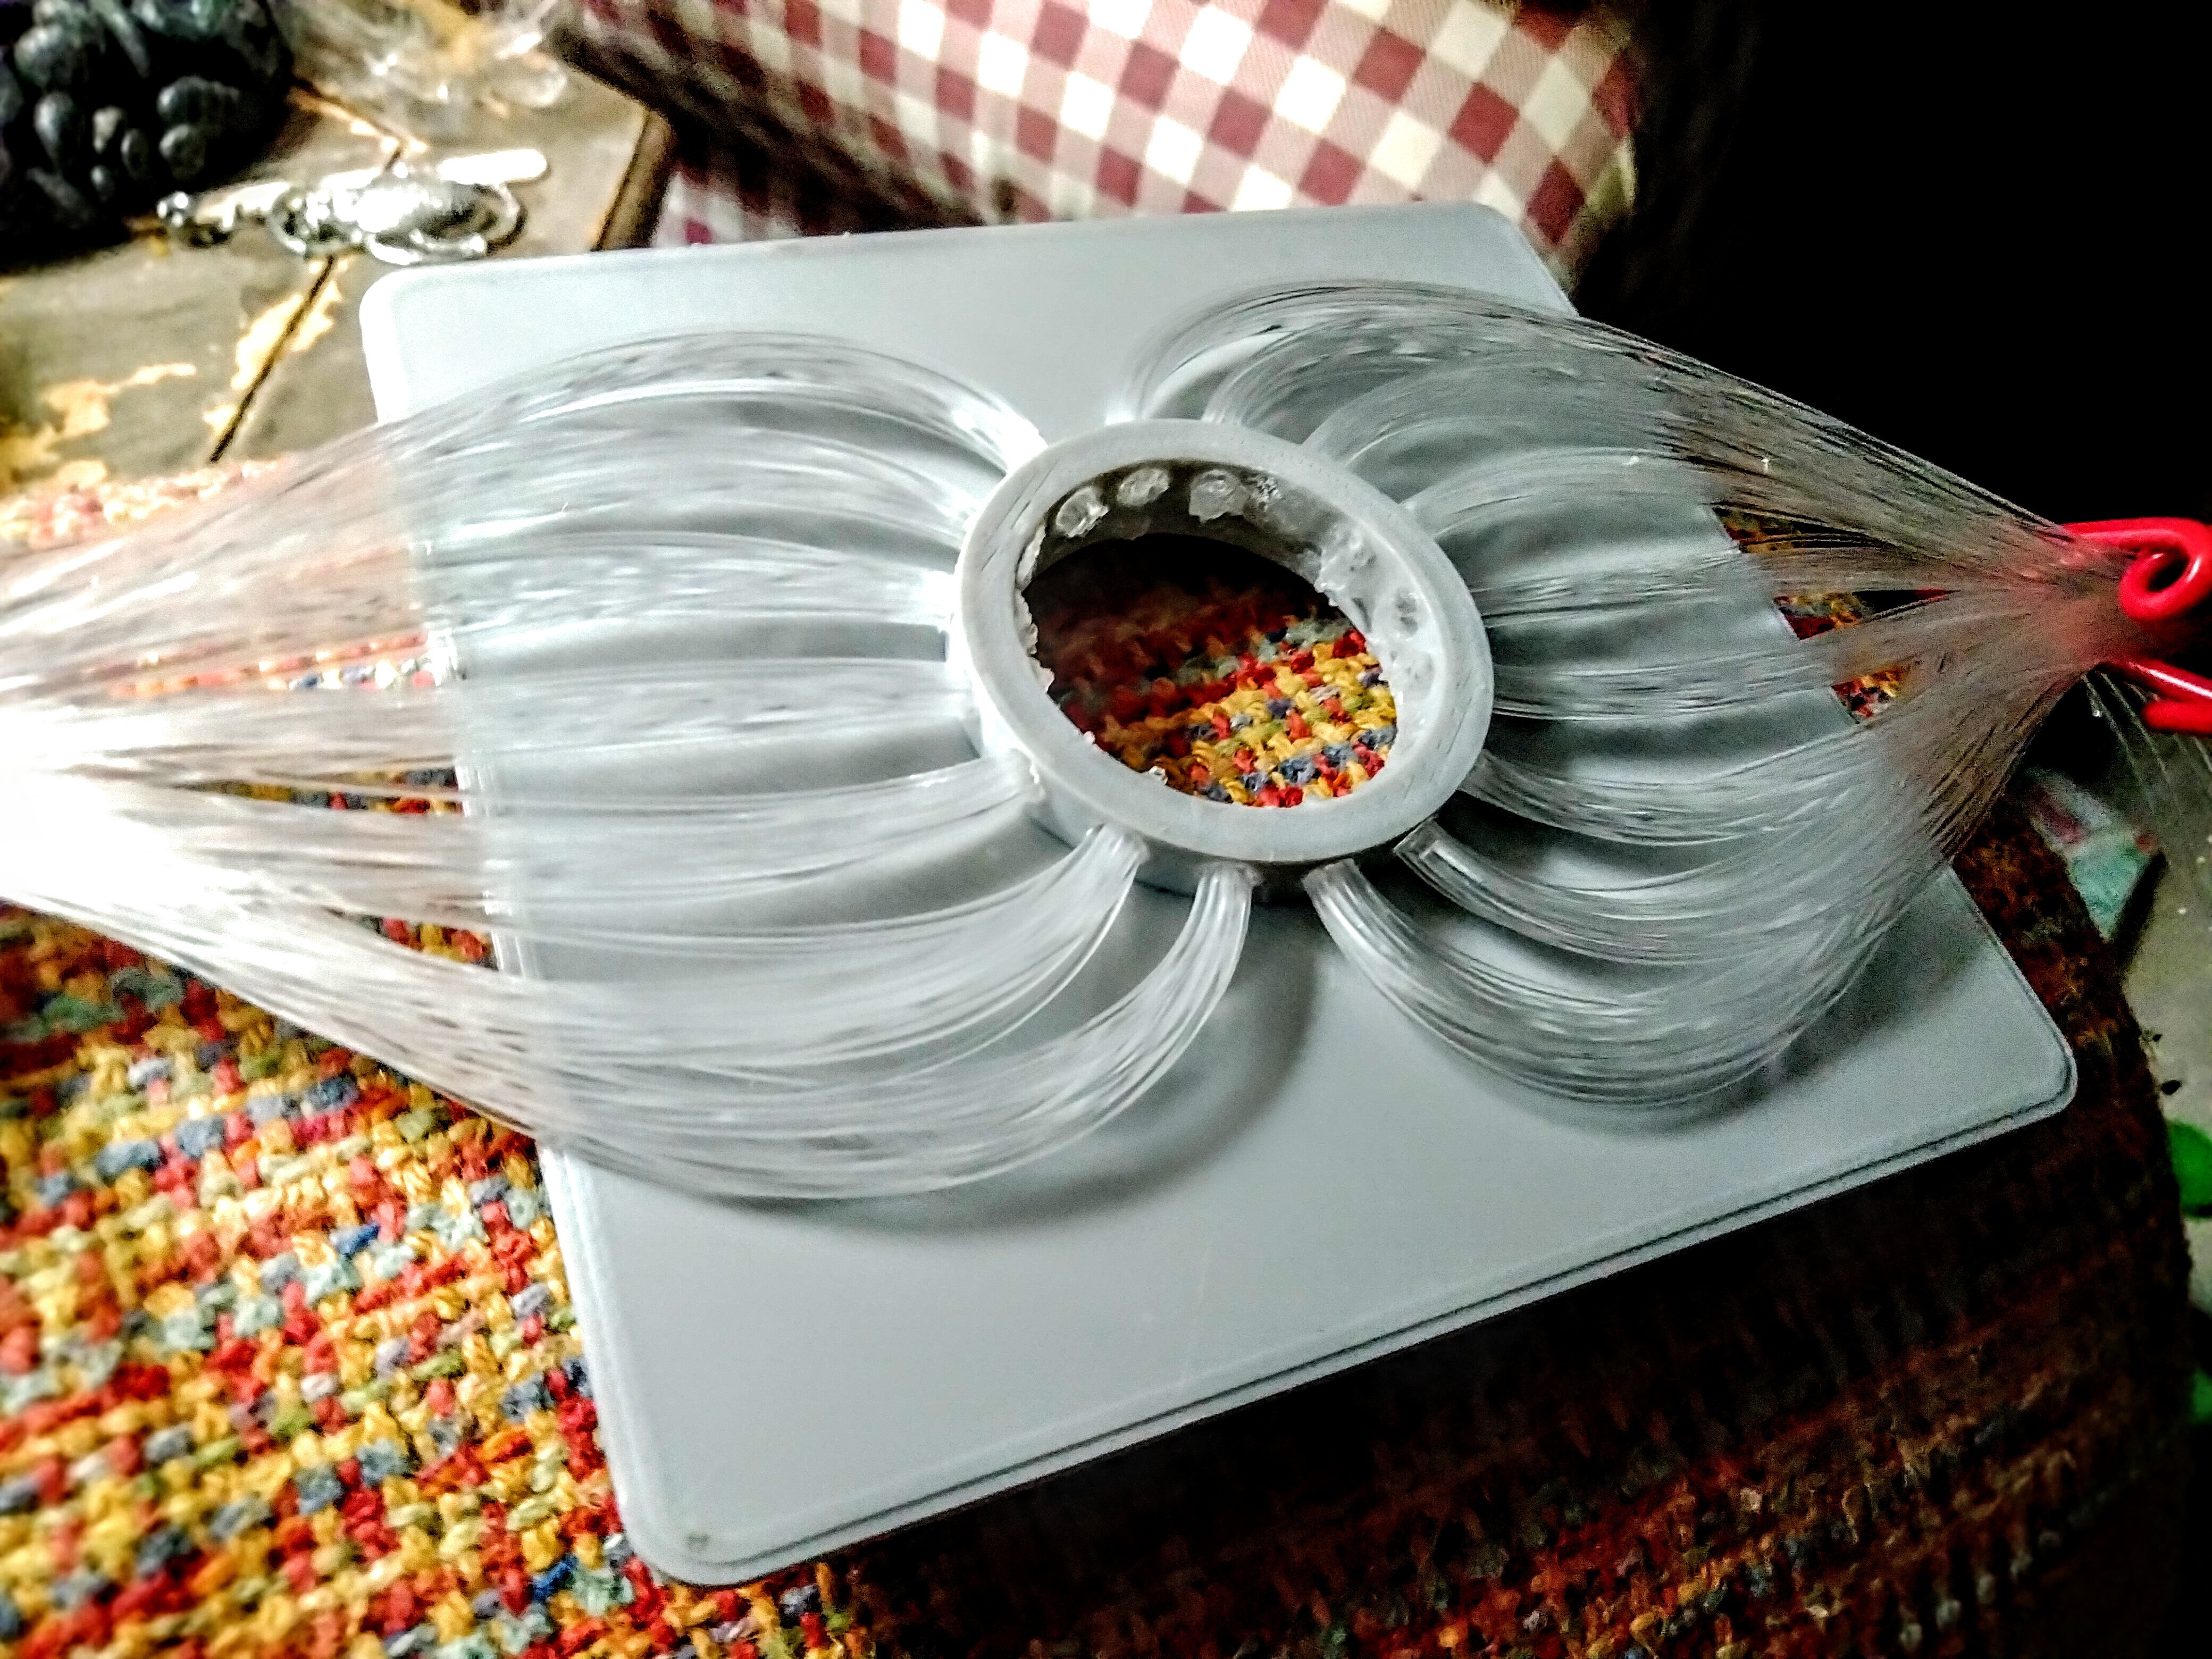
Each fiber bundle is super glued into place on the inside and on the inside of 3mm hole. After a day of hardening the inner circle is sanded smooth and polished to allow the fiber to give off the brightest light possible. Turns out wiring and handling 256 pieces of fiber optics is not an easy task.
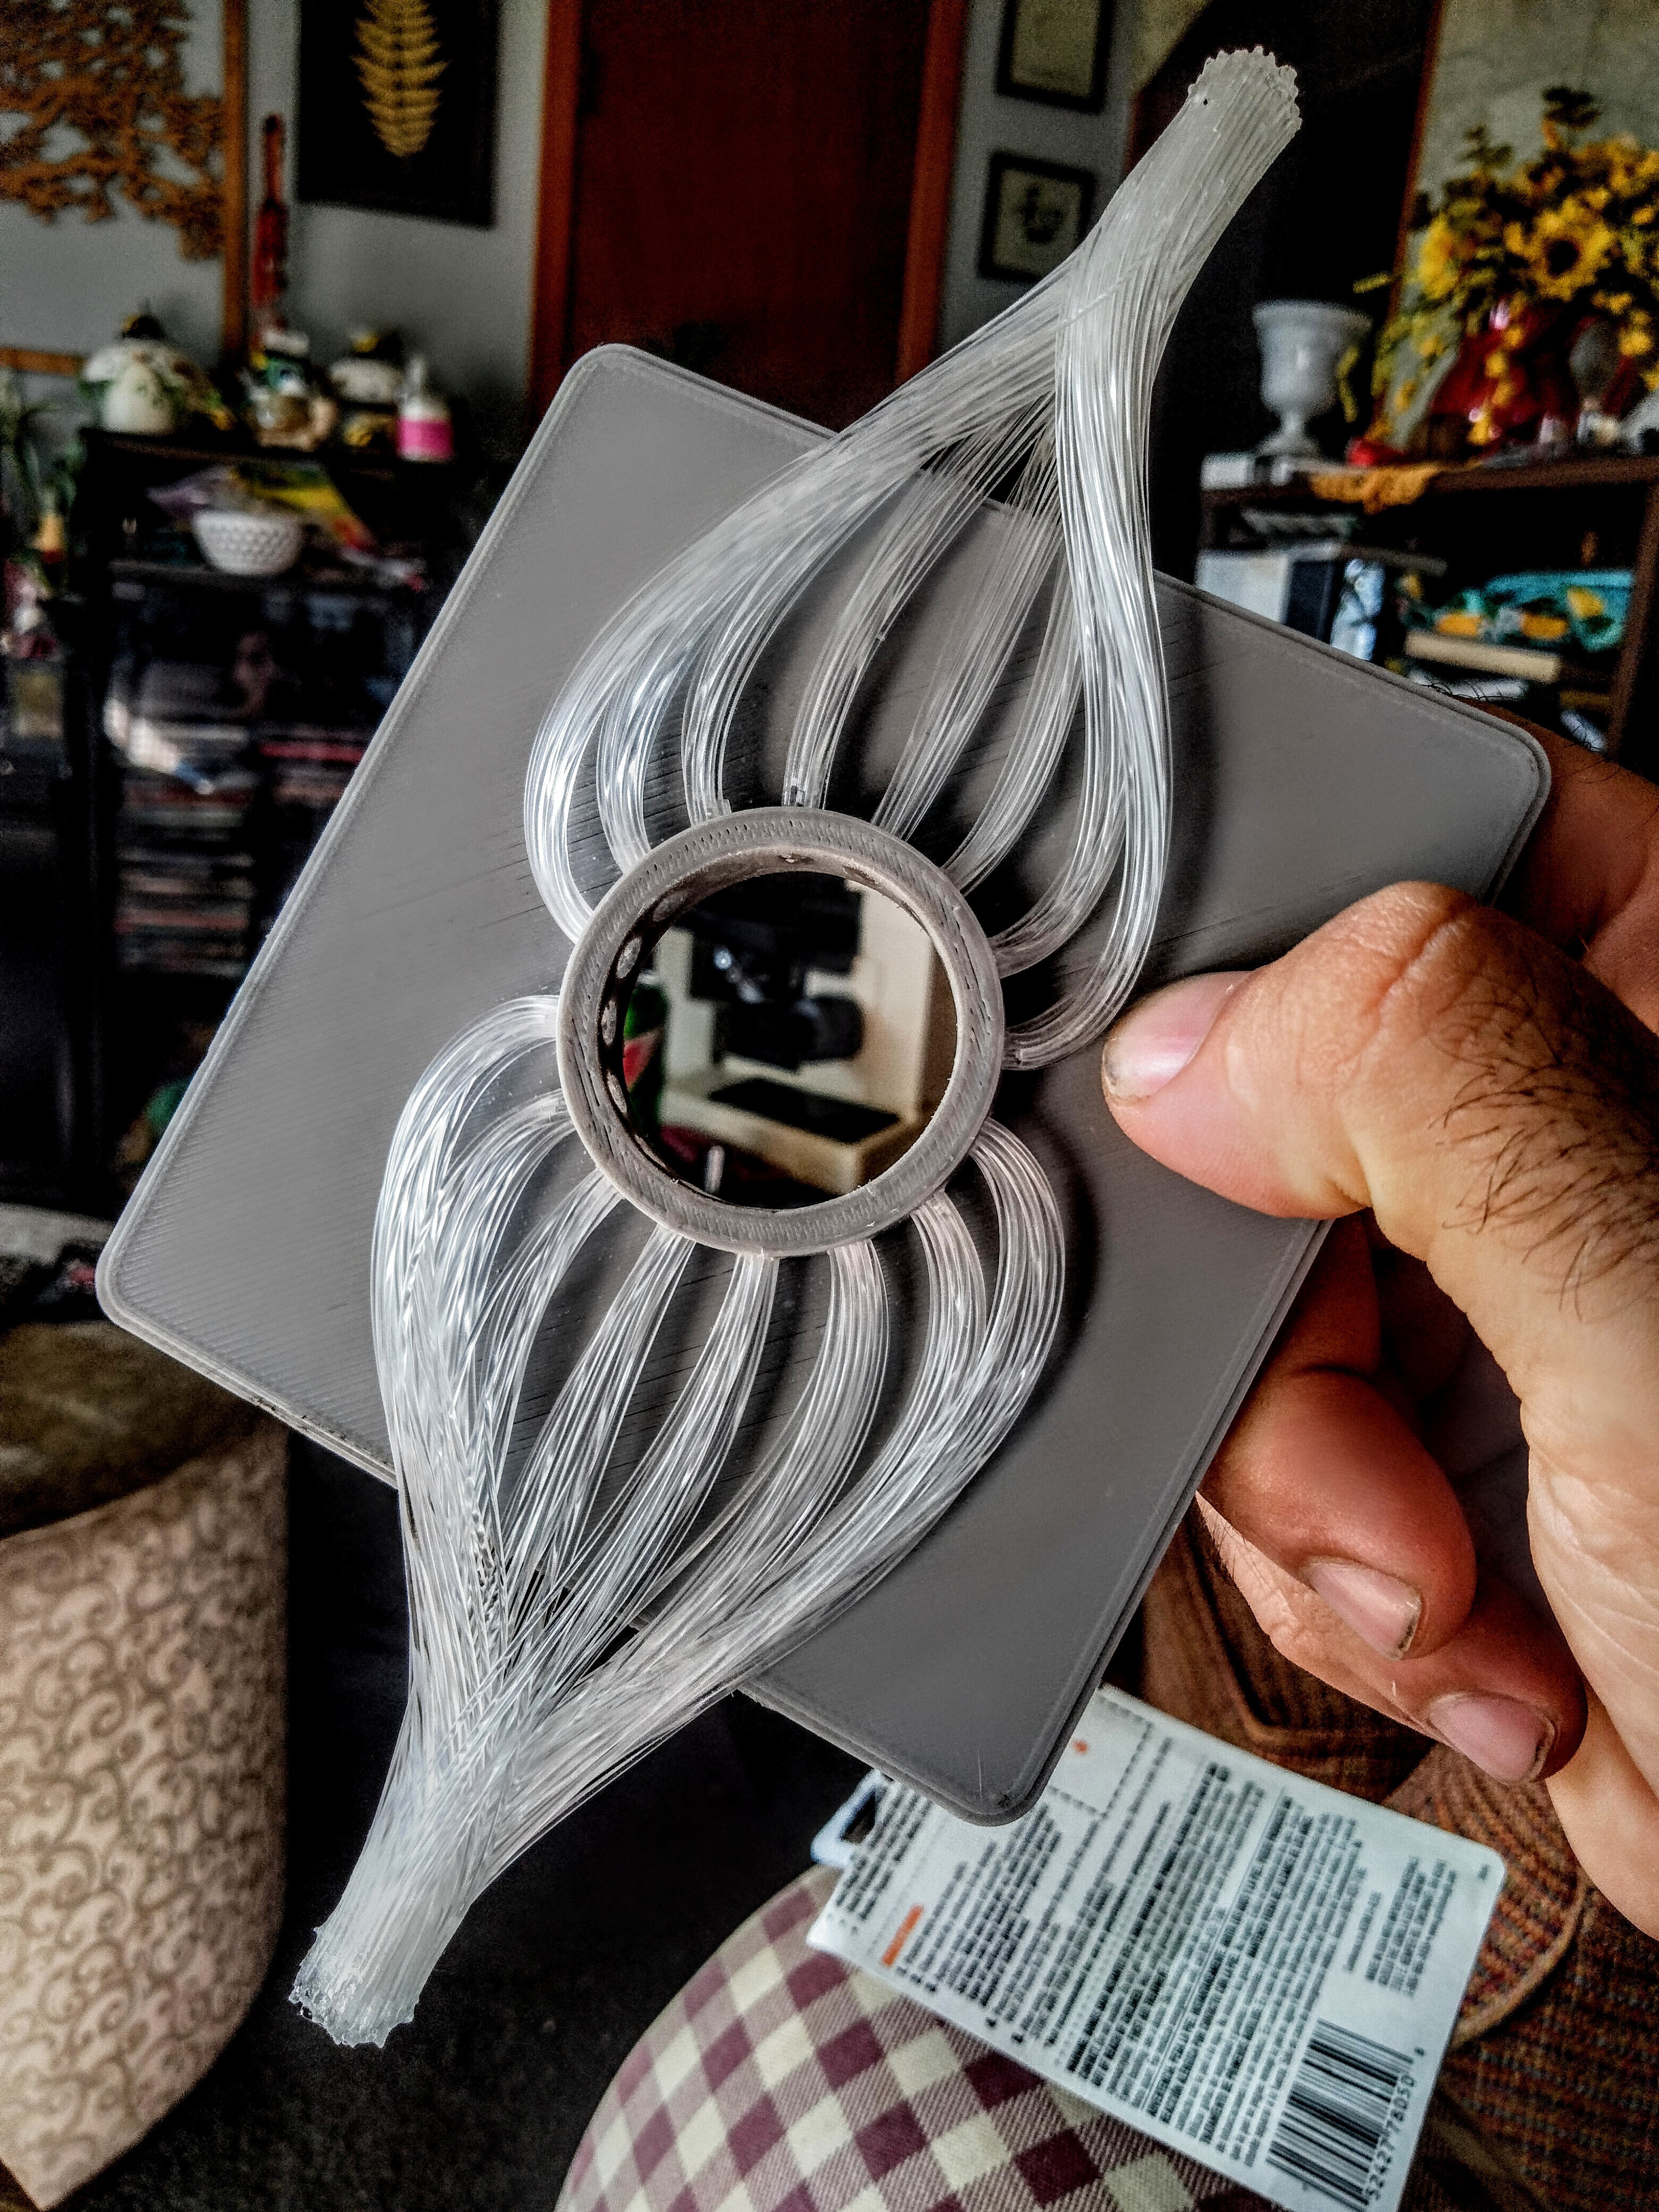
From here it came down to organizing and bringing each bundle to two large bundles of 128 fibers each. This wasn't an easy task but the method I choose was to wrap each bundle using heat shrink and zip ties, from here I would start hardening the bundles using super glue.
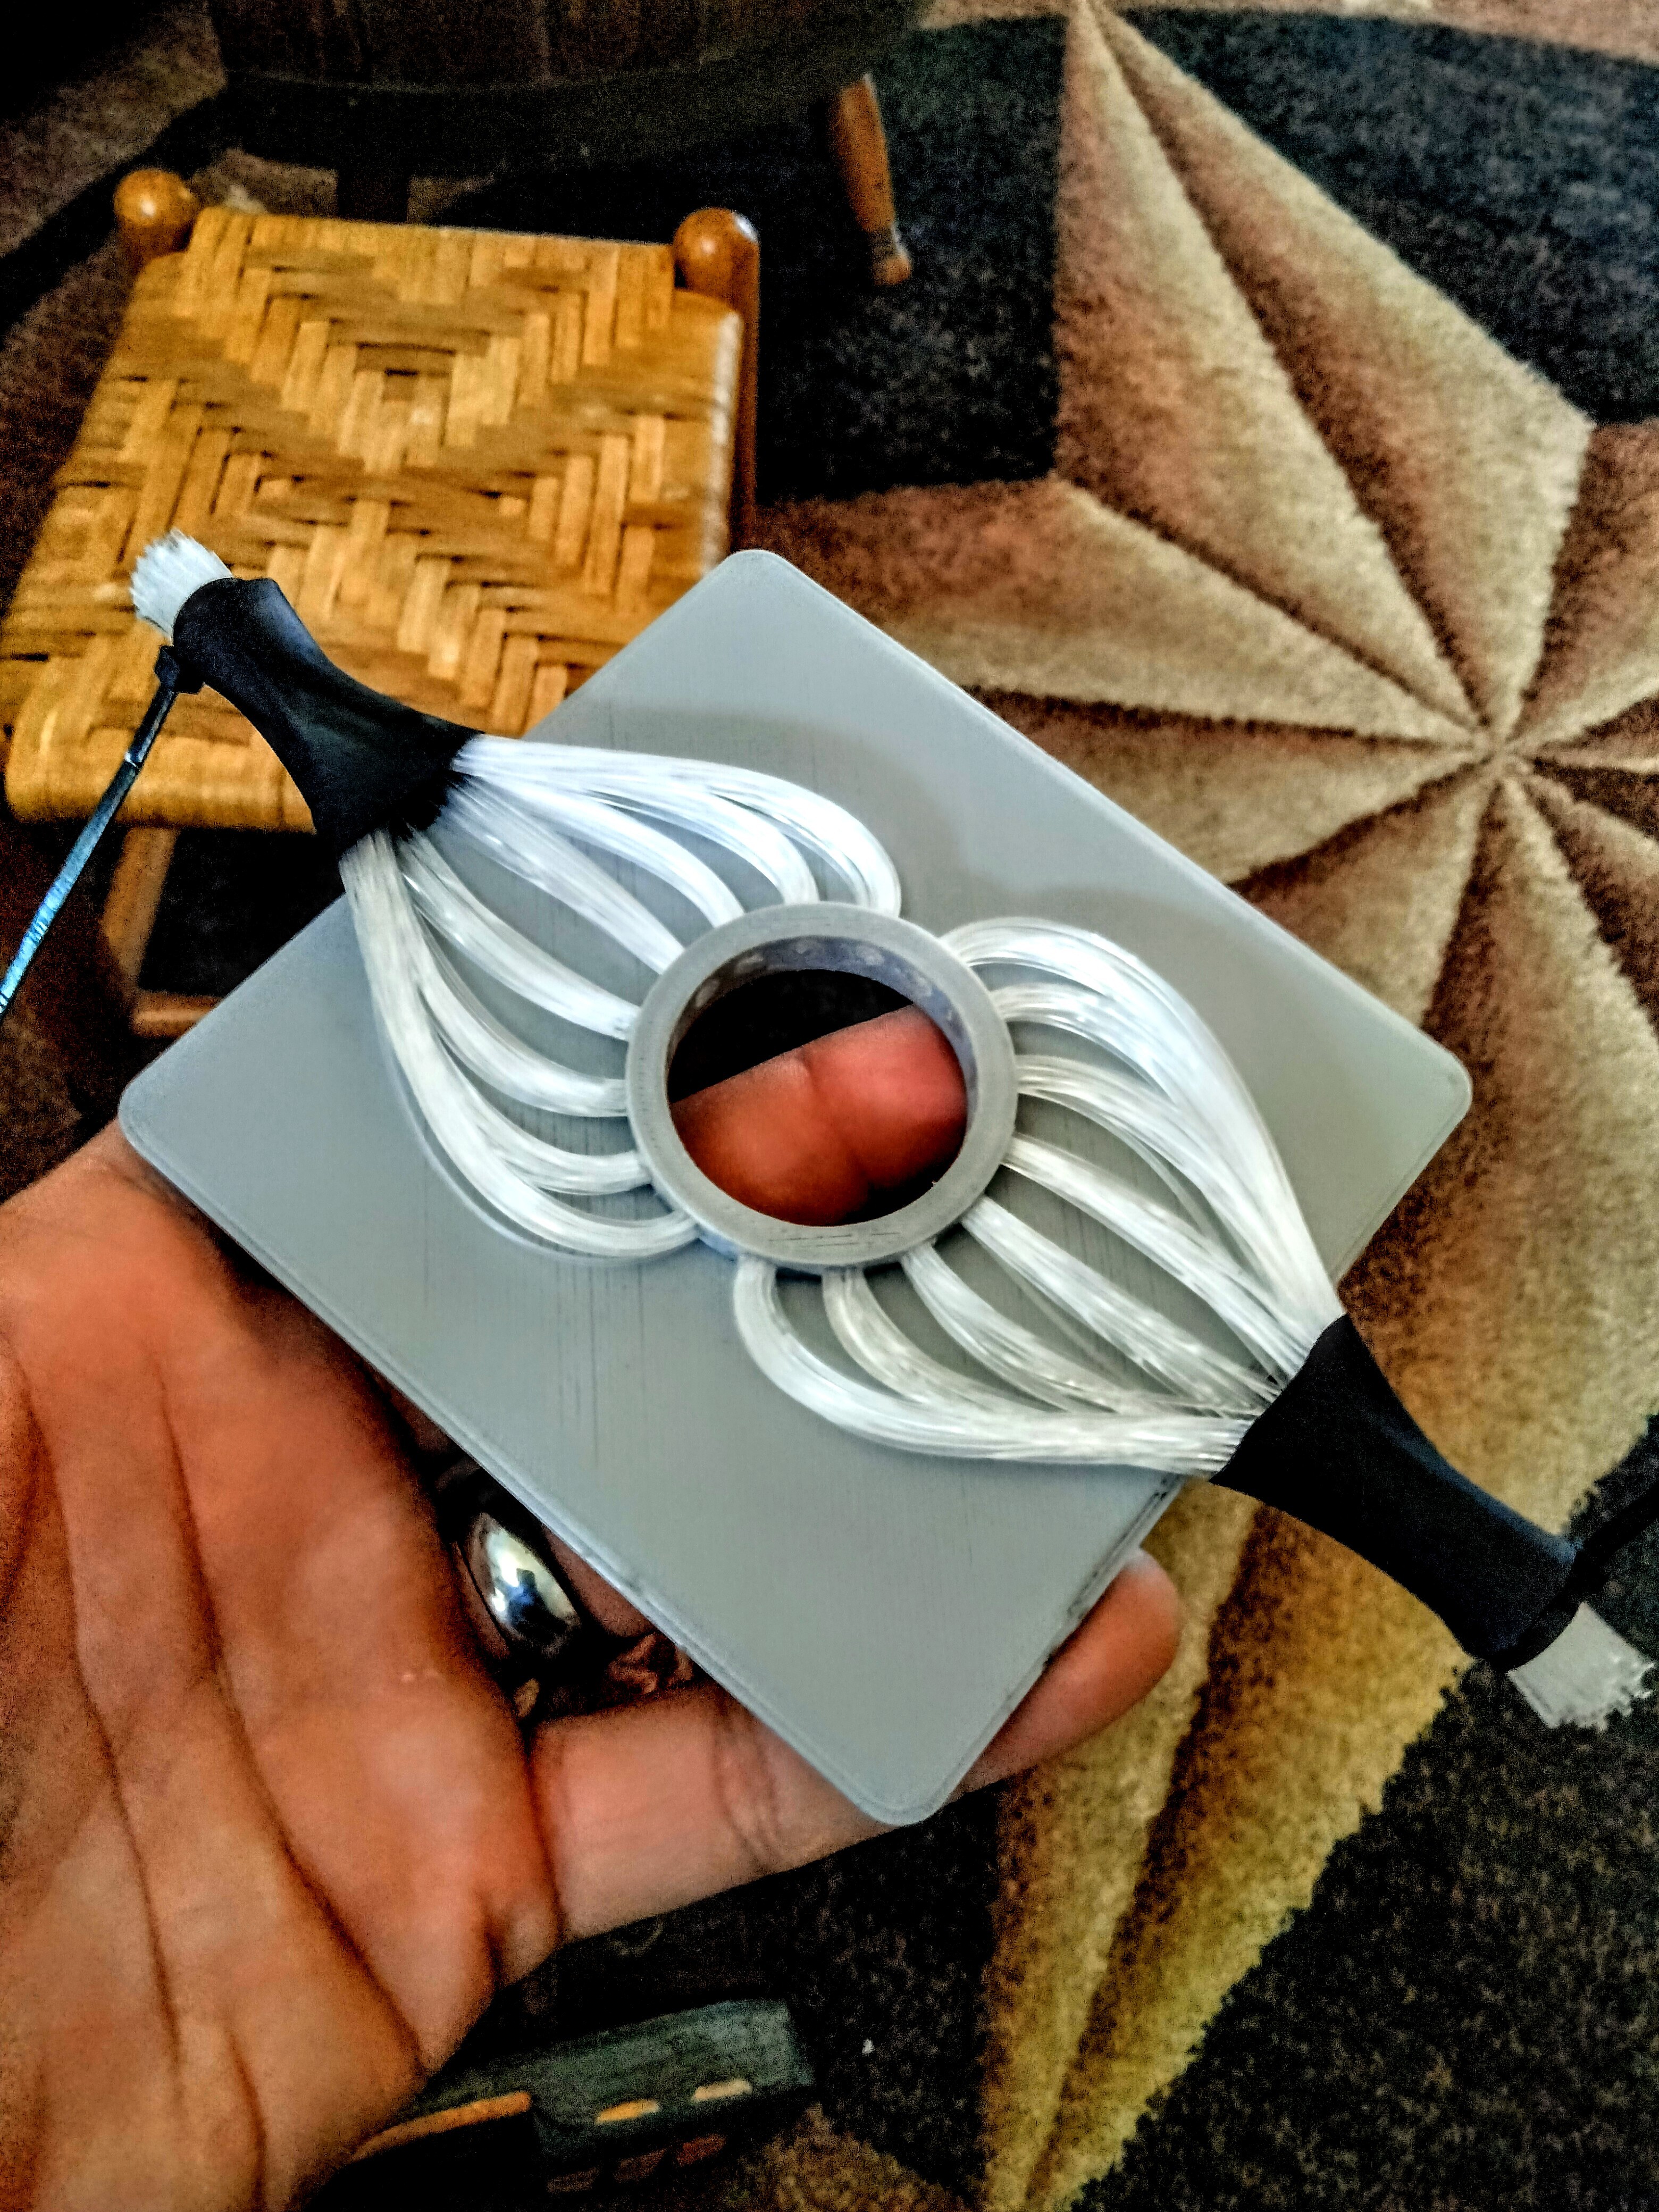
The heat shrink and zip ties were then cut off leaving me with two solid bundles which then were sanded to be flush and smooth. The final length to each bundle was about 4.5 inches.
From here I noticed one small design issue the light sources and the bundle ends are putting downward pressure on to the microscope. This normally wouldn't be a big deal but these plates aren't held down they simply sit into place. This downward pressure would remove the plate from it's position. This problem was easy to solve by raising the bundles up with a two pieces of square dowels. I should have built this into the original design but sometimes you just forget things either way easy fix.
More updates to come soon just working on a way to hold the sample into place (I'm thinking magnets...tiny ones) and for the light sources to arrive.
Discussions
Become a Hackaday.io Member
Create an account to leave a comment. Already have an account? Log In.