To remove the redundant HC-06 Bluetooth module and be able to utilize BLE (Bluetooth Low Energy), I decided to employ an Arduino Nano 33 BLE to build my new room lighting system. In addition to adjusting room lighting, I wanted this project to report weather and gas information, so I added an MQ-4 air quality sensor, an MQ-7 air quality sensor, and a DHT22 temperature and humidity sensor. Also, I added a buzzer to notify the user of a potential gas leak.
I decided to add a screen to display the BLE connection status and the collected weather and gas information. However, I realized a disturbing design flaw while using my previous lighting system: Looking directly at the LCD screen on the remote lamp induced eye fatigue and eyestrain, especially after sunset. Hence, I employed a Waveshare 2.9" e-Paper module instead of using an LCD or OLED screen as I did in my previous project.
Then, I developed a complementing Android application from scratch to adjust lighting settings, control integrated L9110 fan motors, and get informed of the collected weather and gas information over BLE. The Android application lets the user:
- turn on or off two light bulbs via a 2-way relay,
- make the integrated fan motors turn right, left, or stop,
- adjust the built-in RGB LED color.
Due to my predilection for Star Wars, I based my entire project theme on Star Wars characters and airborne vehicles: Millennium Falcon, AT-AT, Yoda, Darth Vader, and Stormtrooper.
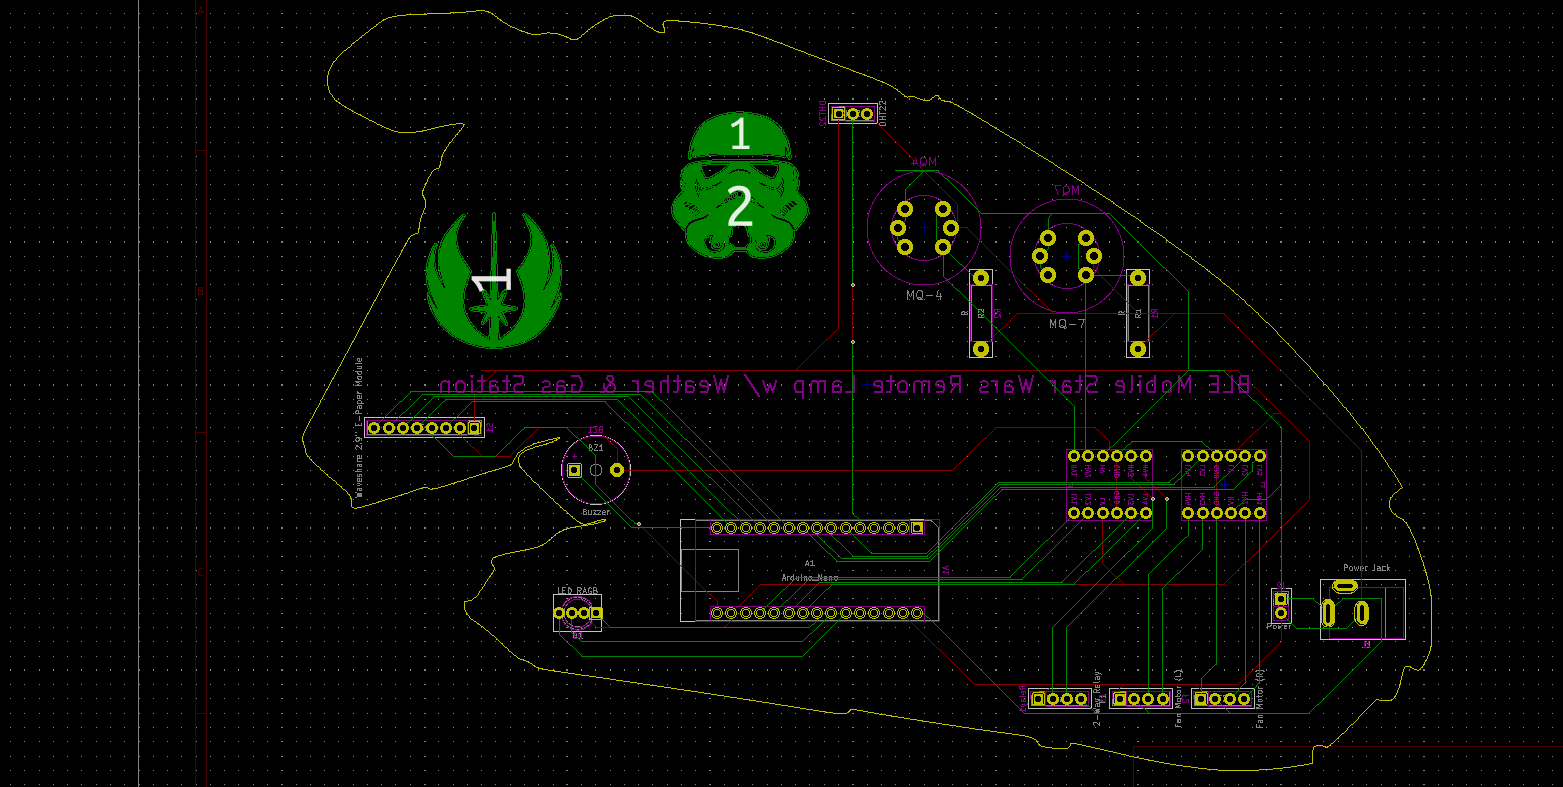
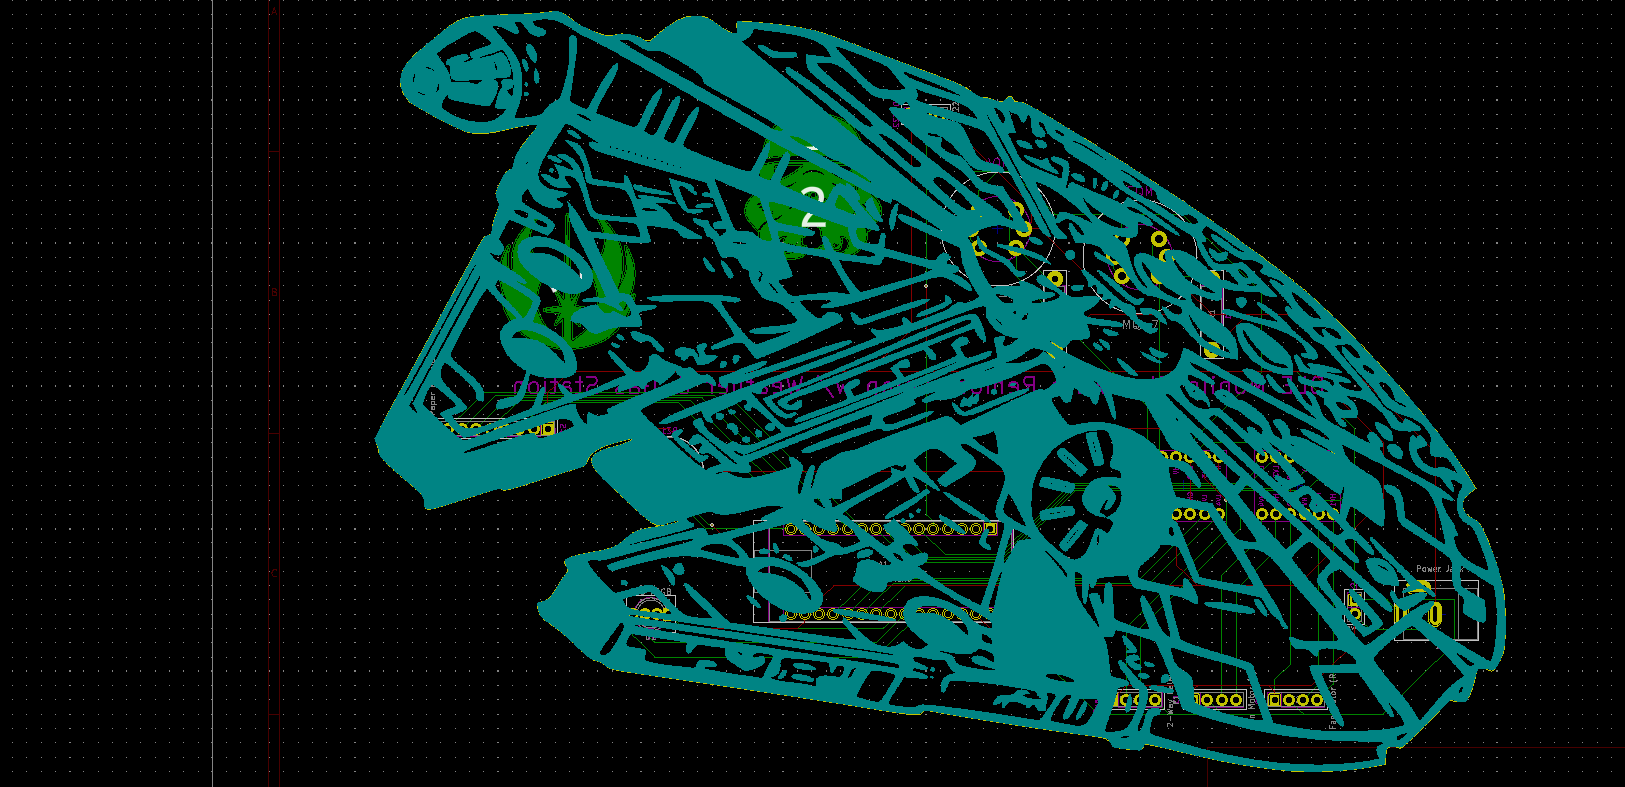
After completing wiring on a breadboard and testing the code for transmitting (writing) and receiving (reading) data packets over BLE, I designed a Millennium Falcon-inspired PCB for this remote lamp project.
Lastly, I also designed a complementary Star Wars-themed lighting system structure resembling an AT-AT (3D printable) to insert the Millennium Falcon PCB in order to create a robust and stylish apparatus emphasizing the Star Wars theme gloriously. Also, the lighting structure glows in the dark thanks to luminous PLA filaments (green and blue) :)
🎁🎨 Huge thanks to PCBWay for sponsoring this project.
Since Millennium Falcon has a captivating and memorable color scheme, I could not get the result I wanted with the regular solder mask options. Therefore, I decided to design my PCB with the grey solder mask option unique to PCBWay. They provide a fast, reliable, and budget-friendly service for exceptional PCB colors and requirements. You can inspect PCBWay solder mask and silkscreen options from here.
Also, if you are interested in developing an industrial-level product with budget-friendly prices, competitive delivery accuracy, and high product quality, you can check PCBWay's OEM service. The OEM service assists PCBWay customers in turning proof-of-concept projects into products ready for marketing with turnkey contract manufacturing options.
🎁🎨 Also, huge thanks to Creality for sending me a Creality CR-200B 3D Printer.


Step 1: Designing and soldering a Millennium Falcon-inspired PCB
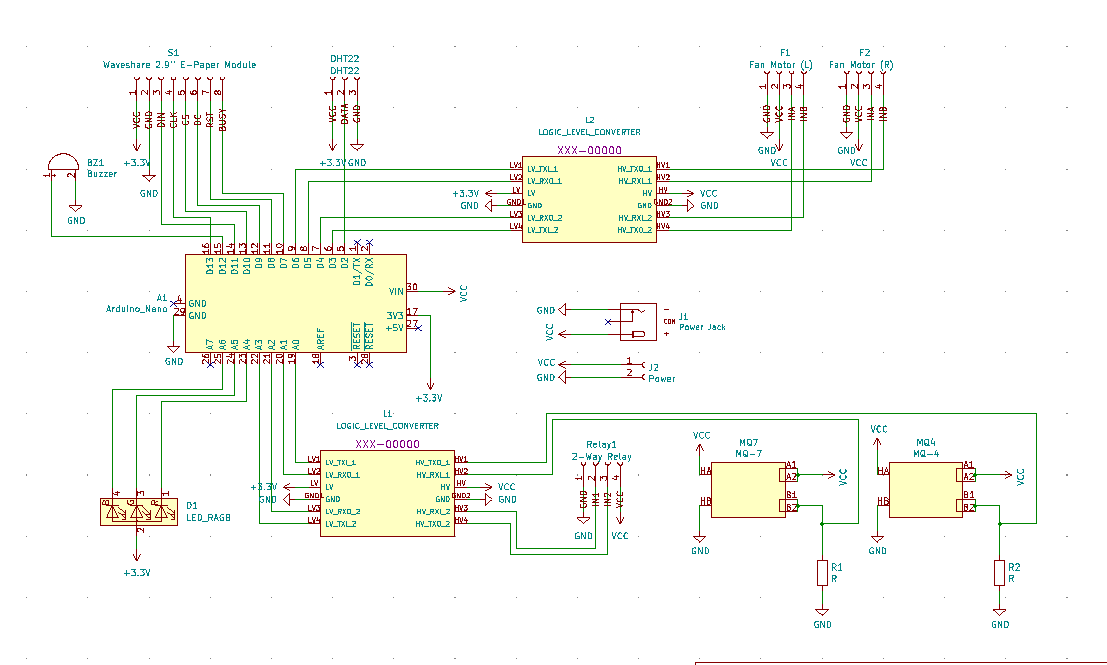
Before prototyping my Millennium Falcon-inspired PCB design, I tested all connections and wiring with the Arduino Nano 33 BLE and checked the connection status between the Nano 33 BLE and the Android application.

Then, I designed the Millennium Falcon-inspired PCB by utilizing KiCad - reminiscent of the legendary interstellar adventures in a galaxy far, far away :) I attached the Gerber file of the PCB below. Therefore, if you want, you can order this PCB from PCBWay to build your BLE-enabled Star Wars-themed room lighting system controlled by a specialized Android application.
Click here to inspect and order this PCB directly on PCBWay.


First of all, by utilizing a soldering iron, I attached headers (female), resistors (20K), MQ-4 gas sensor, MQ-7 gas sensor, two bi-directional logic level converters, a buzzer, a 5mm common anode RGB LED, and a power jack to the PCB.
📌 Component list...
Read more » kutluhan_aktar

 untimony
Please feel free to leave a comment here if you have any questions or concerns regarding this project 😃