 sandy
sandyDIY-Label-Printing-Machine

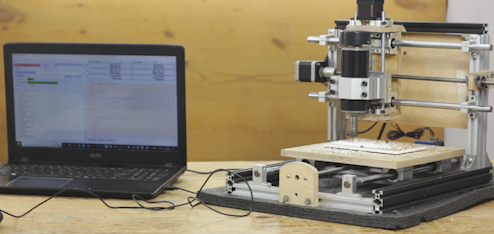
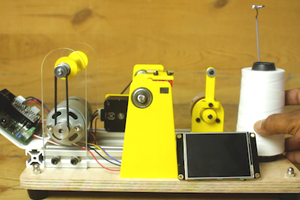
Hello friends In this post I made a CNC machine which draw text on Masking tape in this way we can create cool labels to stick. We can create cool labels for our workshop, office or home.
Here I have created G-code of text in android phone itself using text to CNC android app. And I have used GRBL controller android app to send G code to machine Laptop is not at all needed to print label in this way is handy, compact & portable. You can print label anywhere any time just need to provide 12V DC power. I need to replace all Z1 command to M3 S255 and Z0 to M5 in G-code in text editor in order to run servo up and down.
COMPONENT REQUIRED
- Arduino Nano
- Multipurpose custom PCB
- Micro Servo motor
- A4988 Stepper driver
- Nema 17 Stepper motors
- Timing pulley
- Timing belt
- Linear rails
- 3D printed parts
- Some hardware


First I made base of the machine from the 12mm wooden block.
I have used birch ply to make base foundation of machine.
Then I 3D printed a yellow part which help to clamp stepper motors onto it.
Two stepper motors have to be mount on this 3D printed parts facing in opposite direction.
Then I used my home CNC router to cut the 6mm acrylic sheet, This sheet will became base of X axis of our machine. We’ll latter mount X axis onto this
Whenever you try to machine Acrylic sheet be sure that acrylic must be cast acrylic not extruded acrylic.
Then I used 9mm Linear rails to make X axis of the machine.
This linear rails are very much precise and heavy duty
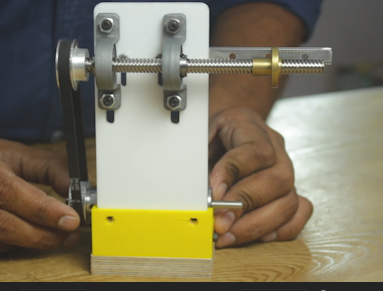
I used 2 8mm pillow bearing to hold the T8 lead screw.
One end of lead screw is connected with timing pulley and this 8mm lead screw is then connected with shaft of stepper motor.
So that when stepper motor rotates then 8mm Lead screw will rotate through timing belt. And move linear rail forward and reverse.
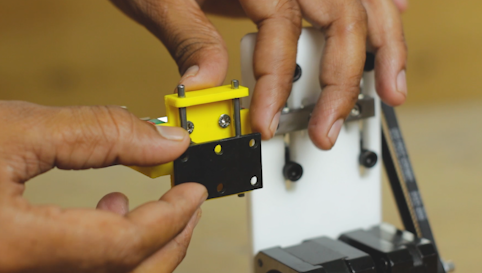
After that I have design a pen holder for X-axis this 3D printed part will mount on X axis mutually connected with the
8mm lead Screw.
Then after I placed 2 3mm smooth rod for up and down moment of pen.
For up and down movement of pen I have used on Micro servo motor. This types of stepper motors are very small in size and have enough power
For such works.


I have used my Multipurpose custom PCB in this project.
If you don't know about my multipurpose PCB then definitely check out my Multipurpose custom PCB
this PCB can be used for many jobs It can able to connect 11 components at a time to the PCB.
We can run
2nos stepper motor
2nos DC motors
2nos Servo motor
at a time
and After designing PCB in my favourite PCB editor tools. Now it’s time to order PCB
I trust on JLCPCB for ordering PCB they have very fast shipping service and low rates for quality PCB.
If you are new customer for JLCPCB You will also get welcome coupons from JLCPCB so hurry up & visit JLCPCB
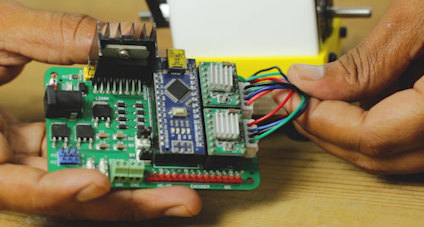
Wiring is very very simple and neat and clear thanks to the PCB.
Just plug the Stepper motor wires, servo motor wires and power supply to PCB
That's it our wiring is complete.

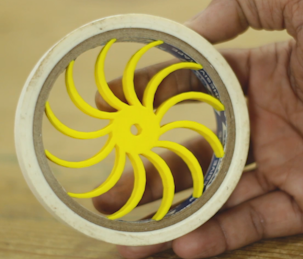
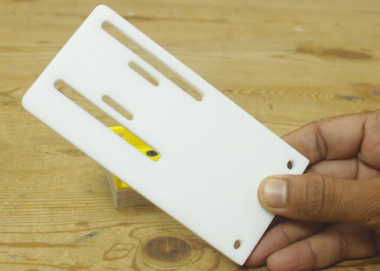
We are printing Label on paper tape so we need something to hold the paper tape. so I printed this part to hold the paper tape.
I design it in such way that it continue to maintain pressure on paper tape from inside due to its design.
So it will be sure that paper tape not get loose while in operation.

So now we finally placing the paper tape onto the shaft of stepper motor
Paper tape must be in aligned with the tip of pen above it.
in this way out construction of paper tape label printing machine is completed.

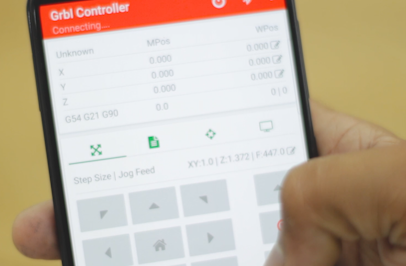
Here I totally control label printing machine from the mobile
I used this mobile app to generate G-code of text
https://play.google.com/store/apps/details?id=com.microtechstelladata.texttocnc&hl=en_IN&gl=US
I used this mobile app to send G-code to label printing machine
https://play.google.com/store/apps/details?id=in.co.gorest.grblcontroller&hl=en_IN&gl=US


 Mrinnovative
 DIY GUY Chris
wheres the stl or openscad print files?