sandy
sandyDIY-Arduino-based-Wire-harness-wrapping-Machine

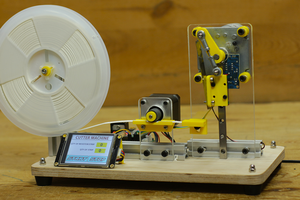
Hello friends in this post I have build a Arduino based wire harness wrapping machine.
some time wrapping tape to wire harness is very challenging and time consuming job so made this simple machine to minimize the work and we can quickly wrap the tape to wire harness.
A cable harness, also known as a wire harness, wiring harness, cable assembly, wiring assembly or wiring loom, is an assembly of electrical cables or wires which transmit signals or electrical power. The cables are bound together by a durable material such as rubber, vinyl, electrical tape, conduit, a weave of extruded string, or a combination thereof.
Commonly used in automobiles, as well as construction machinery, cable harnesses provide several advantages over loose wires and cables. For example, many aircraft, automobiles and spacecraft contain many masses of wires which would stretch over several kilometers if fully extended.
By binding the many wires and cables into a cable harness, the wires and cables can be better secured against the adverse effects of vibrations, abrasions, and moisture. By constricting the wires into a non-flexing bundle, usage of space is optimized, and the risk of a short is decreased.
Since the installer has only one harness to install (as opposed to multiple wires), installation time is decreased and the process can be easily standardized. Binding the wires into a flame retardant sleeve also lowers the risk of electrical fires.
Component Used
- Arduino nano
- A4988 stepper driver
- Custom PCB
- Limit switch
- 12mm wooden sheet
- 6mm acrylic
- Some hardware
- wrapping tape


To make the base of this machine I have used 12mm wooden sheet.
I cut the base of size 150 x 220 mm , I used my mini table saw to cut the wooden sheet and I used my bench sander to sand the edges of the wooden sheet.


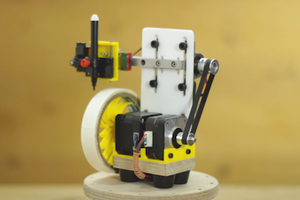
After completing the base of the machine now I have made the C shape acrylic part. this ring is made from 6mm acrylic sheet, I have cut the shape by using my home made CNC router machine.
This ring circle around the wire and tape is attached to this ring.


Then I print a templet on plain white paper, and pasted on the wooden sheet and cut the outline using my jigsaw machine.

The I place the acrylic ring inside the roller so it will rotate sooty.


For this project I have used my multipurpose PCB this PCB can be used for so many projects.
I have design circuit and PCB in easyEDA and ordered PCB from JLCPCB
JLCPCB are the world leader in PCB manufacturing there PCB production rates are very much affordable and they have world class PCB production unit results fast PCB production.
I have provided the link of circuit design so that you can modify it as per your need if you need to change anything.
This is the custom made PCB used in this project. by the way this is multipurpose PCB it can be used for wide range of arduino project.
If you are interested to order this PCB so you can find the Gerber file of the PCB here

I have 3D printed the circular part to hold the wrapping tape also I have used a spring to make tension on the tape so that wrapping tape release with tension and wrap over wire tightly.

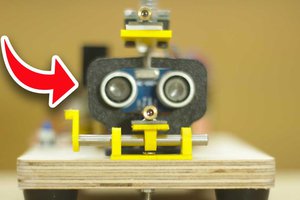
Here I have used a limit switch with a long notch. This limit switch is used to start and stop the wrapping. When we first press the limit switch it will start winding and when we press it again it will stop the winding.
Arduino Code
#include <Arduino.h>
#include "BasicStepperDriver.h"
#define MOTOR_STEPS 200
#define RPM 500
boolean A = 0;
int flag = 0;
int val = 0;
#define MICROSTEPS 8

#define DIR A2
#define STEP A3
int state = 0;
BasicStepperDriver stepper(MOTOR_STEPS, DIR, STEP);


void setup() {    stepper.begin(RPM, MICROSTEPS);    pinMode(9,INPUT_PULLUP);
}

void loop() {
A = digitalRead(9);  Serial.println(A);
if (A==1 && flag==0 && state == 0){  flag = 1;  }
if (A==1 && flag == 1 && state == 1){  flag = 0;  delay(1000);  state = 0;
}
if (flag==1...
Read more »

 Mrinnovative