 Nicolas REIMEN
Hello fellow retrobrewers. Since the Soviet clone chips I was able to source from ebay are new old (old) stock, and have sometimes been stored for decades in less than ideal conditions, they all need to be tested. Here is my testing rig:
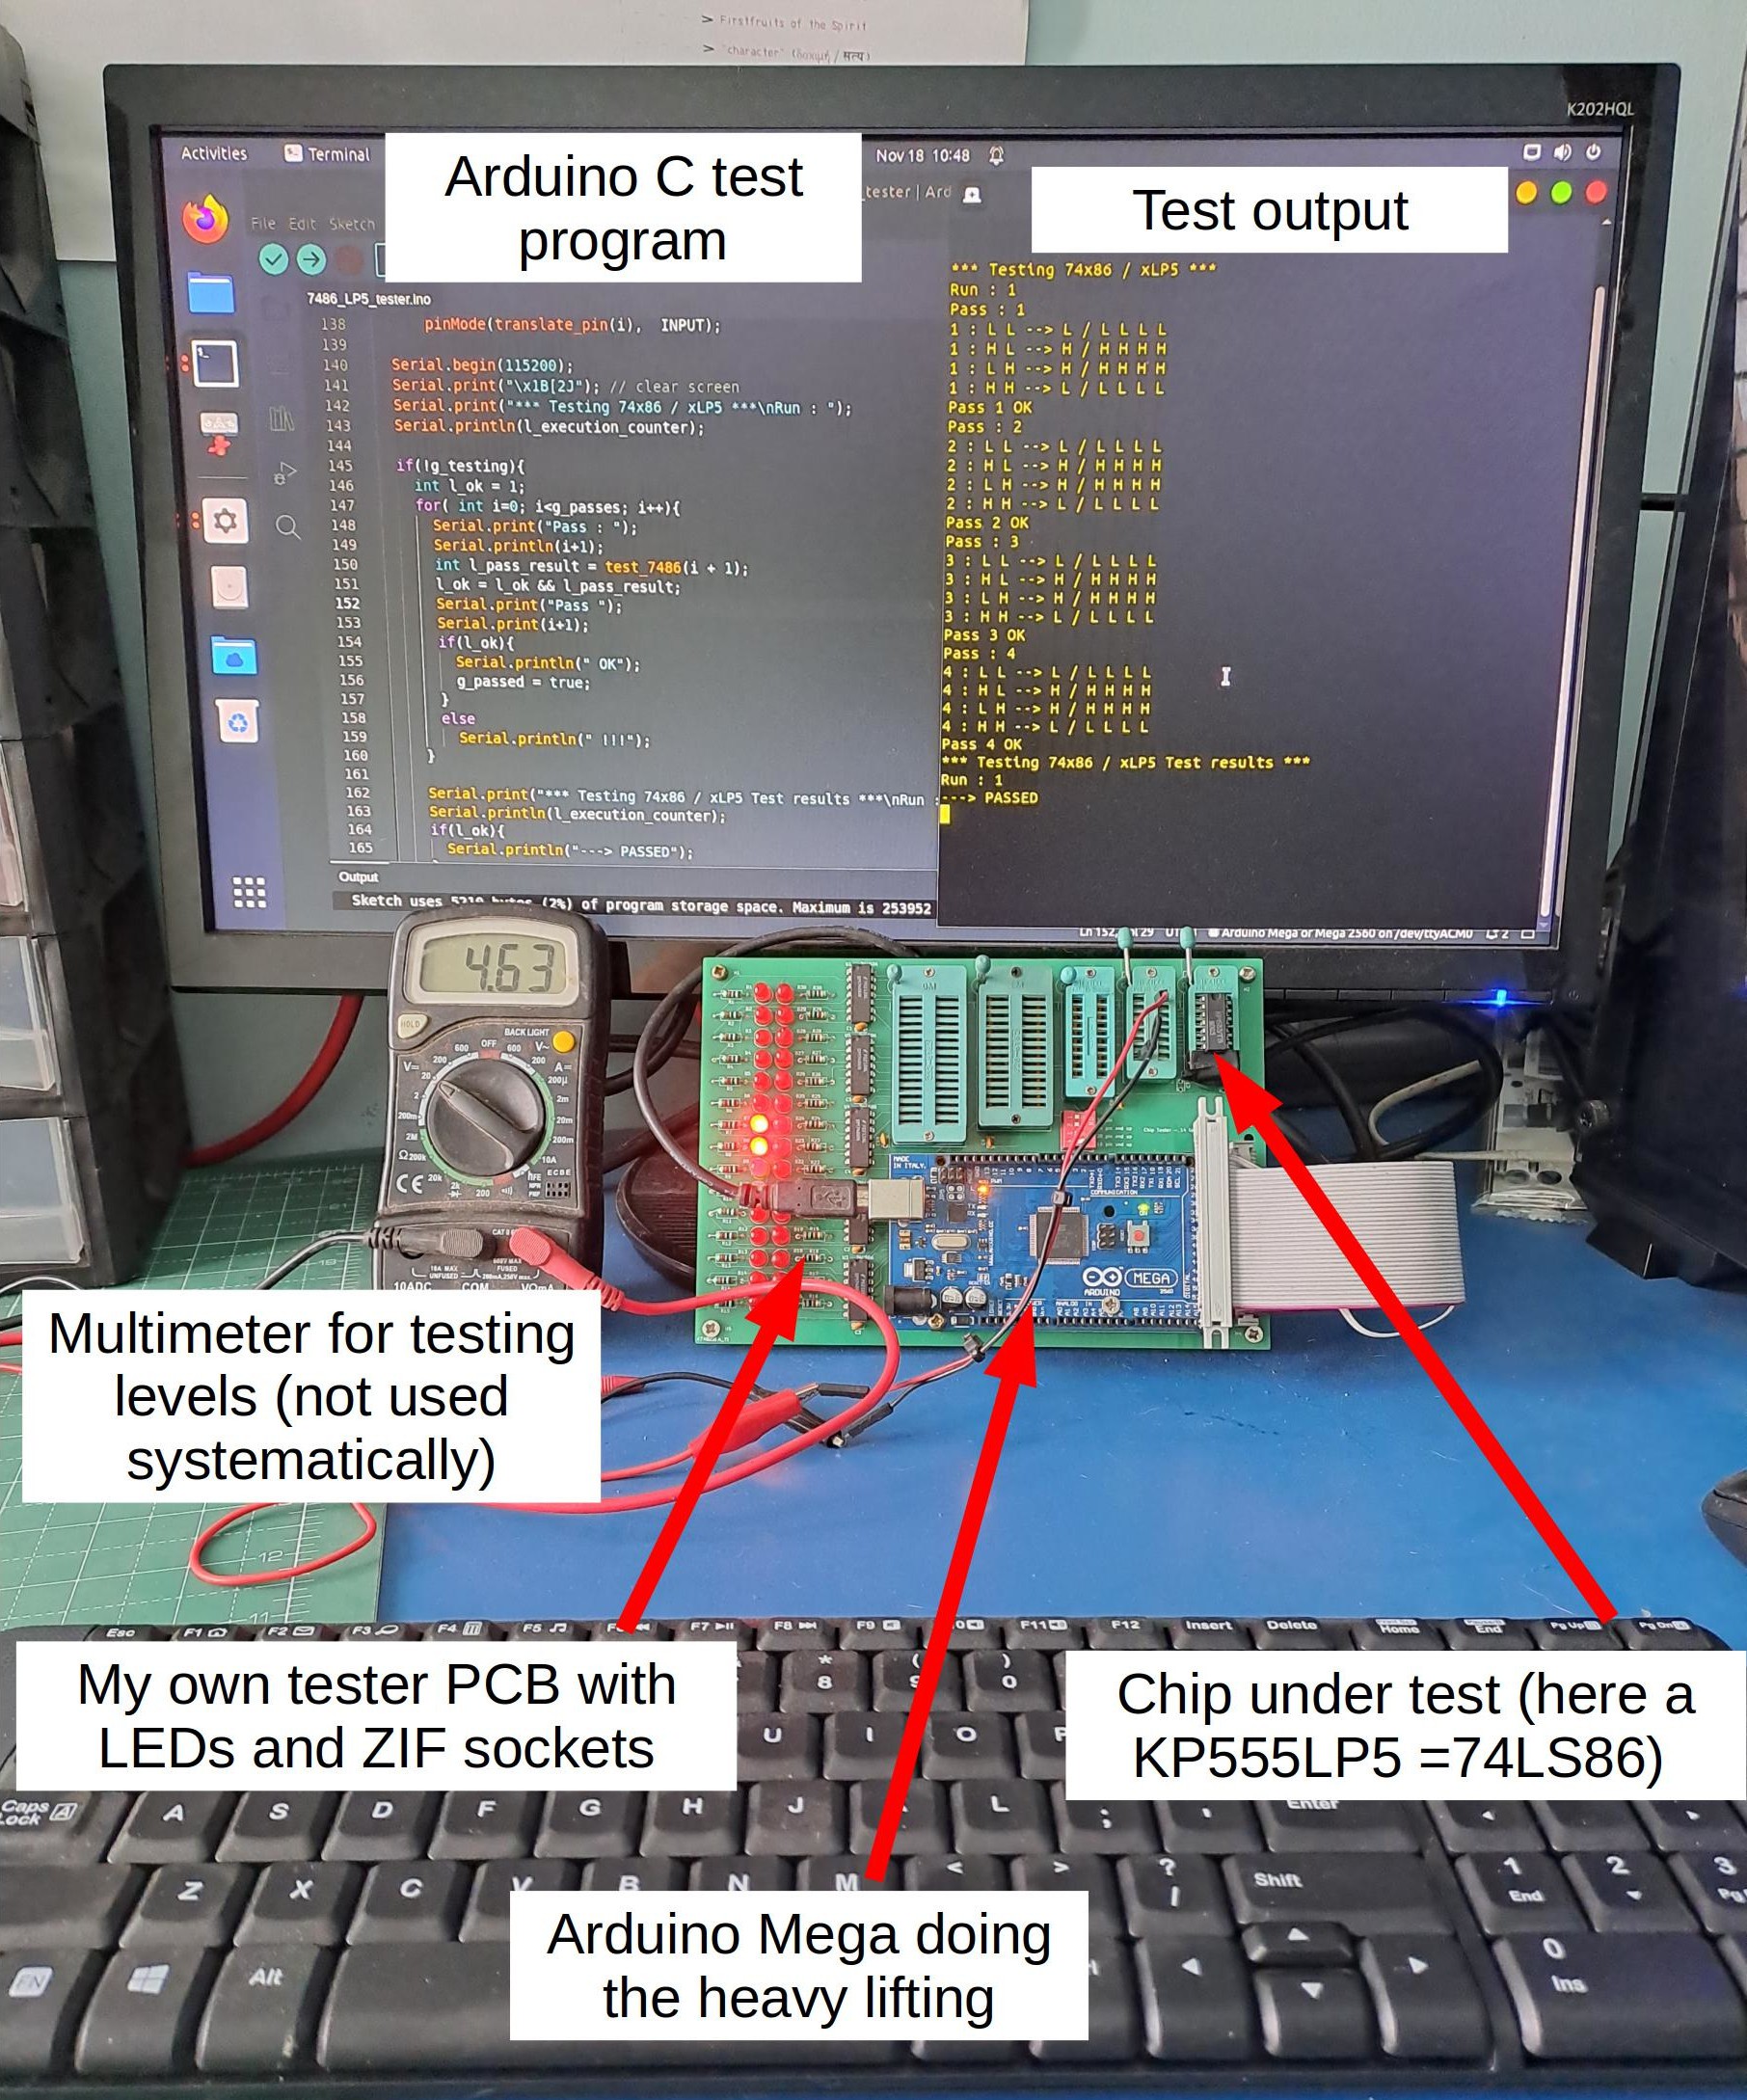
Each chip model has its own test program that I upload into the Arduino before testing a batch. The tester PCB has ZIF sockets from 14 to 32 pins, which allows me to test all types of TTL chips and also large SRAM chips (I will use the very common 512kx8bit size). The Arduino board is connected to the tester PCB through the big grey ribbon cable on the right. The output you see above the tester on the right-hand side of the screen shows 4 successful passes of test for a quad XOR gate chip (KP555ЛП5 = 74LS86).
Some of the Chips I received (from Ukraine, no less) had been stored not so well and their legs were badly corroded. Therefore, I had to find a solution to clean them up. After searching on forums and such, I decided to opt for mechanical polishing using a Dremel-type grinder and these kinds of brushes:
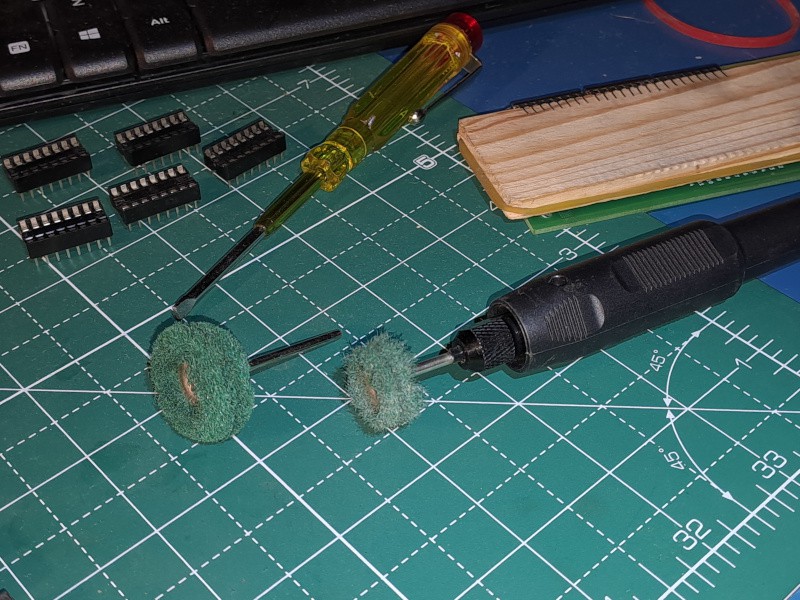
On the left is a new brush and on the right, the way it looks like after polishing a dozen chips. They wear out fast. The material they are made of is similar to scotch-brite pads. In order to hold the chips while polishing them, I used the rig below:
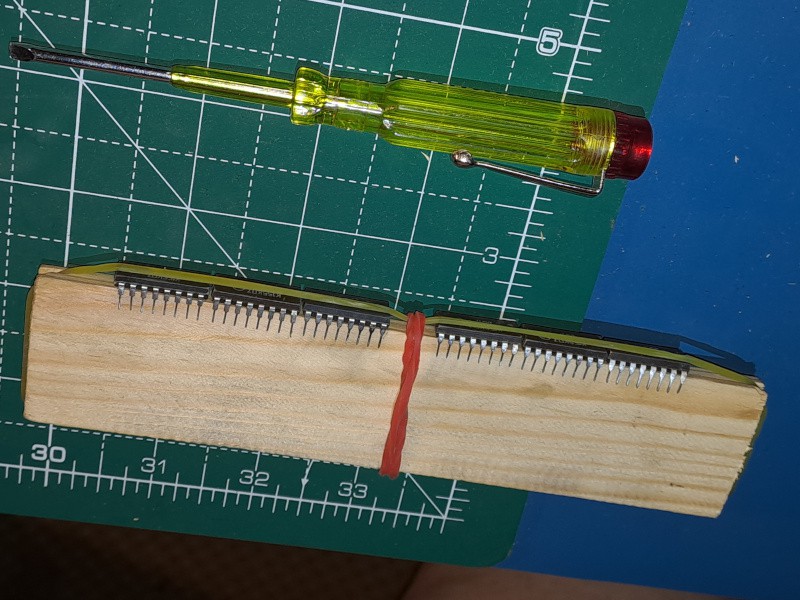
This enables me to polish 6 chips at a time without risk of damaging them. Here is a before/after picture:
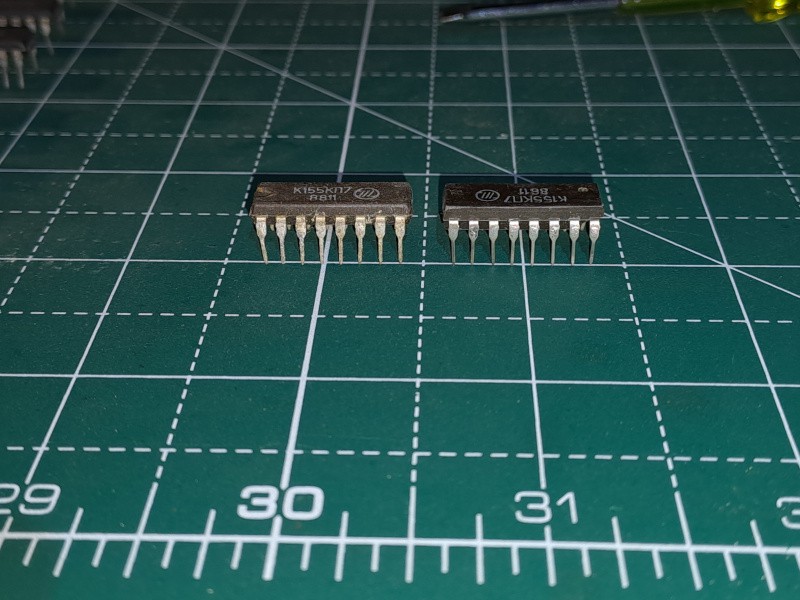
The pin corrosion was bad enough to prevent any electrical contact and thus made the chips fail the test. After cleaning, all passed but some needed to be socketed to reach that goal. The reason is that ZIF sockets grab chip legs from the sides, which my method is not always good at cleaning. By contrast, ordinary sockets establish contact on the front and back of chip legs, which are properly polished by the Dremel brush (actually only the front, but that is enough).
Here is a picture of my complete collection of Soviet TTL clone chips as it stands now:
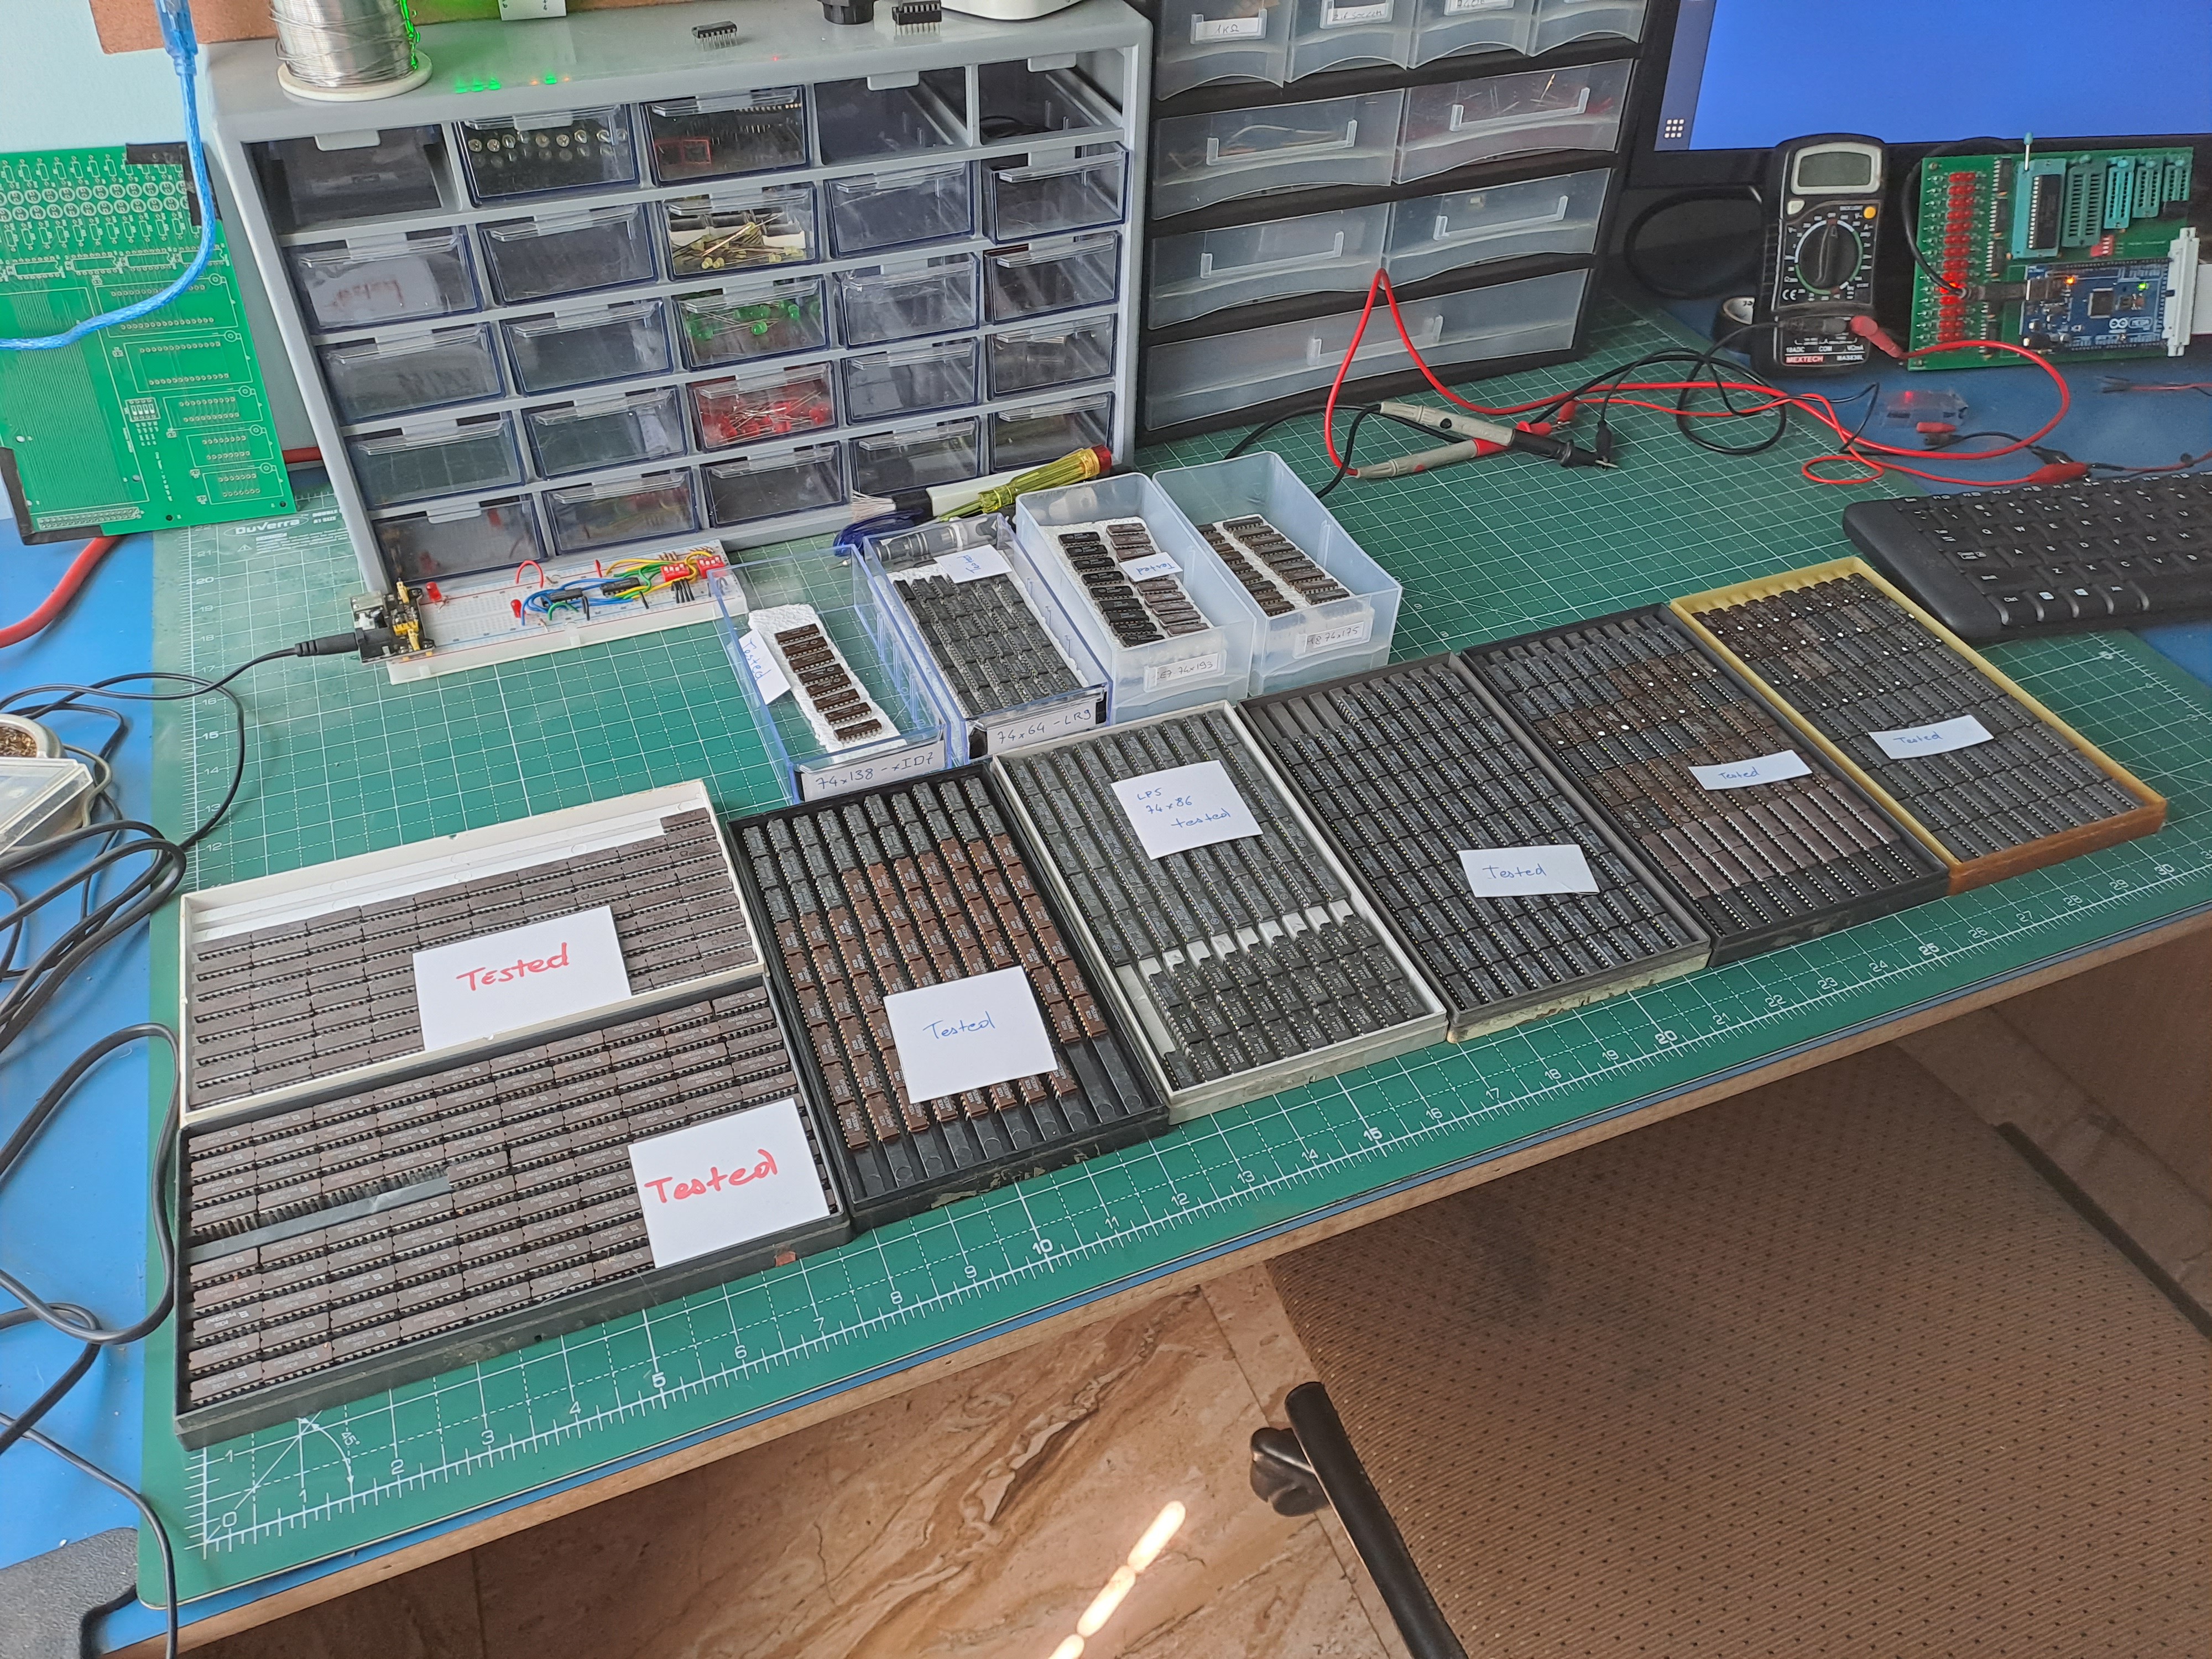
The inimitably crappy Soviet-style plastic trays I received most chips in are really cool in a vintage Chernobyl miniseries kind of way (wonderful series btw, strongly recommended). From left to right, we have:
- KM155ЛА3 = 74LS00 (ceramic, top tray)
- KM155ЛА4 = 74LS10 (ceramic, bottom tray)
- K555ЛР9 = 74LS64 (plastic)
- K555ЛП5 = 74LS86 (plastic)
- KP555ЛА3 = 74LS00 (plastic)
- KM155/K555КП7 = 74LS151 (plastic and ceramic, last 2 trays) The chips with a white corrector fluid dot on their asses are those which failed the direct test but passed when socketed after polishing.
In addition to the trays, the 4 plastic boxes on top contain (from left to right):
- K555ИД7 = 74LS138 (plastic)
- some more K555ЛР9s
- K555ИЕ7 = 74LS193 (plastic)
- K555ТМ8 = 74LS175 (plastic)
The ЛА3s, ЛА4s, ЛР9s and ЛП5s will be used for glue logic and the ALU (similar to the 74181 replica I already built). The ИЕ7s (up-down 4-bit counters) will be used for the uPC and the SP). The ТМ8s (quad D-type FFs) will be used for the other registers. The КП7s (8-to-1 multiplexers) will be used for the cross-bar switch connecting everything inside the processor and the ИД7s (3-to-8 selectors) will be used for address decoding and such.
Discussions
Become a Hackaday.io Member
Create an account to leave a comment. Already have an account? Log In.
@Ken Yap I am going to publish the sources of the testing programs here, along with the KiCad files for the tester PCB.
Are you sure? yes | no
👍
Are you sure? yes | no
Have you published your Arduino test programs somewhere? I did write a couple of test programs for TTL chips but only if not covered by the TL866 and in a very ad hoc fashion. I think I did the 7490 and 74123. PS: very cool that you're using clone chips. Mine are just the normal Western ones recovered from old circuit boards. The dremel tip is useful too.
Are you sure? yes | no