 colton.baldridge
As previously mentioned, I am but a humble electrical engineer, and with that comes the disclaimer that all mechanical solutions I devise are likely far from optimal and mostly intuited rather than calculated. That said, I am pretty smitten with how much progress I've made on the flexure design front.
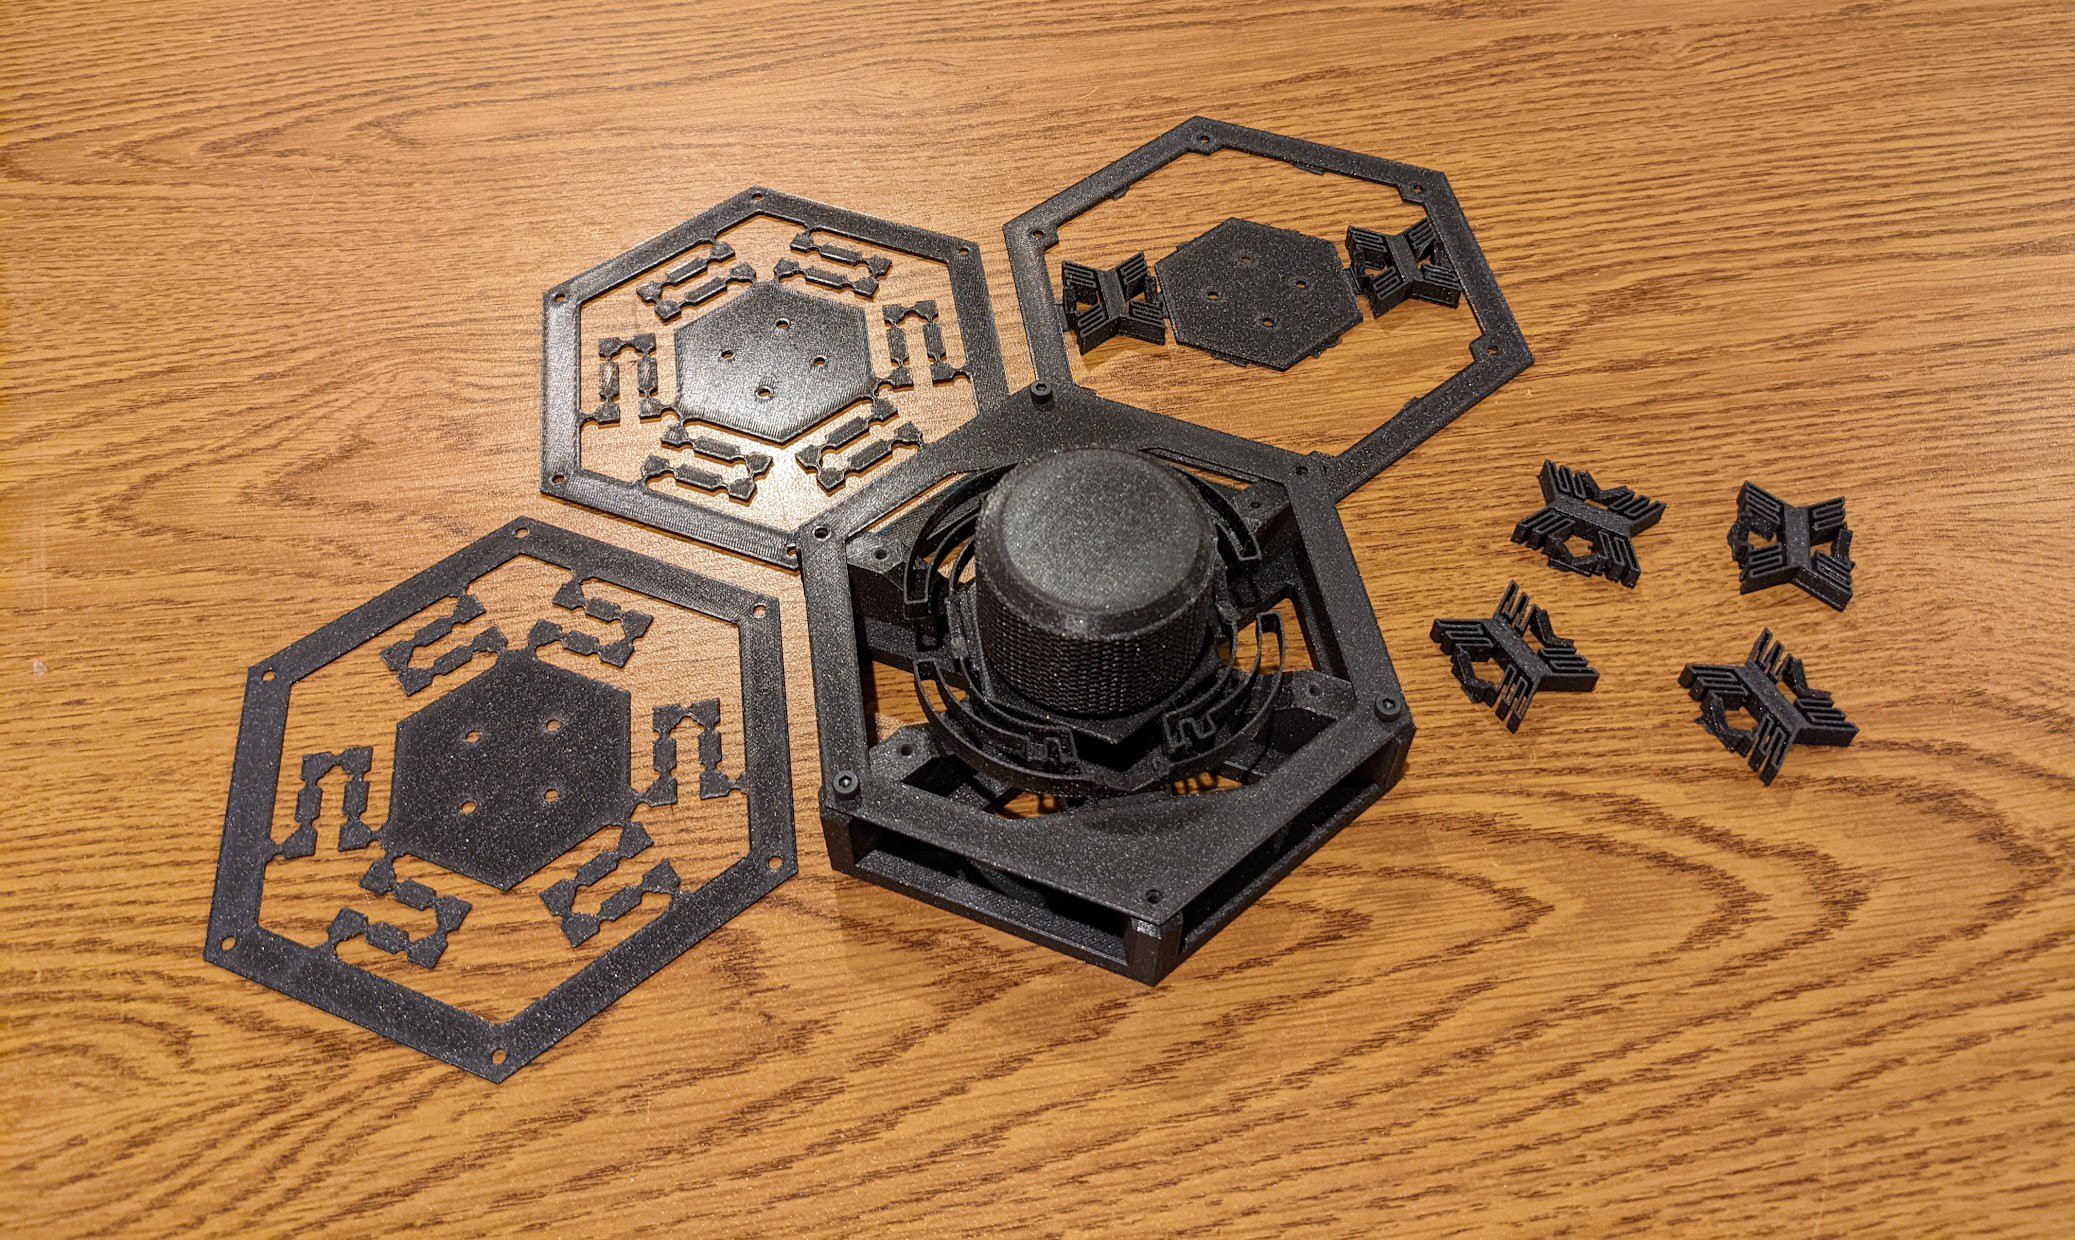
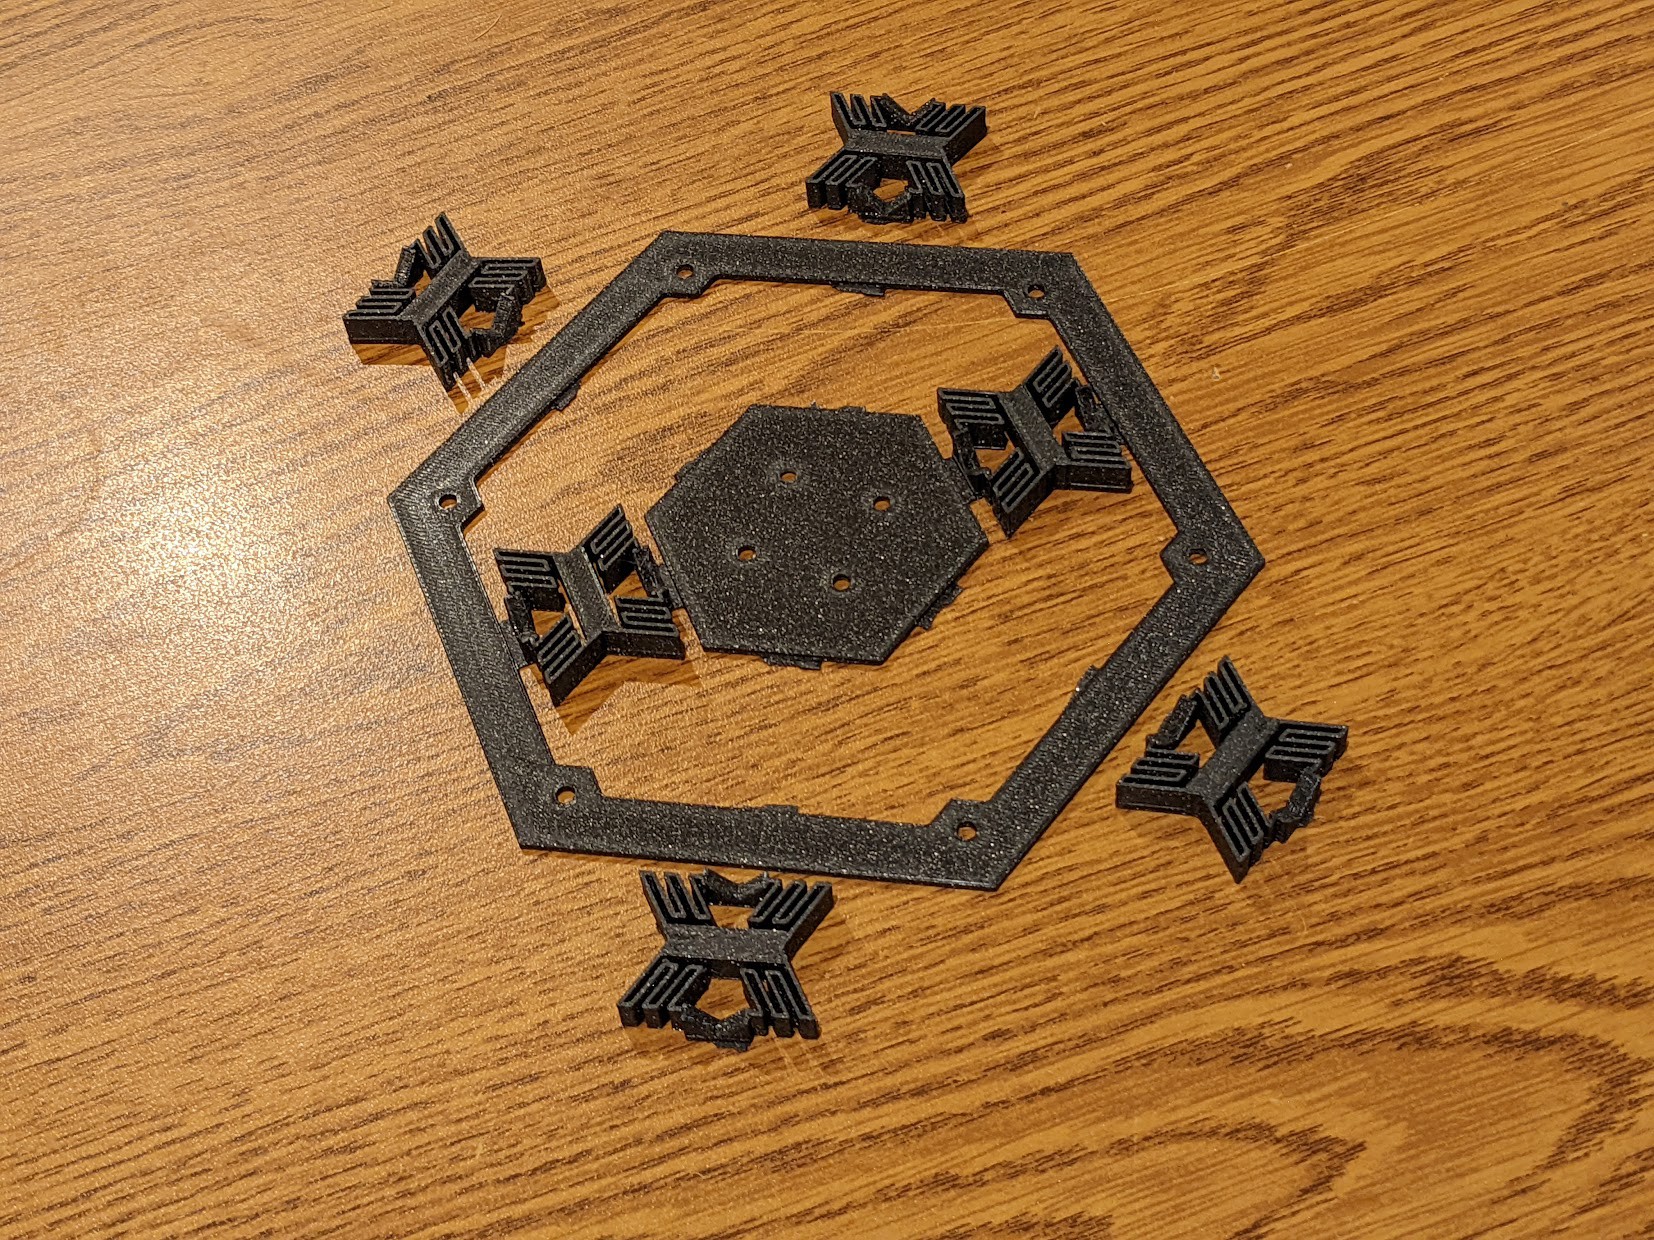
Below are the first 4 iterations of flexure design I created that are compatible with the platform base and knob I created (see Project Log 1 for more details).
Rev 0: Gotta try something
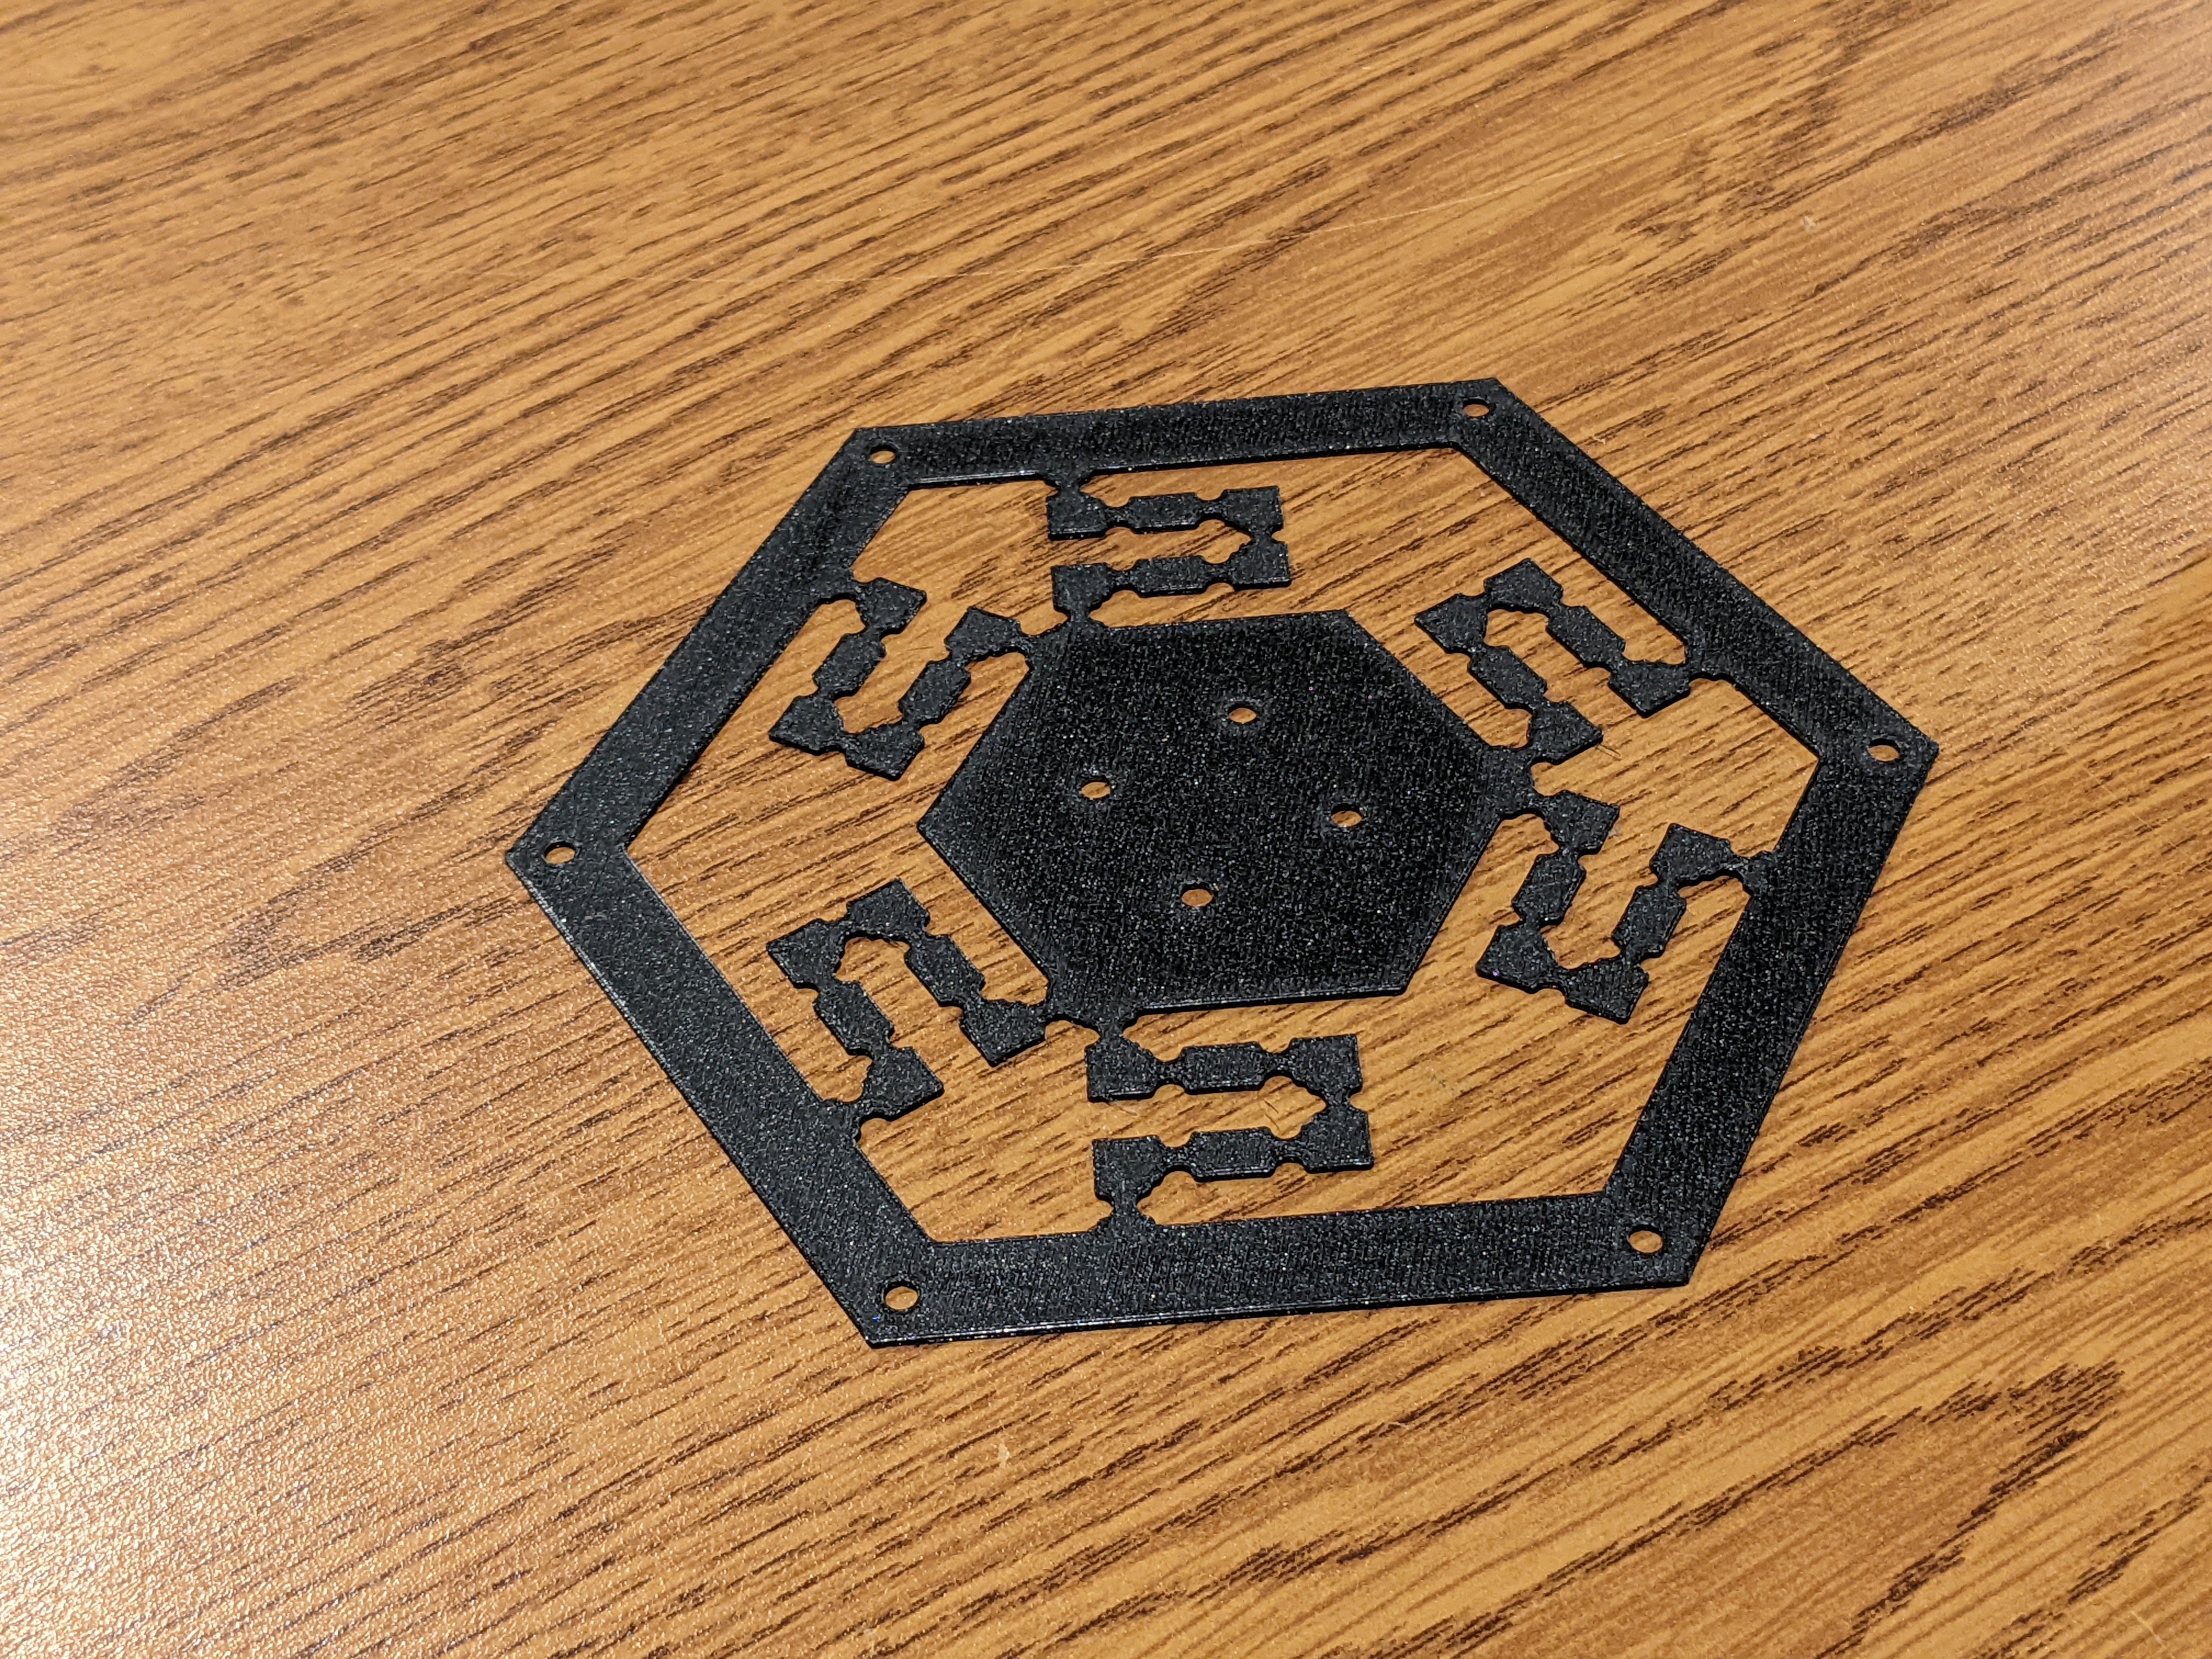
Revision 0 was just a test to see what type of flexibility I could get out of a 1mm thick piece of PLA, as well as see just how thin joints I could make with my Prusa Mini (which is an absolute beast btw). This flexure displayed decent performance in the pitch/roll DOF as well as the ±Z DOF. In the yaw, X, and Y DOFs, however, it was extremely poor offering almost no movement. Here, the joints were arranged as 5mm "bulk bars" with 2mm wide "hinges". This flexure informed me I was quite far from the limits of FDM manufacture, and thus, rev 1 was born.
Rev 1: Basically Rev 0.1
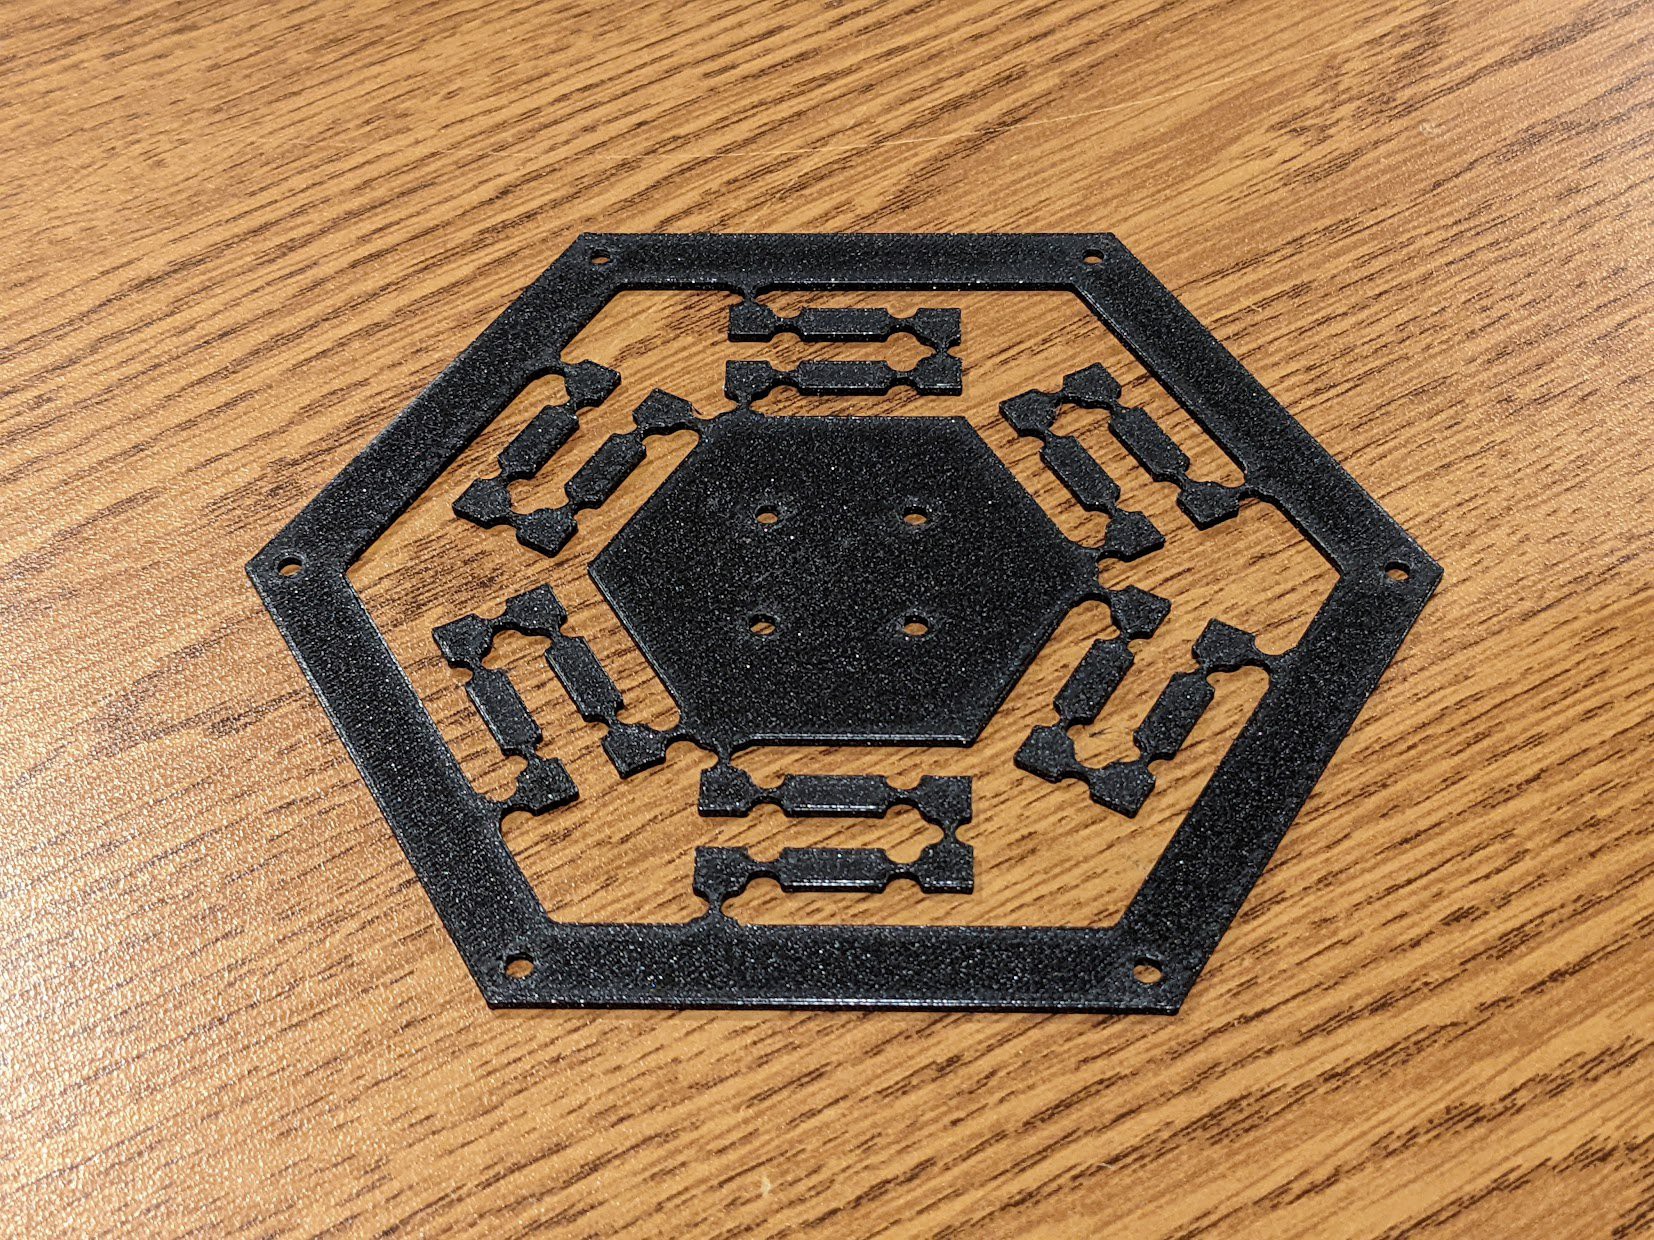
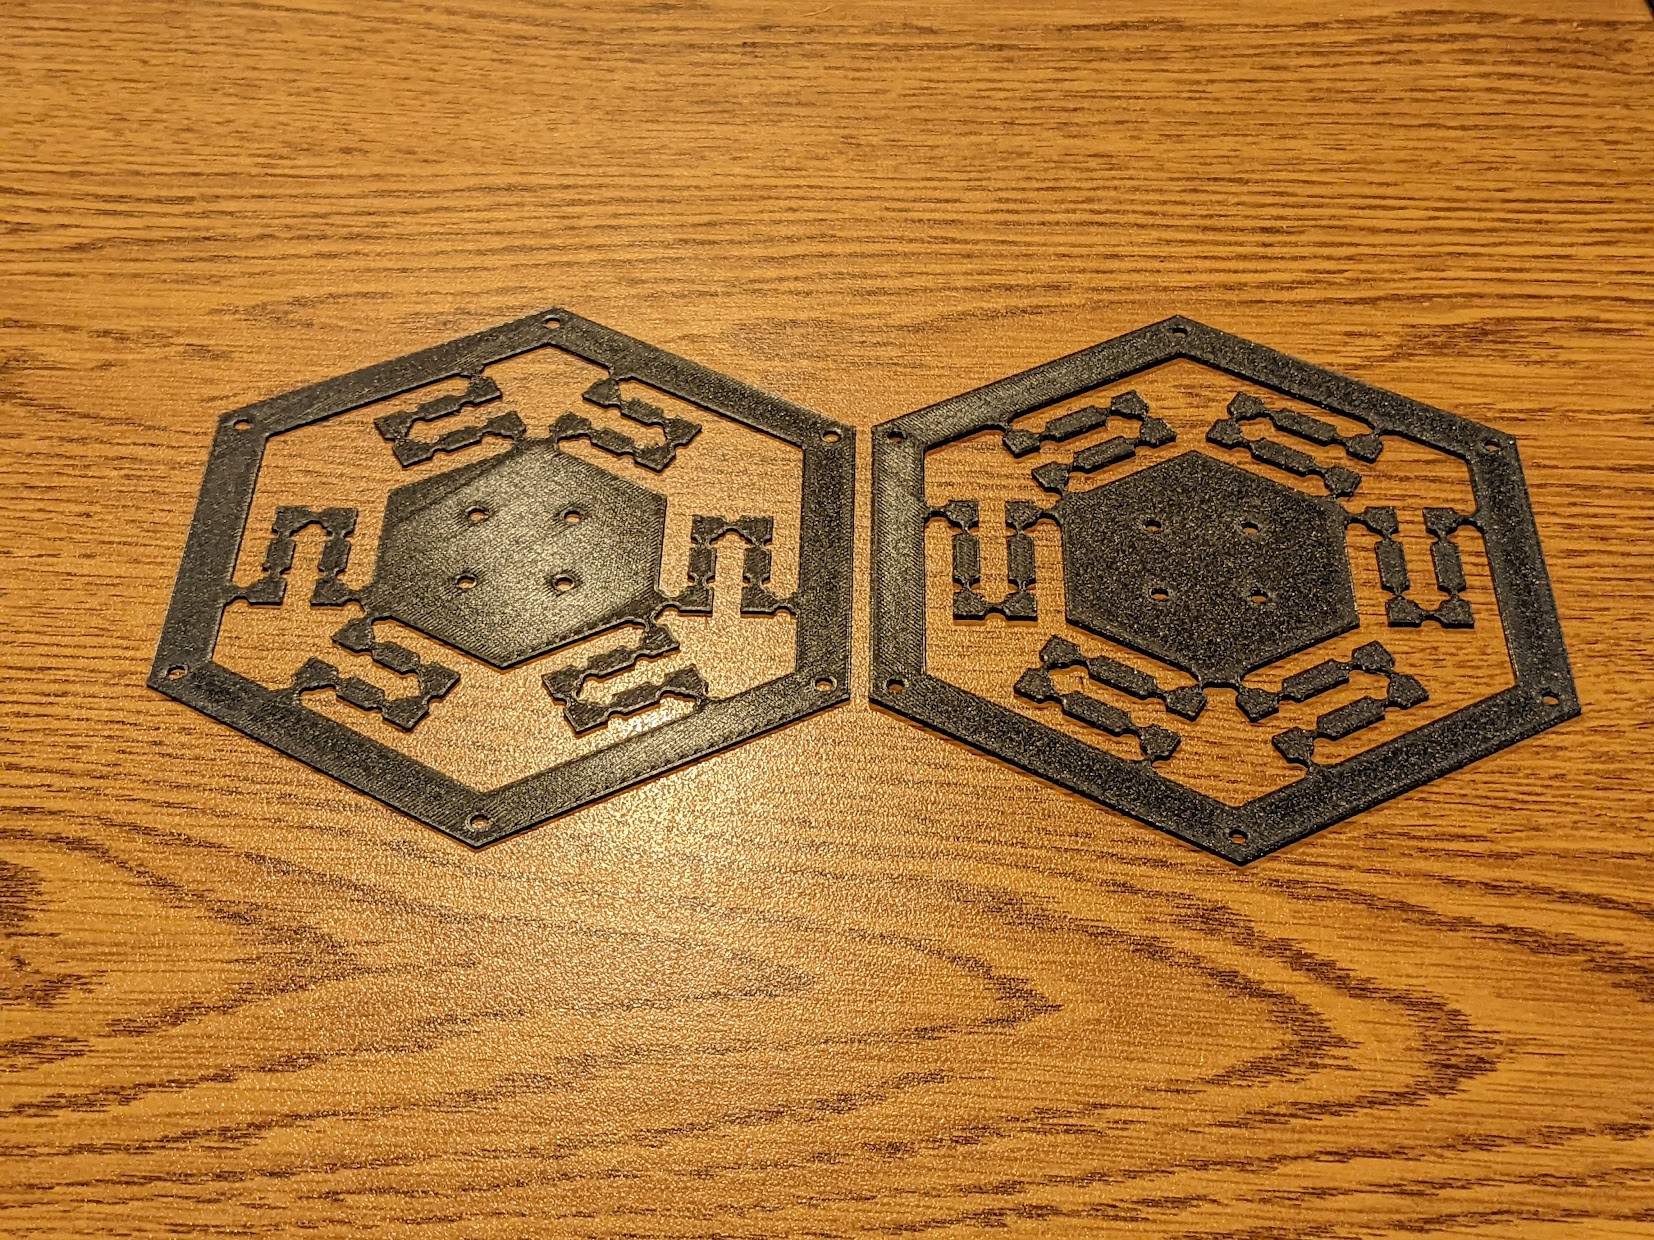
Revision 1 was simply rev 0 but with the overall thickness increased to 1.6mm and "hinge" width decreased to 1mm. See the side-by-side below and perhaps you can make out the difference.
This displayed marginally better flex in the yaw, X, and Y DOFs, but it was clear a total redesign was in order. That said, I gained even more confidence in printing thin features, which was critical for rev 2.
Rev 2: Check out this cool paper!
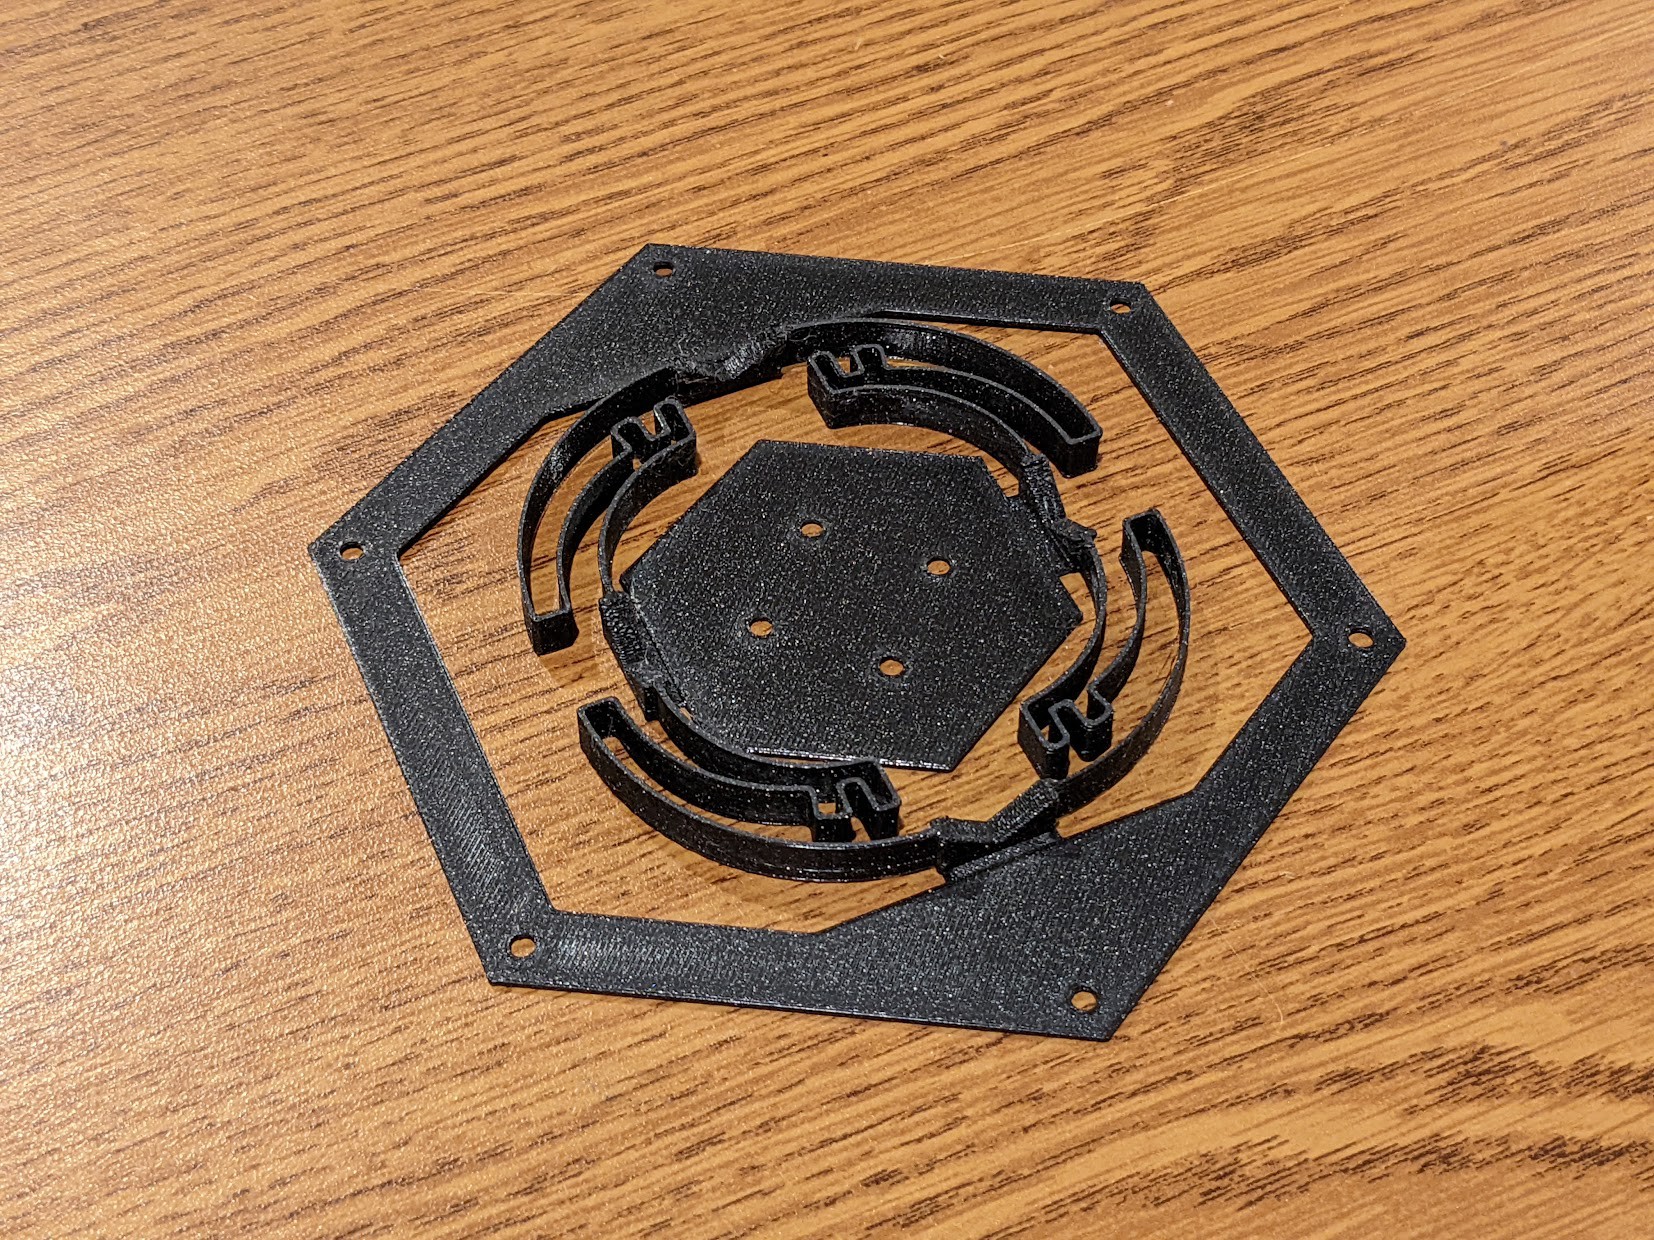
Revision 2 was inspired by a paper titled "A New Butterfly-Inspired Compliant Joint with 3-DOF In-plane Motion." I found it while searching for ways to improve the flex in the yaw, X, and Y DOFs, and it certainly did help. This flexure was still pretty far from achieving the amount of flex I wanted, but again was a step in the right direction. Originally it had 6 "butterfly" sub-flexures, but in my unquenchable thirst for knowledge (and more X/Y flex) I ripped out 4/6 to see how much stiffness just 2 would provide. As an added bonus, this served to prove out just how much force it would take to break a thin piece of PLA. I have no empirical data to support, but let me tell ya, the 0.4mm thick hinges where each "butterfly" was attached took a lot more force to break than I expected. Again, I also cranked down on the width of printed features, this time trying just 0.5mm for the little wings of the butterflies. Again, the Prusa Mini pulled through with flying colors.
Rev 3: Now we're getting somewhere
Revision 3 is what I would classify as my first breakthrough. I used the learnings from rev 2 about making vertical thin structures (as opposed to planar ones in revs 0/1) to inform the design of the wide sweeping structures surrounding the knob mount. With these large thin structures, the X/Y flexibility was drastically improved, almost to the point of being acceptable. After ripping out 4/6 of the butterflies in the rev 2 flexure, I also made the call to reduce the number of symmetrical flexures from 3/6 to 2. Basically, giving each symmetrical flexure 180deg of the area to consume, rather than 60/120deg. This allowed for more open space in the flexure and more room to space apart the thin links. That said, this does come at the cost of pitch/roll force asymmetry (I think? intuitively I feel the 3/6 layout is pitch/roll symmetric, but that may not be true). Regardless, the feel of this asymmetry is not noticeable.
Here is a video of rev 3 in action (headphone warning):
Note on all the scratching and grinding -- I forgot to see how much interference there'd be between the flexure an the mount, but this is an important learning for later.
Speaking of later, I felt that rev 3 is about as good as I needed to get before moving forward. The current design of the base platform and knob forces the axis of rotation to be at the bottom of the knob. If you've ever used a name-brand 3D mouse, you'll know that it actually rotates about roughly the center of mass of the knob, which gives it a better feel. It feels more like you're grabbing the object in 3D space, whereas with mine it feels like you're pushing a knob around on a platform.
And with that, I announce my next magic trick, compacting this entire giant flexure to fit INSIDE the knob, while still remaining FDM printable, and avoiding interference!
Discussions
Become a Hackaday.io Member
Create an account to leave a comment. Already have an account? Log In.