 Andrew Lamchenko
The star of this project is the temperature and humidity sensor SONOFF SNZB-02 from ITEAD. This sensor appeared on the market about 2 years ago, it was in fact ITEAD's first attempt to enter the Zigbee device segment. A series of sensors was released, like 4 pieces and a hub.
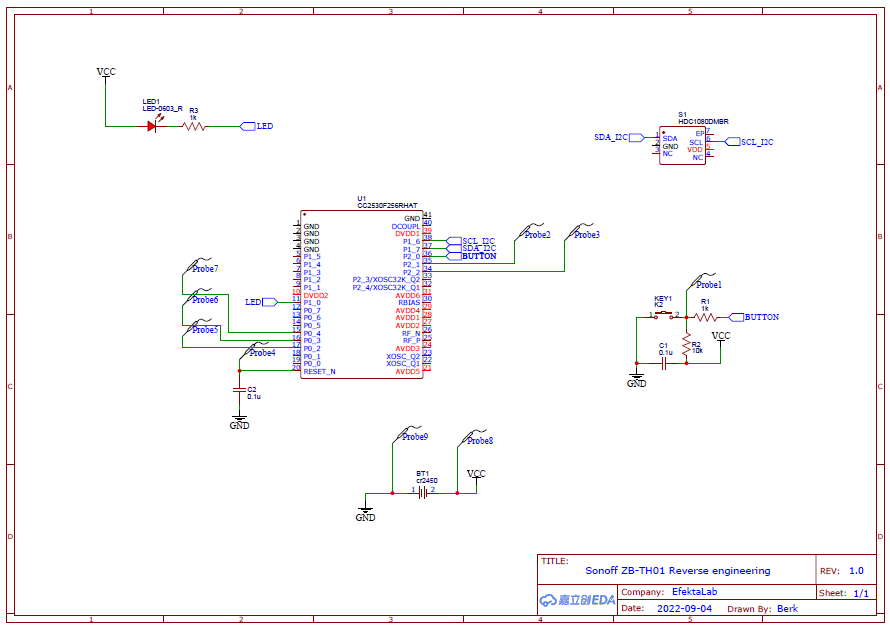
The SONOFF SNZB-02 sensor is built on the cc2530 microcontroller, the sensor for measuring temperature and humidity was selected hdc1080, apparently ITEAD tried to do everything on a component base from Texas Instruments.
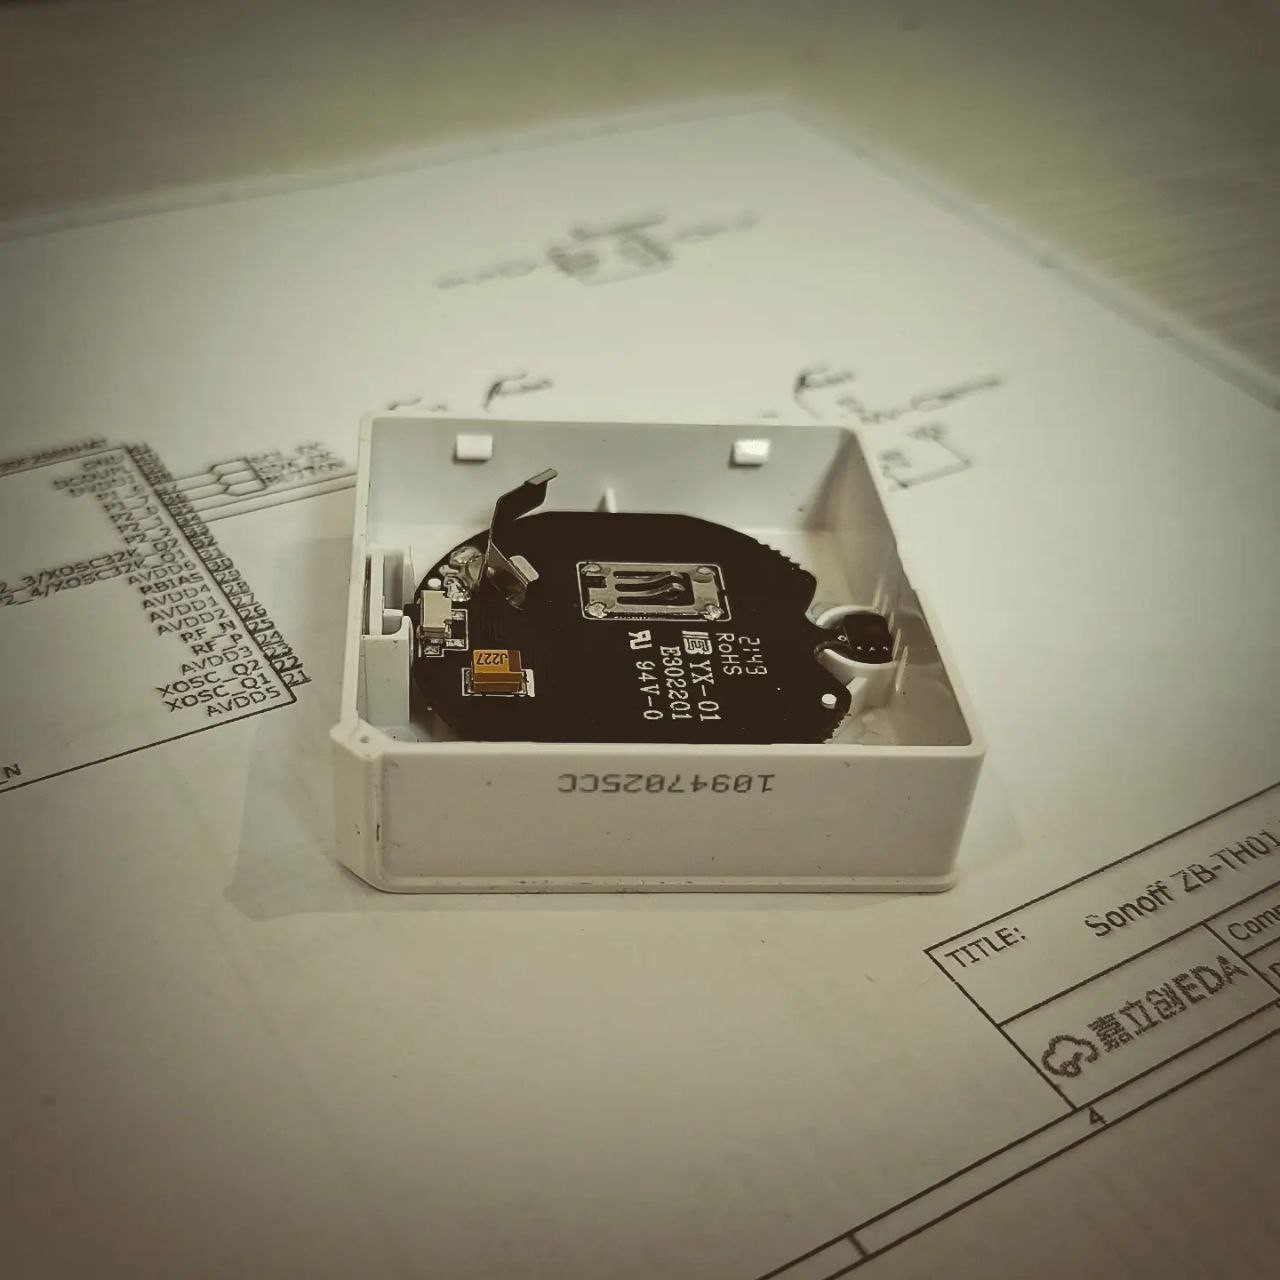
And so, with the help of a table lamp and a magnifying glass, it took some time to decipher the sensor circuit and transfer it to paper.
The i2c interface lines from the HDC1080 on this sensor are routed to pins p1.6 and p.17. The LED is connected to the leg p1.0 by the cathode. The button is connected to the p2.0 leg with a binding that suppresses contact bounce. There are a lot of contact pads on the board, they are all marked on the device diagram. In the photo below, I have highlighted the areas to which you need to solder to flash the device with my alternative firmware.
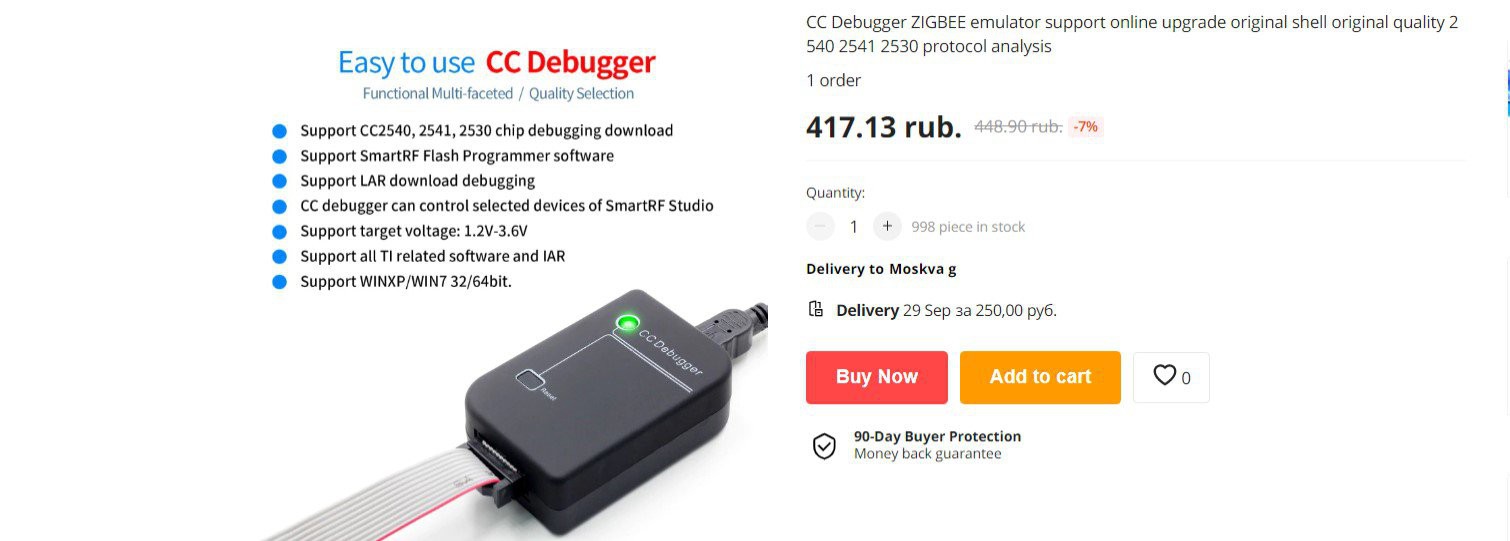
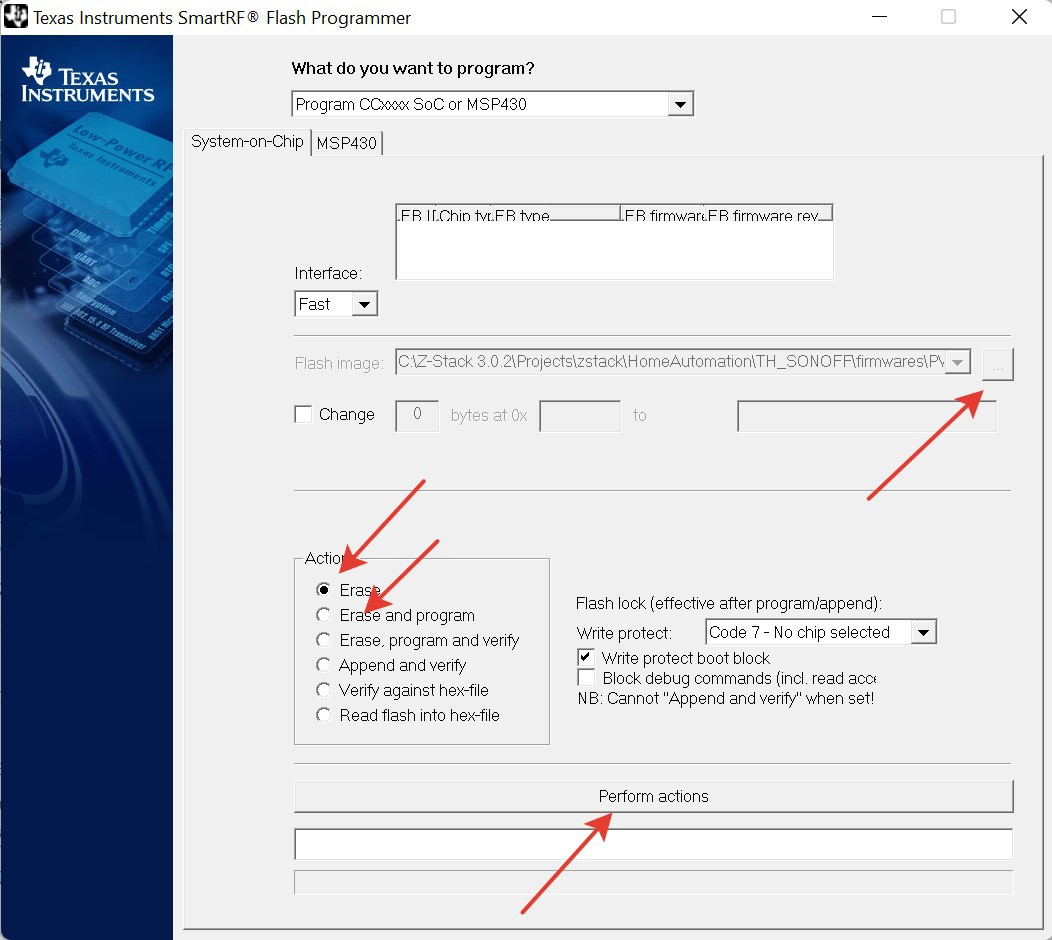
The firmware process itself is simple. To do this, you need to go to my github and download the file with the firmware. Next, you will need the SmartRF Flash Programmer version 1. How to download and install it is beyond the scope of this article, I'm sure the Internet will help with this. You will also need CC Debugger or Smart RF04E (recommended for ease of connection).
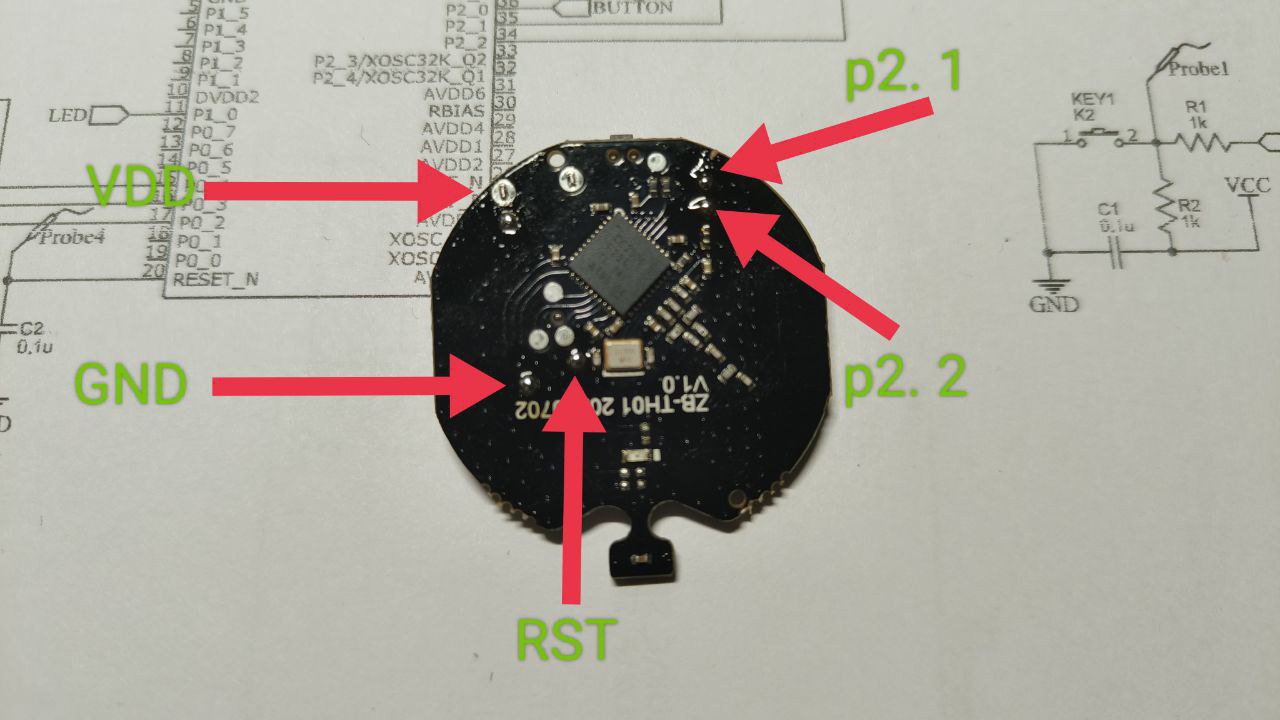
Solder 5 wires to the pads indicated in the photo and connect these wires to the corresponding signed debugger contacts. Connect the debugger to the computer's usb port, open the SmartRF Flash Programmer v1. To the right of the field in the Flash Image item, click on the "browse" icon and select the firmware file downloaded earlier. In the Actions section, select Erase and click on the Perform actions button below. After you have cleaned the chip, select Erase and program in the same Actions item and press the Perform actions button again.
Solder the wires, assemble the sensor back into the case, insert the battery.
To add a device to z2m, you need to click on the Allow Connections button in the z2m web interface. After that, press and hold the button on the SONOFF SNZB-02 sensor for 2 seconds, the LED will flash and the Zigbee network login process should begin
To remove the device from the Zigbee network, it is necessary to hold down the button for 10 seconds, after this time the LED will start flashing, and the sensor will start the procedure for leaving the network. A short press initiates the reading and sending of all data from the sensor out of schedule.
What will change in the operation of the sensor?
The sensor now transmits temperature and humidity data through temperature and humidity clusters. The sensor can be bound to these clusters to other devices that have implemented binding according to these clusters. After binding, the sensor will transmit temperature and humidity data directly to the devices to which it is associated.


Also, the sensor will start to work with the oNoFF cluster. This can be useful for direct relay control. For these purposes, the simple functionality of a thermostat and a hygrostat is implemented in the sensor. For direct control of the sensor by external relays, it is necessary to bind the sensor to the relay with which it will work. To do this, go to the sensor page in the z2m web interface, go to the communication tab. And in the new line in the first field, select the starting point -1, in the next field to the right in the drop-down list, find the relay to which you plan to bind the sensor. Further to the right, in the oNoFF checkbox, check the box and click the Connect button. After that, press the button on the sensor body so that the sensor wakes up and accepts new configuration data.
After binding, you must go to the properties tab, set the thresholds in the thermostat or hydrostat section, after each value entered in...
Read more »
 B K
B K
 Guy Cole
 yancan
 valencia.ca