 Tom Nardi
At this point, it seemed to me that the entire project hinged on the viability of slotting in a new keyboard. If I couldn't get better input on this thing, there was no sense putting any more time and money into it.
Now I've previously said that the PreComputer 1000 had a full-sized 60% board...which is technically true. If you measured the actual width of the keys themselves, the spread was within a few mm of what you'd measure if you went from Ctrl to Ctrl on a standard layout board. Unfortunately, all the 60% mechanical keyboard PCBs I could find extended out considerably beyond the surface area of the keys themselves. I could probably have taken one of those open source PCBs and slimmed it down a bit, but that seemed like a lot of work for a one-off project like this. What I really needed was a way to fit an off-the-shelf board into the original keyboard tray.
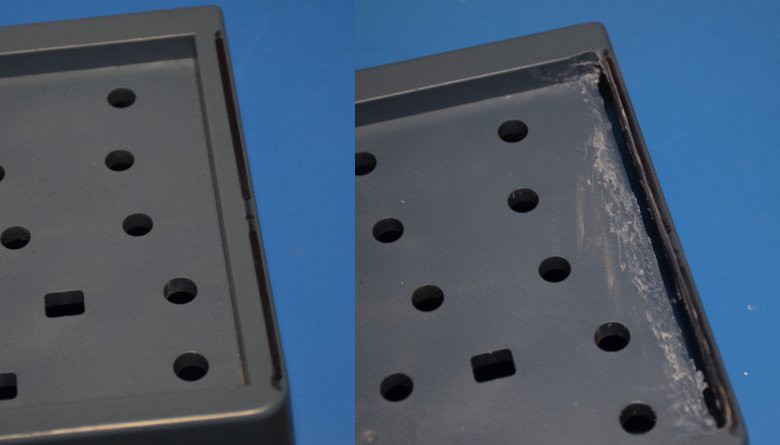
In the end, I realized that if I shaved off about 5 mm on either side of the tray, I could just drop in the PCB from a Royal Kludge RK61 board in there. It would be very close, with only maybe 2 mm of plastic left on either side after the operation. At this point I actually ordered a few more PreComputers on eBay in case I managed to ruin the tray on this one, but I'm happy to report that a steady hand and a Dremel got me where I needed to be.
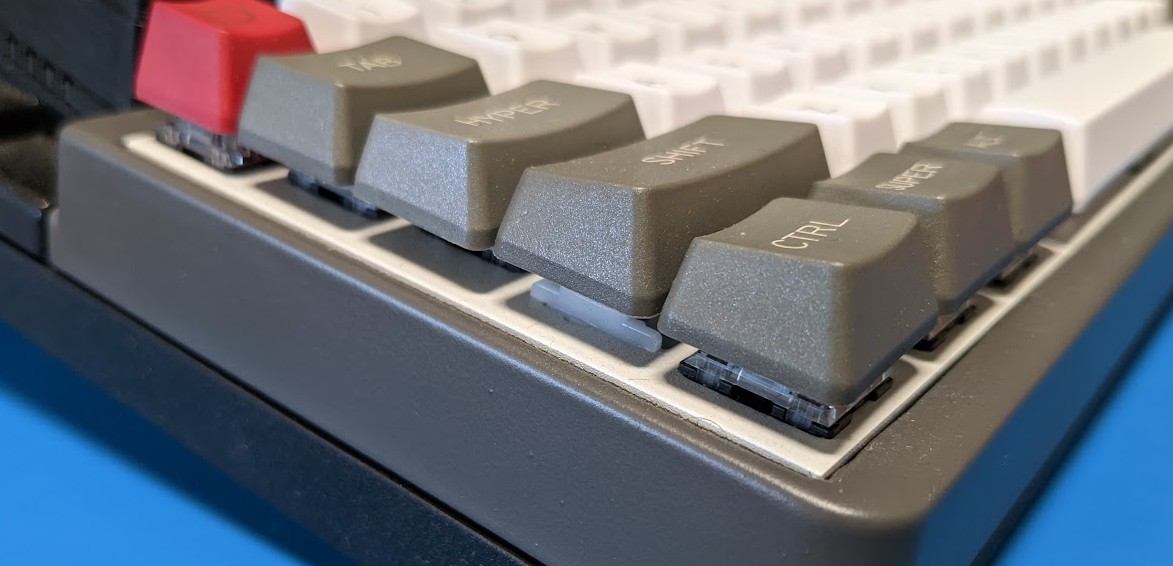
That gave me enough width to fit the PCB, but there was still a catch -- the original board used membrane keys, so the tray was very shallow. The mechanical switches would stick out much farther. In fact, the RK61's plate would actually be at the level the tops of the keys were previously.
I thought this would be ugly, but in the end, I think it actually works really well considering the computer's overall bulk. The raised keys give it an almost typewriter sort of look.
But we're getting a little ahead of ourselves. Getting the PCB even that low into the tray meant having to cut out (blindly) around all kinds of stuff on the backside of the board, such as the battery connector (incidentally, I'm not using the battery here) to the USB-C connector. It looks pretty ugly, but if I didn't post this picture here, you'd never see it anyway.
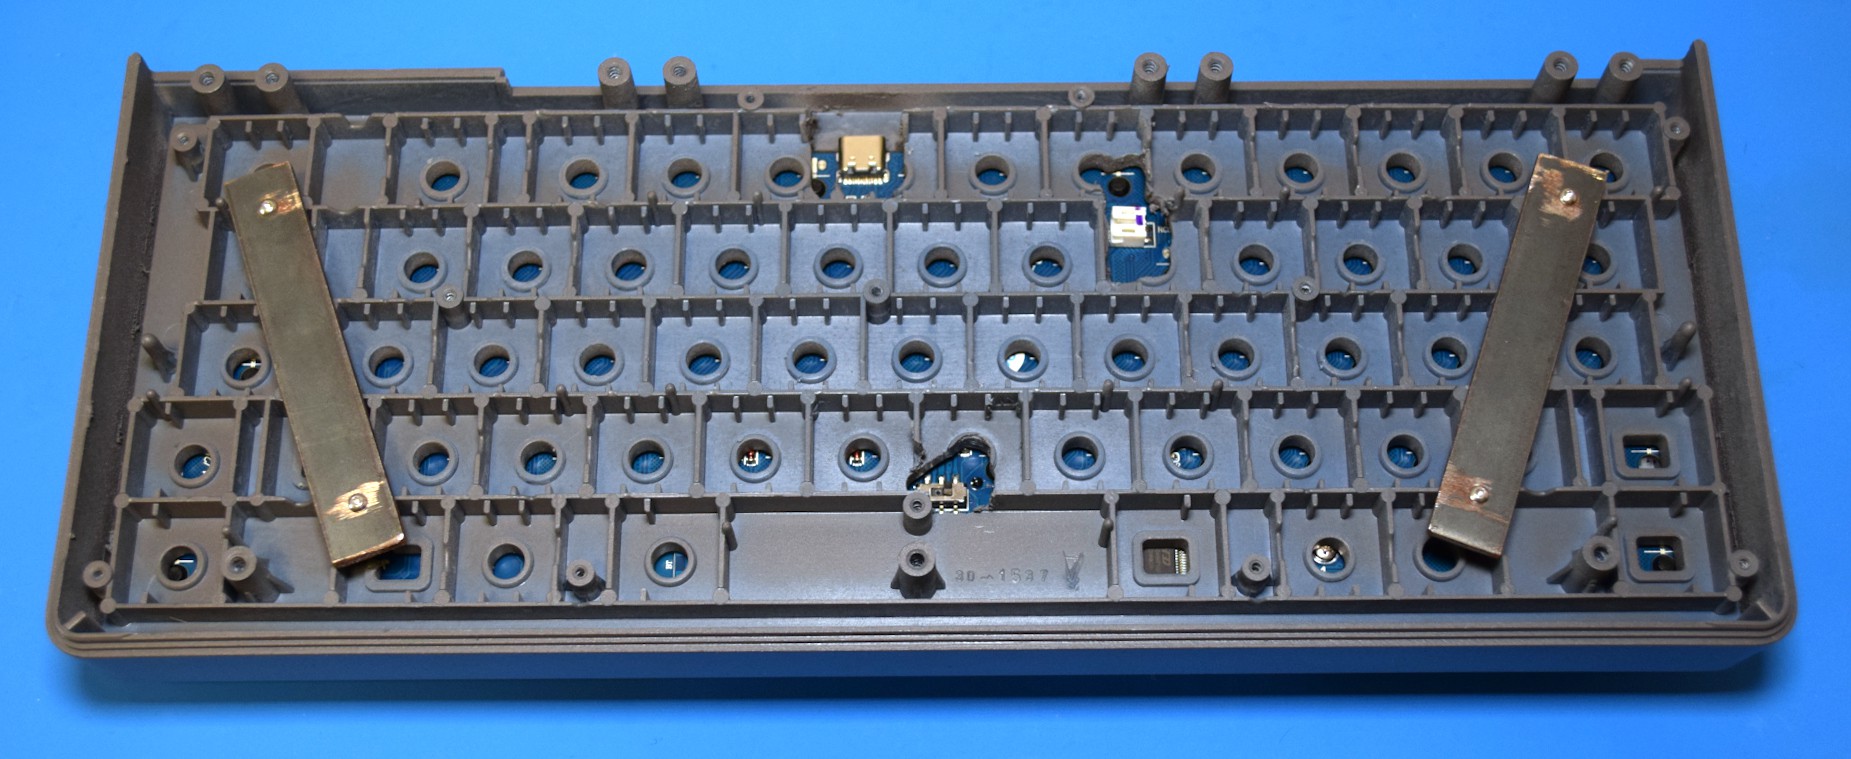
To hold the board in, I cut those two pieces of flat bar stock and drilled holes which aligned to the mounting holes on the RK61 board. With the addition of longer screws, I was able to tighten those to the back of the tray so everything is nice and tight.
Discussions
Become a Hackaday.io Member
Create an account to leave a comment. Already have an account? Log In.