 Tom Nardi
Up to this point, everything had been kind of coming together without any sort of real plan. In fact, the cartridges had ended up taking more effort than anything on the deck had. But now it was time to get serious -- I had to design a faceplate that would be a drop-in replacement for the original.
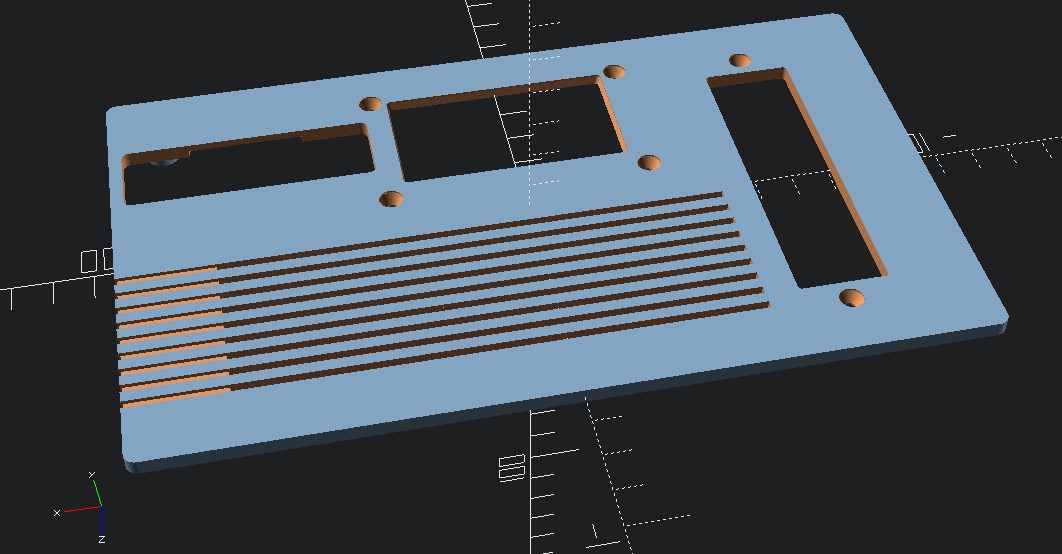
This component was critical, as it would hold the secondary OLED display, the buttons to control the hardware, the lower magnets that would eventually hold the LCD down, and the cooling fan. A lot of parts had to be crammed into a relatively small piece of plastic...plus, it had to have the faux-80s look I was going for.
To try and expedite things without wasting more time and plastic than necessary, I did test fits in sections. Like if I wanted to test the fit of the lighted buttons on the right hand side, then I would just print that half (or even quarter) of the face. When I wanted to make sure the OLED would bolt on properly, I just printed out that section, etc. It was a slow process, but I'm very happy with the end result.
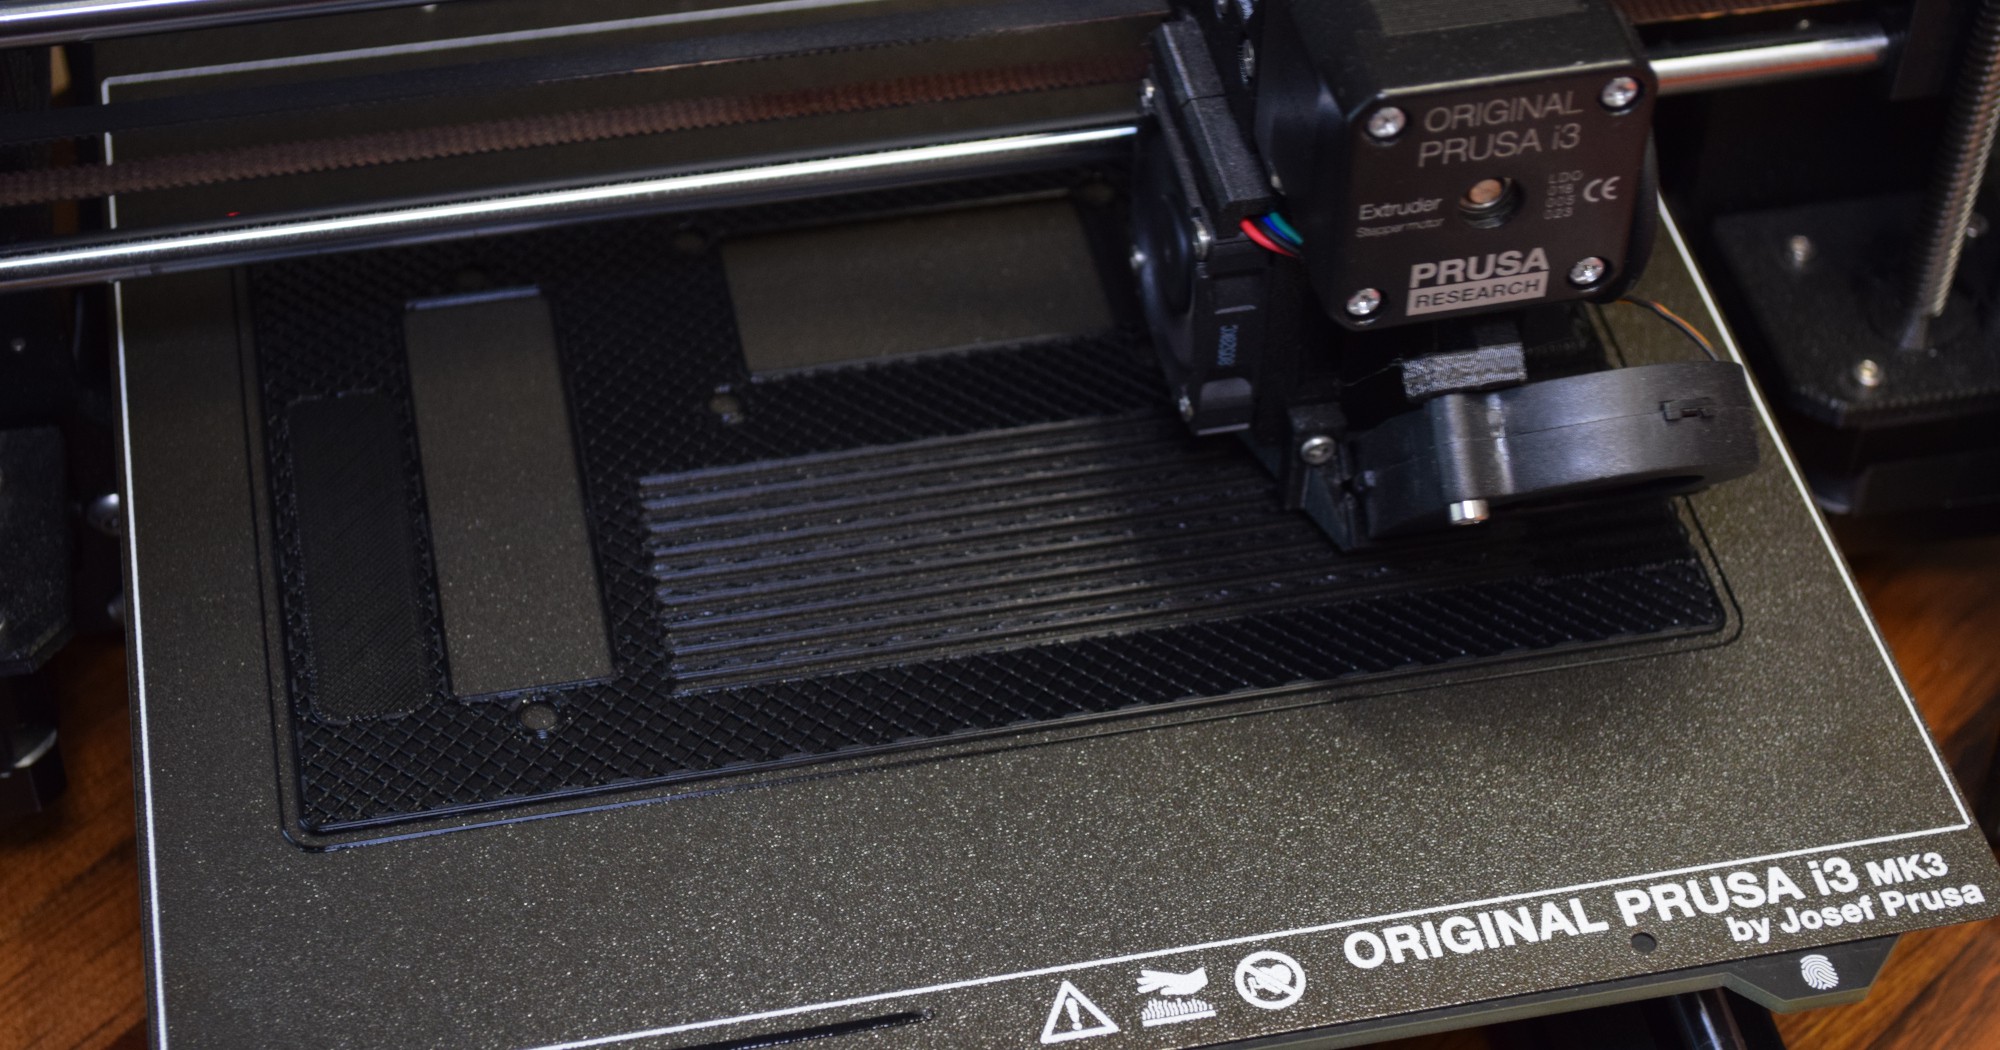
Notice the somewhat unconventional duct attached to the fan, this was designed to (hopefully) redirect some air over the heatsink mounted to the top of the 5 V regulator that sits underneath. The rest of the fan's airflow is directed directly onto the Pi's CPU.

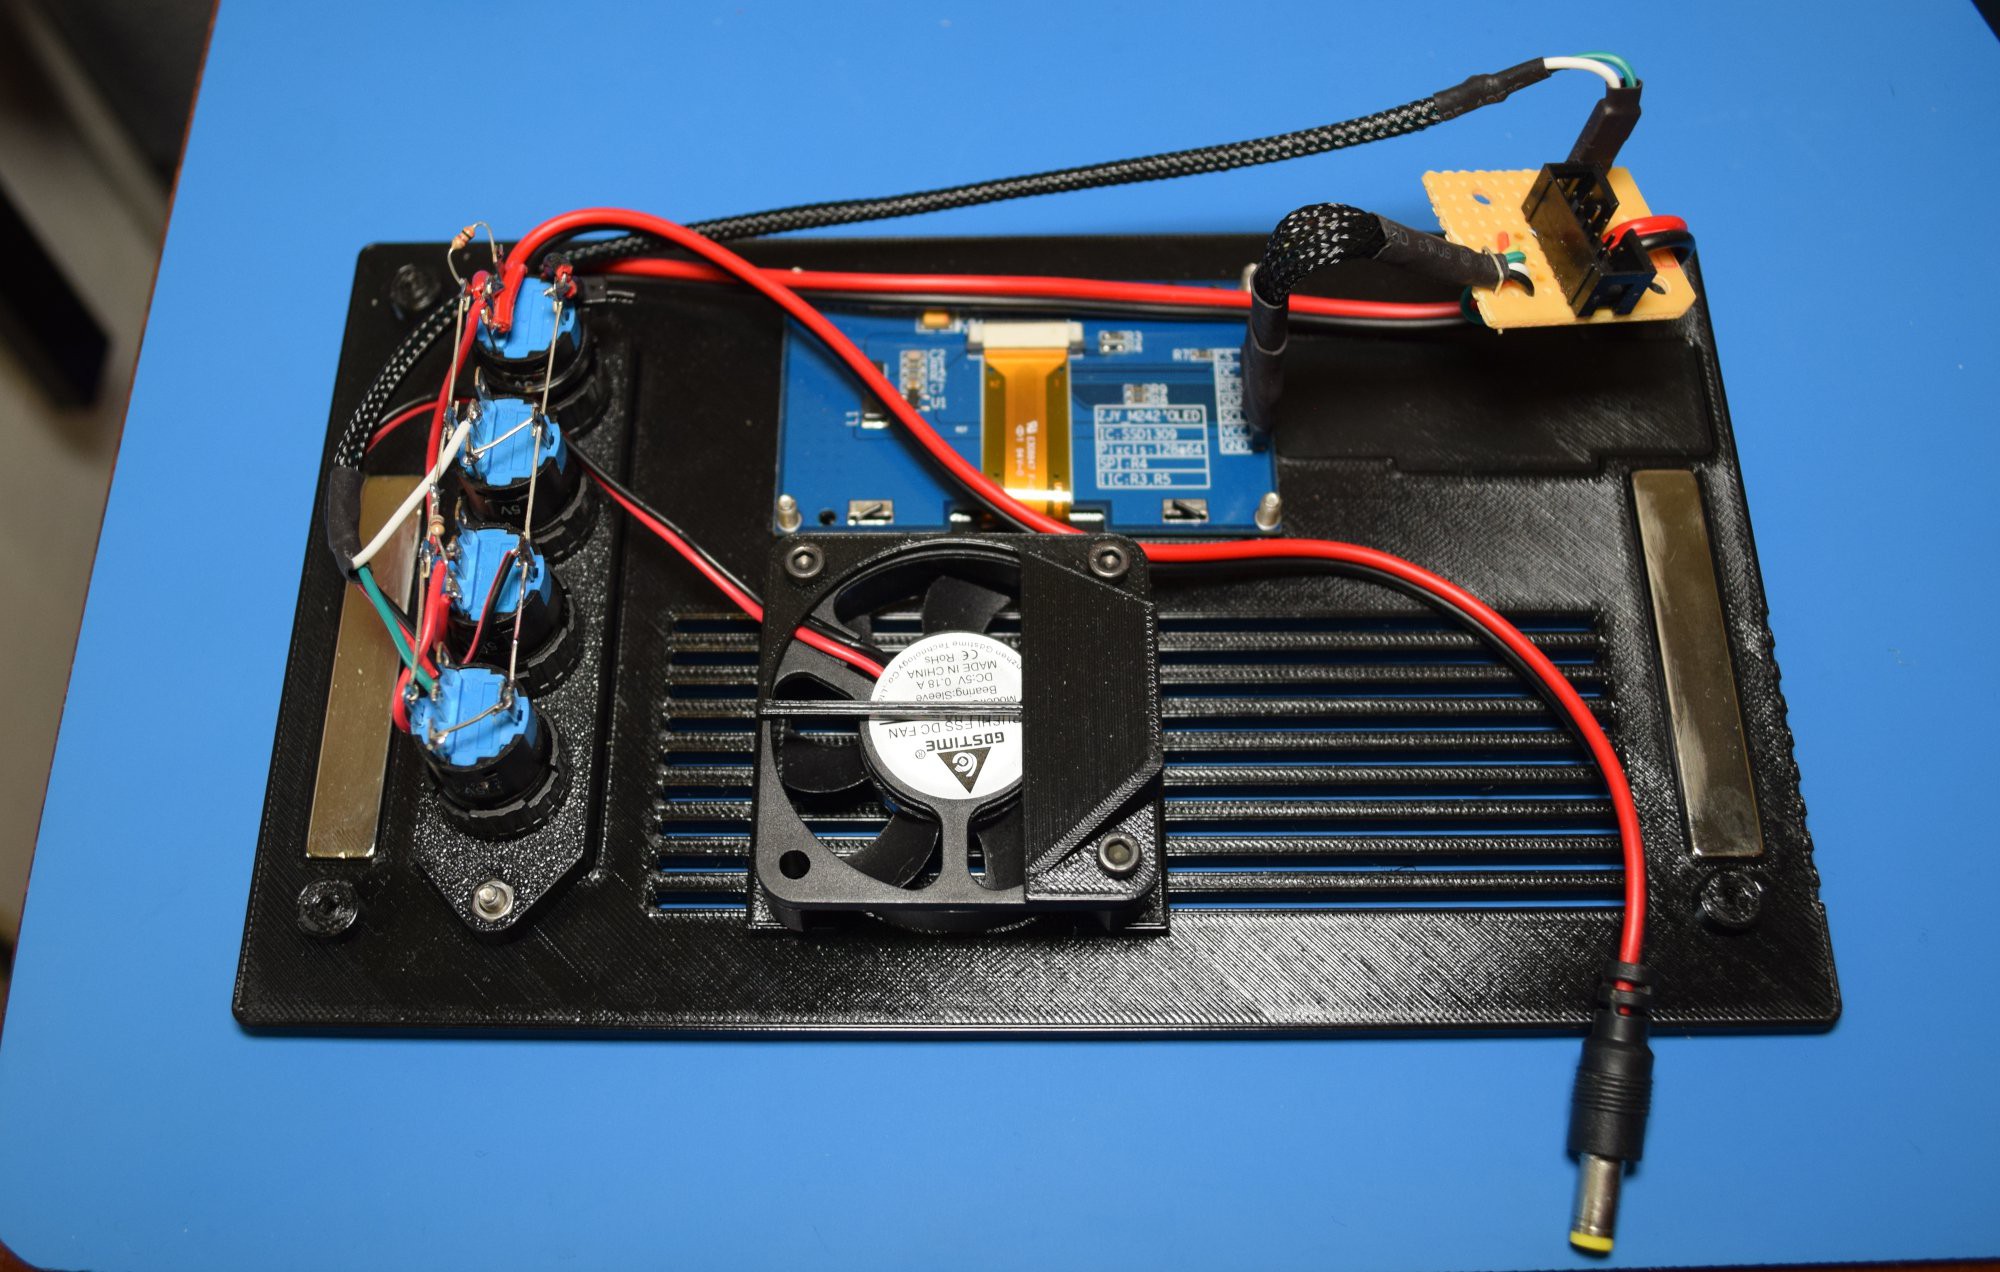
The wiring for the buttons is a bit janky, to say the least. As another time saving effort, I just did everything point-to-point instead of spinning up a custom PCB. This is something I might revisit down the road, but I've also considered just taking the lessons learned and putting them towards building a second deck that would be a bit more practical for daily use.
For those wondering, the top red button is main power, white is for the OLED display, blue is for the fan, and green is connected to one of the Pi's GPIO pins so it can be used for whatever software-defined purpose I have in mind.
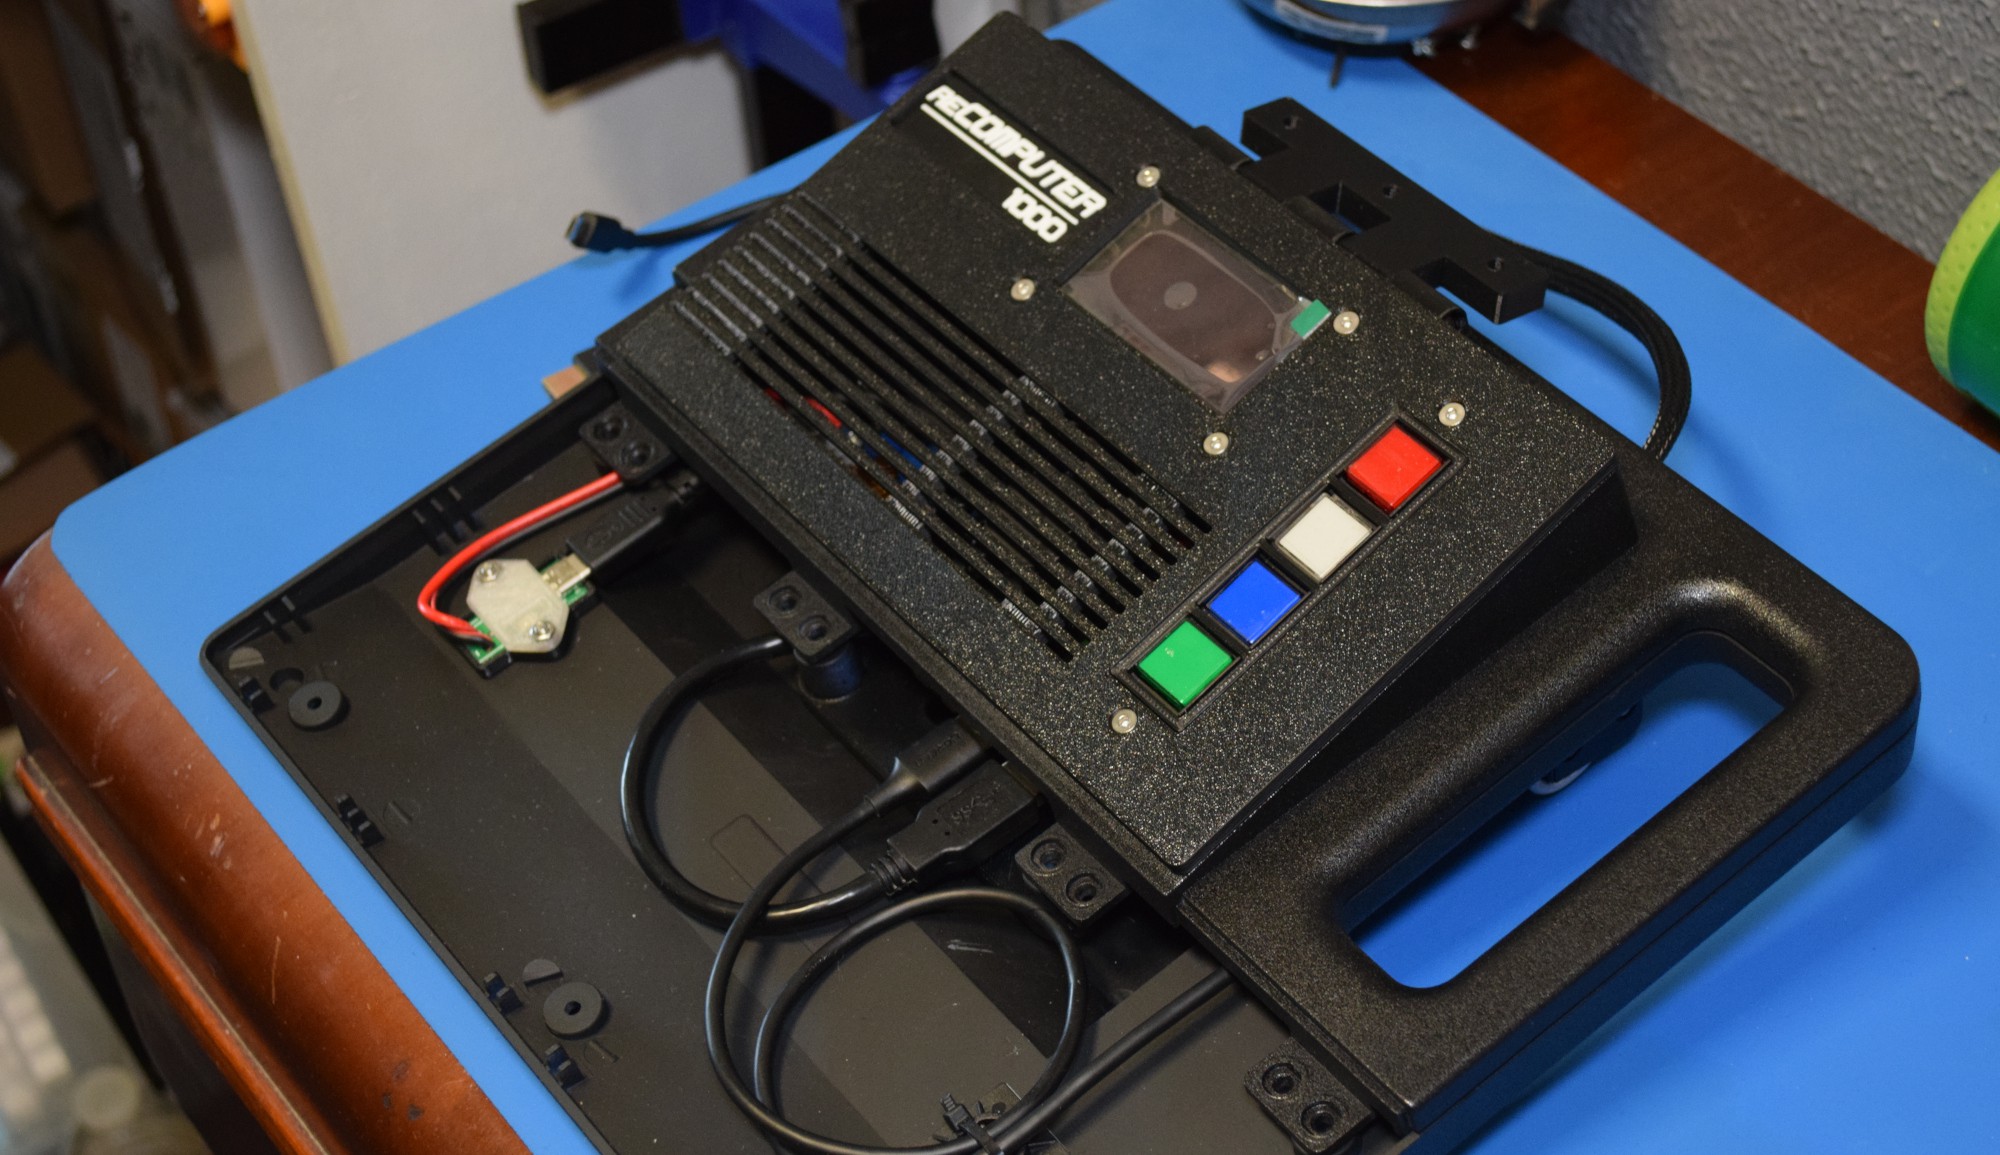
Incidentally, this is also around the time I designed the hinge to hold on the LCD. I don't actually have many good shots of this, probably because it went through so many revisions, but you can see the CAD version of the final design here:
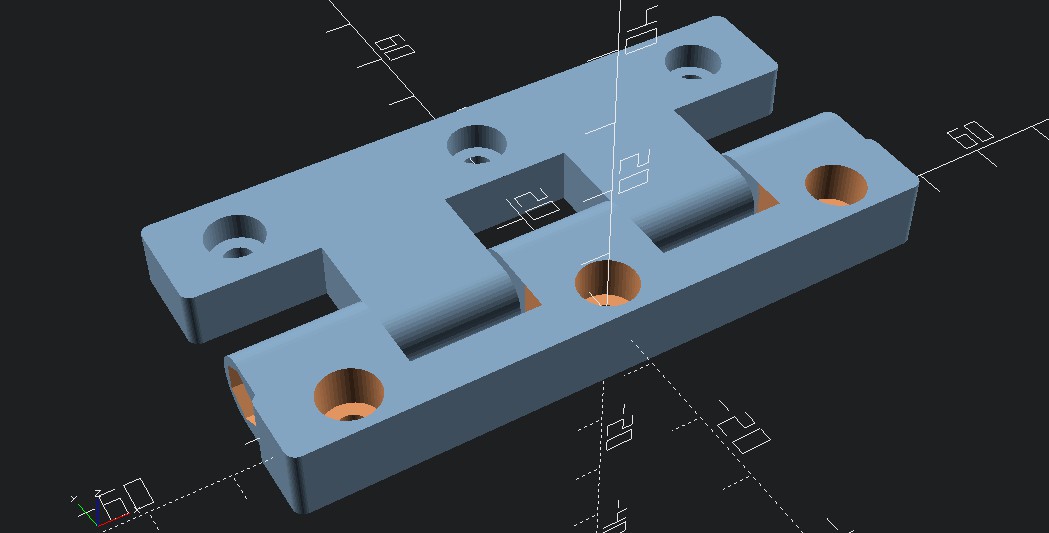
It simply uses an M5 bolt (with captured nut on the other side), and alone, isn't particularly tight. The only reason it stays closed is because of the magnets built into the face and the LCD frame. But printed from PETG, it's plenty strong to hold the display up when the lid is open.
Discussions
Become a Hackaday.io Member
Create an account to leave a comment. Already have an account? Log In.