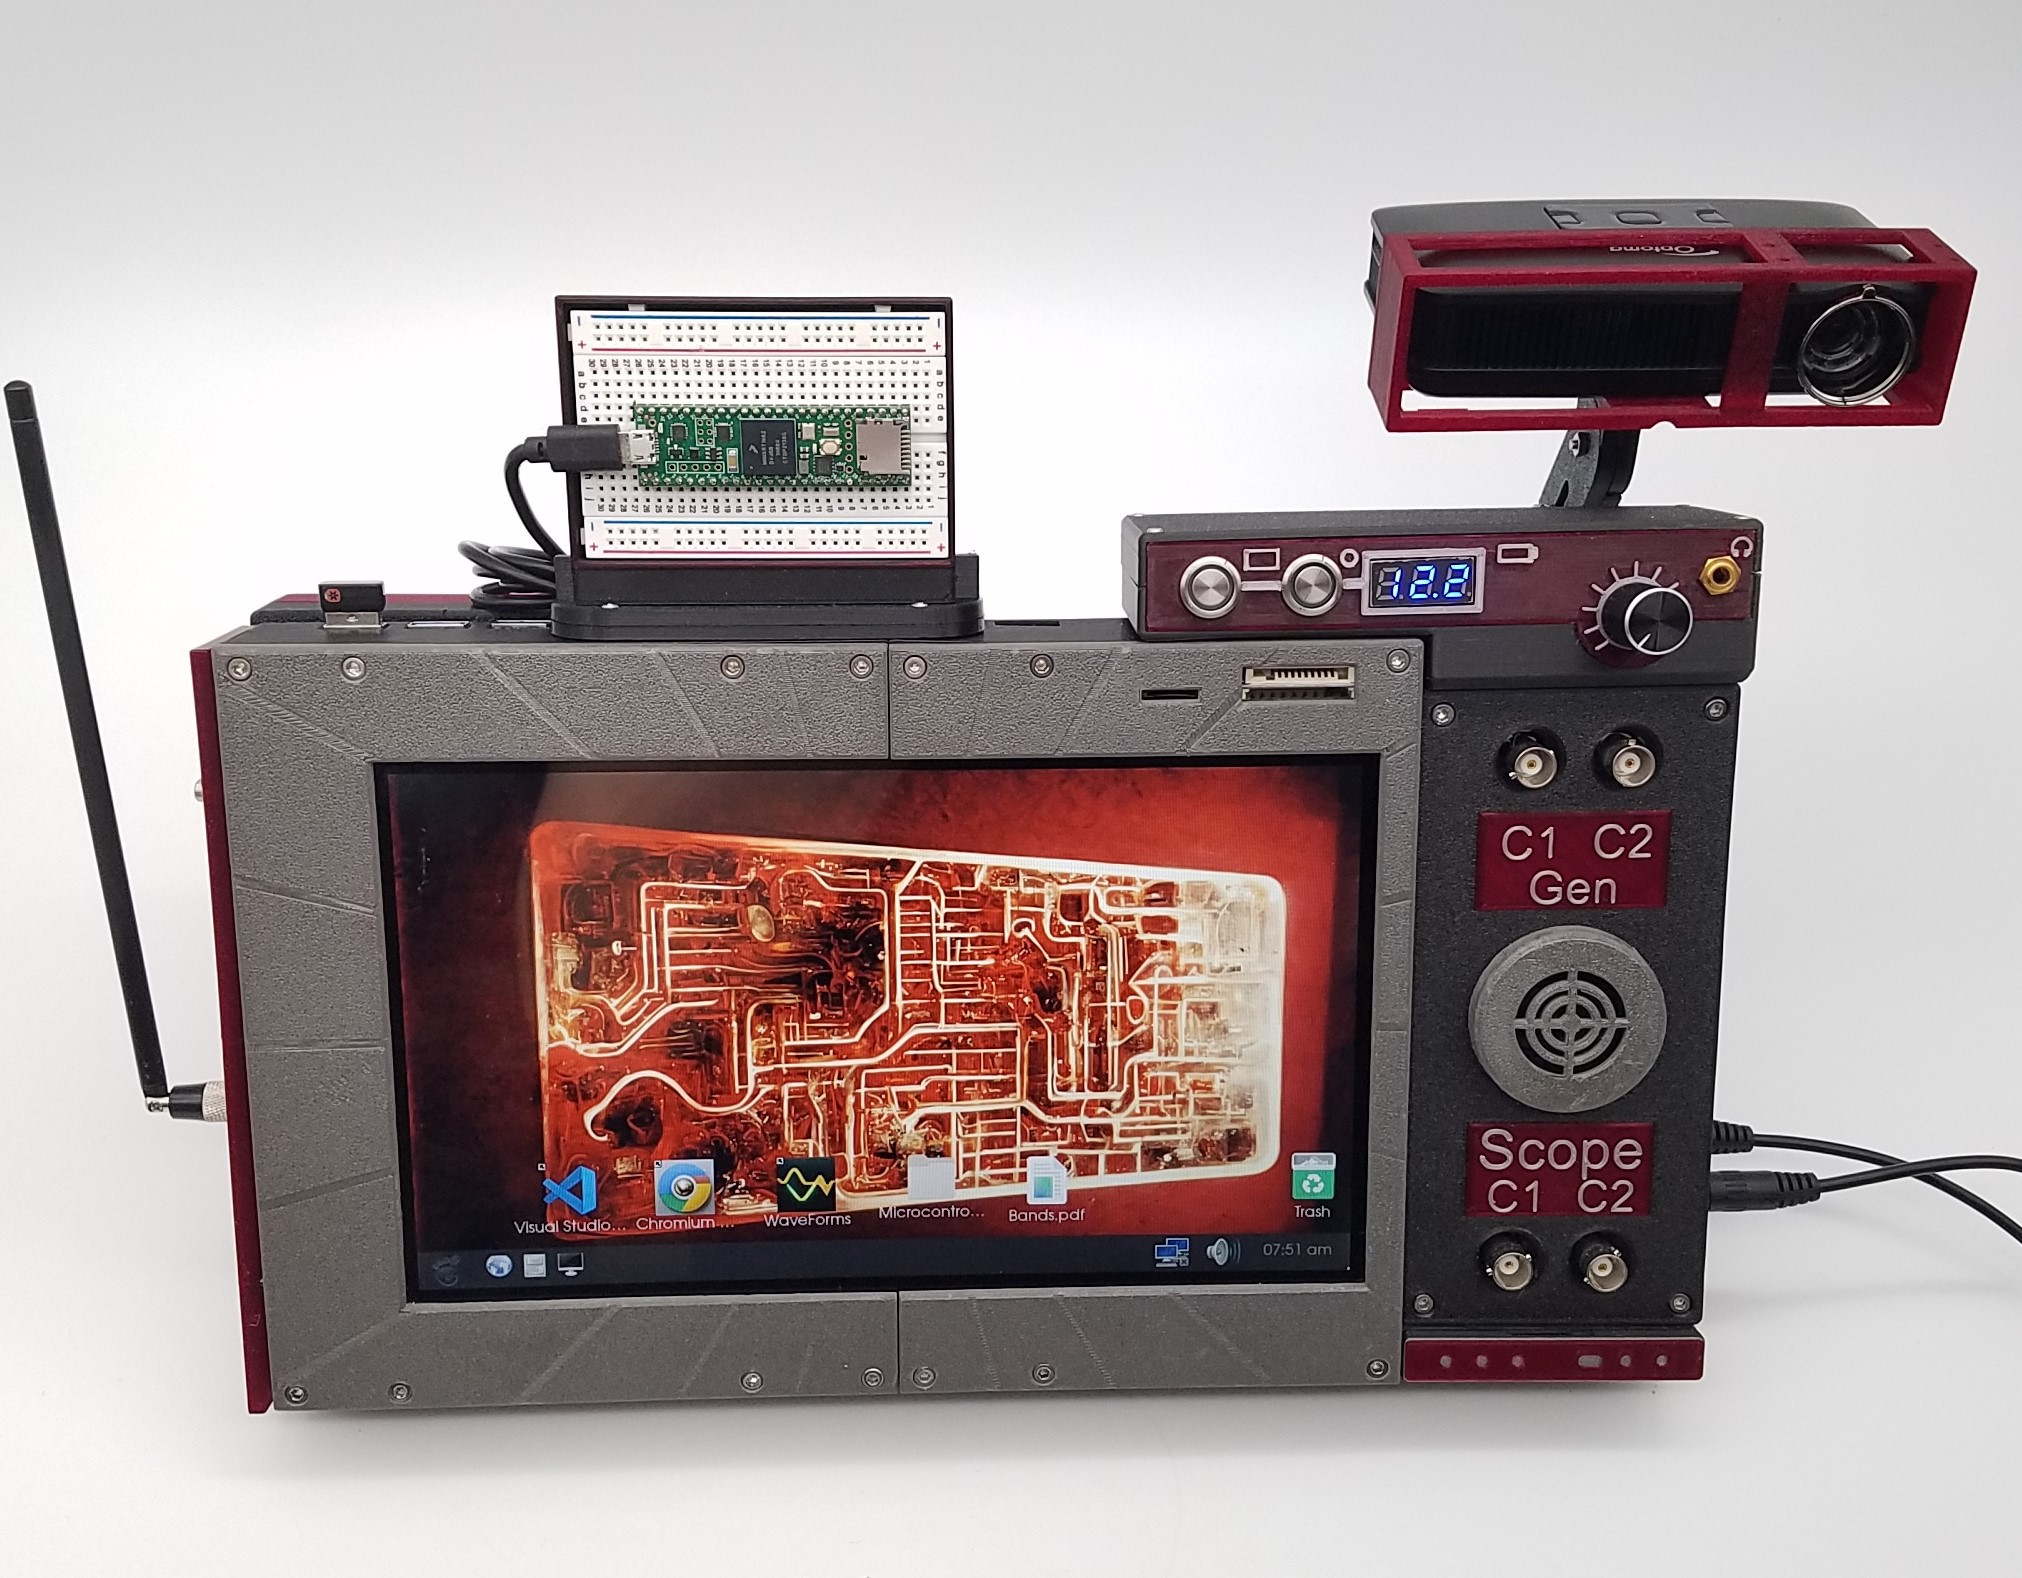
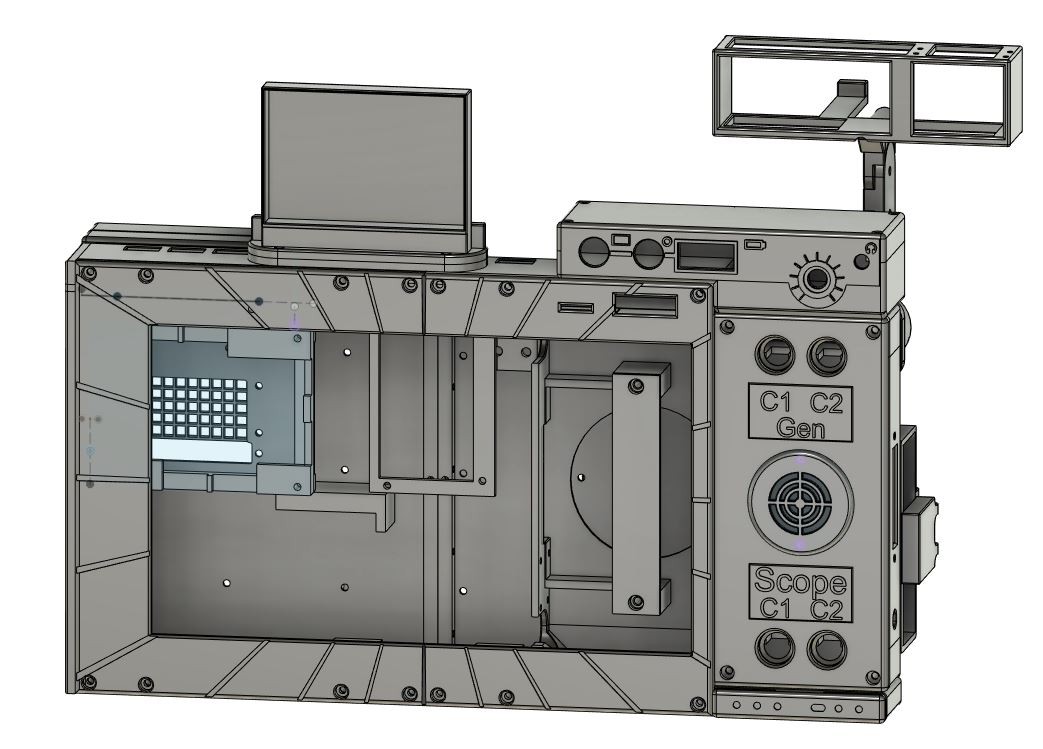
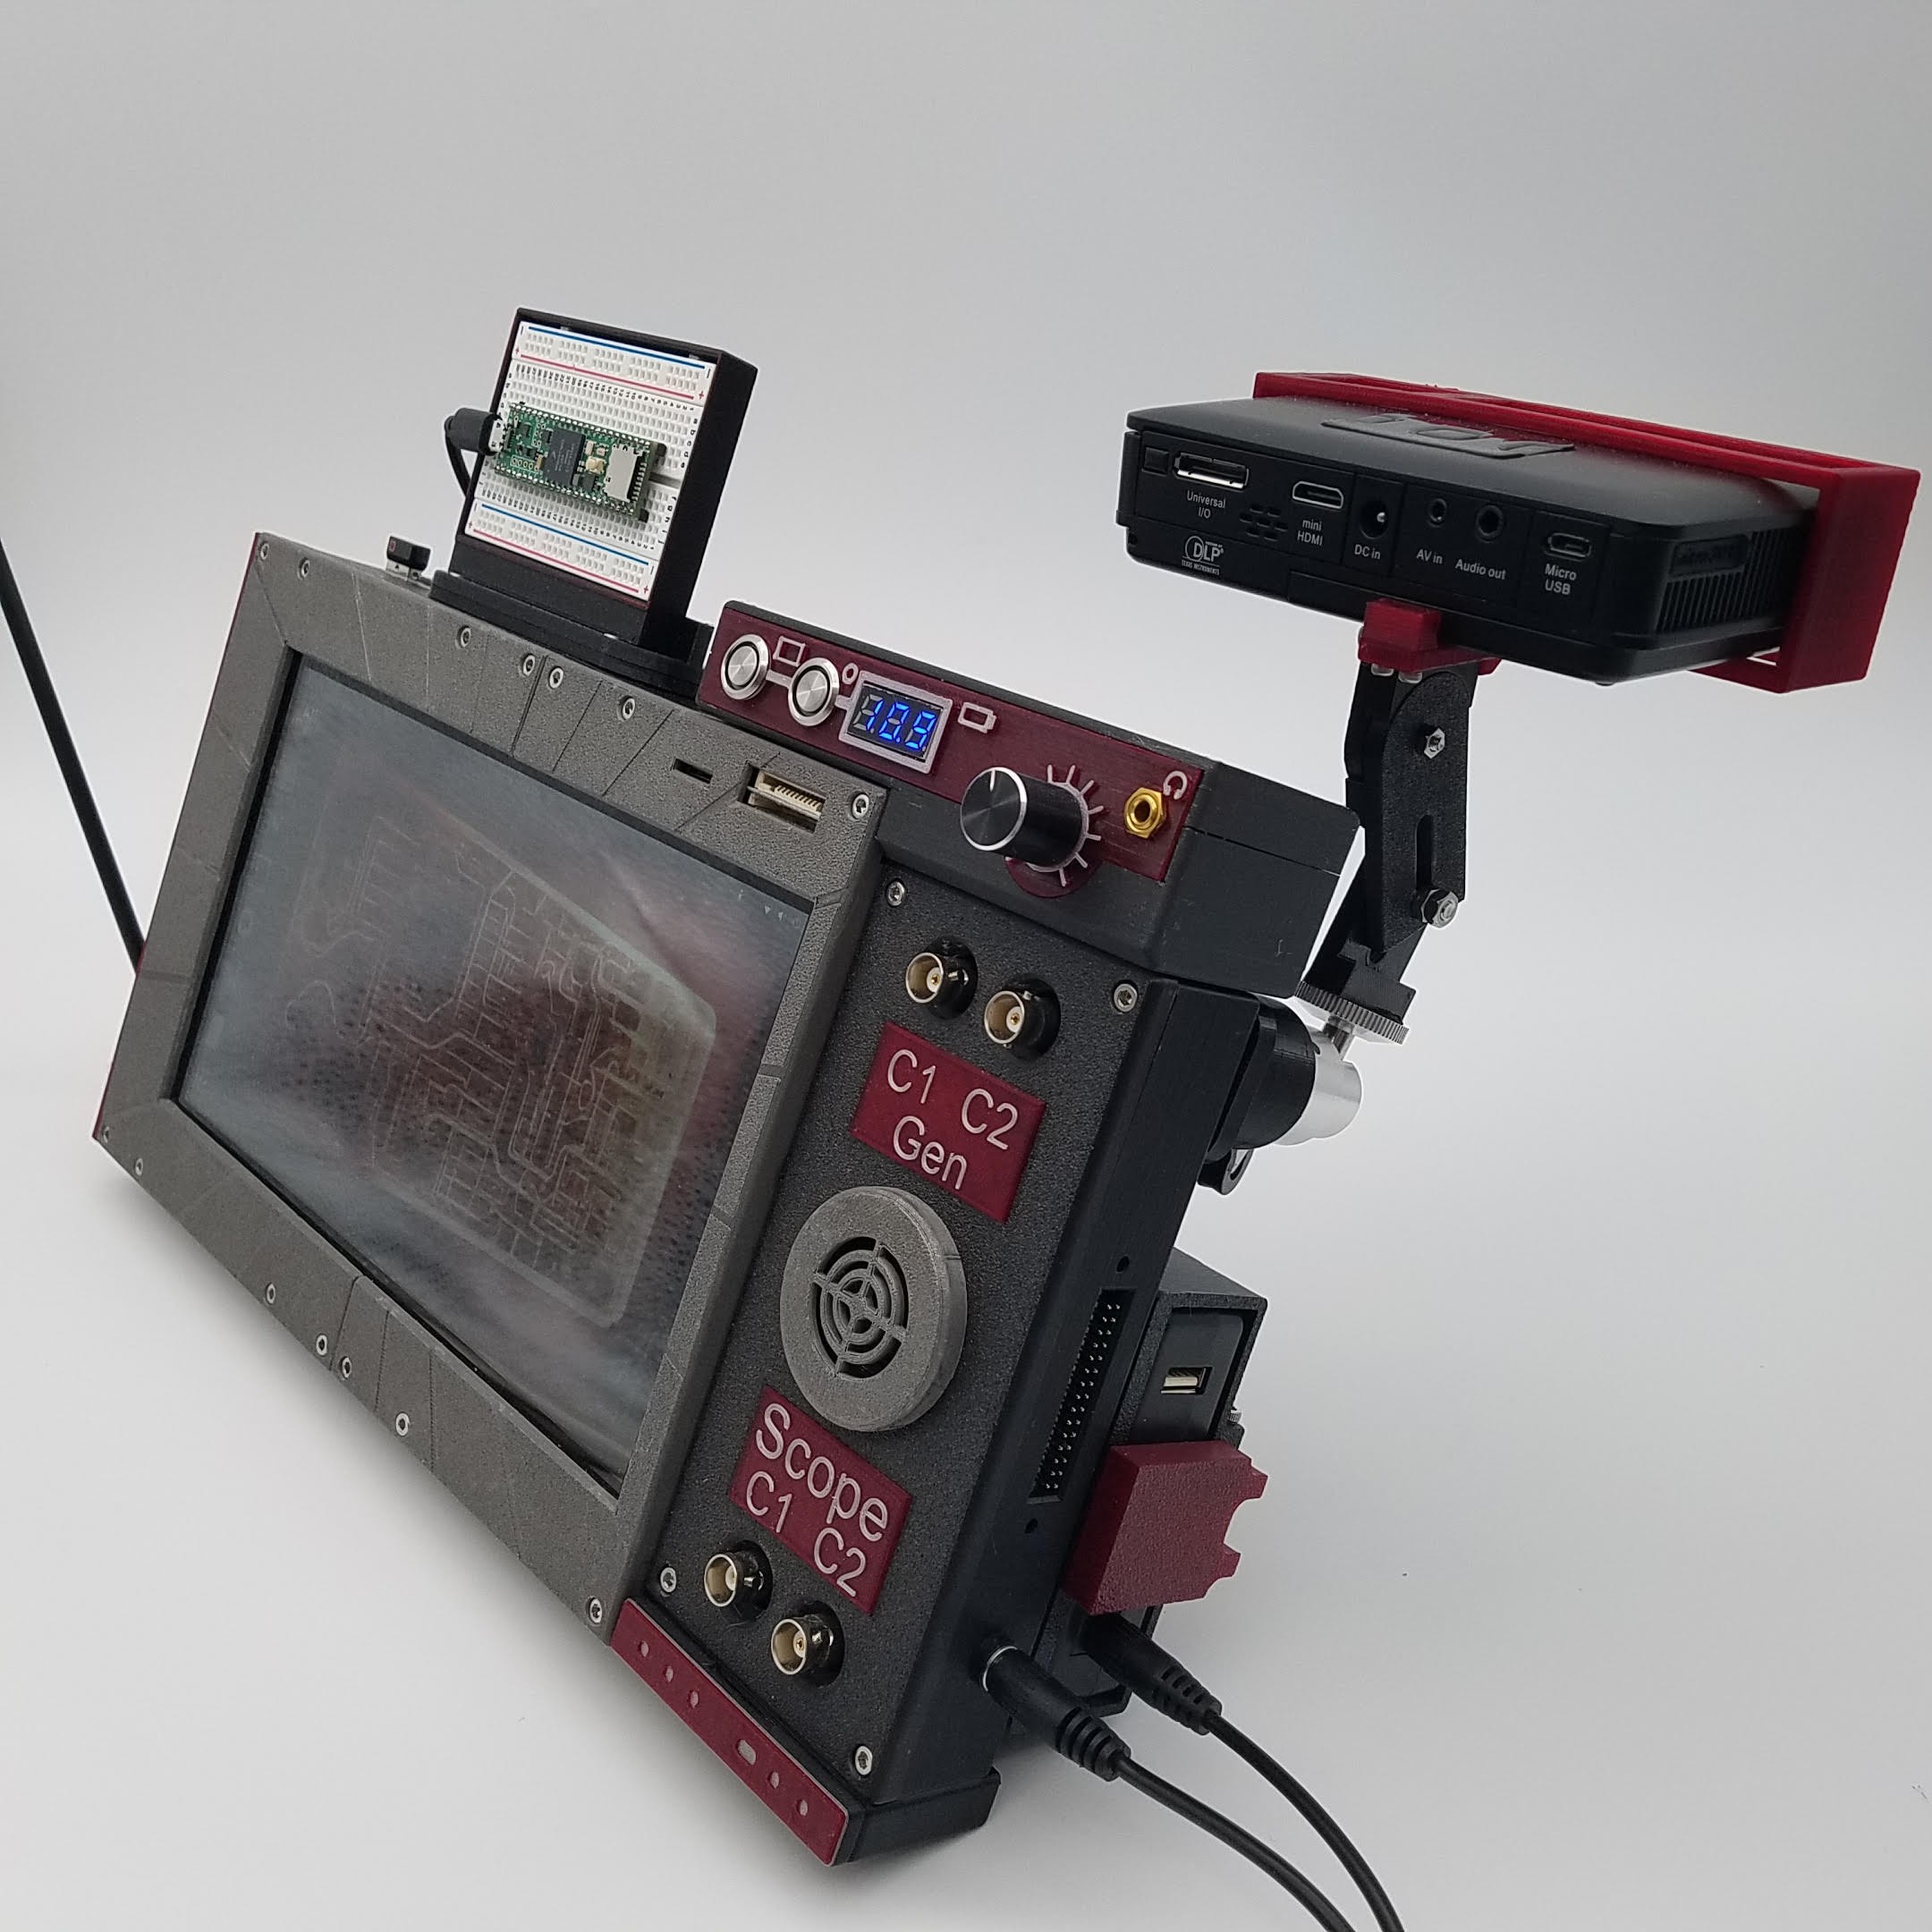
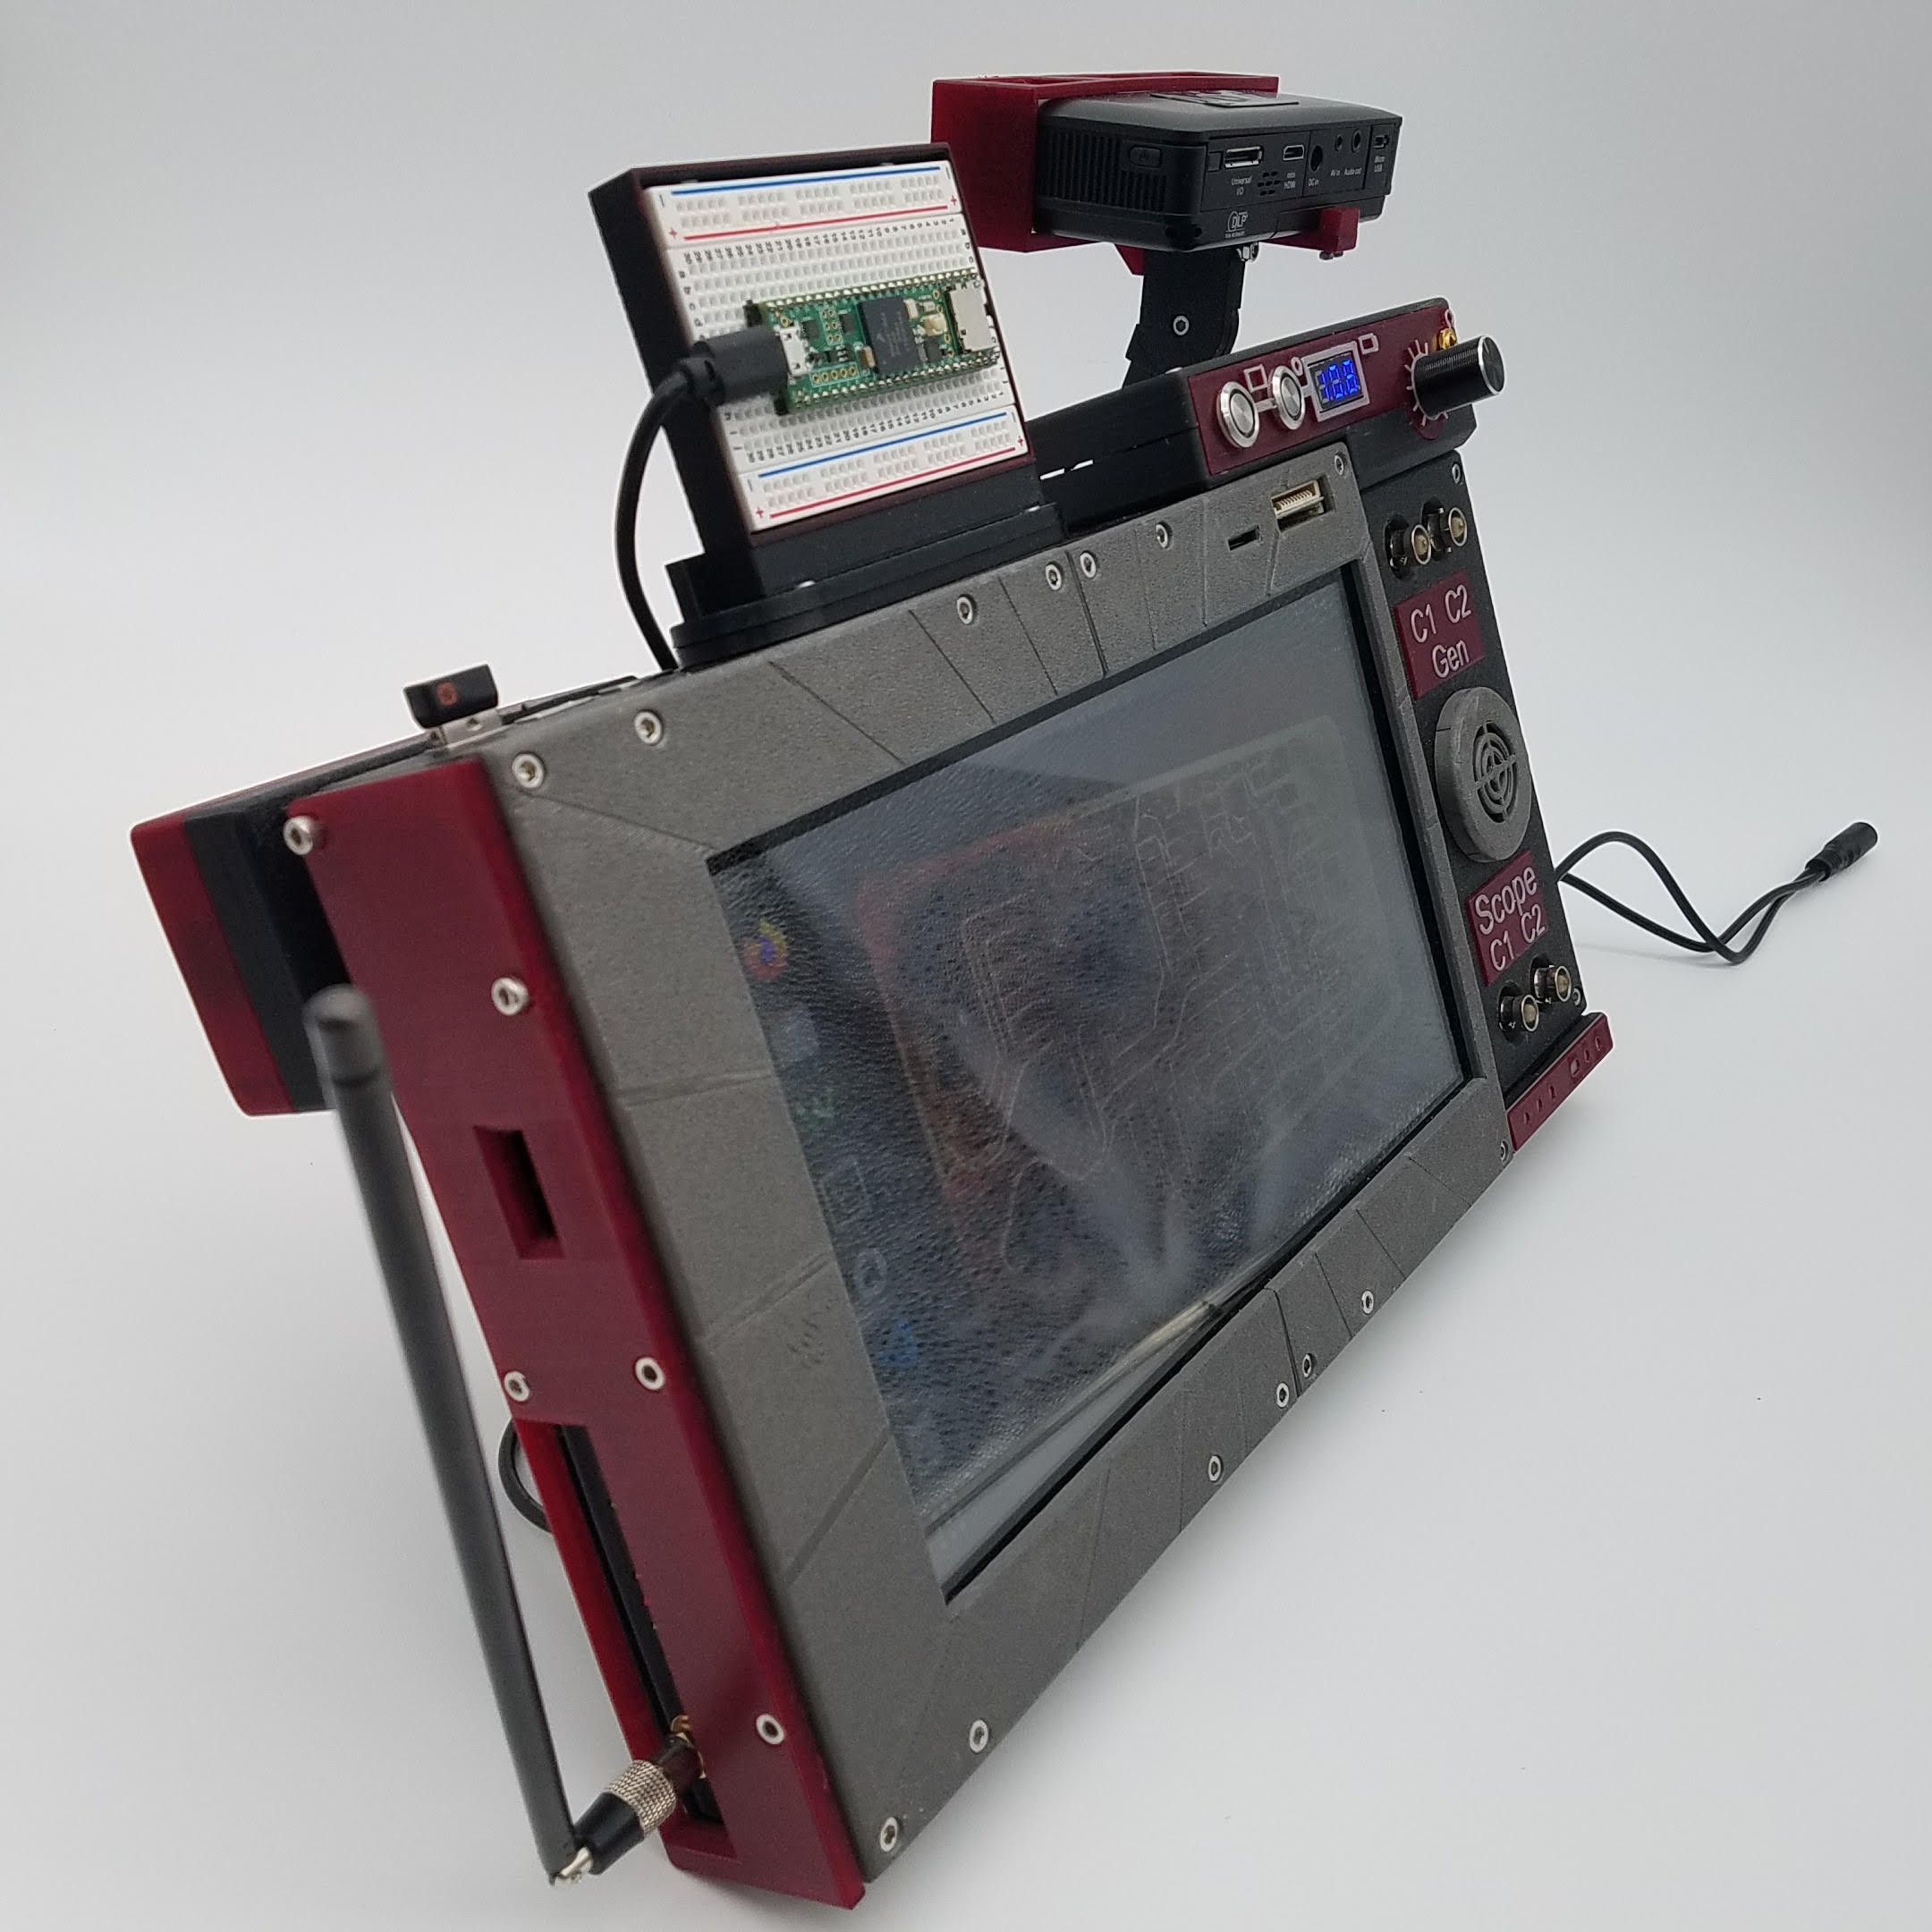
Features:
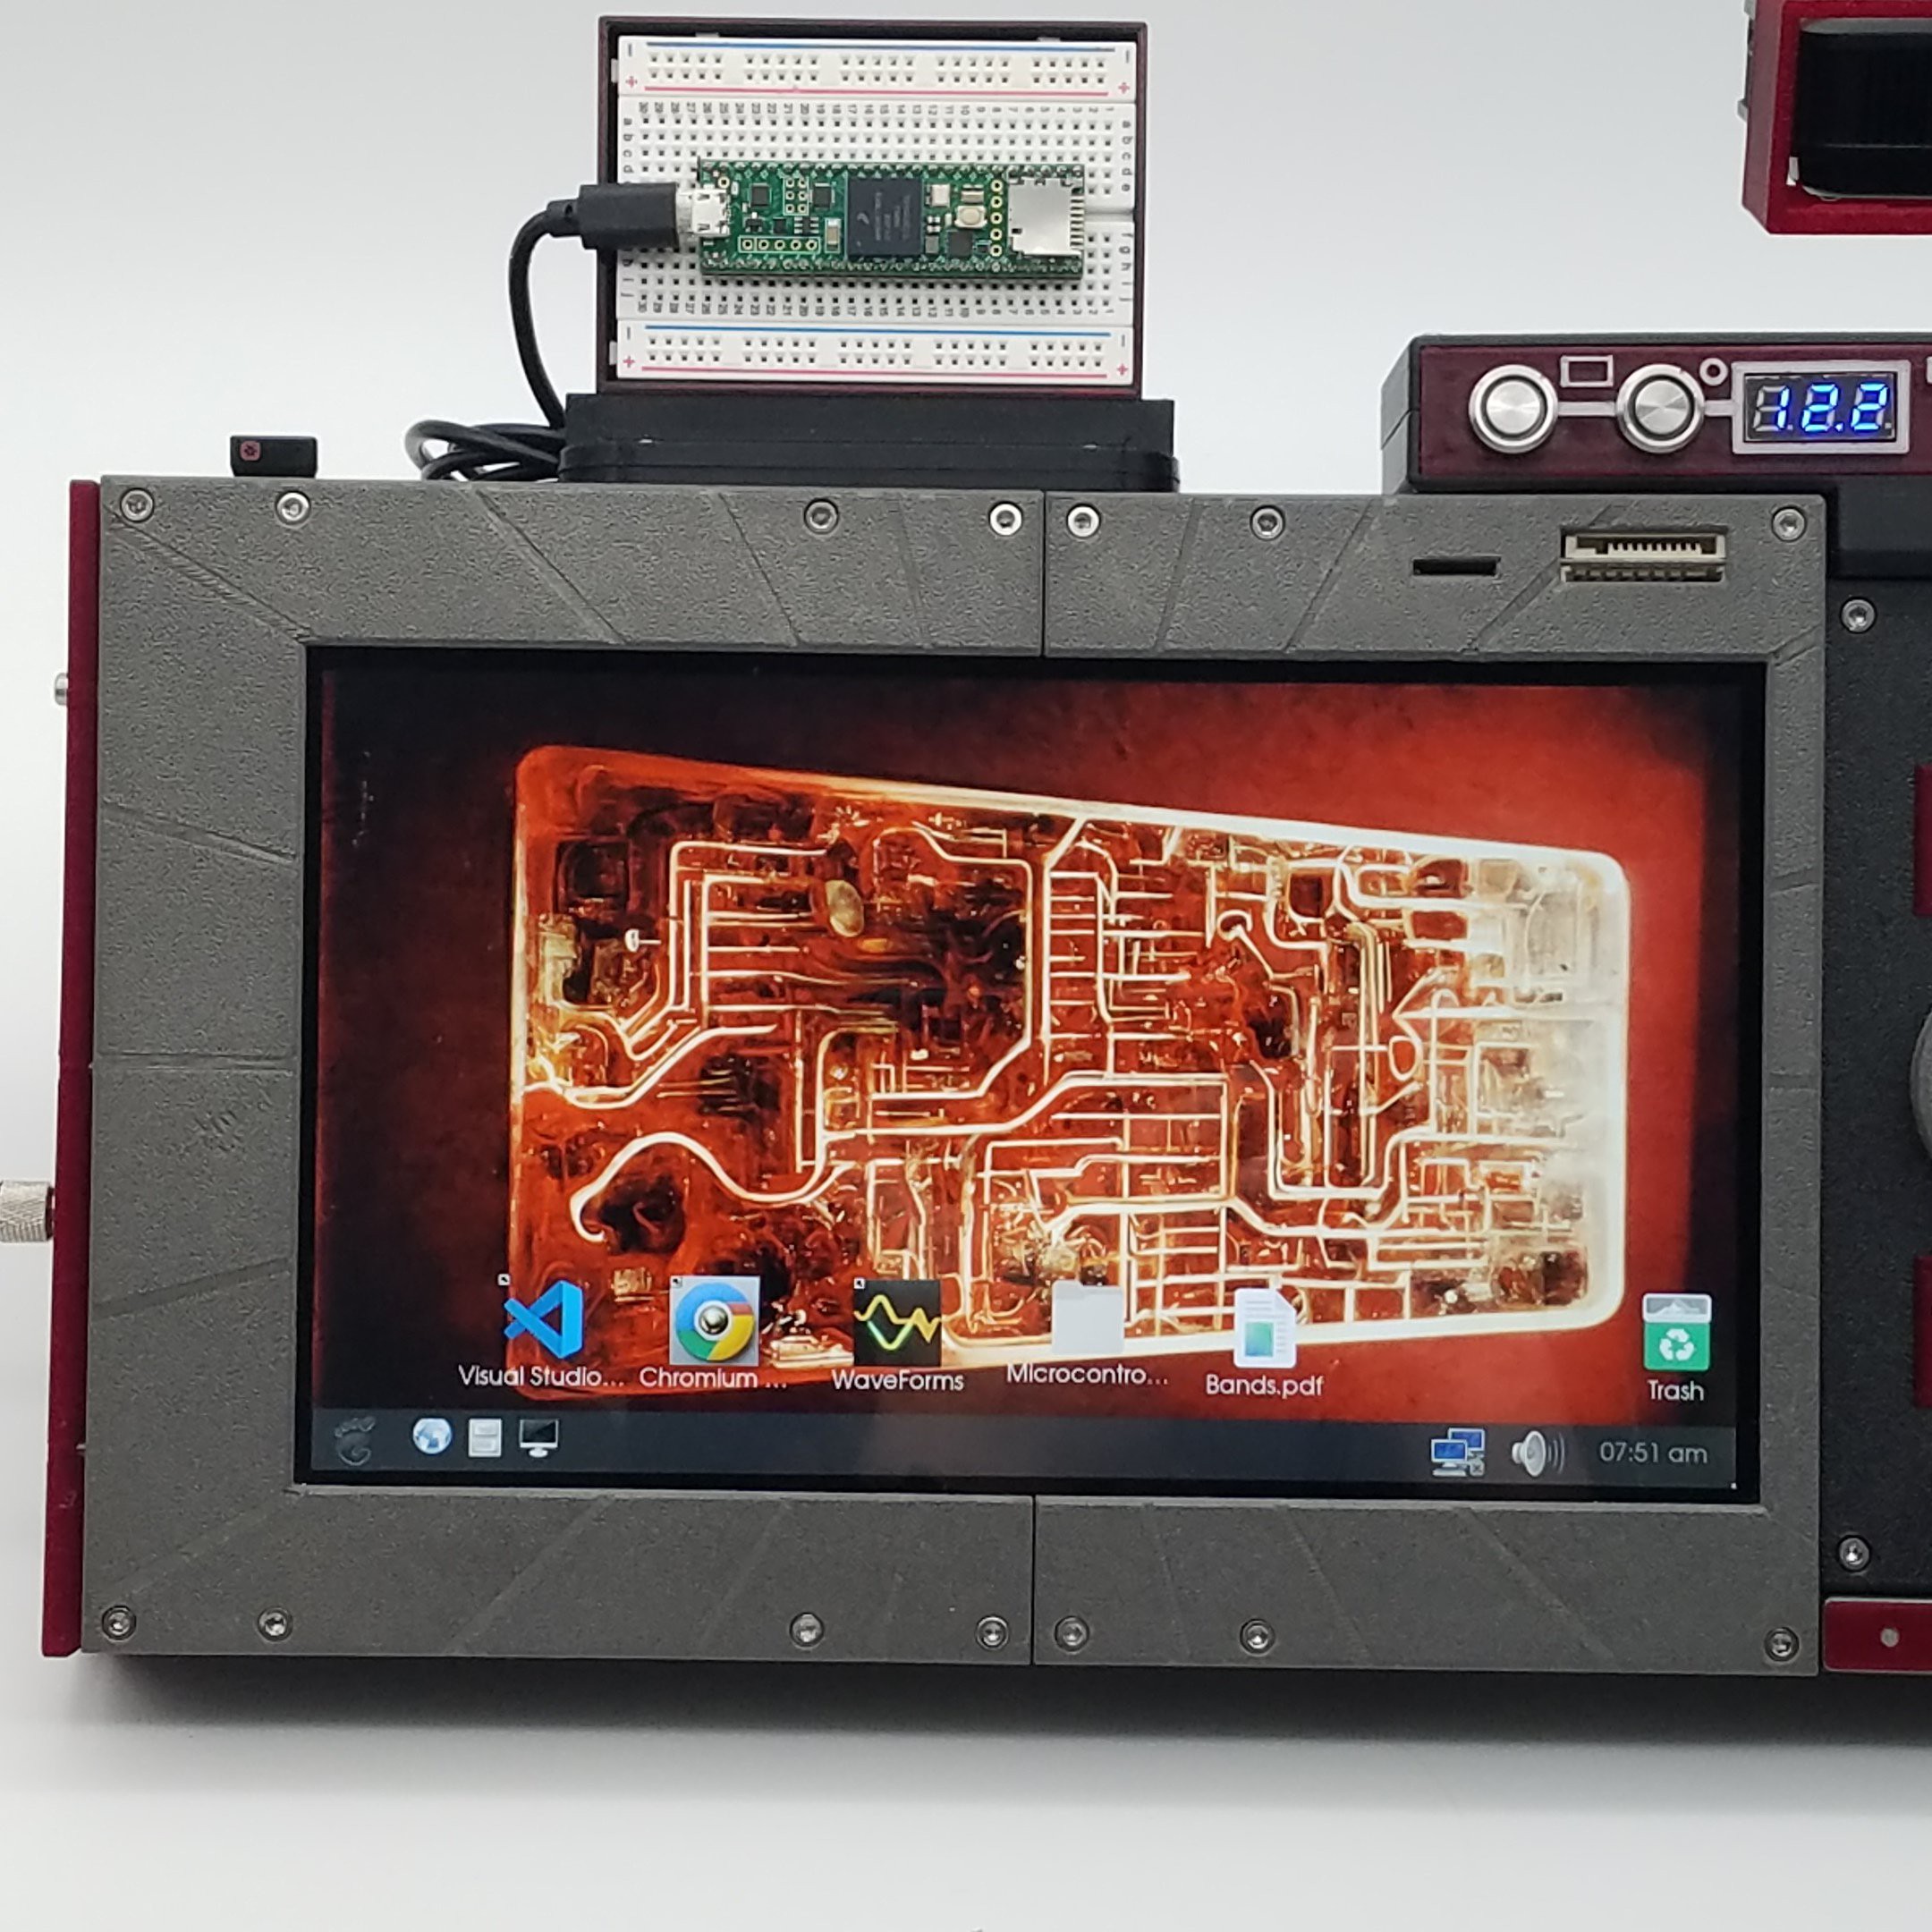
- Raspberry Pi 4
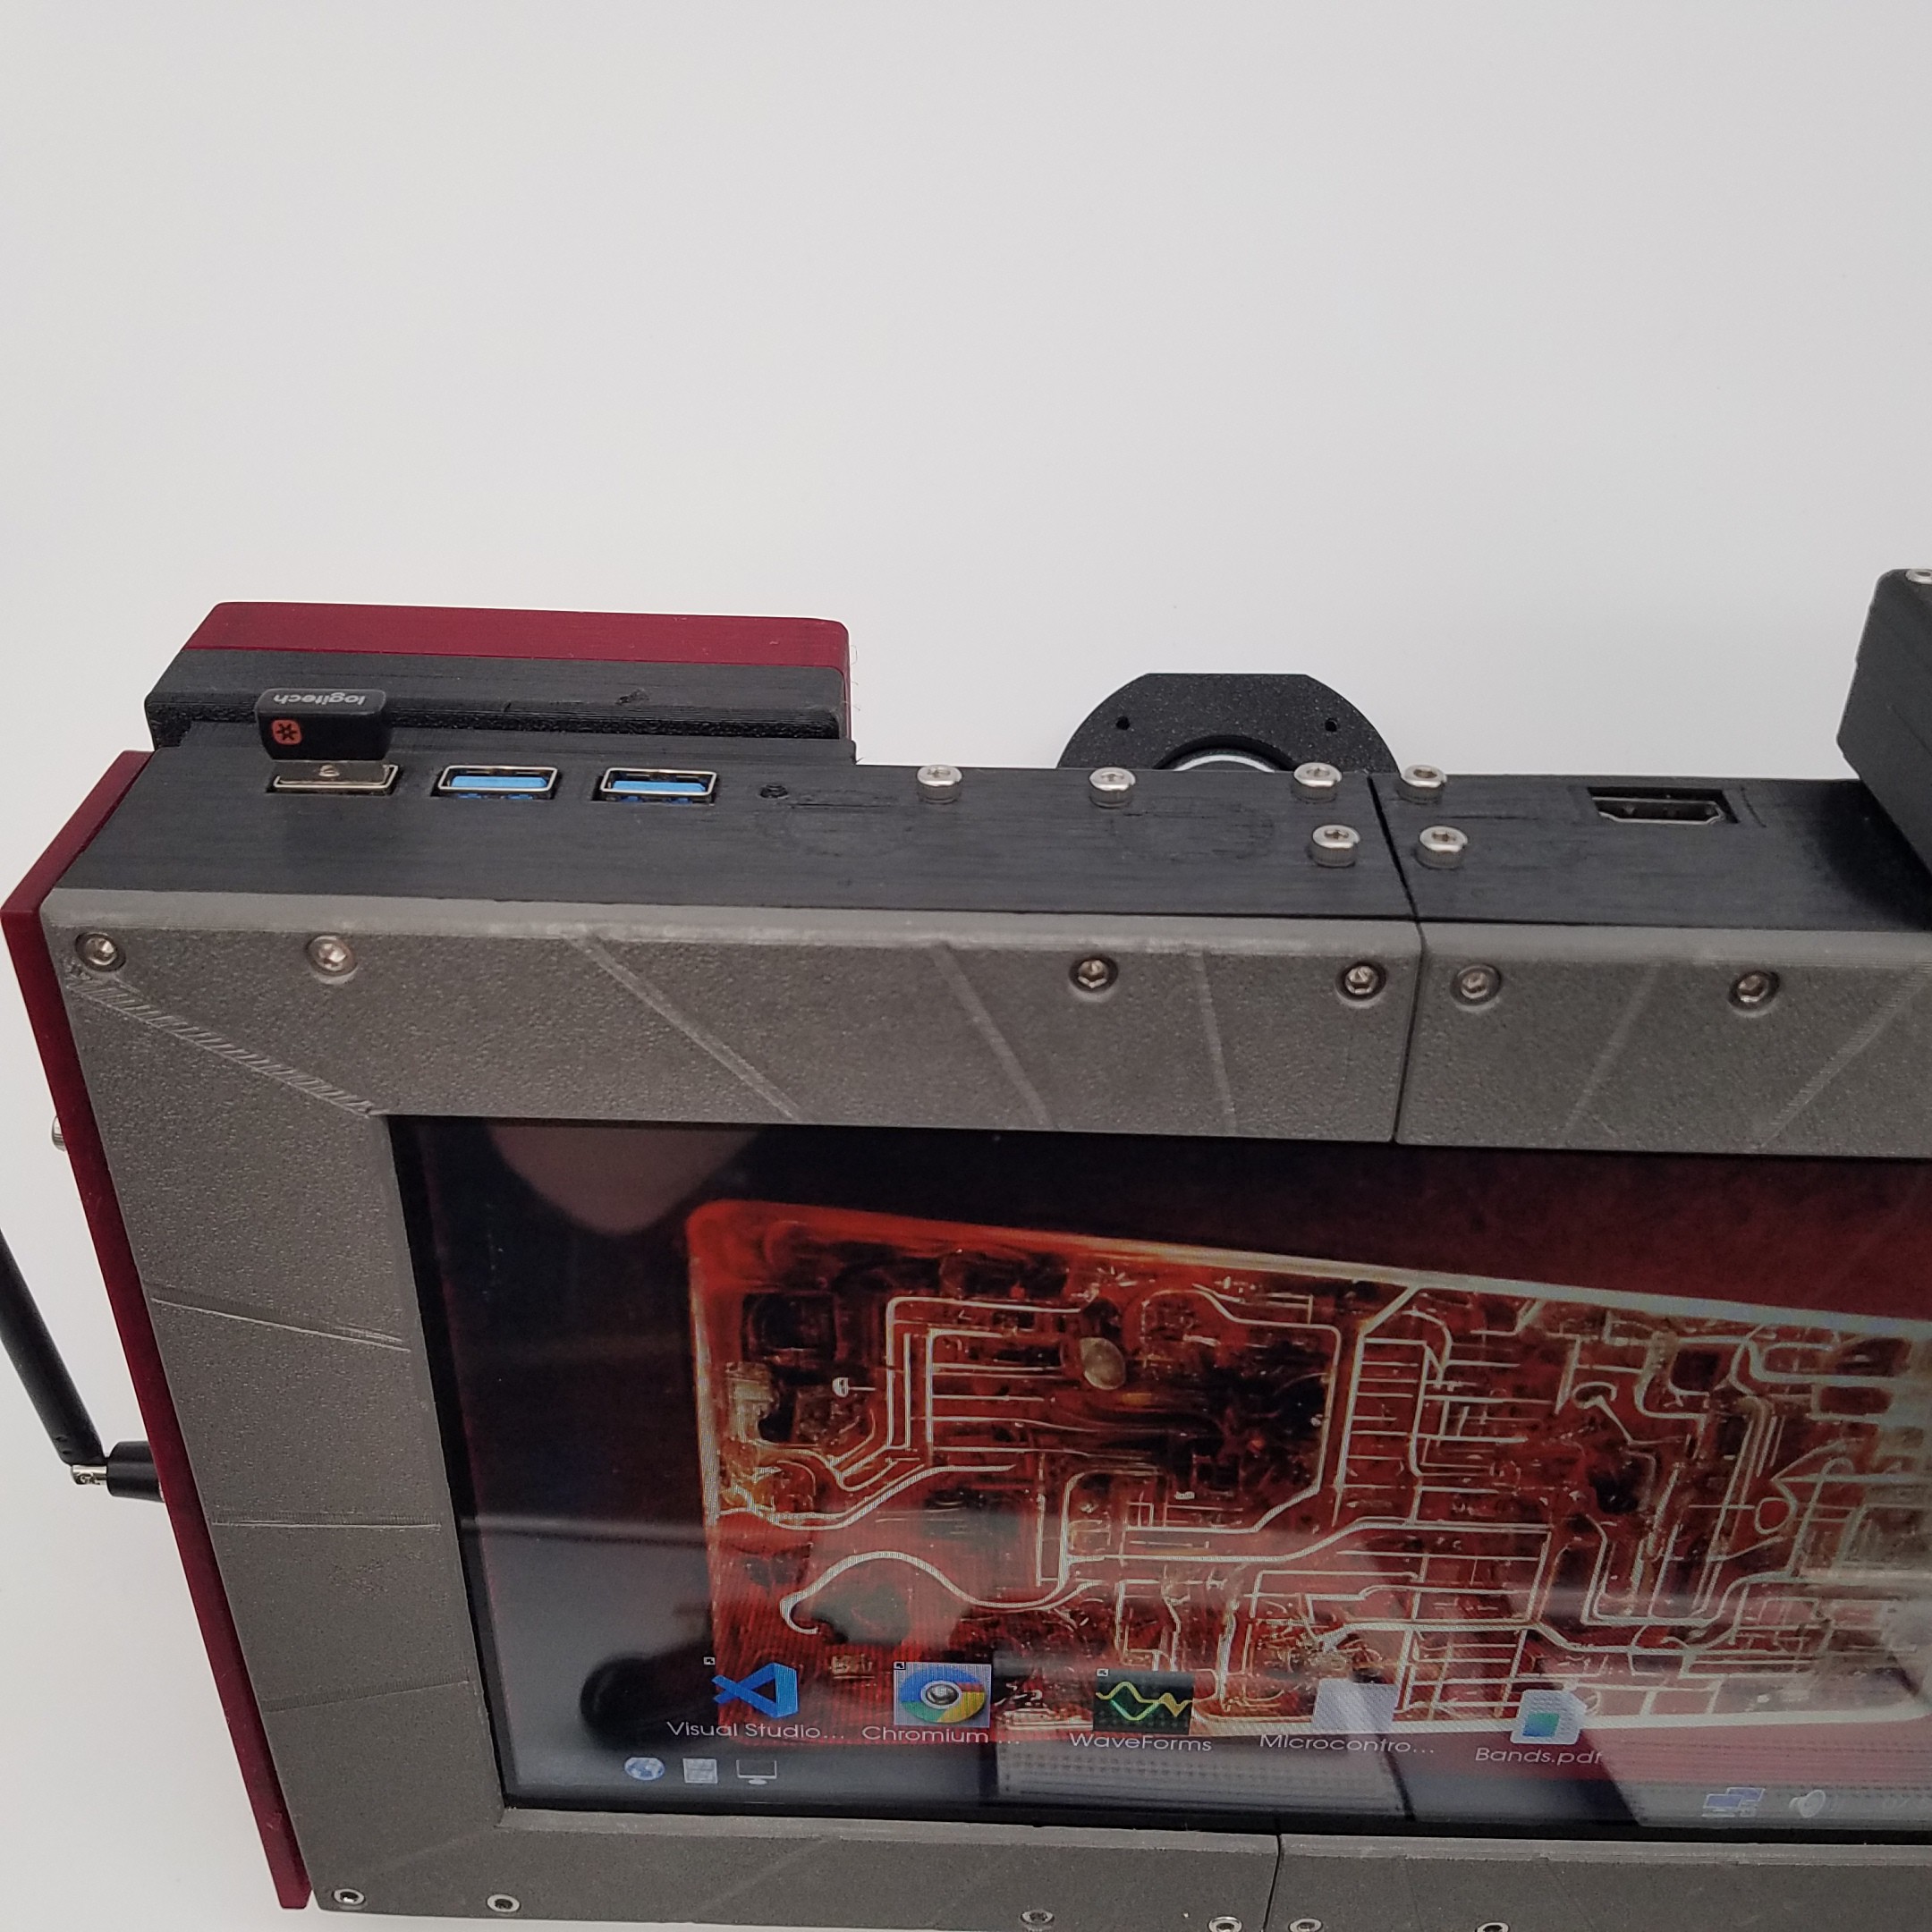
- 10.1in 1024x600 Touchscreen
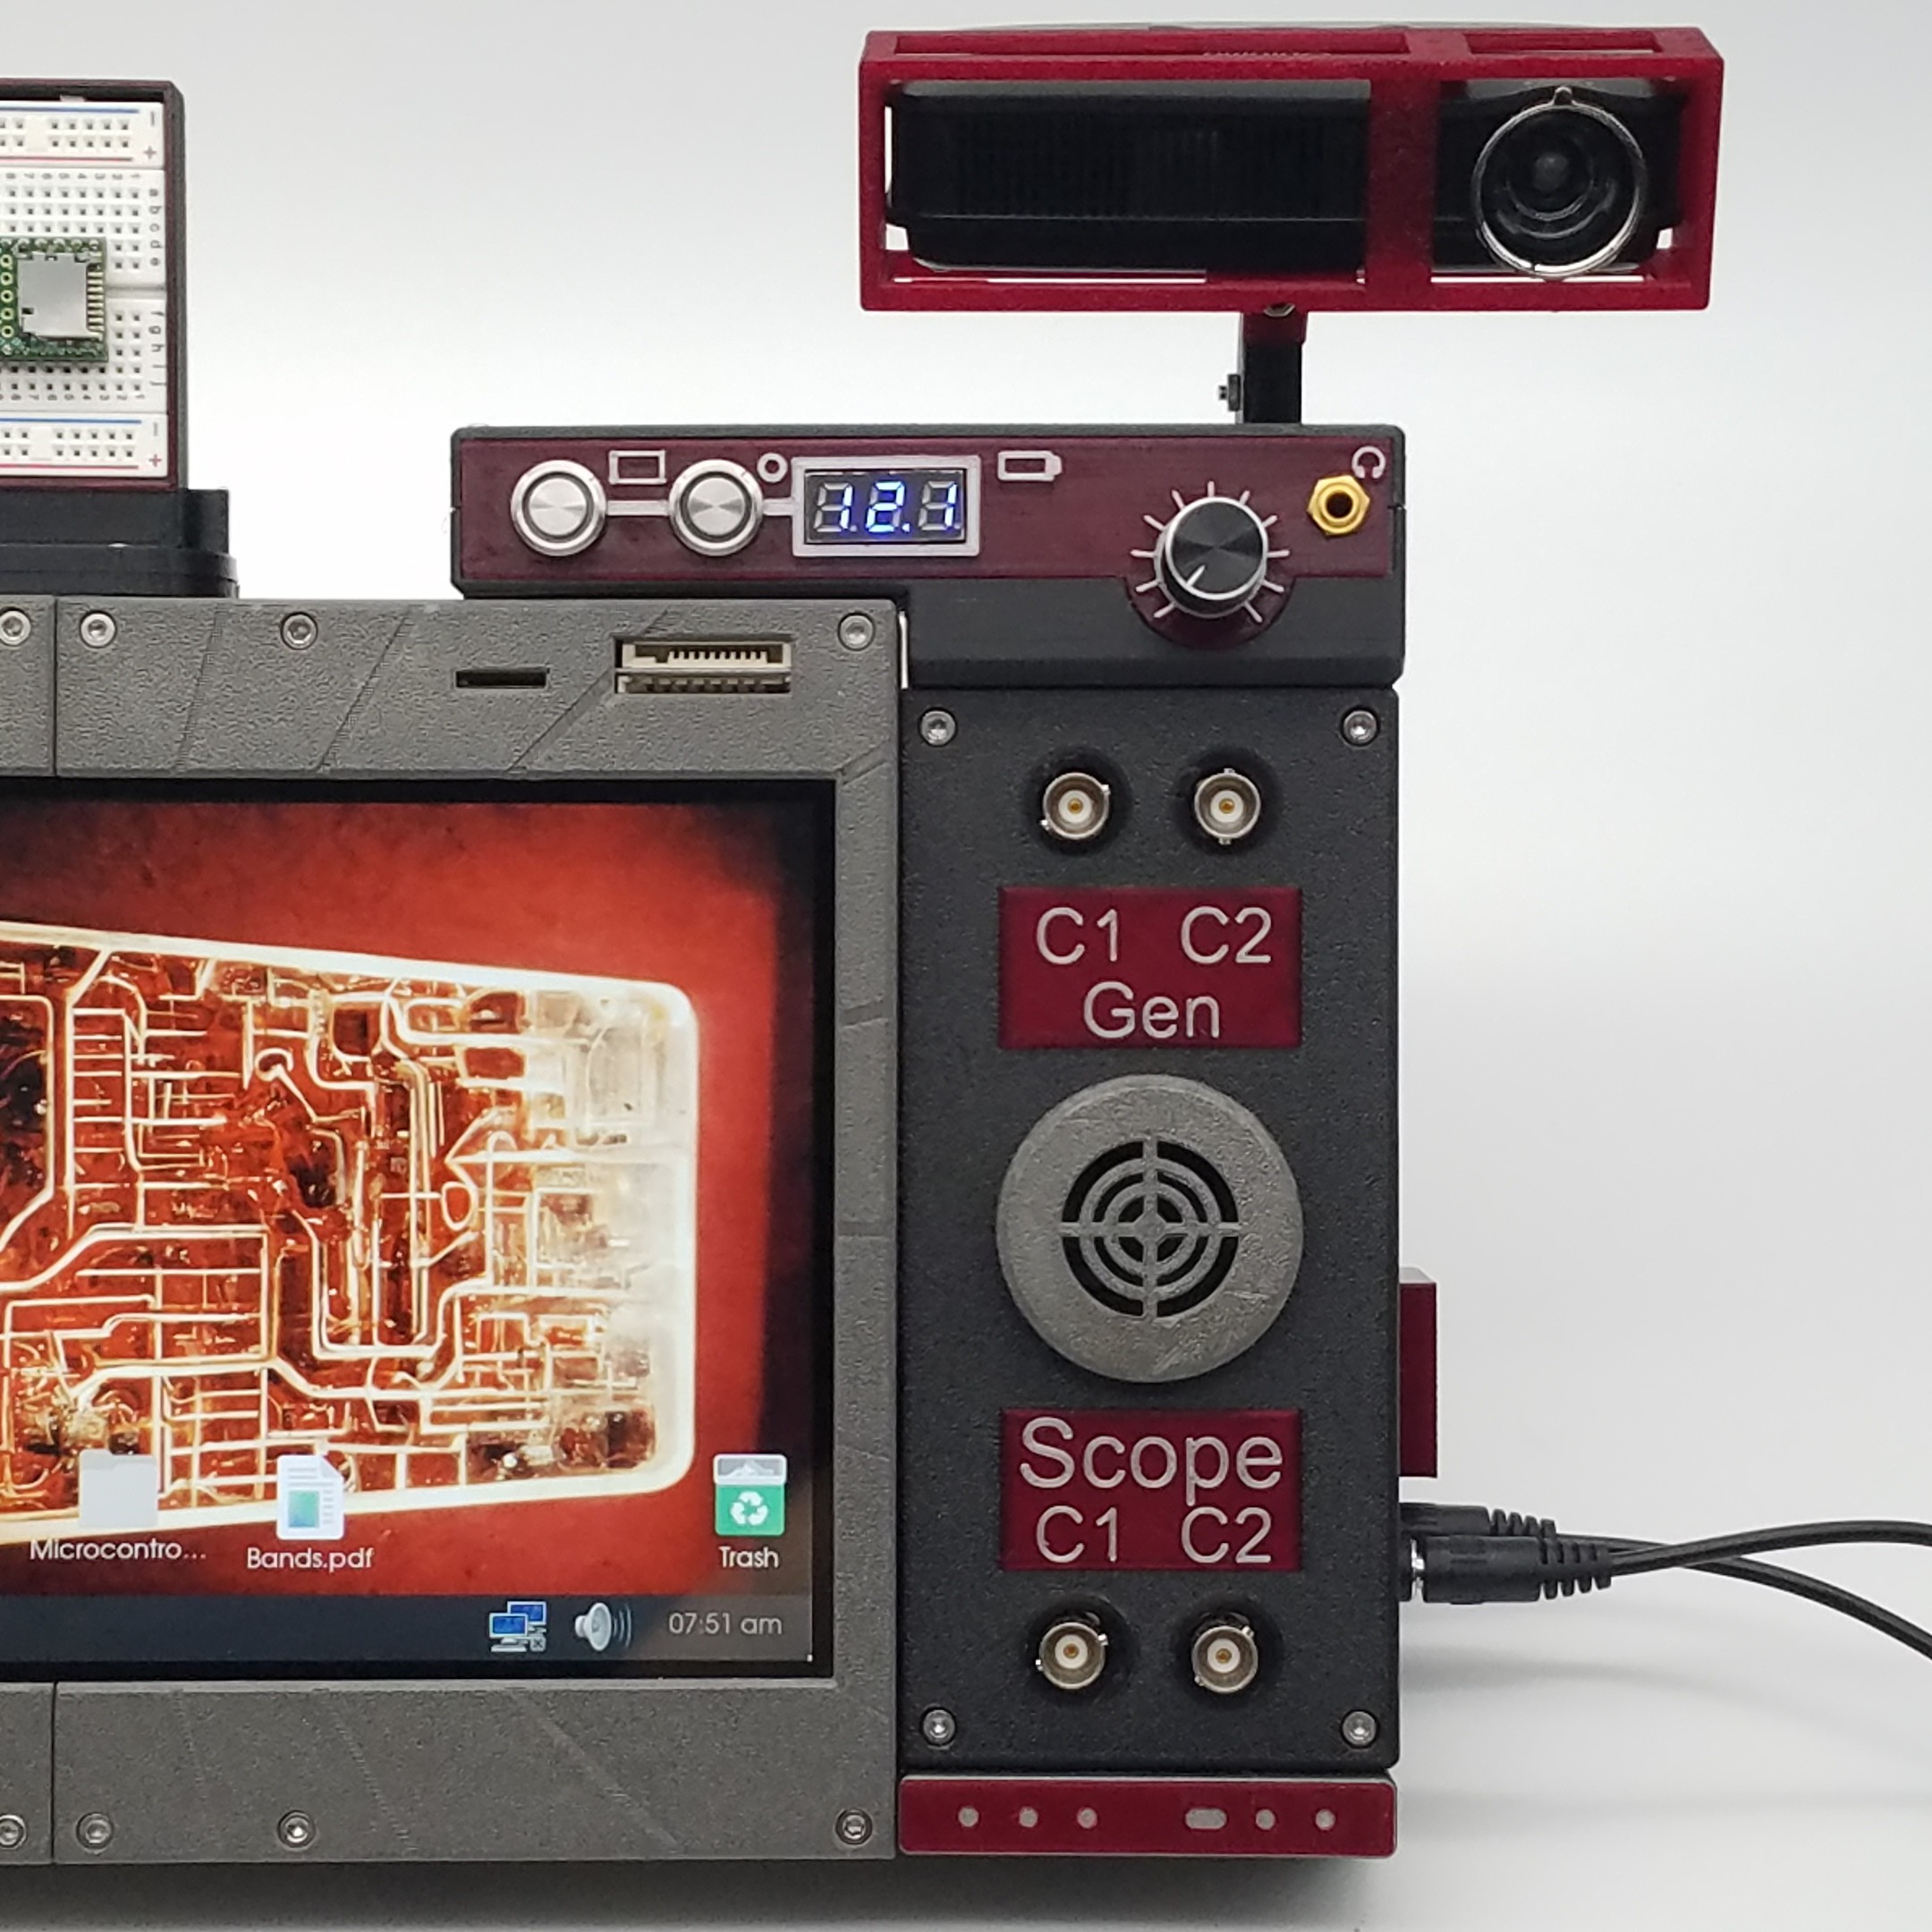
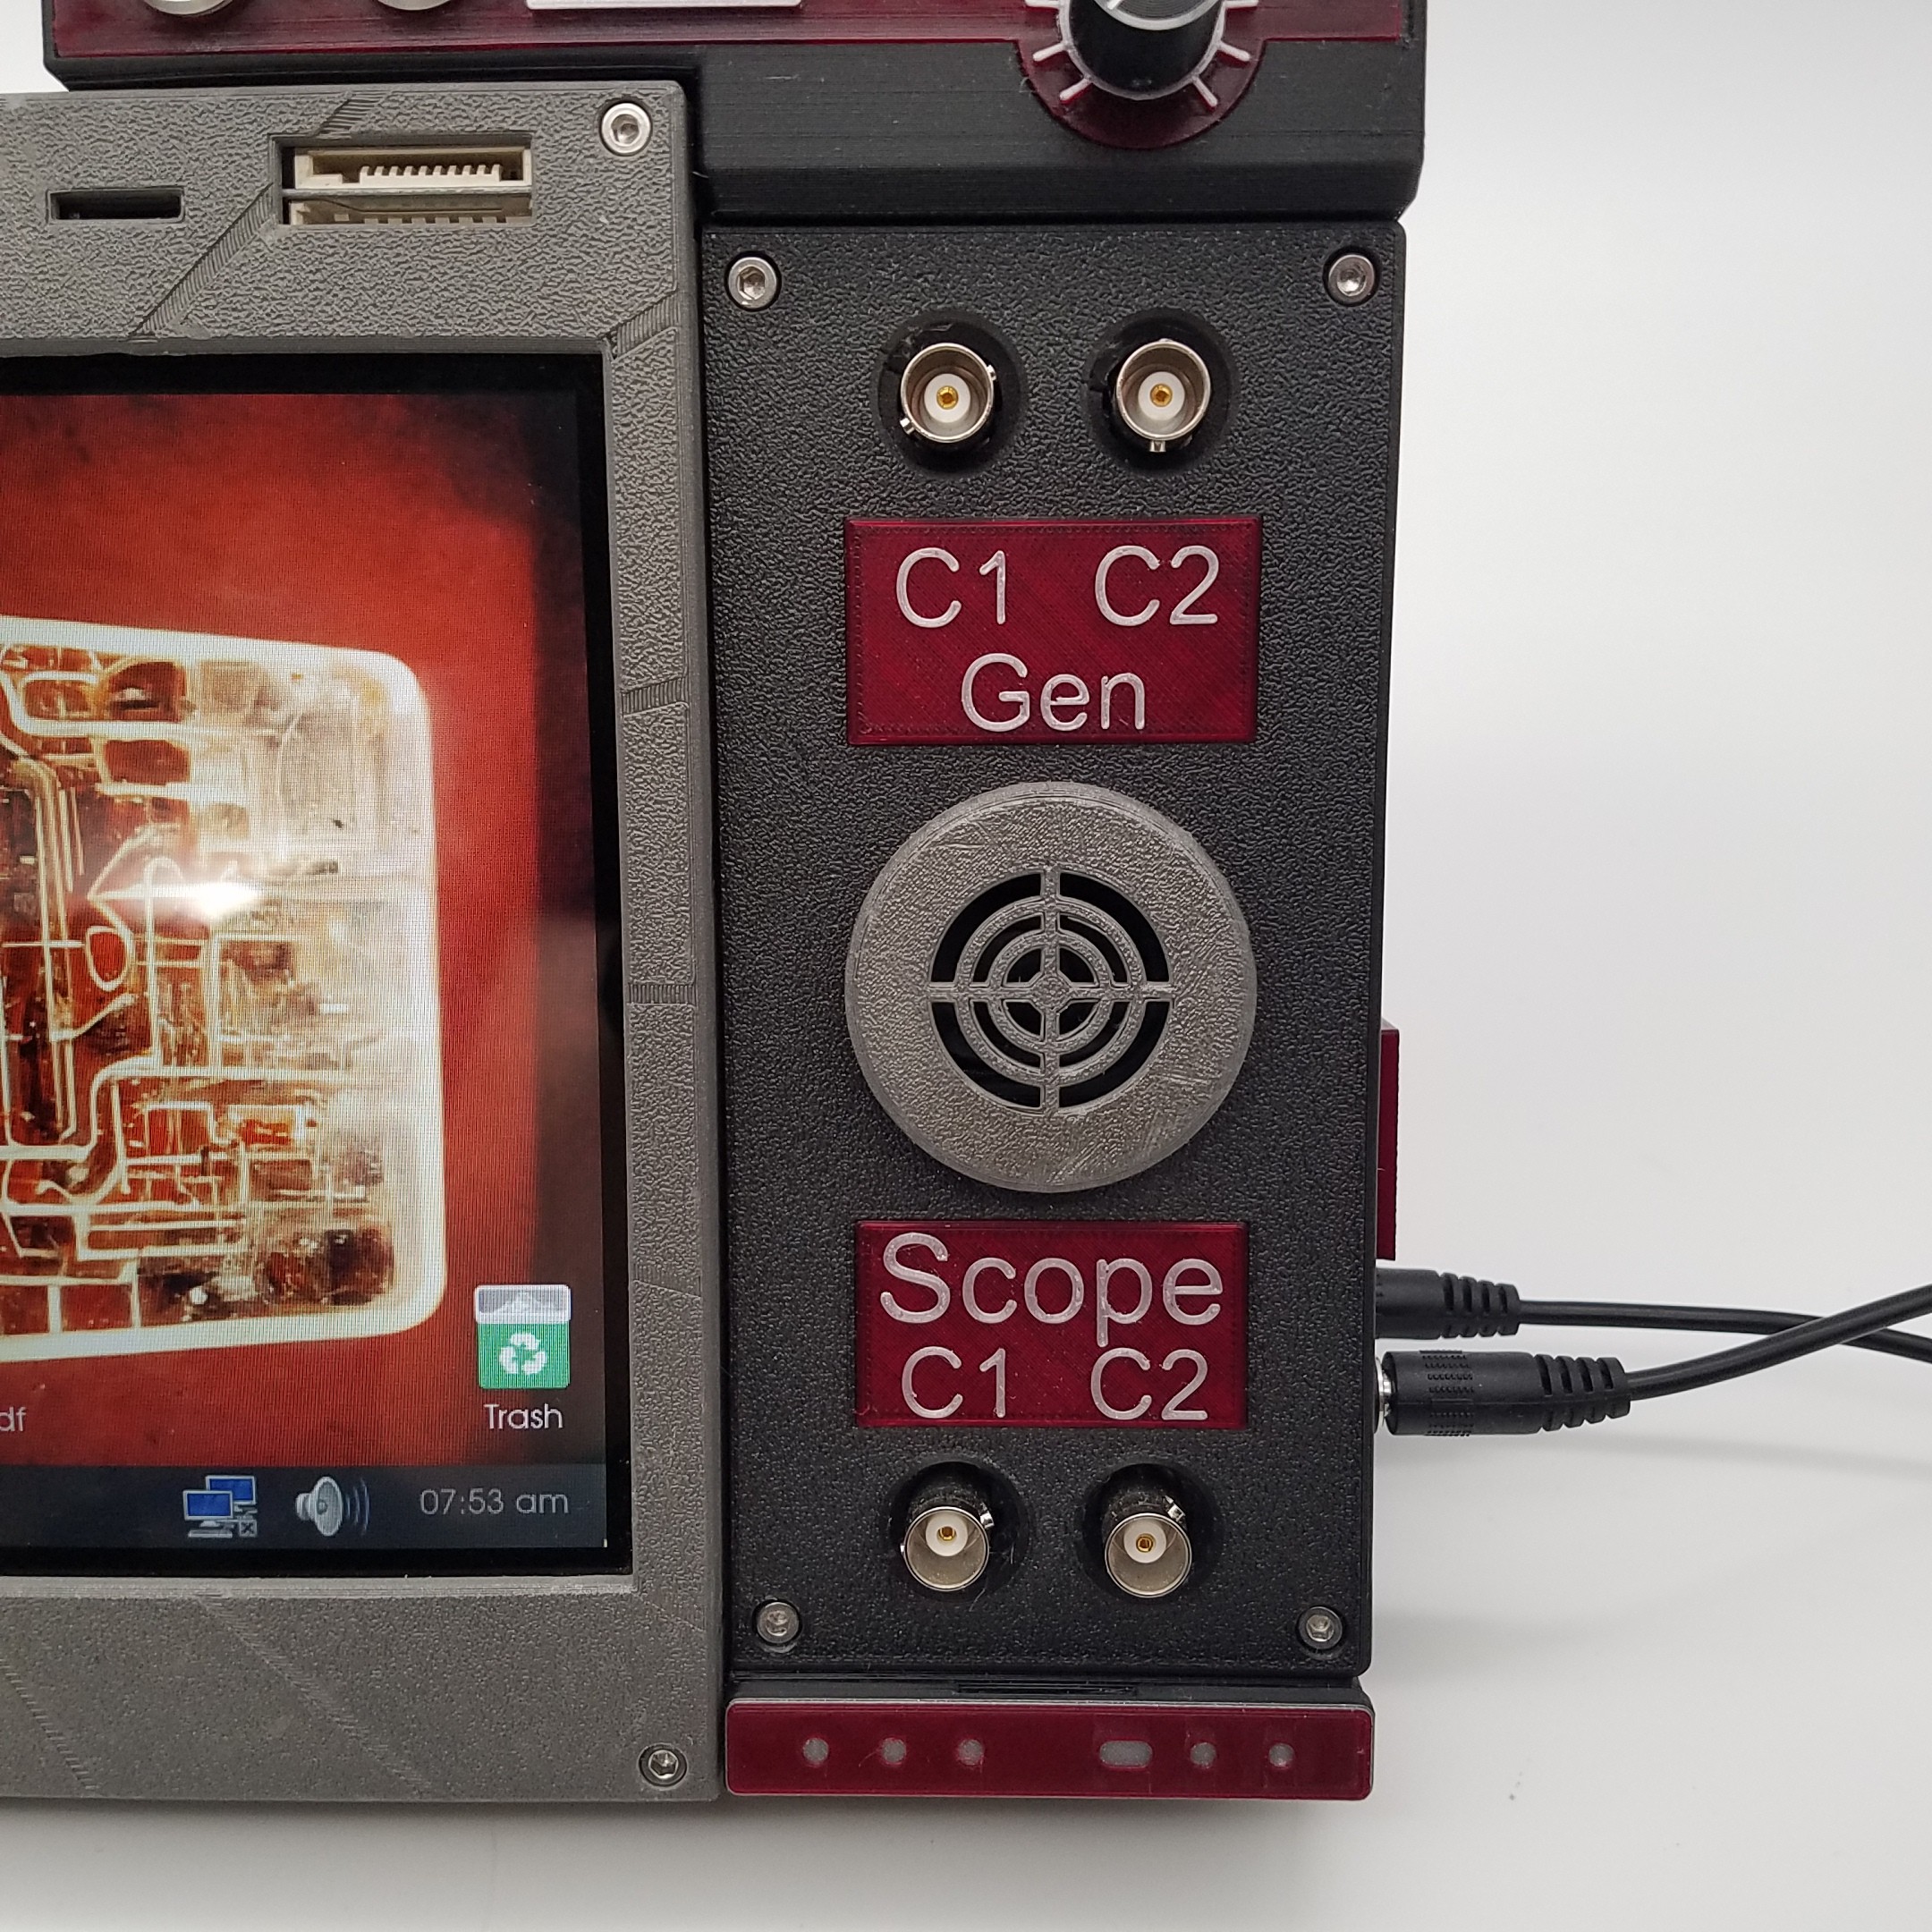
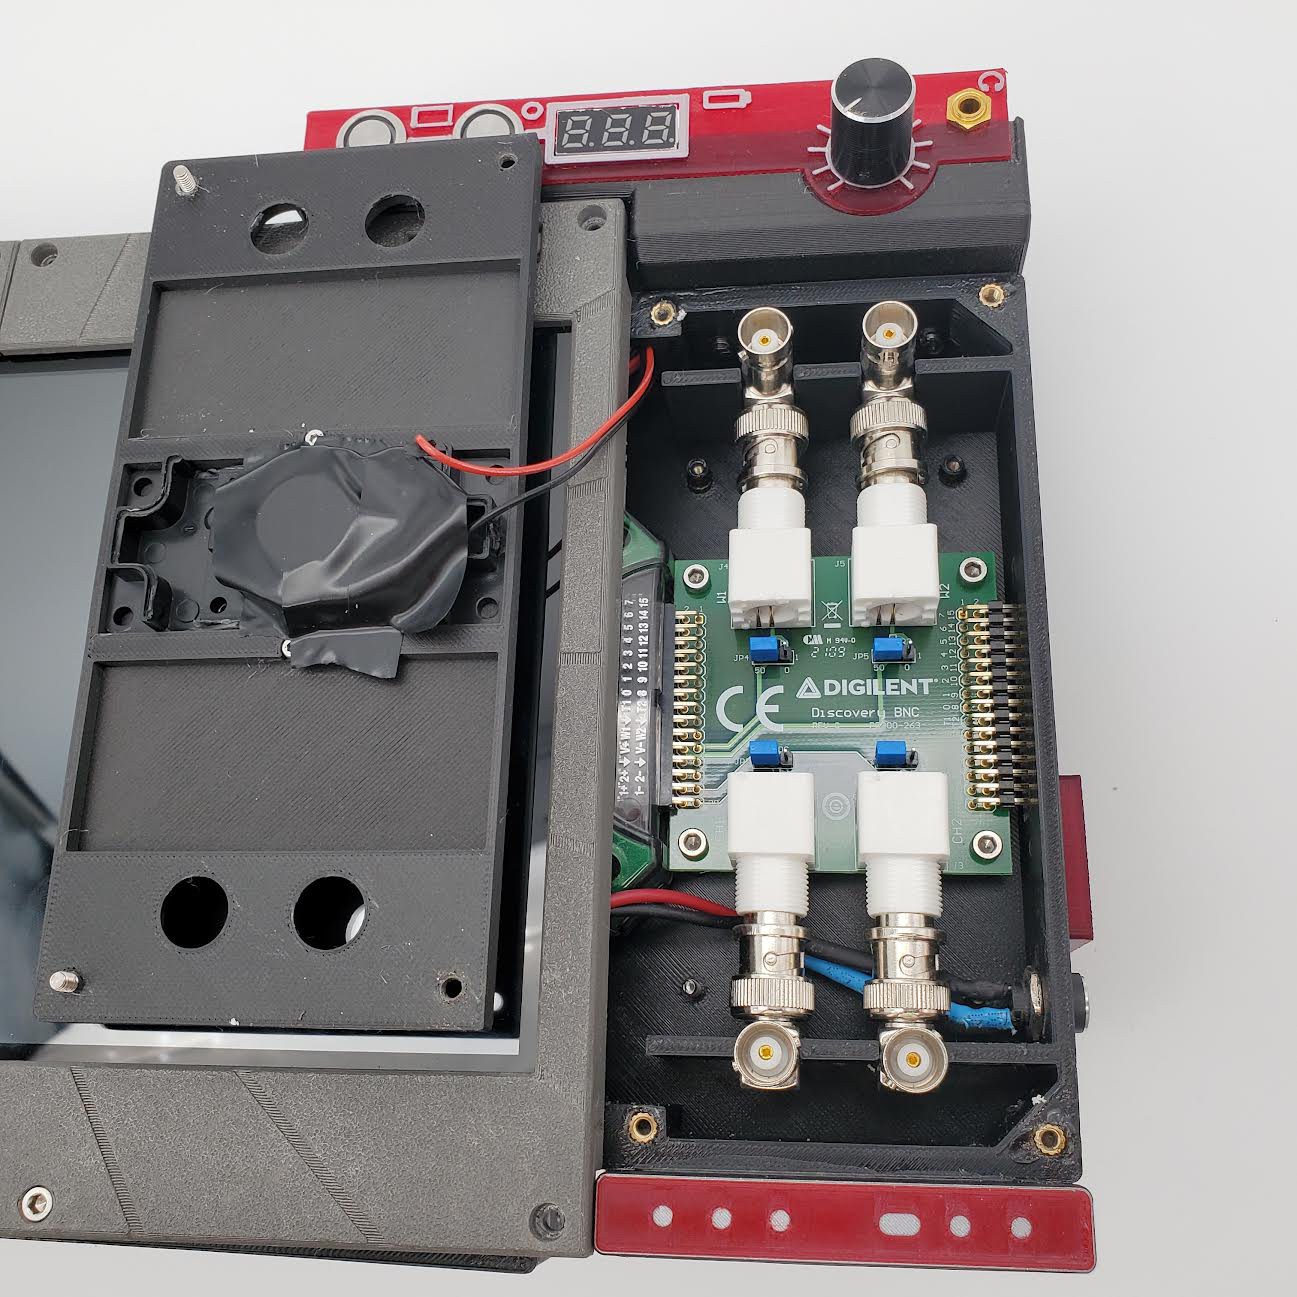
- Analog Discovery 2 which adds …
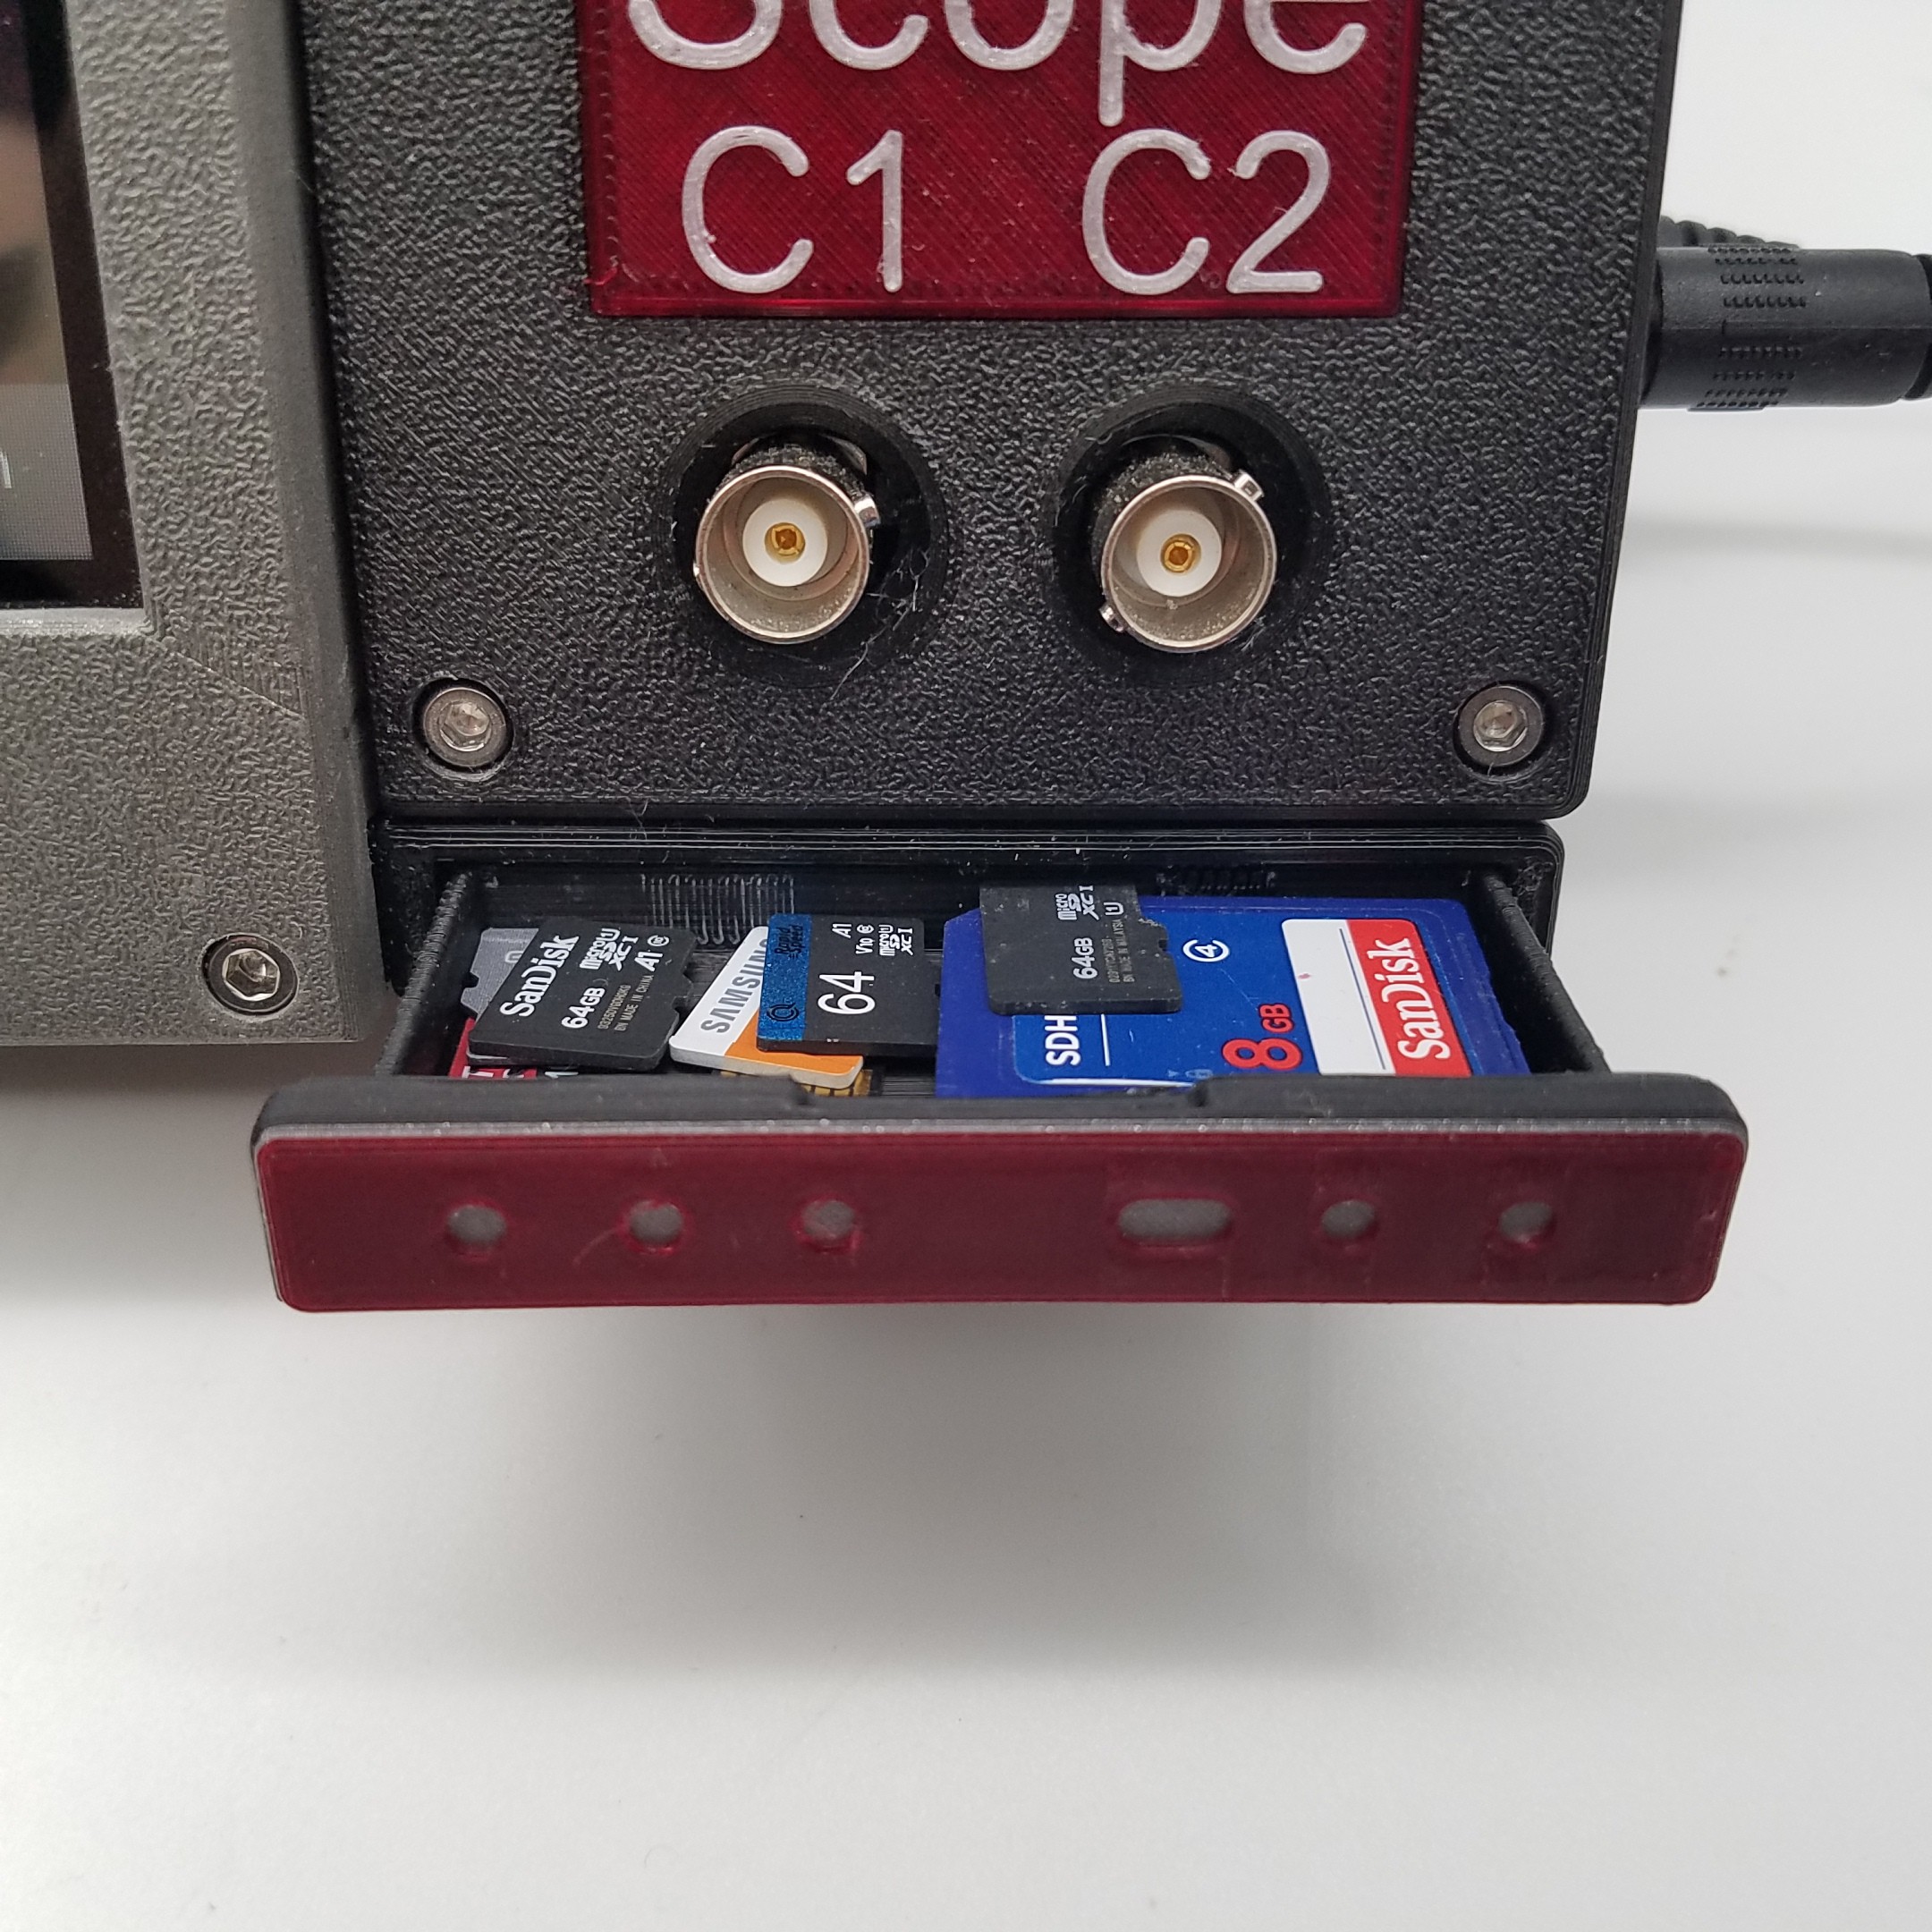
- 2 CH 30Mhz Oscilloscope
- 2 CH Waveform Generator
- 16 CH Logic Analyzer
- 2 CH Voltmeter
- Network Analyzer
- Spectrum Analyzer
- Data Logger
- Impedance Analyzer
- Protocol Analyzer
- Two programmable power supplies (0.5V to 5V , -0.5V to -5V)
- (half this stuff I didn’t realize this thing did until just now when I looked this up. This thing is awesome.)
and…
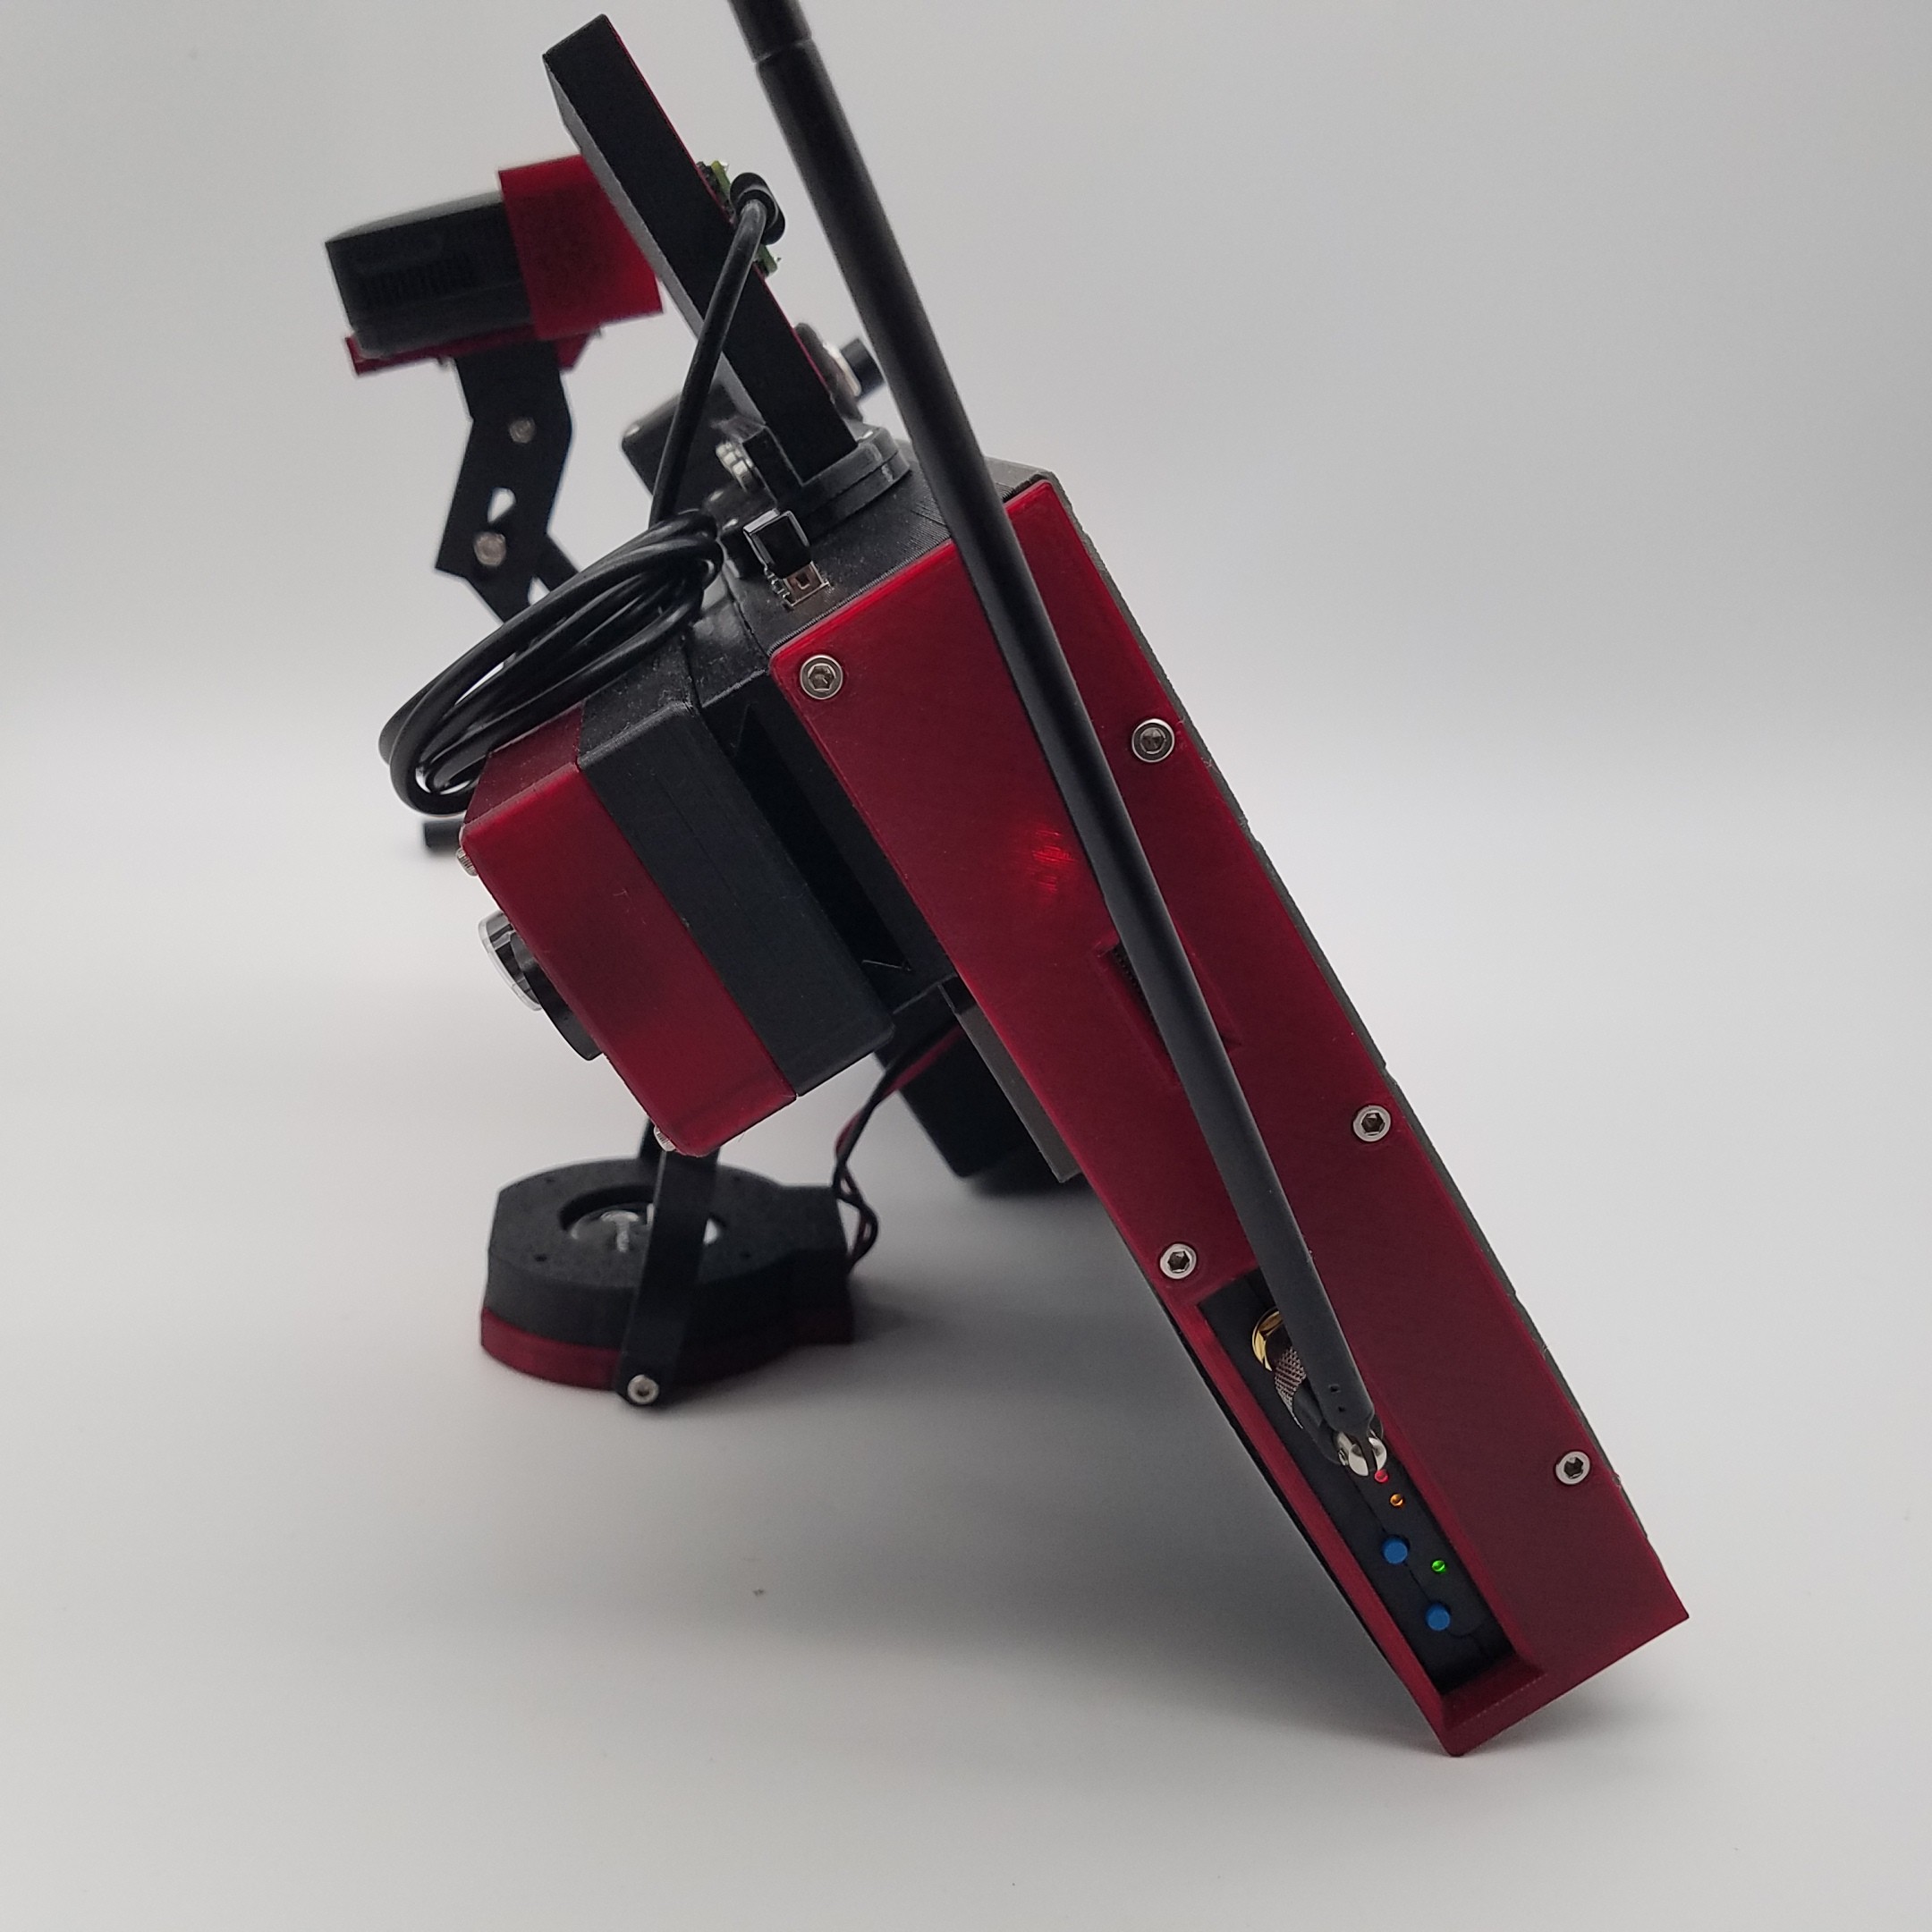
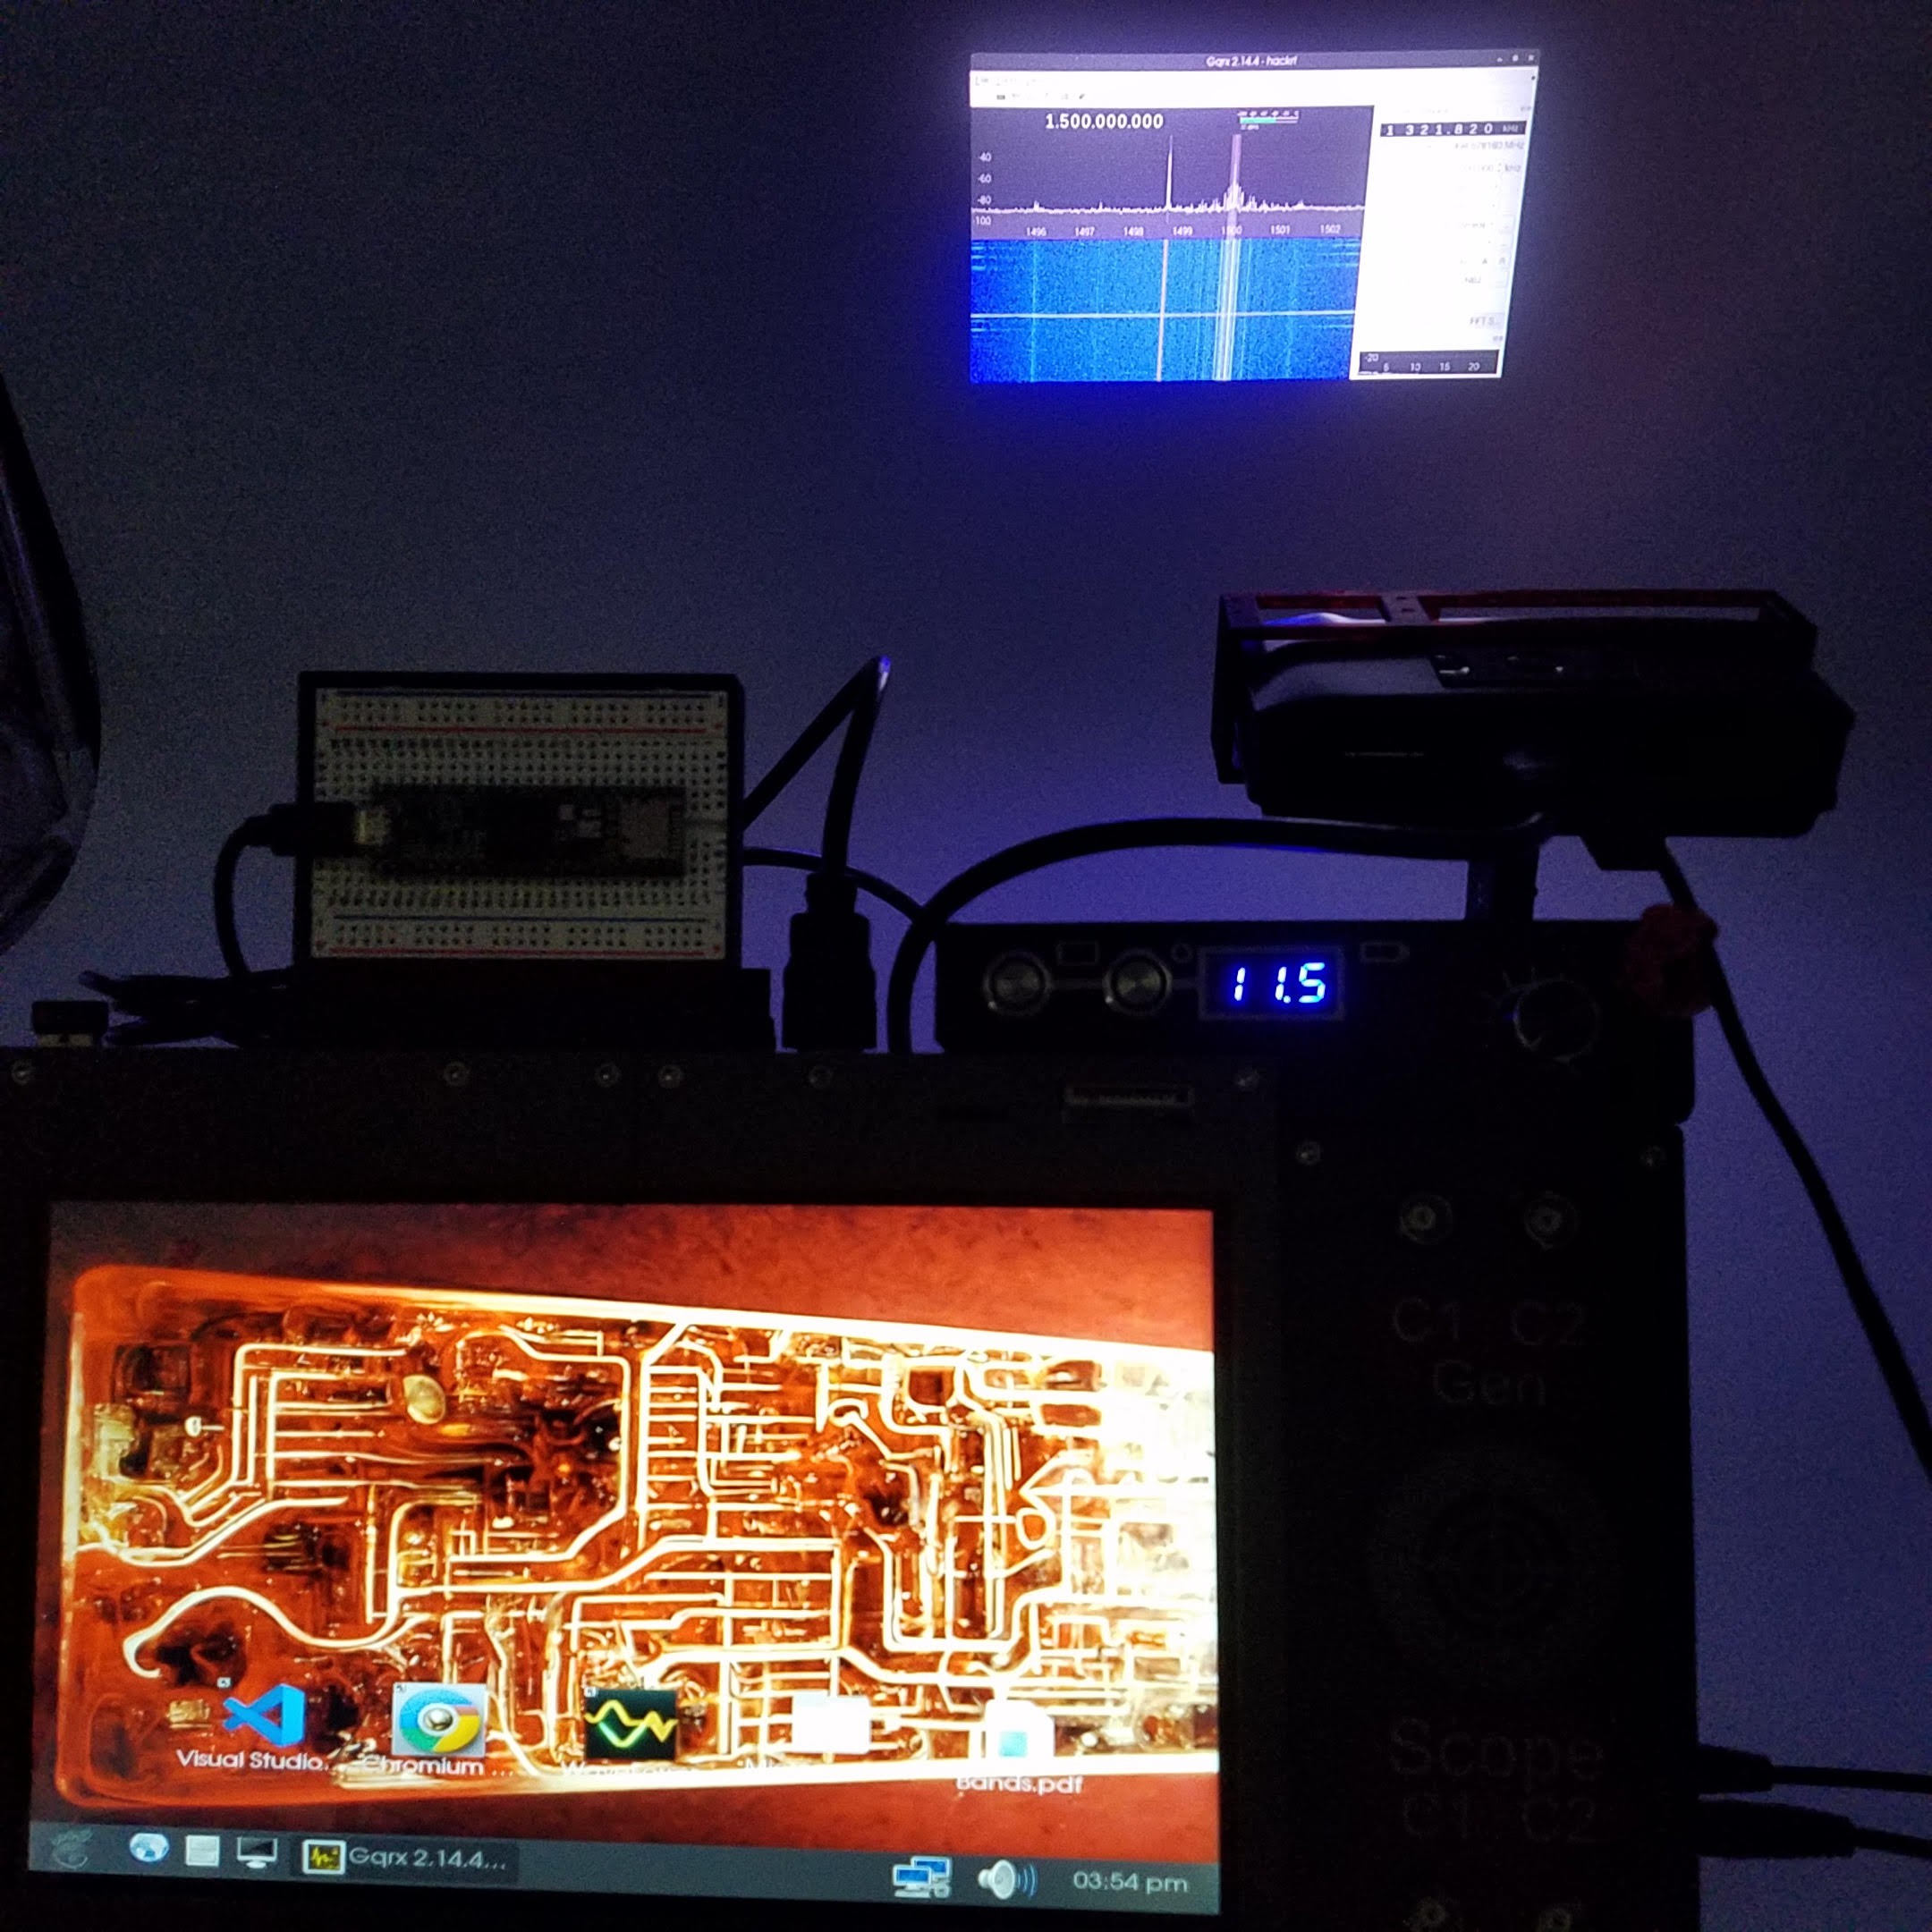
- Great Scott Hack RF One 1 MHz to 6 GHz SDR
- Audio System which has...
- 2 Ch 5W Audio Amplifier
- Headphone Jack
- Normal 5W Speaker
- Stand with Exciter Built In (It turns the table into a big speaker for epic bass)
- A Power System which has...
- 6000mAh Battery Bank
- Front panel voltage meter for battery
- Buttons to turn off LCD and Misc Front Panel Lights
- DC Regulator and Input Jack (The deck runs off of any voltage between 8-40V)
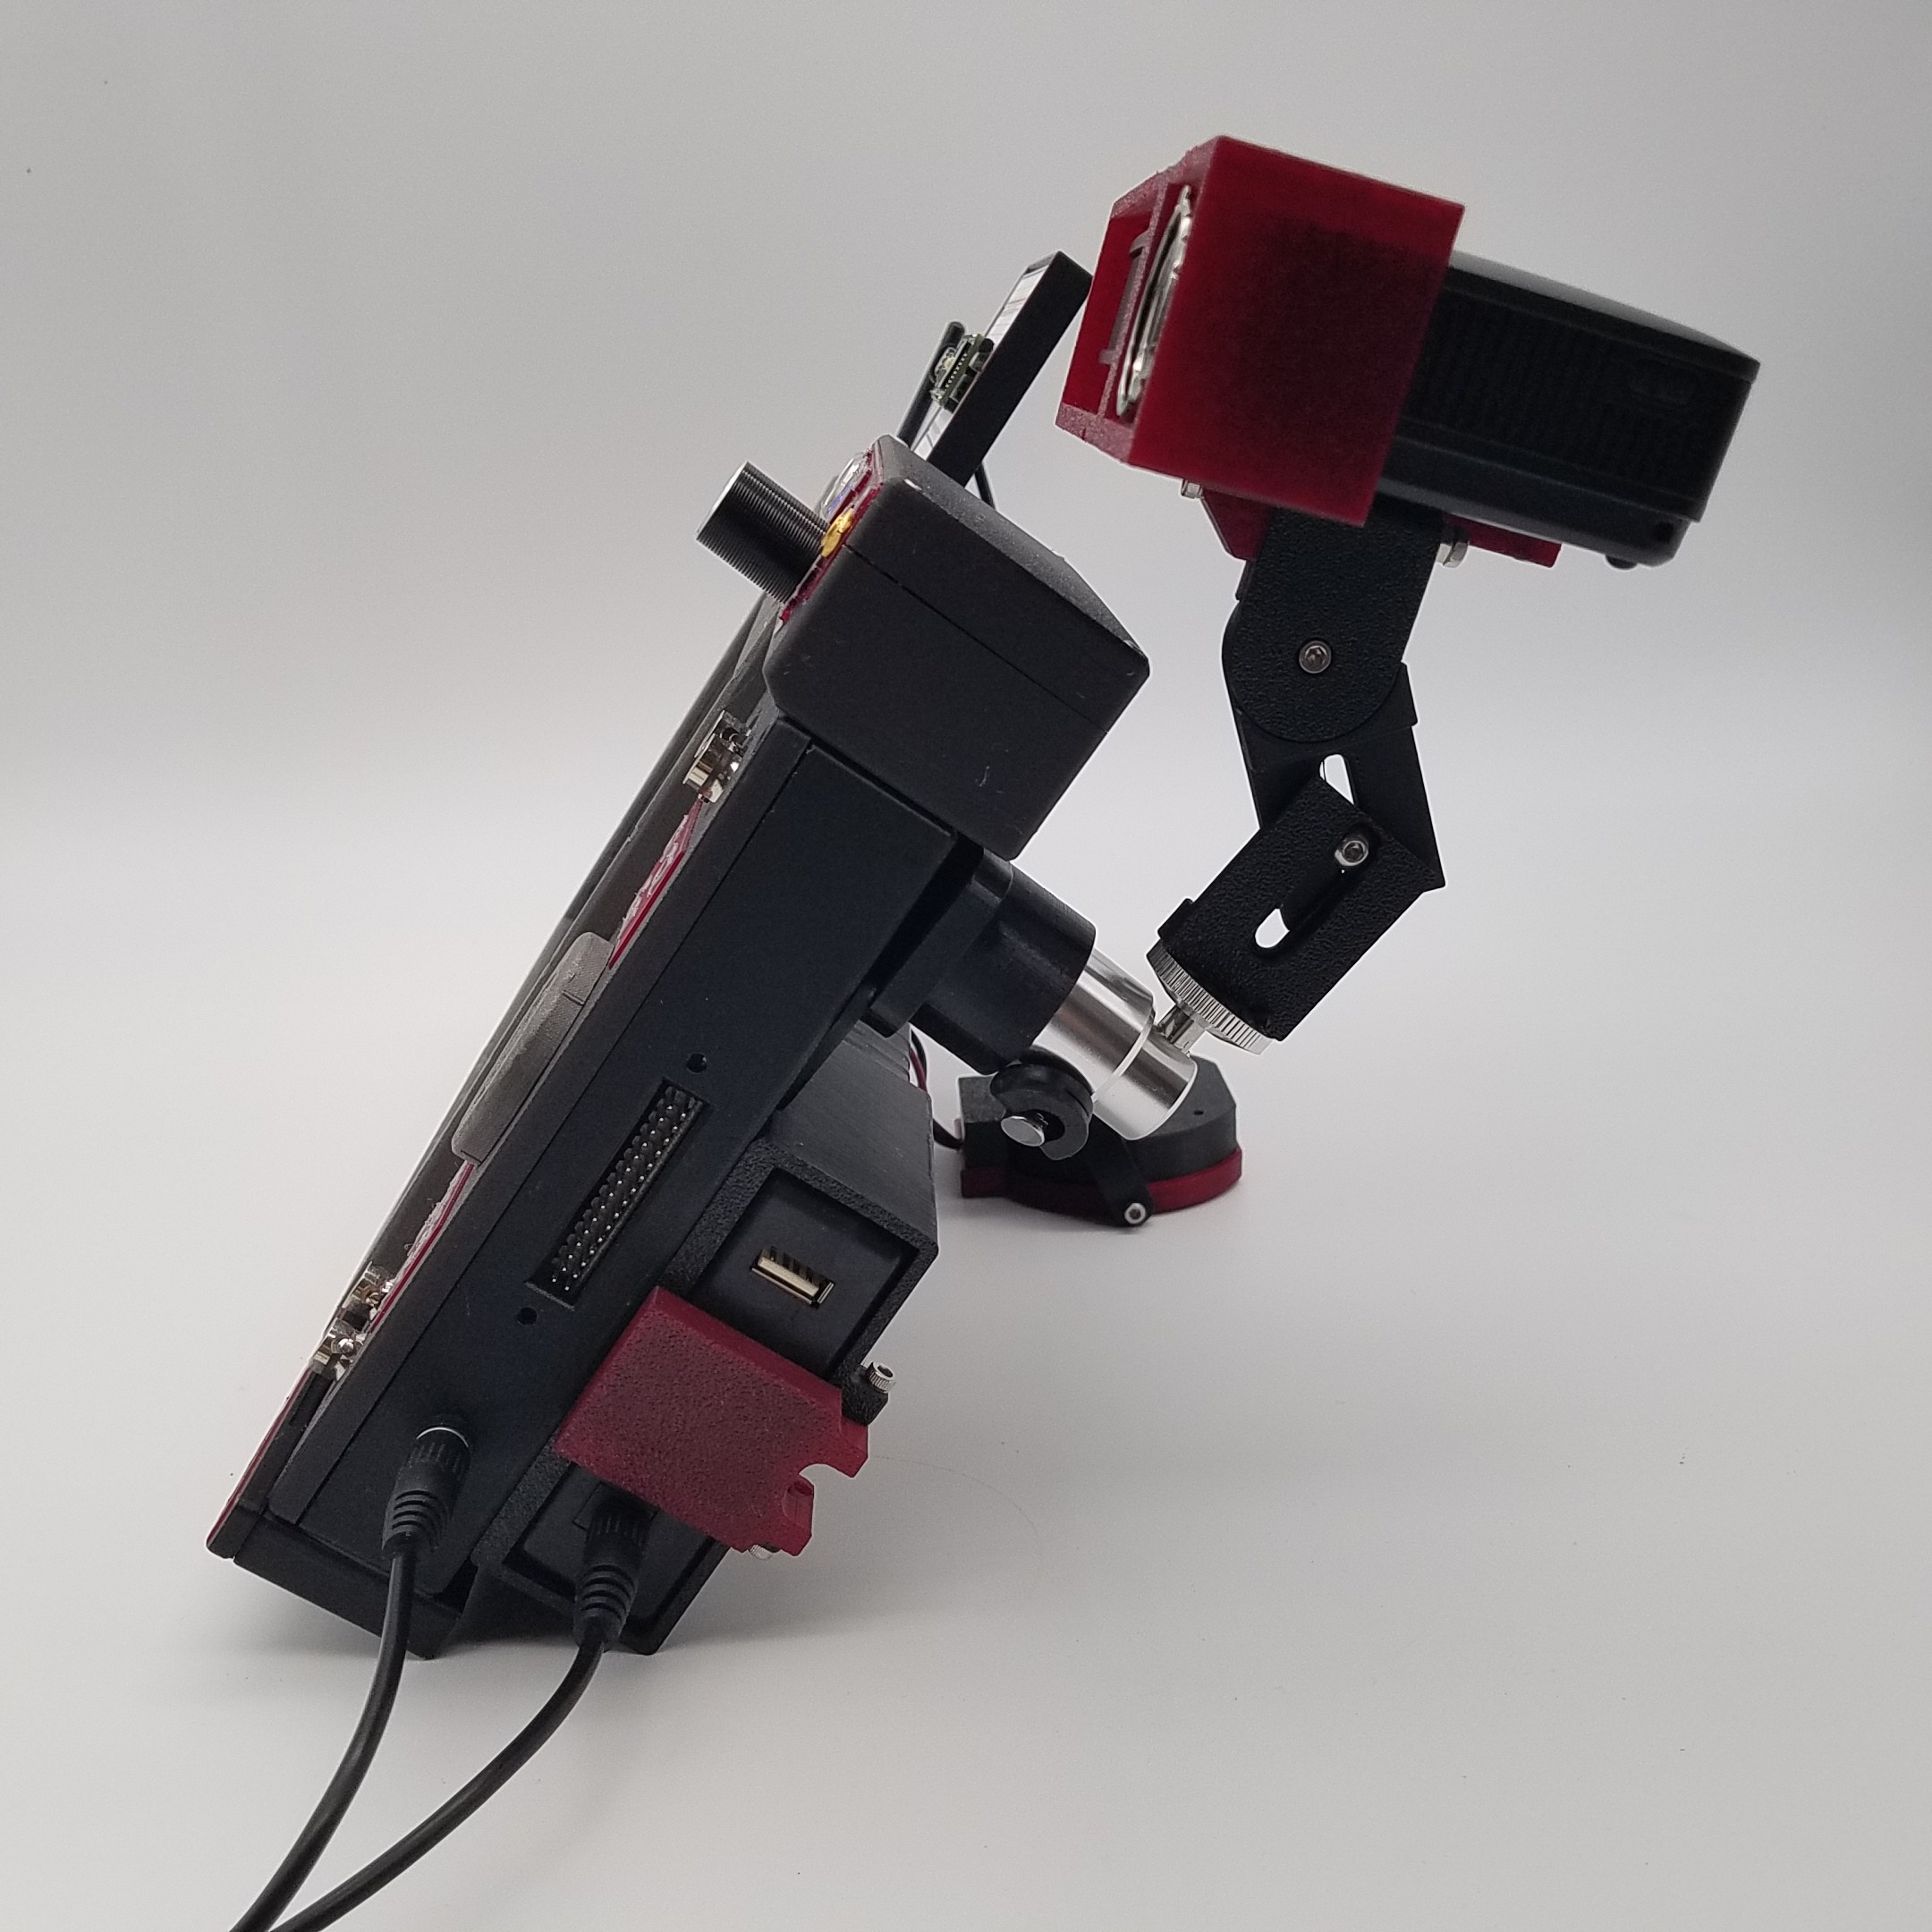
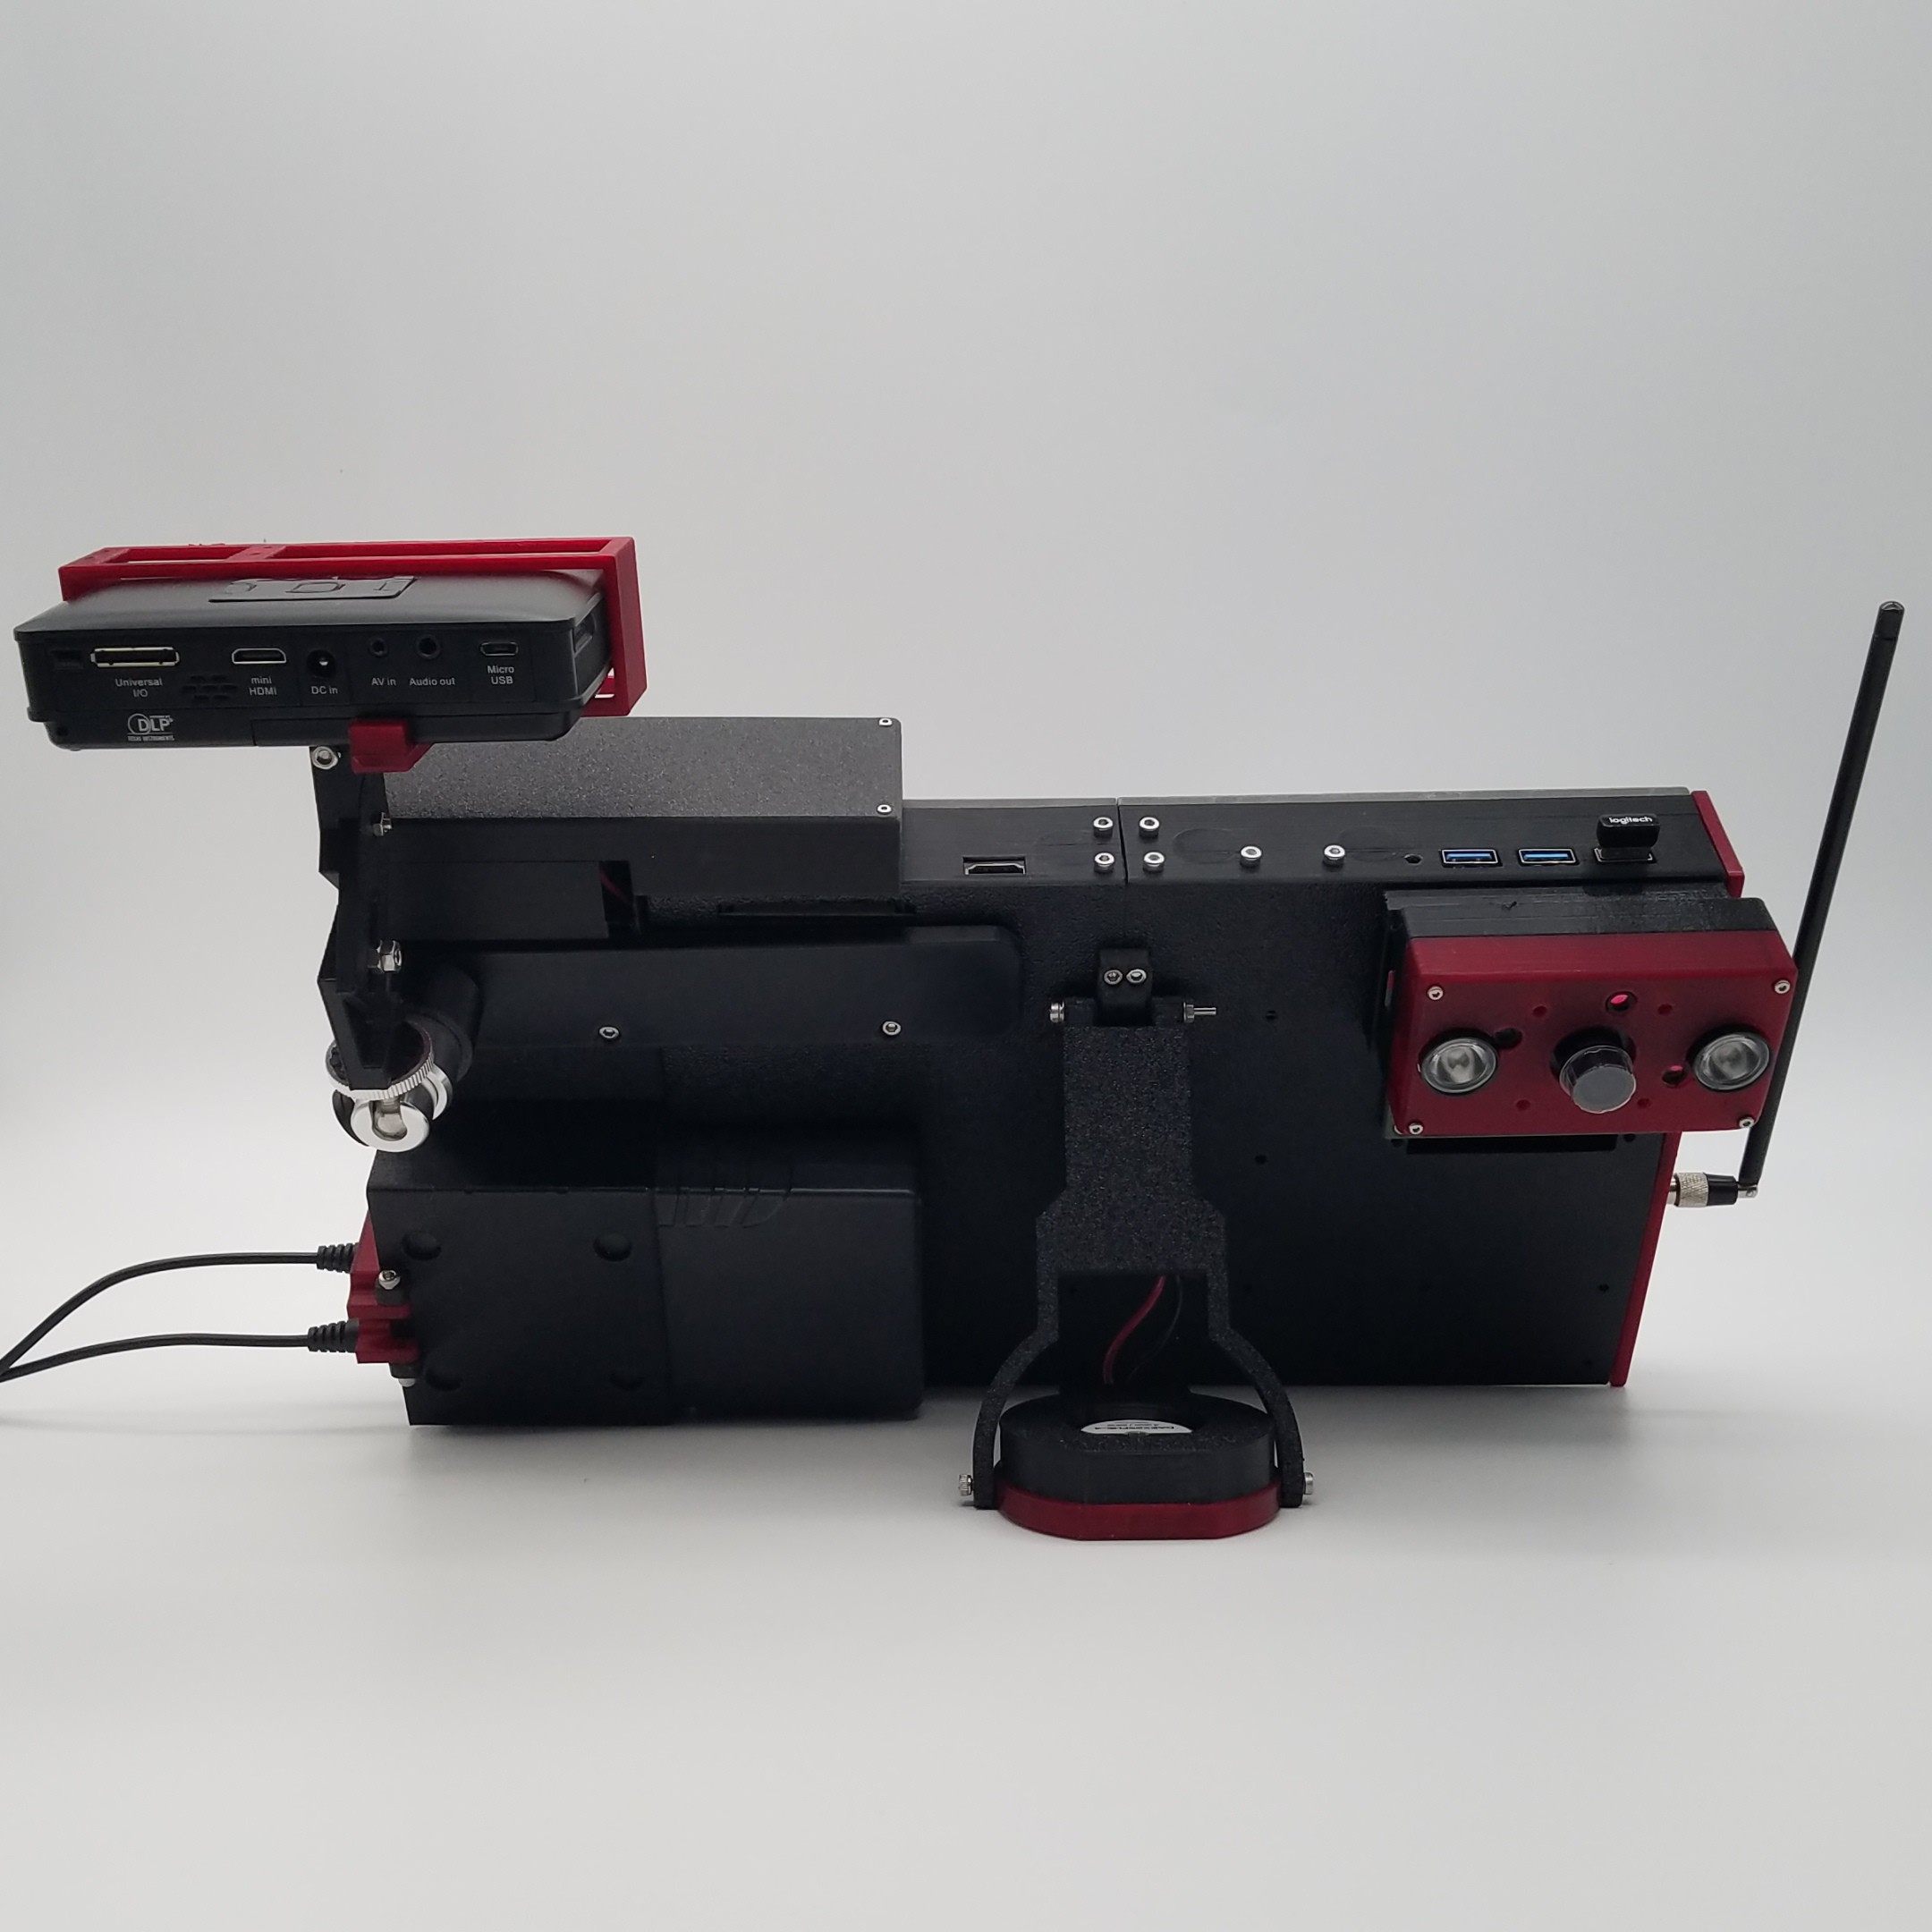
- Small Projector (for second monitor or just watching movies on the go)
- Magnetic Mount On Top (so I can swap breadboards or add future modules)
- Removable Wide Angle Day and Night Vision Camera with a Raspberry Pi Zero W for Wireless Video (Not quite finished but will be soon)
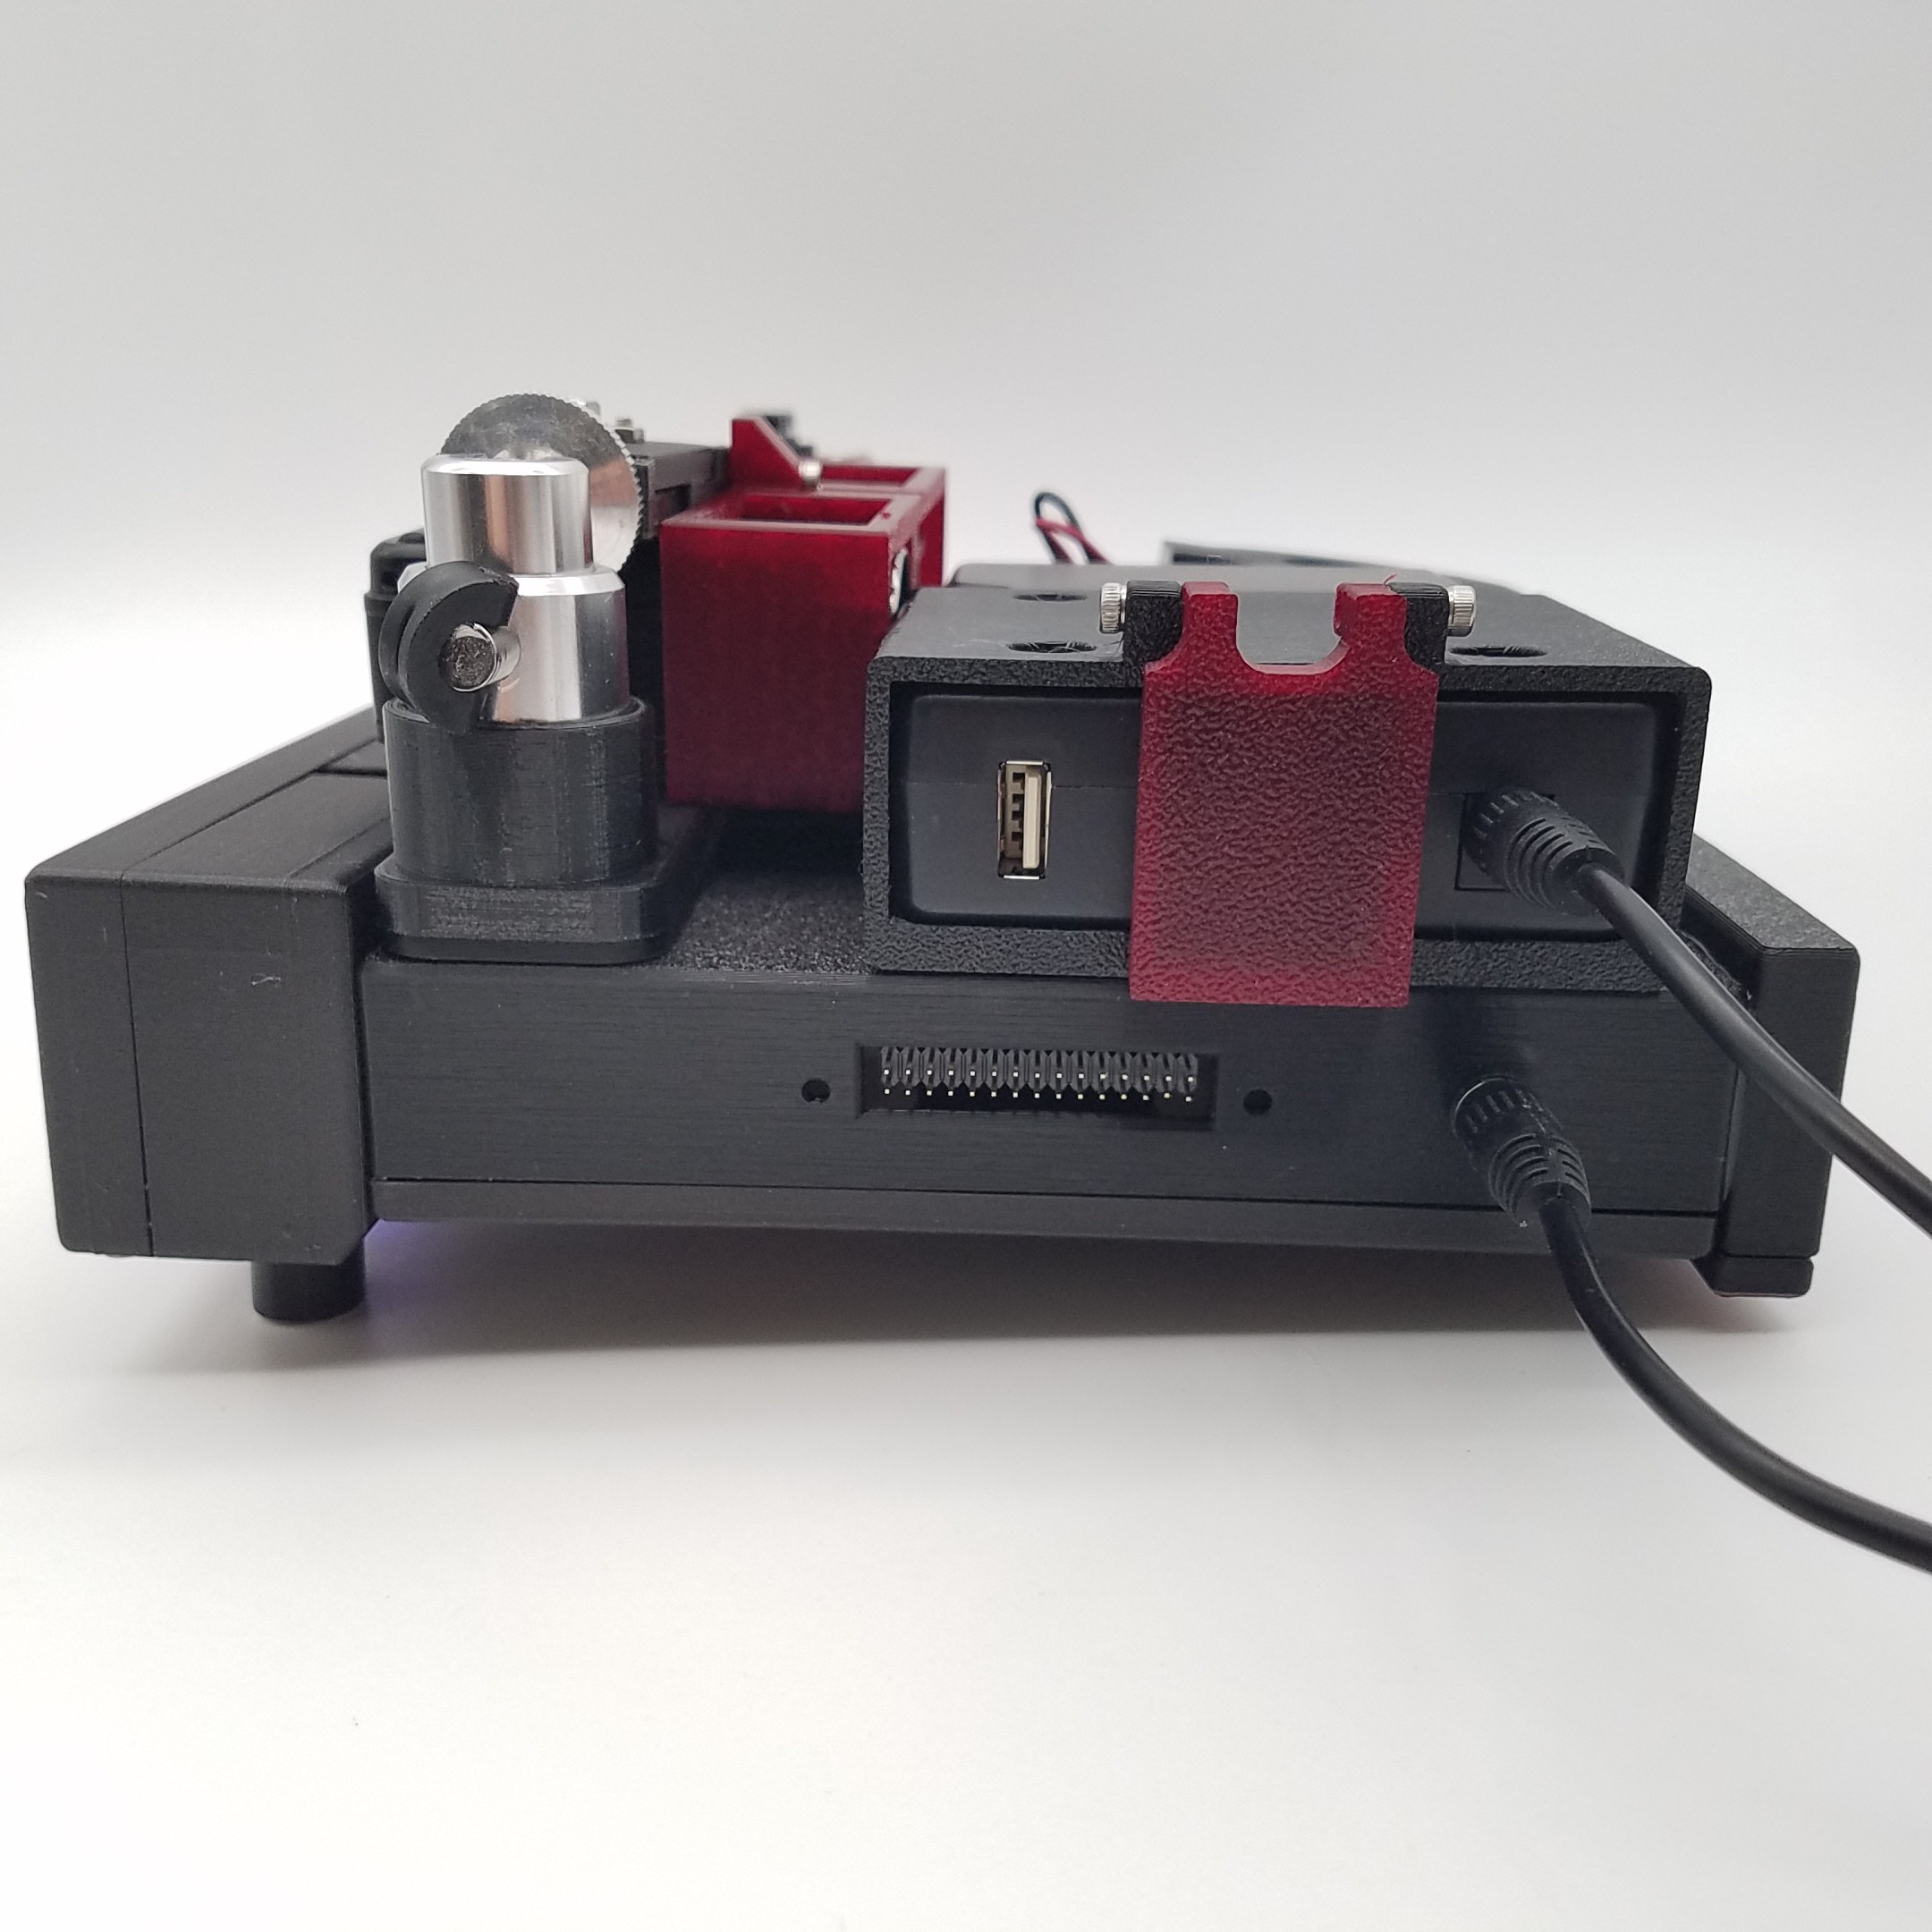
- Extra Ports and Things
- 3x USB Ports
- HDMI Port (for second monitor or projector)
- Card Reader built in for Micro SD/SD/MS/CF
- Small Drawer (to hold misc. SD cards with alternative operating systems or for extra storage)
- Access to The Raspberry Pi’s GPIO pins
- Access to the Analog Discovery 2’s various pins
The following pictures show the above but, you know, in picture form and not necessarily in the same order.


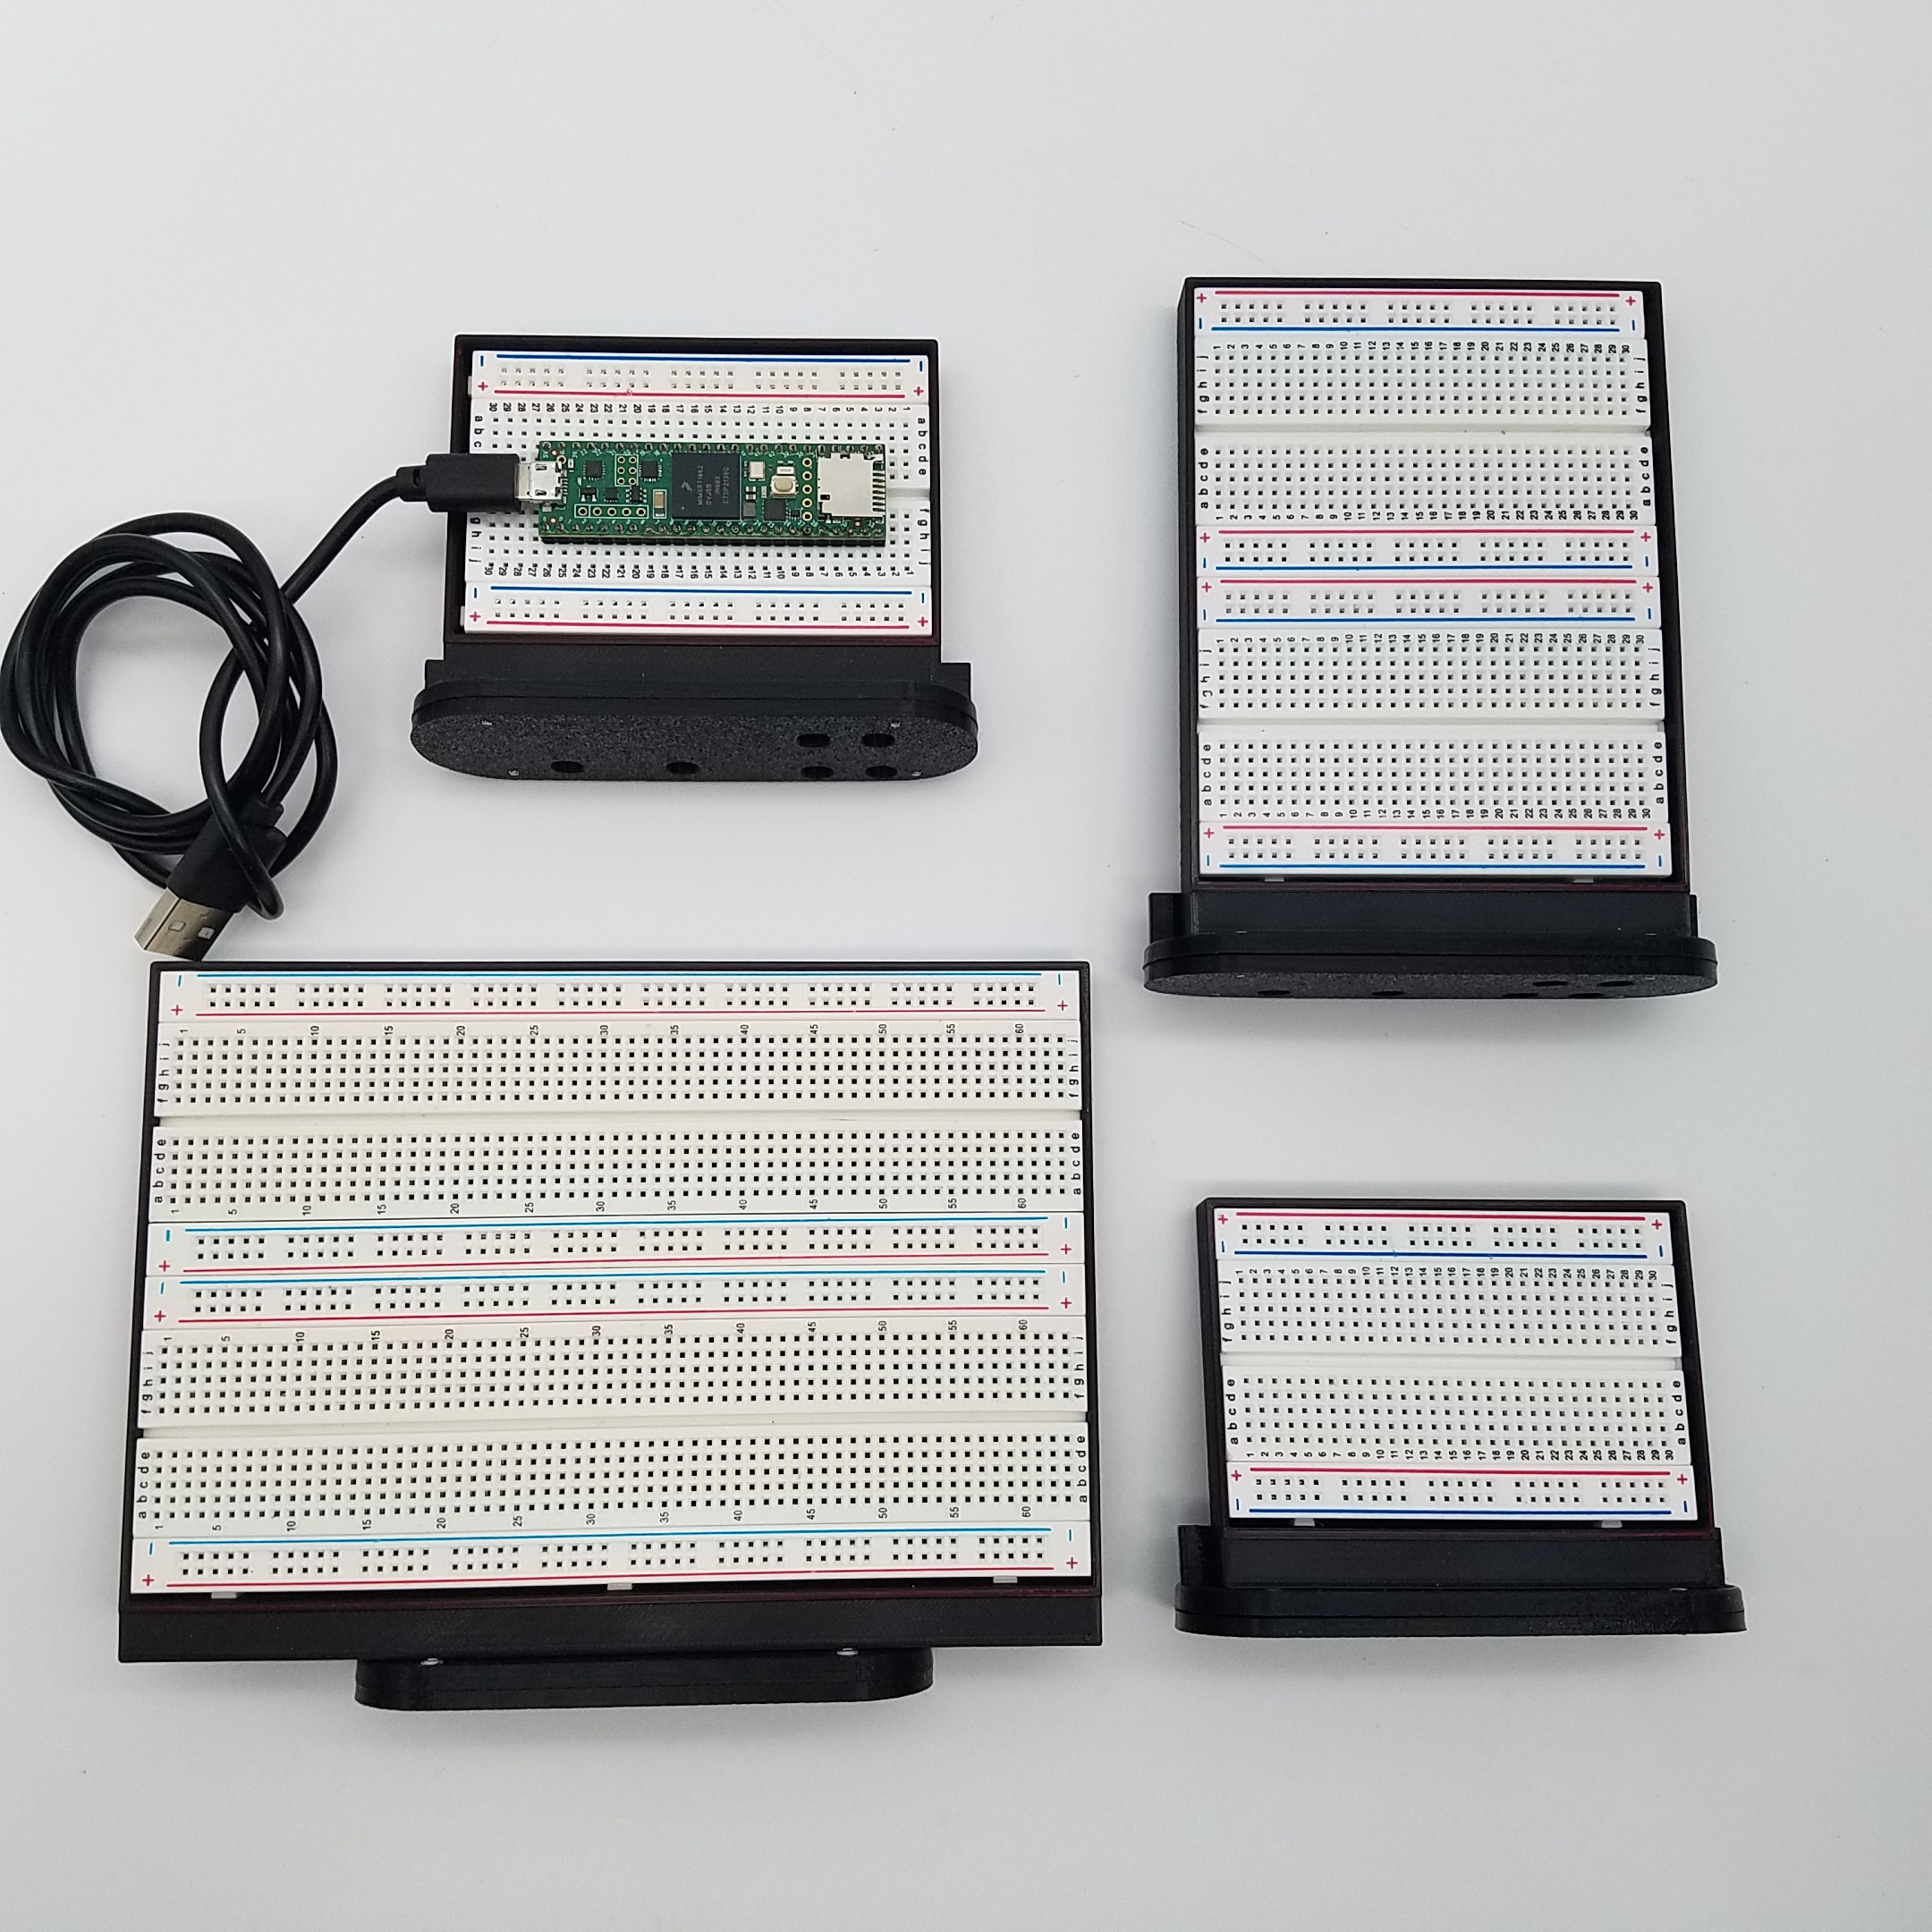
CAD and Parts List
I have attached the Fusion 360 design and a quick PDF of the various parts I bought to make this.
The file might melt your computer when you open it. I modeled a lot of these parts separately, but combined the components for the final file. It's usable but if you try and open this on an older laptop or similar it's going to take awhile. Fusion 360 seems to struggle with larger designs in general. I tried to clean up a lot of random errors in the design that crop up when Fusion 360 sometimes glitches. I think I got them all, but keep an eye out for more.
I thought about generating the STL files for this but after realizing there are around 50 parts I decided it would just make things more confusing. I personally just send the parts directly to Prusa Slicer using File>>3D Print in Fusion 360 and never bother with STL files myself.
Keep in mind that this is really only a rough draft. It was designed by thinking of new devices I wanted to add and trying to figure out how to attach them to whatever I had already printed out. Some of these parts take around 8hrs to print and require disassembly to replace, so obviously I tried to avoid redoing them. Indeed there are many components that could be combined to reduce the parts count.
There isn't a single part in this entire model that I wouldn't change if I started over.
The main body is cut in half as it is too large to fit on most printers. In particular my printer which is a Prusa MK3S+. One day if I ever get something bigger I might redo the whole deck with a drastically reduced parts count.
In theory, if you buy the exact parts I used and printed everything out you should have the same deck I do. There are places where you might find yourself drilling holes for screws or using glue to hold things together, but it's should be pretty darn close to what I have.
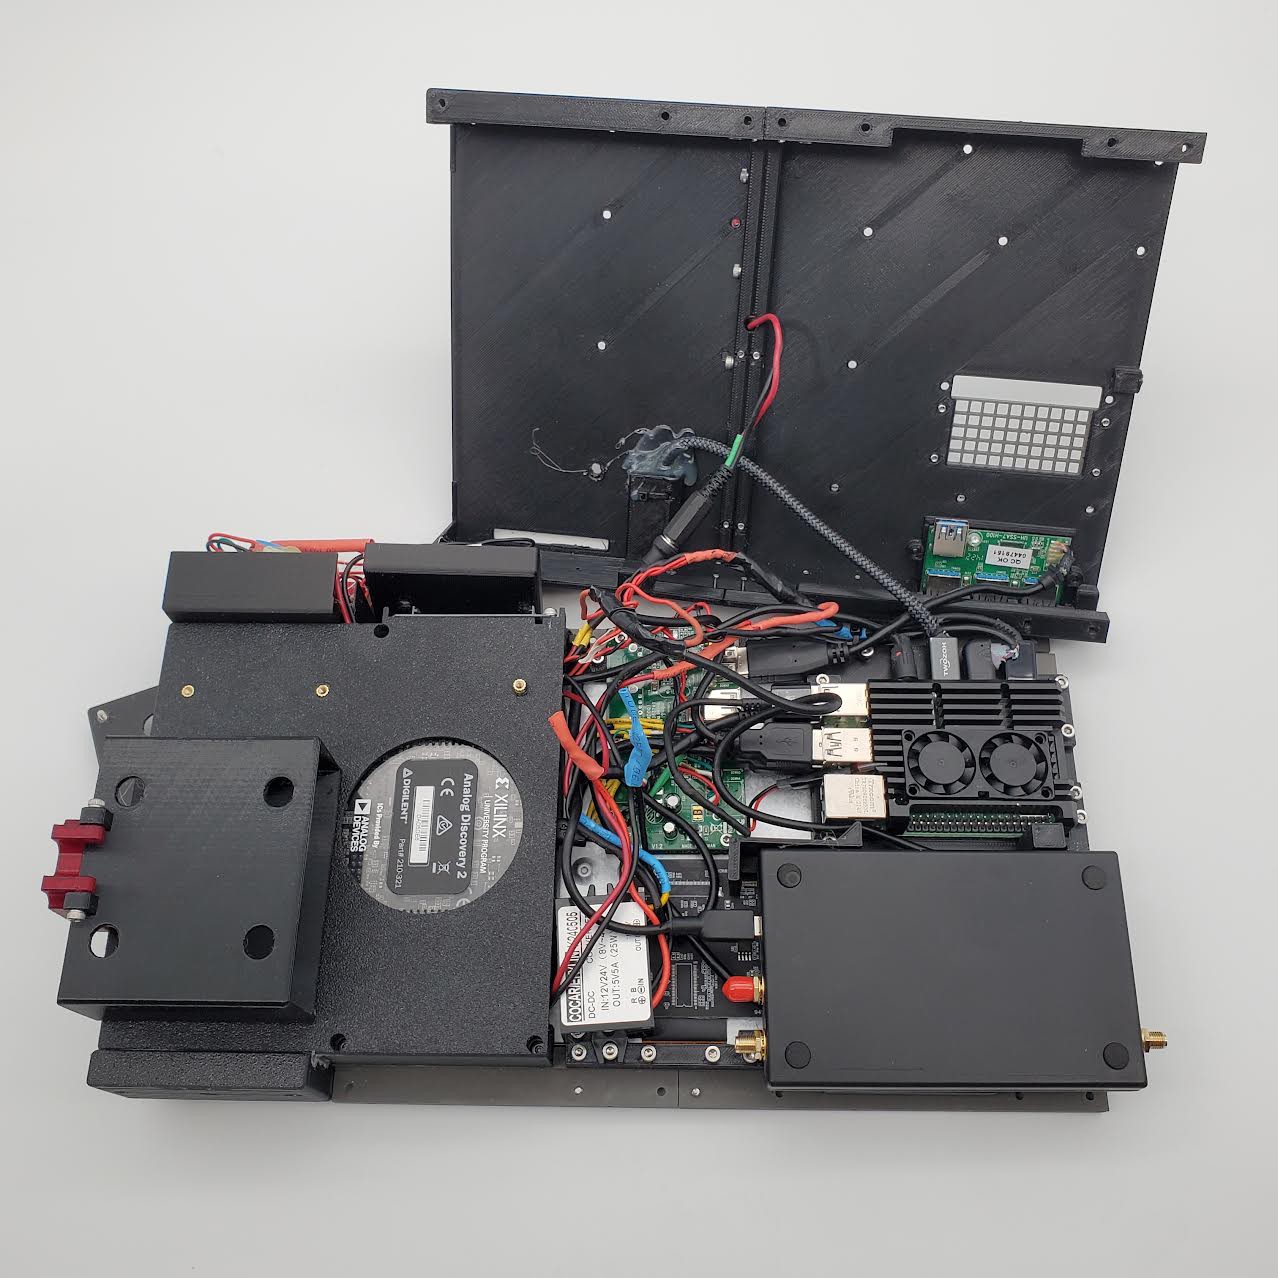
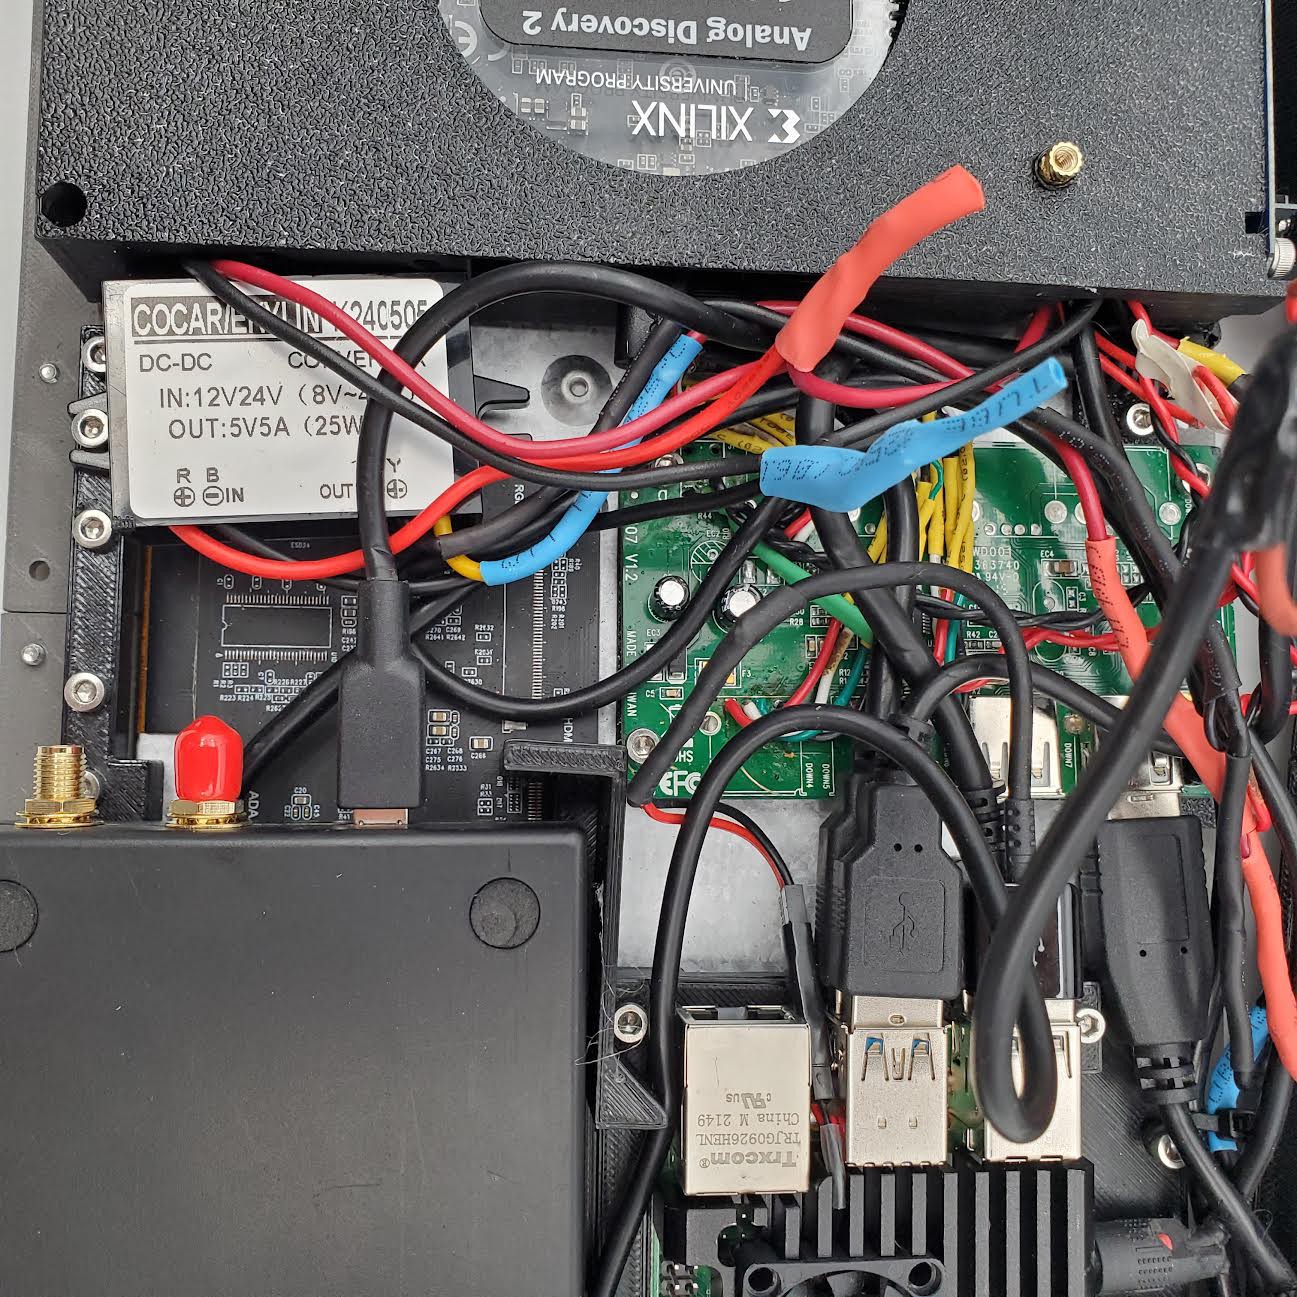
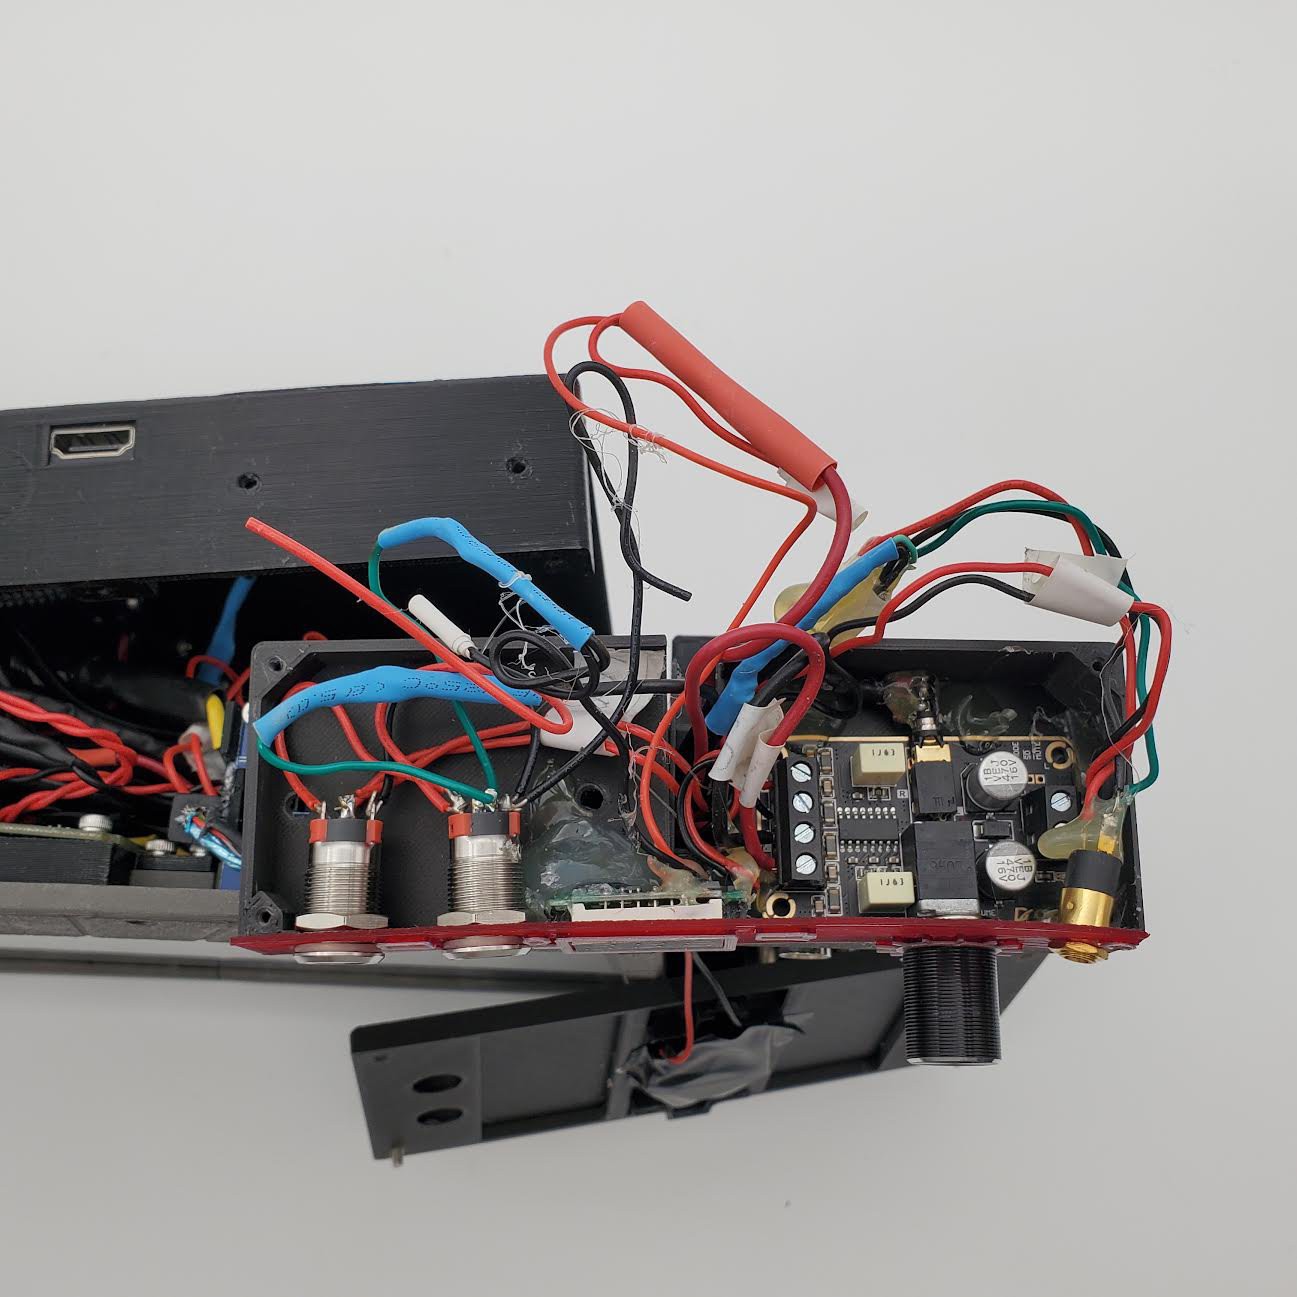
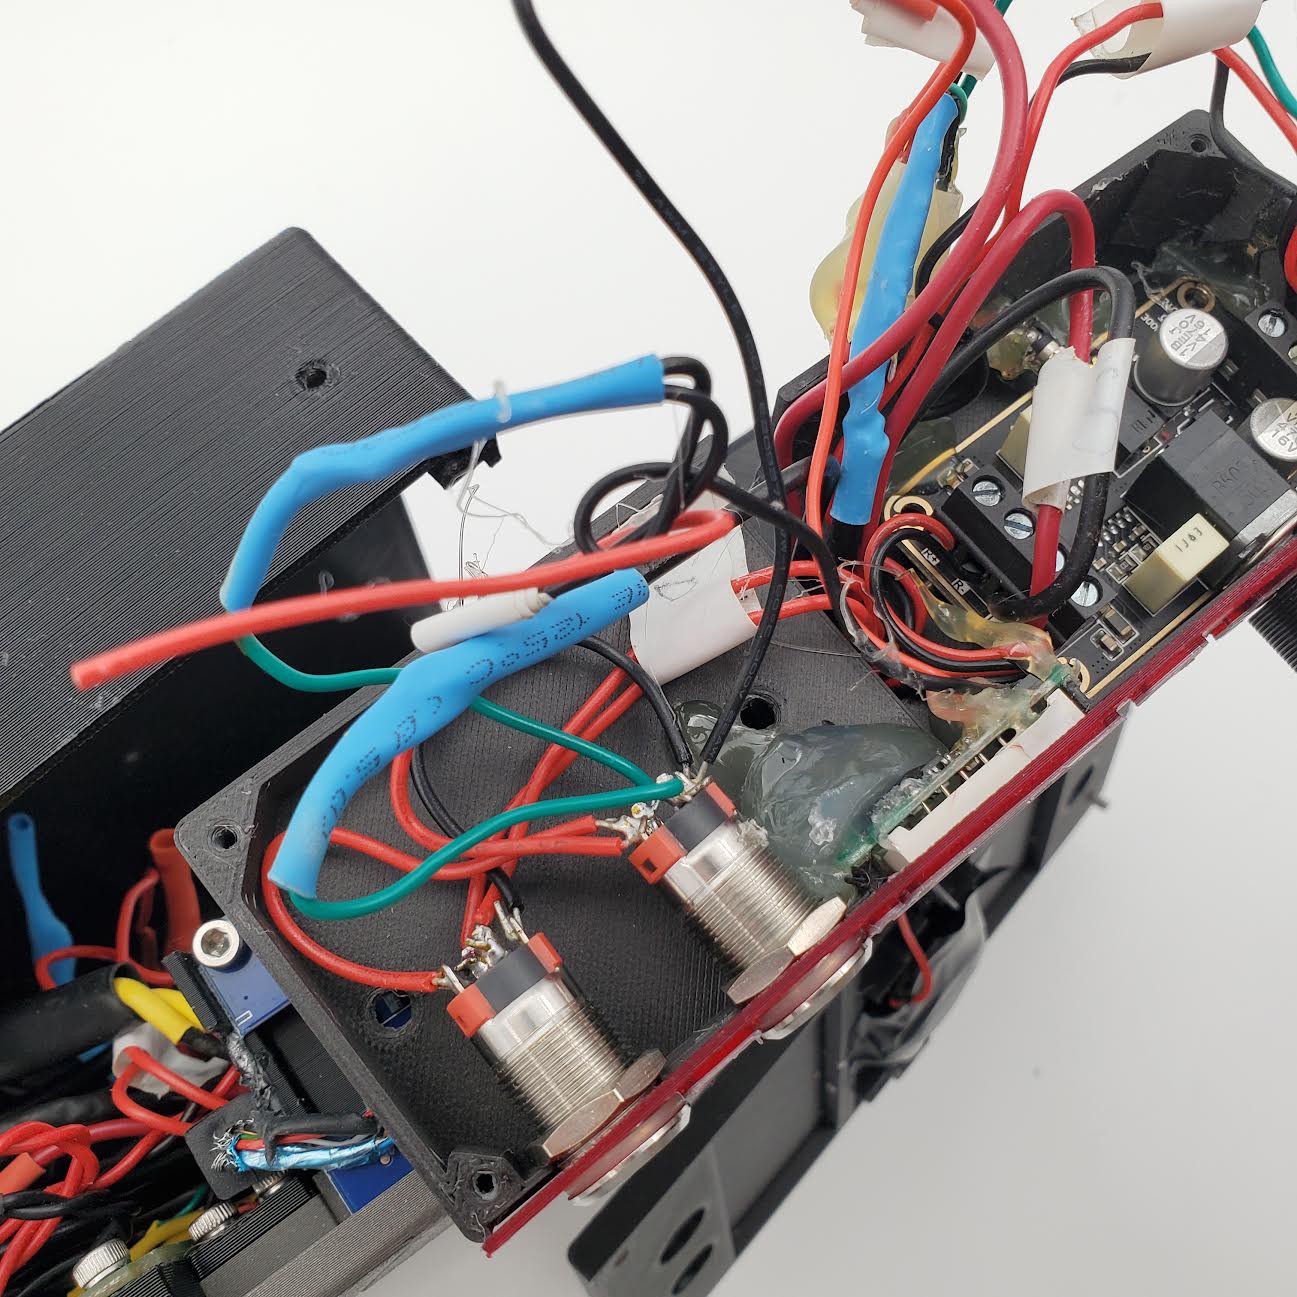
Electronics
The electronics for this project was honestly the easiest part. For every 25 hours of CAD there was maybe 1 to 2 hours of electronics work.
It's amazing what you can connect using USB these days.
Because of the space constraints I had to tear off the normal USB inputs on the Powered Hub and solder USB wires directly to it as there wasn't enough room. I also had to trim some of the plastic protection off of several cables to make some of the tight turns.
Like the CAD model, the electronics are something of a rough draft. There are several things I would change. In particular the LCD adds noise to the audio which I need to figure out how to deal with. It's not unusable, but it can be annoying when it's quiet.
I thought about trying to draw a basic schematic, but, honestly, 2D drawing is boring. The electronics assembly is pretty straight forward though.
Electronics: Power
The power is done through a lithium ion power bank which outputs 12ish volts. Alternatively there is of course the plug in DC power supply option.
Warning! The power bank I have linked is decent but is kind of sketchy in that the charger jack uses the same plug as a typical DC power supply. One would hope that this things has overvoltage protection or something, but it is possible to get it mixed up with a normal power supply with the wrong voltage and possibly either damage something or just set it on fire. It also doesn't help that they use a standard barrel jack with their charger, and it helps even less that I used this exact same jack as the DC input for this Cyberdeck.
After the DC Jack there is a 5V voltage regulator to bring the input voltage down. The 5V regulator splits and goes to the Pi, a Powered USB Hub, and the Amplifier, all of which run off of 5V.
The LCD gets it's power via the Pi's USB and also sends touchscreen data into this same port. The Pi can only power the LCD. If you add much else the LCD starts to turn on and off as there isn't enough amperage for more devices that draw much current. This is why there is a powered USB hub. I will probably change this up in the future and make it so that the LCD gets the power directly from the voltage regulator but for now it is what it is.
I also spliced into the 5V in the LCD's USB line and extended it to a button so that I could turn it on and off.
Electronics: USB Connections
The Analog Discovery is connected through the powered USB hub.
The Hack RF is connected through the powered USB hub.
The 3 Port USB hub goes to the powered USB Hub.
The SD Card Reader is connected to the Pi's USB.
The fans on the heat sink I'm using could be powered using the pins on the Pi, but I instead connected it via USB to keep the Pi's GPIO pins clear for future use. Any 5V connection would work, the USB port was just what was convenient at the time.
The Amplifier and the Control Panel
The amplifier is easy to wire, just read the silkscreen on the PCB.
The headphone jack goes to the audio out from the Pi. Both the amplifier and the headphone jack use the same port on the Pi. You just have to remember to turn off the amplifier if you don't want the speakers on when you are using headphones.
The battery voltage display goes to the input voltage on the DC power jack.
One button goes to the extended +5V power for the LCD to turn it on and off.
The other button goes to the voltage display power input to turn it on and off.
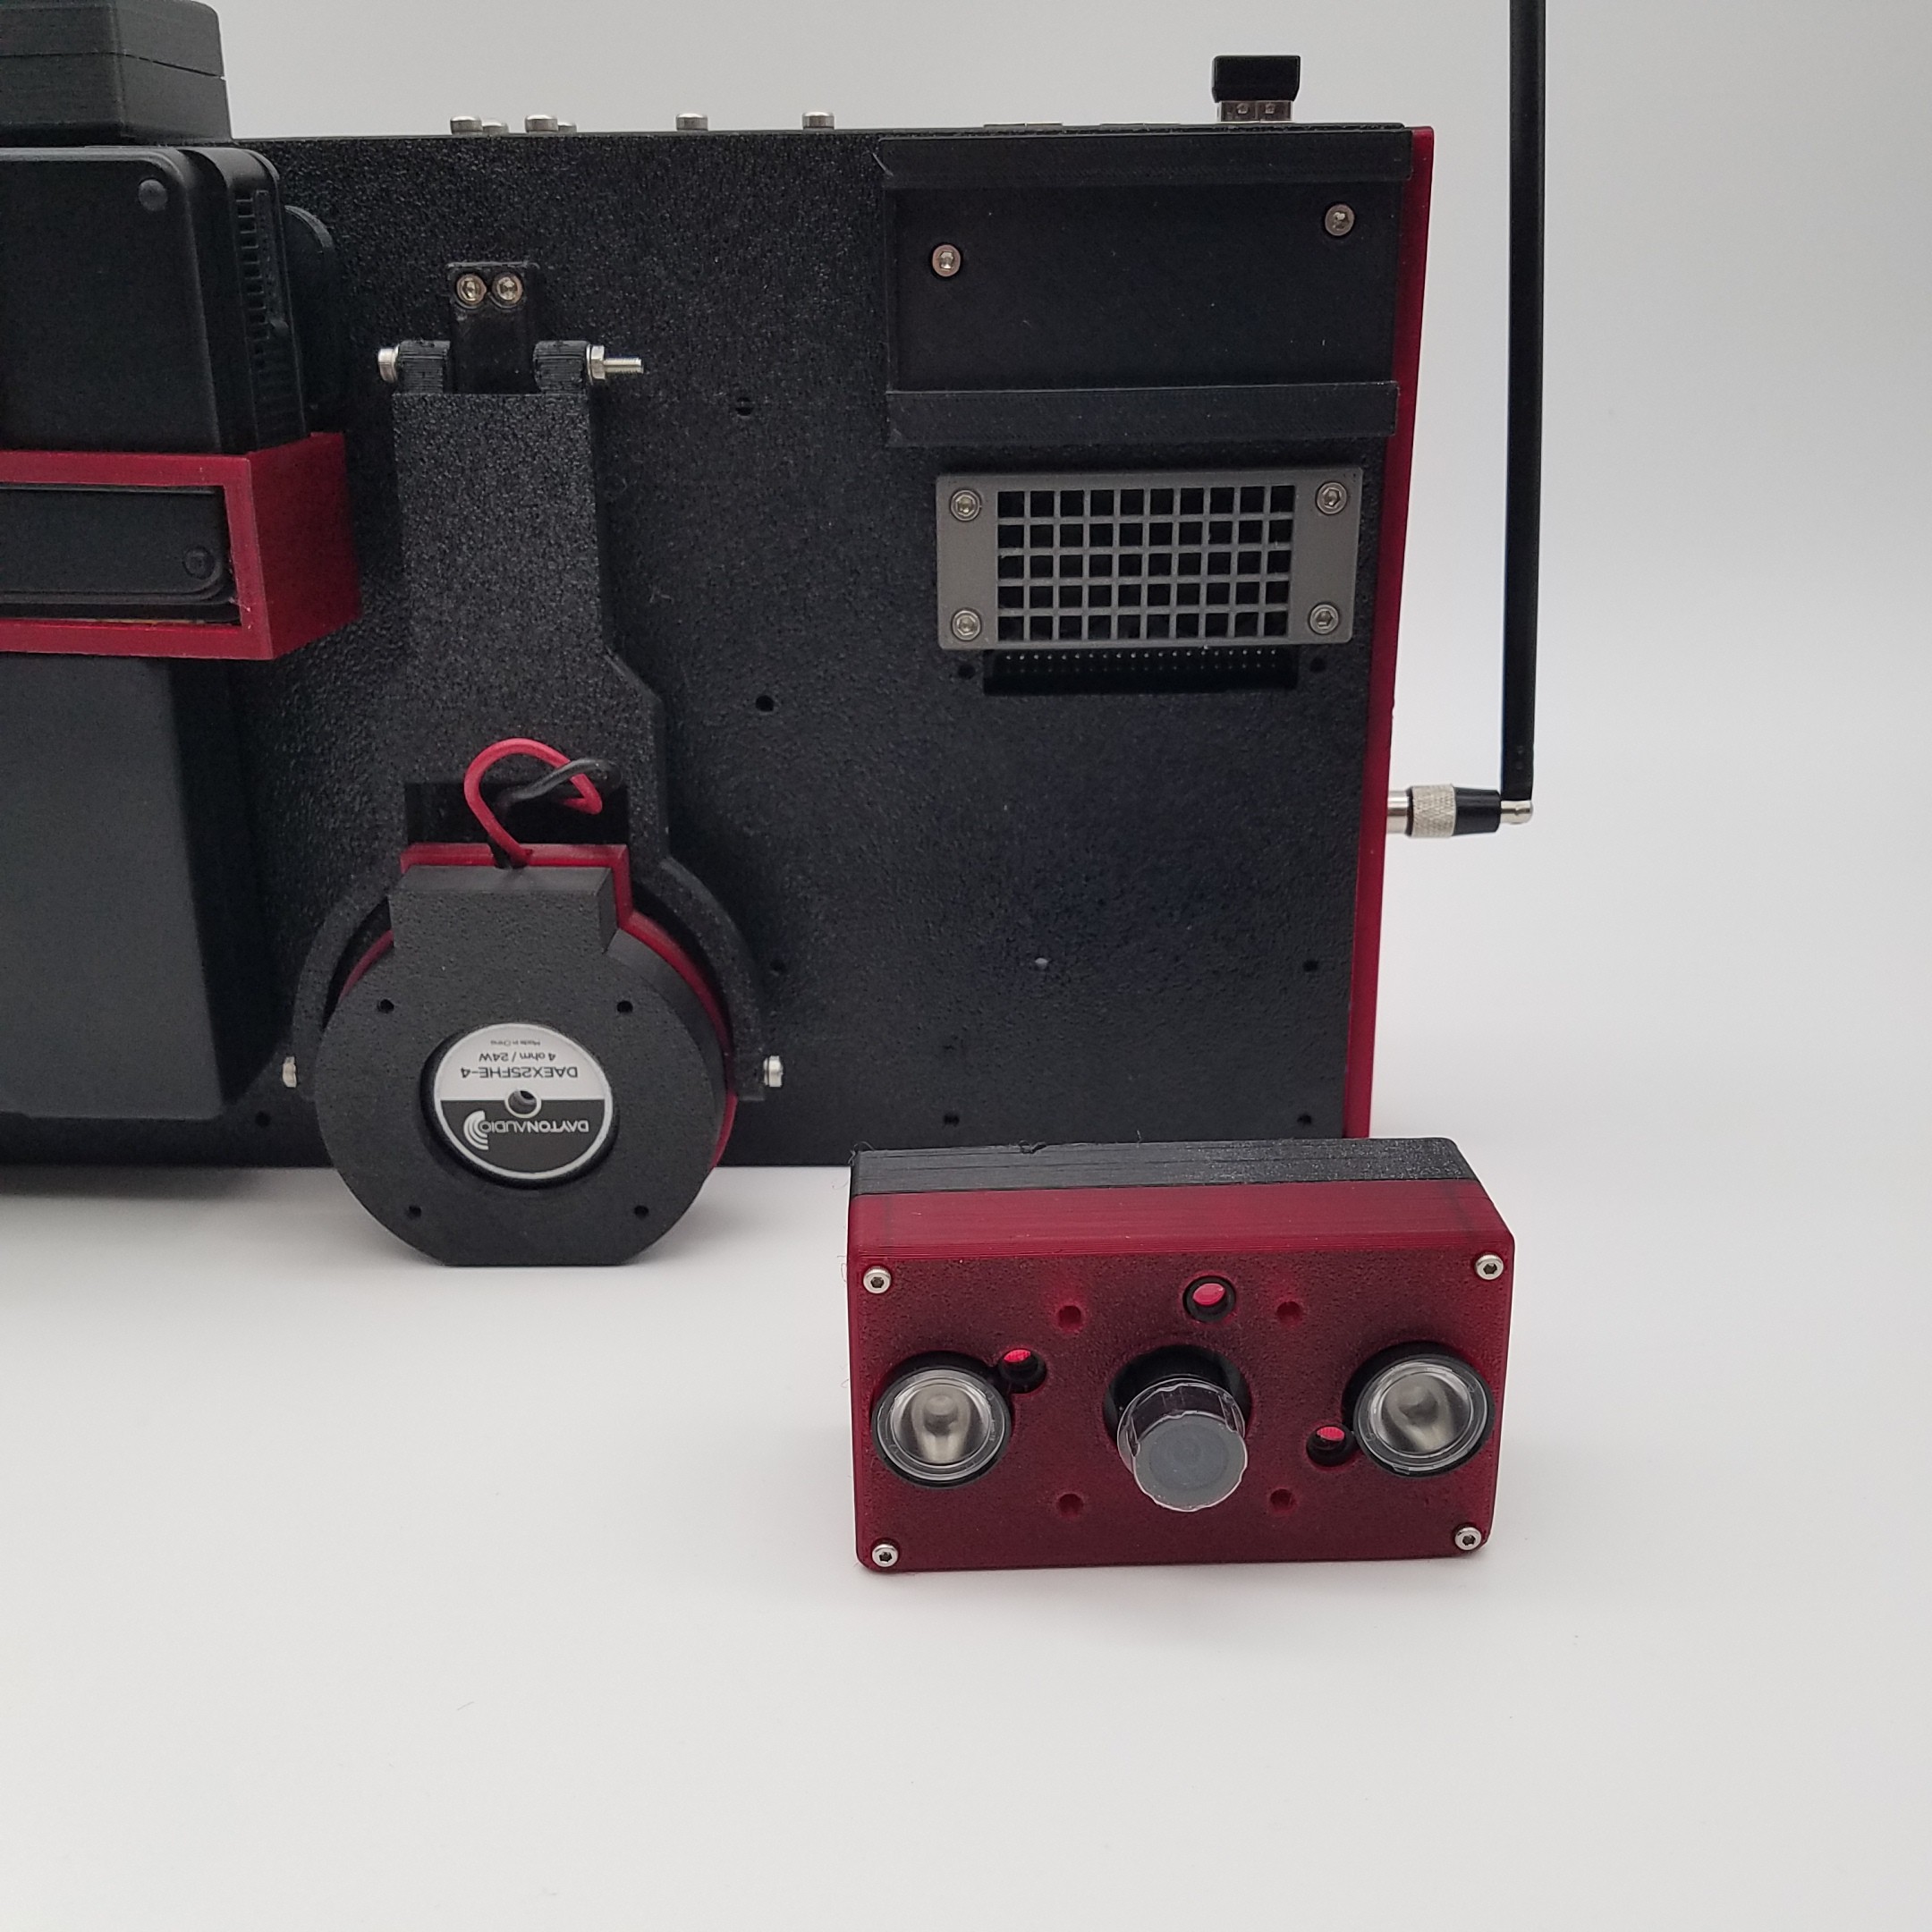
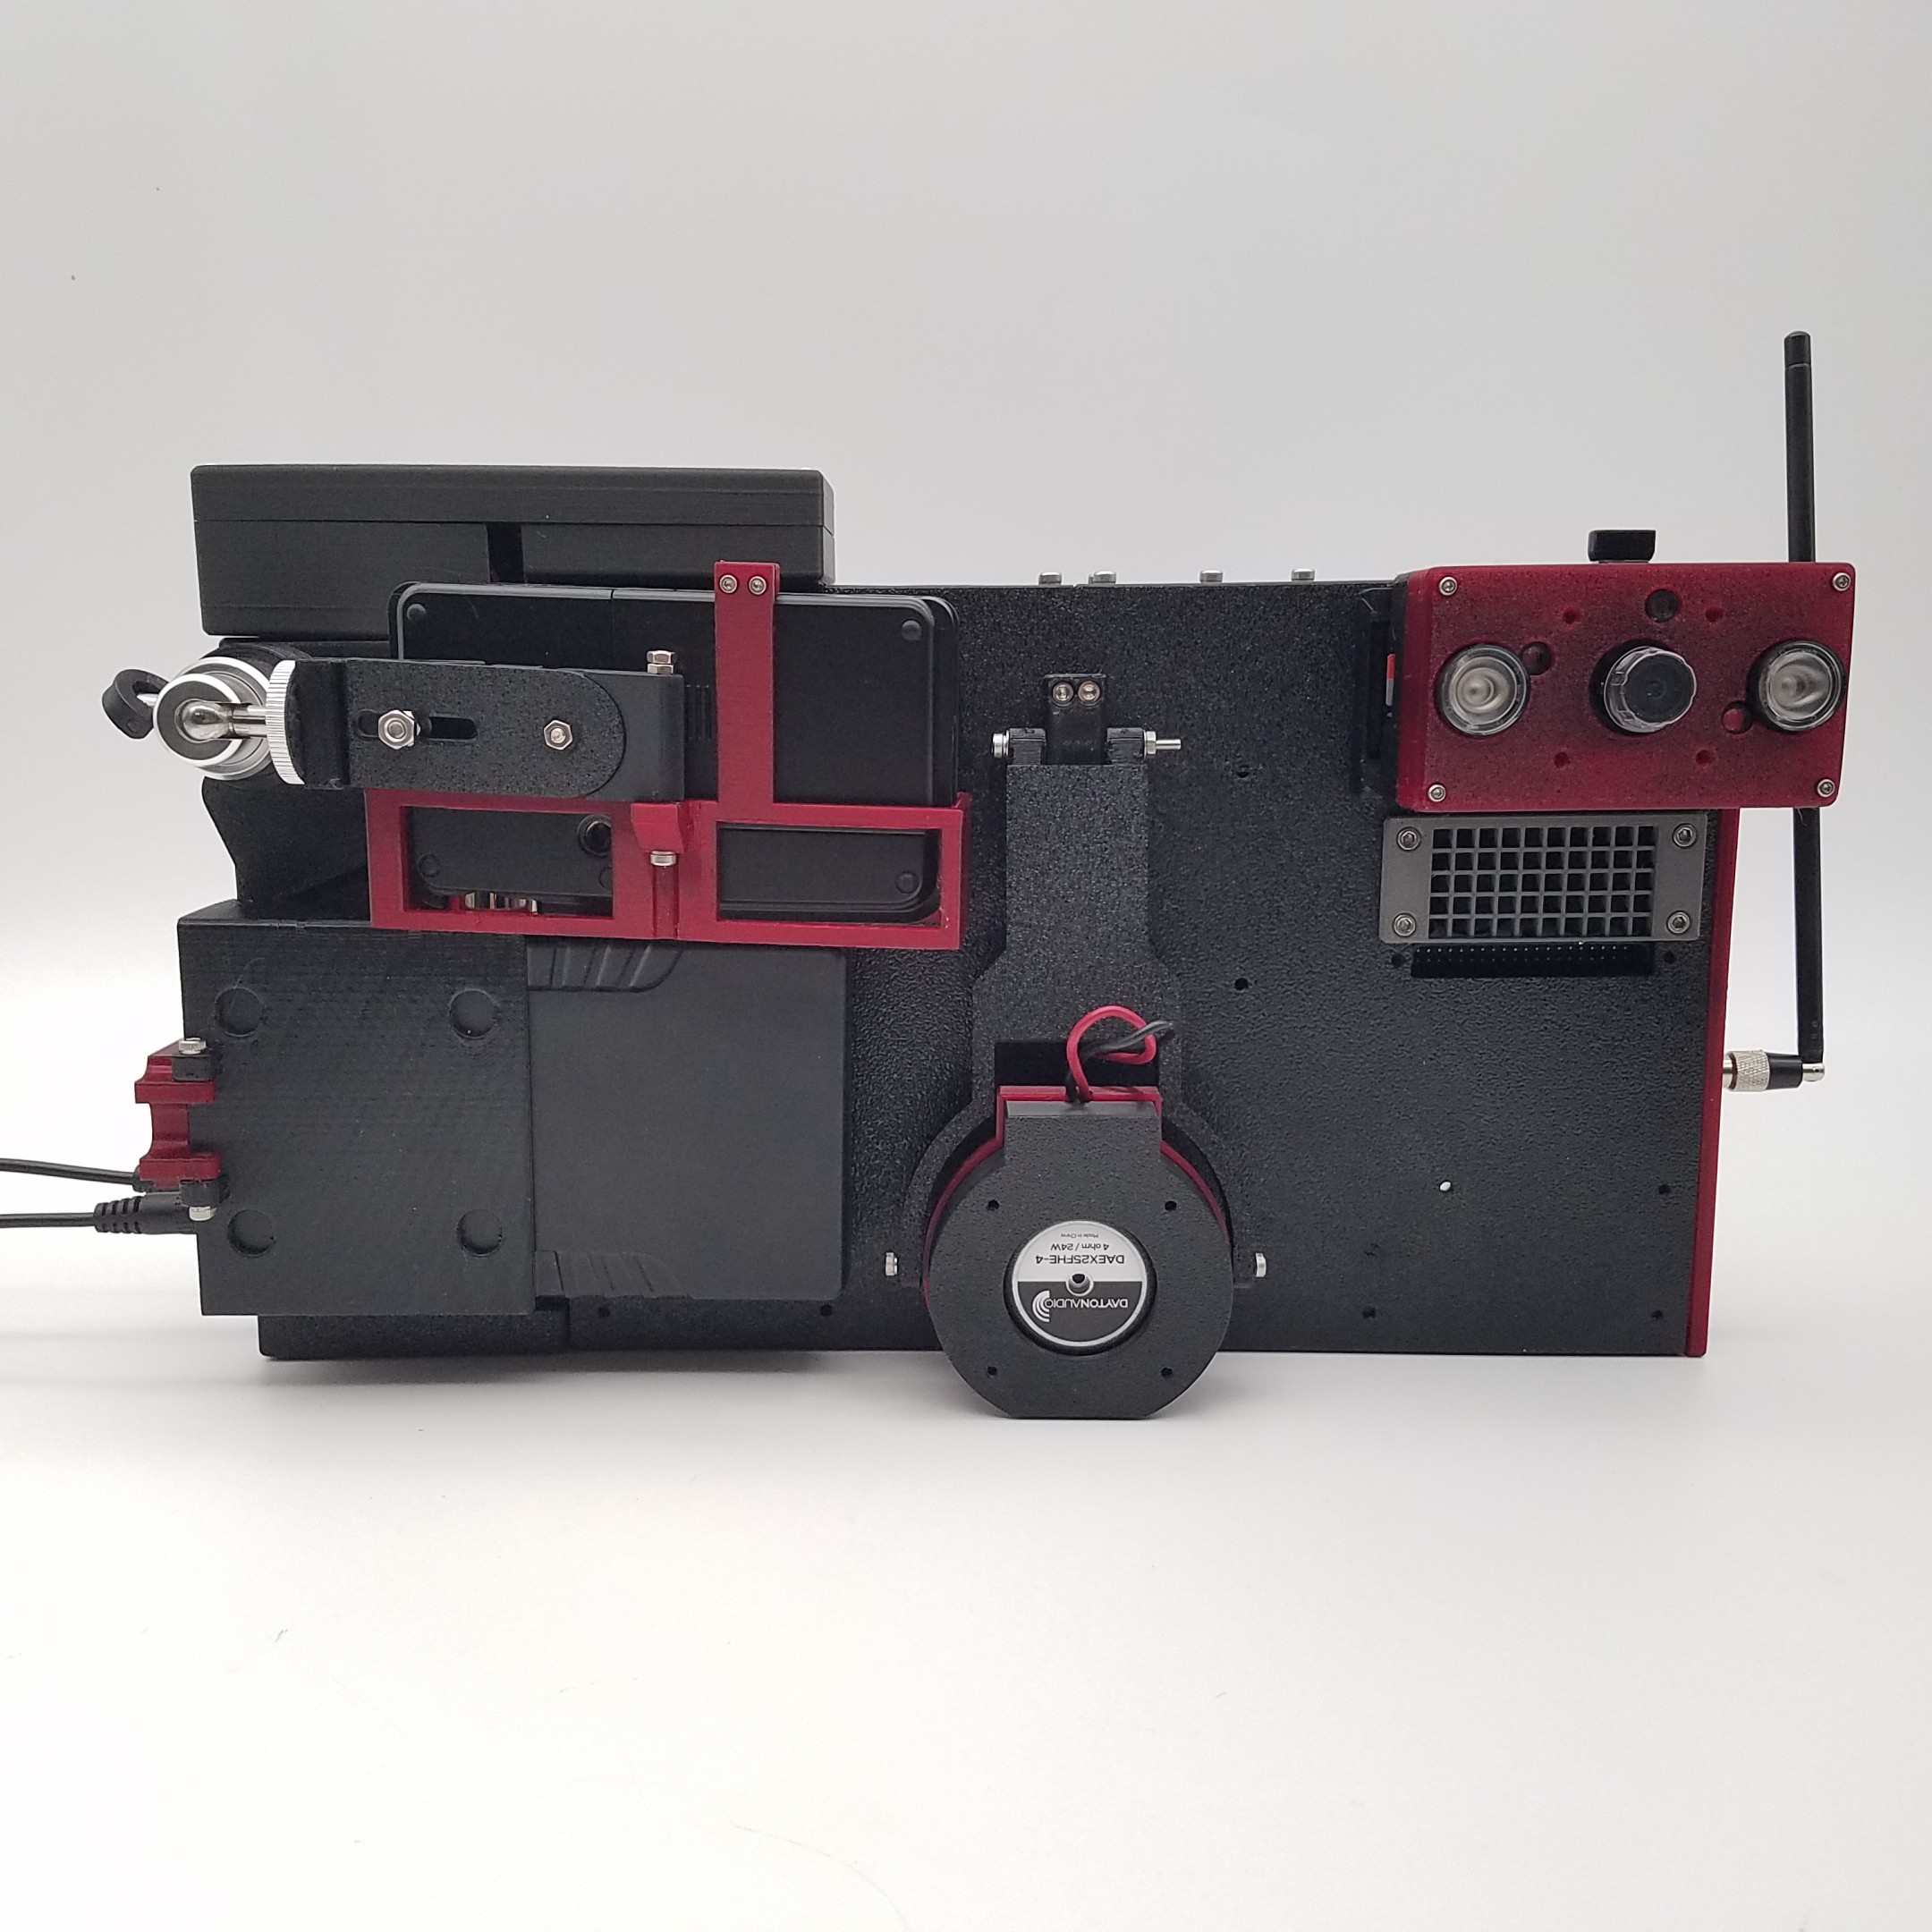
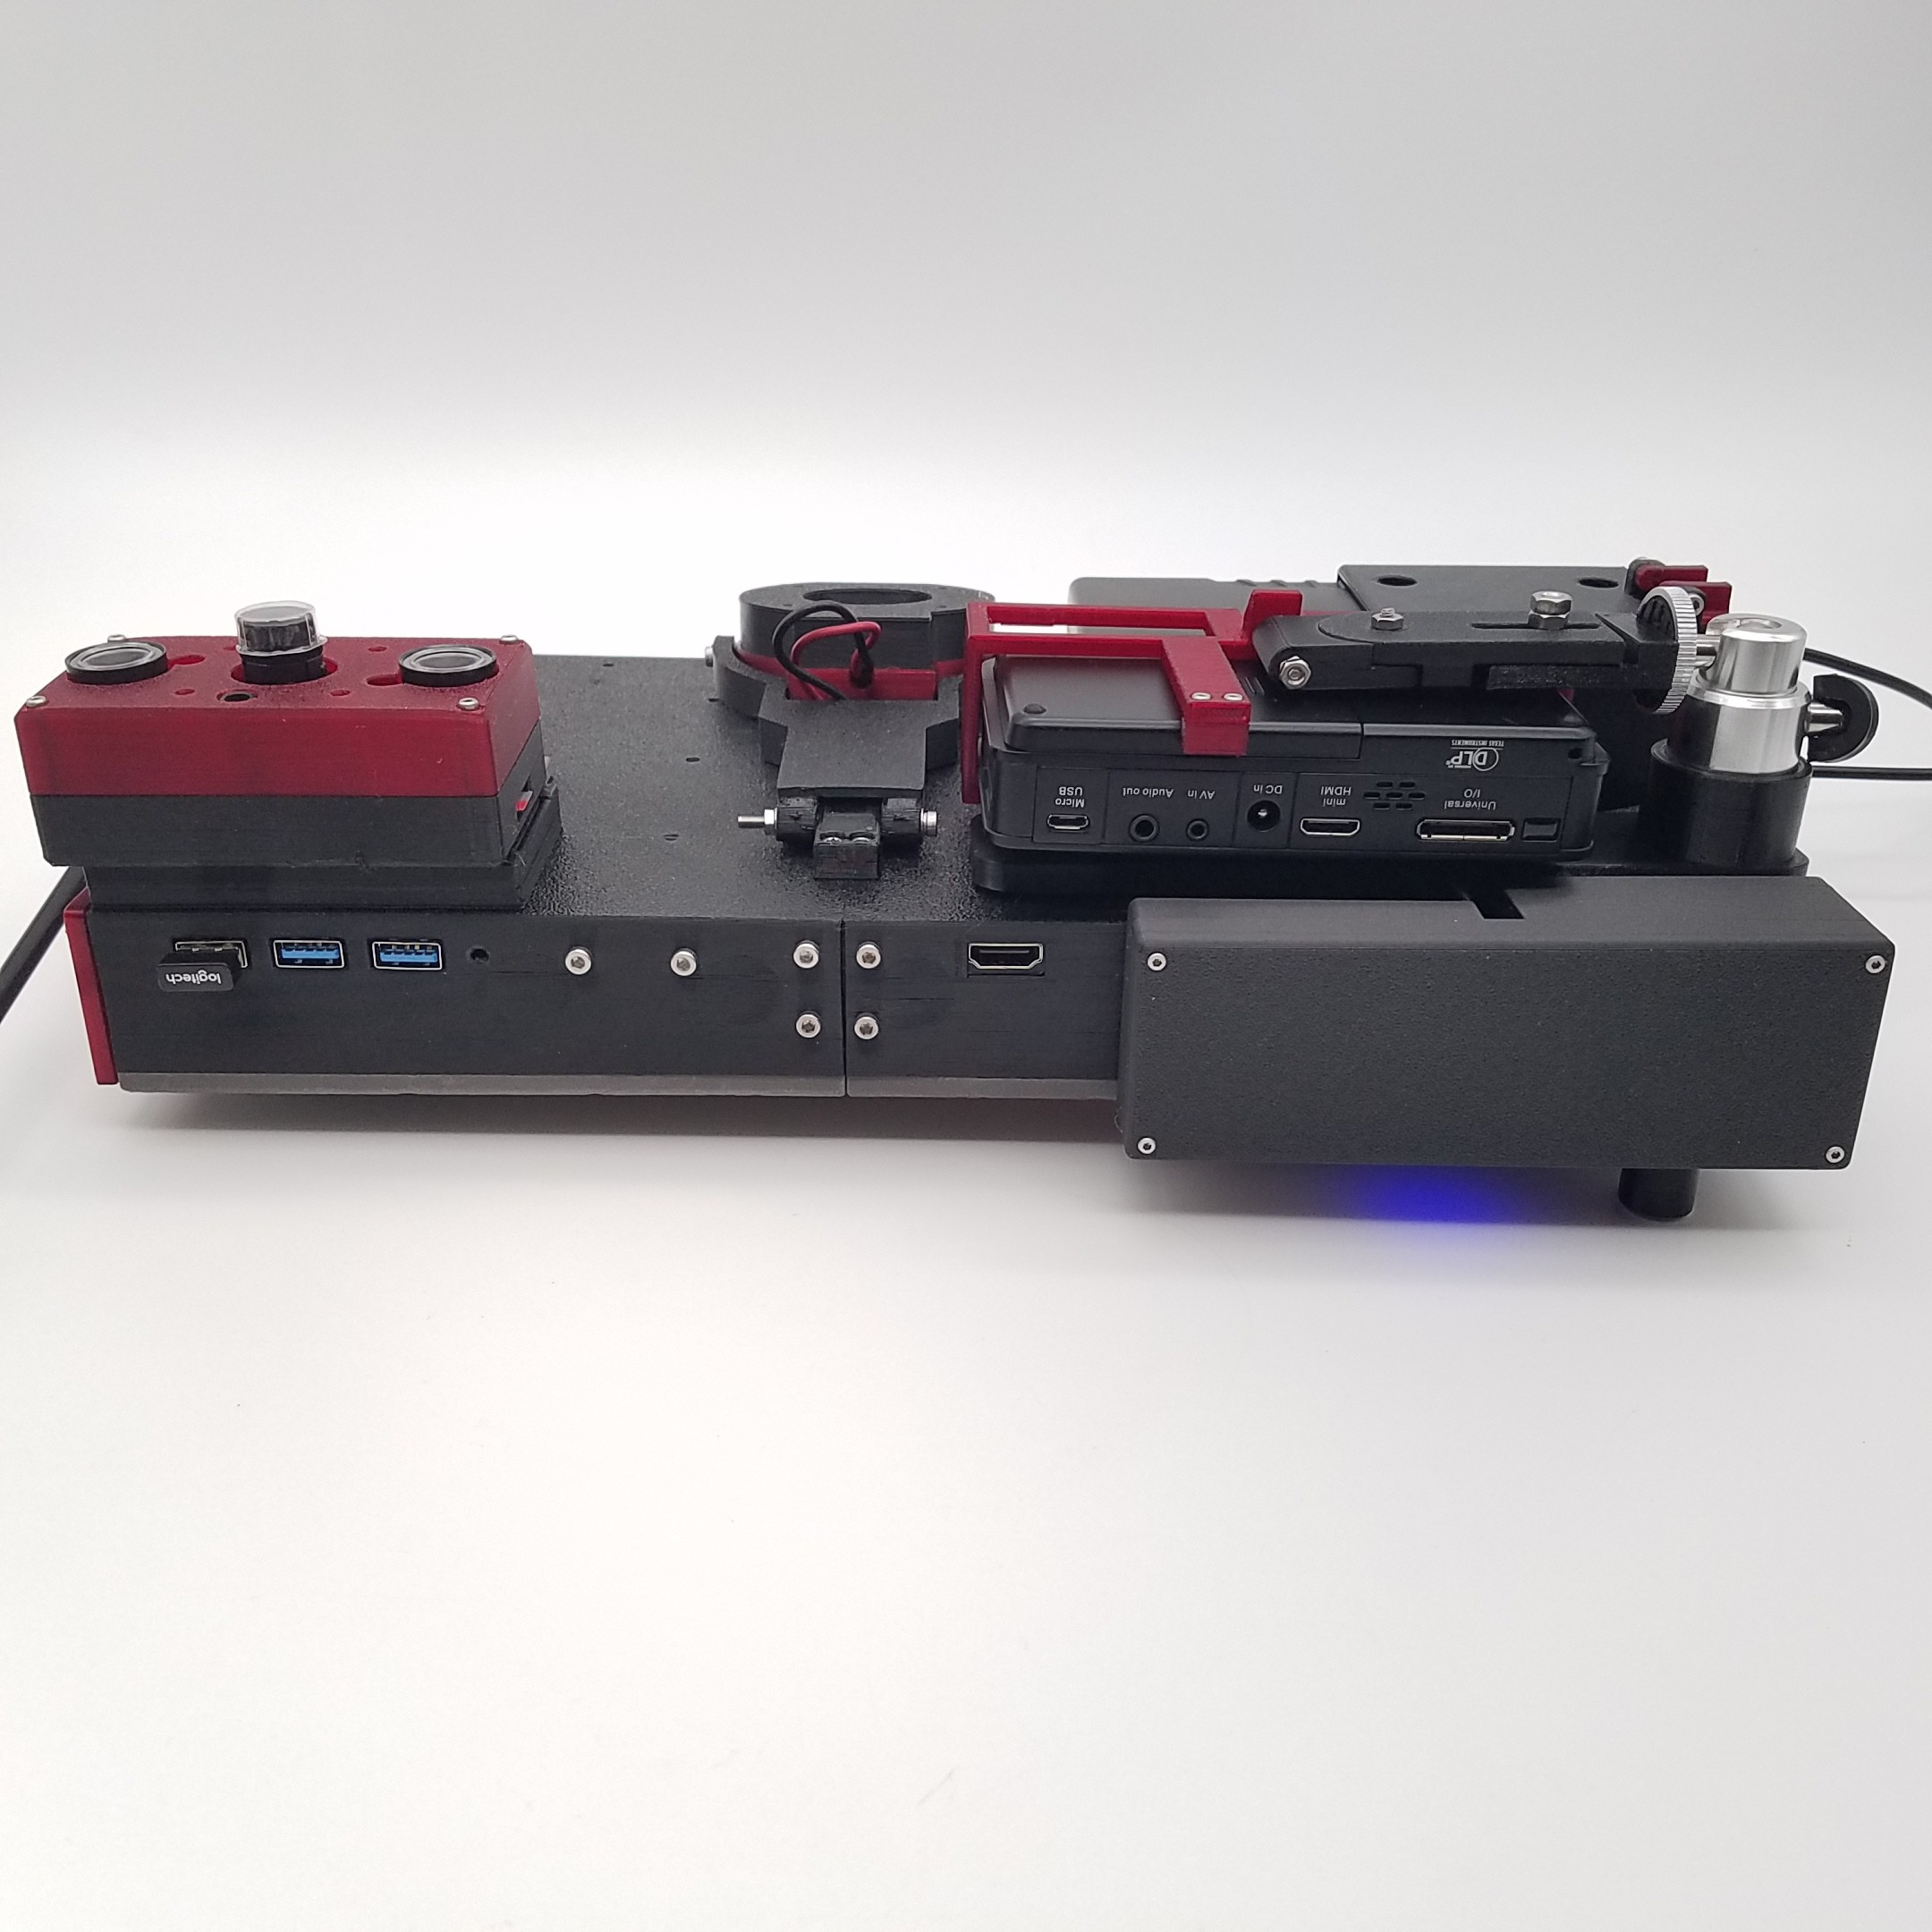
Pictures of the Insides

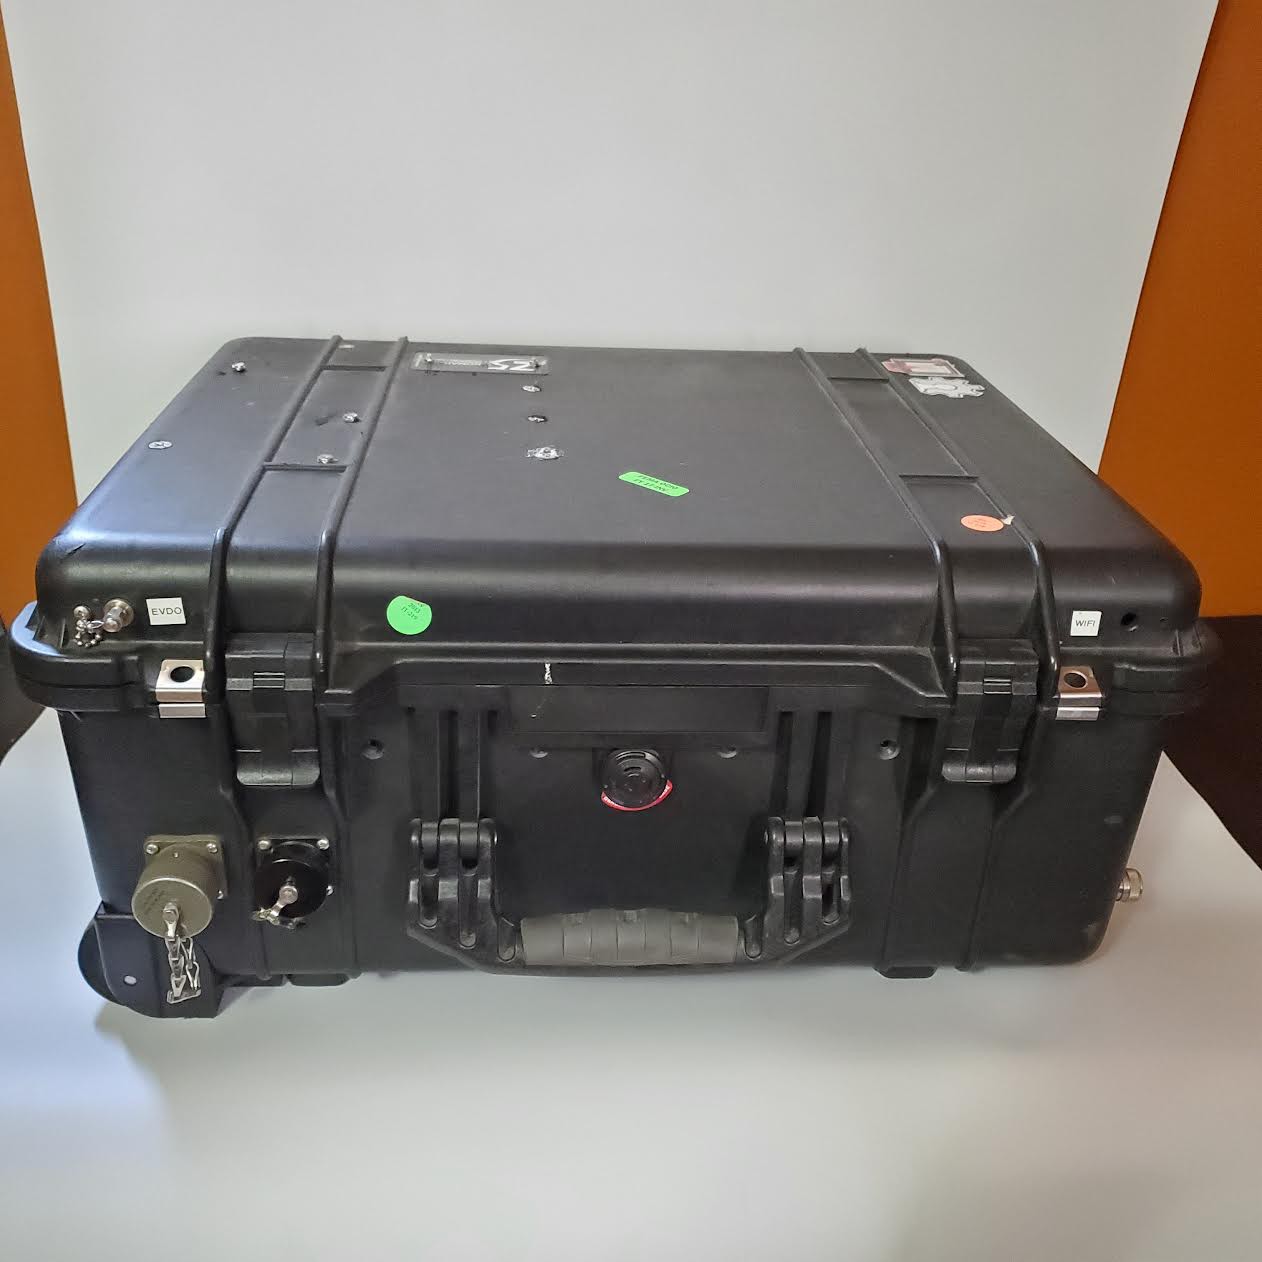
The Case that Started it All
And finally the case I mentioned at the beginning. The real question is does the Cyberdeck fit inside. Um... I may have to move some stuff around.

It'll be Finished when I Stop Adding Stuff to It
As this Cyberdeck is now, it could be considered finished. There are some quality of life changes I will be making in the near future, but it is quite usable in its current form.
This project started with the simple concept of combining a tablet with an oscilloscope but it turned into something far more ambitious. Somewhere after beginning I played through Cyberpunk 2077 for the first time and was inspired by the lore and by other similar projects online. This Cyberdeck really was designed to be a Cyberdeck. In fact, I found the Hackaday Cyberdeck contest this deck was entered into while looking for ideas.
There is a ton I could still add though. In particular, a keyboard that fits the aesthetic would be really nice. This would also have the added benefit of almost doubling the amount of space I have to add tech.
A module for RC is on the list. Perhaps a built in KVM switch so that I can plug in entire single board computers as modules. Or maybe an A.I. with voice communication.
I can't imagine I have thought of everything though. Please do leave a comment if you have any ideas. I will try to check back from time to time for awhile.
Update: 10/162022
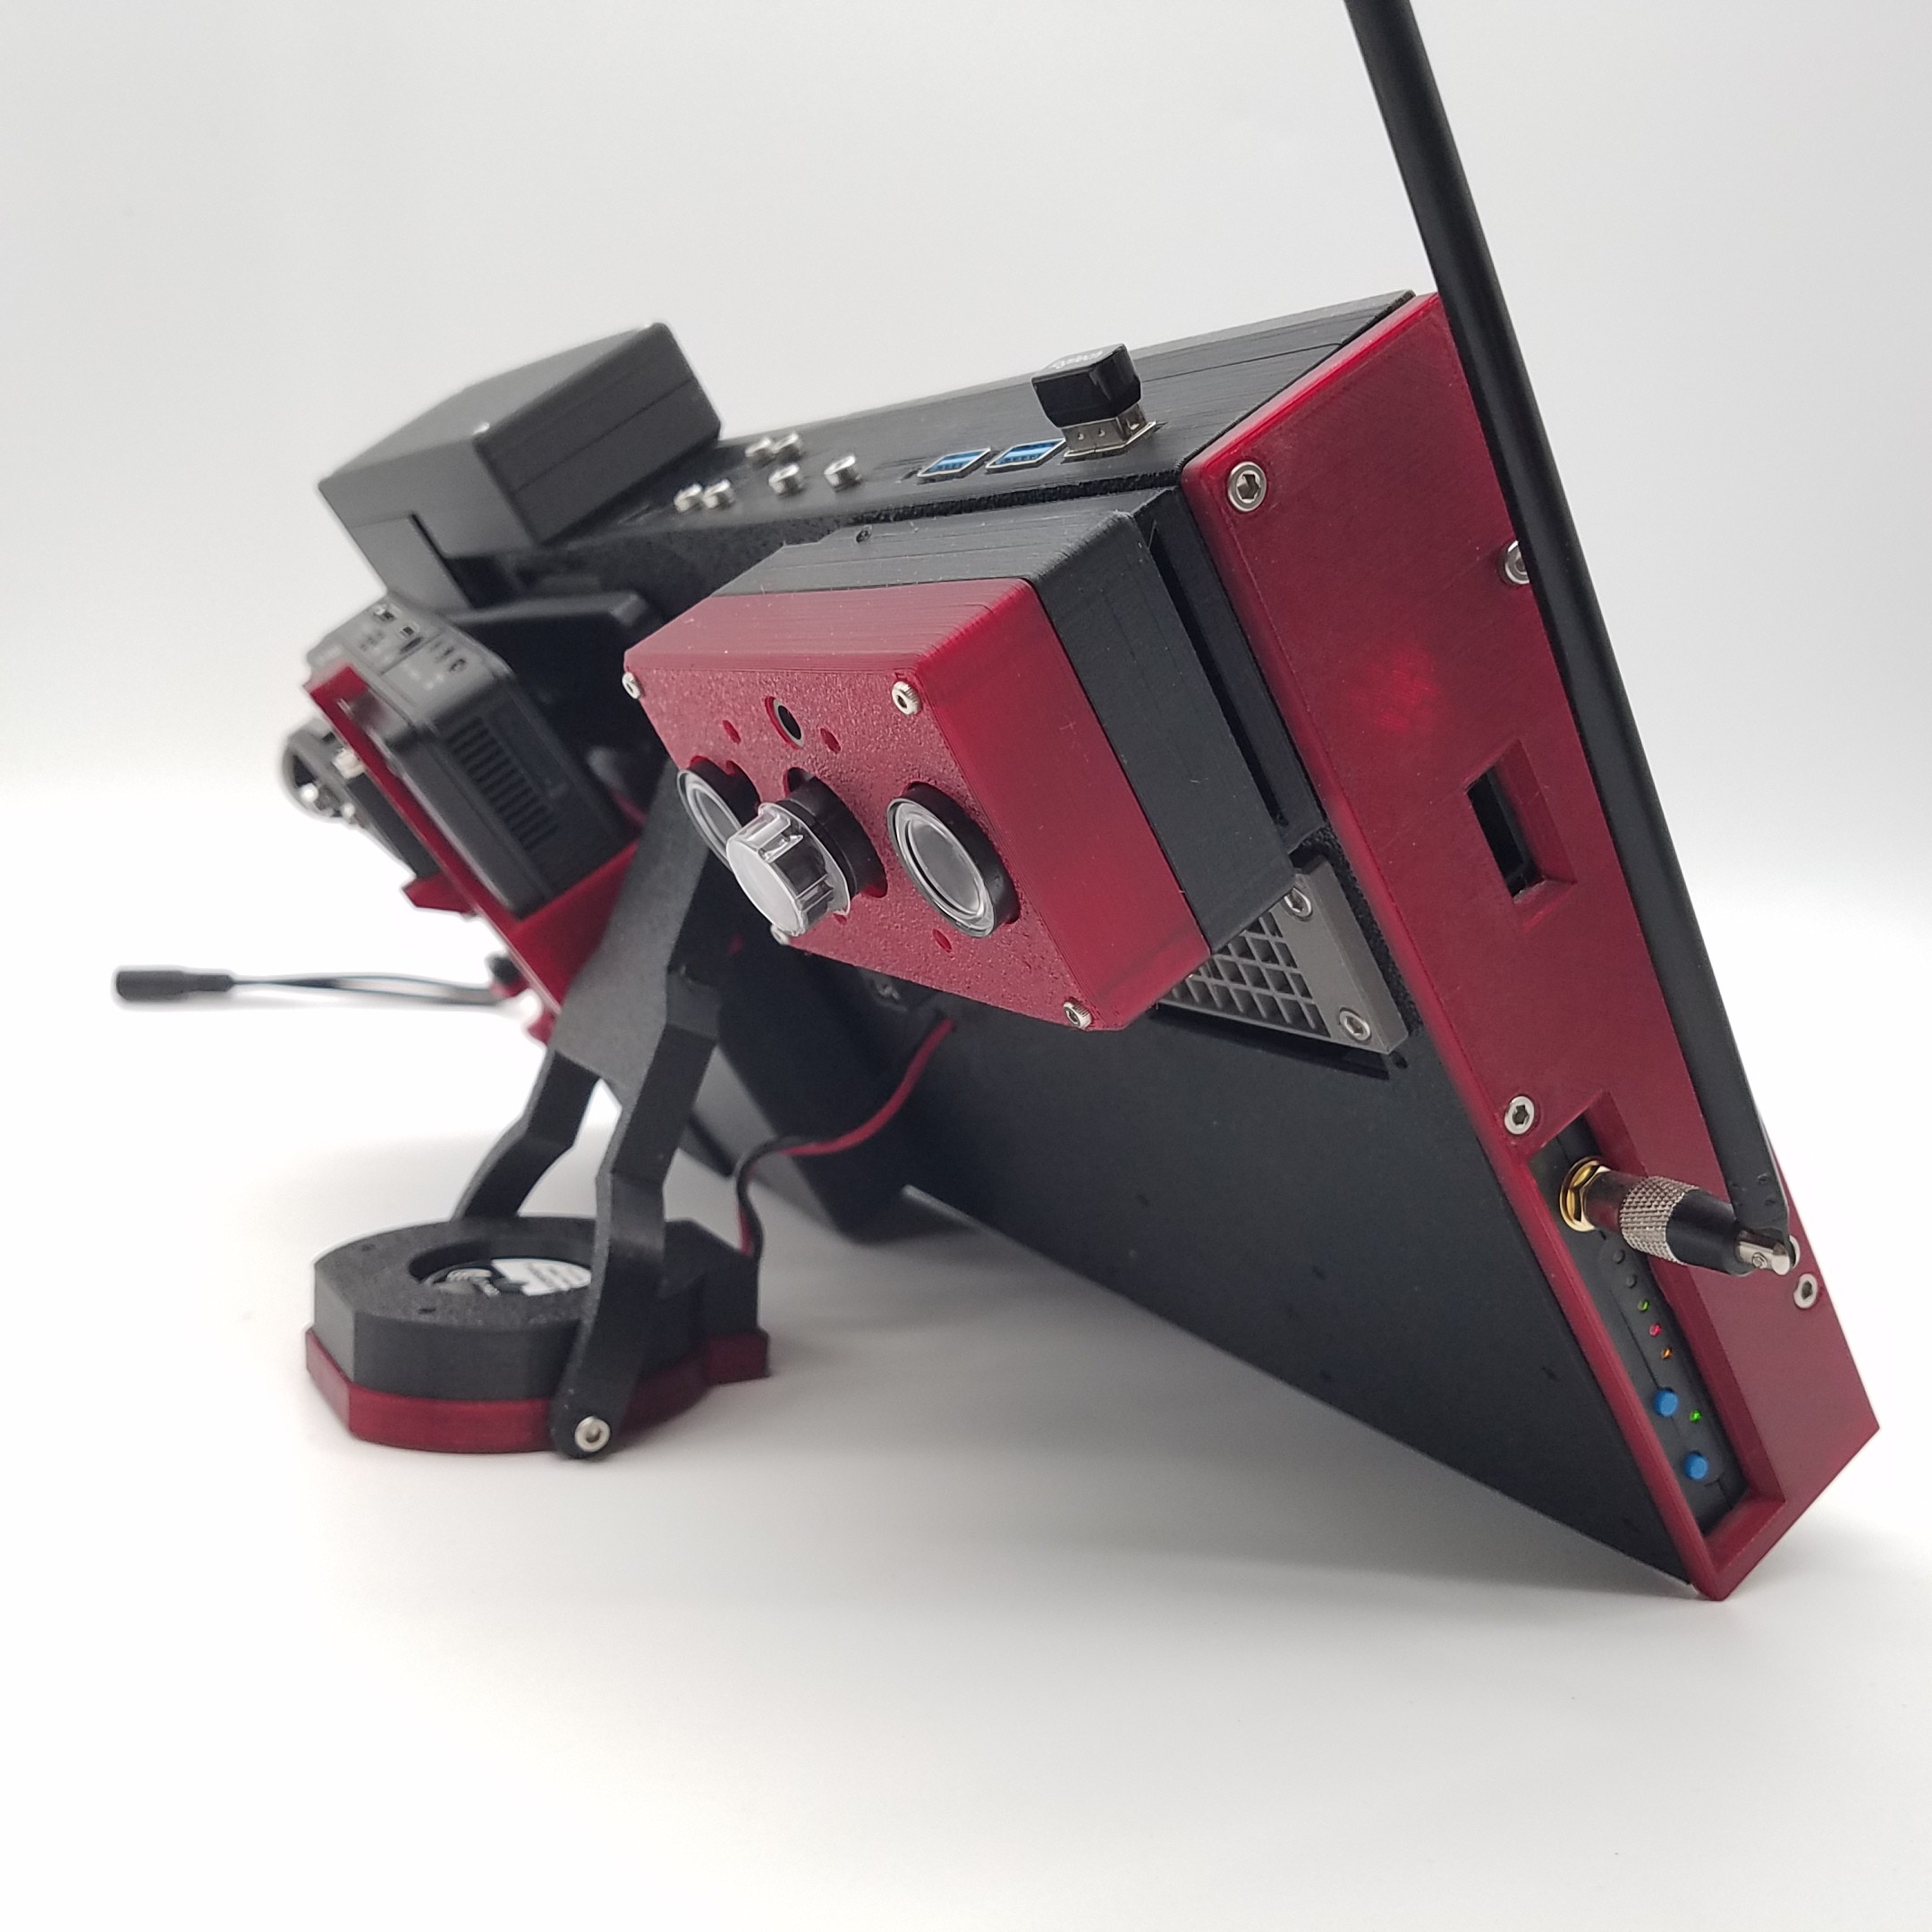
A couple pictures at an angle as requested by someone.
Also, working toward adding a split keyboard. The keyboard is basically done, I'm just waiting for the LEDs to arrive so I can install them. Also, I have to figure out if and how I'm going to attach it.
