 Sp4m
Sp4mFor the past two weeks I've been obsessively iterating over my design for the 'Dockbox'.
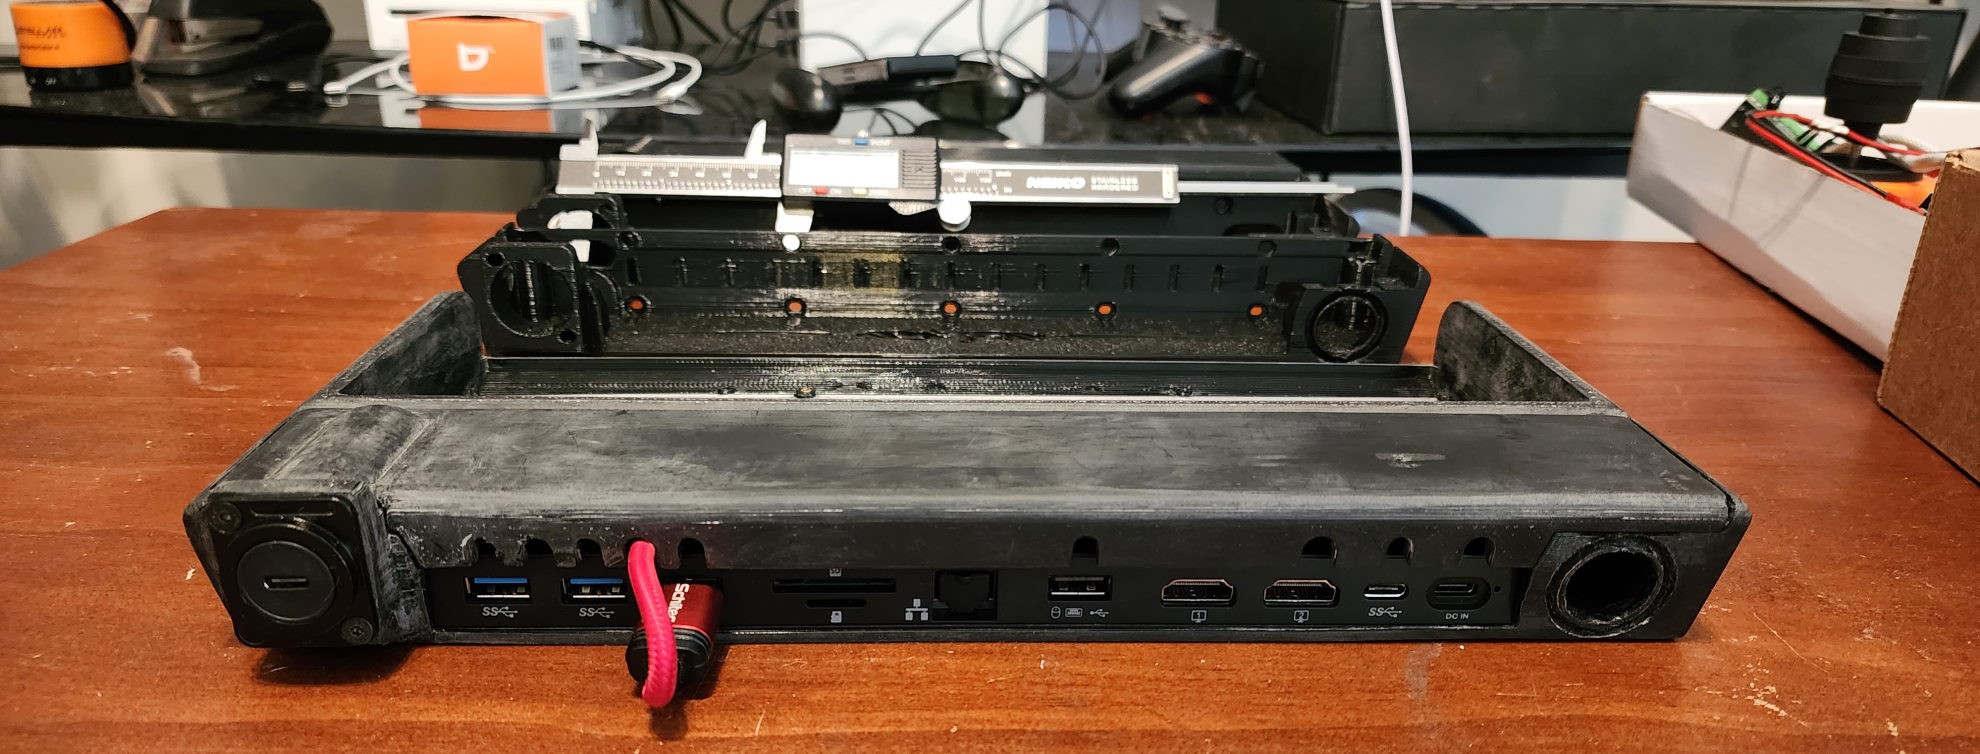
The 'Dockbox' is a modular housing that attaches to the back of the Keyboard Chassis and contains a USB-C Docking station.
For this project, I chose the [NewQ 12-in-1 Docking Station], because it supports dual HDMI out, all the interfaces are on one side, and it's particularly thin, measuring 43.3 mm front to back. Consequently, I was able to build a housing unit that's only 47.5 mm deep (though if I make the keyboard chassis and the 'Dockbox' into a single piece, I can probably shave another 5mm off the size).

I'm hoping to reduce wear and tear on the cabling by using a [Penglin USB-C Panel Mount Coupler], and connecting my device with a quality USB-C cable, rather than plugging the docking station directly into the device. This also means I don't need to have a USB-C Cable flopping around while not in use. Actually, not having a permanently floppy USB cable is the primary reason. Unfortunately, this particular coupler is rather deep, (25mm), and the hub's USB cable needs 40 mm(!) to hold a safe bend, so I also needed to get a [USB Right Angle Adapter]. With the adapter, I only need 39.5 mm space.
To properly mount the Coupler, I had to break the clean lines of the Dockbox, and create an off-set squared box that rises a little above the 30mm 'waterline' present in the rest of the design. This adds a functional asymmetry to the design, which I'm a fan of.
Interestingly, the official [Steam Deck Dock] is only 50 mm deep, though it also needs an additional 15mm to safely loop the cable back. Due to the ubiquity of the official hardware, I will also make a housing unit for it once I've settled on a final design.
I spent a long time sanding the components to get a quality finish, and this to lead me to design improvement opportunities.
1. Places where flat surfaces run into concave curves and angles create sanding challenges.
2. The "Lid" component of the 'Dockbox' has visible seams where it contacts the 'Base' component. This is unsightly.
Delightfully, I was able to solve both of these problems by moving the seams to the bottom of the device, and the point where concave surfaces meet.
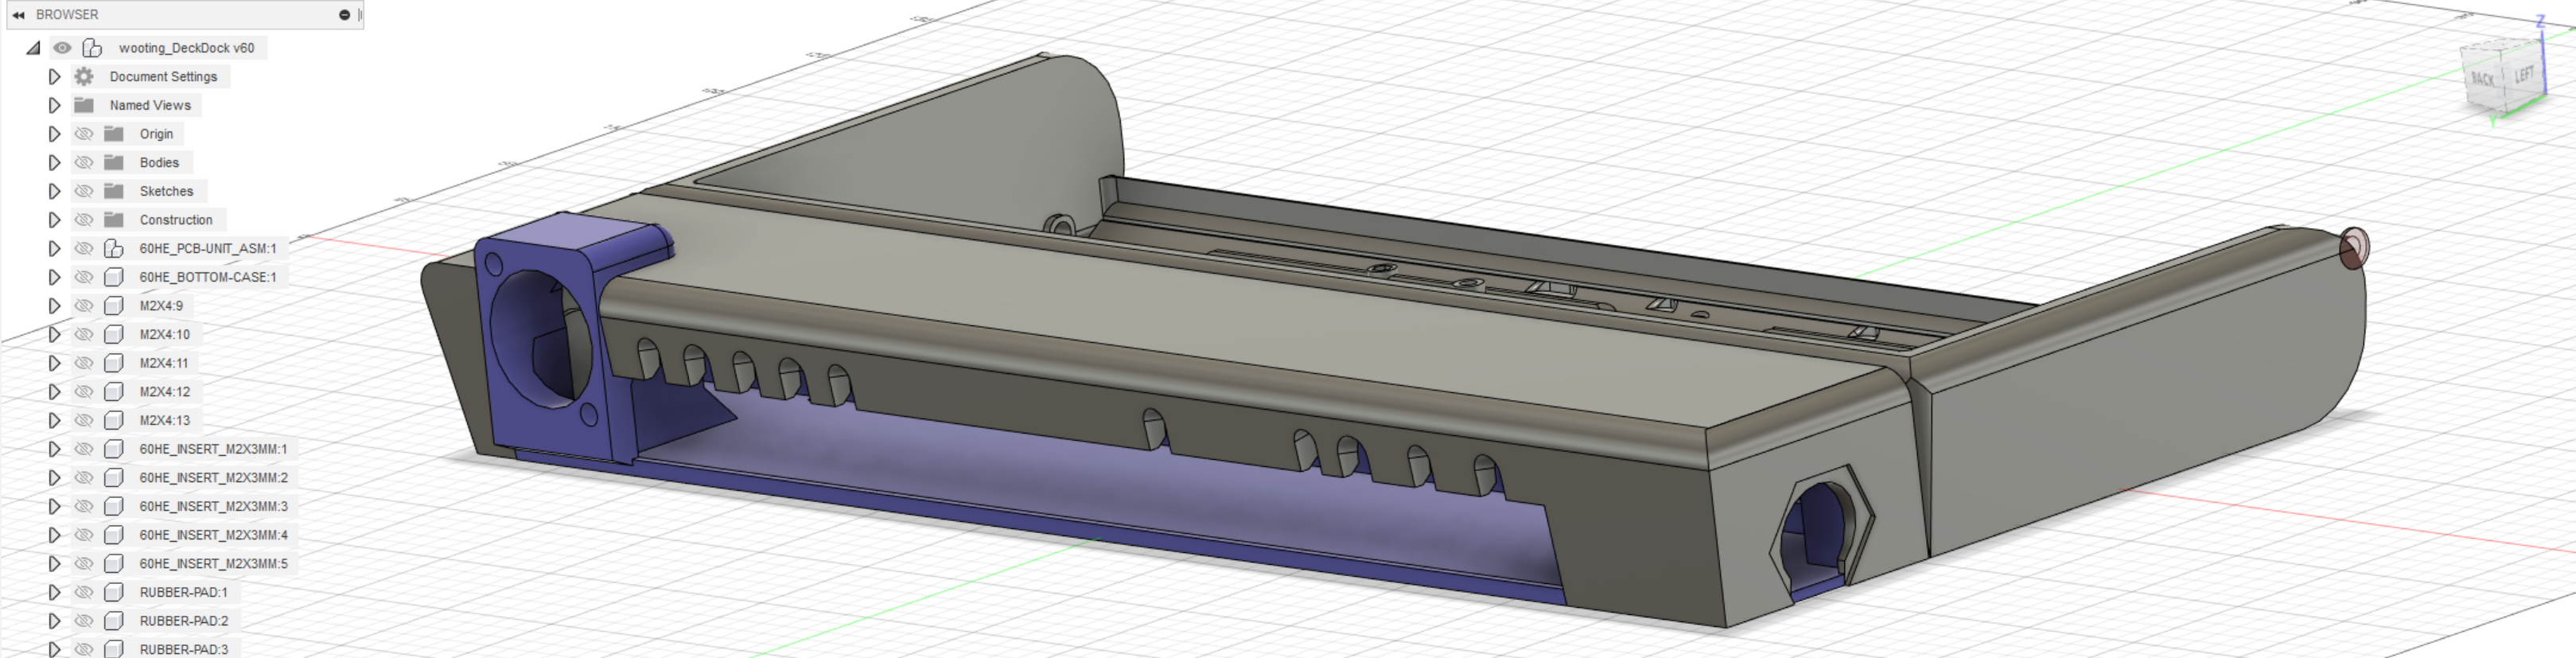
I haven't printed this version out yet. I'm wondering if I need to establish a 'standard' spacing for chassis screw-inserts, or if I can just place them where they fit, and make my modular components location-specific.
The final component I need to add to the 'Dockbox' is the laptop hinge. I spent a long time trying to engineer my own laptop hinge, until I finally performed a google search on how laptop hinges are made, and I realized that I could just buy one. While generic laptop hinges aren't expensive, I was able to cannibalize an old broken laptop that and get the part for free!
As of now, a few questions remain:
1) Do I affix the body of the hinge to the 'base' of the 'Deckbox' or the 'lid'?
2) Do I use the wide m11-x hinge that I have, or do I design it for a more generic part?
3) Do I actually *NEED* a laptop hinge, or should I just build a device-supporting nook into the lid, like the official Steam Deck Dock has?
A device-nook has a lot of aesthetic benefits. It means the HID-cluster isn't permanently committed to a clam-shell design. It would be equally at home plugged into a desktop as it would a Steam Deck or Dex-Compatible mobile device.
The benefit of a clam-shell device mount is that the Steam Deck can be safely carried with the keyboard, and even used while in motion... however, I'm not sure this is a necessary feature, as long as the HID cluster and Steam Deck can be easily transported together.
Discussions
Become a Hackaday.io Member
Create an account to leave a comment. Already have an account? Log In.