 Sp4m
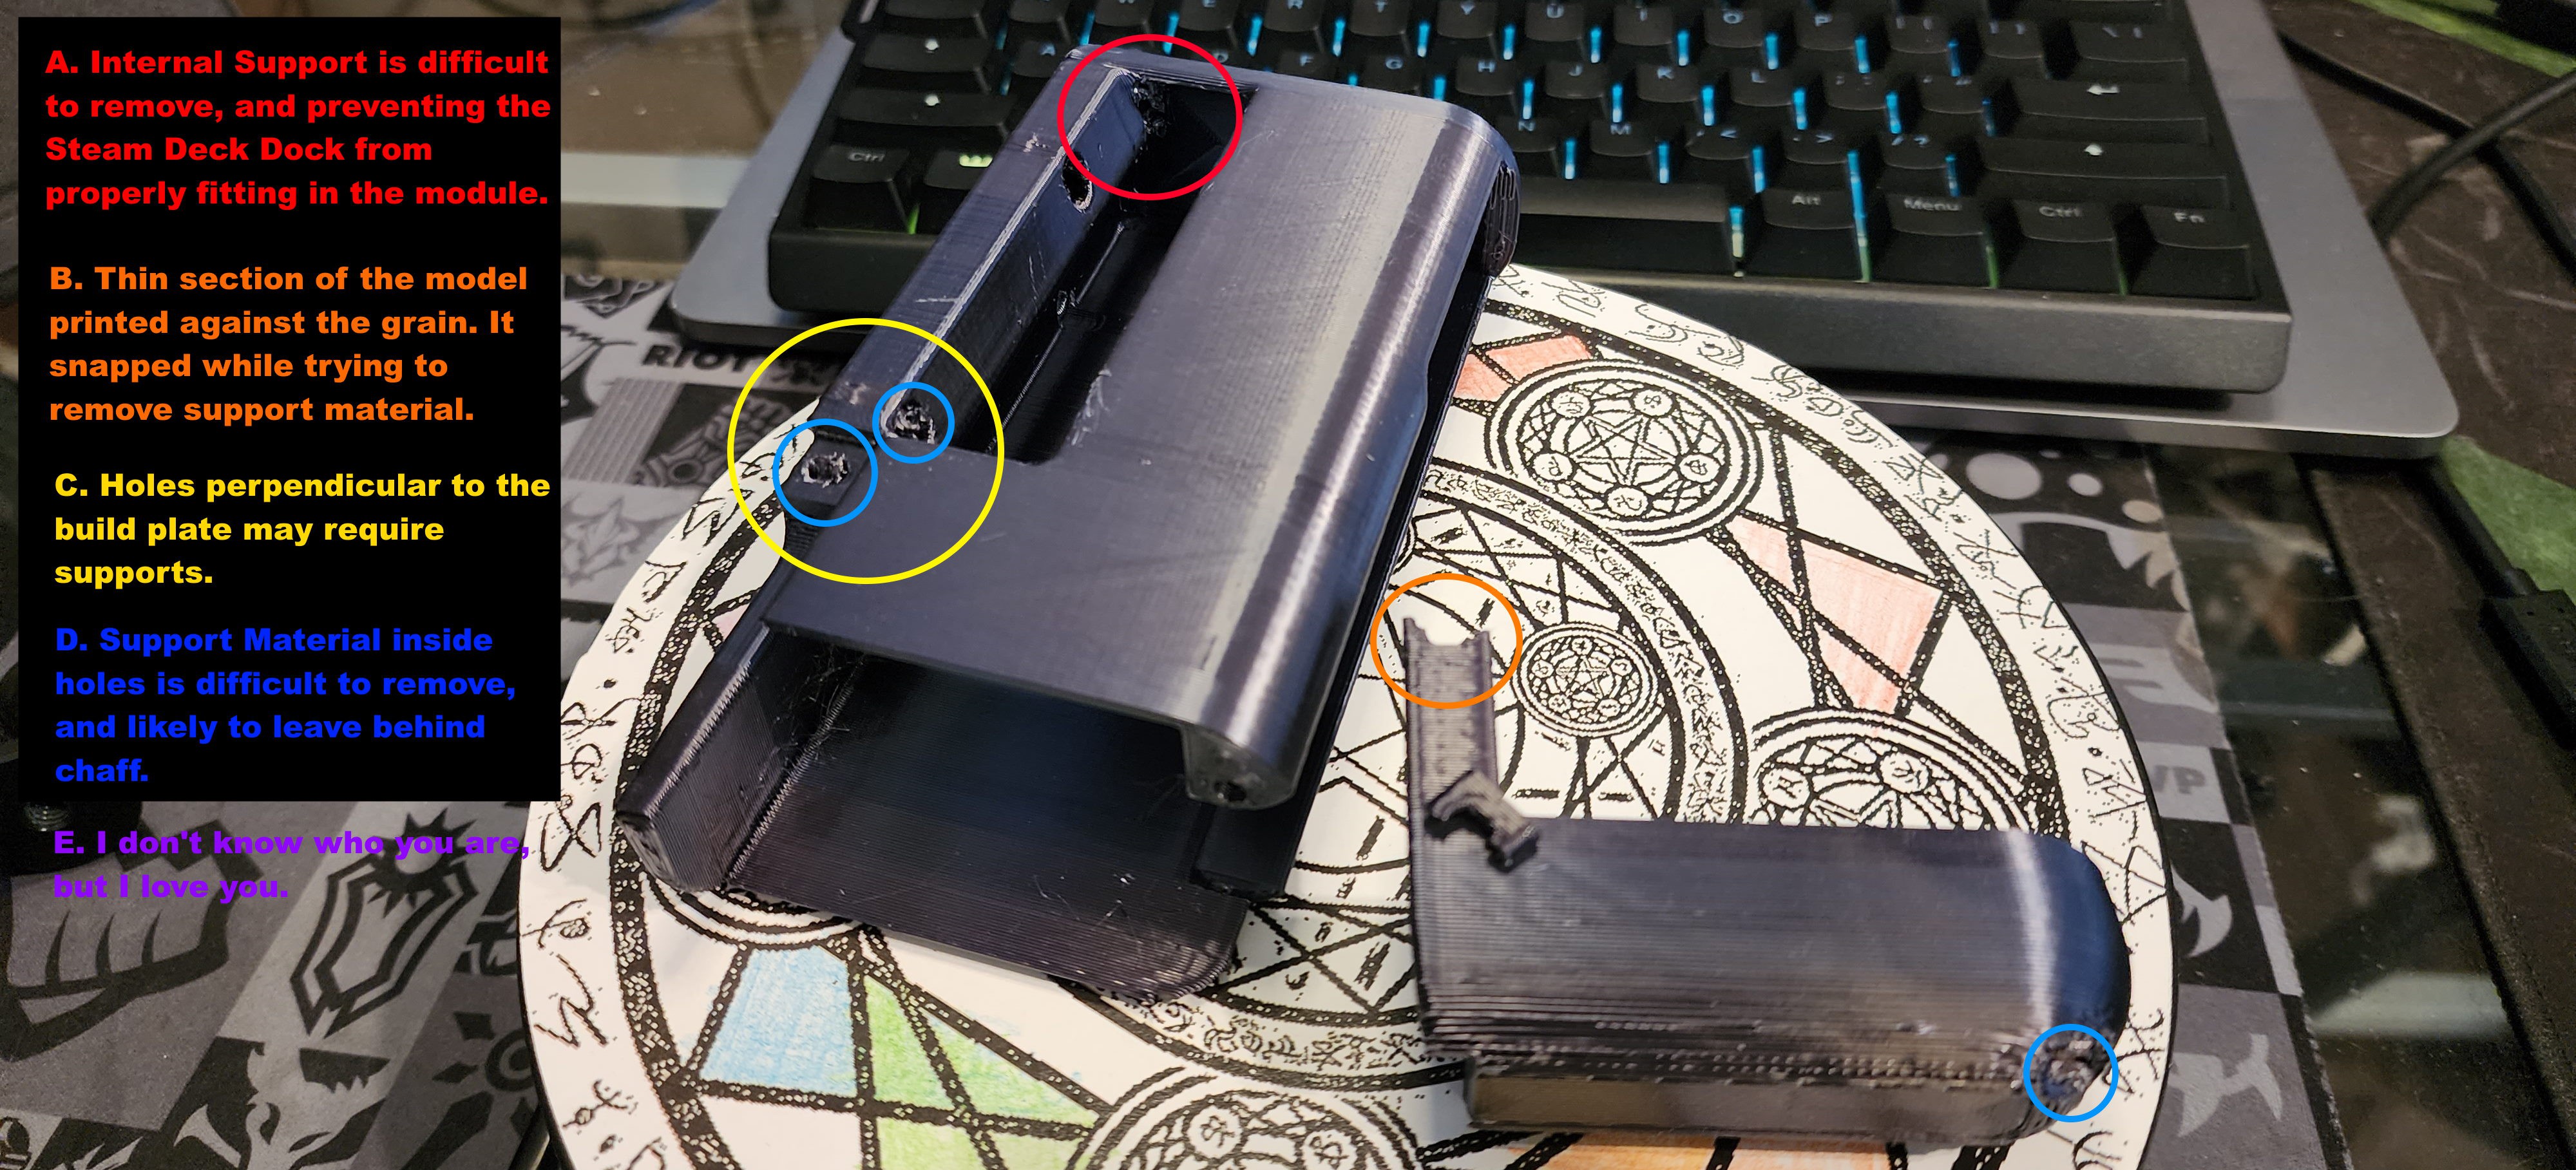
Sp4mLast night I ran my first print of the Steam Deck Dock RHS Module, Version 2. I failed to design it in a print-friendly way, and I sliced it in a hurry. The consequence is FAILURE AND SHAME. So, for your benefit, I will share the lessons I should have already known.
1. Design the object with FDM printing in mind.
a. Pick a face that will be on the print bed, and build it to minimize the need for supports. ESPECIALLY supports that aren't on the build plate.
b. Keep the 'grain' of the layers in mind. Any thin parts should be build in alignment with the 'grain' of the layers, or the model will break, and it will rightly judge you.
c. Try to align screw-holes with the build plate. This will help prevent the need to supports inside little holes.
2. Don't be lazy with your slicing.
a. Use Automatic Supports only for VERIFICATION of surfaces that may require support.
b. Don't put supports inside screw-holes, peg holes, or any other hole too small to stick a blade into.
c. Verify temperature settings when using new filament. Different filament from different brands have different printing requirements. This means you need to spend time testing new filament to help determine the right temperature (and other settings) to print it.
Improvement Opportunity: Color Code the letters above. But ain't nobody got time for that.
I had a feeling this print wouldn't come out right, so I decided to try out a new "Black Silk" filament, to see how it looks, and how it responds to sanding.
Discussions
Become a Hackaday.io Member
Create an account to leave a comment. Already have an account? Log In.