 Sp4m
Sp4mI recently tested out "Black Silk" filament, and found it to be more like "Purple Stripe" filament, but that's okay!
I decided to use the parts for a painting test!
The power bank was already sanded, 150 grit dry-sanding, followed by a 400 grit wet sanding. It felt pretty smooth, so I was pretty sure the painting would go well.
The Steam Deck Dock Module wasn't sanded yet, so I figured I'd see how it looked if I painted it, then sanded. FOR SCIENCE.
Spoiler: It looked bad.
I gave them both a base coat of Citadel Bone White Primer. I used that primer because it was the closest. It's a very fine primer, and since I'm hoping the paint can fill in some of the layer-lines, it was probably the worst one I could have chosen.
Once that was try, I applied a few layers of high gloss Rustoleum Ultra-Cover.
I let the paint dry for a couple of days, which was only possible because I had a camping trip. Otherwise I would have been much more impatient.
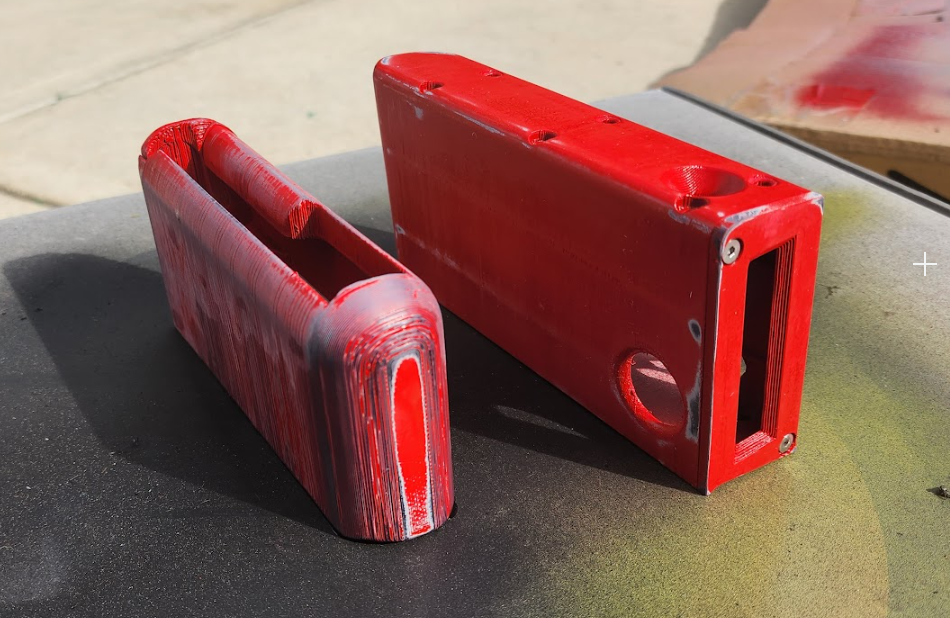
I sanded the Steam Deck Dock module (Left) by hand with a coarse sanding sponge, then a fine, wet sanding sponge. You can see that the uneven texture immediately caused the red and the primer to strip off, leaving the dark gray/purple of the "black silk" filament of shame behind. This is more or less what I expected, but the patchwork look can be pretty cool, if you can get past the layer lines.
I wet-sanded the Power Brick Module with 1000 grit sand paper on my Harbor Freight hand sander, and I learned that I should have hand sanded that one. It's still looking pretty good, but places where I applied too much pressure stripped all the paint off. I was hoping that this would sort of be the smooth, shiny finish that I heard you can get with high-grit sand paper, but I think I'm going to need to give it another coat of paint and try again.
Meanwhile, handling these modules brings more "Improvement Opportunities" to light.
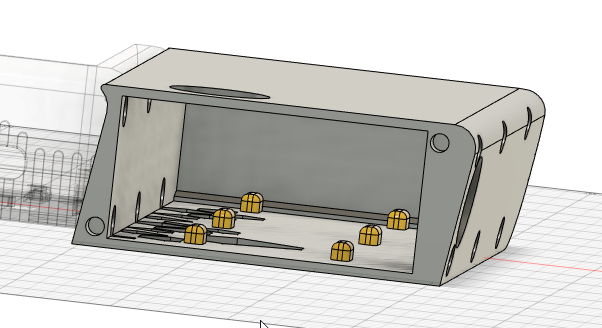
The Power Brick Module can be improved by removing the "support/guide rails" from the top of the box, and augmenting the distance/size of the ones on the bottom. That will give a cleaner finish to the top, AND make space to run wires, if I were so inclined.
The 'End Cap' of the power brick can use some more style, but it's completely stand-alone, and I can iterate on that separately.
The Steam Deck Dock Module had a lot more improvement Opportunities, though it was subtle.
I moved the RHS mounting hole all the way to the right of the module.
This makes the opening for cable management a little more than 4mm tall, but that should be fine.
I also cleaned up the Geometry a bunch, which probably isn't apparent, and made a nice rounded nook for the Steam Deck Dock's permanent Cable to wrap back through.
I really like the short form factor with the Steam Deck Dock on the Right. The handle is nice too.
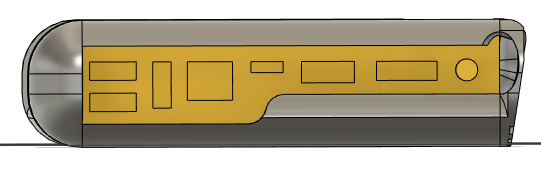
I think I can smooth out the design by pulling the back end of the Keyboard Chassis out 27mm and using the extra interior space as a cable channel, and a way to mount the USB C panel mount.
I think I'm going to see if I can find a new USB panel mount that's no more than 25mm deep. That would clean things up a bit!
Discussions
Become a Hackaday.io Member
Create an account to leave a comment. Already have an account? Log In.