 Mx. Jack Nelson
Step 1: Locating the motor controllers
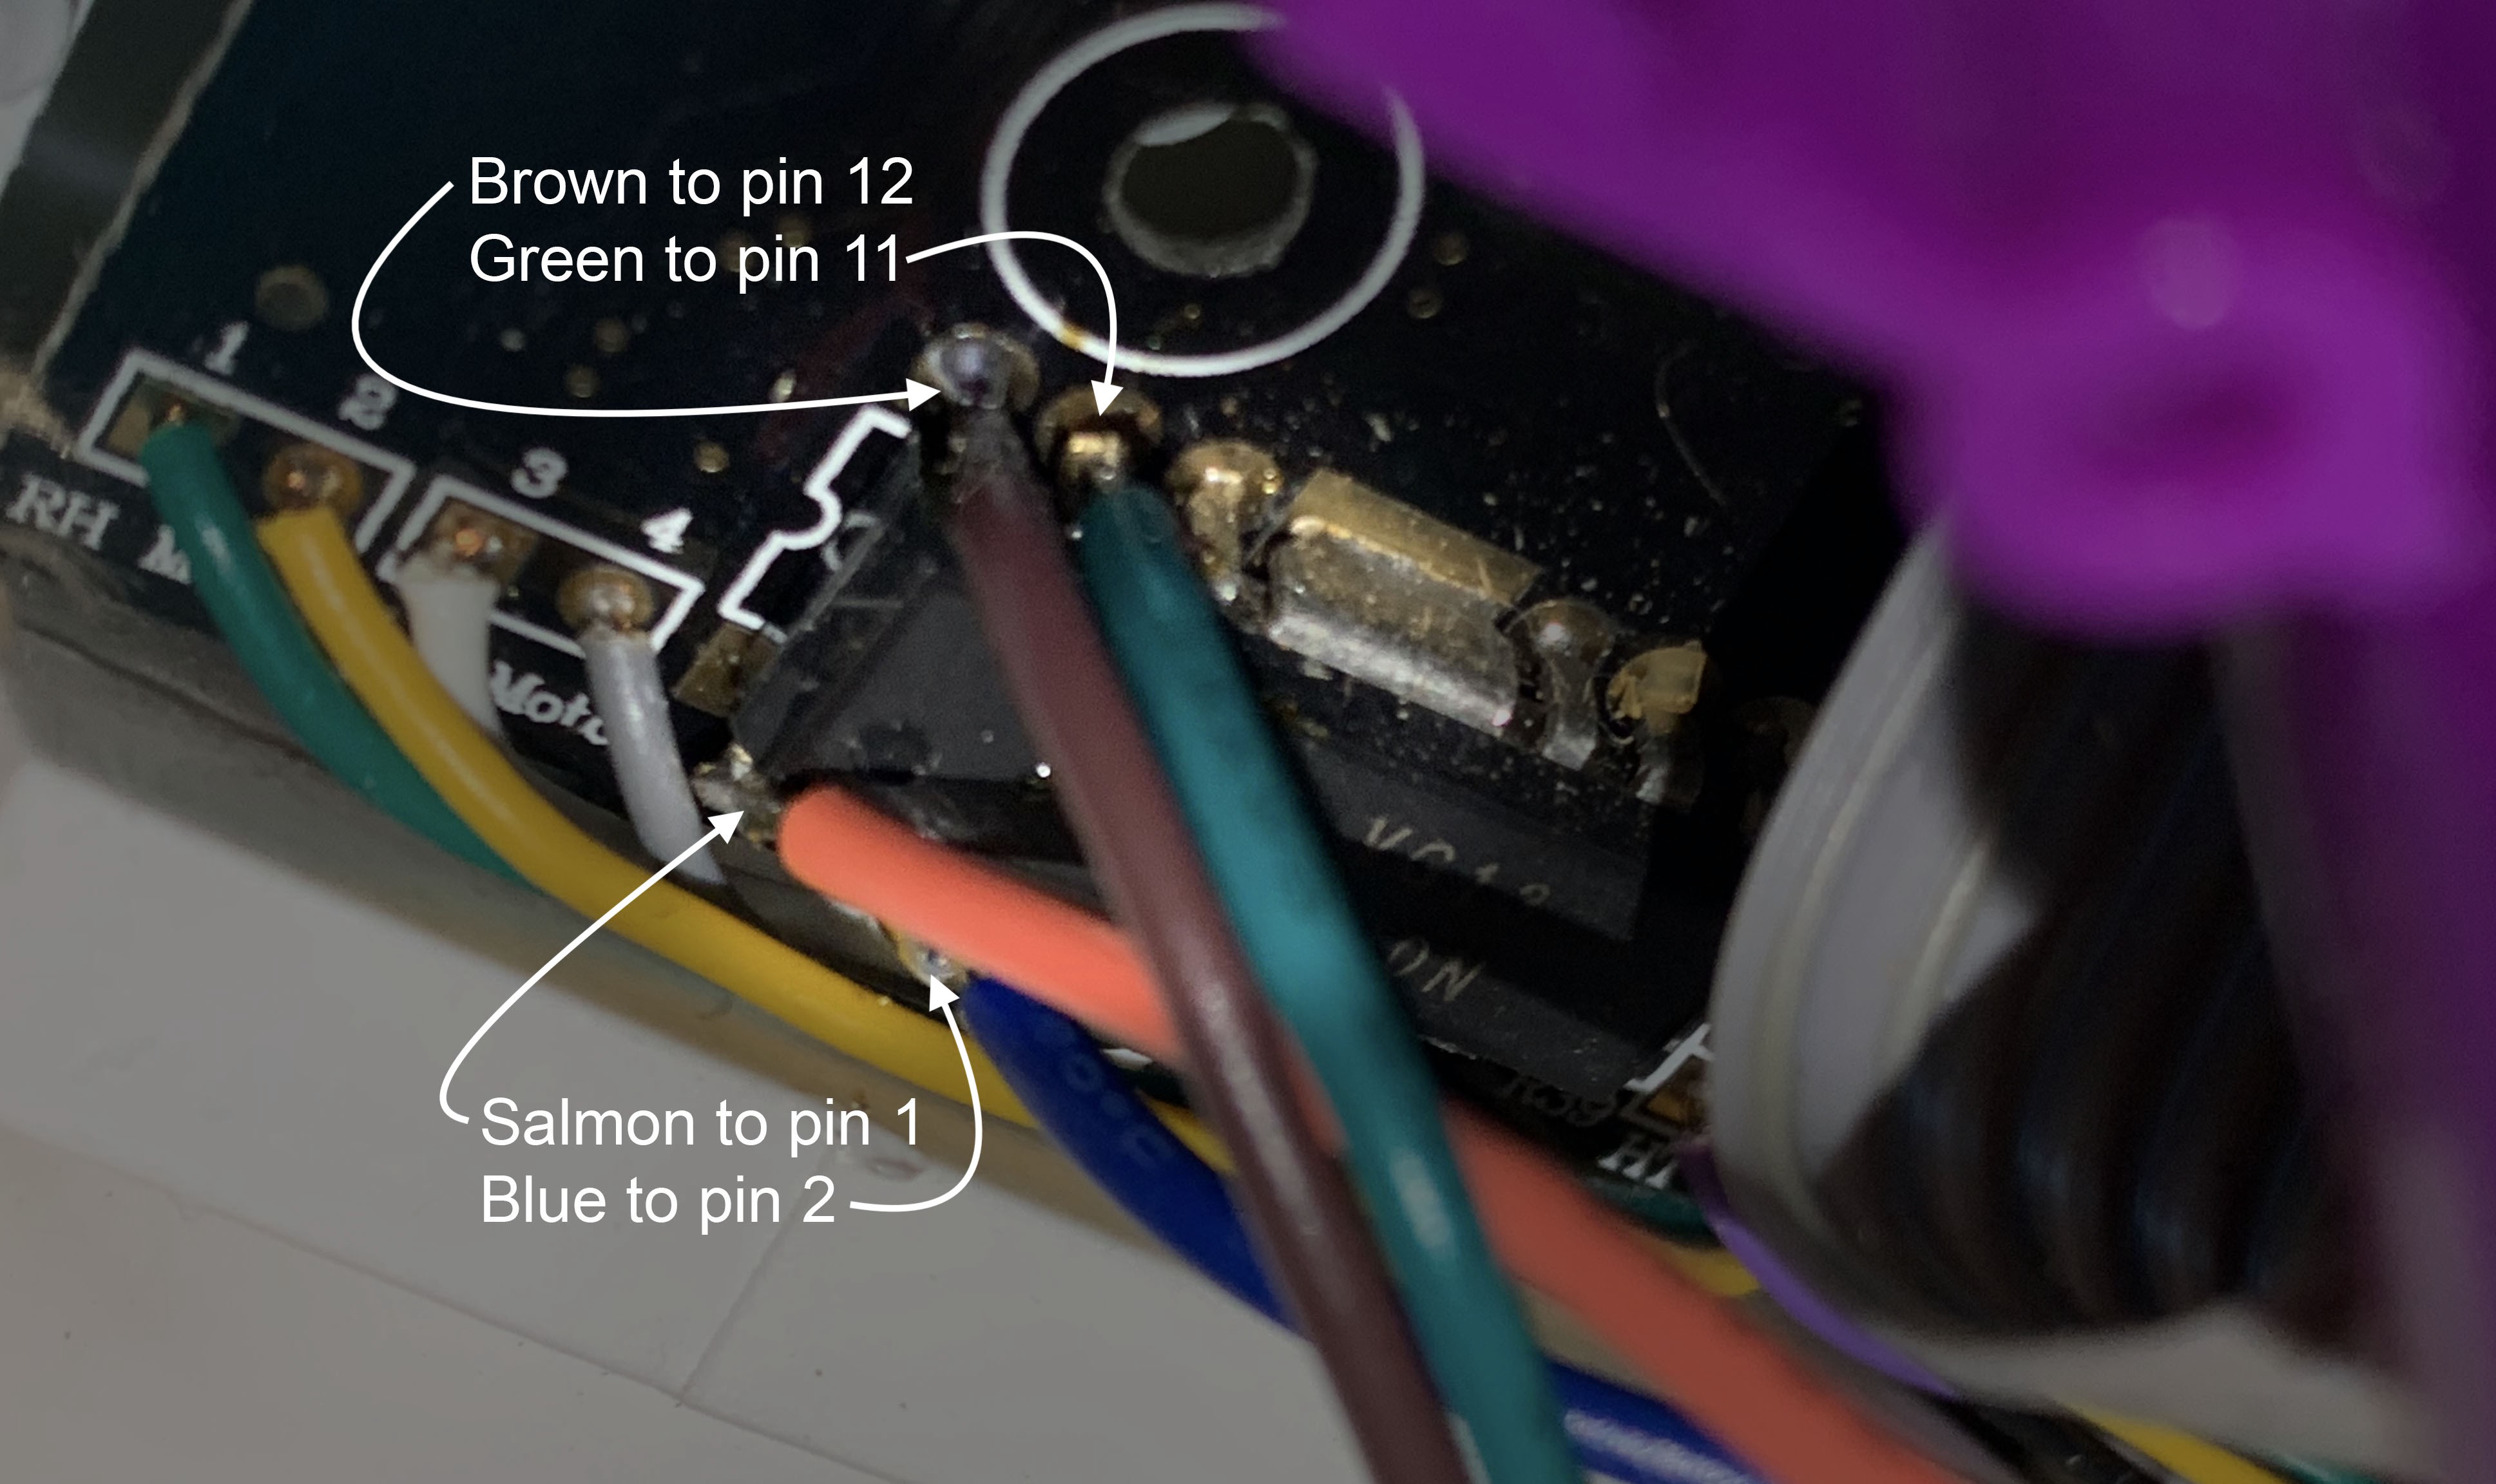
TJ Bearytales has three motor controllers located on his board. The pin assignments for the motor driver tell us that the top two left pins 12 and 11 are ReverseA and ForwardA, and that the bottom two left pins 1 and 2 are ReverseB and ForwardB. Before attaching wires to the pins and resistors we tested his movements with a jumper wire.
Step 2: Hot-wiring the H bridges and connecting to GPIO
Attaching wires to the correct points for each of TJs motor controllers is shown below.
The three motors are controlled by the following pins in this configuration.
- Motor A
- Pin 1 to GPIO 13 - Head Turn - Salmon
- Pin 2 to GPIO 11 - Right Arm - Blue
- Motor B
- Pin 11 to GPIO 15 - Left Arm - Green
- Pin 12 to GPIO 29 - Head Nod - Brown
- Motor C
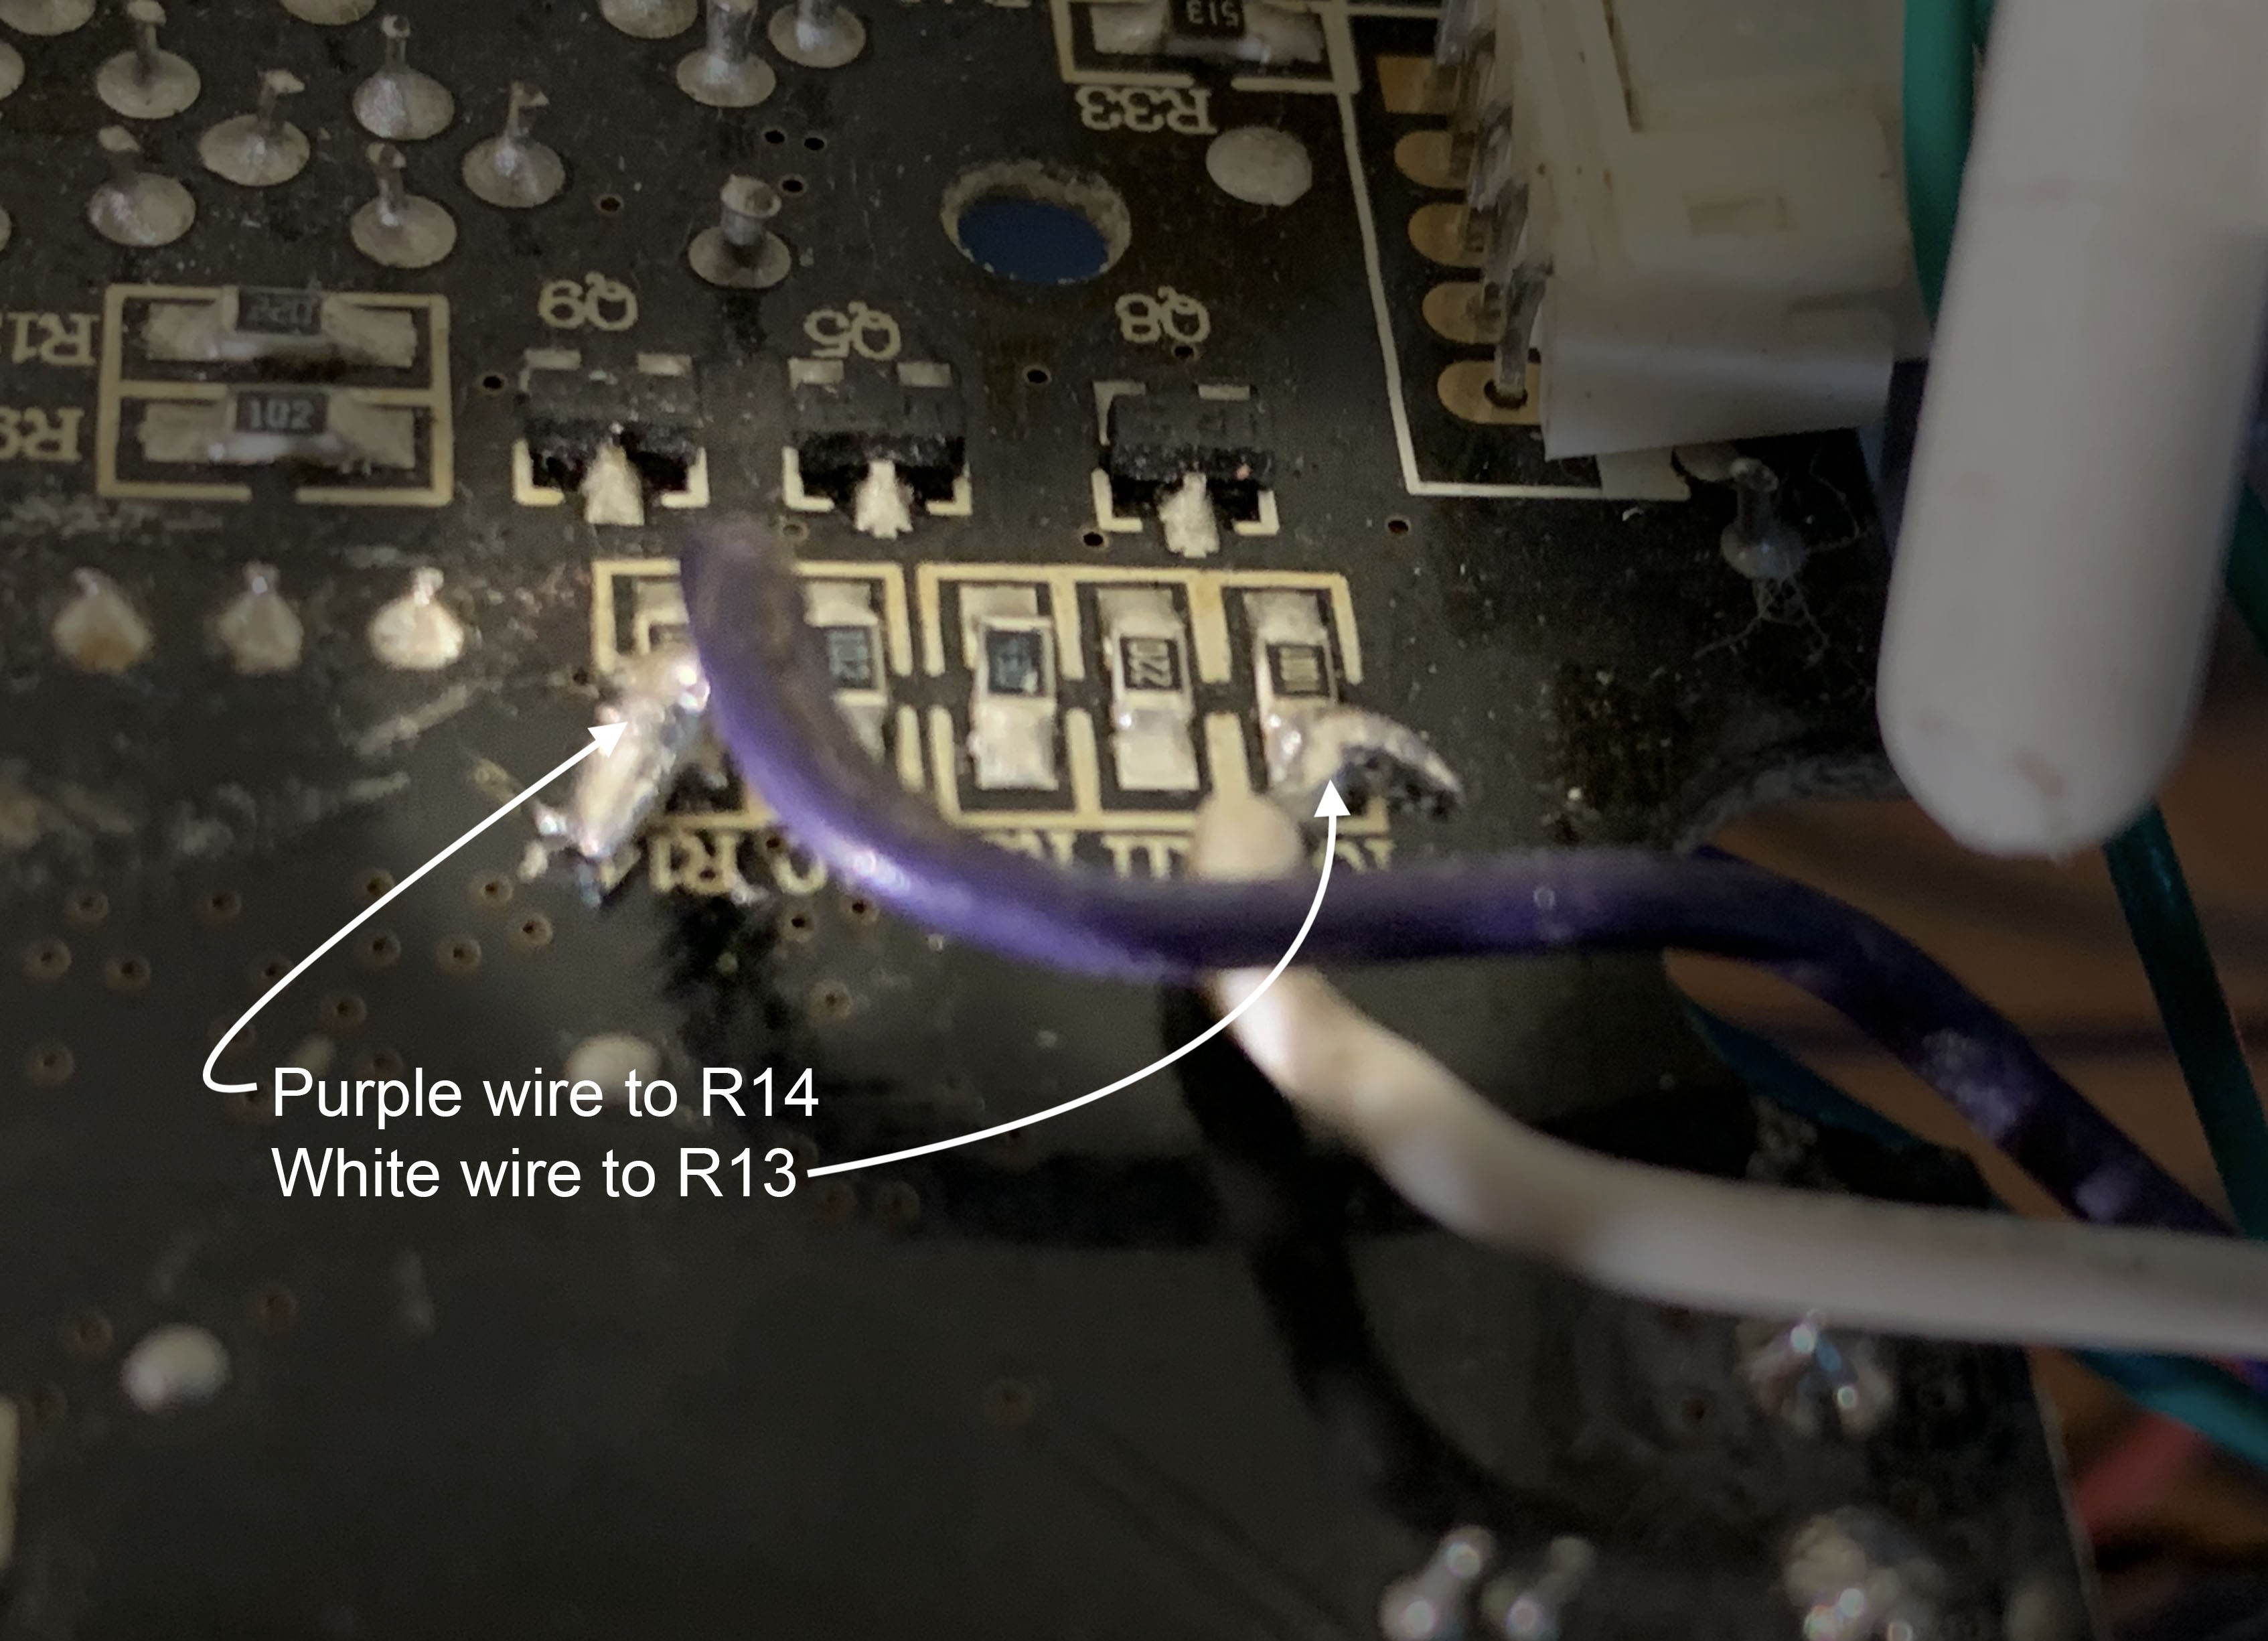
- R13 to GPIO 16 - Ears & Eyes - White
- R14 to GIPO 18 - Mouth - Purple
We took our newly installed wires and connected them to the GPIO pins on the Raspberry Pi, including a ground wire from TJs board to a ground pin on the Raspberry Pi. 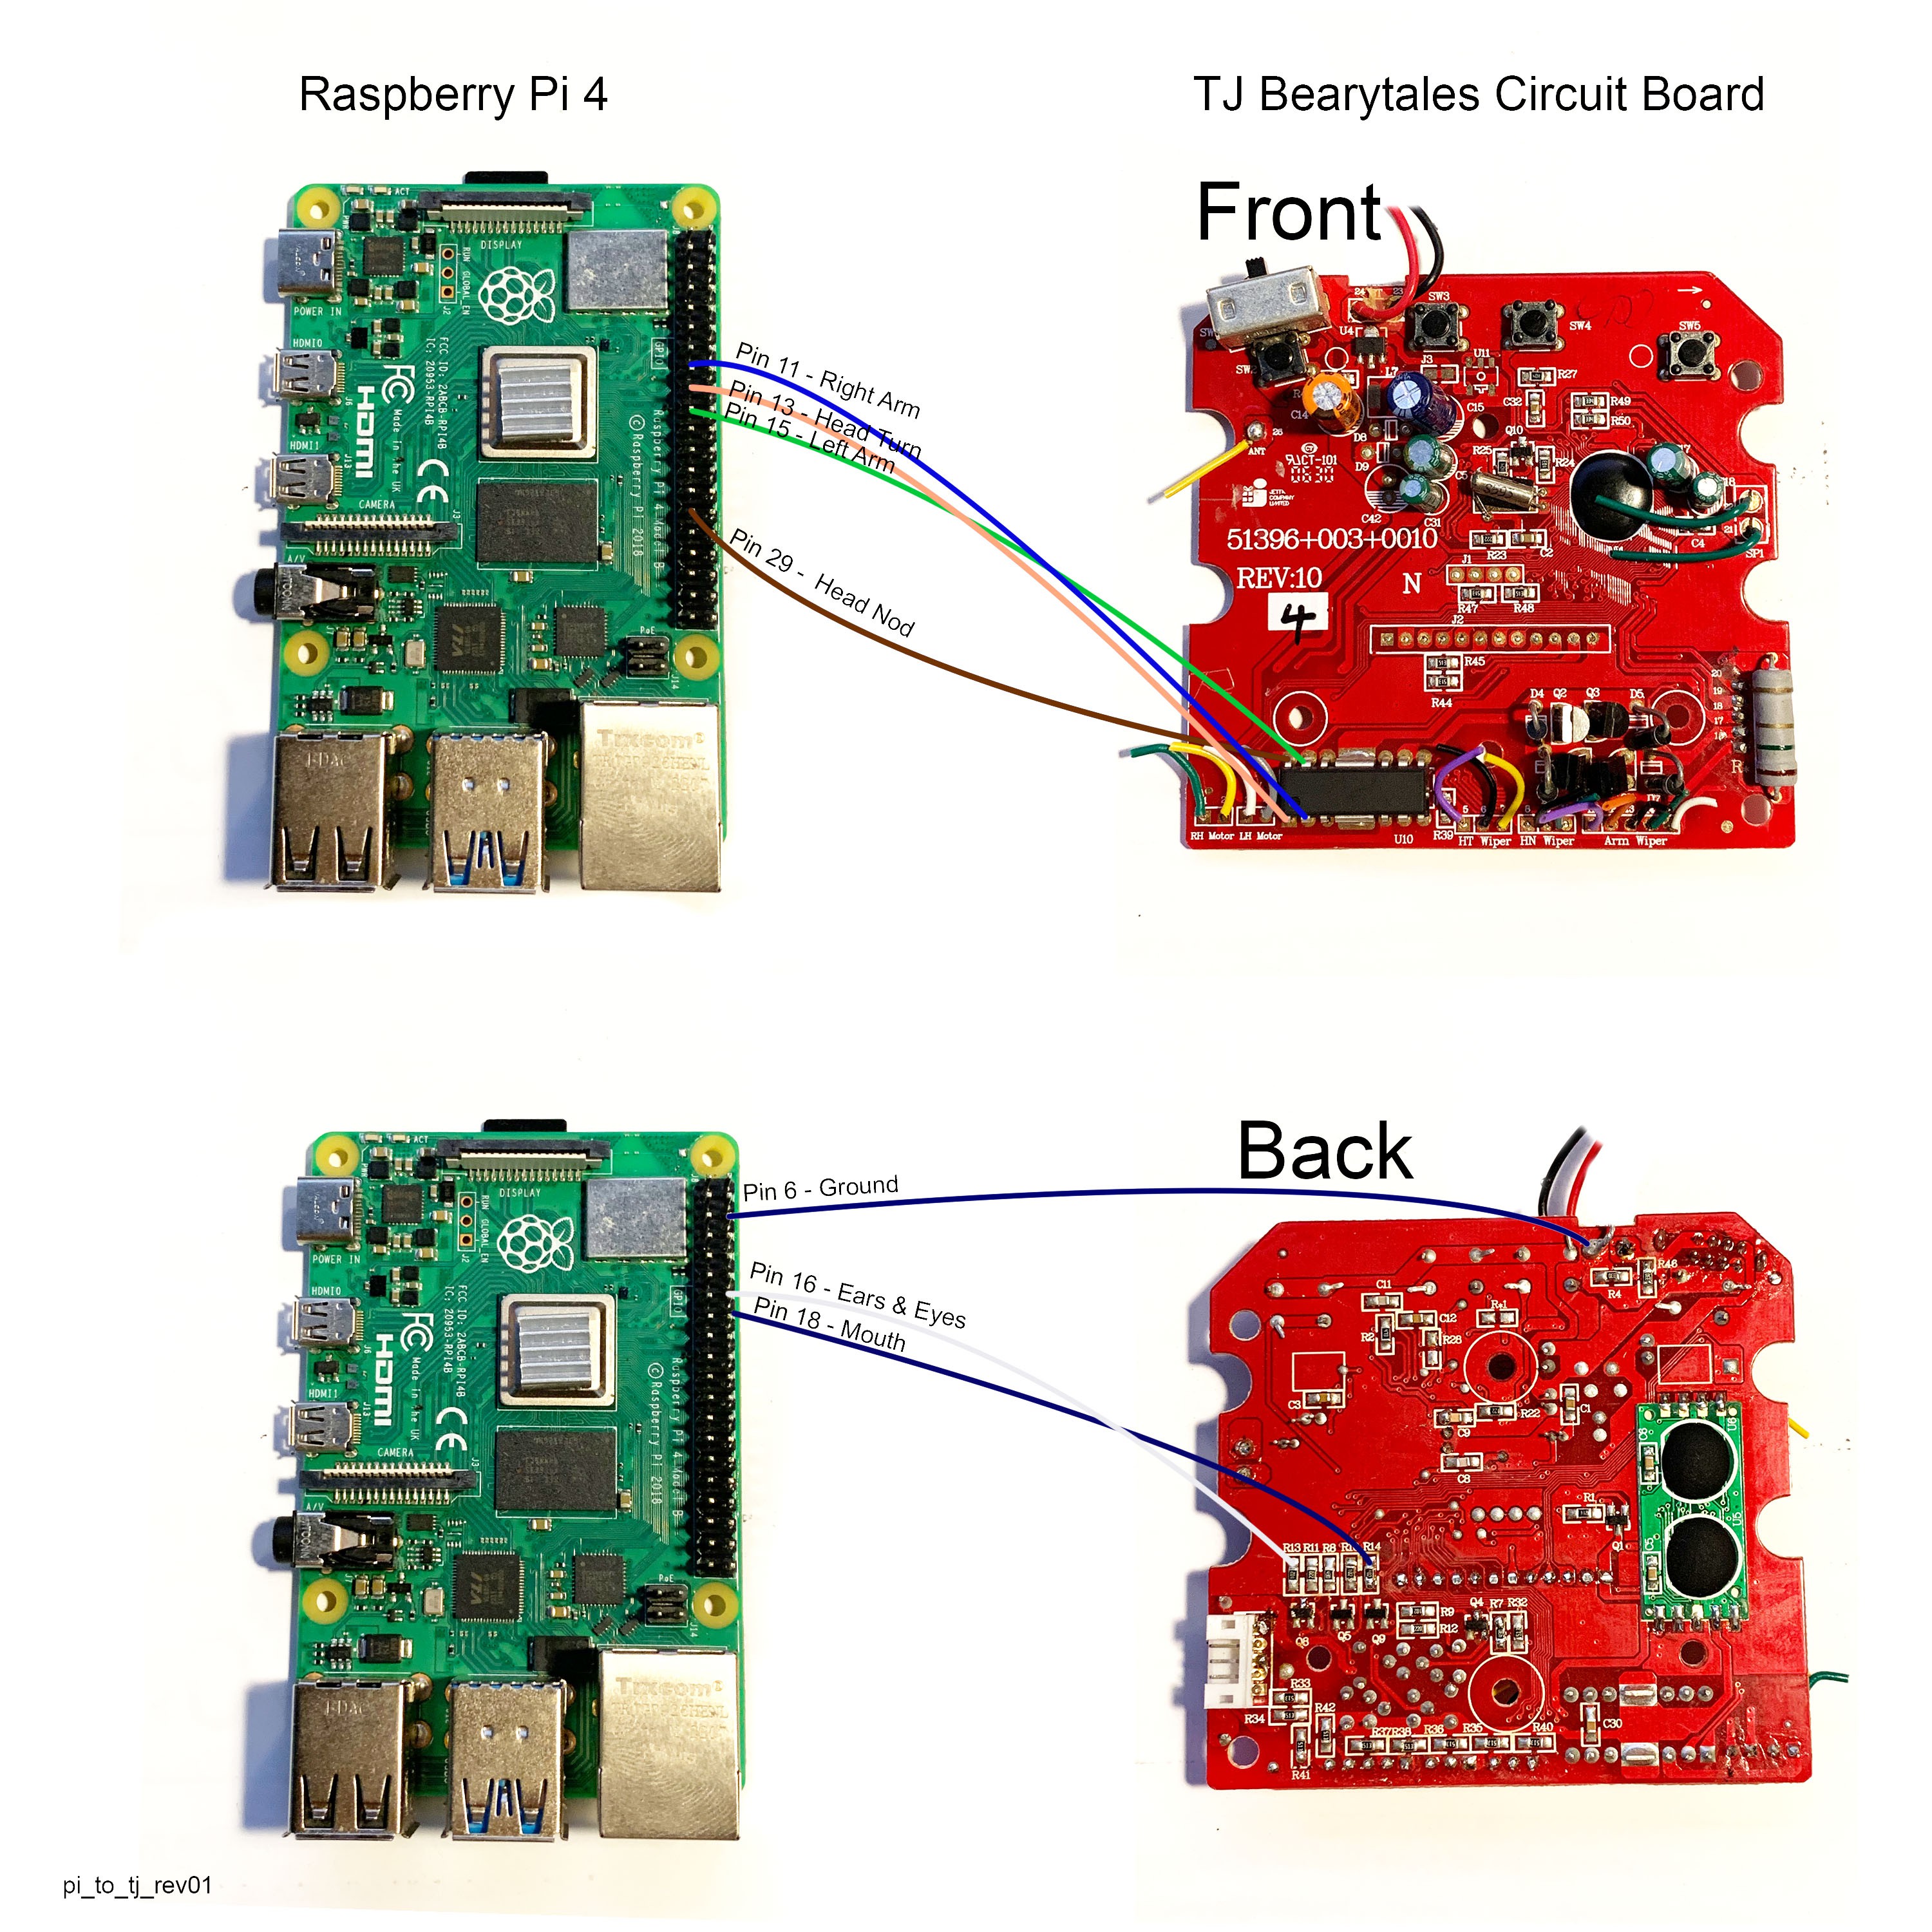
Step 4: Demo code
We used the following code to define which GPIO pins are attached to which motor controller, and then control them.
#Script to test all three motors of TJ Bearytales

# Copyright 2023 Steph & Jack Nelson
# SPDX-License-Identifier: MIT
# https://hackaday.io/project/187602-tj-bearytales-rewritten

#Import libraries
import RPi.GPIO as GPIO
import time

# Set the GPIO numbering mode to BOARD
GPIO.setmode(GPIO.BOARD)

# Define which GPIO pins are attached to each motor control input,
#     two pins per motor, one for each direction. Diagram in link.
#MotorA
rightArm = 11
headTurn = 13
#MotorB:
leftArm = 15
headNod = 29
#MotorC:
earsEyes = 16
mouth = 18

# Setup all pins as outputs and set them to low
for motorPin in [rightArm, headTurn, leftArm, headNod, earsEyes, mouth]:
    GPIO.setup(motorPin, GPIO.OUT)
    GPIO.output(motorPin, GPIO.LOW)

# Setup a function to start the motor, pause, then stop the motor
def Motion(motor, duration):
    if motor == mouth and duration > .25:
        duration = .25 #always force this short duration to prevent jamming mouth open
    GPIO.output(motor, GPIO.HIGH)
    time.sleep(duration)
    GPIO.output(motor, GPIO.LOW)

# Begin the motor test
try:
    print('Wiggling ears and blinking eyes...')
    #call the Motion function
    Motion(motor=earsEyes, duration=1)
    print('Done wiggling!')

    print('Opening and closing mouth...')
    for x in range(3):
        print('loop:', x+1)
        Motion(motor=mouth, duration=.25)
        time.sleep(.2)
        Motion(motor=earsEyes, duration=.2)
        time.sleep(.2)

    print('Moving the arms and head')
    for motor in [rightArm, headTurn, leftArm, headNod]:
        print('Moving...')
        Motion(motor=motor, duration=2)
        print('Done!')
        time.sleep(.5)

finally:
    # Ensure all motors are off
    for motorPin in [rightArm, headTurn, leftArm, headNod, earsEyes, mouth]:
        GPIO.setup(motorPin, GPIO.LOW)

    # Clean up GPIO resources
    GPIO.cleanup()
    print('Cleanup Done.\n\n~~Thanks for playing!~~')
Here you can see a short video of TJ running on the Raspberry Pi using his own motor controllers and built in D battery bank.
Discussions
Become a Hackaday.io Member
Create an account to leave a comment. Already have an account? Log In.