mircemk
This time I will show you how to make a small FM Radio with oled display which all functions are controlled by a single rotary encoder. So far I have made several FM radios, but this is my first project with an Arduino Due board.
The Arduino Due is a microcontroller board based on the Atmel ARM Cortex-M3 CPU. It is the first Arduino board based on a 32-bit ARM core microcontroller.
It has 54 digital input/output pins of which 12 can be used as PWM outputs, 12 analog inputs, 4 UARTs , a 84 MHz clock, an USB OTG capable connection, 2 (digital to analog), 2 TWI, a power jack, an SPI header, a reset button and an erase button.

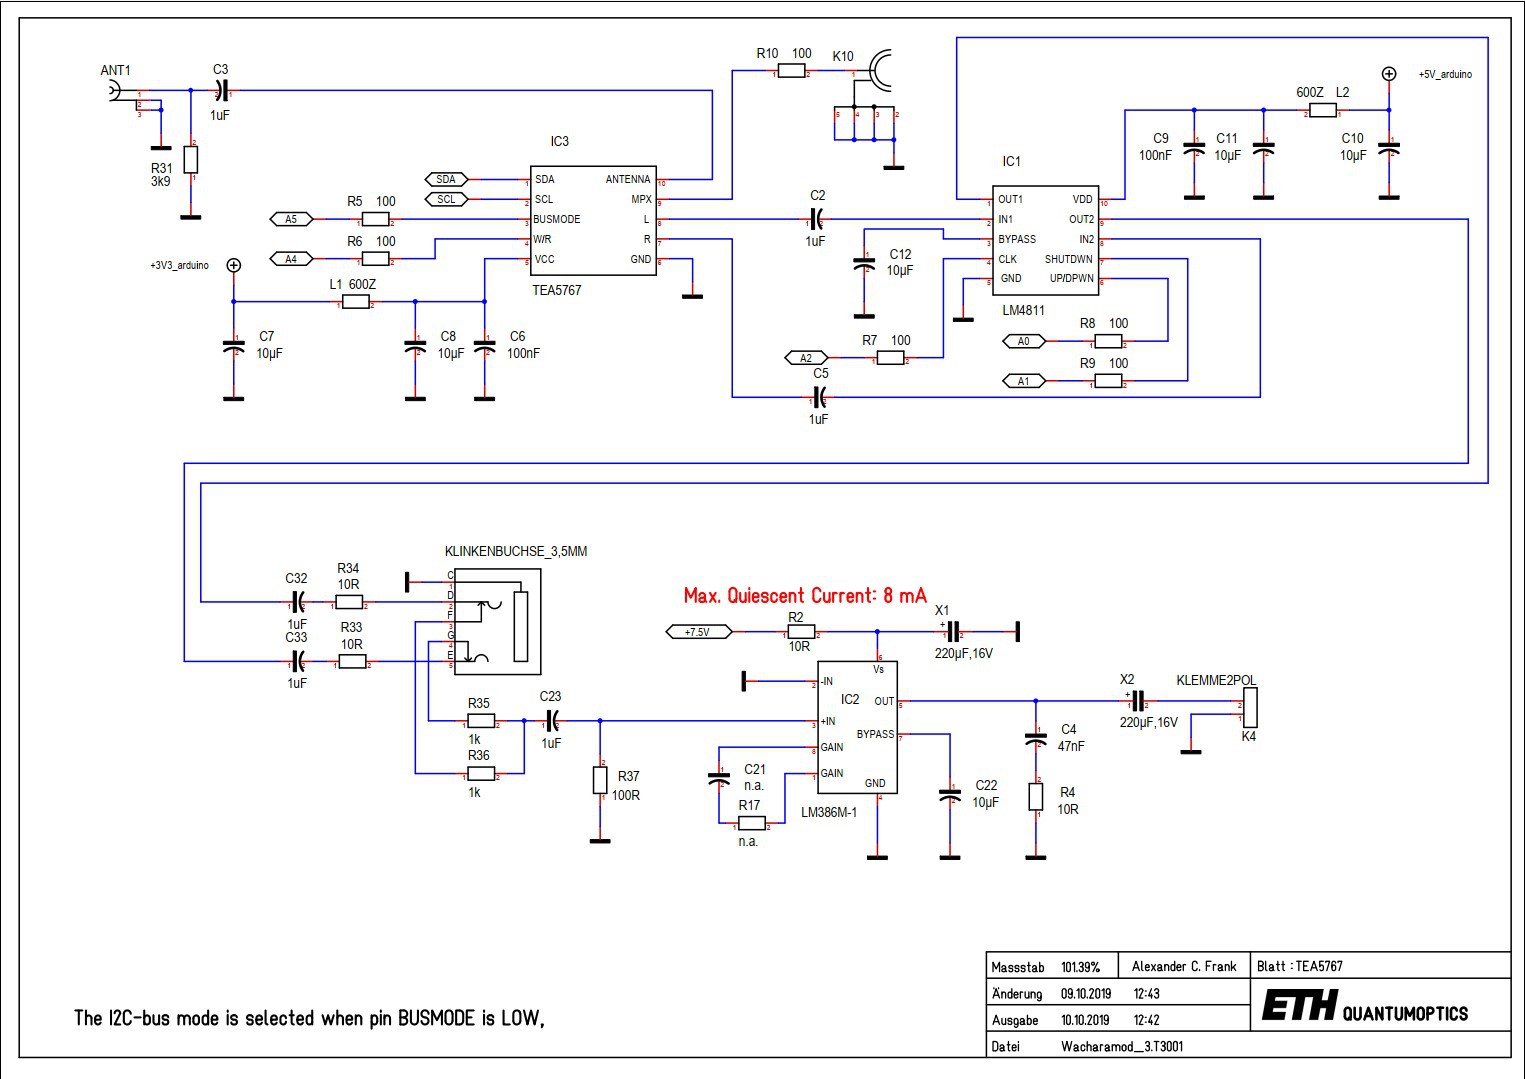
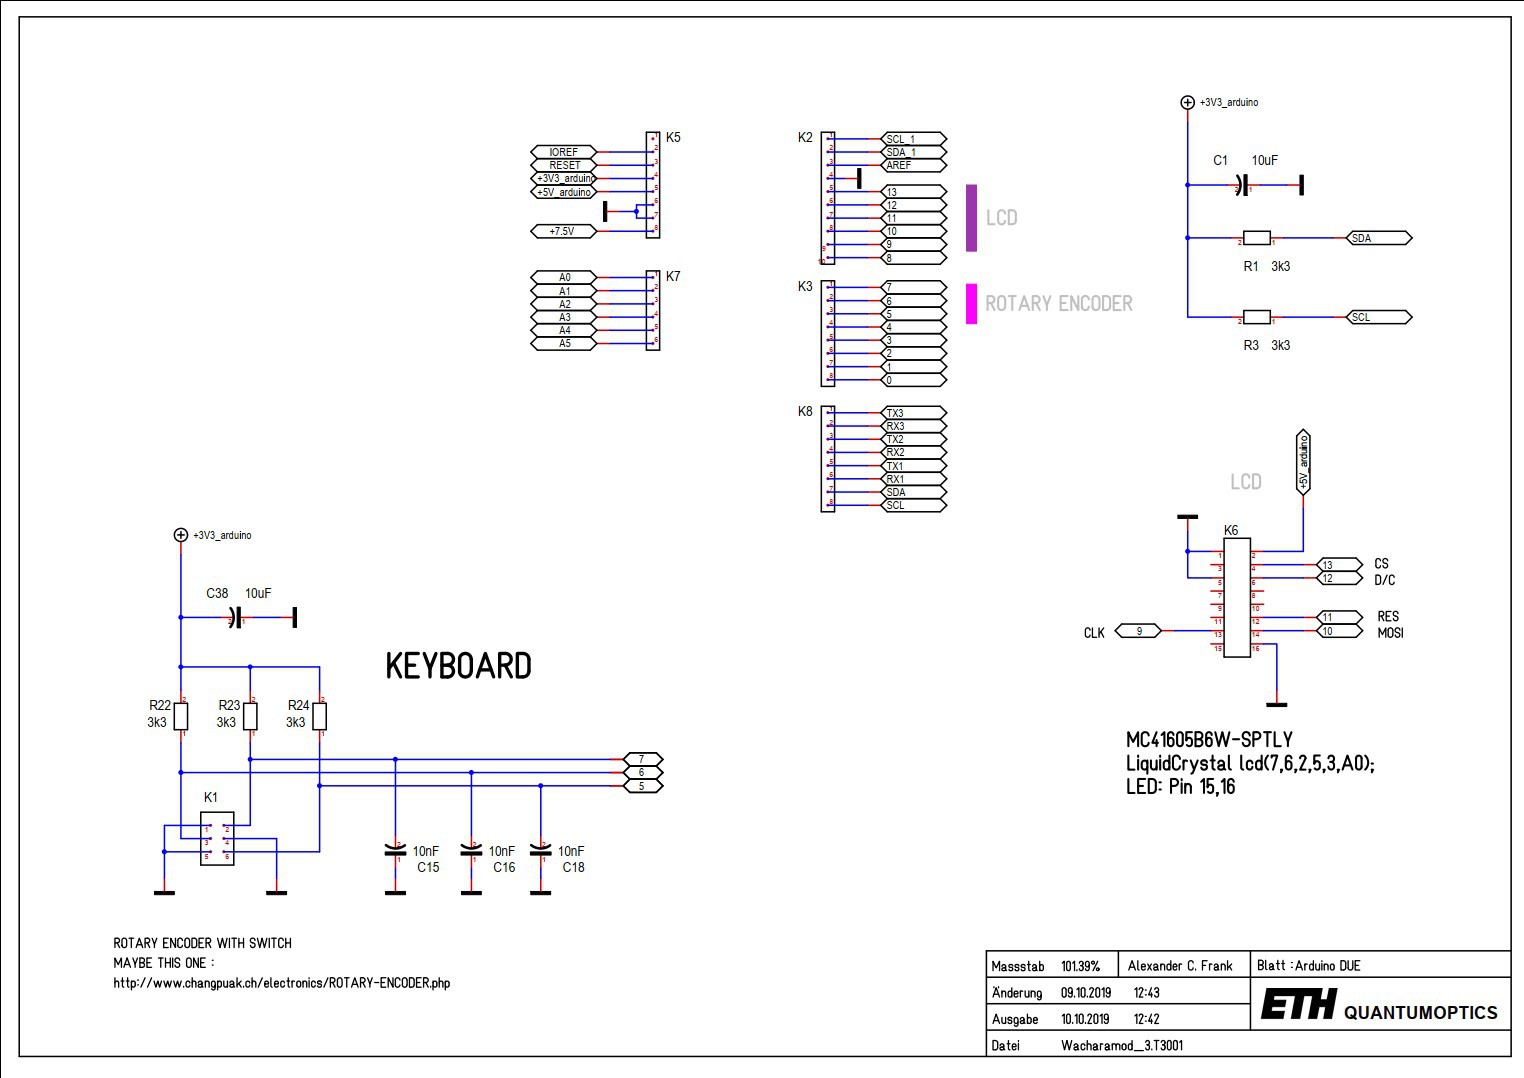
The Due is compatible with all Arduino shields that work at 3.3V. The project is taken from https://www.changpuak.ch/ where it is named "Wacharamod" in honor of Khwankeo Vajarodaya, and where you can find the original schematic diagrams and code. In the hardware section I have omitted some resistors and filter capacitors for simplicity.

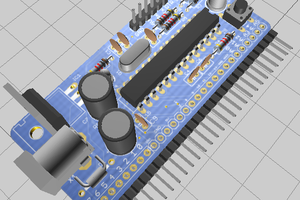
Otherwise, the device is relatively simple to build and contains the following components:
- TEA5767 small Radio board which is the basis of the whole project
- Arduino Due microcontroller board
- SH1106 Oled display
- LM4811 Headphone Amplifier with Digital Volume Control
- PAM8403 small audio D-class amplifier board
- Speaker
- and Rotary encoder
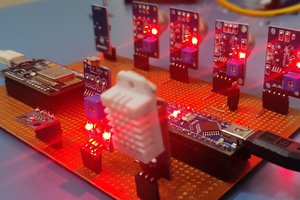
The radio module and other parts are mounted on a separate PCB compatible with Arduino Due pins, in my case it's experimental, but you can make a professional PCB, the cheapest, fastest, and highest quality at PCBWay. How to order is very easy and you will get 10 Pcs PCB for $5 with very great PCB quality TG150-160. Also You can design your own Gerber files for this circuit and upload it on their site (www.pcbway.com) Generally, shipping of the orders takes only 3 to 5 days.

Since this is my first project with Arduino Due, let me briefly explain how to upload a sketch to this board. First, we go to the Tools tab, then the board manager and in the search field we write Due. Now we need to install Arduino SAM Boards, which in my case are installed. Exit the board manager, and go to Tools > Board > Arduino Arduino ARM (32-bits) Boards. The Arduino Due has two USB ports available. We choose Programming port wich is the default for uploading sketches and communicating with the Arduino. After that we select the appropriate com port and we can upload the given sketch.

And now let's see how the radio works in real conditions. Immediately after switching on, the start screen appears on the screen with a logo and information about the software version. After that, the frequency of the radio station that was previously set in the code appears. In my case it is 94.8 megahertz where we can hear the local radio station. Short presses of the encoder change the focus under the frequency numbers, and rotating changes the value of the digit. After a few clicks, the focus moves to the volume bar, and now we can change the sound intensity by rotating it. With a long press on the rotary encoder, the radio switches to SEEK mode and starts automatic station search.
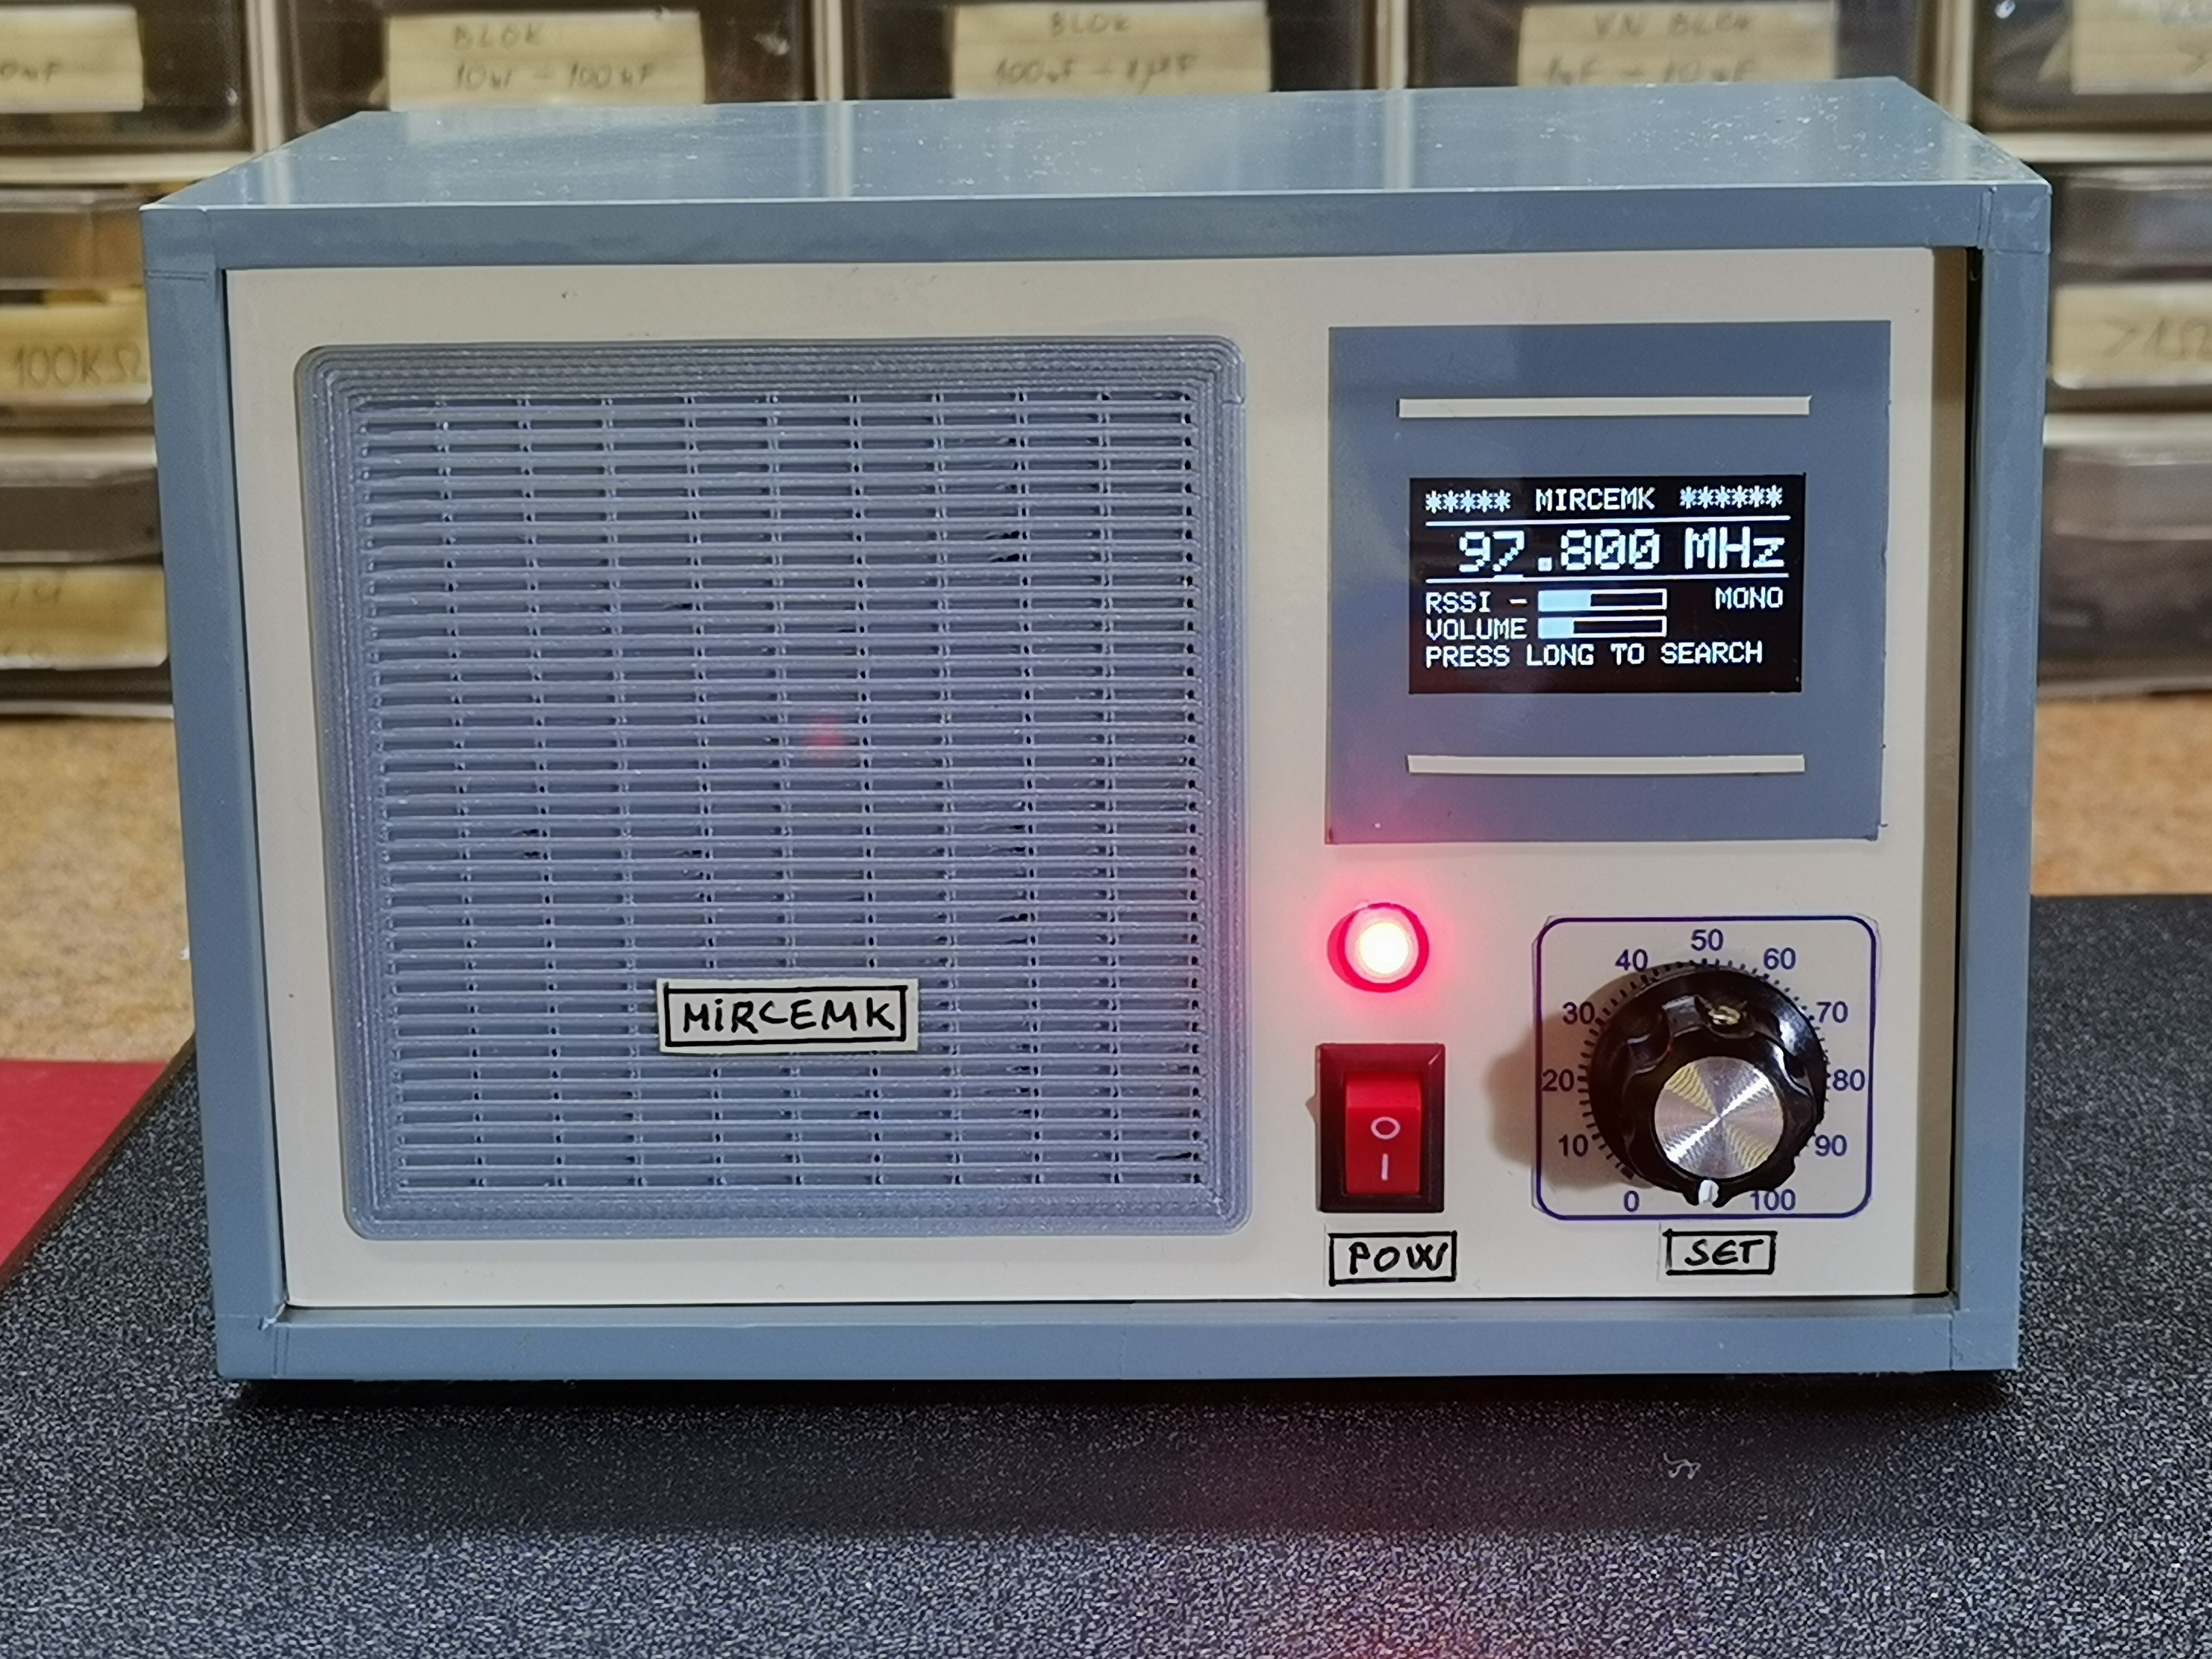
Finally, the device is installed in a suitable box made of PVC plastic with thicknesses of 3mm and 5mm and coated with a colored self-adhesive tape.
 Clovis Fritzen
 Mislav Breka
 Daniel Frausto