PySpectrometer2
The second incarnation of the Spectrometer project!
This is a more advanced, but more flexible version of the original program. It changes the spectrometer from educational 'toy' to serious instrument, which can easily compete with commercial units costing thousands of dollars!
This program, hardware design, and associated information is Open Source (see Licence), but if you have gotten value from these kinds of projects and think they are worth something, please consider donating: https://paypal.me/leslaboratory?locale.x=en_GB This project is a follow on from: https://github.com/leswright1977/PySpectrometer
This readme is accompanied by youtube videos, showing how to build and use the spectrometer! Visit my Youtube Channel at: https://www.youtube.com/leslaboratory
There is a video on this project here:
Rationale for the new build
Recent changes in the OS (Bullseye) broke the old version e.g broken video, broken dependencies and so on. PySpectrometer v3.0 was hacked and fixed as of 3.1), however I have been thinking about a rewrite of this software for a while, so here it is!
Accuracy has been significantly improved by implementing multi-wavelength calibration and a Polynomial regression data fit to compute wavelengths as precisely as possible across the measured range.
Tk has been dropped as the GUI to allow easier maintainability, extendability and flexibility. The new interface is coded entirely in OpenCV, and whilst things like trackbars and buttons are now dropped in favour of keybindings, this frees up screen real estate, and allows the support of resizing without fuss, and fullscreen mode is now supported!
In Fullscreen mode on Raspberry Pi systems, the interface is designed to fit 800 x 480 screens, which seem to be a common resolution for RPi LCD's, paving the way for the creation of a stand alone benchtop instrument.
Whats new:
- Higher resolution (800px wide graph).
- 3 row pixel averaging of sensor data.
- Fullscreen option for the Spectrometer graph.
- 3rd order polynomial fit of calibration data for accurate measurement.
- Improved graph labelling.
- Labelled measurement cursors.
- Optional waterfall display for recording spectra changes over time.
- Key Bindings for all operations.
- Analogue Gain control for the Picam
The functionality of the previous version has been retained, including peak hold, peak detect, Savitsky Golay filter, and the ability to save graphs as png and data as CSV.
A very cool addition to this project is a Waterfall display! This allows the recording of change in in wavelength over time. For my purposes this is especially useful for Dye Lasers, however this may be of use to those observing the spectra of light sources that may change in intensity of wavelength.
Example waterfall display of a fluorescent lamp: 
Waterfall display of a Dye laser being tuned (Coumarin-1). The jagged tuning curve is because this laser was hand-tuned! 
Below the tuning curve of Rhodamine 6G 
Hardware
The hardware is simple and widely available and so should be easily to duplicate without critical alignment or difficult construction. The hard work was developing the software.
Resolution/accuracy seems to be +/- 1nm with a well built and calibrated setup, which is excellent for the price of the hardware, especially when you consider the price of commercial components such as the Hamamatsu C12880MA breakout boards which run north of 300 bucks, and has a resolution of 15nm. Of course, this build is physically much larger, but not enormous!
Standard Spectroscope
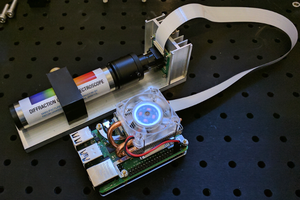
For the standard build, I used a pocket spectroscope(link below) coupled into a picamera by means of a zoom lens. The job is simple: Mount the zoom lens on the picam, and mount the spectroscope in front, and focus the camera on the spectrum, until it is sharp and clear. Use either daylight (which has pronounced Fraunhoffer lines) or a fluorescent lamp, which has pronounced emission...
Read more » LesWright

 John Evans
 J. Peterson
By the way, love your build with the old software! I presume it will be getting an upgrade... ;-)