 DIY GUY Chris
Supplies
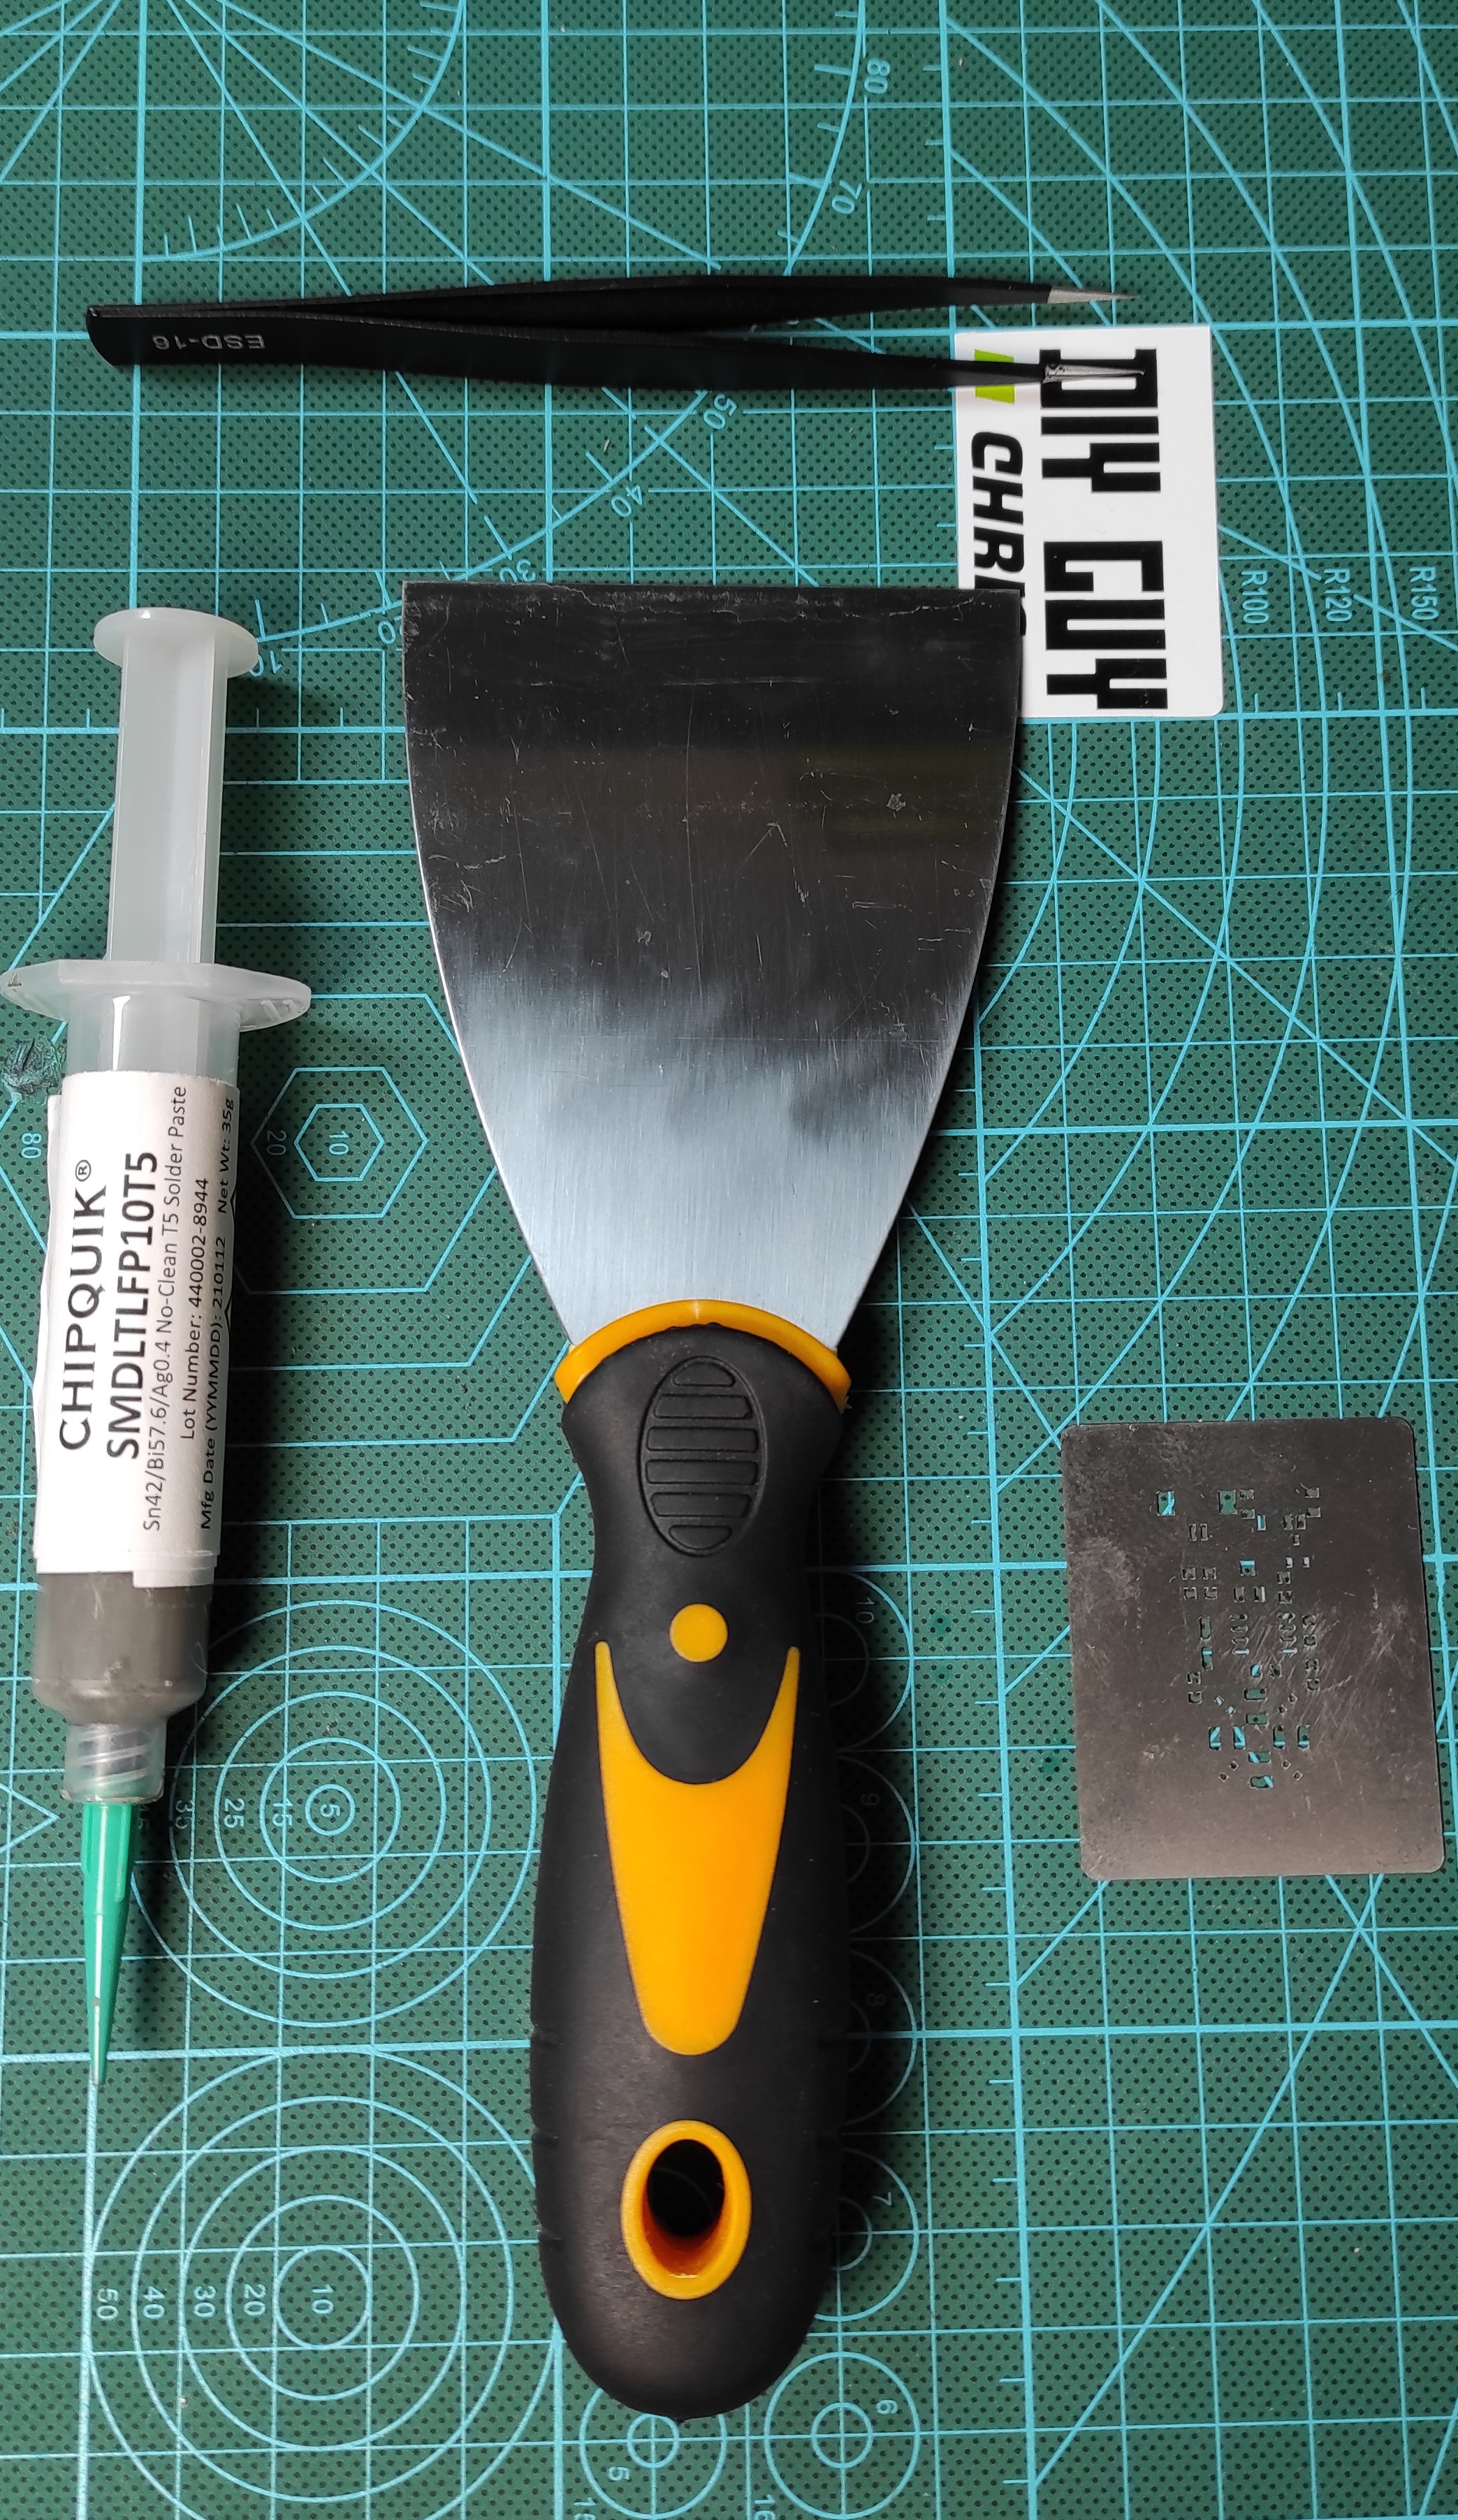
The tools selection is up to you to define based on your skills but here I share the necessary tools that you need to easily complete the assembly of the Surface Mounted Parts on a Printed Circuit Board, you may find that some tools are extra but consider that it depends on your capabilities.
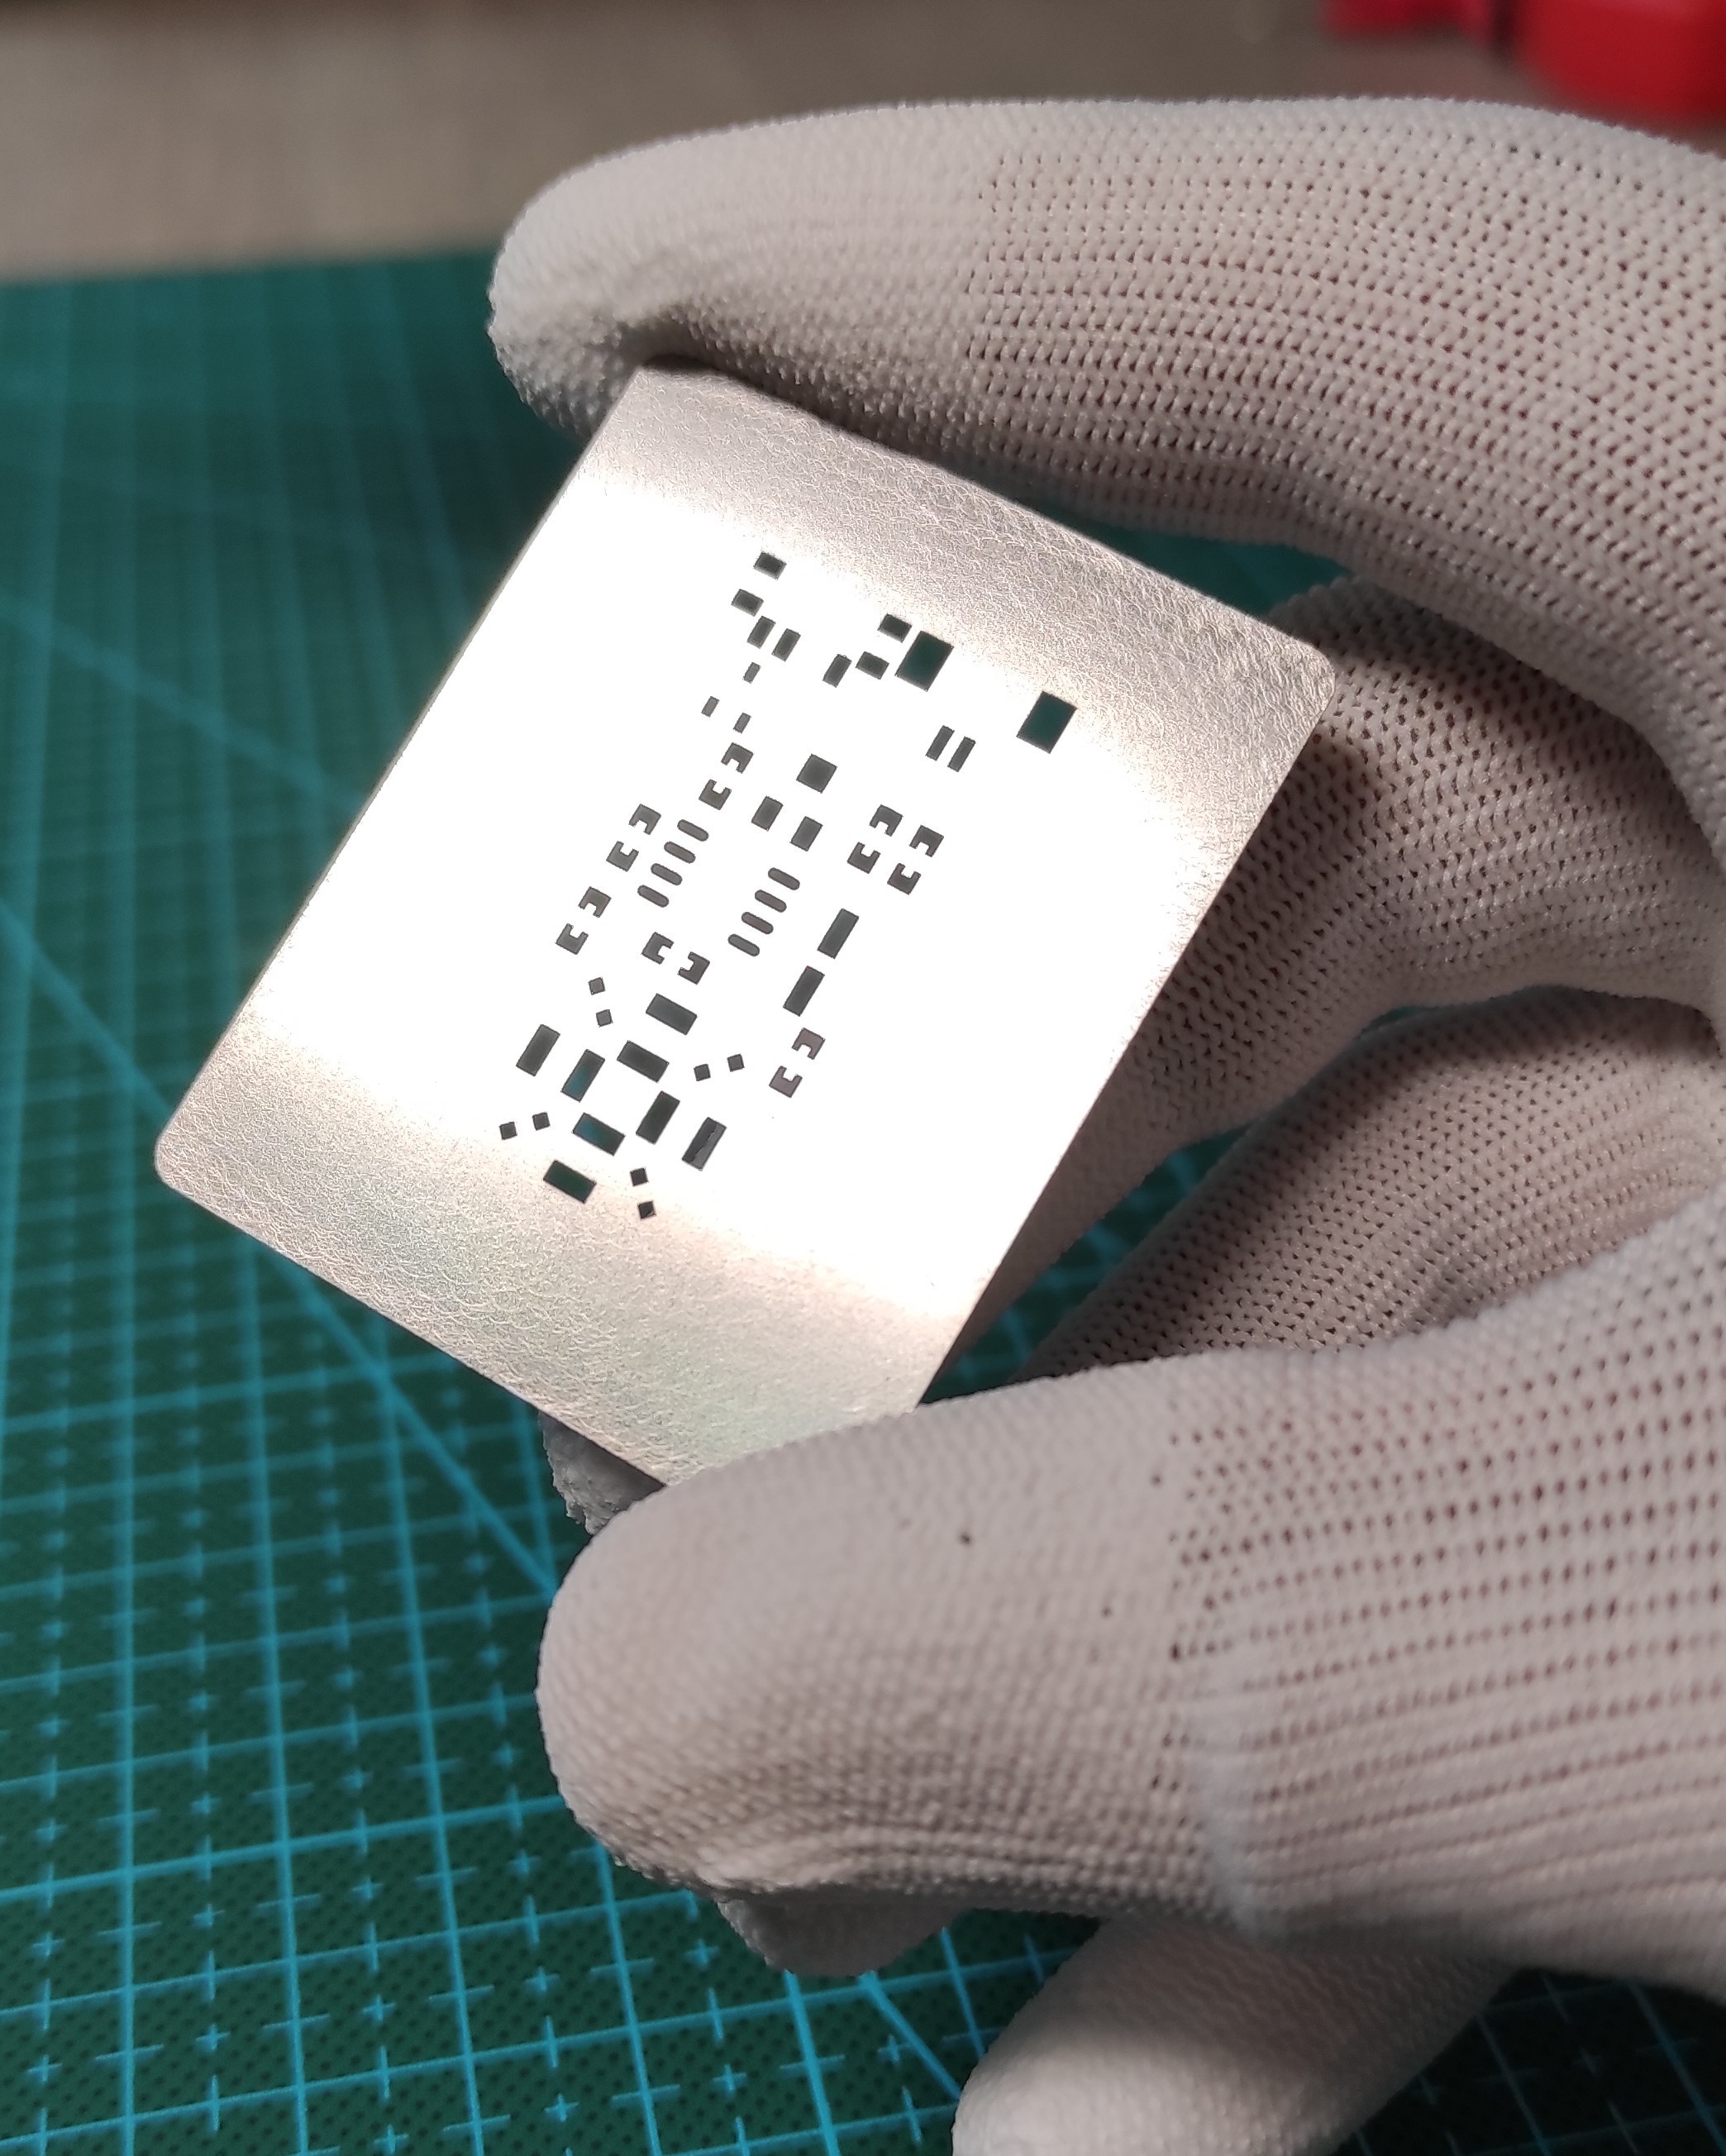
The Solder Paste is the main part that you will use to achieve the assembly of these SMD parts and it has to be properly spreaded on the SMD parts pads, in this project I used a low temperature profile solder paste from CHIPQUIK SMDLTLFP10T5, in order to achieve an equally spreaded solder paste we use the Stencil, this stainless steel tool could be ordered from any PCB manufacturer and it is related to the PCB design, such tool has slots of the parts Pads and once we properly place it on the PCB it will cover it all and only keep the pads exposed, then as soon as we drop the solder paste on the Stencil it will get to the pads equally.
The Spatula will help us to sweep the solder paste on the Stencil and as always, we need Tweezer to deal with the SMD Parts.
Circuit Board Design
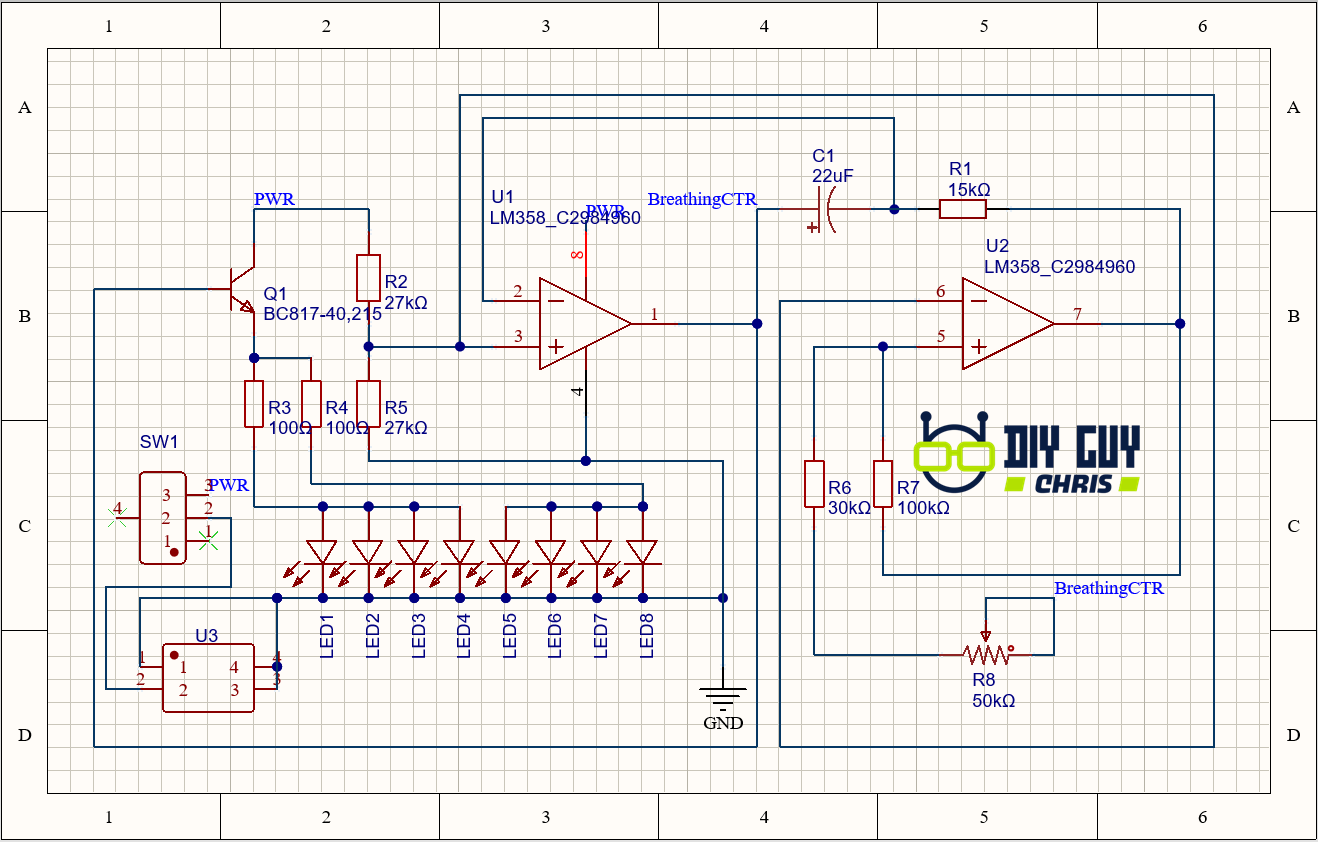
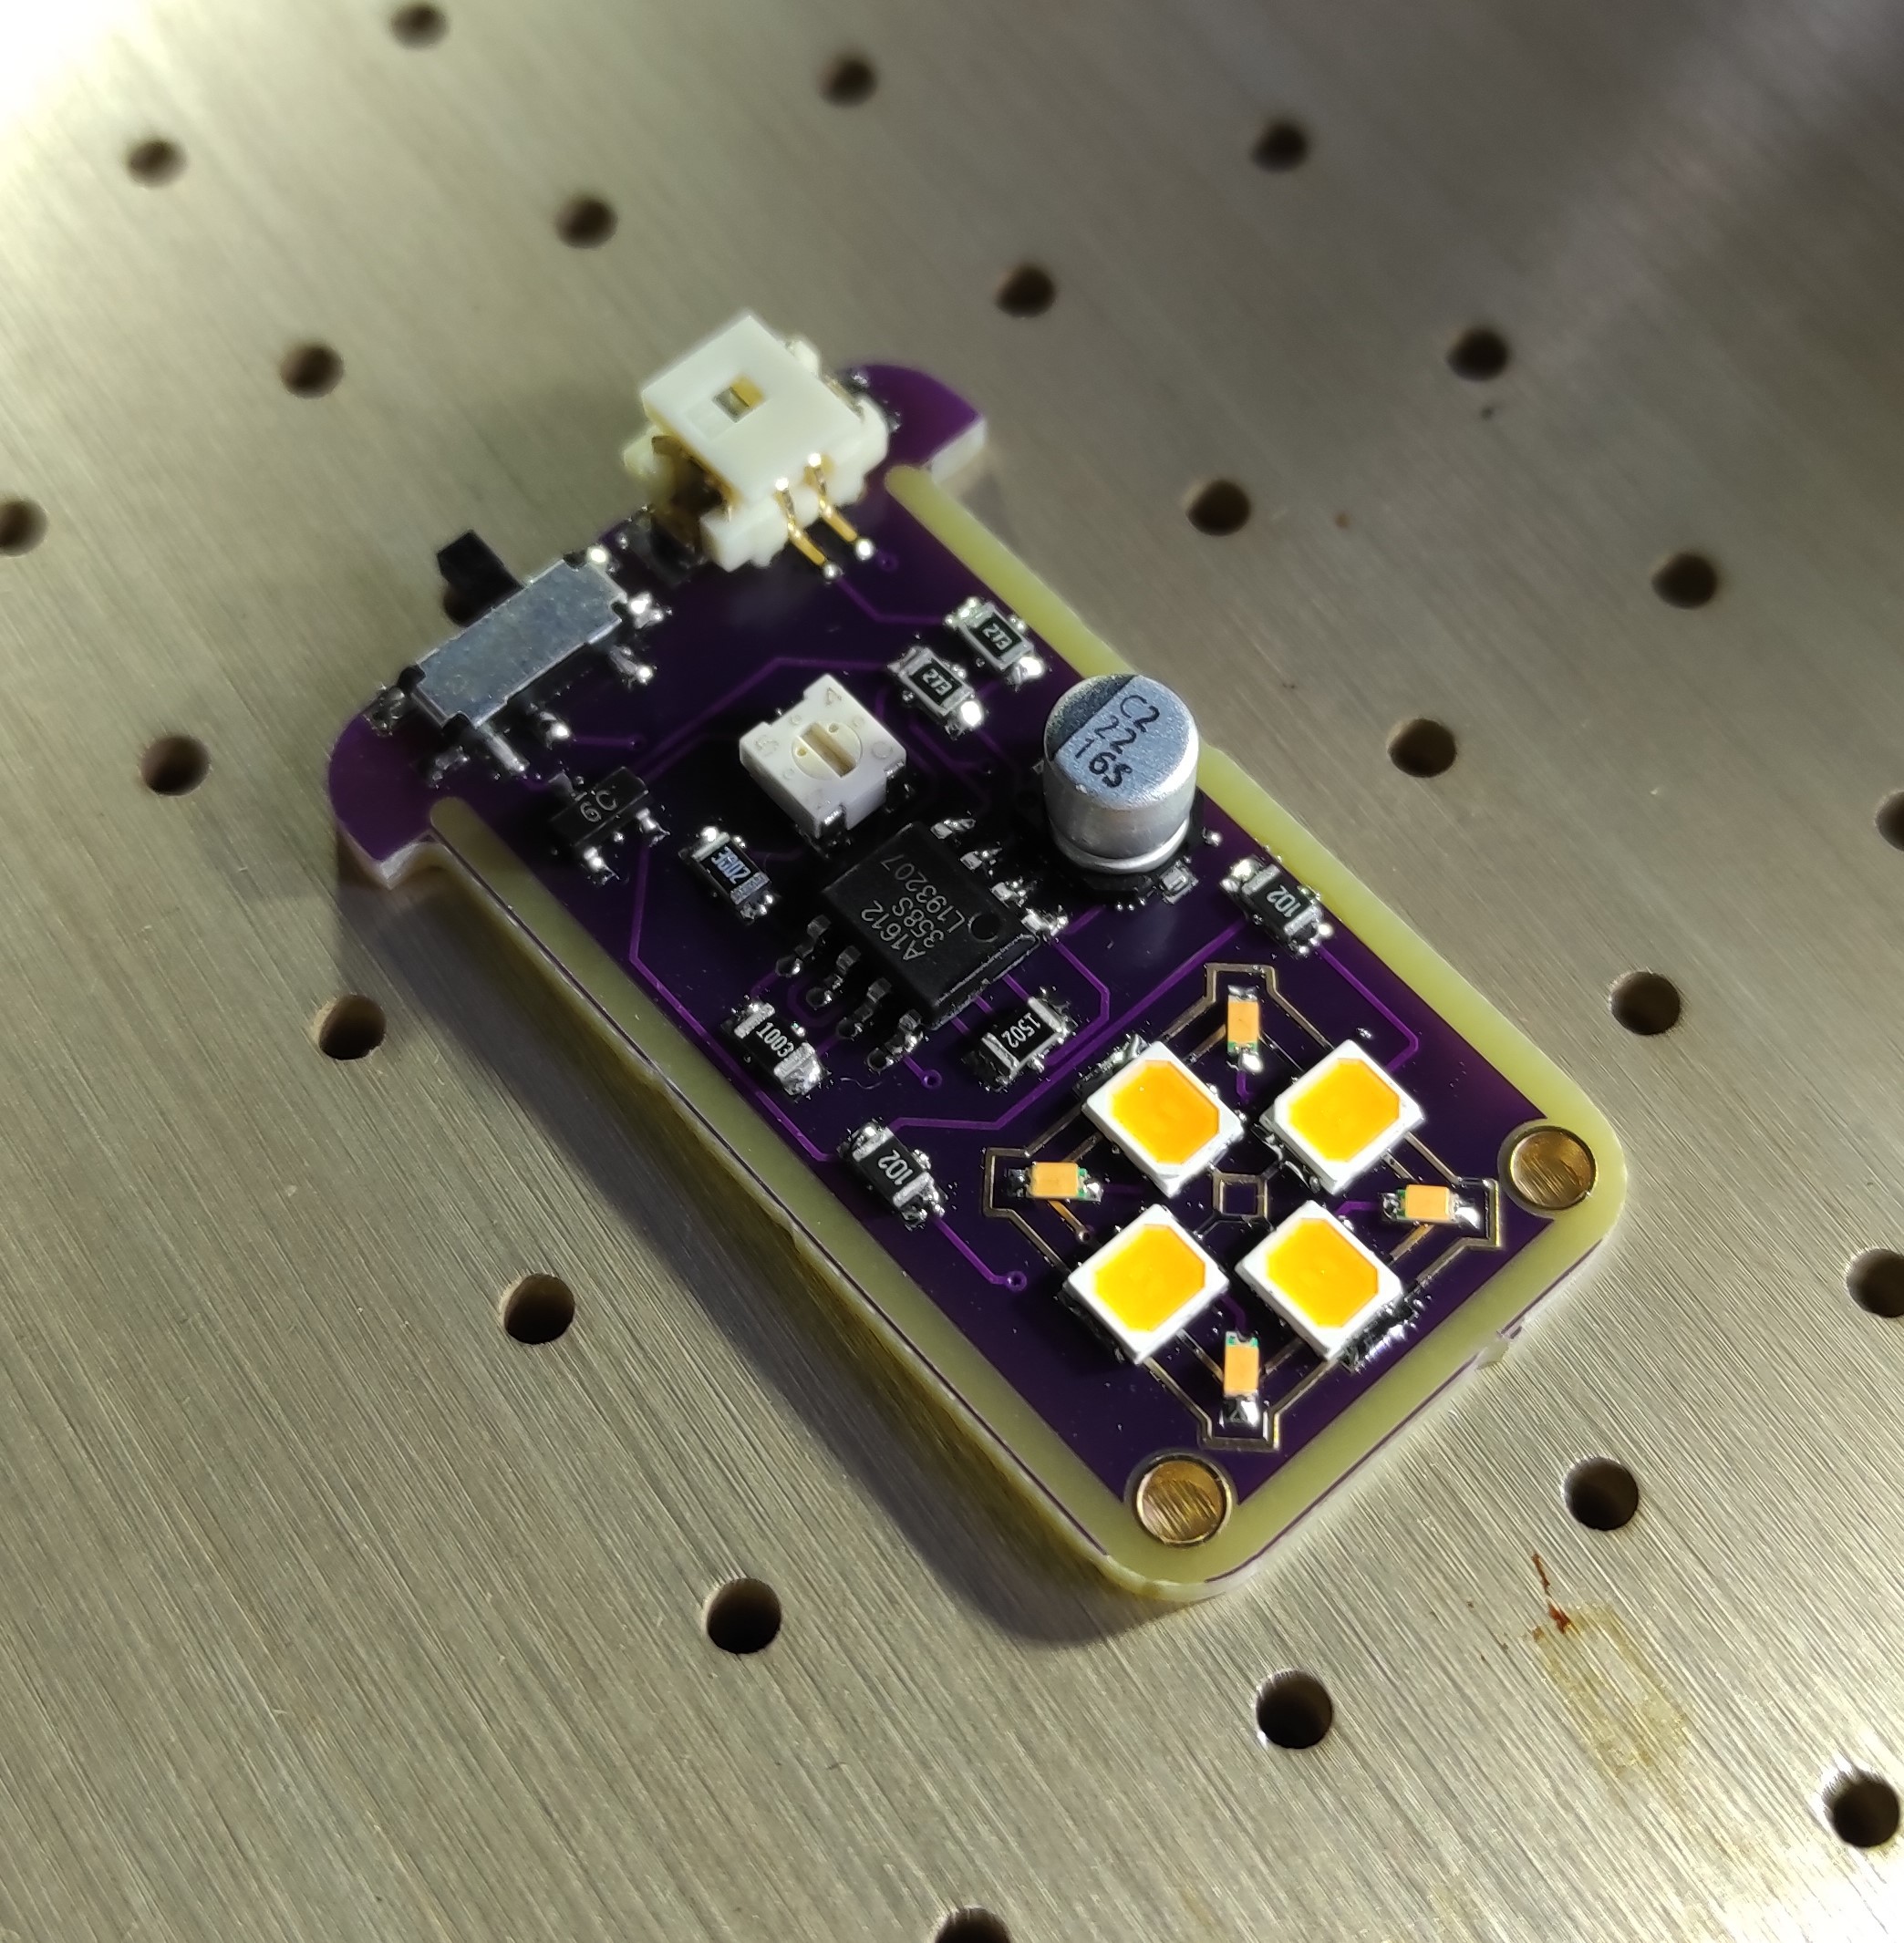
Since we are using the same circuit Schematic as the previous project then no changes to make in here except for the parts packages we will use the SMD ones instead of the Through-hole parts.
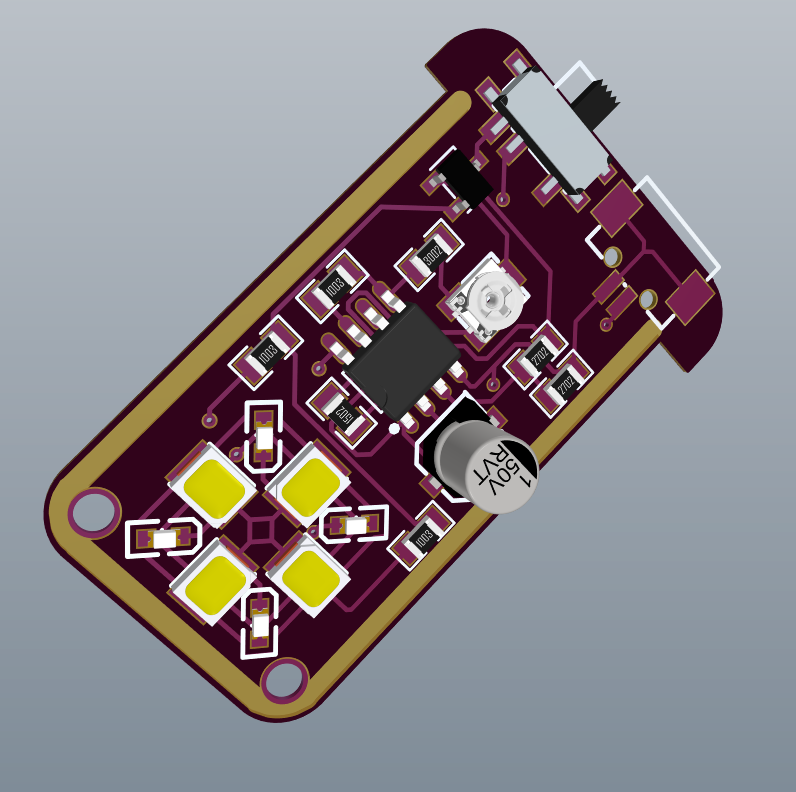
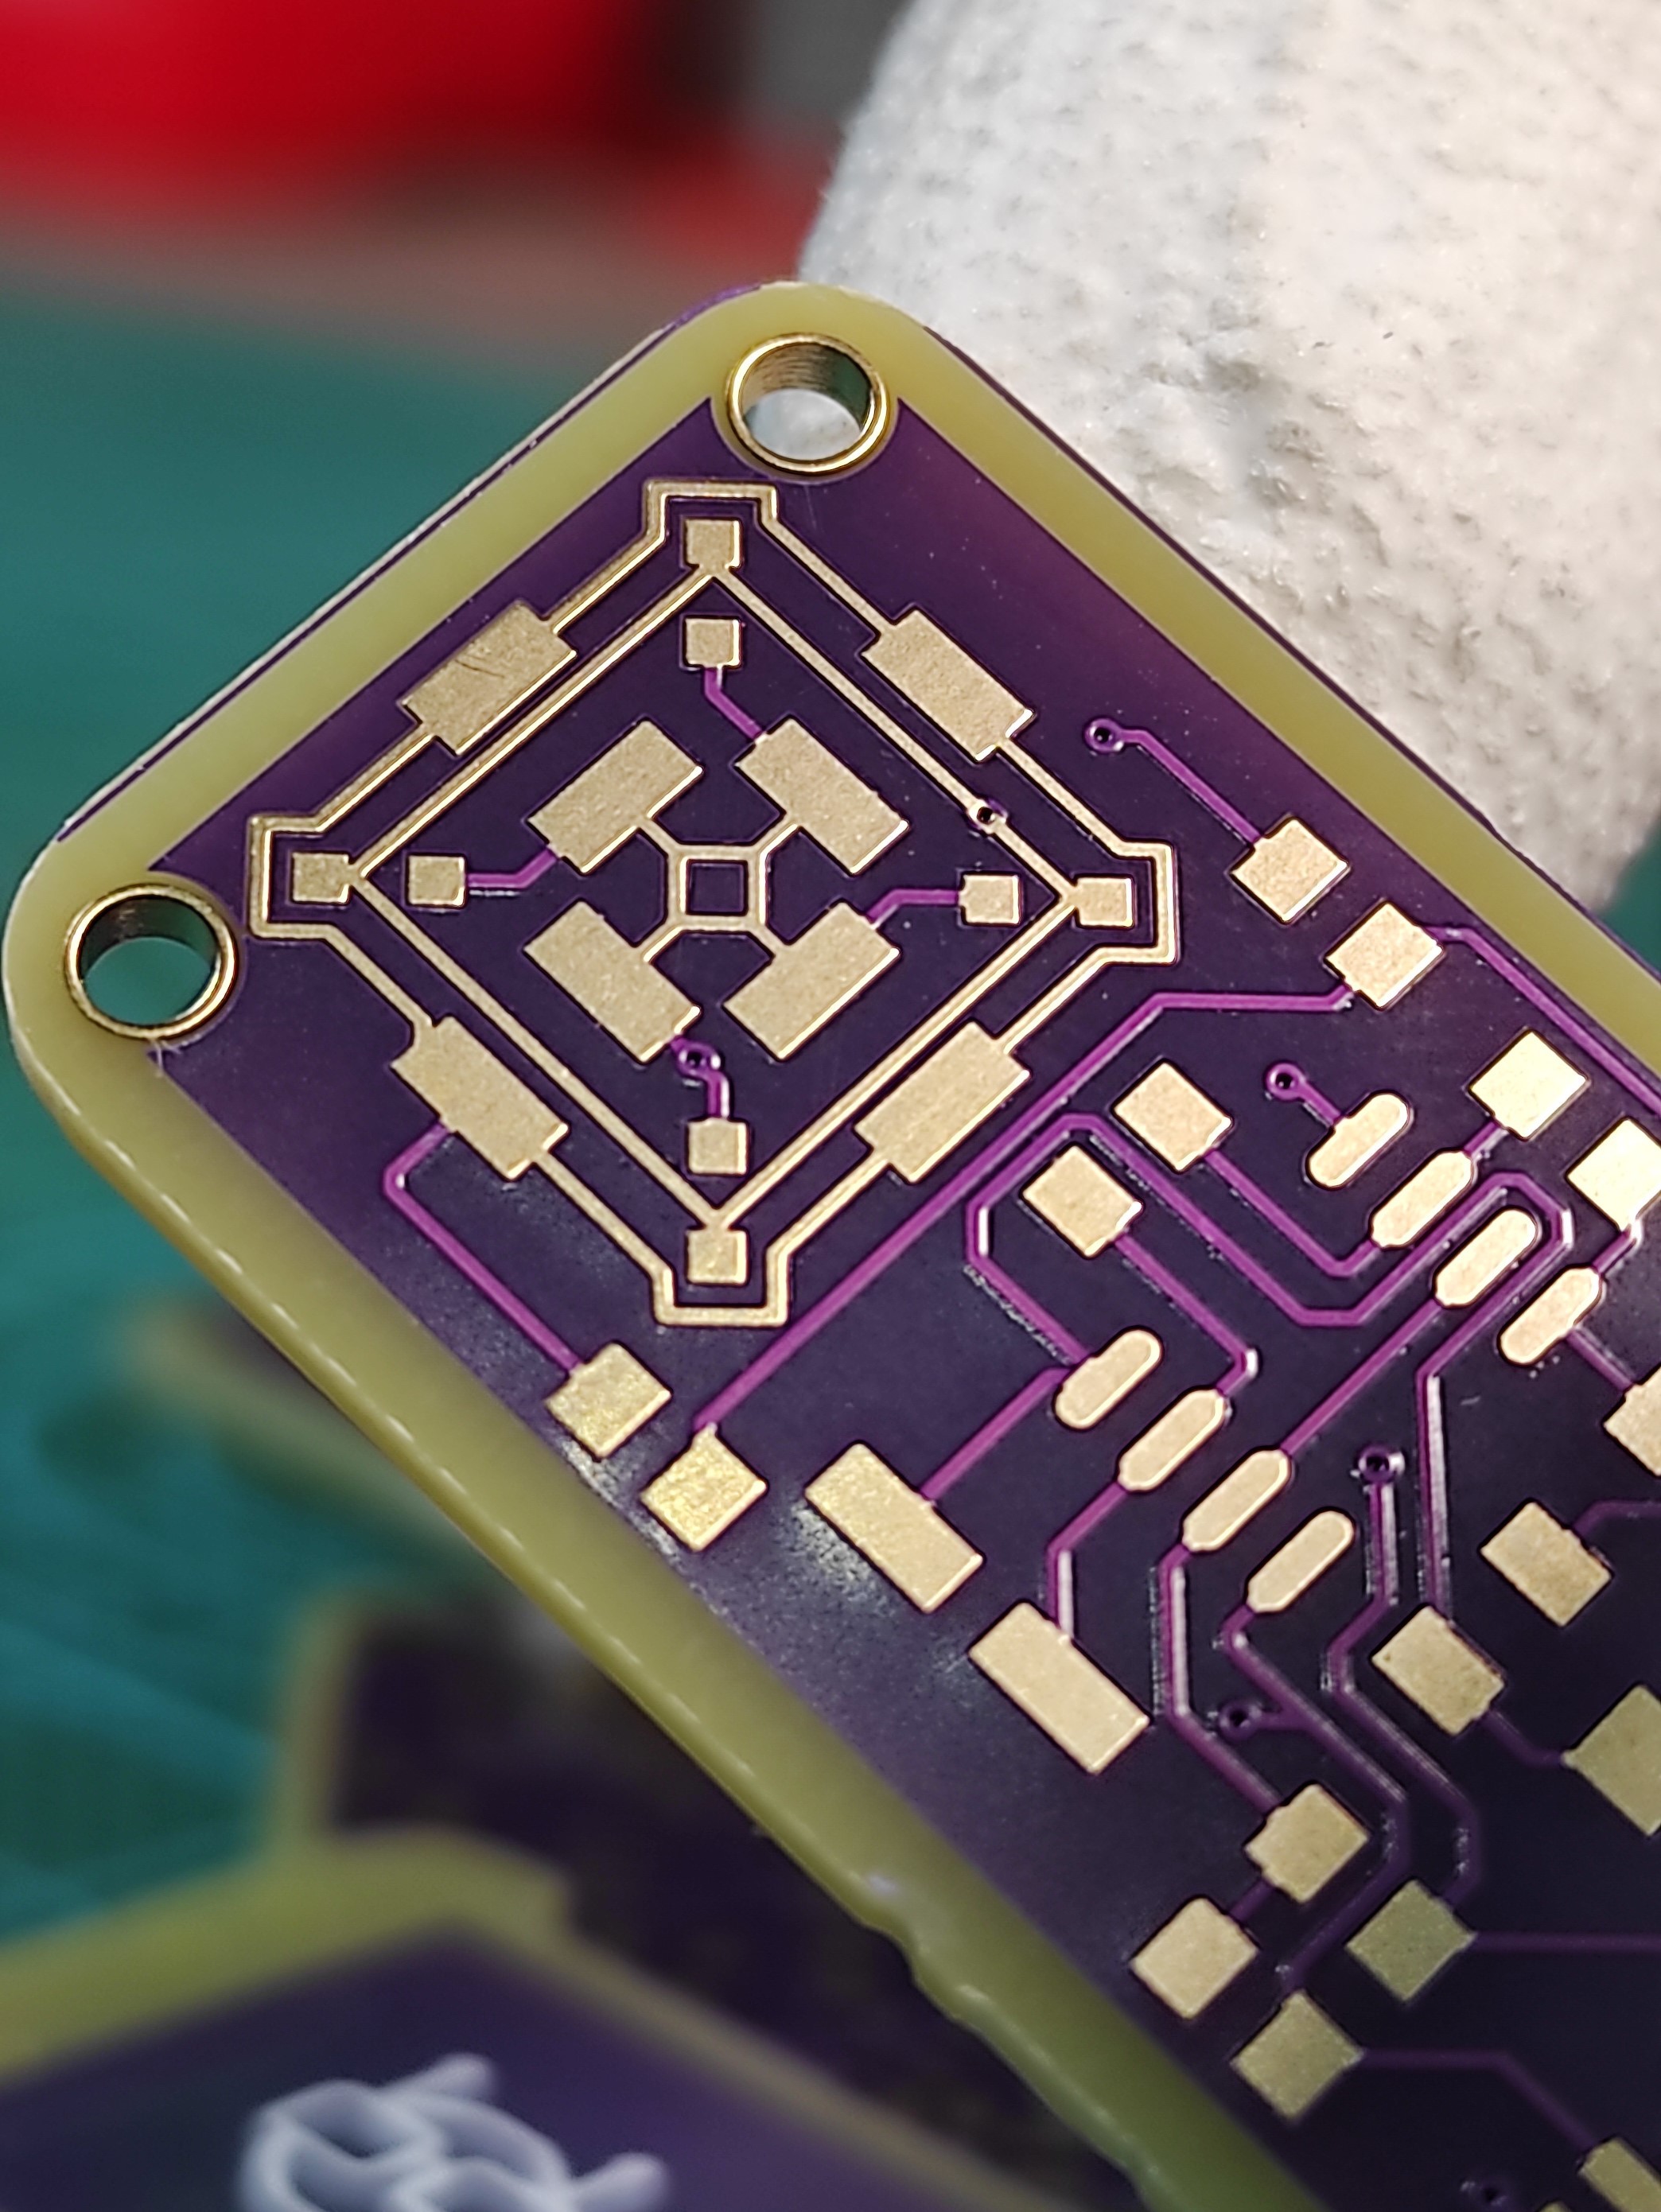
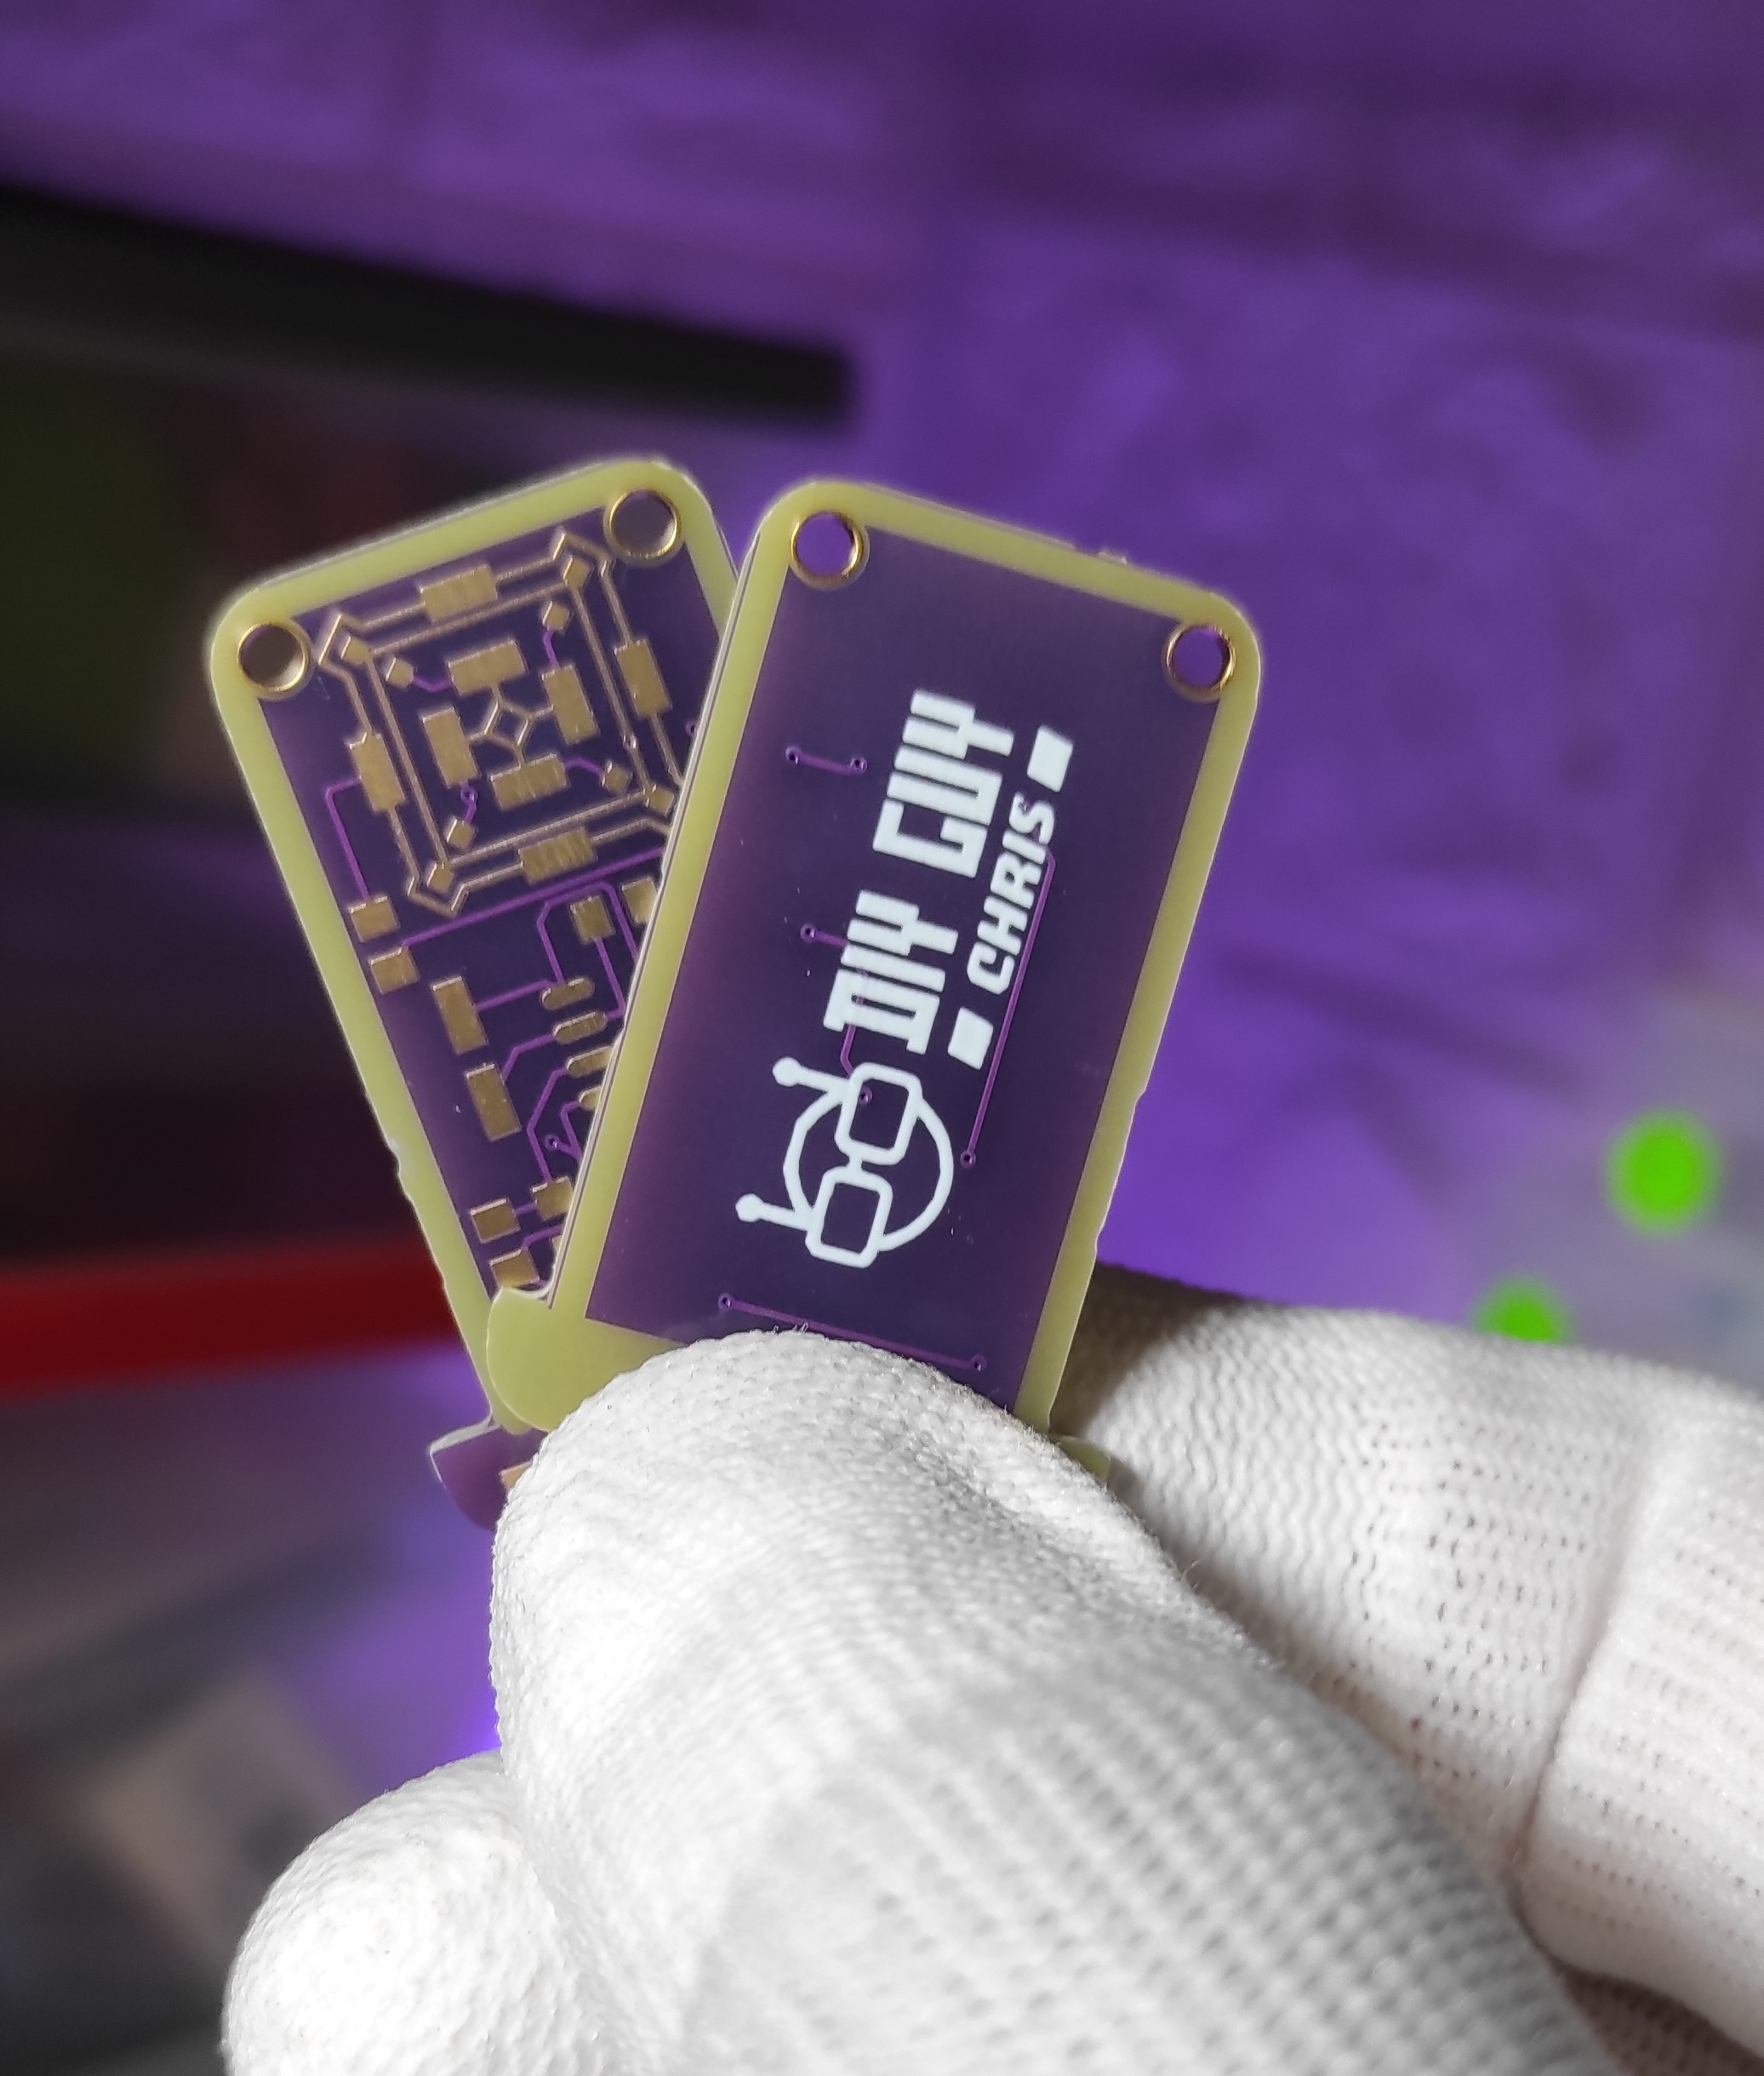
I also made PCB art for the routing around the LED pads to give an attractive looking of the gadget, Altium designer made it easy at this point and I can check the 3D view of my circuit design to make sure that everything looks okay before proceeding to the PCB ordering.
I then moved to JLCPCB and uploaded the GERBER design files to order the Printed Circuit Board and its related Stencil.
Gadget Assembly
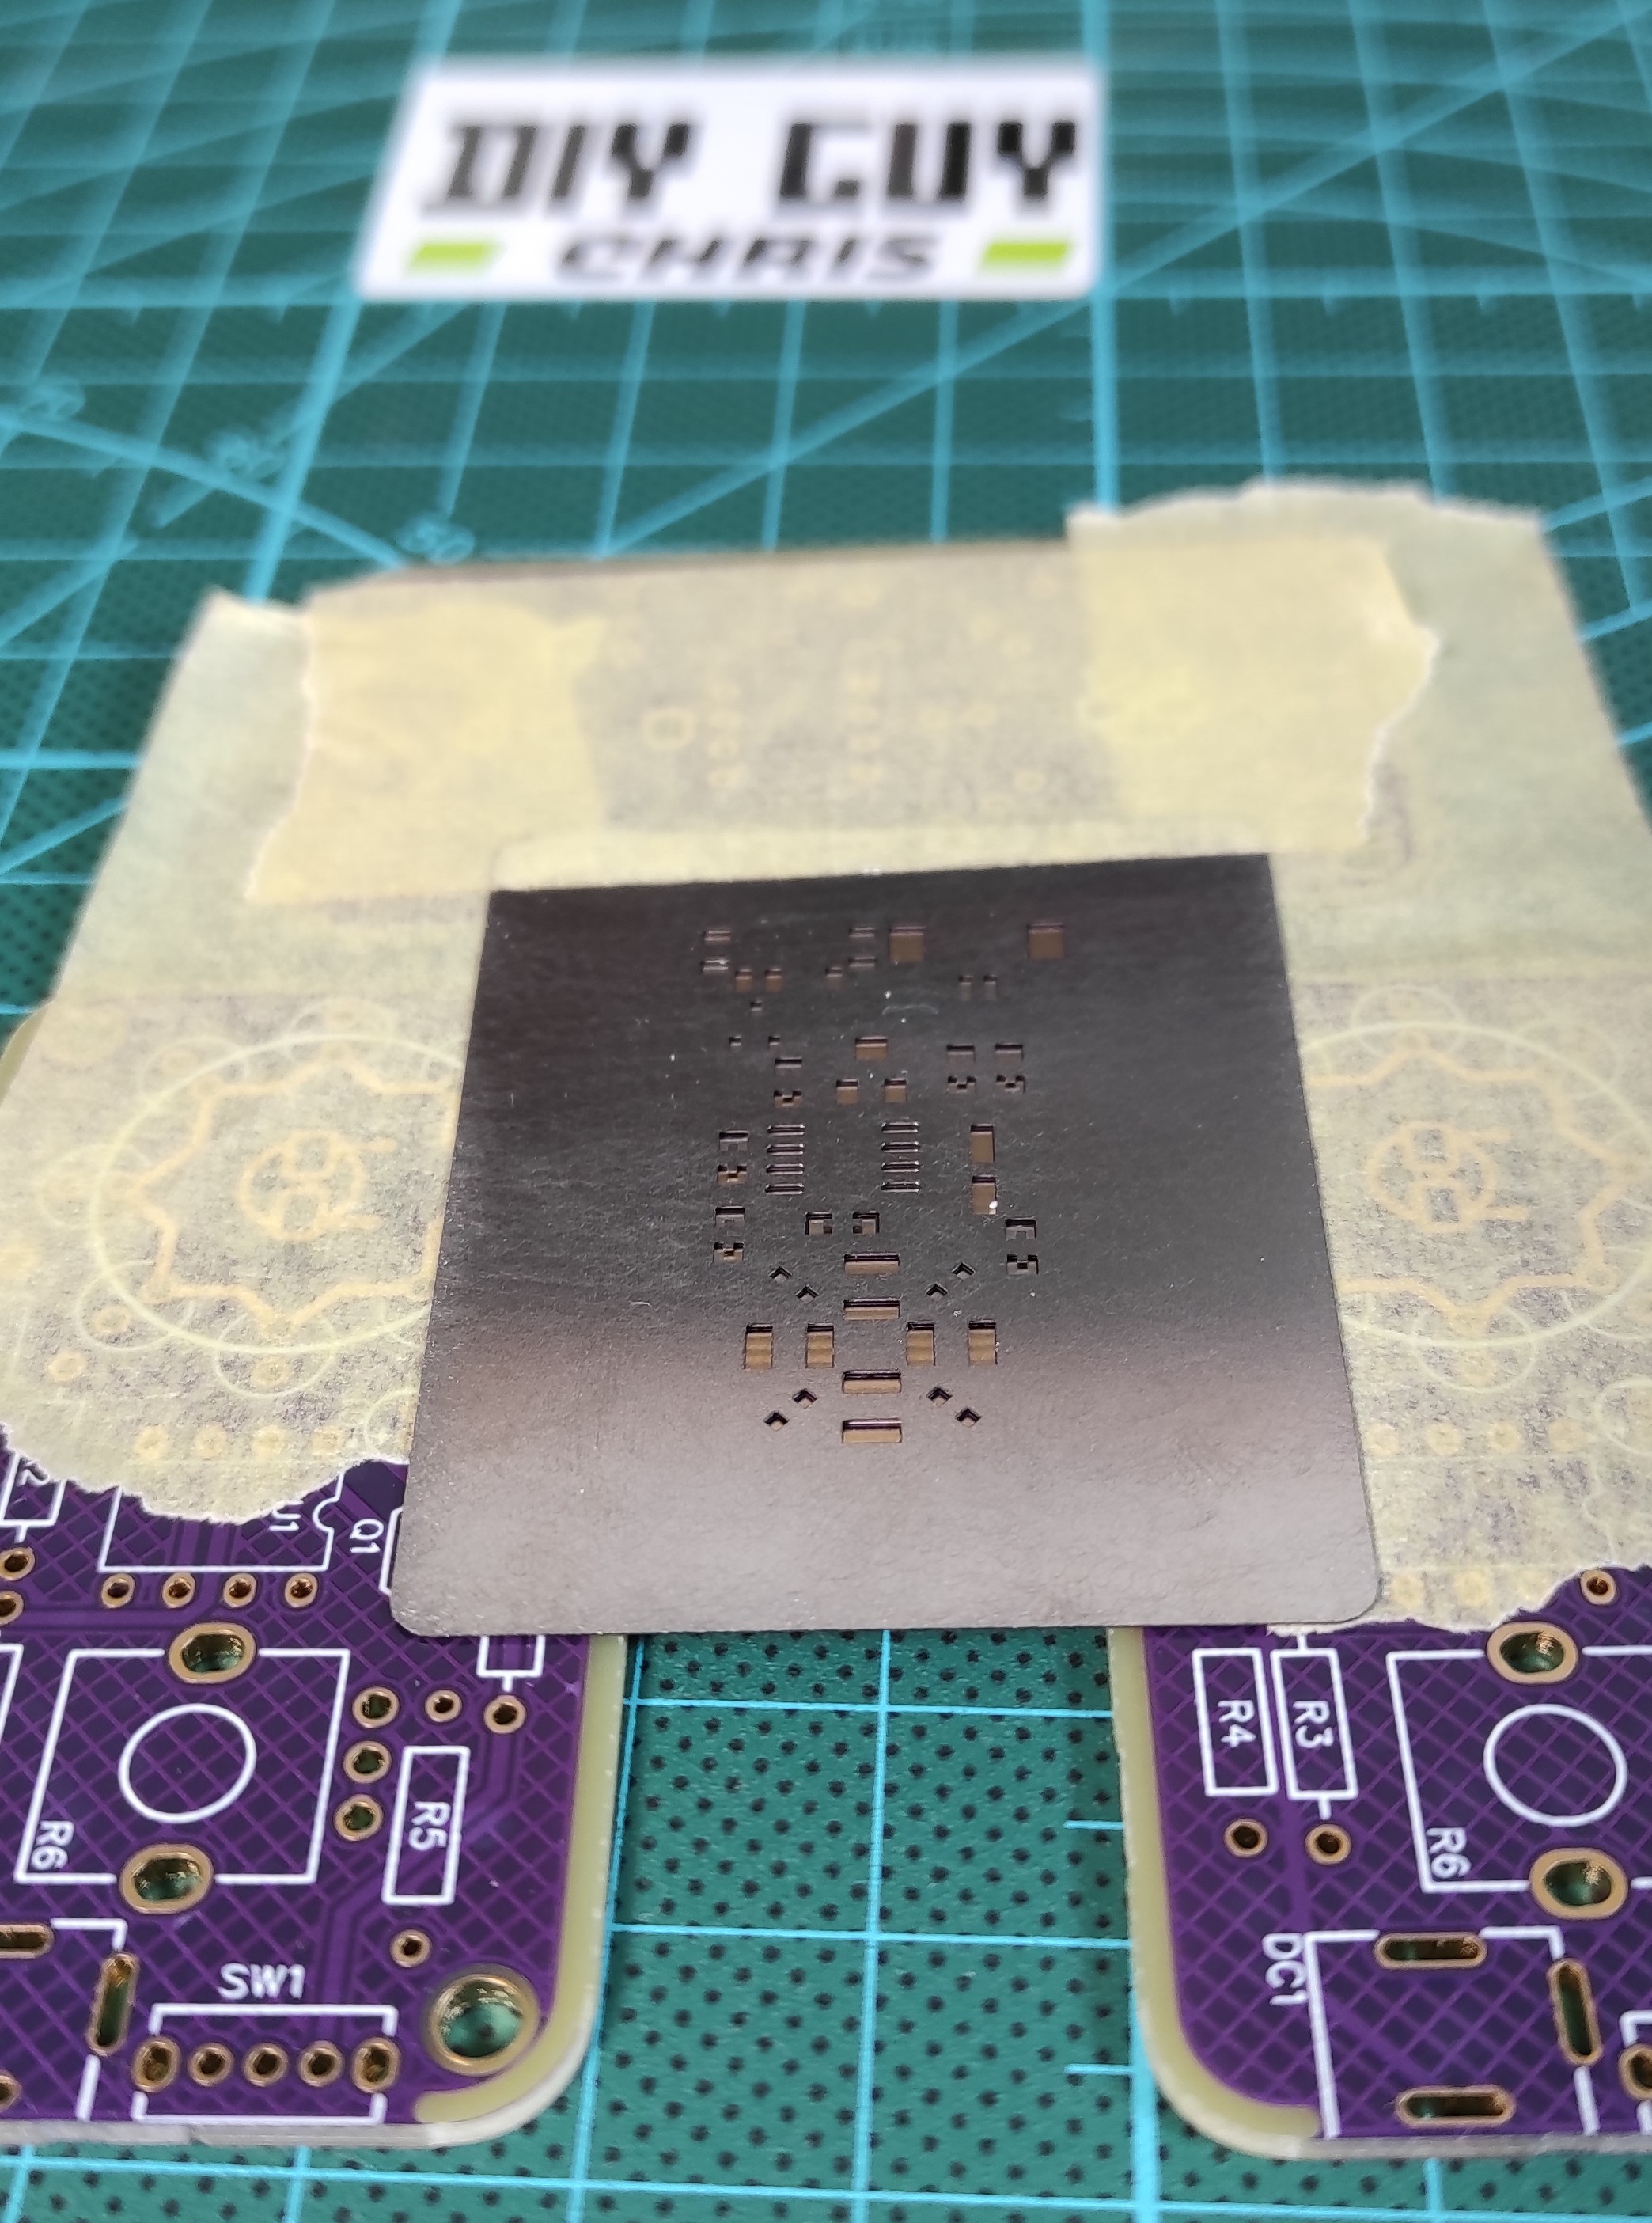

After getting all the ingredients we move to assemble the Printed Circuit Board, the first step is sticking the Stencil above the PCB in a way that we keep the parts pads and the Stencil slots aligned and exposed, after that we sweep the solder paste on the Stencil to get it equally spreaded on the pads.
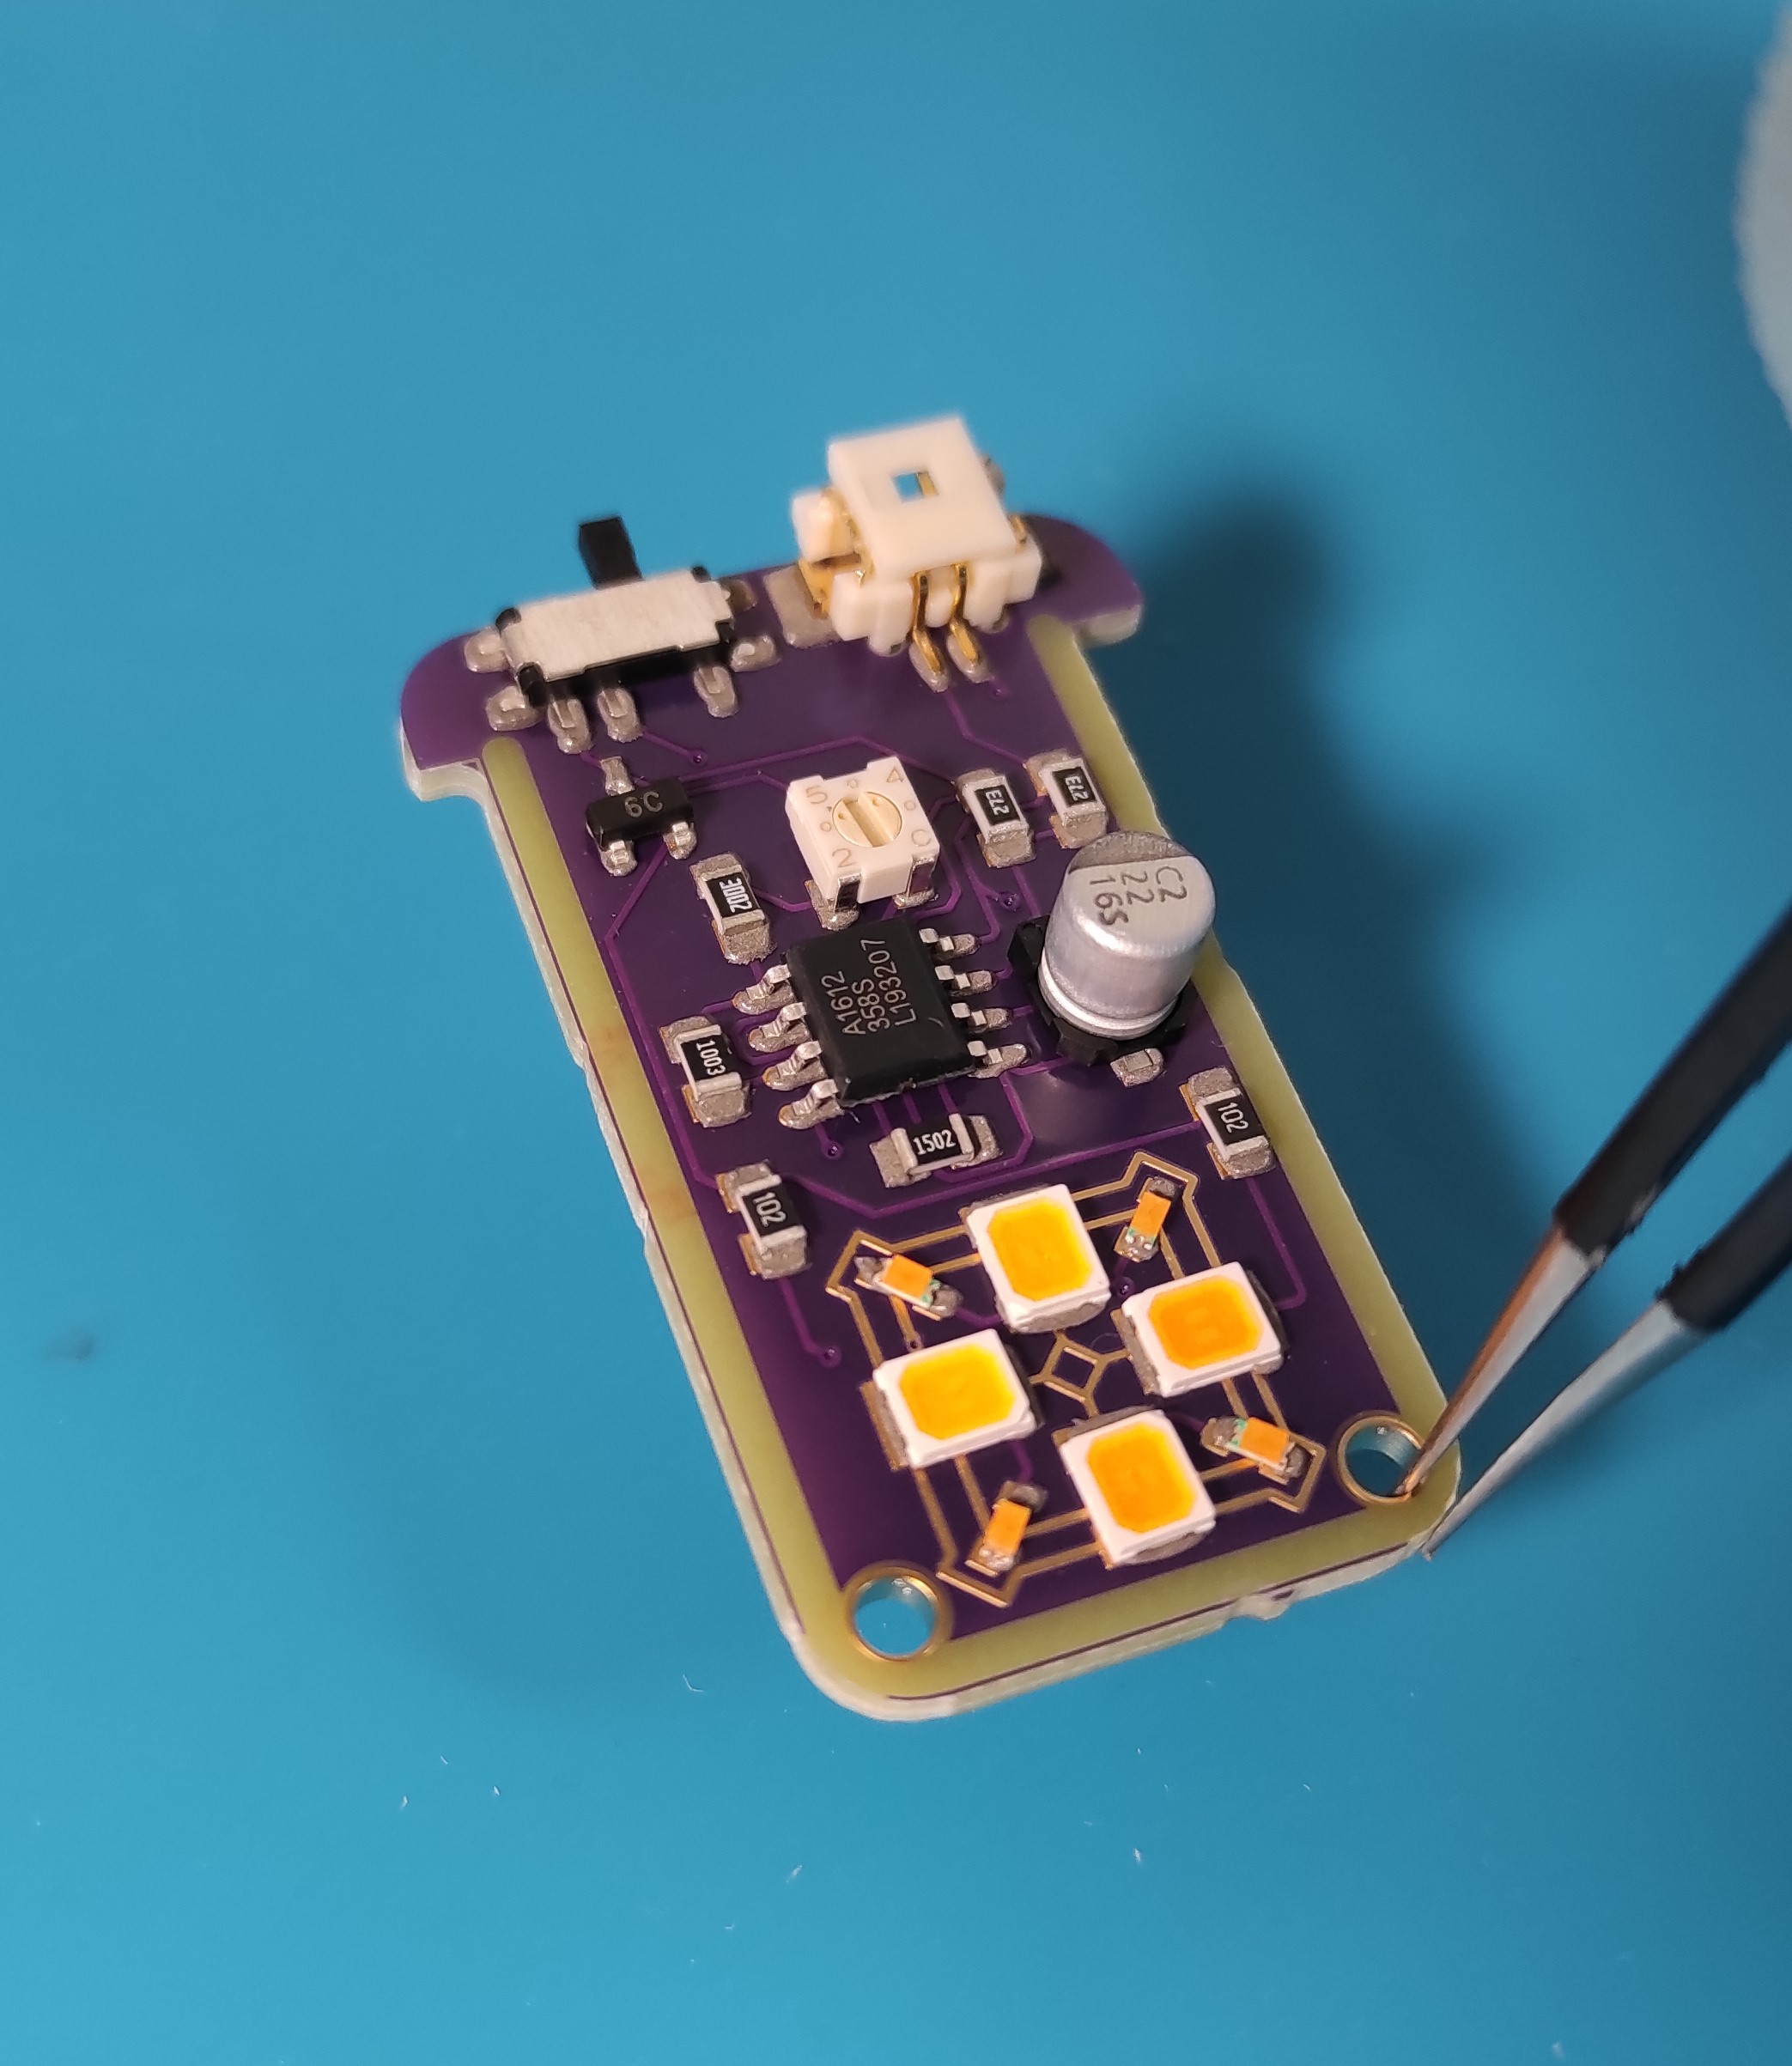
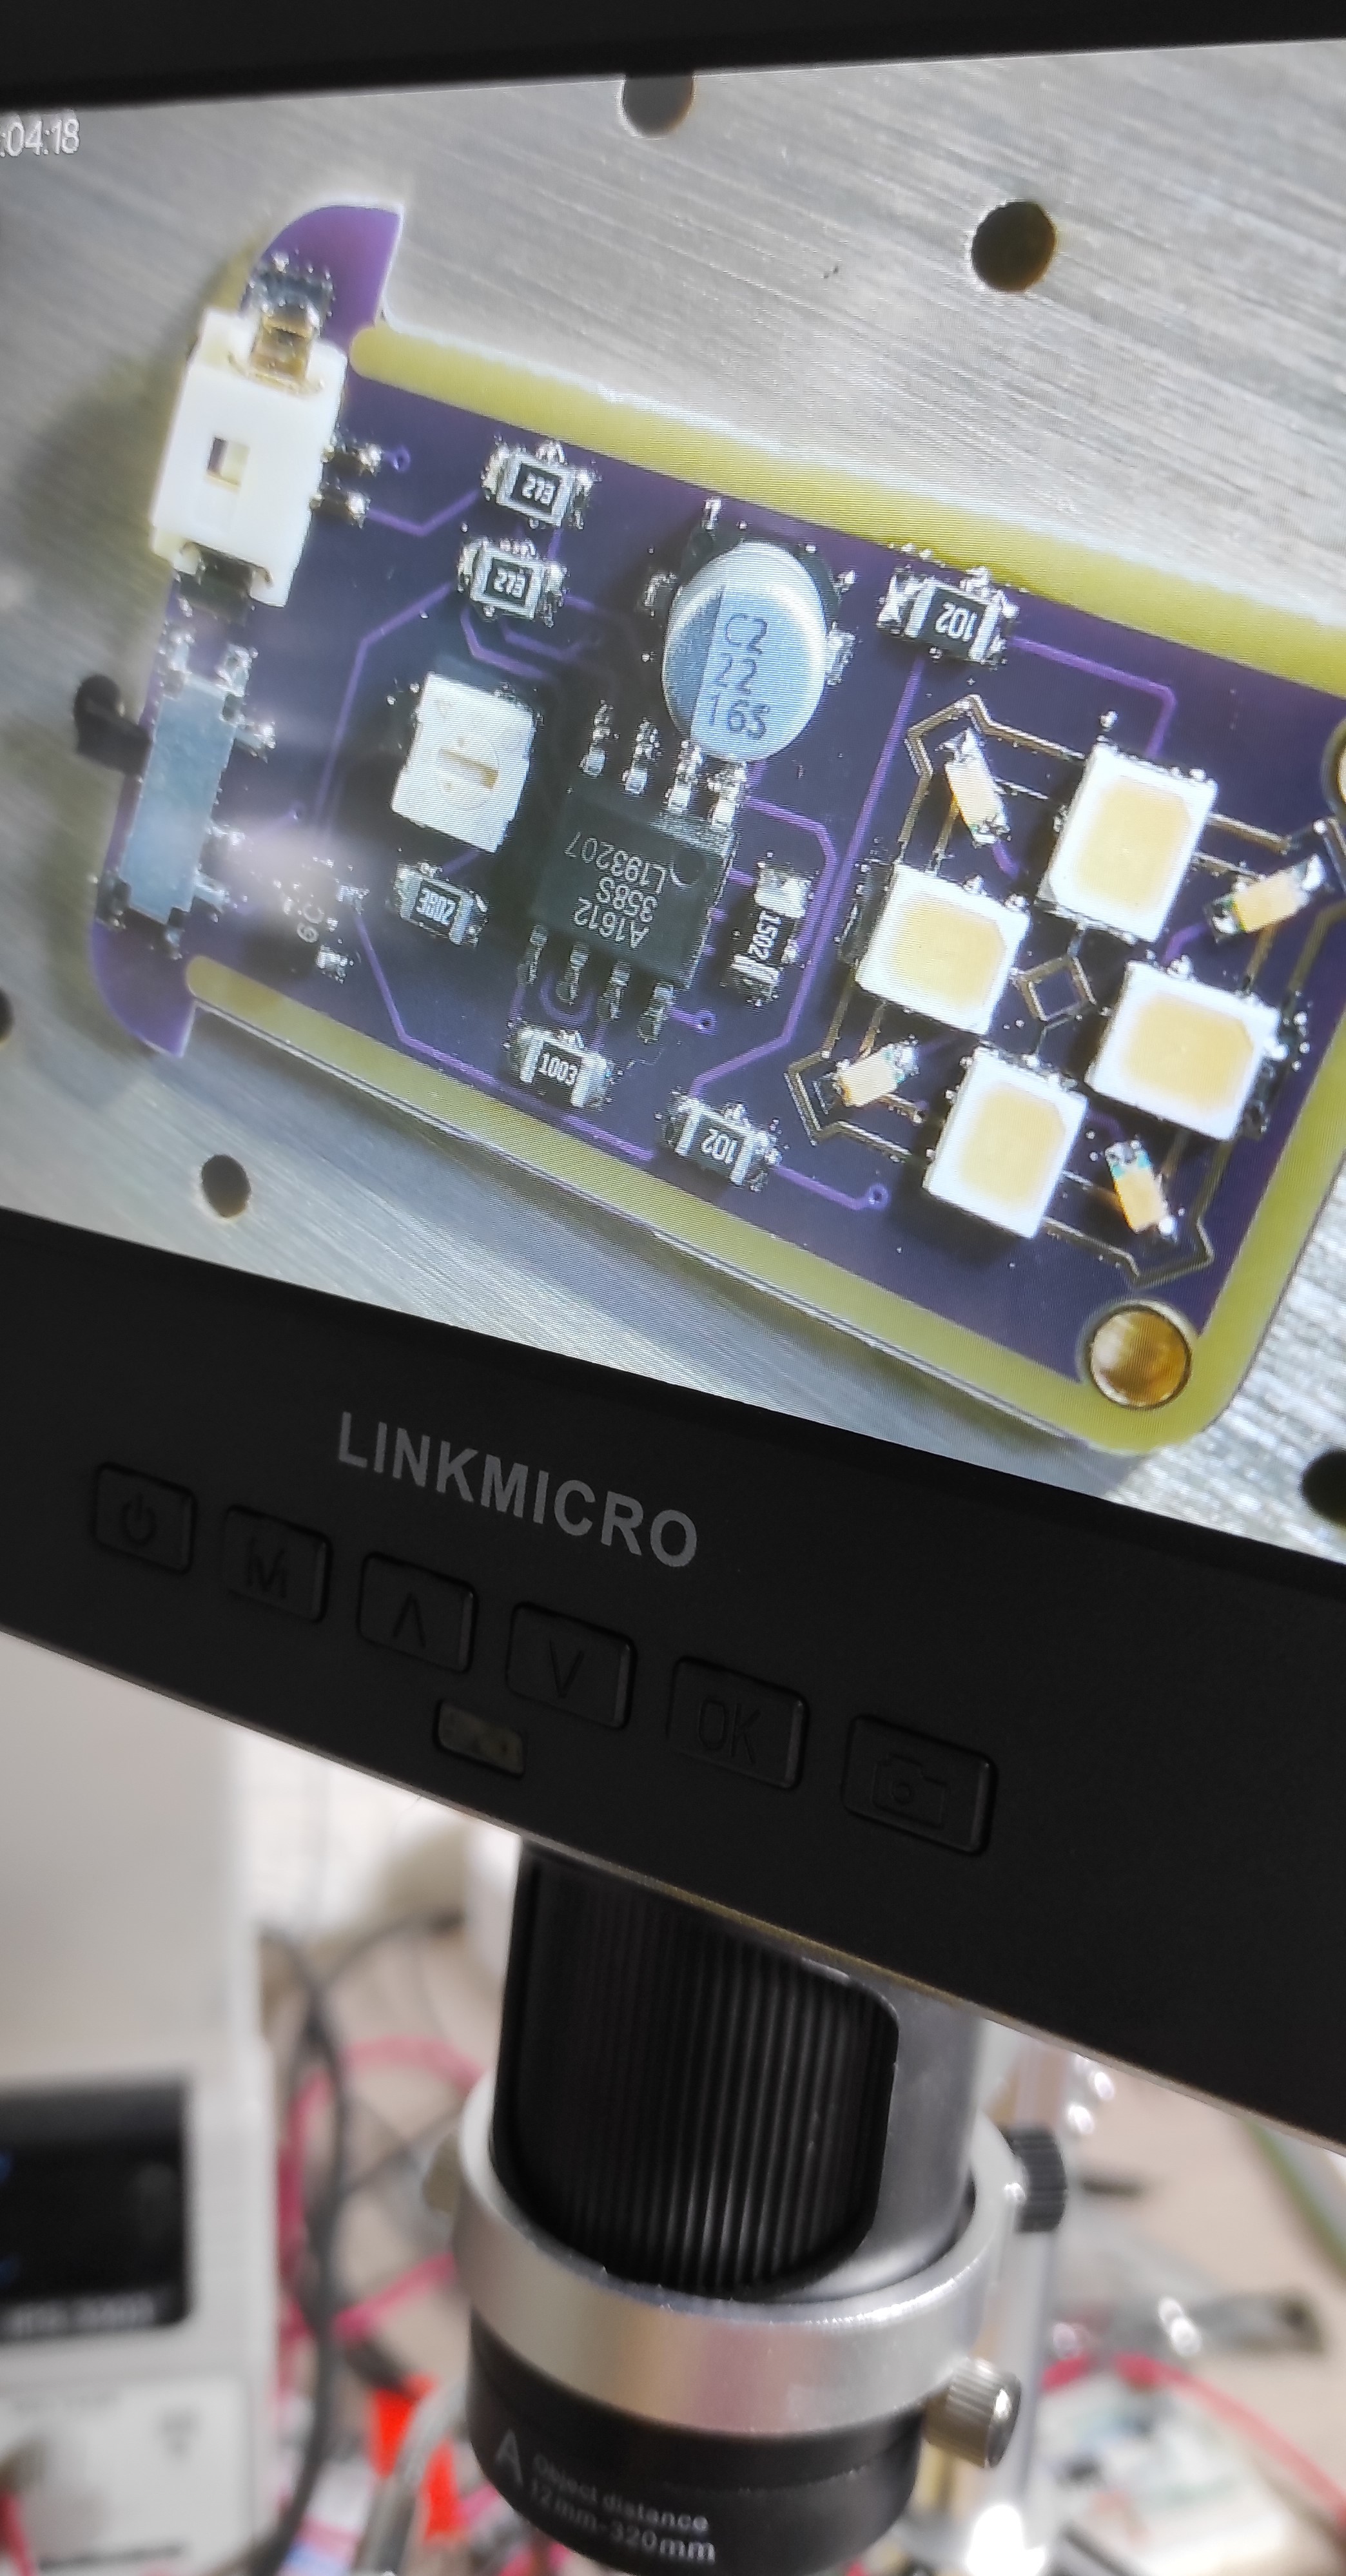
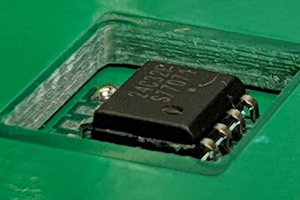
The next step of the assembly is picking and placing the parts on the PCB then take it to the hot-plate for assembly, I shared a closer look to the Components through my digital microscope camera.
After getting the parts assembled I recommend that you clean it using some flux removal solvent and this way we finish the electronics assembly.

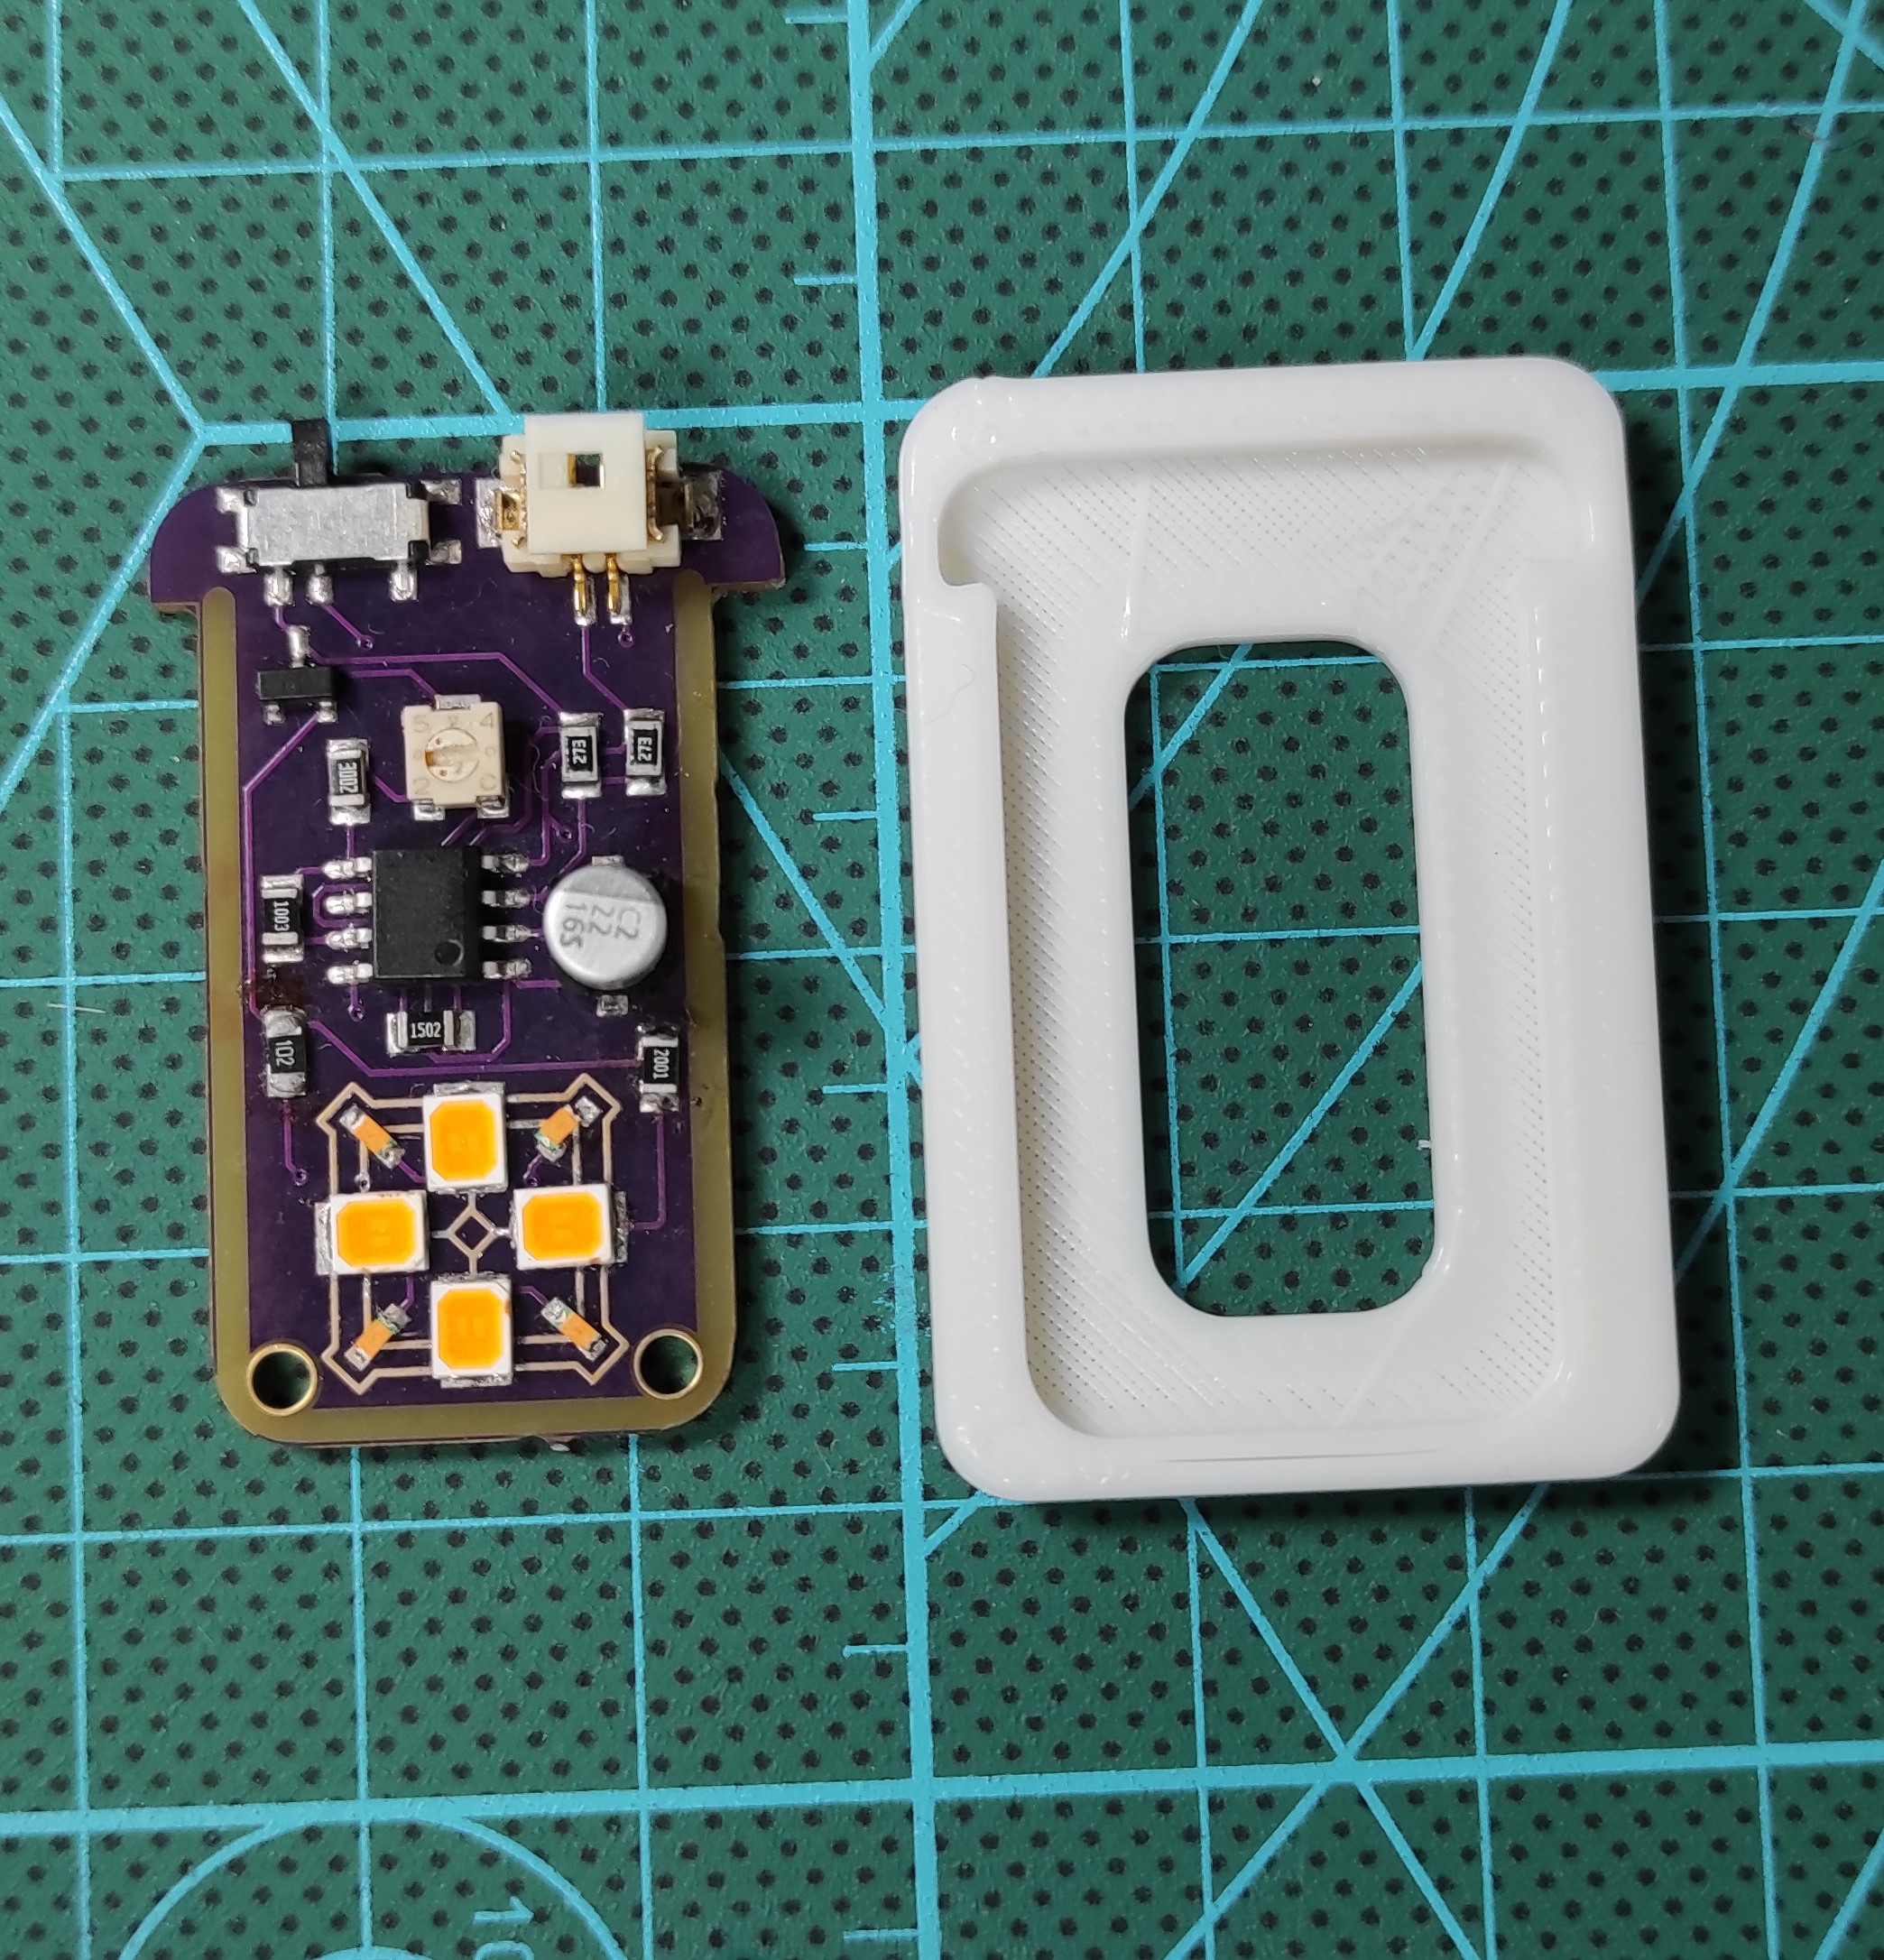
I then prepared a housing for this gadget and 3D printed it in PLA filament then I put the board to the housing and it fits in it very well.
Make It Glow
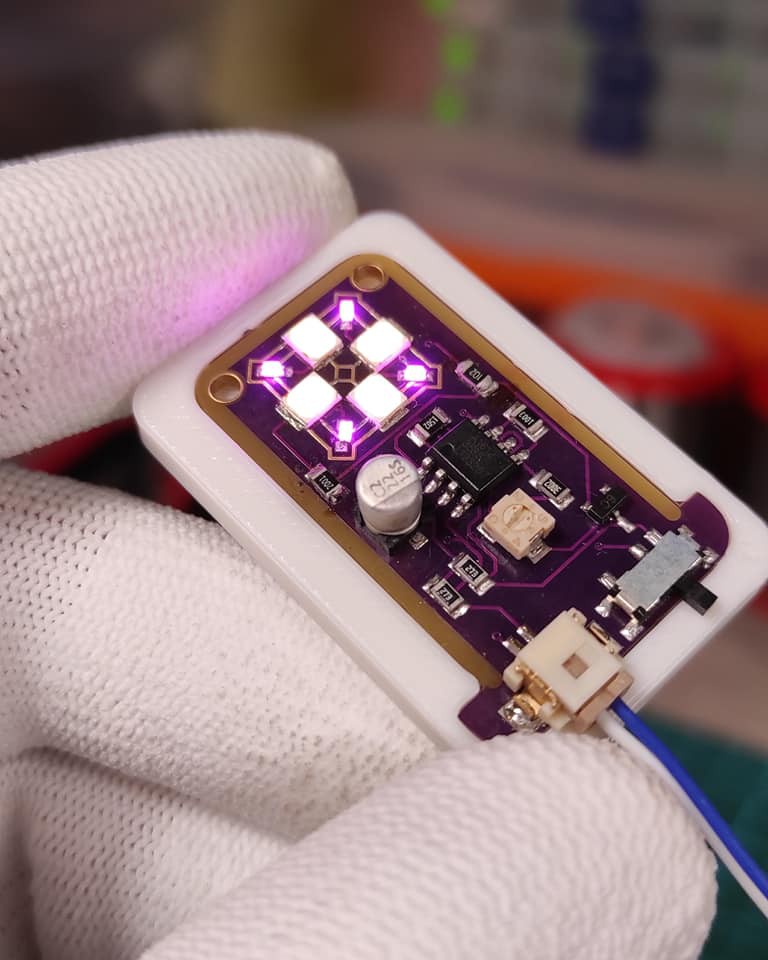
All what we need now is an external 12V DC power supply to connect it to the main power connector, as soon as I turn on the device the LEDs start on breathing in a controllable rhythm that could be adjusted through the SMD rotary potentiometer.
That's it for this project, it was a great journey around Through-hole and SMD versions of these gadget.
Waiting for your improvement suggestions in the comments section.


 Benchoff
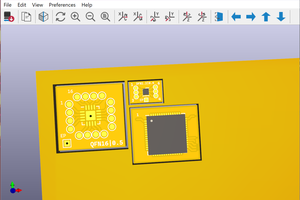
 Kumar, Abhishek
from several similar flashers I have done in the past, usually digitally controlled by PWM, I found a linear response just loooked wrong. The eye perceived brightness doesn't seem to be linear. I needed to use a more exponential brightness curve to get something that looked somewhat reasonable. Doing that in analog fashion without any trims can be a challenge.