 charliex
Finally started the Z install.
Removed the flashcut motor mount, and the removed the two retaining nuts at the top, one jam. they come off easily.

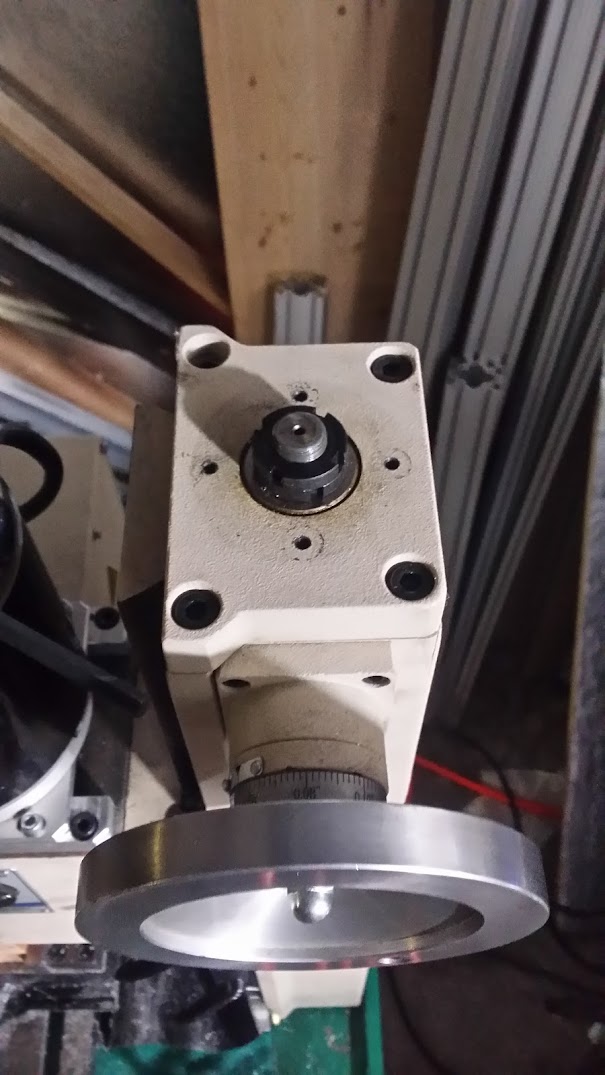
the collet tool i use on my CBeam machine fits perfectly.

Undo the head bolts, but don't remove them yet and rotate the head. I put a block of wood under the motor to hold it


the two bolts in the middle there are what connect to the Z axis platform and the lead screw. remove these, loosen the head bolts and the lead screw will just pop out . the mount to the head is a two piece part. so it comes away easily.
Removed the manual jog wheel, just a few bolts on the side and it pops out.

the old lead screw and z axis connector, the circular part fits in the front block which bolts to the z axis gantry. it can move backwards and forwards and fits inside a key way. knowing this earlier would have been useful

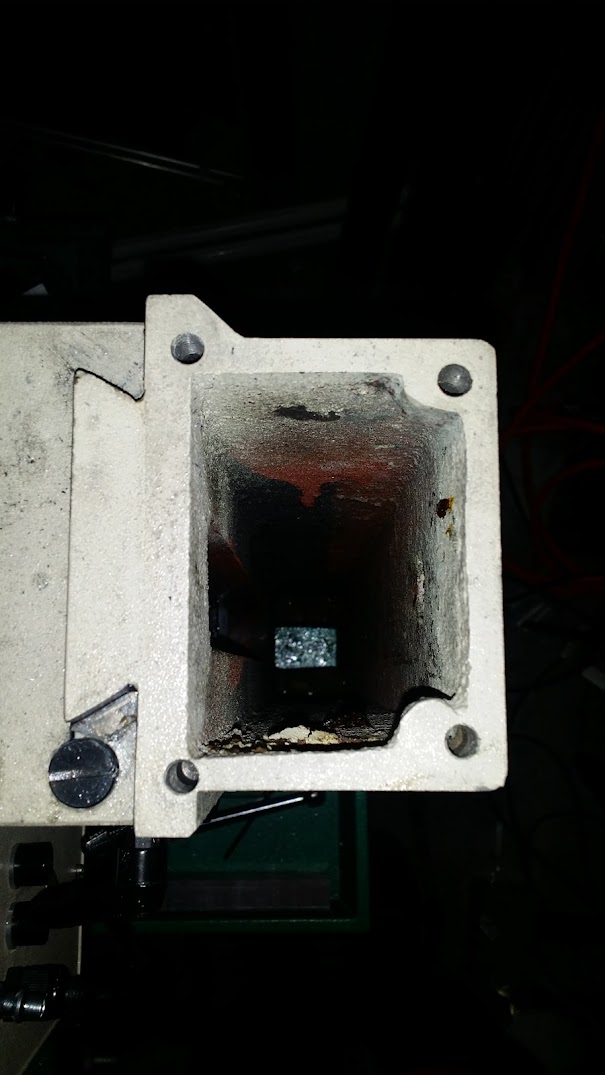
the hole left behind

so here's the first indication we're going to run into issues later, look at the hole patter its not even close to what it ought to be the top z plate has a lot of clearance and it can move around a lot, the M8 bolts slop around. note the bottom left hole is so far off its actually visibly cutting through the casting in the hole. . I used an internet attained internet PDF for those hole positions, welp (and pardon the irony) information off the internet isn't always accurate
bolts removed

remove the head , the three outer bolts sit inside a channel, one can fall out into the column , not hard to get it out but take care here. lift the head away then slide the z plate up and off.
to put the ballscrew and the ballnut to z axis plate mount in there, we dropped the nut into the machined mount and held it there while adding the four bolts, its fiddly but you can't really install it whiles its mounted to the ballnut
later one we'll discover this forward distance is quite important and the mounting bolts in the top plate being off will cause it to bind at the top, so we ended up superglueing a couple of small belleville washers to the front of this to give a small spacer of about 2.7mm, since we can then change the gap with the pressure on the bellevilles it means we can test it later and let the machine pick where it wants to be, before bolting it all down.

top plate mounted (with only one M8 bolt), than ran it up and down a few times to let the ballscrew settle into place with no binding.


and here's a test of it unloaded, moving at 100 IPM , which is the limit i set in the controller
we didn't have a pulley for the ballscrew z, and the old one had center hole too large so onto the lathe to make a brass insert with two holes for the allens to go through. didn't get photos of that operation though.

ended up ordering some off ebay, that had flanges and about the same build quality as our drill press version.
back together and leveling out the table, manged to install it with .0001" off! but of course when we tightened the bolts down it moved as expected, so tram with a mallet time..
testing the backlash, tested out to .009" on the first go, which is when we had to go back , find the binding, realise the mount holes were so far off , mark them out and then remount it all with only one bolt, so have to recad that Z plate mount and plate again. So for each mount i'd check the machine first, or use slots in the mount. we didn't preload the double nuts with bellevilles on the Z so the backlash is higher than we'd like, but still much better than it was. Having the max speed go from 15IPM to 100IPM is worth it.

i have the china/ebay quick tool changer things in ER20A with collets that were about 1.99$ each !
Super!
Super Precision 14 PCS 1/16"-1/2" ER20 ER-20 Collects Set With 1/8 1/4 3/8
New 10pcs C3/4 ER20A 1.38" Collet Chuck Straight Collet Chuck CNC Milling Lathe
the holders are decent, the collets are OK but since they cost just about the worth of the metal, i'll upgrade them as we go along.

also picked up this one way bearing on a pillow block, its used for mounting the tools into the r20 holders when its off the machine, insert and tighten, then flip to the other side to loosen. tormach sell them but they're probably available elsewhere. the ebay pulley is in the background too, we're doing 2:1

the holders and collets arrived in a few days.

unfortunately i had to run off to ER as we were about to cut since my gpa was admitted again (he's ok). but mmca managed to cad up a 2.5/3d cut cone to test the new Z axis.
Discussions
Become a Hackaday.io Member
Create an account to leave a comment. Already have an account? Log In.