 electronicsworkshops
Introduction
This tutorial will teaches you how to build a weighing machine with the Arduino using a load cell and the HX711 amplifier. First, you’ll learn how to wire the load cell and the HX711 amplifier to the Arduino to build a Weighing Machine. Then we’ll show you how to calibrate the scale and use it to calculate the weight of objects. We’ll also add a display to show the measurements in LCD.
Bill Of Materials
| SN | COMPONENTS NAME | DESCRIPTION | QUANTITY | |
|---|---|---|---|---|
| 1 | Arduino Board | Arduino UNO R3 Development Board | 1 | https://amzn.to/3UBnwTO |
| 2 | LCD Display | 16x2 LCD Display | 1 | https://amzn.to/3UhShNH |
| 3 | Potentiometer | 10K | 1 | https://amzn.to/3NMyzag |
| 4 | Load Cell | 1Kg-40KG Load Cell | 1 | https://amzn.to/3U8I329 |
| 5 | HX711 Module | 24 Bit Precision Amplifier for Load Cell | 1 | https://amzn.to/3zT6IzN |
| 6 | Push Buttons | Push-To-ON Reset Tact Switch | 1 | https://amzn.to/3DP2V7J |
| 7 | Connecting wires | jumper wire | some | https://amzn.to/3fMoSw7 |
| 8 | Breadboard | Normal | 1 | https://amzn.to/3FUQlXe |
PCB Manufacturer
PCBWAY is quite professional in the field of PCB manufacturing; you can try their services at extremely low prices, Only 5 dollars for 10 PCBs , besides this the new members also get a 5 Dollars bonus.
You can now upload the Gerber File to the Website and place an order. The PCB quality is superb & high standard. That is why most of people trust PCBWAY for PCB & PCBA Services.
You Will get FREE prototype pcb from PCBWAY. So do not be late to register and place your first order from PCBWAY
If you want to order pcb from PCBWAY . CLICK IN THE LINK BELOW:

What is Load Cell
A load cell is a transducer that converts a force into electrical signal that can be measured. The electrical signal changes in proportion to the applied force. Load cells come in three varieties: strain gauges, pneumatic, and hydraulic. We’ll go over strain gauge load cells in this tutorial.

A strain gauge is a sensor that changes its resistance depending on the pressure exerted on it due to the piezo resistive effect.
Bar Load Cells
A bar load cell contain four strain gauges already in a Wheatstone bridge.

The white blobs at the top and bottom each have two strain gauges. The object to be weighed is placed on the bar’s edge (the one far from the wire). This elongates the strain gauges at top and compresses the ones at the bottom.

If the load cell has weight, a voltage will exist in the white and green wires. Then again, due to infinitesimal change in the resistance, this voltage is still very small and cannot be fed to micro controller directly. So, here we need a amplifier circuit that converts a small signal to required signal that can be read by analog pin of micro controller.
HX711 Amplifier
The output signal produced by the load cell is in range of millivolts, so we need an amplifier to convert the signal into a level that we can later transform it into a digital signal and process it. For this purpose, we useHX711 amplifier sensor. The HX711 amplifier sensor includes a HX711 chip with analog-to-digital conversion capability in 24-bit accuracy. The HX711 module amplifies the low-voltage output of the load cell and sends it to the Arduino so that the Arduino eventually calculate weight from this data.

Wiring Load Cell and HX711 Amplifier


Circuit Diagram: Interfacing HX711 Load Cell with Arduino

Working Principle
First of all we must place a known weight on our load cell.Then, do the calibration with the raw value displayed at serial monitor. Now, You can place any object on load cell which weight is unknown to you. The output of load cell will be in mili volt so its output is feed to amplifier and analog to digital converter before providing to...
Read more »
 Peter McCloud
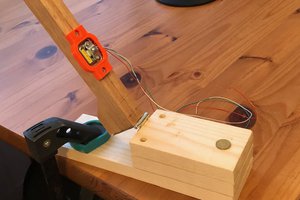
 Alexander Dvorkovyy
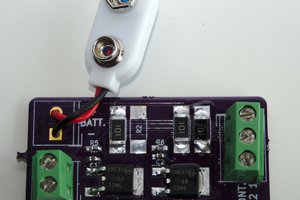
 Ben Holmes
 jeanlucdemarc