 Bulbul
Backlog 3 brings us to the current revision of the board. I learned of the ZMK firmware which adopted a bluetooth first (but not bluetooth only!) approach to open keyboard firmware, they use Zephyr RTOS as the base for the firmware and i was delighted in how easy it was to make a custom board for it. It's also easy to maintain custom builds with their github actions fork that will build firmware for you when you change your keyboard files and push the changes. One of the most well supported bluetooth soc's in the maker ecosystem is the nordic NRF52840, this has been very popular for reasons of arduino support (and other firmware as well such as Zephyr Rtos), dev boards and modules available, and the fact it also has a usb peripheral making it a perfect match for a keyboard project.
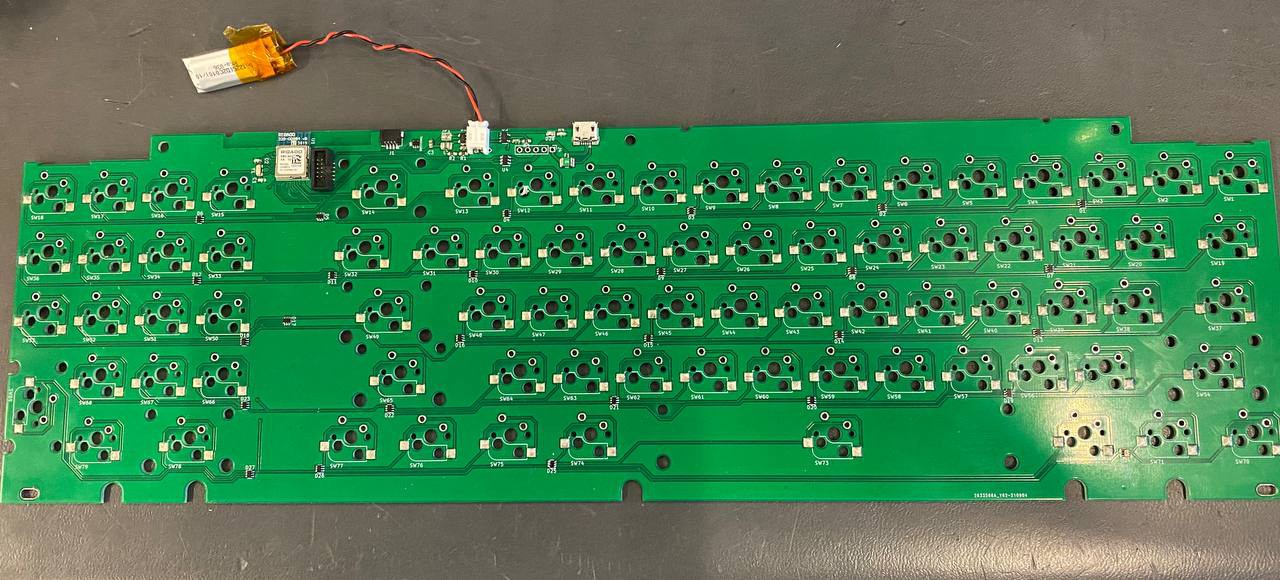
I had a nice grab of about 20 modules from the free table of my old workplace. These were Rigado BMD-340 modules. (which were acquired in the past few years by ublox and rebranded ublox BMD-340 iirc). Since I had some I decided to take the dive and redesign the plapple board around this module, as well as why I didn't opt for the cheaper more common raytac modules.
Design was simple, the biggest changes was needed to add a LIPO charger and a cut out zone for the bluetooth.
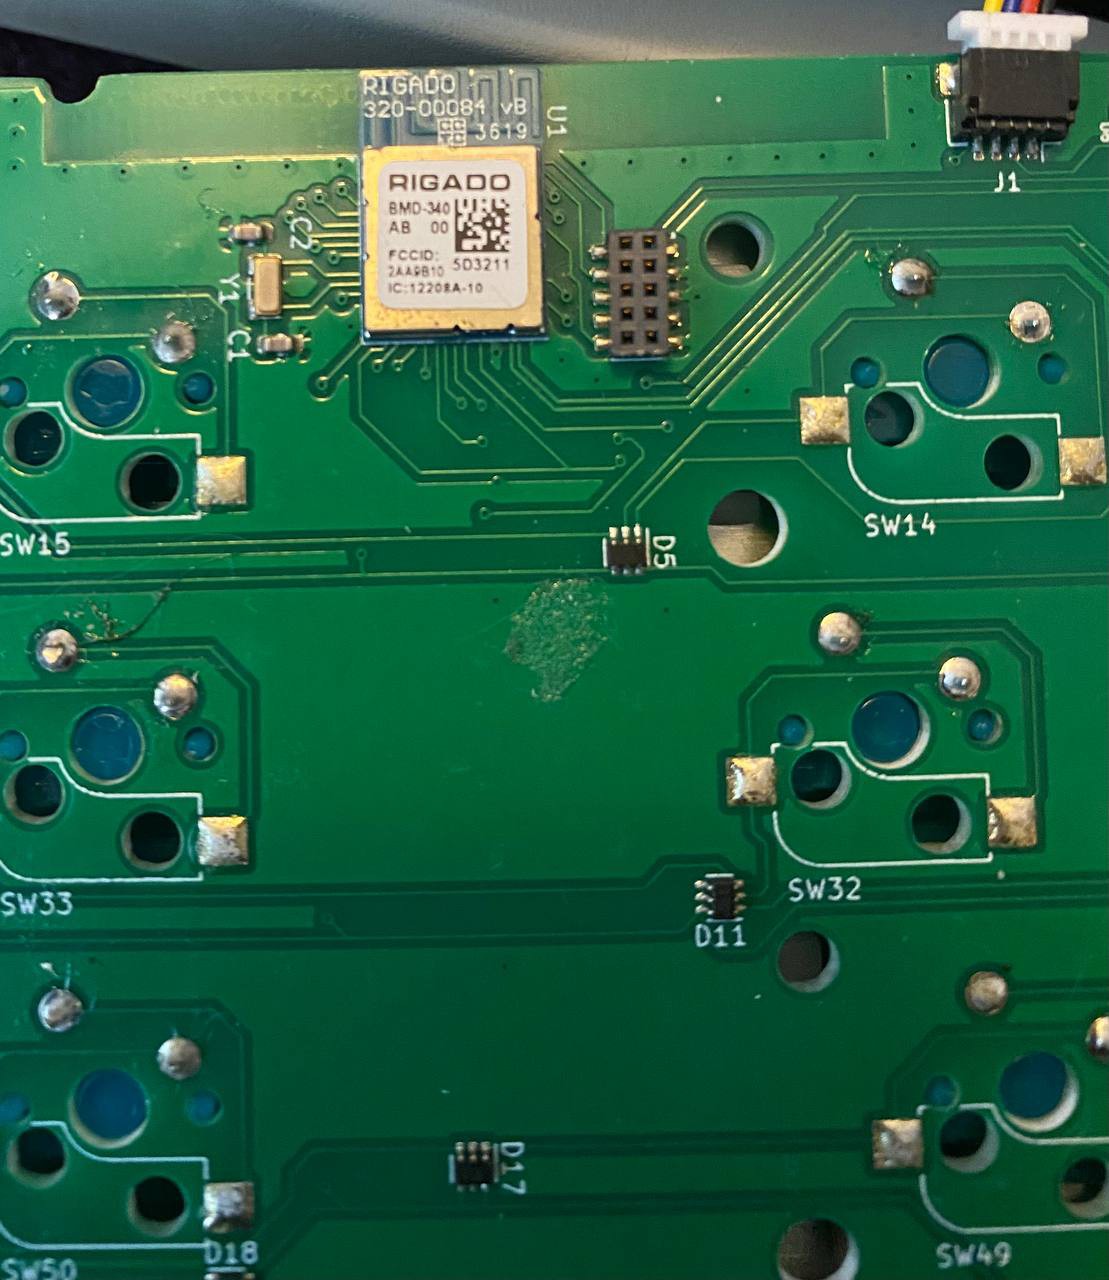
As you can see I also switched to surface mount diode arrays to lower parts count and to make it more smd friendly.
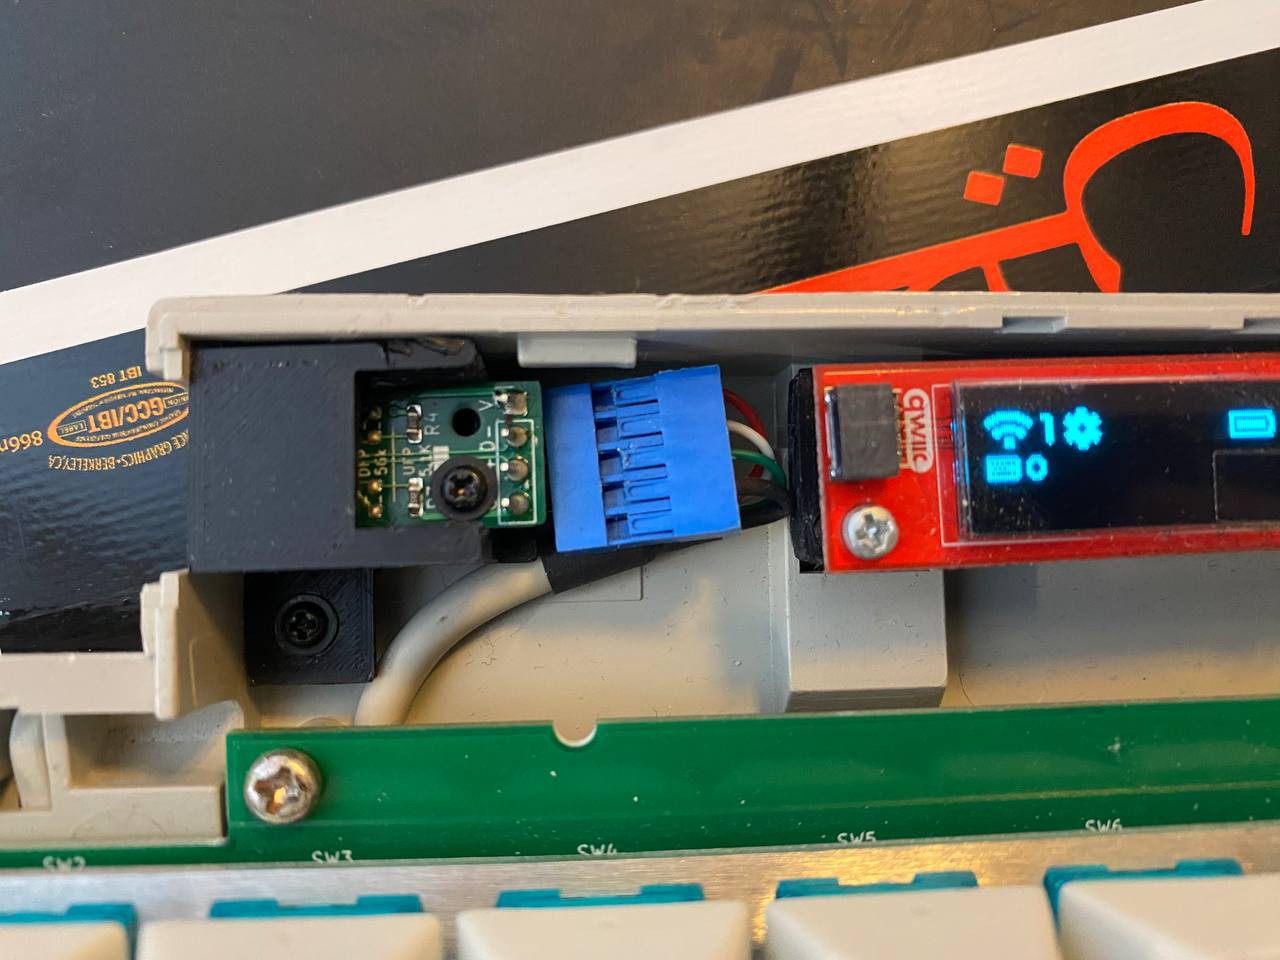
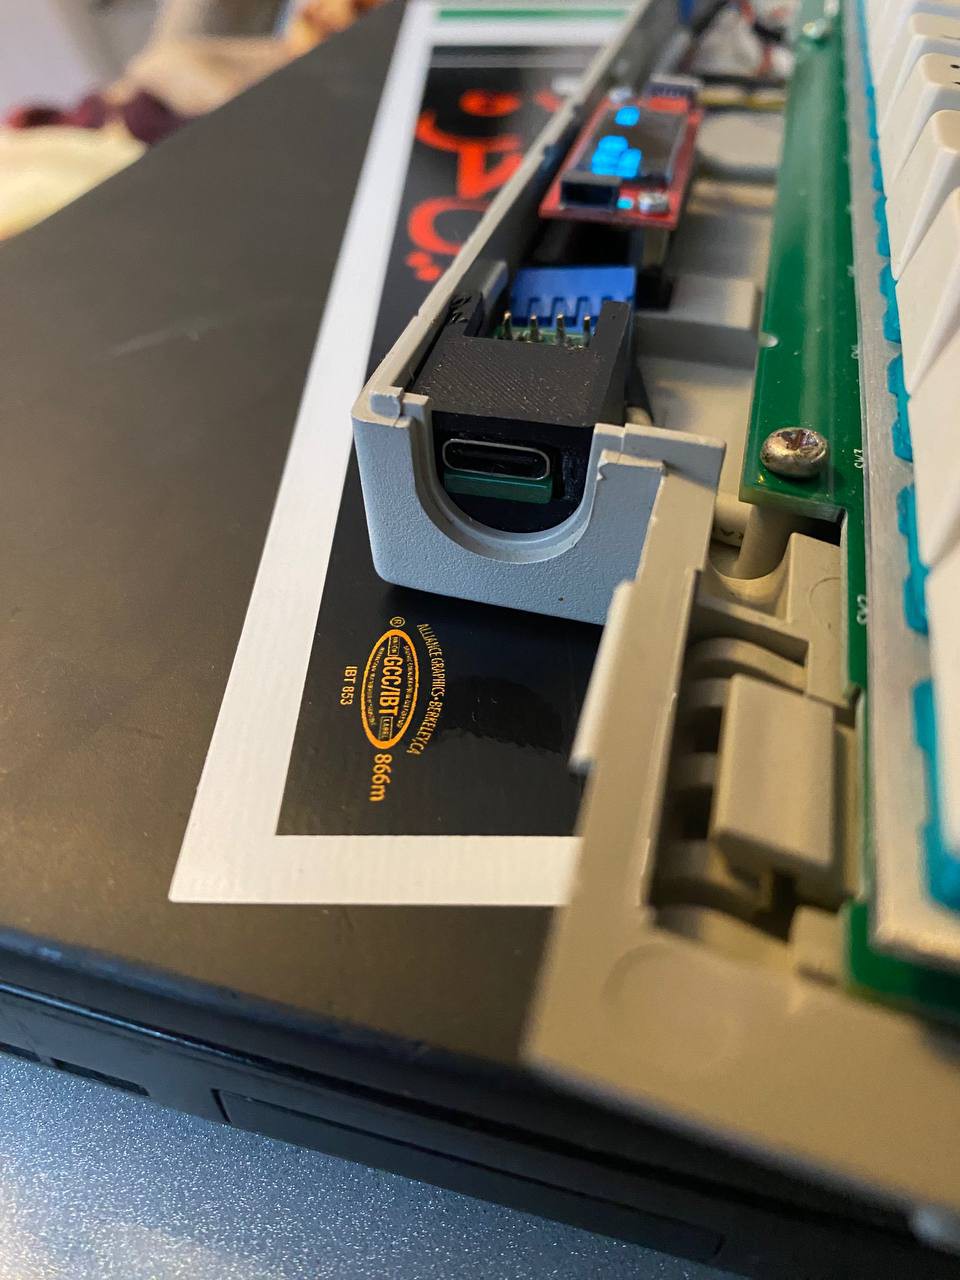
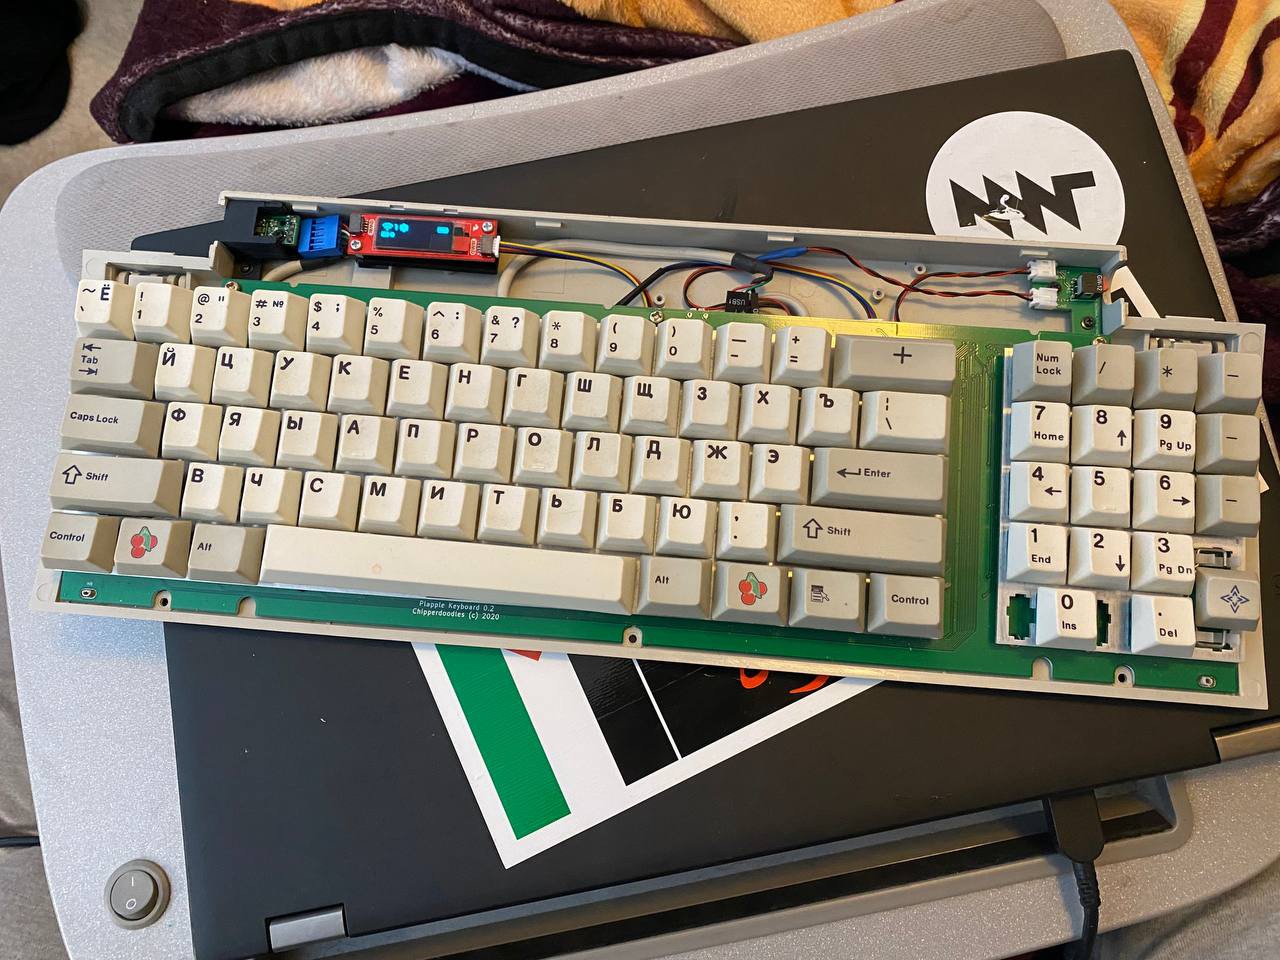
Outside of that and my many failed secondary pcb designs (the ones that fit where the old controller board would go) It was relatively painless. I improvised a simpler usb-c adapter for usb connection that relied on a 3D printed housing to make it line up where with the spots for the old mini-din connectors went along with a cobbled together a internal usb cable from an old pc case. I just need to adjust the 3d printed part to center the connector better otherwise, I'm really happy with that fit. For the battery connection I added an in between board for the battery with a switch to disconnect the load if the keyboard is going in storage. The circuitry on board only has a LIPO charger IC and no cell protection so the added safety of a switch as well as the mental reassurance that something is off when switched off felt like a good enough reason to add it. I had to splice 2 jst battery cables together to make a male/male cable to go between kebyoard and power switch board. For the display I used a little i2c SSD1306 oled and 3dprinted a (accidentally) press fit mounting bracket that slips around supports for the old apple power switch.
Not ideal but it works.


An important note, These little adapters for the power switch only work with the SMK version of the apple keyboard II case. This is because the SMK version actually had screw mounts for the old controller board, which allowed me to reuse them. The mitsumi case lacks the screws and it's controller board is a simple pres fit and held in place with some plastic supports.
So that leaves me with some things I still want to do before I call the project finished:
- Re-examine Power draw
- Re-design power rail/management
- Add lipo cell protection IC (maybe add to switch daughter board)
- design a succesful/functional full size daughter board
- Change power switch to pushbutton on switch daughterboard
- Hatch the ground planes
Discussions
Become a Hackaday.io Member
Create an account to leave a comment. Already have an account? Log In.