 Jerry Isdale
There quite a few alternatives for creating the Pose2Art system. I will review the basic subsystems in this Details section, and go into the implementations of my setup in the Project Logs to follow. This is an ongoing project as we explore what is possible.
My GitHub for the project is https://github.com/MauiJerry/Pose2Art
And, yes, the overall idea of Pose2Art is something that has been done in the past using the Microsoft Kinect, which also includes a depth camera and other cool features. However, the discontinued Kinect and its replacement, the Azure are closed systems. The video and depth streaming (etc) features of these devices are quite powerful and desirable. Future updates of our Pose2Art might add some of these features, AND explore other smart camera functionality
Critique (Nov 2022)
(see Log 5 for planning next level)
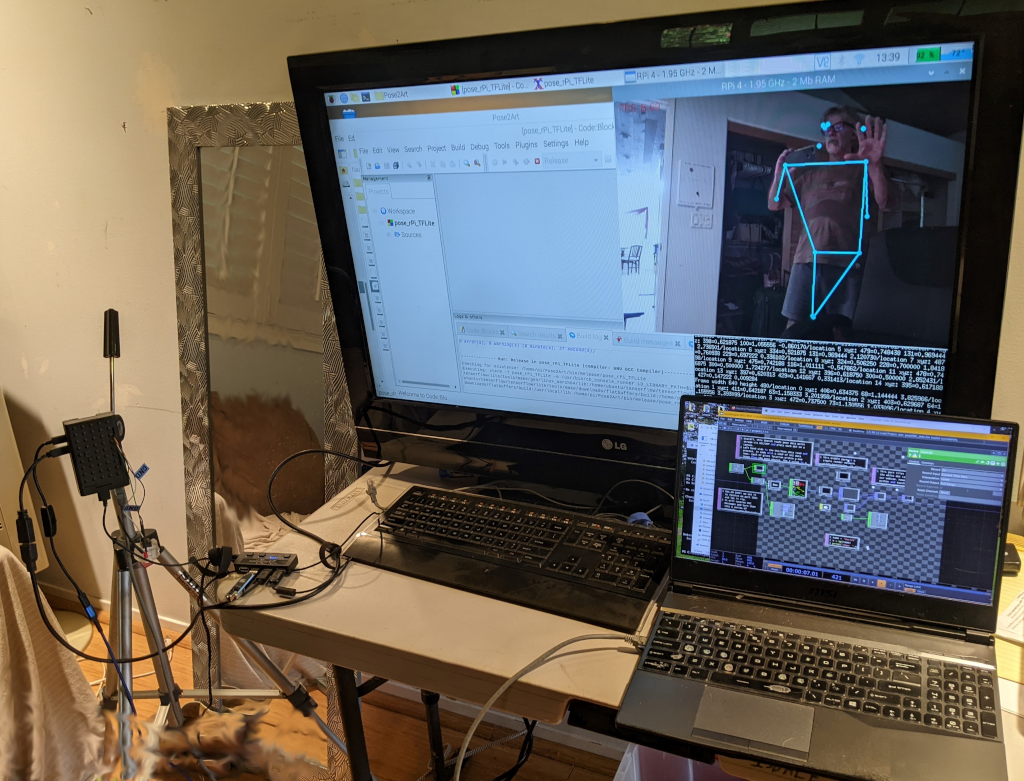
Initially there are 2 Smart Camera hardware for Pose2Art: a PC's webcam and Raspberry Pi 4 (rPi4).
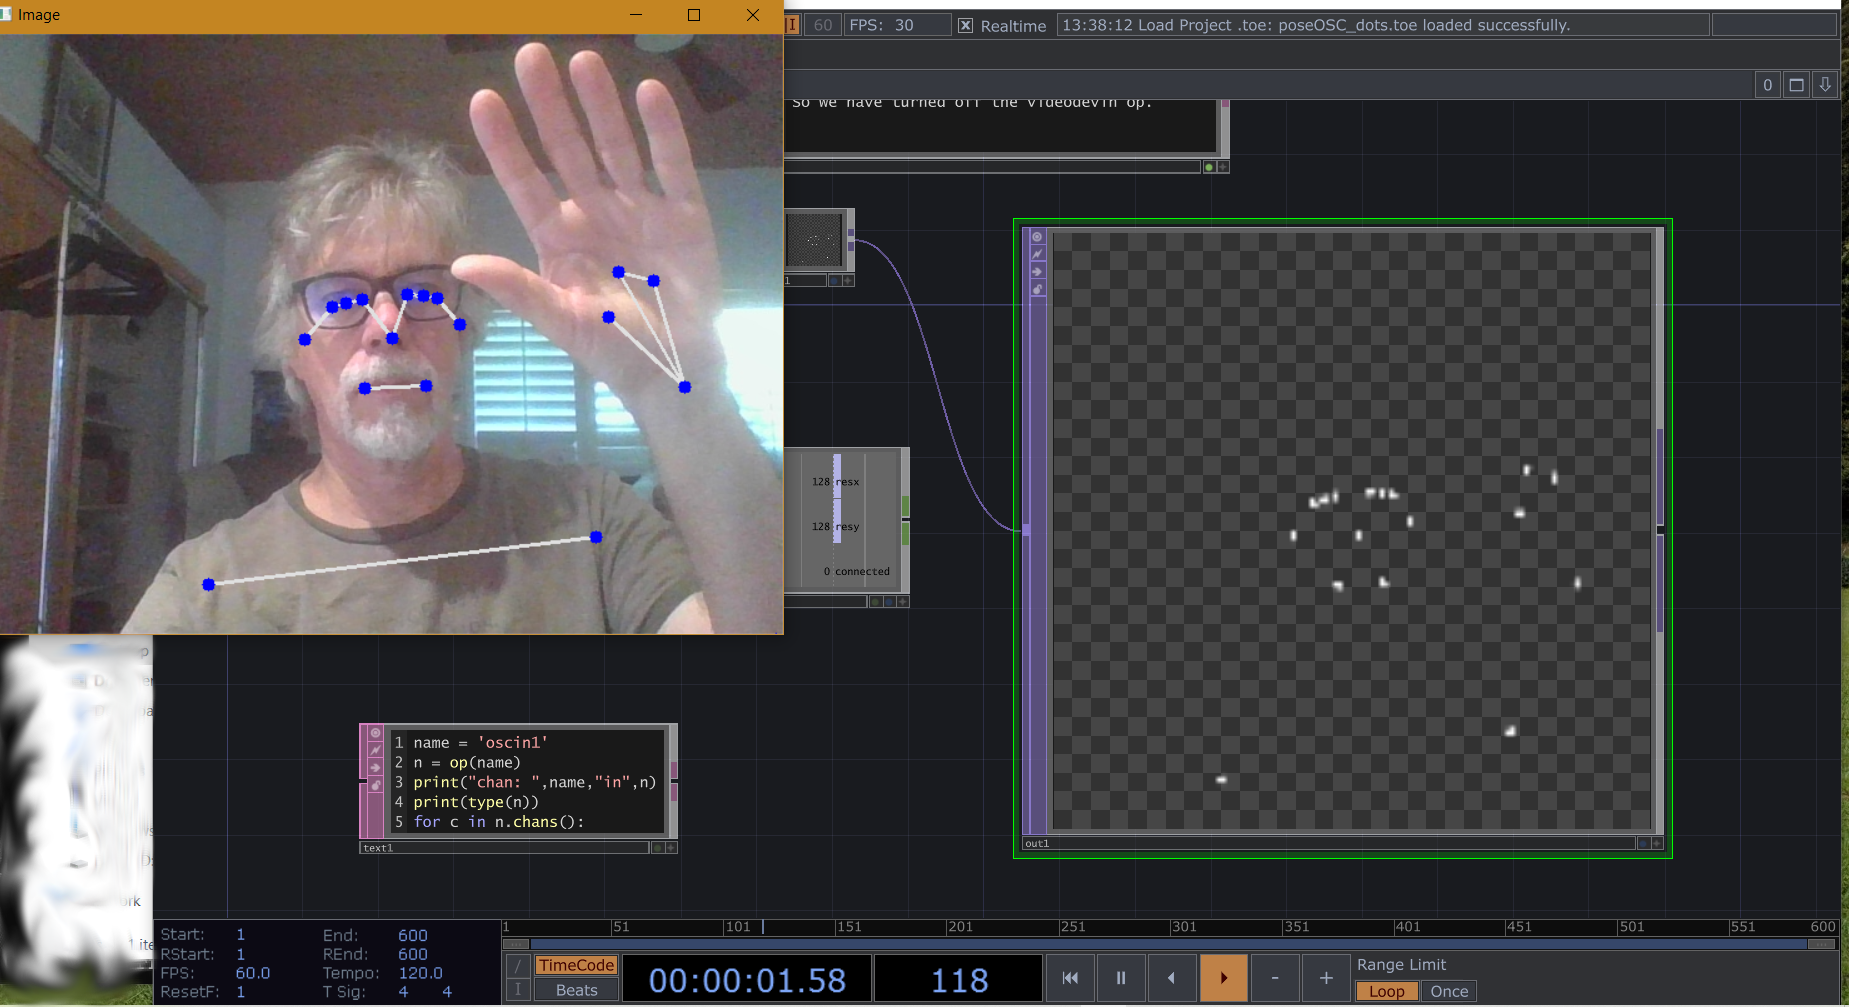
A PC with decent graphics board can do a respectable ML frame rate, with power left over to render some things. I get about 28fps on the laptop/2070rtx i use for TouchDesigner. Alas, the rPi4 gets only about 8-9fps, which is not good enough for interactive work. Hopefully alternative Edge Computing devices such as the Jetson Nano or Coral dev boards will do better..
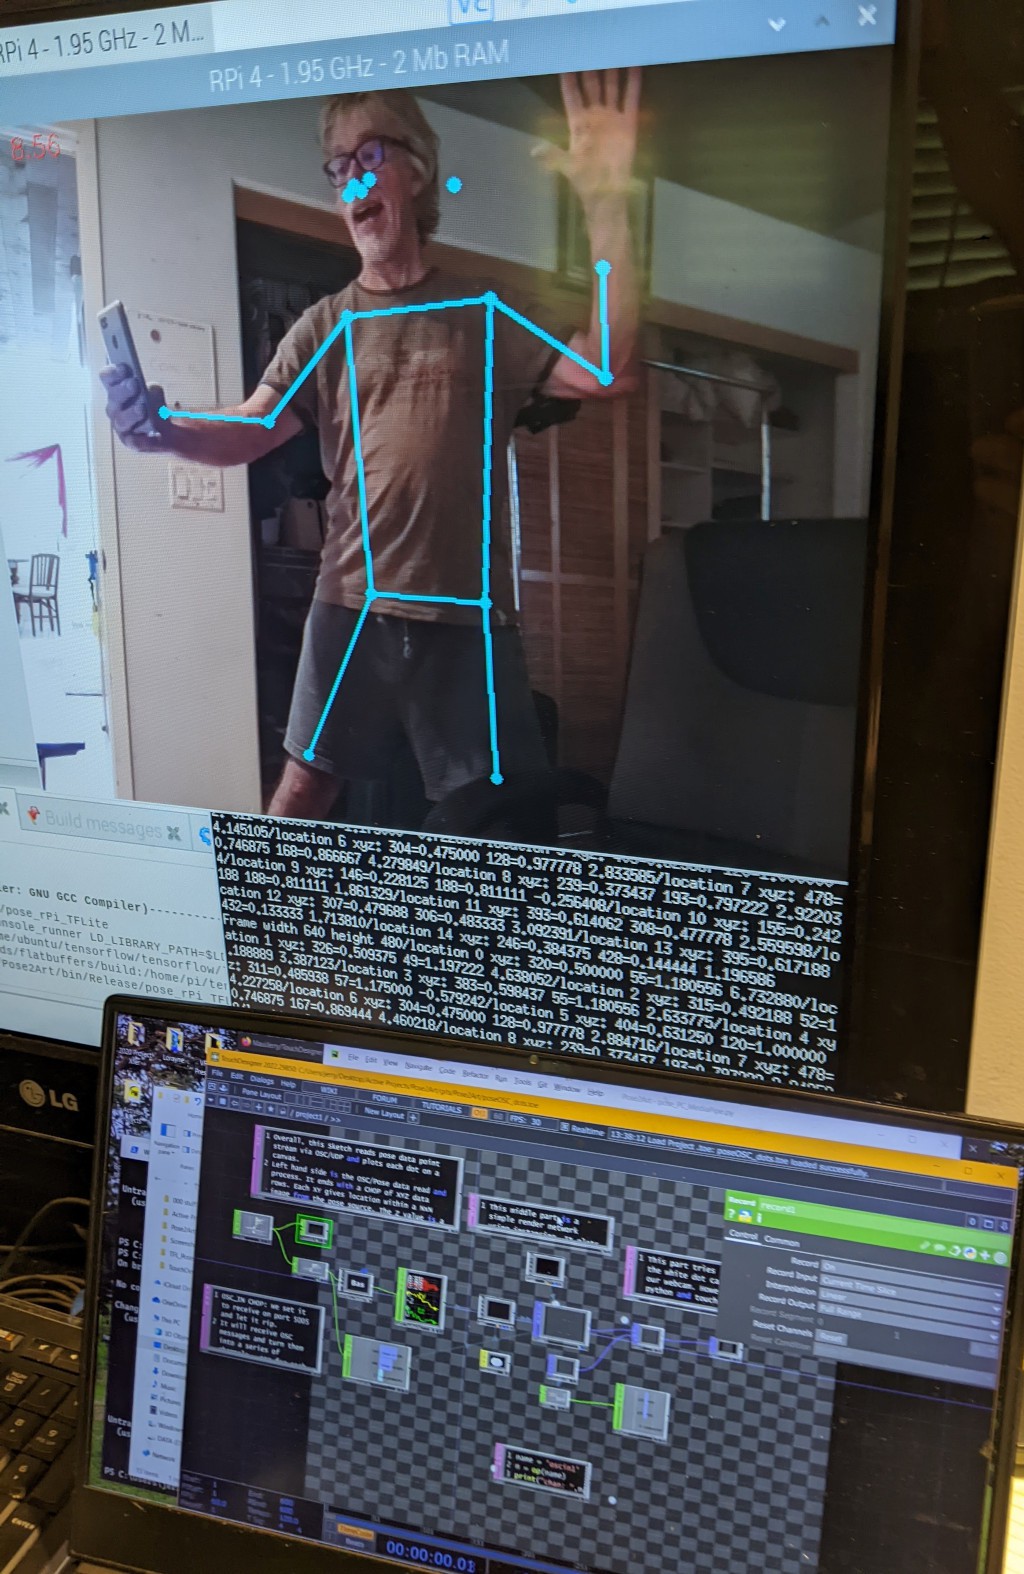
Meanwhile, we at least have a path for getting ML data into TouchDesigner via OSC. This method could be extended for multiple person tracking (on fast hardware), object detection or other ML processing. The OSC messages will need to change for those new applications, so when you fork this, document them ;-)
And yes, I REALLY need a couple videos here. One quick overview of idea w/demo, and perhaps a more in-depth walk through.
Table Of Contents:
- Example Installations of Related Projects
- Hardware Components
- Smart Camera (aka Edge Computer)
- Networking
- Rendering PC
- Software Components
- Machine Learning Pose Tools
- Edge Computing Software - Linux etc
- Networking - Open Sound Control (OSC)
- Rendering Computer - TouchDesigne
- Project Logs (Listing)
Example Installations of Related Projects
As yet I have not created a public installation using Pose2Art. Definitely need to get some stills and vids here of demos.
Meanwhile, here are some examples of similar system using Pose to drive interactive immersive installations...
Dance with Interactive PoseNet
Motion Tracking Measuring Tapes
Pose Tracking Fitness Applications (ok not an Art Installation, but alternative market for Pose2Art)
Character Tracking with Kinect and Unity3d
Character tracking with Kinect and Unreal
Hardware Components
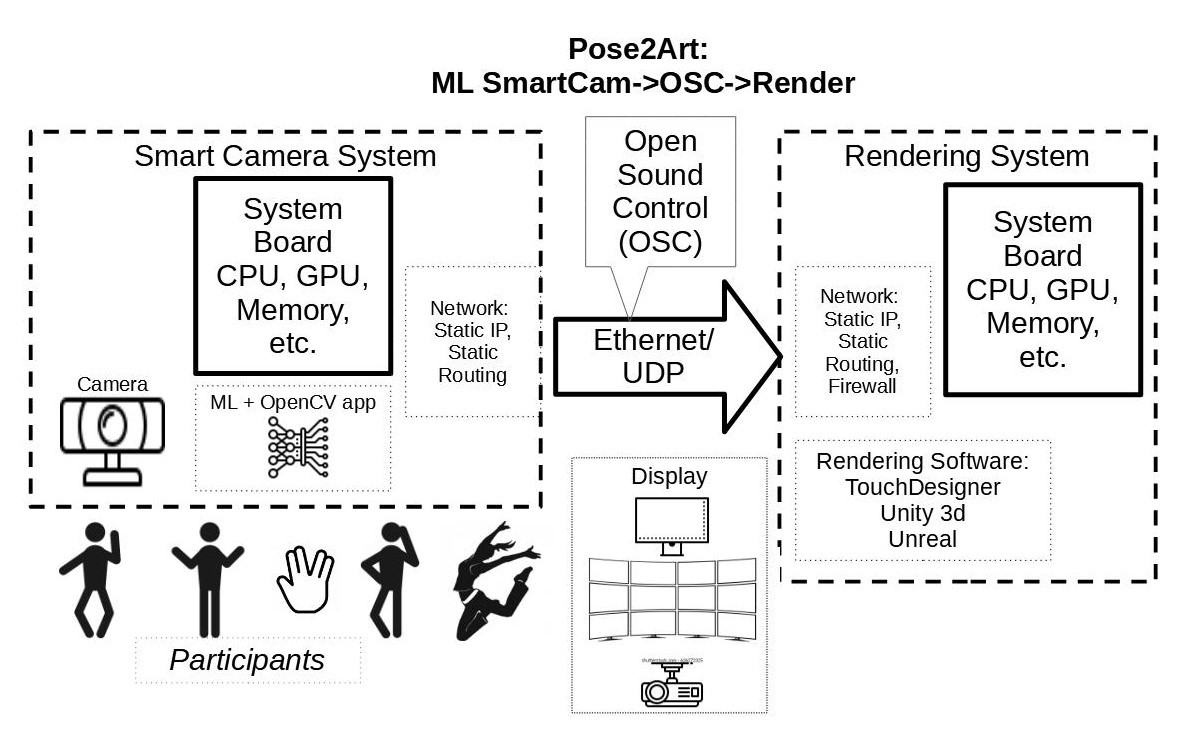
There are 3 basic hardware components: The smart camera/edge system, the network and the rendering engine/PC.
Edge Computer aka Smart Camera
The Edge Computer part has roughly 3 main components: the system board, the camera, and the case.
I have two system board options in house that are capable of running Video Pose: a RaspberryPi 4 (rPi4) and an Nvidia Jetson Nano Development System. While capable and in hand, the downside of these machines is the cost and availability to replicate. While the rPi4 might list for under $100, they retail now for over $200USD, if you can get them. The Jetson Nano sells on Amazon for about $300US, and Nvidia is moving to new, more expensive Orin, targeting the robotics market. An alternative low cost base system might be the Google Coral Dev Board at about $130, but again supplies are limited. The Nano is the most powerful for DL followed by the Coral with rPi4 about 1/2-1/4 the power.
During development, the edge system will greatly benefit from (Need) a nice HDMI monitor, keyboard and mouse. A powered USB hub is recommended for the keyboard, mouse and (optional) usb camera. I recommend adding an in-line power switch for the raspberry Pi, as well as a dedicated...
Read more »


 Brenda Armour
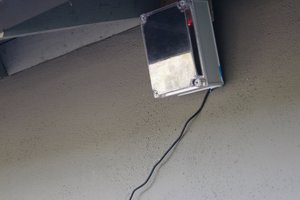
 J. Peterson
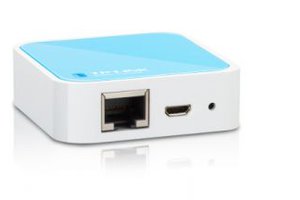
 Benjamin Blundell