 Vedran
WIFIP110FWT from Nedis is a relatively low-cost smart power outlet with power meter functionality. When I recently got a couple of them, I was somewhat disappointed to find out that they require internet connection to provide data and allow you to control them. Sure there's a button for manual relay control, and status LED to indicate whether the internal relay is conducting or not, but all the smarts are unavailable unless the power plug can talk to Tuya's web services. Online search pointed me in the direction of re-flashing the power outlet with one of the available open-source firmware. I went with ESPHome as it's super easy to use, and it works seamlessly with Home assistant that I'm already running.
First step was disassembling the power outlet. There's a triangle-head screw that can be taken out with a flat-head screwdriver of just the right length.

After removing the cover, ESP8266 chip pops into view and following and this thread gives clue as to which wires should be connected where for re-programming.
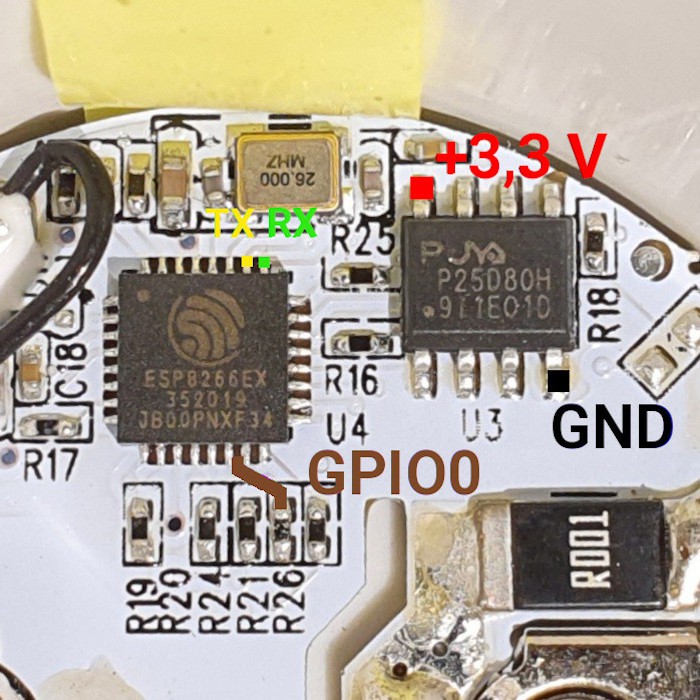
At this point, a USB to UART adapter can be used to flash the firmware. To do so, I headed to ESPHome instance in Home assistant and created a new ESP8266 device. This gist was a pretty good template, except that it missed red status LED
With some modifications, my code ended up looking like
substitutions:
  friendly_name: <Descriptive name>
  # Higher value gives lower watt readout
  current_res: "0.0015"
  # Lower value gives lower voltage readout
  voltage_div: "1850"

esphome:
  name: pmeter01

esp8266:
  board: esp01_1m
  restore_from_flash: true

# Enable logging
logger:

# Enable Home Assistant API
api:
  encryption:
    key: <home assistant API key>

ota:
  password: <ota password>

wifi:
  ssid: !secret wifi_ssid
  password: !secret wifi_password
  reboot_timeout: 0s

  # Enable fallback hotspot (captive portal) in case wifi connection fails
  ap:
    ssid: "Pmeter-01 Fallback Hotspot"
    password: <fallback hotspot password>

captive_portal:

time:
  - platform: homeassistant
    id: homeassistant_time

sensor:
  - platform: hlw8012
    sel_pin:
      number: GPIO12
      inverted: True
    cf_pin: GPIO04
    cf1_pin: GPIO05
    current_resistor: ${current_res}
    voltage_divider: ${voltage_div}
    current:
      name: "${friendly_name} Amperage"
      unit_of_measurement: A
    voltage:
      name: "${friendly_name} Voltage"
      unit_of_measurement: V
    power:
      name: "${friendly_name} Wattage"
      unit_of_measurement: W
      id: "${plug_name}_Wattage"
    change_mode_every: 8
    model: "BL0937"
    update_interval: 30s
  - platform: total_daily_energy
    name: "${friendly_name} Total Daily Energy"
    power_id: "${plug_name}_Wattage"
    filters:
        # Multiplication factor from W to kW is 0.001
        - multiply: 0.001
    unit_of_measurement: kW
  - platform: wifi_signal
    name: "${friendly_name} RSSI"
    update_interval: 60s
  - platform: uptime
    name: "${friendly_name} Uptime"

binary_sensor:
  - platform: gpio
    pin:
      number: GPIO0
      mode: INPUT_PULLUP
      inverted: True
    name: "${friendly_name} Button"
    on_press:
      then:
      - switch.toggle: relay
    filters:
      - delayed_on_off: 50ms
  - platform: status
    name: "${friendly_name} Status"

switch:
  - platform: gpio
    name: "${friendly_name} Relay"
    pin: GPIO14
    id: relay
    restore_mode: ALWAYS_ON
    on_turn_on:
      then:
      - switch.turn_on: led
    on_turn_off:
      then:
      - switch.turn_off: led
  - platform: gpio
    name: "${friendly_name} LED"
    pin: GPIO13
    id: led
    restore_mode: ALWAYS_ON
    inverted: true
ESPHome can now generate firmware file by pressing Install and selecting Manual download. Finally, use Microsoft Edge or Chromium to upload the firmware via https://web.esphome.io/?dashboard_wizard. Finally, the meter should be calibrated to improve measuring accuracy. To do so, I measured voltage using multimeter and calibrated voltage_div constant until multimeter and the plug match. Then follow this guide to calibrate power by adding a known resistive load (e.g 60W incandescent light bulb) and adjust current_res in configuration above until power reading matches the...
Read more »

 Electroniclovers123
 PuceBaboon
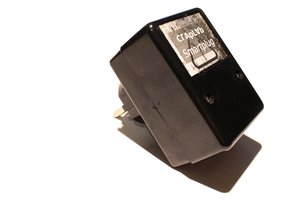
 Sven Gregori
 engineerkid1
Hi.
New versions of this plug have BK7231n chip. Tasmota isn't compatible with BK7231n.