 Cameron
It was clear after the protoboard approach that if I wanted to do a decent job of the thing, I would need a custom PCB. The fact that I would need to design a PCB antenna for the NFC part, combined with never having made a PCB in my life before, really slowed down this step. It was not until 2 years later, in 2022, that I had finally practiced with PCB design (for my Postcard Frame project) and felt ready to give this another shot.
As I was basically recreating my prototype that used the ST development board, I pretty much copy and pasted the design for this bit from their reference files. I watched a lot of videos about antenna design and tuning, and my main take away was that I really didn't want to design my own antenna if copying someone else's would do the job.
I became quite worried about the various impacts of a radio antenna on my board though, and tried to follow as many best practices as I could to limit its effects, especially considering I had an ESP32 with wifi and bluetooth on the board, and communication with a camera too. I haven't used the wifi or bluetooth yet, but I thought they eventually could be interesting in the future. I think I am still getting some kind of noise into the camera signal, as sometimes I see line artefacts in the camera image, but I am not quite sure where this is coming from, or if it's just a soldering issue.
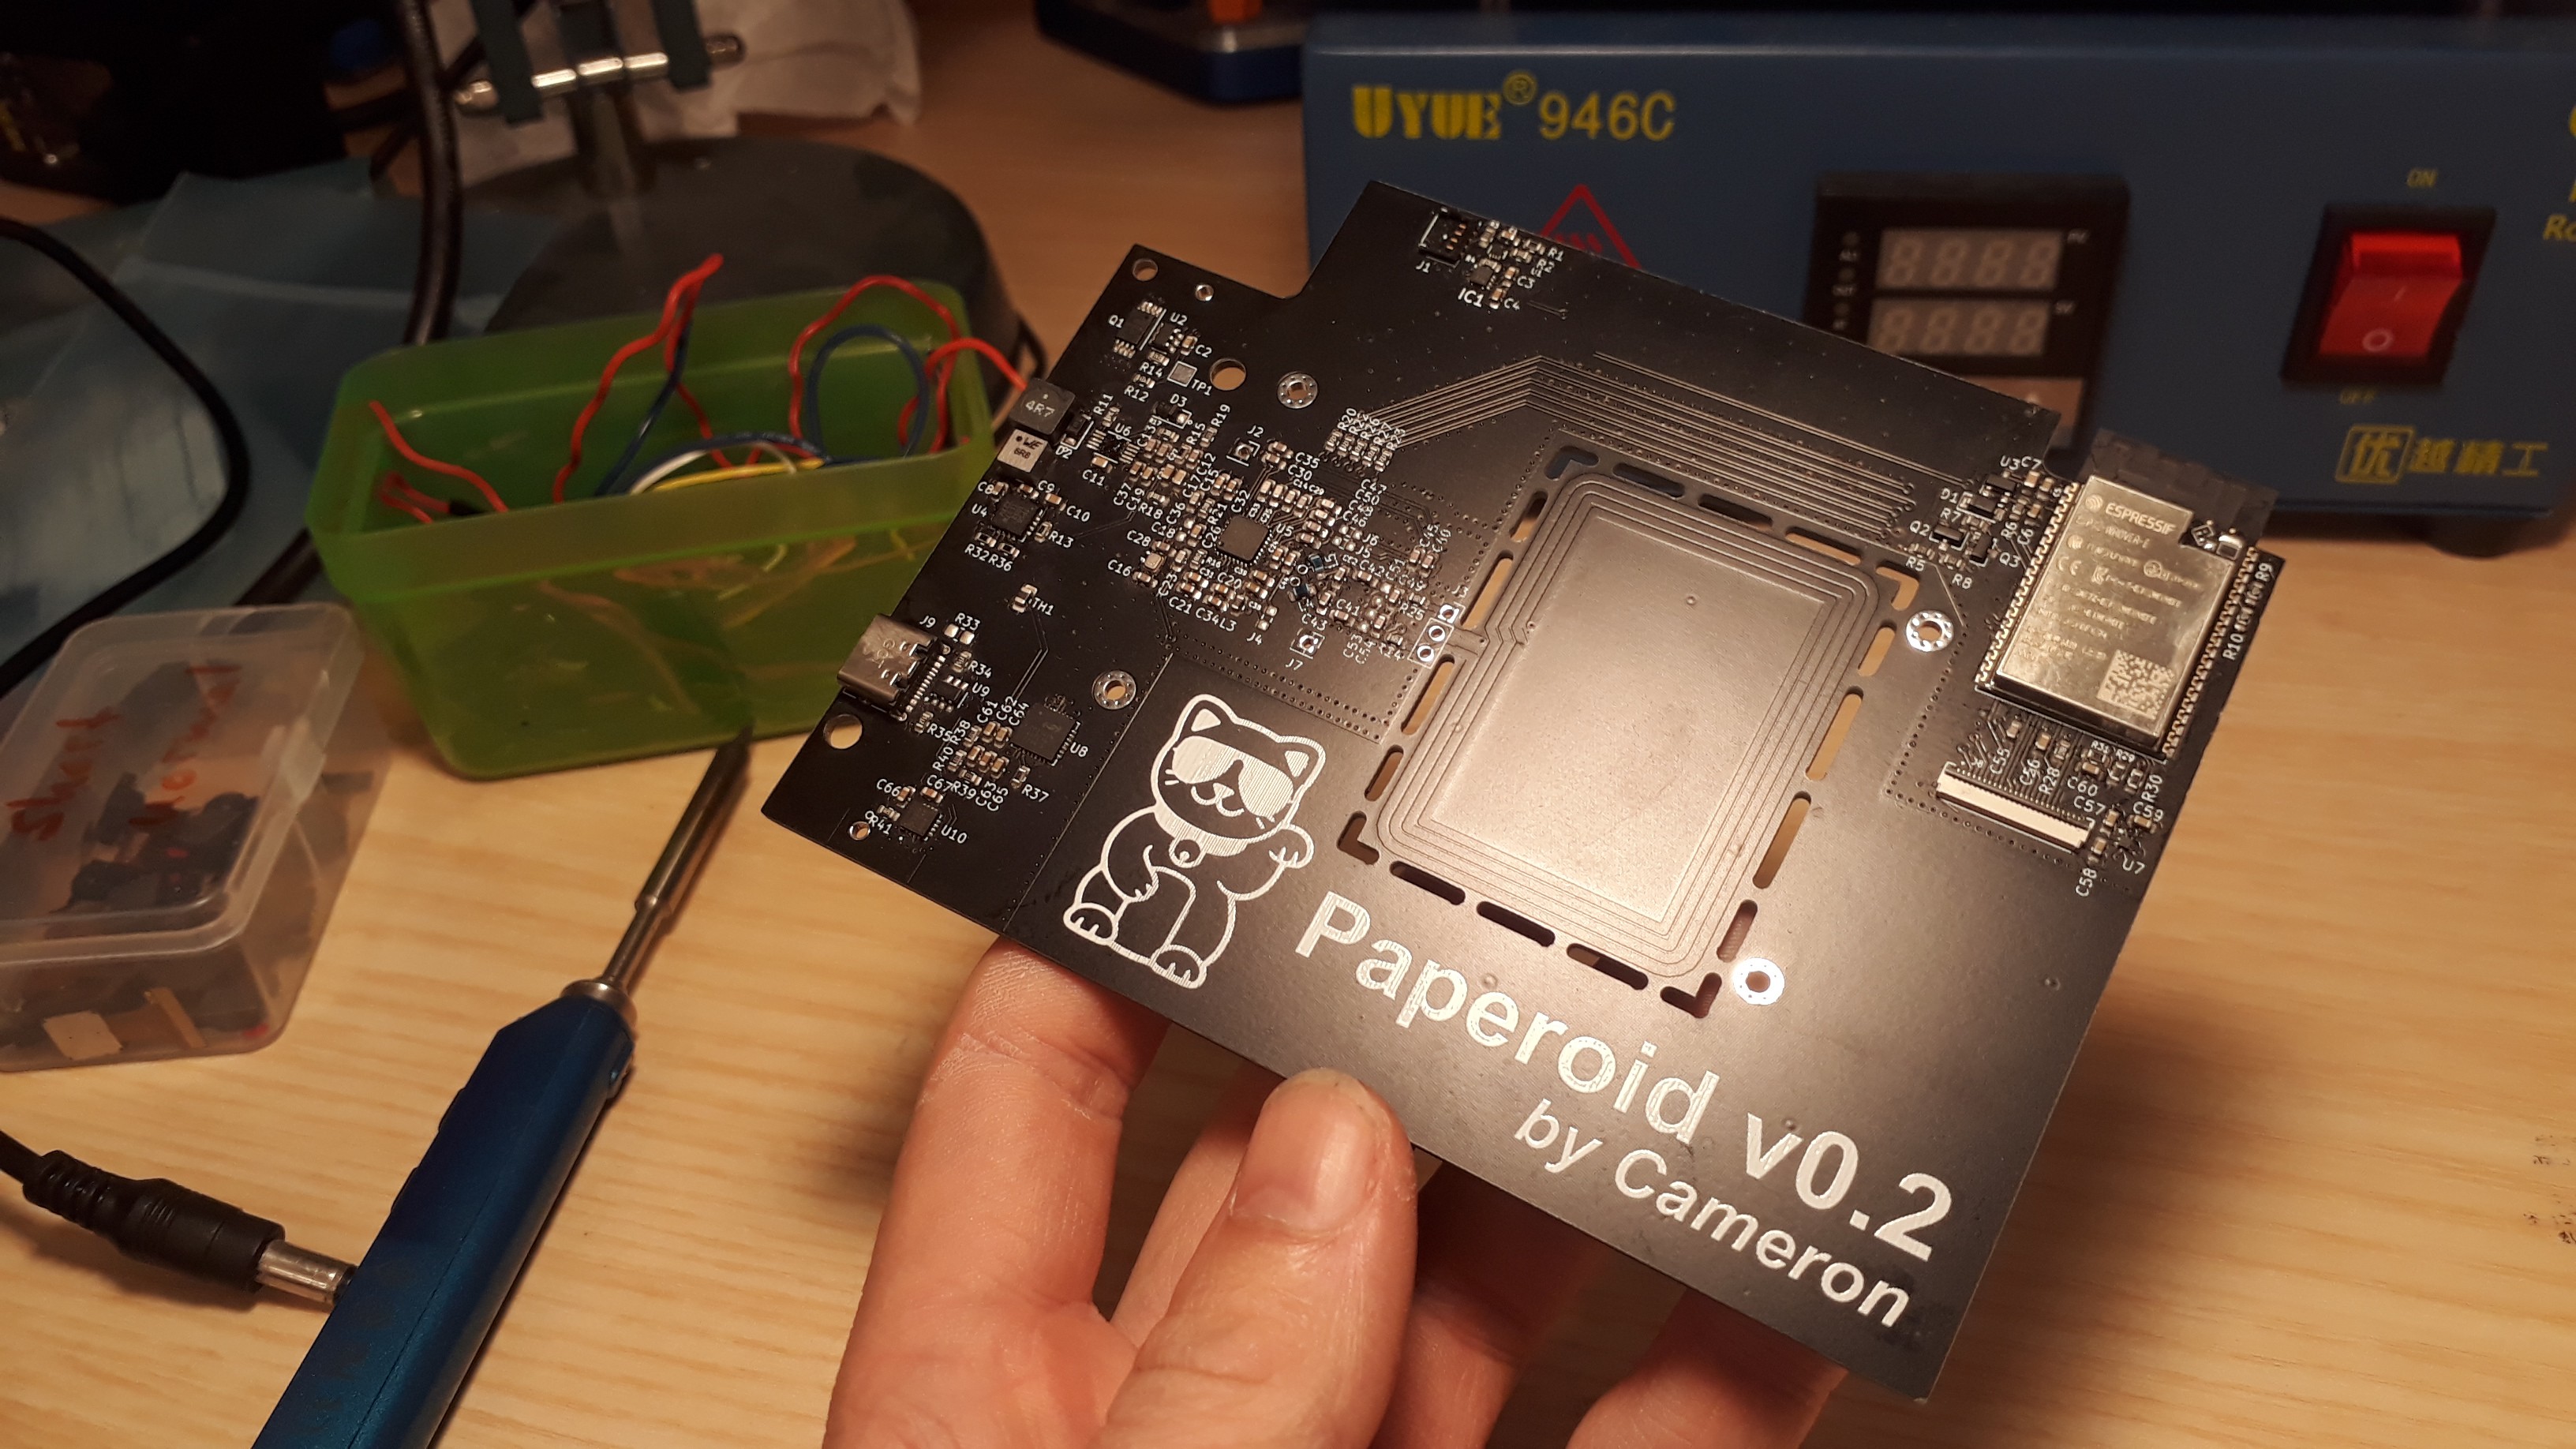
Of course it needed a little waving cat on it as well.
But overall the PCB design was fine, definitely much to improve and hopefully the design could be further simplified, but importantly I was able to stencil up the solder paste, solder on the components, and it all worked first time. Or mostly. Right now there is a slight issue that the device can shutdown on holding the capture button, but it doesn't turn back on without disconnecting the batteries. Still need to debug this.
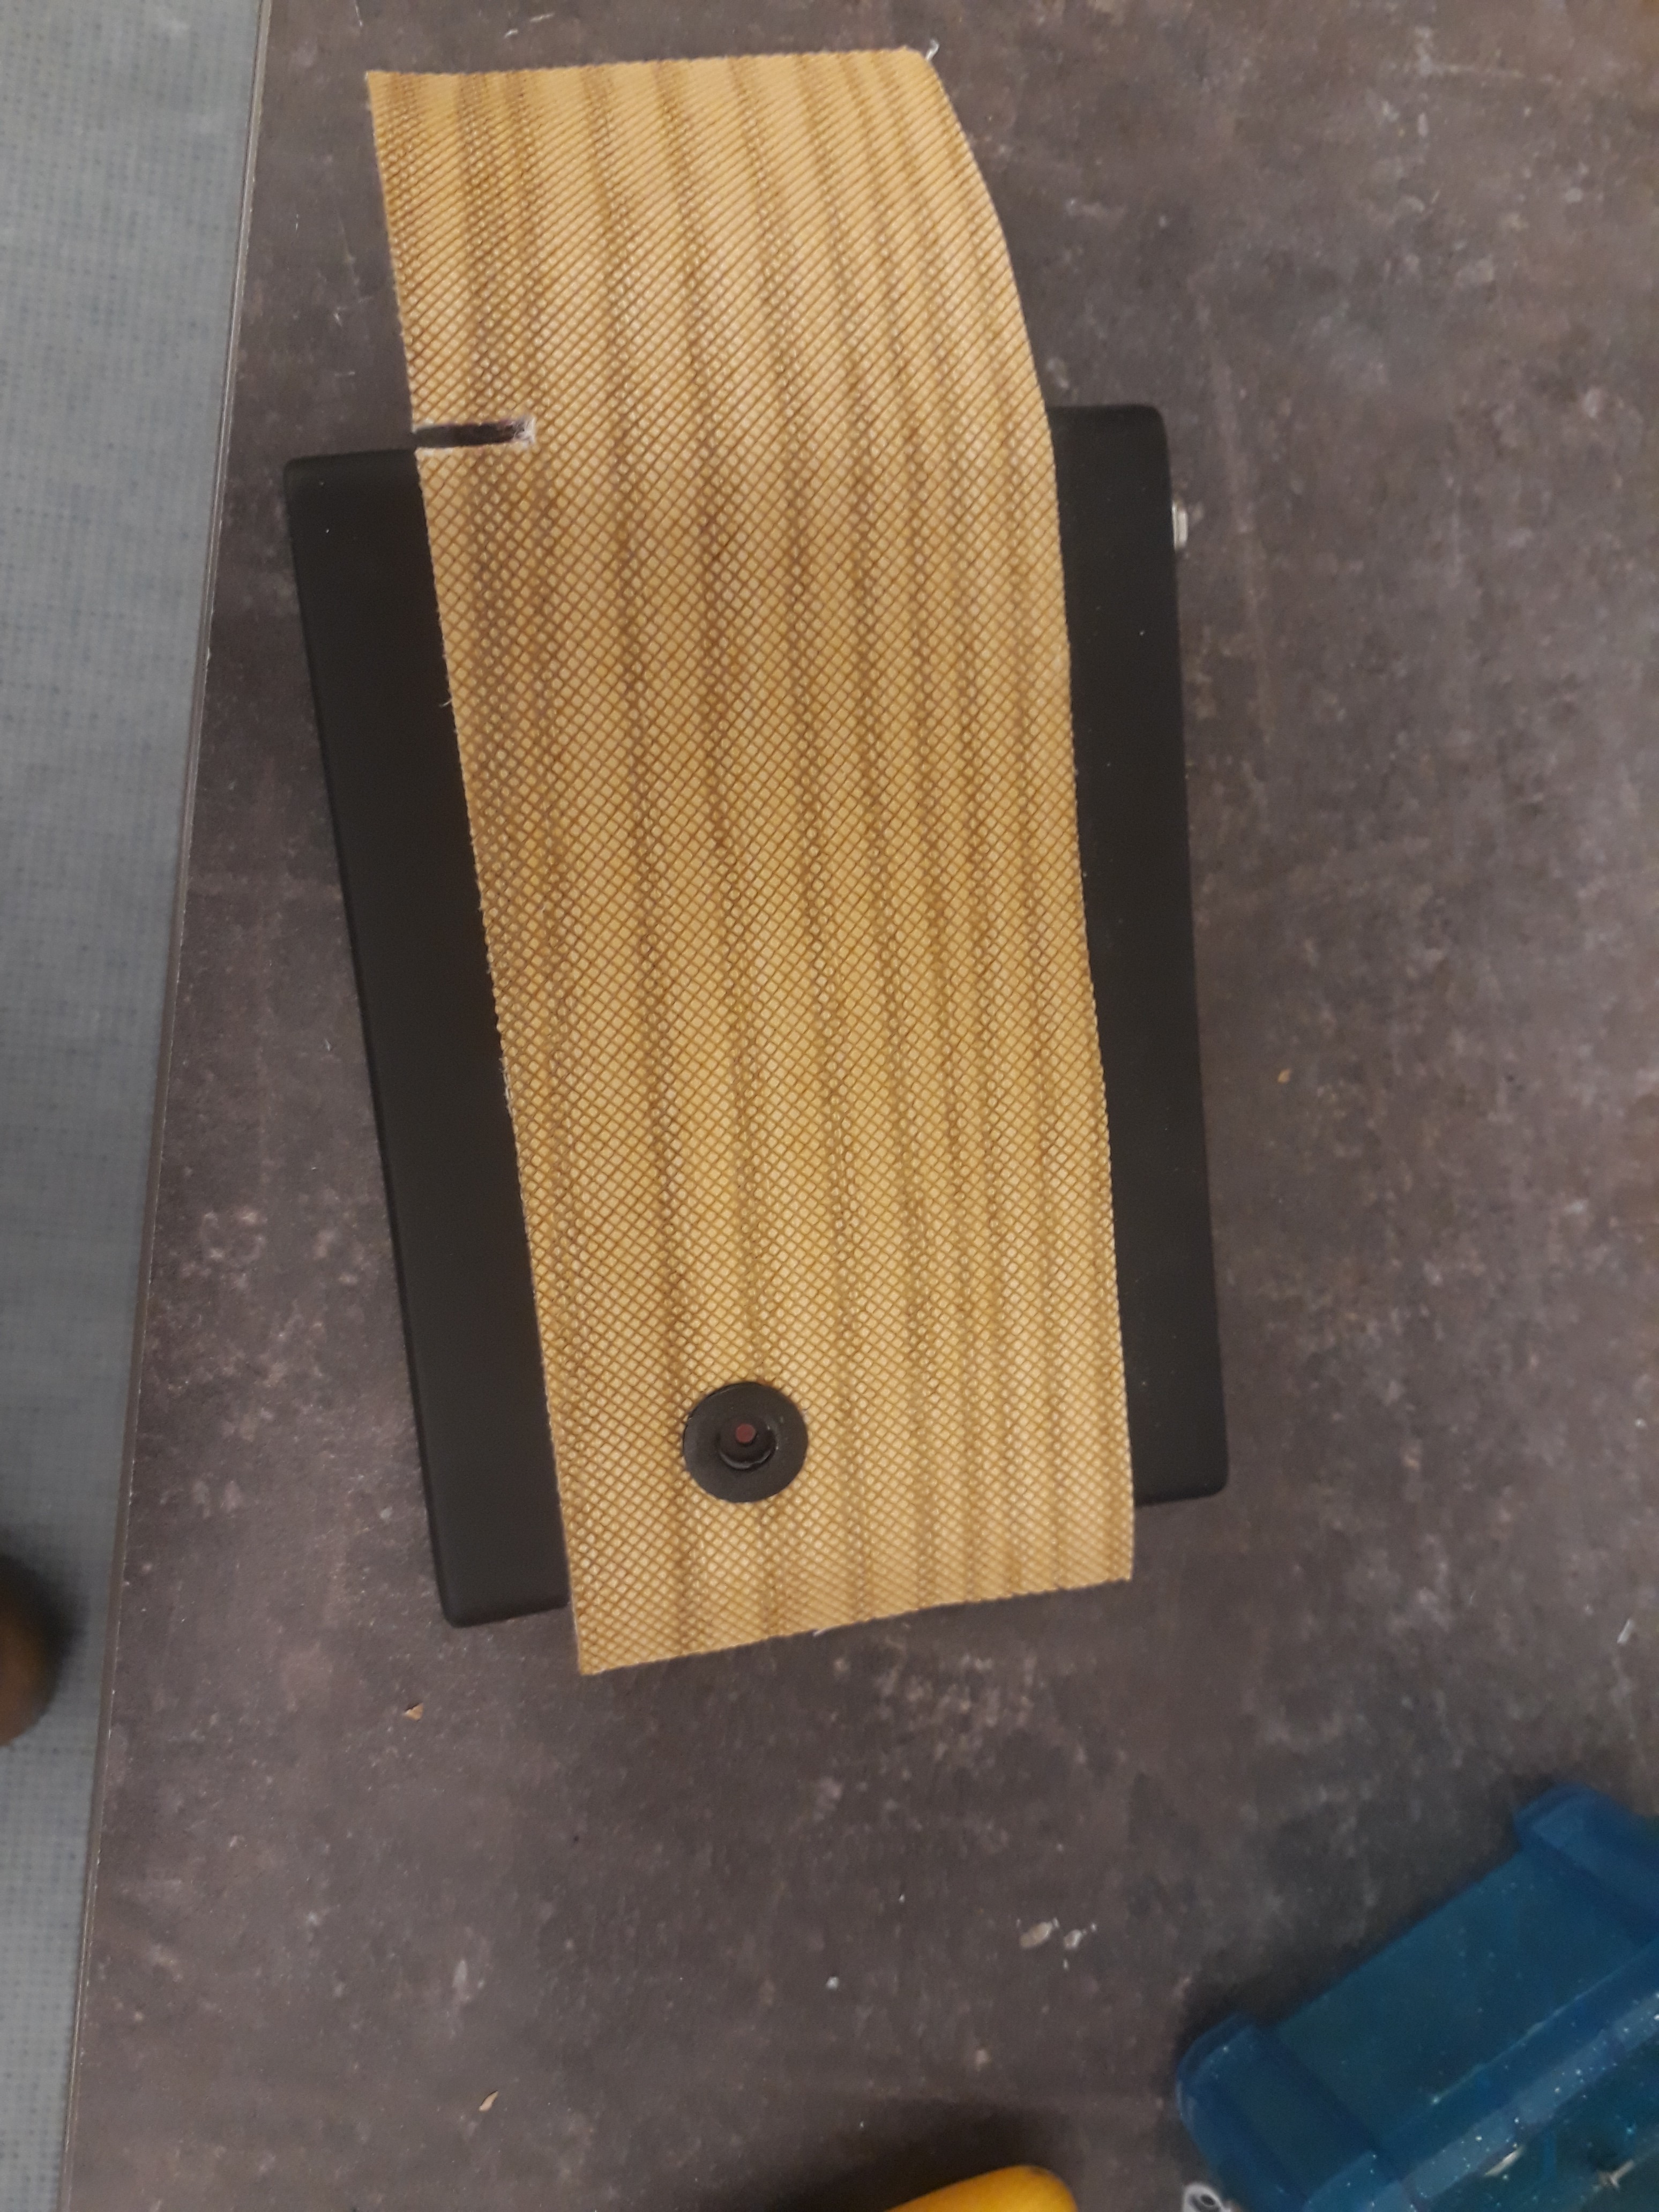
Almost as important as the PCB design was the design of the body itself. I wanted to make something that looked like a camera, maybe like one of those cool 80s style ones, and was simple to use. I settled on the final shape, essentially a more compact version of my intial concepts, but added magnets inside the Waveshare NFC screens to hold the screens in place on the camera. This allows the screens to be orientated correctly, and also allows them to be fixed to a fridge.
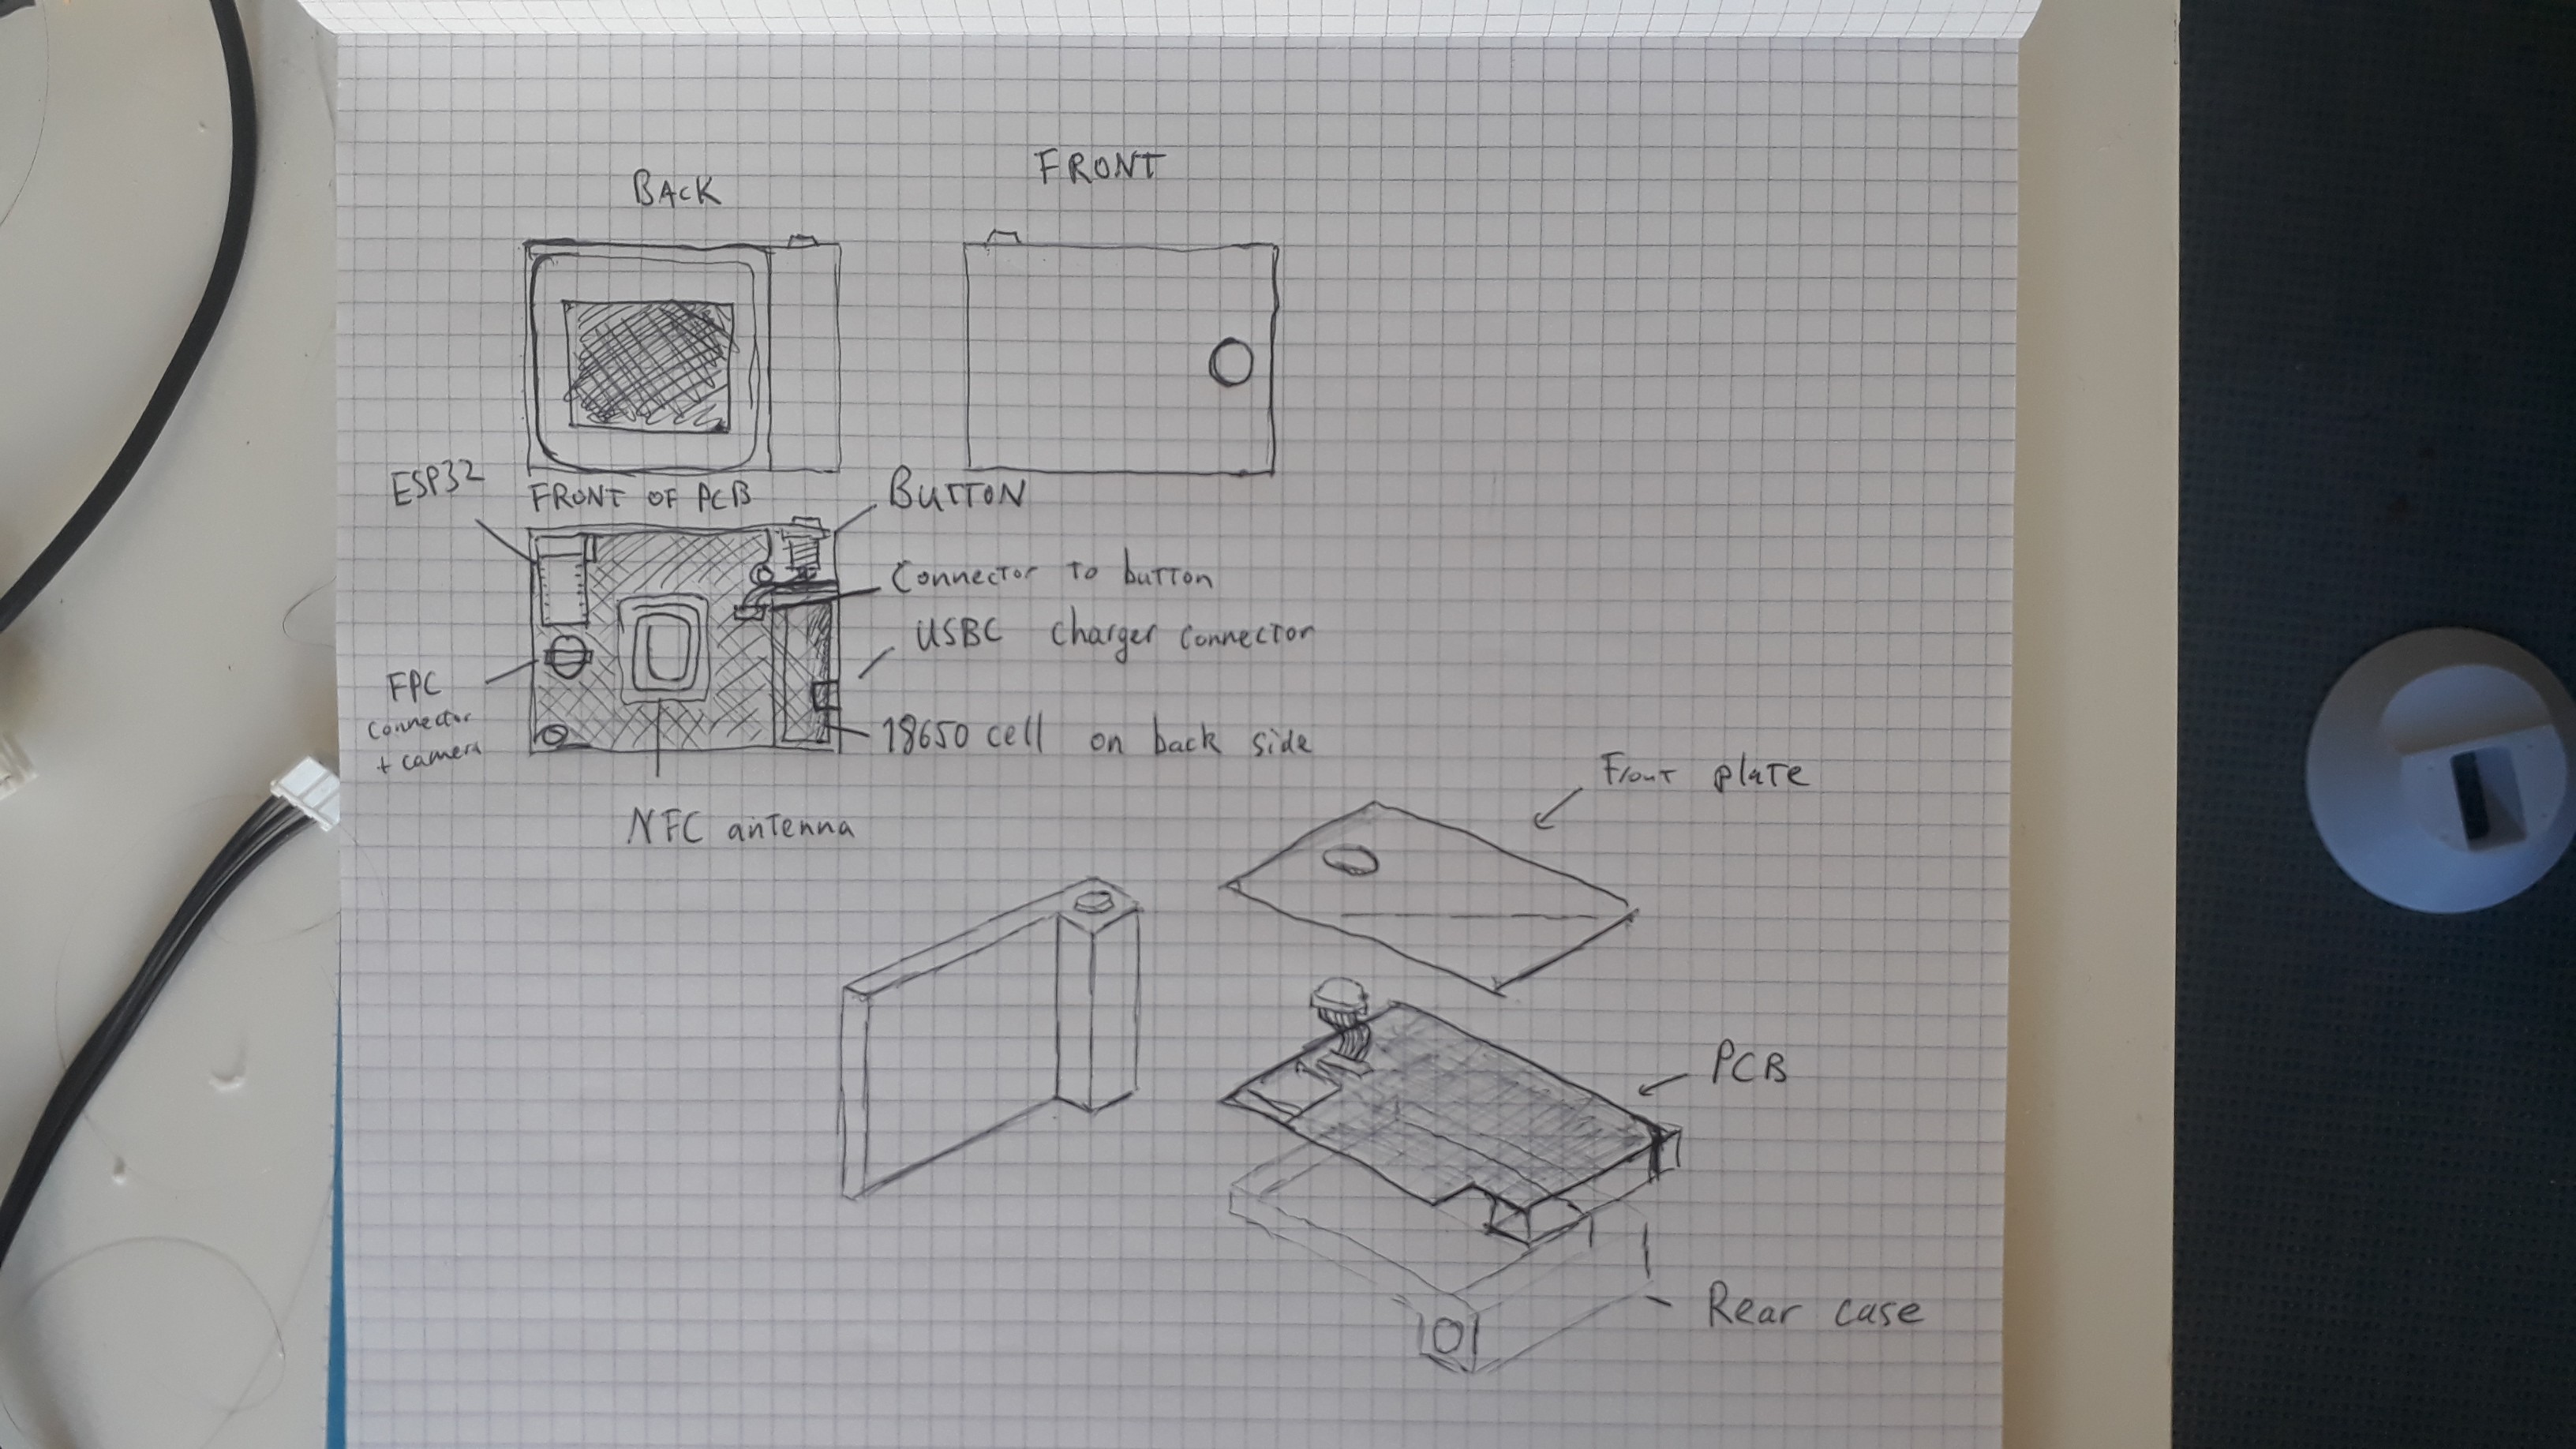
The case was 3d printed using an FDM printer, but it is very thin and has small holes so resin or powder based printer would probably be better.
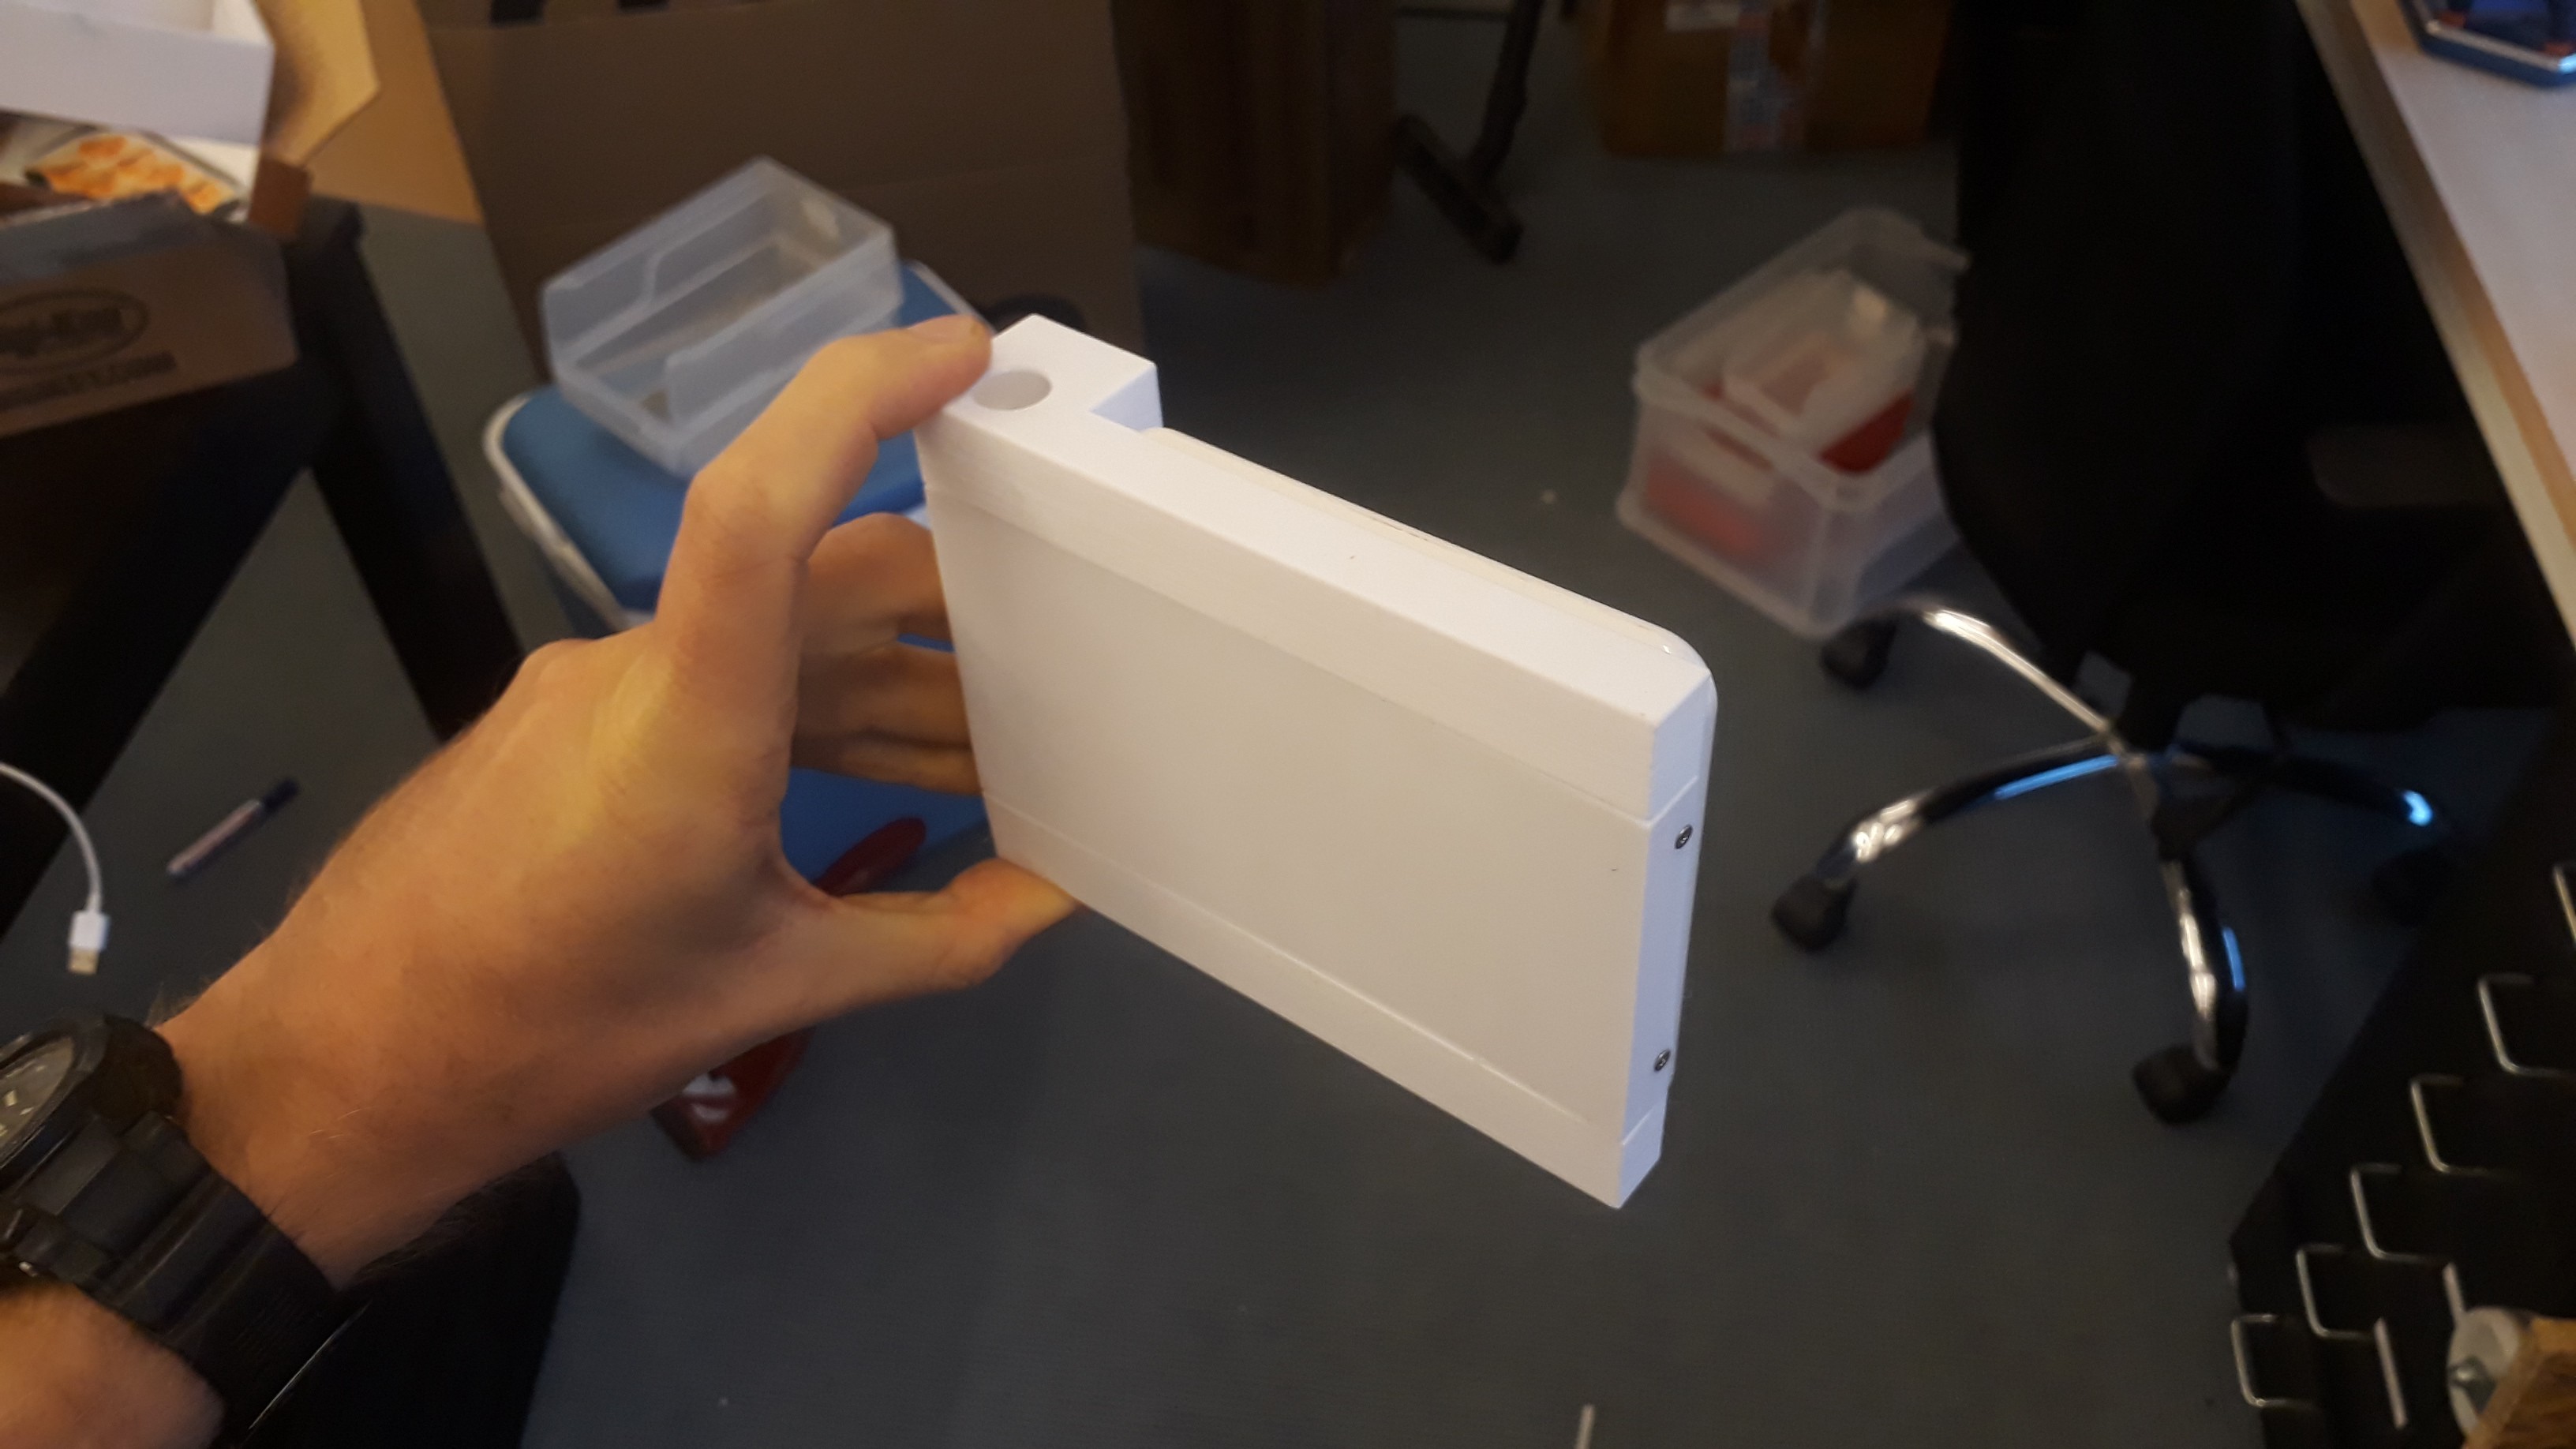
To make it actually look a little less "garage" I primed, filled, sanded and painted the parts to get an okayish finish.
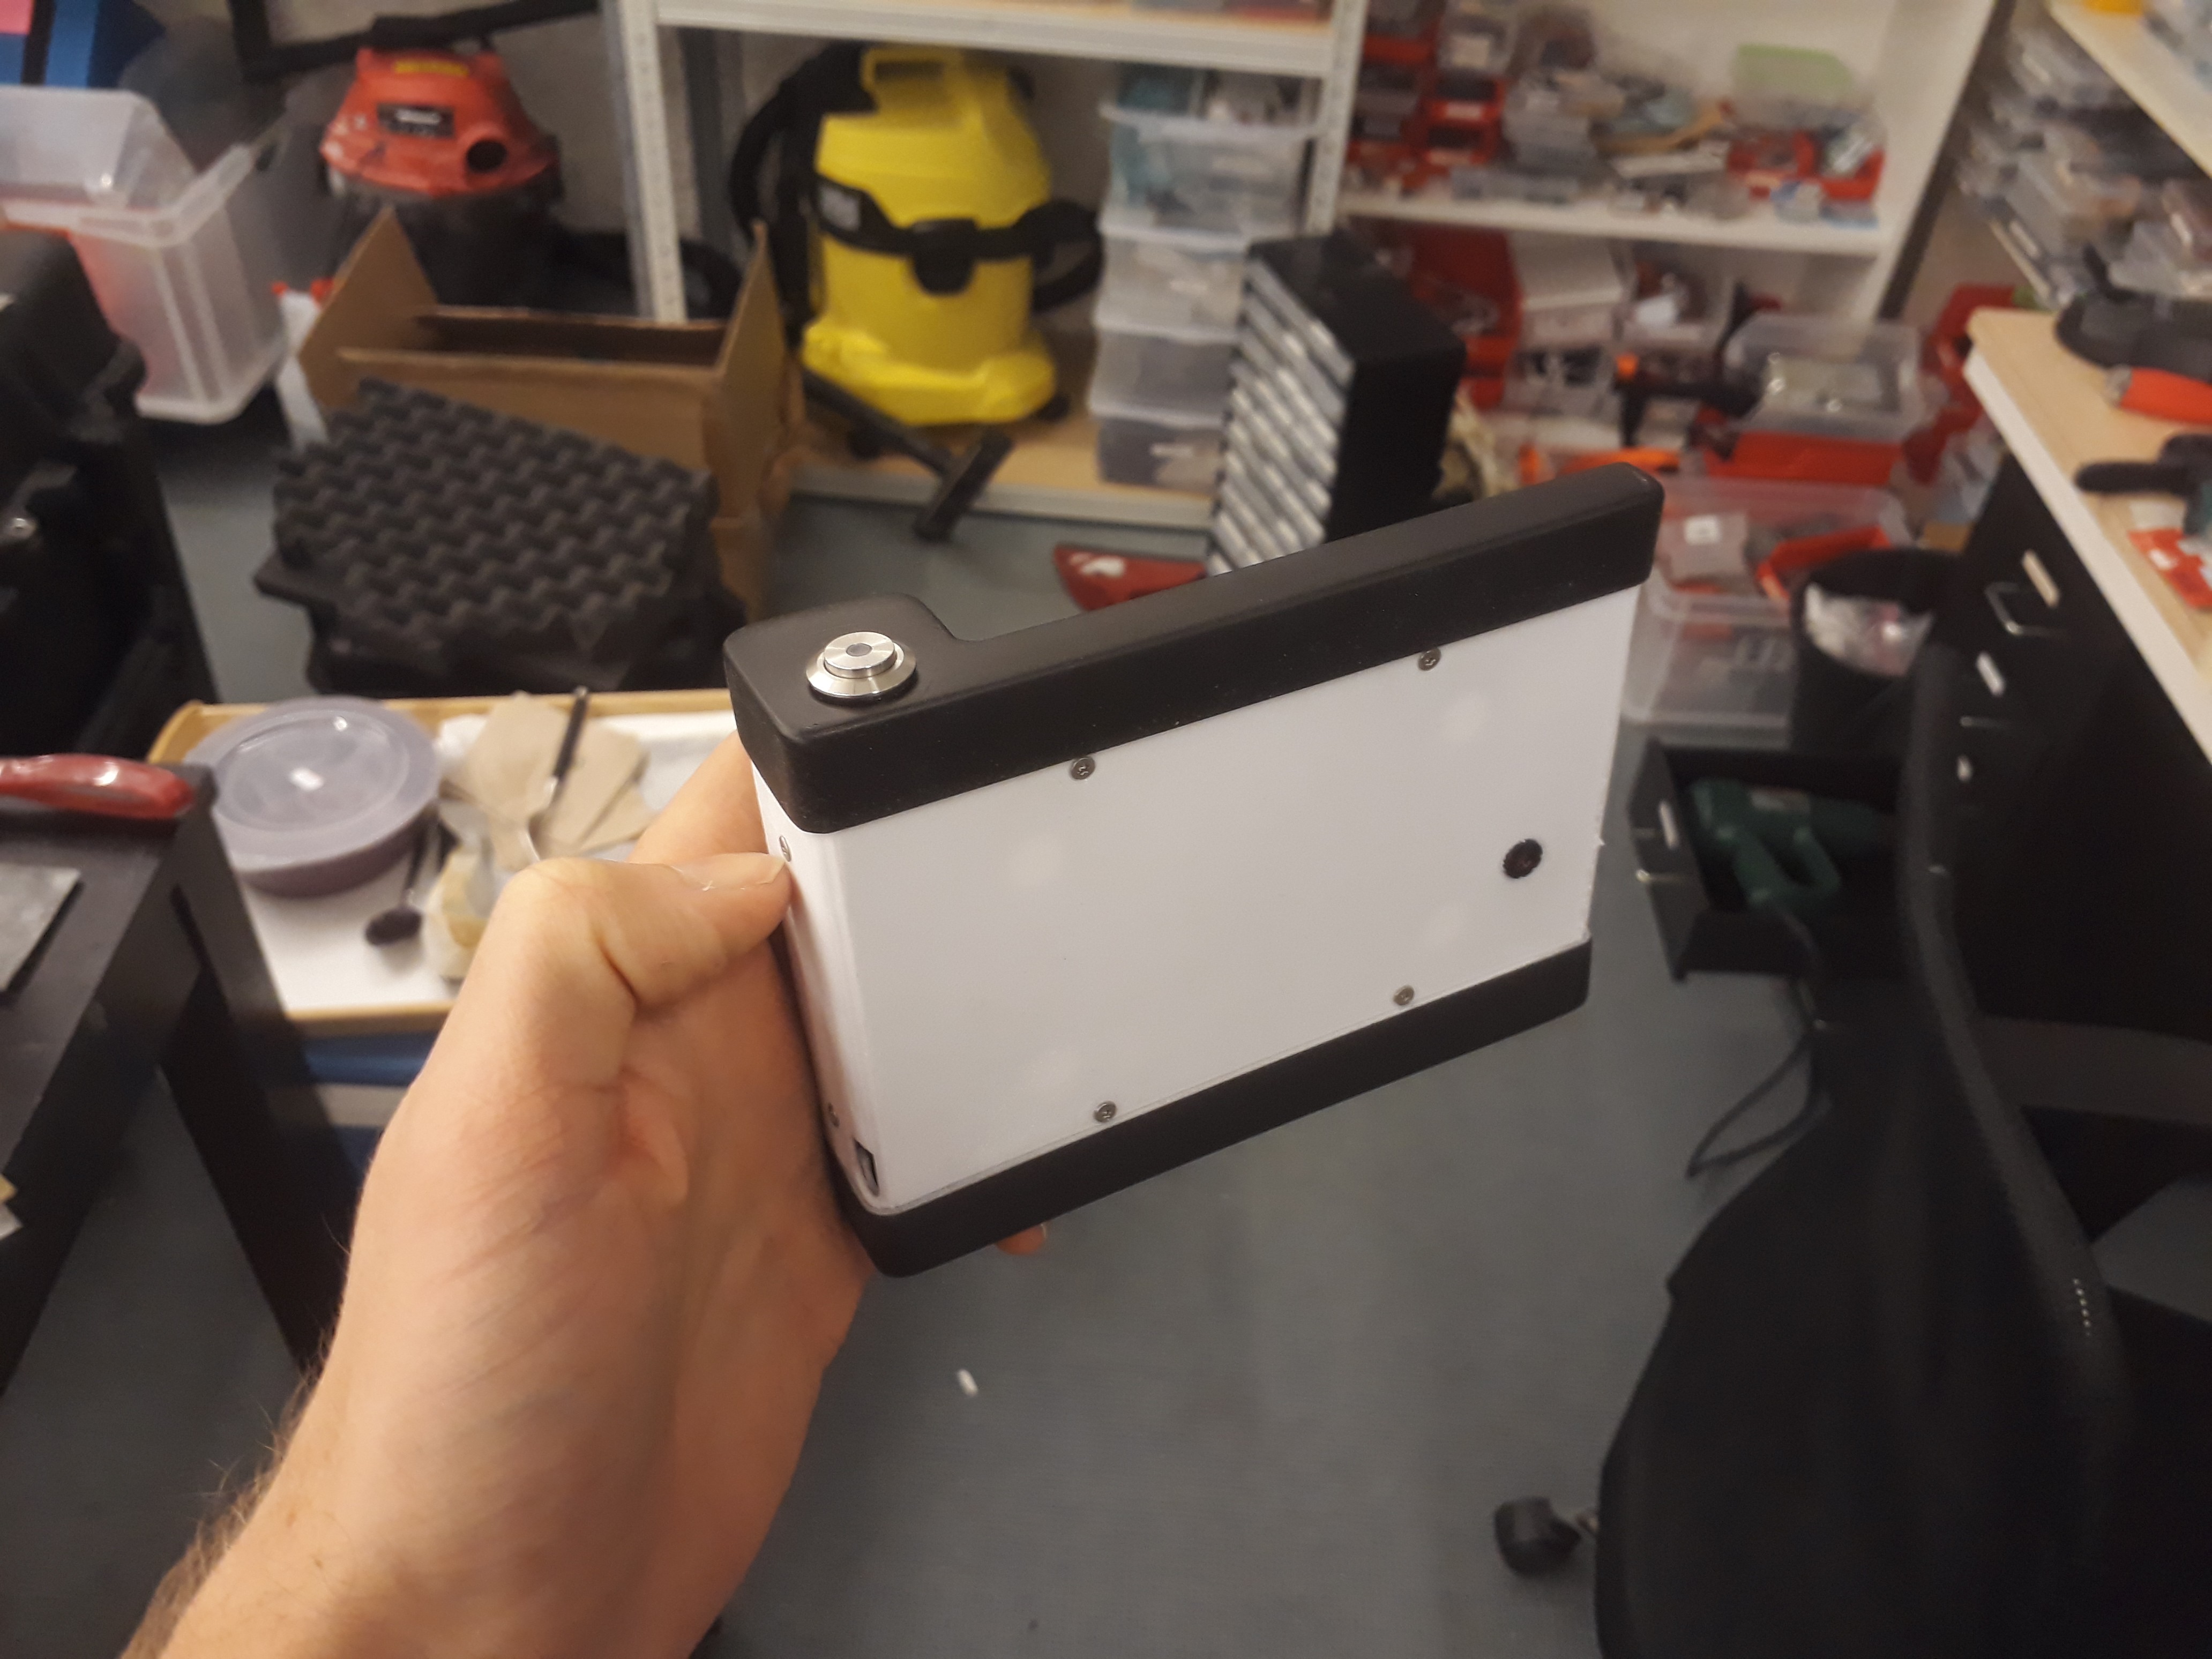
The band in the middle as a grip also had to look good. Leather was one idea, but almost too ordinary. I had played around with mushroom based mycelium leather in the past, and thought that could be a potential option, but the suppliers i had samples from didn't look much more impressive than leather themselves. I was looking for different sources of wood veneer for a kind of natural look when I came across this very nice flexible wood veneer with engraved patterns called NUO. It came in a variety of different wood types and looked amazing in pictures. So I ordered a sample and it was exactly what I wanted.
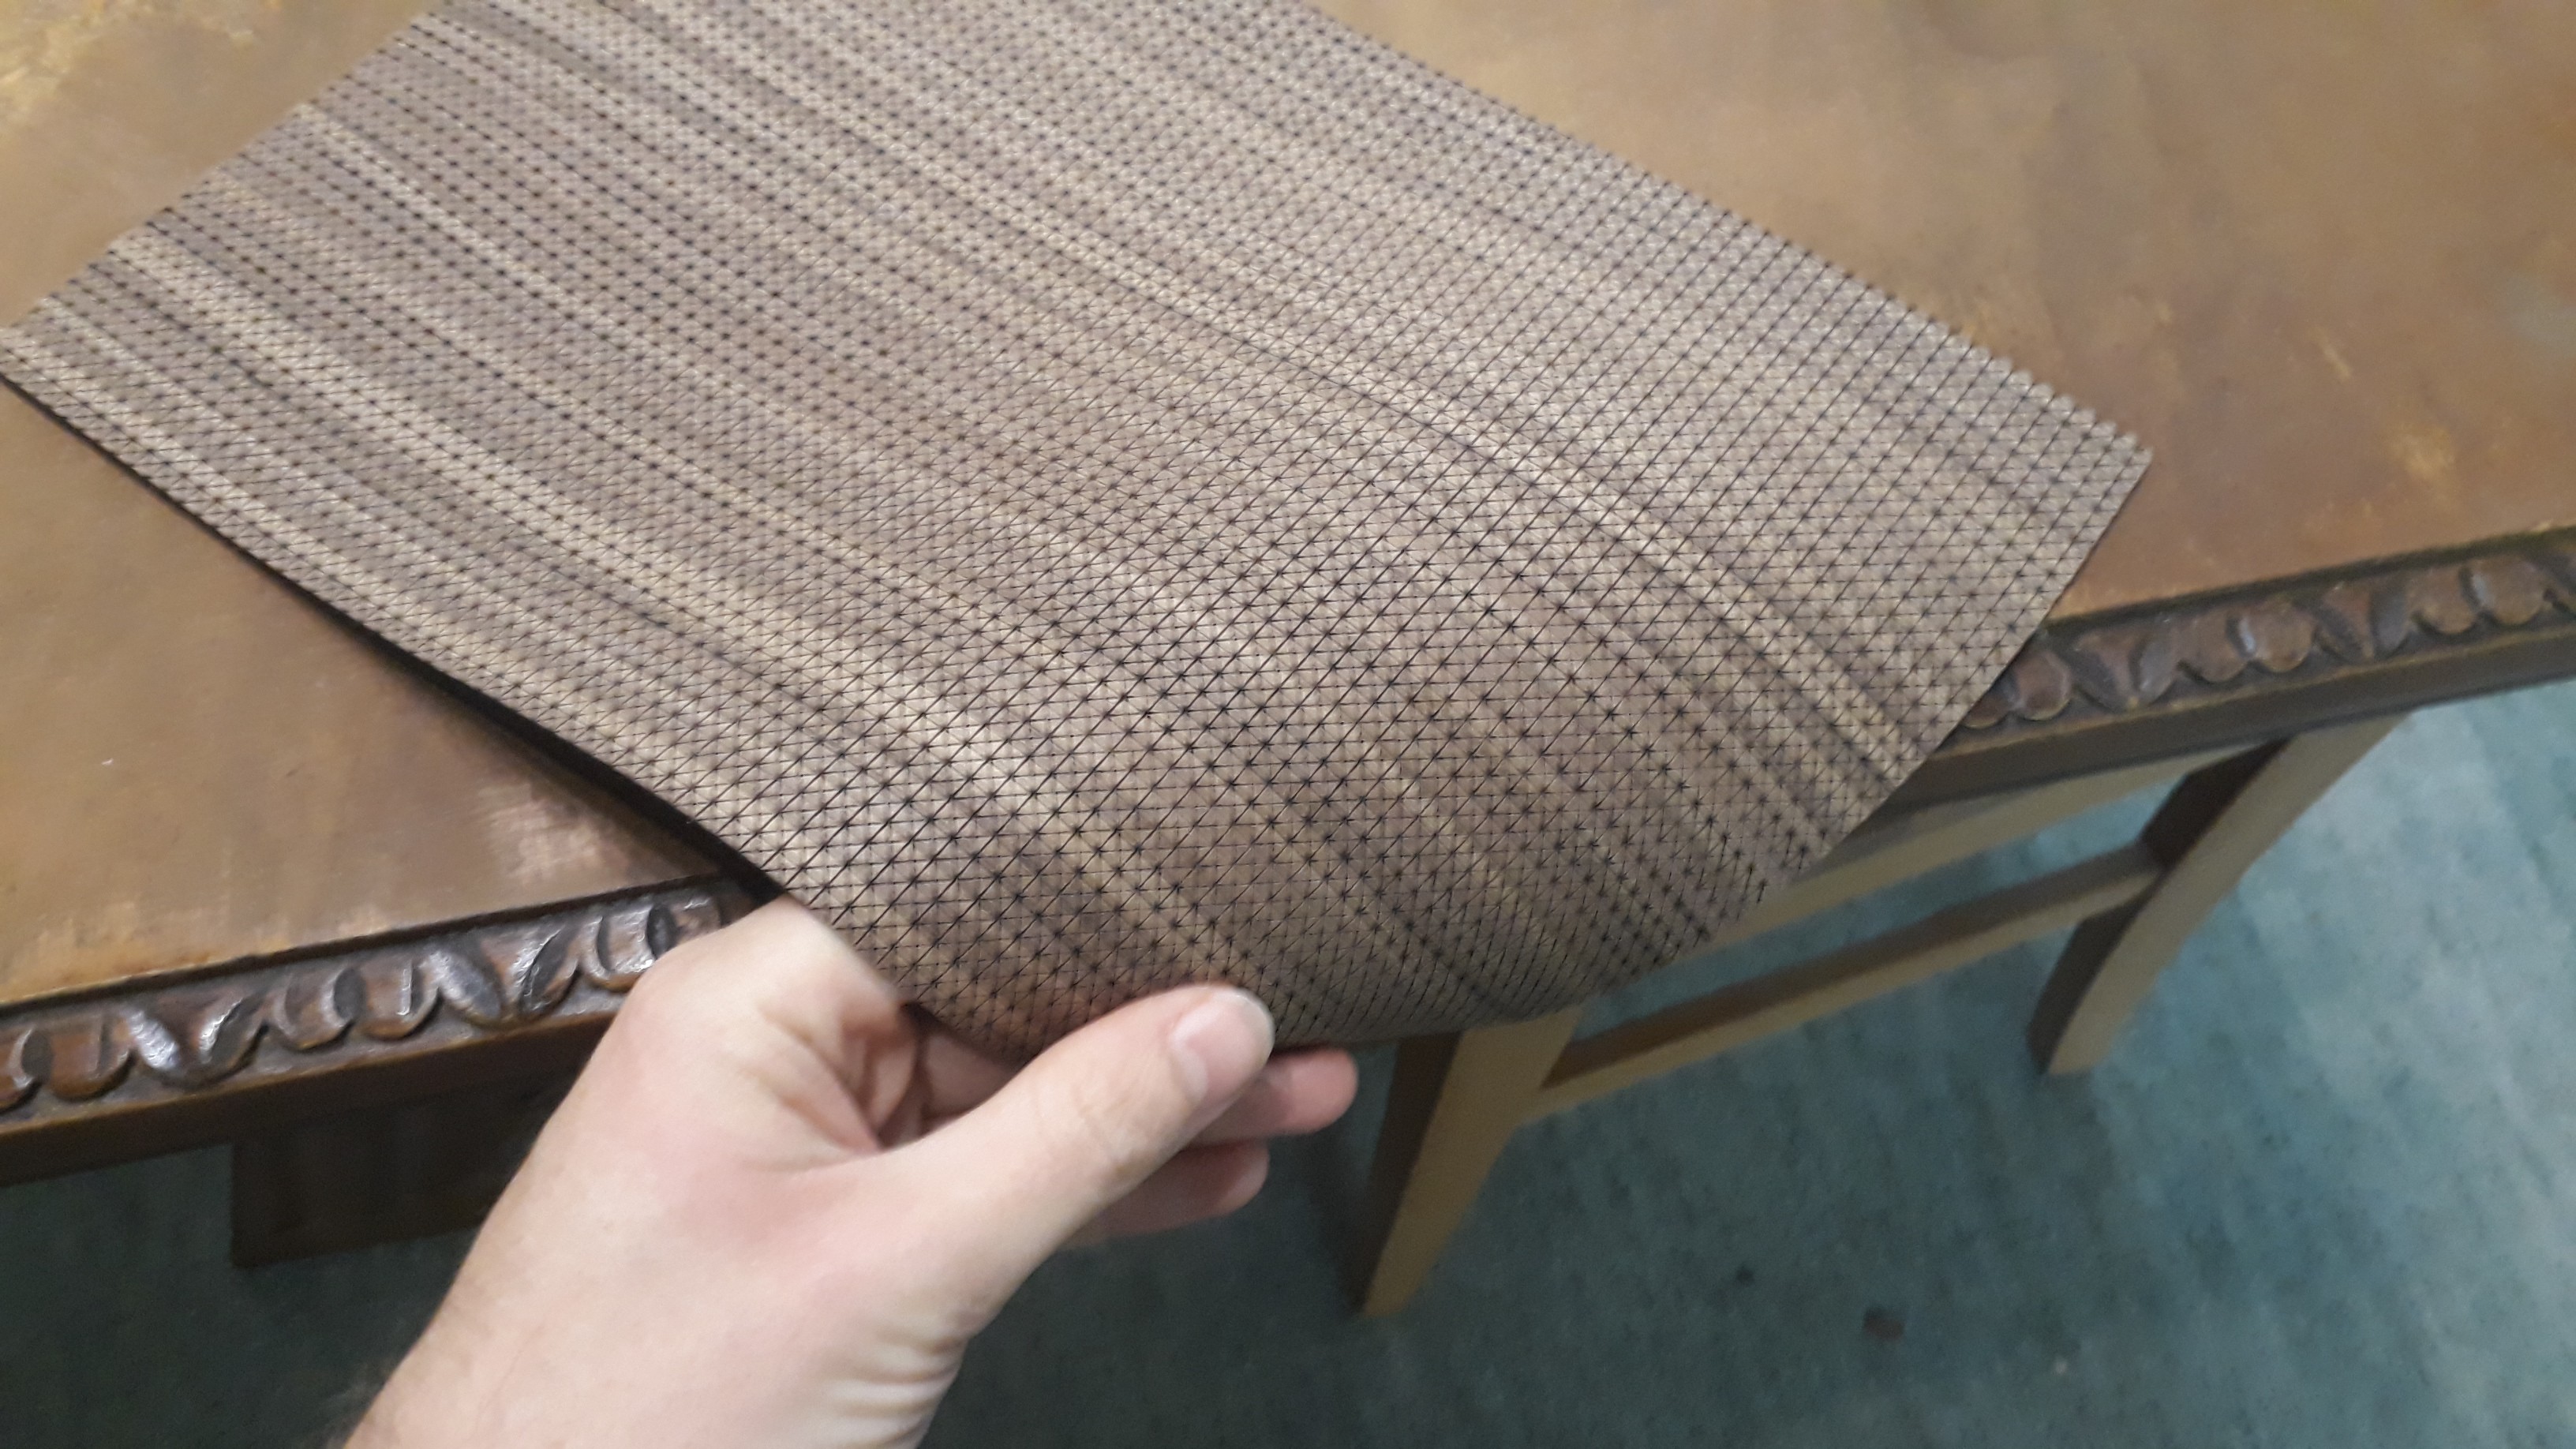
Cutting this was not so trivial though, at least neatly. I think you can probably laser cut it, I was in a rush though and just used a printed out template and a stanley knife. To hide the edges I added little edging pieces around the camera hole and the USB charging hole.
Discussions
Become a Hackaday.io Member
Create an account to leave a comment. Already have an account? Log In.