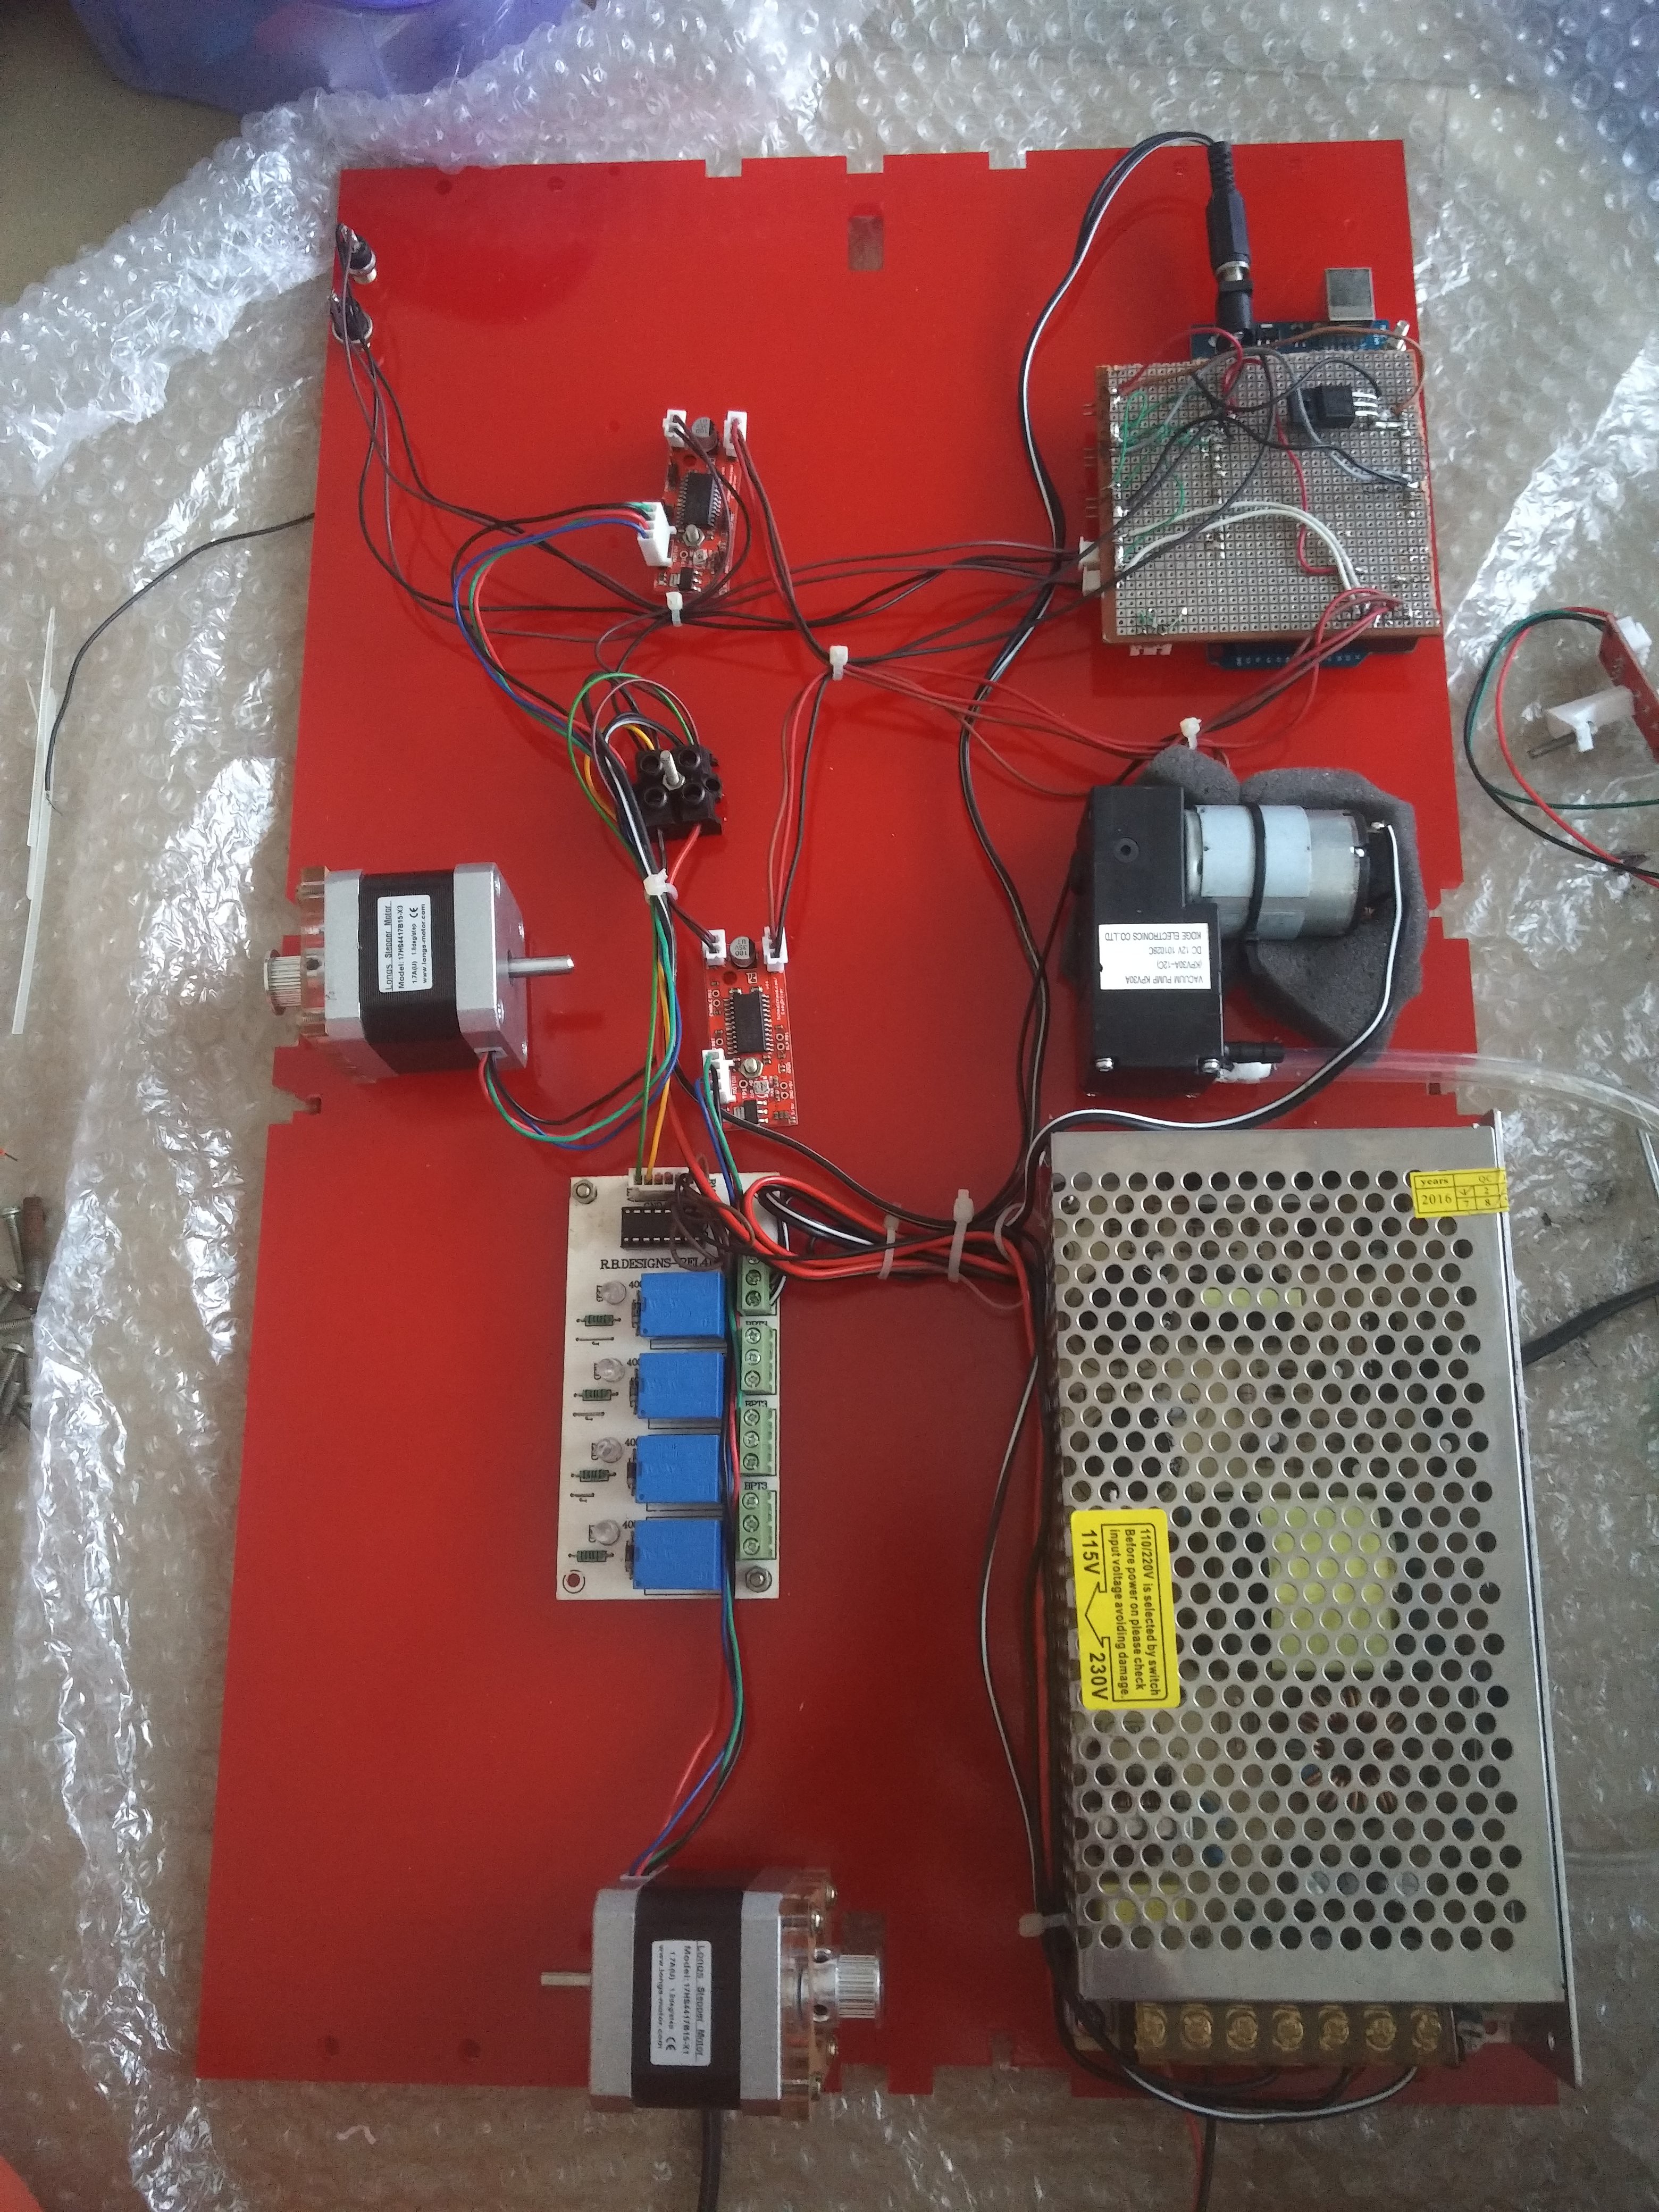
We run a small hydroponic lettuce farm on our rooftop and need to plant about 600 lettuce seeds per week. This took between 2 and 3 hours to do it manually, seed by seed. We recently built an iPrusa 3D printer and I got inspired to build something to speed up the process. The printer itself gave me plenty of ideas on how to move the X axis. The idea is that the foam block which is already precut into cubes slides forward row by row, while seeds are sucked up from the seed tray by a pipette attached to the rotating PVC tube. The tube is connected to a small vacuum pump. As the tube approaches the seeder tray a small vibratotion motor switches on below the tray to shake up the seeds, making it more likely for them to get stuck to the pipettes. This the rotates to the drop point, which are basically 3D printed cones that force the seed into a small hole thus making the positioning more accurate. At the point the small vibrator switches on again briefly, causing a small shake that dislodges any seeds stuck in the cones.
I designed the entire thing in sketchup and the exported each part to a separate file either for 3D printing or to have laser cut.
The prototype is working and if there is Interest I would be happy to share the full project details and source code here or on GitHub so others can replicate it.
To see the first trial run in action see here:
And the final working model here:


 Russell Munro
 Greg Duckworth
 Otto Gloeckner
 Elliot
Hi!
I live here in Brazil, in a small community. We grow vegetables here to make our surviving.
We loved your project! It would help us very very much here!
Do you have the instruction? How to assemble the electronic parts, solder...
If you could help us, our community here will be very happy!! :)
Many thanks!!!!