The seeder has two axes, the X axis where the foam block moves on and the r or rotating axis, which moves seeds between the seed tray and the drop point.
We did various trials using foam as a medium to germinate seeds for a hydroponic NFT (nutrient film technique) system, based on visits to various hydroponic farms in south east Asia, and we realised that just placing a seeds on top of the foam cube works just as well as inserting them into a groove in the foam. Therefore, the only challenge is to get one or two seeds and place them at the center of each 20mm cube. We had a mold made and we die cut the foam so that all of the cubes are easily separable without damaging the root system when the seedlings are ready for transplanting.
The size of the foam block is about 21x31 cm and contains 10x15 block, so a total of 150 seedlings.
The X axis tray is basically just a flat acrylic sheet that needs to move back and forth so that each seed row is aligned with the drop point. And endstop is installed at one end that is used to home the system at startup. The X stepper motor is mounted on one end, below the main plate. Three pulleys form a loop, one pulley is mounted below on the opposite end to the stepper and two at the top. The belt is pulled tight and screwed to a 3D printed part that also screws into the moving tray, so that it can go back and forth on the linear bearings with a movement of about 30cm totally. The rails are 8x500mm SS rods.
The R axis rotates about 300 degrees, back and forth. It consists of a PVC 1/2" tube with holes drilled into it. The first attempt was a 3D printed bar but for some reason I was never able to get sufficient suction from the nozzles, I assume it's due to the pla filament and the gaps between the printed rows. I did epoxy it but it didn't help. So, I cut up syringes and glued the end part into the holes in the PVC pipe. I the removed the needles from the small needle ends and stuck a plastic pipette tip onto it. I tried using needles first but the vacuum suction and the sharp tip often caused the seeds to get poked and stick to the needle tip.
One end of the pipe is blocked with a 3D printed plug. The other end has a 3D printed nozzle which joins to a flexible hose connected to the vacuum pump.
The PVC pipe rotates on a small round 3D printed part on each end that it fits into - I did not go with bearings and tried to make fit as tightly as possible while still allowing rotation. A 3D printed gear slides over the PVC pipe and connects to a stepper motor below the main plates using a timing belt.
The final part is a small 3D printed stopper that also fits tightly onto the pipe and presses against the endstop directly over the drop point. It is also used to set the zero position at startup.
The seed tray is 3D printed as well and just sits on a horizontal acrylic bar, so that it is easy to switch out different seed types. I glued a small vibrating motor to the bottom of the seed tray to allow the seeds to jump a bit. This makes it easier for them to be picked up and also helps to distribute the seeds more evenly throughout the tray.
Below the main plate is where everything is mounted. At one end there is a power supply of 12v 7a. There is a 4 channel relay board with only 1 relay currently used to switch the vacuum pump. Two buttons are also mounted onto the board to start and stop the operation in case of issues. Then there is the vacuum pump, the stepper motor drivers, the two stepper motors, and the arduino and home brew shield. That is the most ugly part right now, I will make a proper pcb when I get some time.
I just finished spray painting the various parts in bright red, which is what I happened to have at the moment. I am assembling the final prototype and will post pictures of the build process.
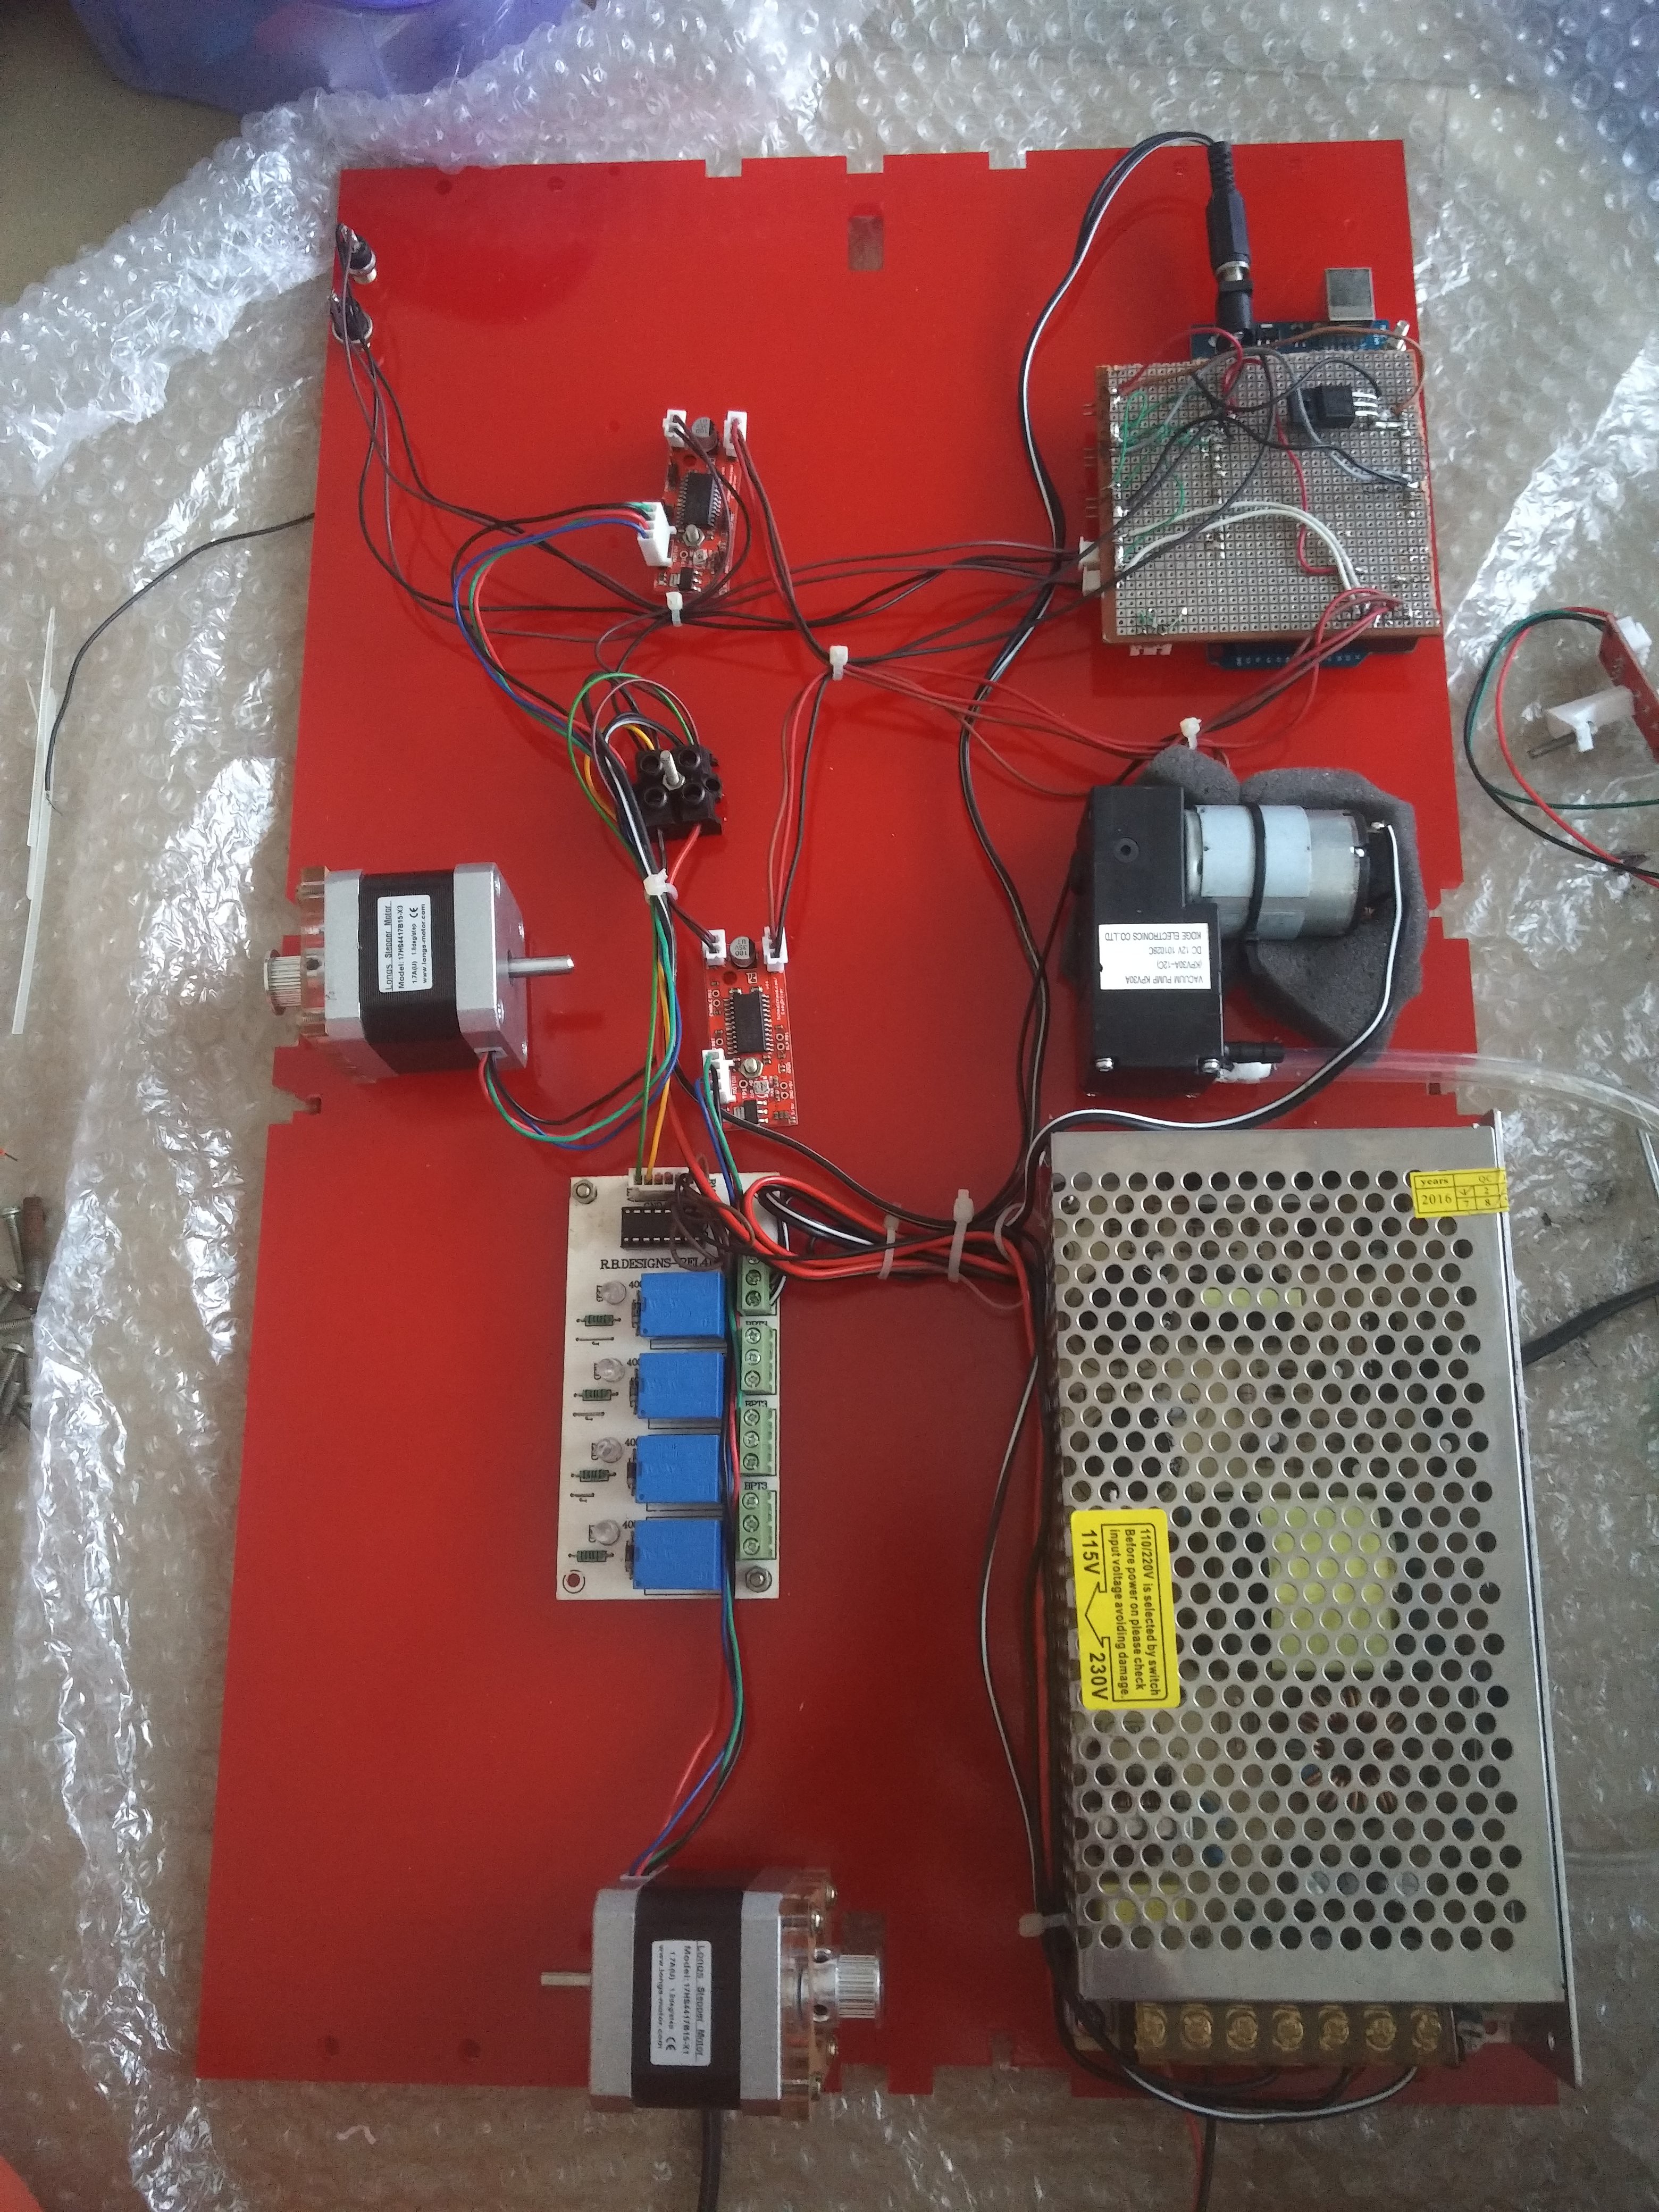
This is the base plate from below with all the electronics mounted onto it.
Discussions
Become a Hackaday.io Member
Create an account to leave a comment. Already have an account? Log In.