 digitalbird01
Features:
• Typically up to 550mm of Jib Travel more with lighter payloads.
• Vertical, horizontal & diagonal motion.
• Camera head can be mounted Upright or under slung.
• Digital Bird Pan Head can be used to provide a second axis for pan control of the hole jib assembly.
• Tested on payloads up to 4.5KG ( 2.5kg of Camera with PT head)
• Sony NP style batteries with 7.5v external power port.
• Full feature interface through Digital Bird compact WIFI remote or PTZ remote
• OLED battery monitor and PTZ slave ID
• Camera shutter control
• Links wirelessly with all the other Digital Bird devices.
• Ultra quiet operation, Silky smooth motion.
Operating modes:
• A-B straight run
• A-B with acceleration controls (Ramp/Ease)
• A-B-A Bounce mode
• Time-lapse mode with built in intervalometer and camera shutter control.
• Six key sequencer for more complex moves.
• Stop motion functions for animators.
• PTZplus real-time camera functions.
Tools
- Super Glue
- A pair of small pliers
- A pair of tweezers
- A set of metric Allen keys
- A kitchen torch or other heating device. A gas ring will do.
- A hot glue gun (Nice to have but not essential)
- A sharp blade & a file for cleaning up the parts as required.
- Some small metal drill bits 2-6mm
- A hack saw (may be required to remove the feet from the end of the tripod legs).
- A few small screwdrivers
Addition tools required if not building from a kit
- Soldering Iron & solder
- JST style crimping tool
Plastic
To keep it as simple as possible have used PLA for all the parts on this project. The Jib has to withstand total payloads of over to 9kg (Camera System and counter weights). To this end many of the parts require 100% fill. Allow yourself about 3kg of filament. In my case 2KG of black and one of orange. My personal preference is to use matt PLA since the finish looks far more even and less plasticky! Layer lines are also far less obvious. I currently use Tinmorry which I am very happy with but you may have your own favourite. Parts are numbered in such a way that the first part of the number is the part number and the second part is my suggested fill so part 001_25 is 25% fill. Most parts require support somewhere so be aware! On the plus you should be fine with Automatic supports.
Steel Counter weights
The counter weights I am using are the same size and dimensions I used on the vertical slider setup and are therefore interchangeable between the the two projects.
A pattern is included for you to pass on to a supplier or cut and drill yourself from from 20x60mm bar stock. Each weight is approximately 1KG 220mm long and you will typically need 3 or possibly 4 for very heavy cameras. Remember the system has only been tested with a total camera side payload of 4.5Kg (Camera & Pan Tilt head) heavier payloads will limit the length of your Jib and may require a longer Nema17 stepper motor with a modified case to accommodate it. I sourced my weights on ebay and had the supplier cut the standard bar stock down to the 120mm lengths. I then drilled out the three 6mm diameter holes myself using a pillar drill. I am sure my supplier would have been happy to drill out the holes also, had I known at the time where I wanted them.
Suitable Tripod legs to use for the Jib Arms
It was incredibly difficult to find suitable telescopic sections to use for the jib arms. After spending around £30 on raw aluminium sections which were suppose to be telescopic but simply did not work! I hit on the idea of using the legs from a cheap Velbon DF-60 tripod I owned and only cost me £18.00 used on ebay. While these tripods are nothing special, the legs proved to be a gold mine and work very well complete with section locks. Some of these tripods are no longer manufactured however there are always some available on the used market.
Verified:
- Velbon DF61
- Velbon DF60
- Velbon EX630
- Velbon CX640
- Velbon C600
- Velbon EF61
- Velbon 7000
Tripods which look to have the same leg profile. I have...
Read more »
 Kevin Kadooka
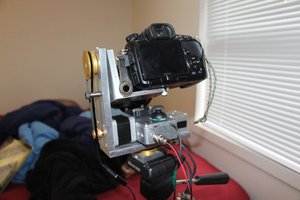
 Matt Barr
 The_Mekon