 ElectronicABC
GERBER PCB:
https://mega.nz/file/zMoyjBYB#-q_gkjaRB01UumAw917G5sfCQVlWTou_GVNATf7LYEg
GAMES ATTINY85:
https://mega.nz/file/uEAwyLiD#k2Ue8fS_xayOWp8b0AO5nRquHepY1aJdpoC7bVY9NB4
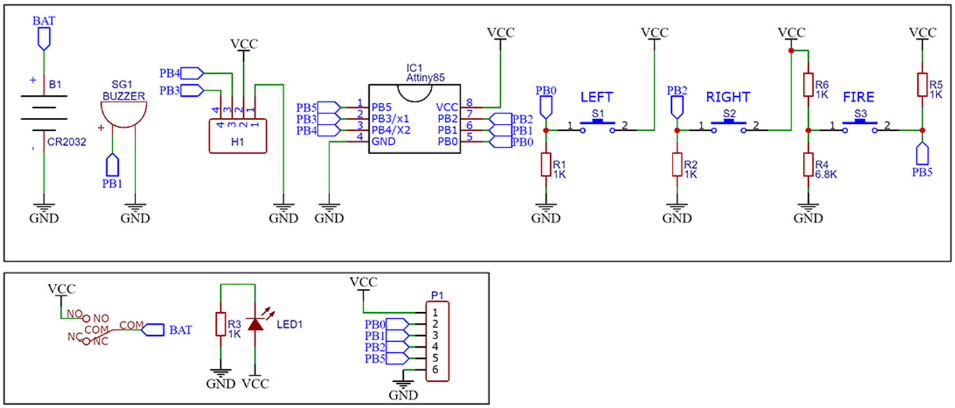
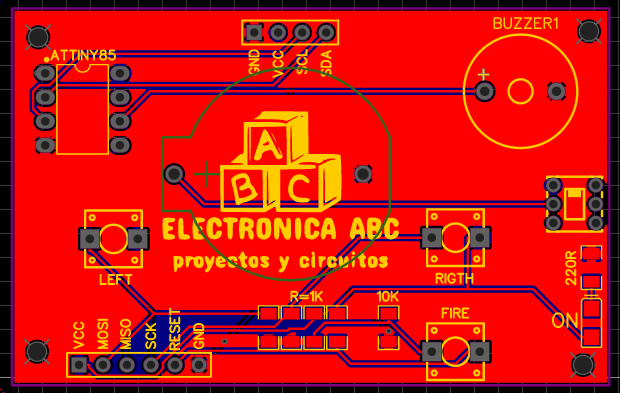
SCHEMATIC DIAGRAM
The connections are very easy. The ATtiny has 6 pins taht we could use and a supply of 3V from the battery and GND pin. Don't worry, the chip works fine at 3V and the same for the rest of the components. The buttons have a pulldown and are conencted to pins PB0, 2 and 5. The OLED display needs i2c communication and that is created on pins PB4 and PB3 for data and clock. We have the SPI port for ISP programming with the Arduino.
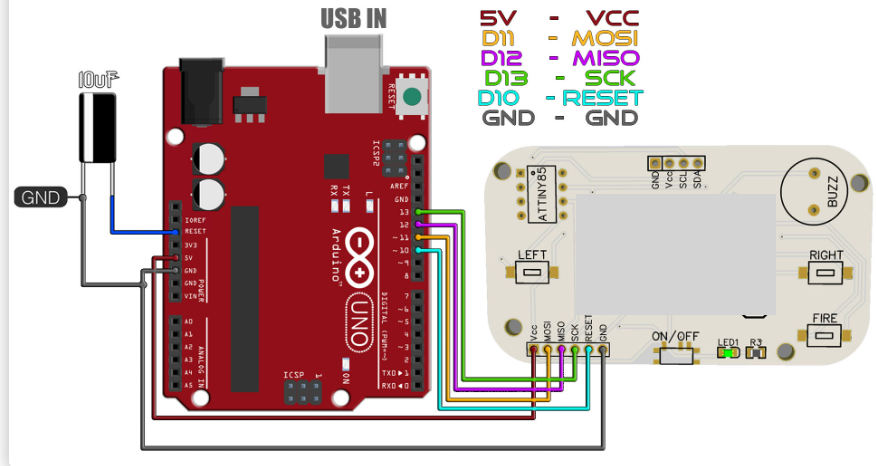
BOOTLOADER ATTINY85
Ok, we have to burn a bootloader to the chi adn then uplaod the code. For both those steps we need the connections below to an Arduino. In my case I will use Arduino UNO. So, make the connections as below between the Arduino SPI port and the PCB. We will sue the Arduino as ISP to uplaod codes.
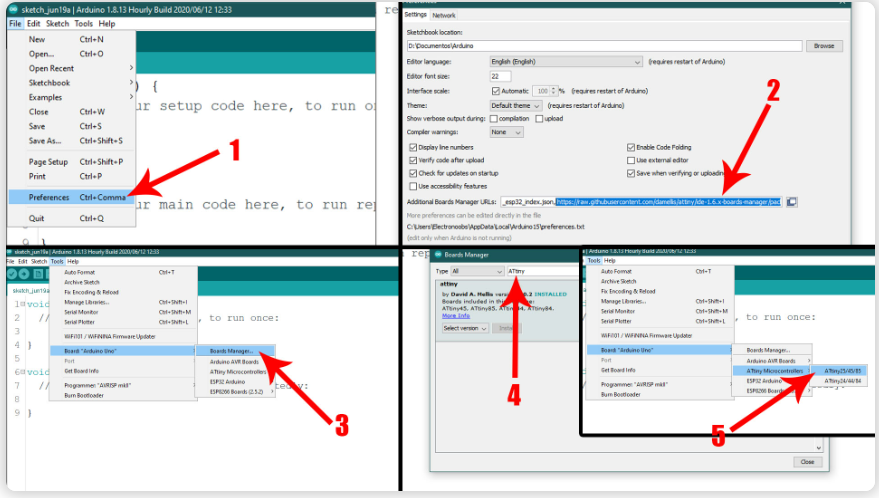
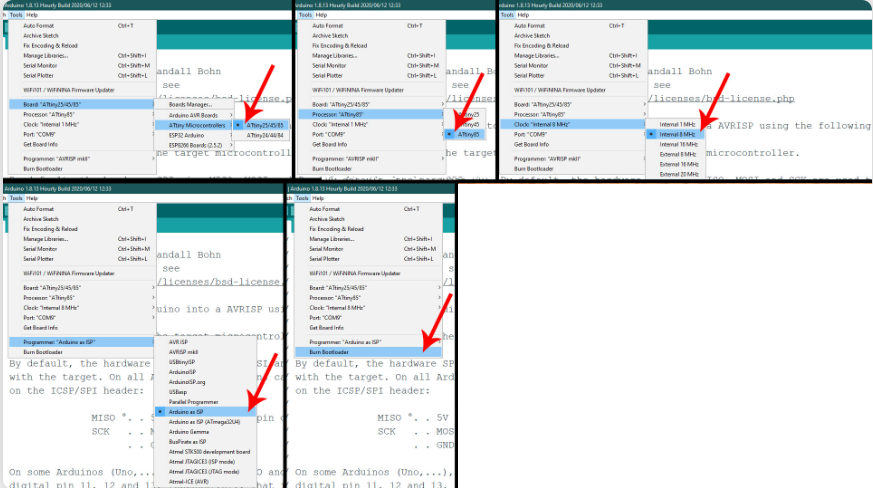
Install ATtiny Boards
Run your Arduino IDE. We need to install the ATtiny85 boards in case that you don't already have that. To install the boards, copy the link below. Go to Ardduino IDE, to File -> Preferences -> Paste the link in the "Additional Boards Manager URLs". If you already have another link ther, add a comm "," first and then paste the new link. Save and close preferences. Now go to Tools -> Board -> Boards Manager. In this manager search for ATtiny adn install the attiny boards. Now, if you go on tool -> board, you should see the ATtiny boards as well.
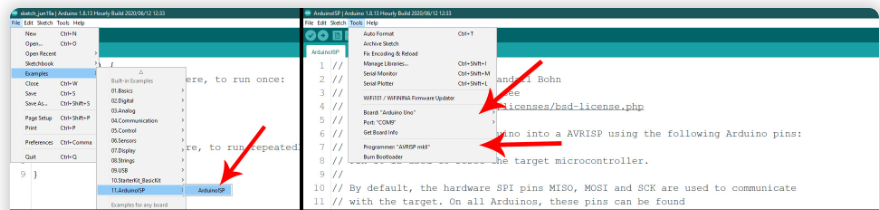
Arduino As ISP
In order to use the Arduino as an ISP programmer, we need to uplaod a code to it so for taht, go to Examples -> ArduinoISP -> ArduinoISP and open that example code. Then make sure yous elect the type of board for your Arduino, in my case, Arduino UNO. Select the com and leave the default programmer as "AVRISP mkII". Connect the USB, select the COM and uplaod the code to the Arduino UNO.
Bootloader Burn
Ok, now the Arduino has the ISP code so it will act as a ISP programmer. Now, let's butn the bootloader. Go to Tools -> Board and selectt the ATtiny25/45/85 type of board. Then, once that is selected, go to Tools -> Processor -> And select the ATtiny85. Then go to Clock -> and select the internal 8MHz one so we will burn that bootlaoder. Go to Tools -> Programmer and make sure you now change the normal programmer from "AVRISP mkII" to "Arduino as ISP". Finally, amke sure the Arduino UNO is connected to the PCB to the ISP port and go to Tools -> Burn Bootloader. The Arduino Rx/Tx LEDs will blink and after a while you will get the bootloader burn complete on the screen.
CODE ARDUINO - GAMES
GAMES ATTINY85:
https://mega.nz/file/uEAwyLiD#k2Ue8fS_xayOWp8b0AO5nRquHepY1aJdpoC7bVY9NB4
ELECTRONIC COMPONENTS
- 1 BUZZER
- 1 PCB
- 1 PANTALLA OLED
- 1 ATTINY85
- 4 RES 1K 1206 SMD
- 1 RES 10K 1206 SMD
- 1 RES 220 ohm SMD
- 1 DIODO LED 1206 RED
- 3 BUTTON NO 2 PIN
- 1 SWICTH 6 PIN
- 1 SOCKET BATTERY CR2032
- 1 BATTERY CR2032 3VDC
PCB
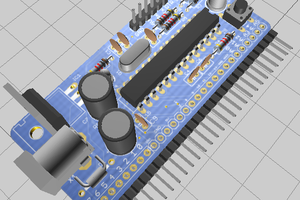
Once the project is finished with all the respective tests, we carry out the PCB design and we will obtain the routed tracks and the 3D image of how our finished PCB would look.

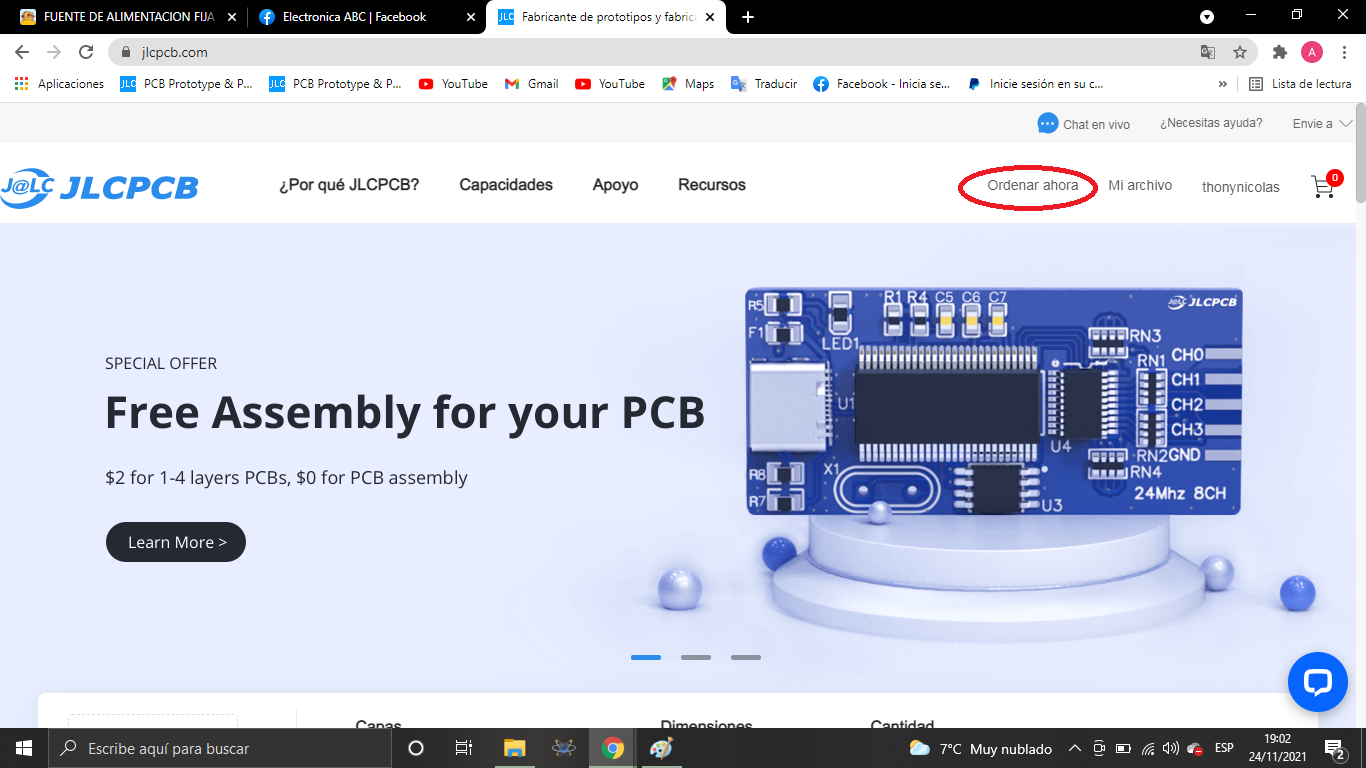
JLCPCB
Once the pcb is designed, we will send our friends from JLCPCB to manufacture our PCB.
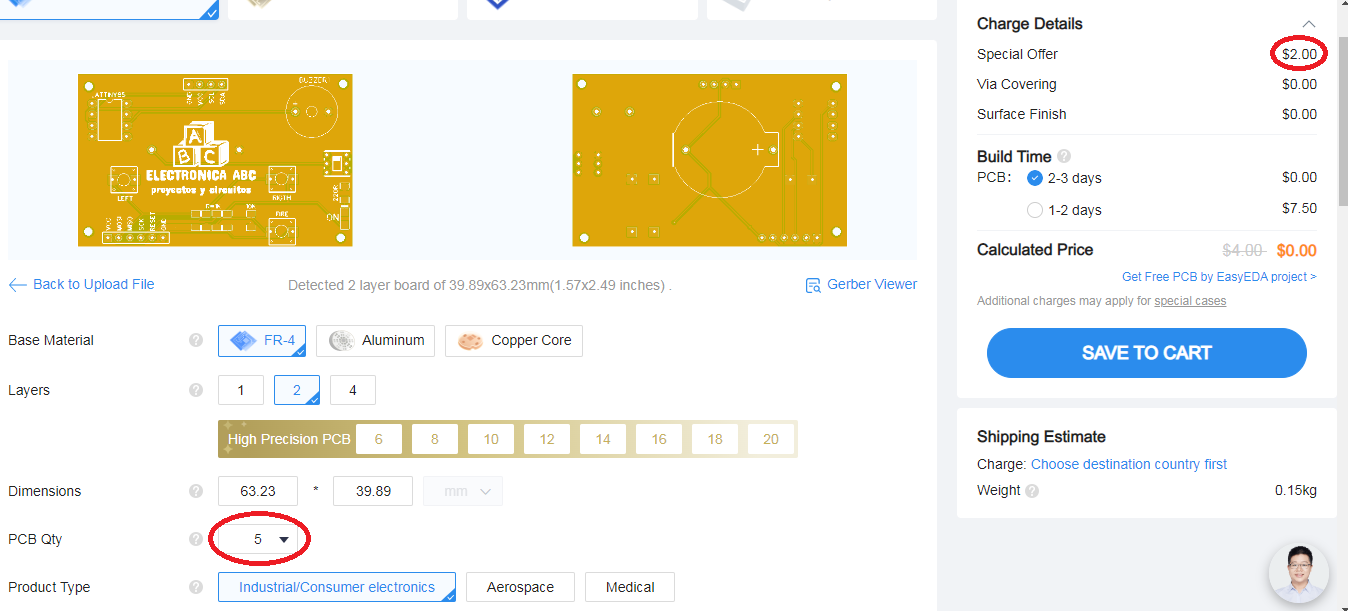
5pcbs only $2
JLCPCB number 1 PCB manufacturing company worldwide professional pcbs and excellent finish.
GERBER PCB:
https://mega.nz/file/zMoyjBYB#-q_gkjaRB01UumAw917G5sfCQVlWTou_GVNATf7LYEg
 Clovis Fritzen
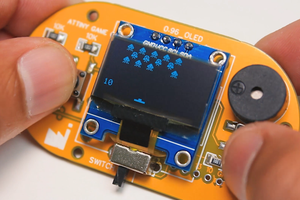
 Mrinnovative
 selena1995
 Pratik Makwana
Fire Kiring is often played with friends or other online players, providing an opportunity to connect and interact with others who share similar interests https://firekirindownload.app.