Close
0%
0%

HBKD-81

An open, replacement case design for a wedge style home computer

Similar projects worth following
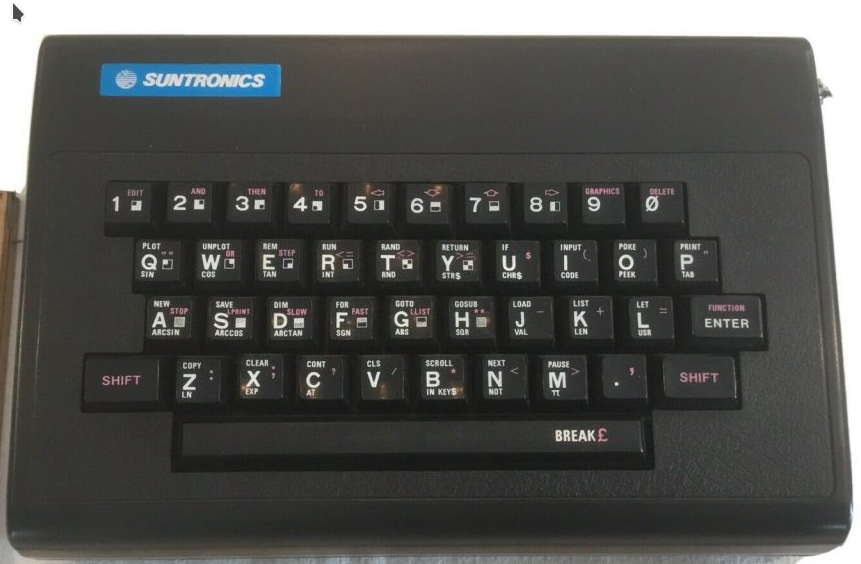
This is my home brew, ZX81 case -- but it has the potential to be so much more. This project is the start of a open, small form factor standard for home brew computer cases. The styling will be based off the suntronics KD-81 replacement case

Initial goals:

I want this to be a standard case replacement for the ZX81 first and foremost. So, to that end I have the following goals in mind:

  • Use the KD-81 as a reference for styling
  • small (ish) form factor with out having a crowded case
  • standard size key caps, and key switches allowing for the use of salvaged parts
  • standard DC-DC Power supply to provide cool, reliable power to the computer without excessive heat.
  • power / reset switch header

Additional Goals:

  • Make inserts for the case to use it as a stand alone terminal for other single board computers.
  • Make an adapter board that turns the key-matrix into a PS/2 compliant keyboard for use with a FAB-GL terminal board. as well as does all the ancillary voltage conversion (if needed) from 5v ttl to 3.3v.
  • allow for use of a serial breakout to a FTDI to allow code to be serially loaded from a host PC or other machine for computers with only a serial monitor, without disconnecting the VGA terminal.
  • make a power breakout for a pico-atx power supply or source a small high quality switching supply that can be used at multiple voltages for safe cool power.

Example uses for the terminal build:

As a case for single board computers, like the Z80-MBC2, V20-MBC, 68K-MBC or Agon Lite

UPDATE:

Dr Matt Regan has done a video showing the keyboard PCB connected to a ZX Spectrum 48K Clone,  I have updated the gerber silkscreen to include the connection notes.

Thank you Matt!


Links:

Full Repository for project: GitHub
Shared Project link (supports development): PCBWay Shared Projects   additionally if you use use discount code: ROBOTMAKER, you can get an 5 dollars off your order, for a limited time.

extra case assembly directions:

Sponsorship:

PCBWay has kindly offered to sponsor the prototyping for HBKD-81, Its only with their kind sponsorship we are able to do these projects, and their support is greatly appreciated.  If you don't know PCBWay does PCB prototyping, fabrication, 3d printing and so much more with quality that is unmatched in the industry.  Thank you PCBWay!

PCBWay

Gerber_HBKD-81-Keyboard-PCB_PCB-Layout-Keyboard_2024-06-16(1).zip

Production files.

Zip Archive - 266.34 kB - 06/30/2024 at 00:32

Download

CAD Files.7z

These are the 3d printed / 2d cad drawings for the case panels

x-7z-compressed - 30.59 kB - 04/30/2023 at 20:05

Download

BOM HBKD-81.xlsx

Bill of materials for the keyboard

sheet - 19.28 kB - 03/13/2023 at 16:46

Download

  • 42 × MX1A-11NW Switches and Relays / Switches
  • 1 × CFM14JT1K00 Resistors (Fixed) / Metal Film
  • 1 × C503C-RCS-CYAZaAA2 RED LED T – 1 ¾
  • 1 × 27630502RP2 Electronic Components / Misc. Electronic Components
  • 1 × M20-9750846 Connectors and Accessories / Board-to-Board and Card Edge Connectors

View all 10 components

  • Greetings Programs!

    Dave Collins04/28/2023 at 05:15 0 comments

    Hello There!


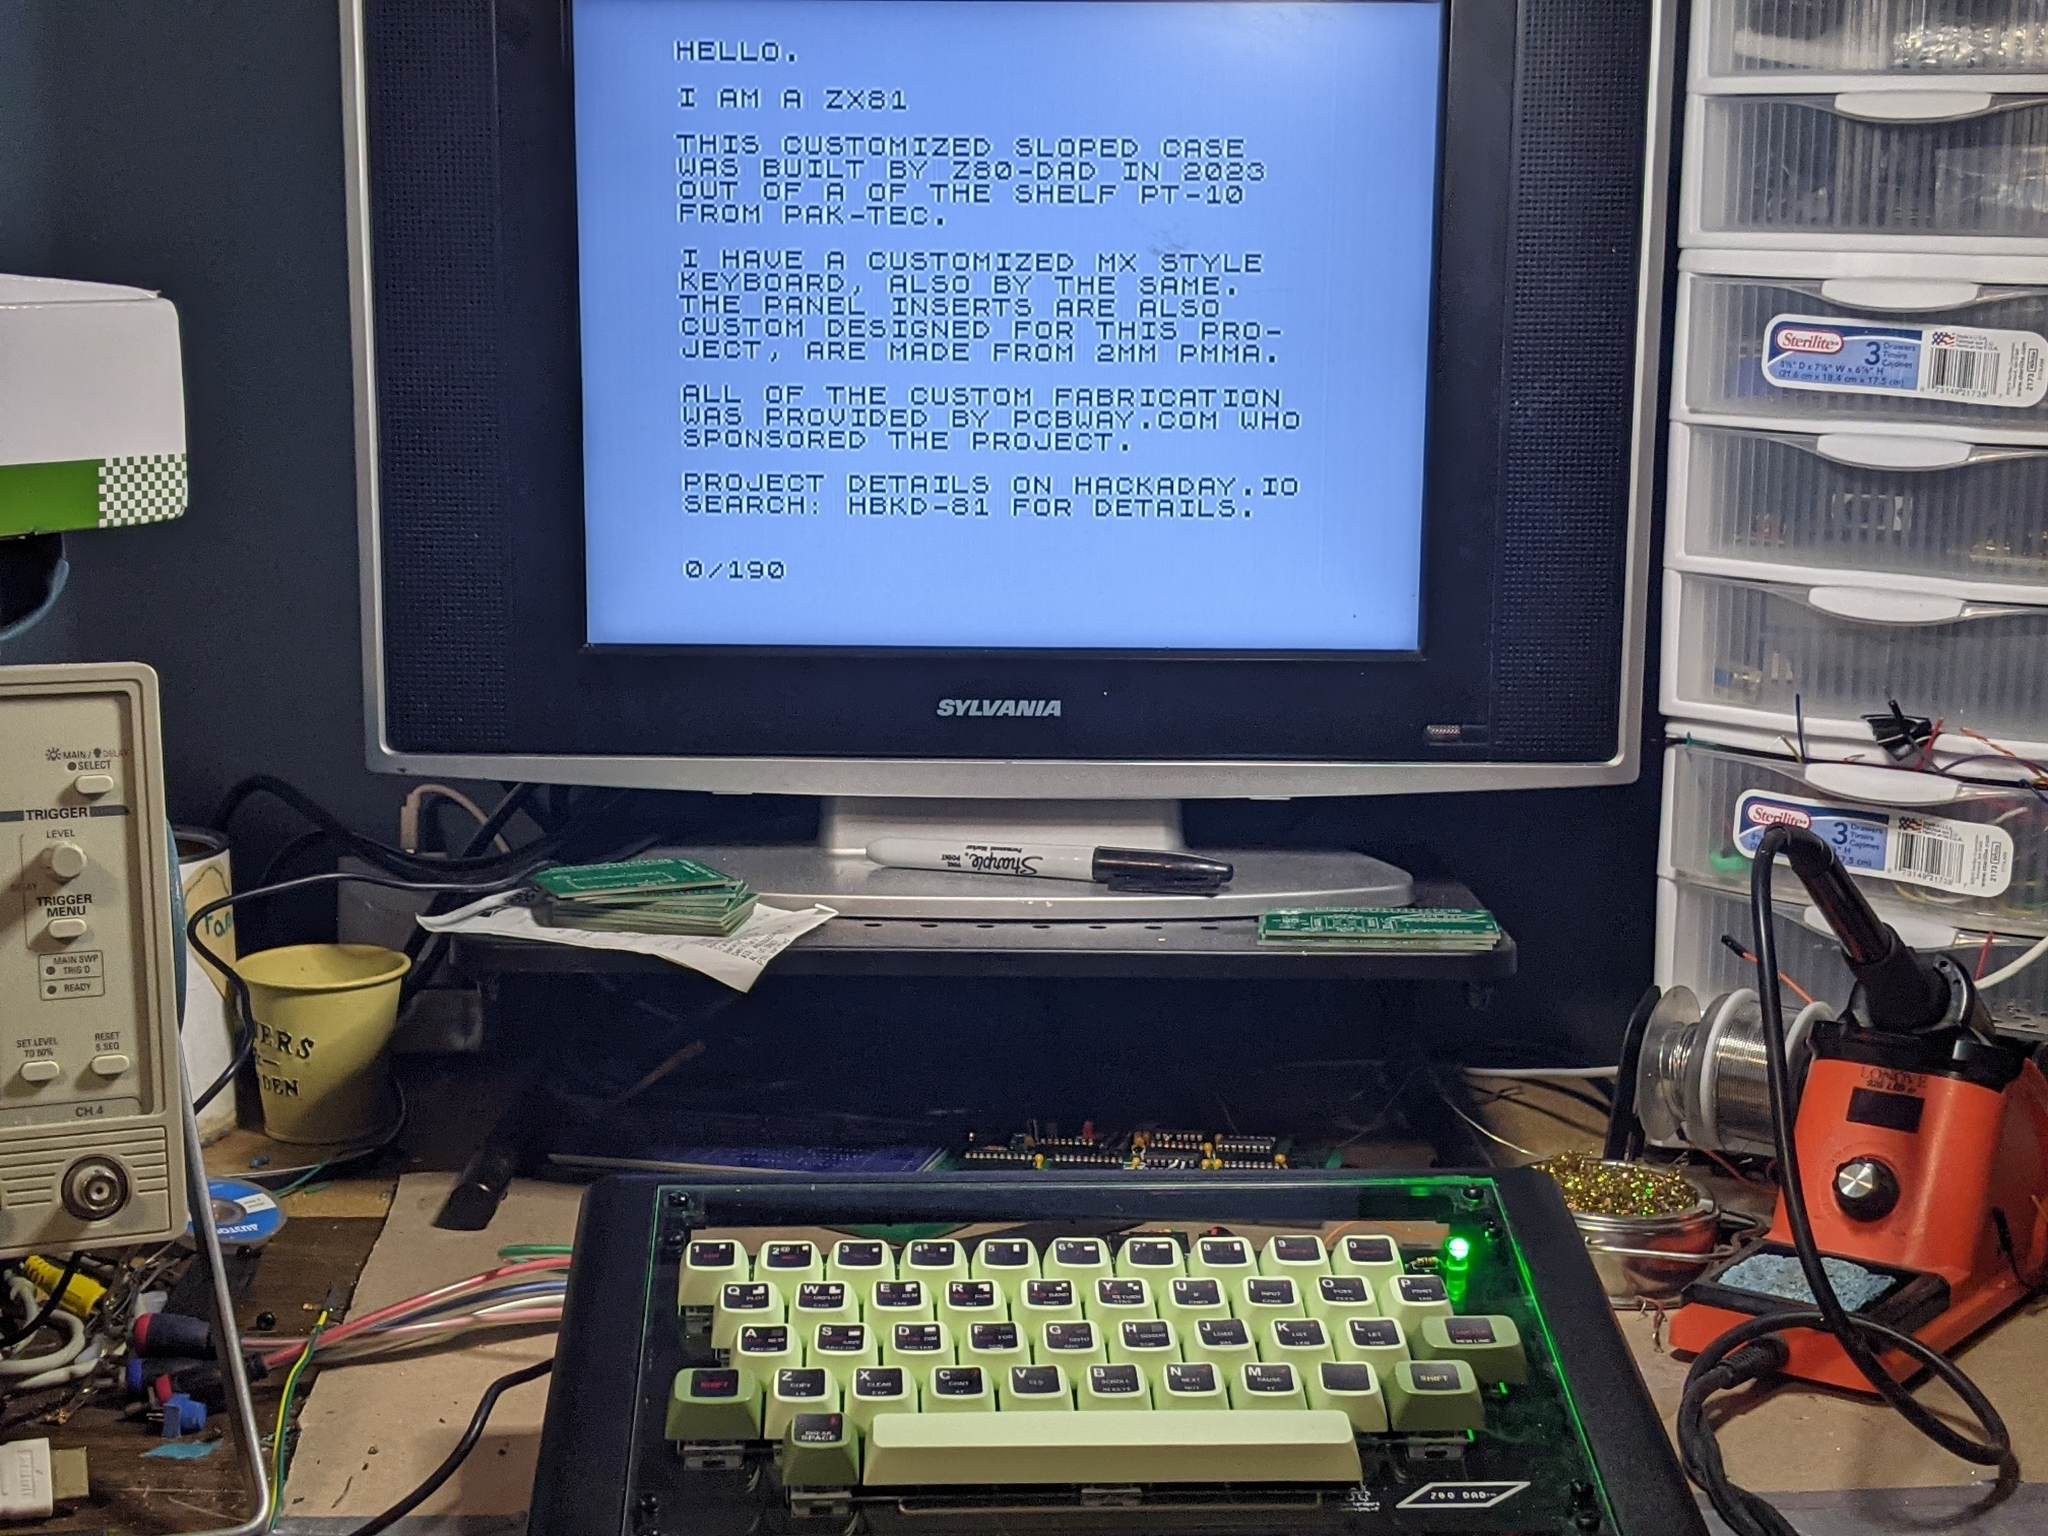
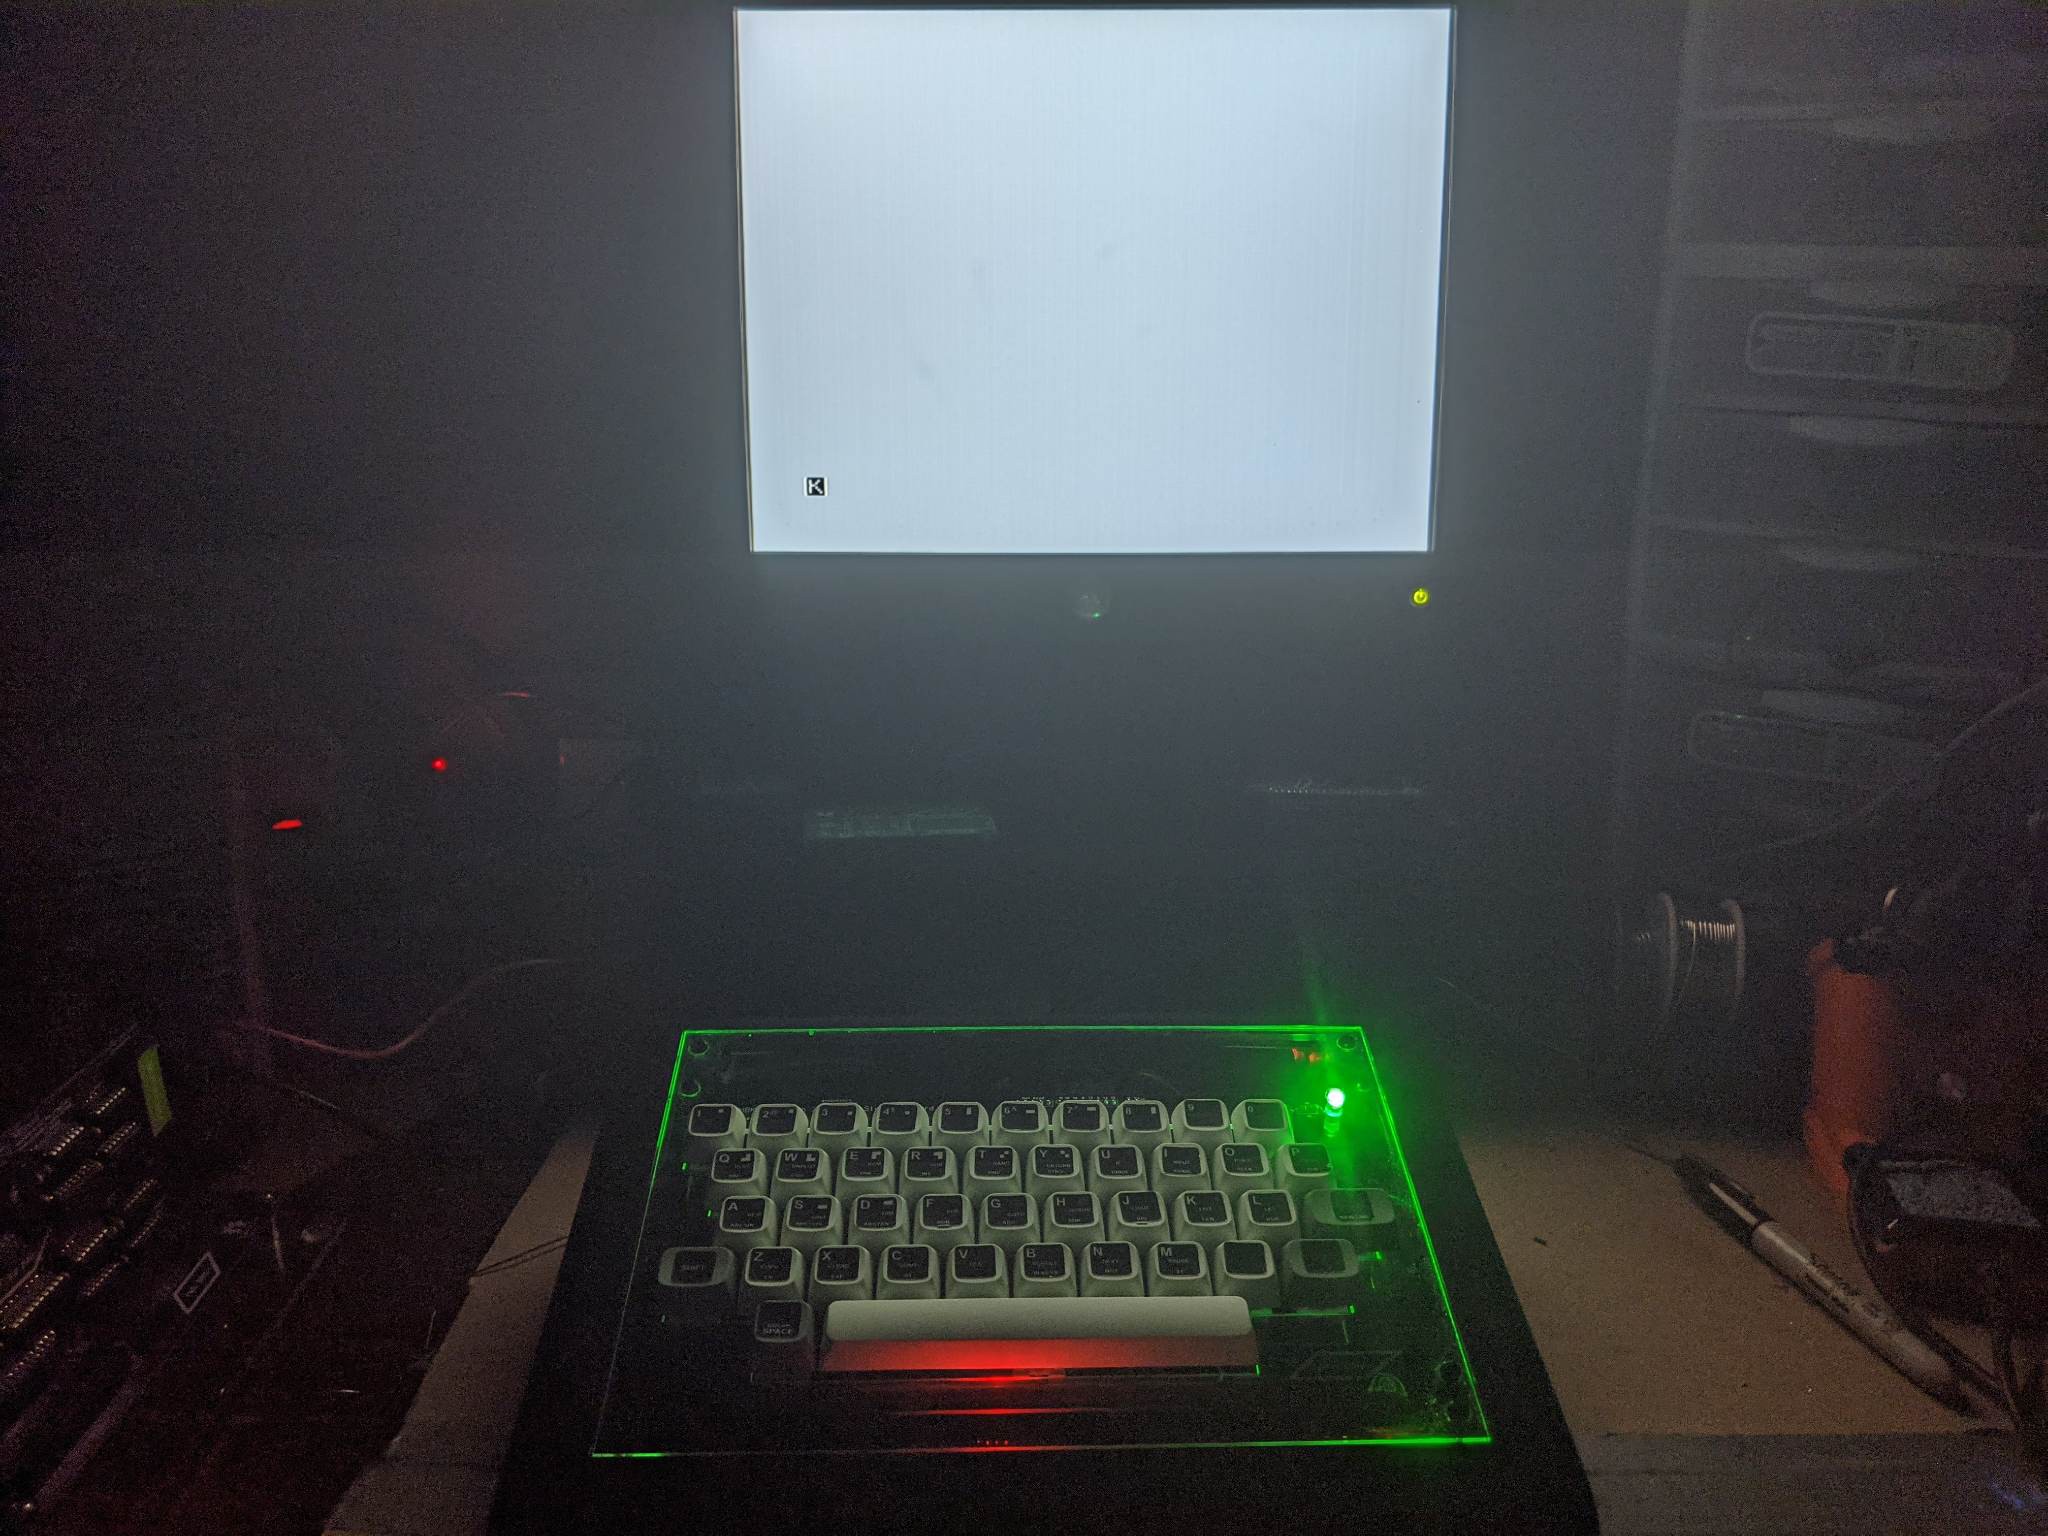
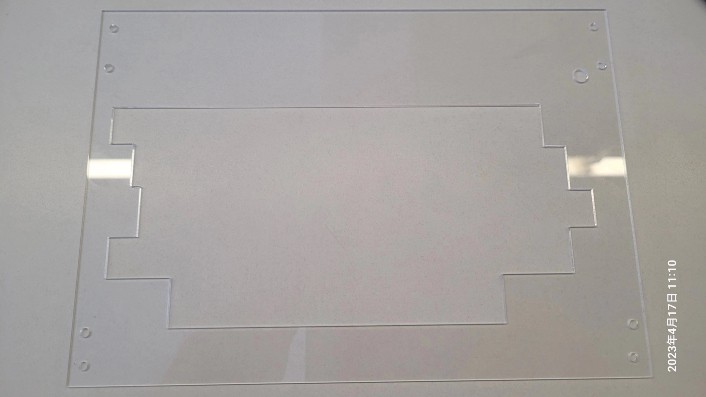
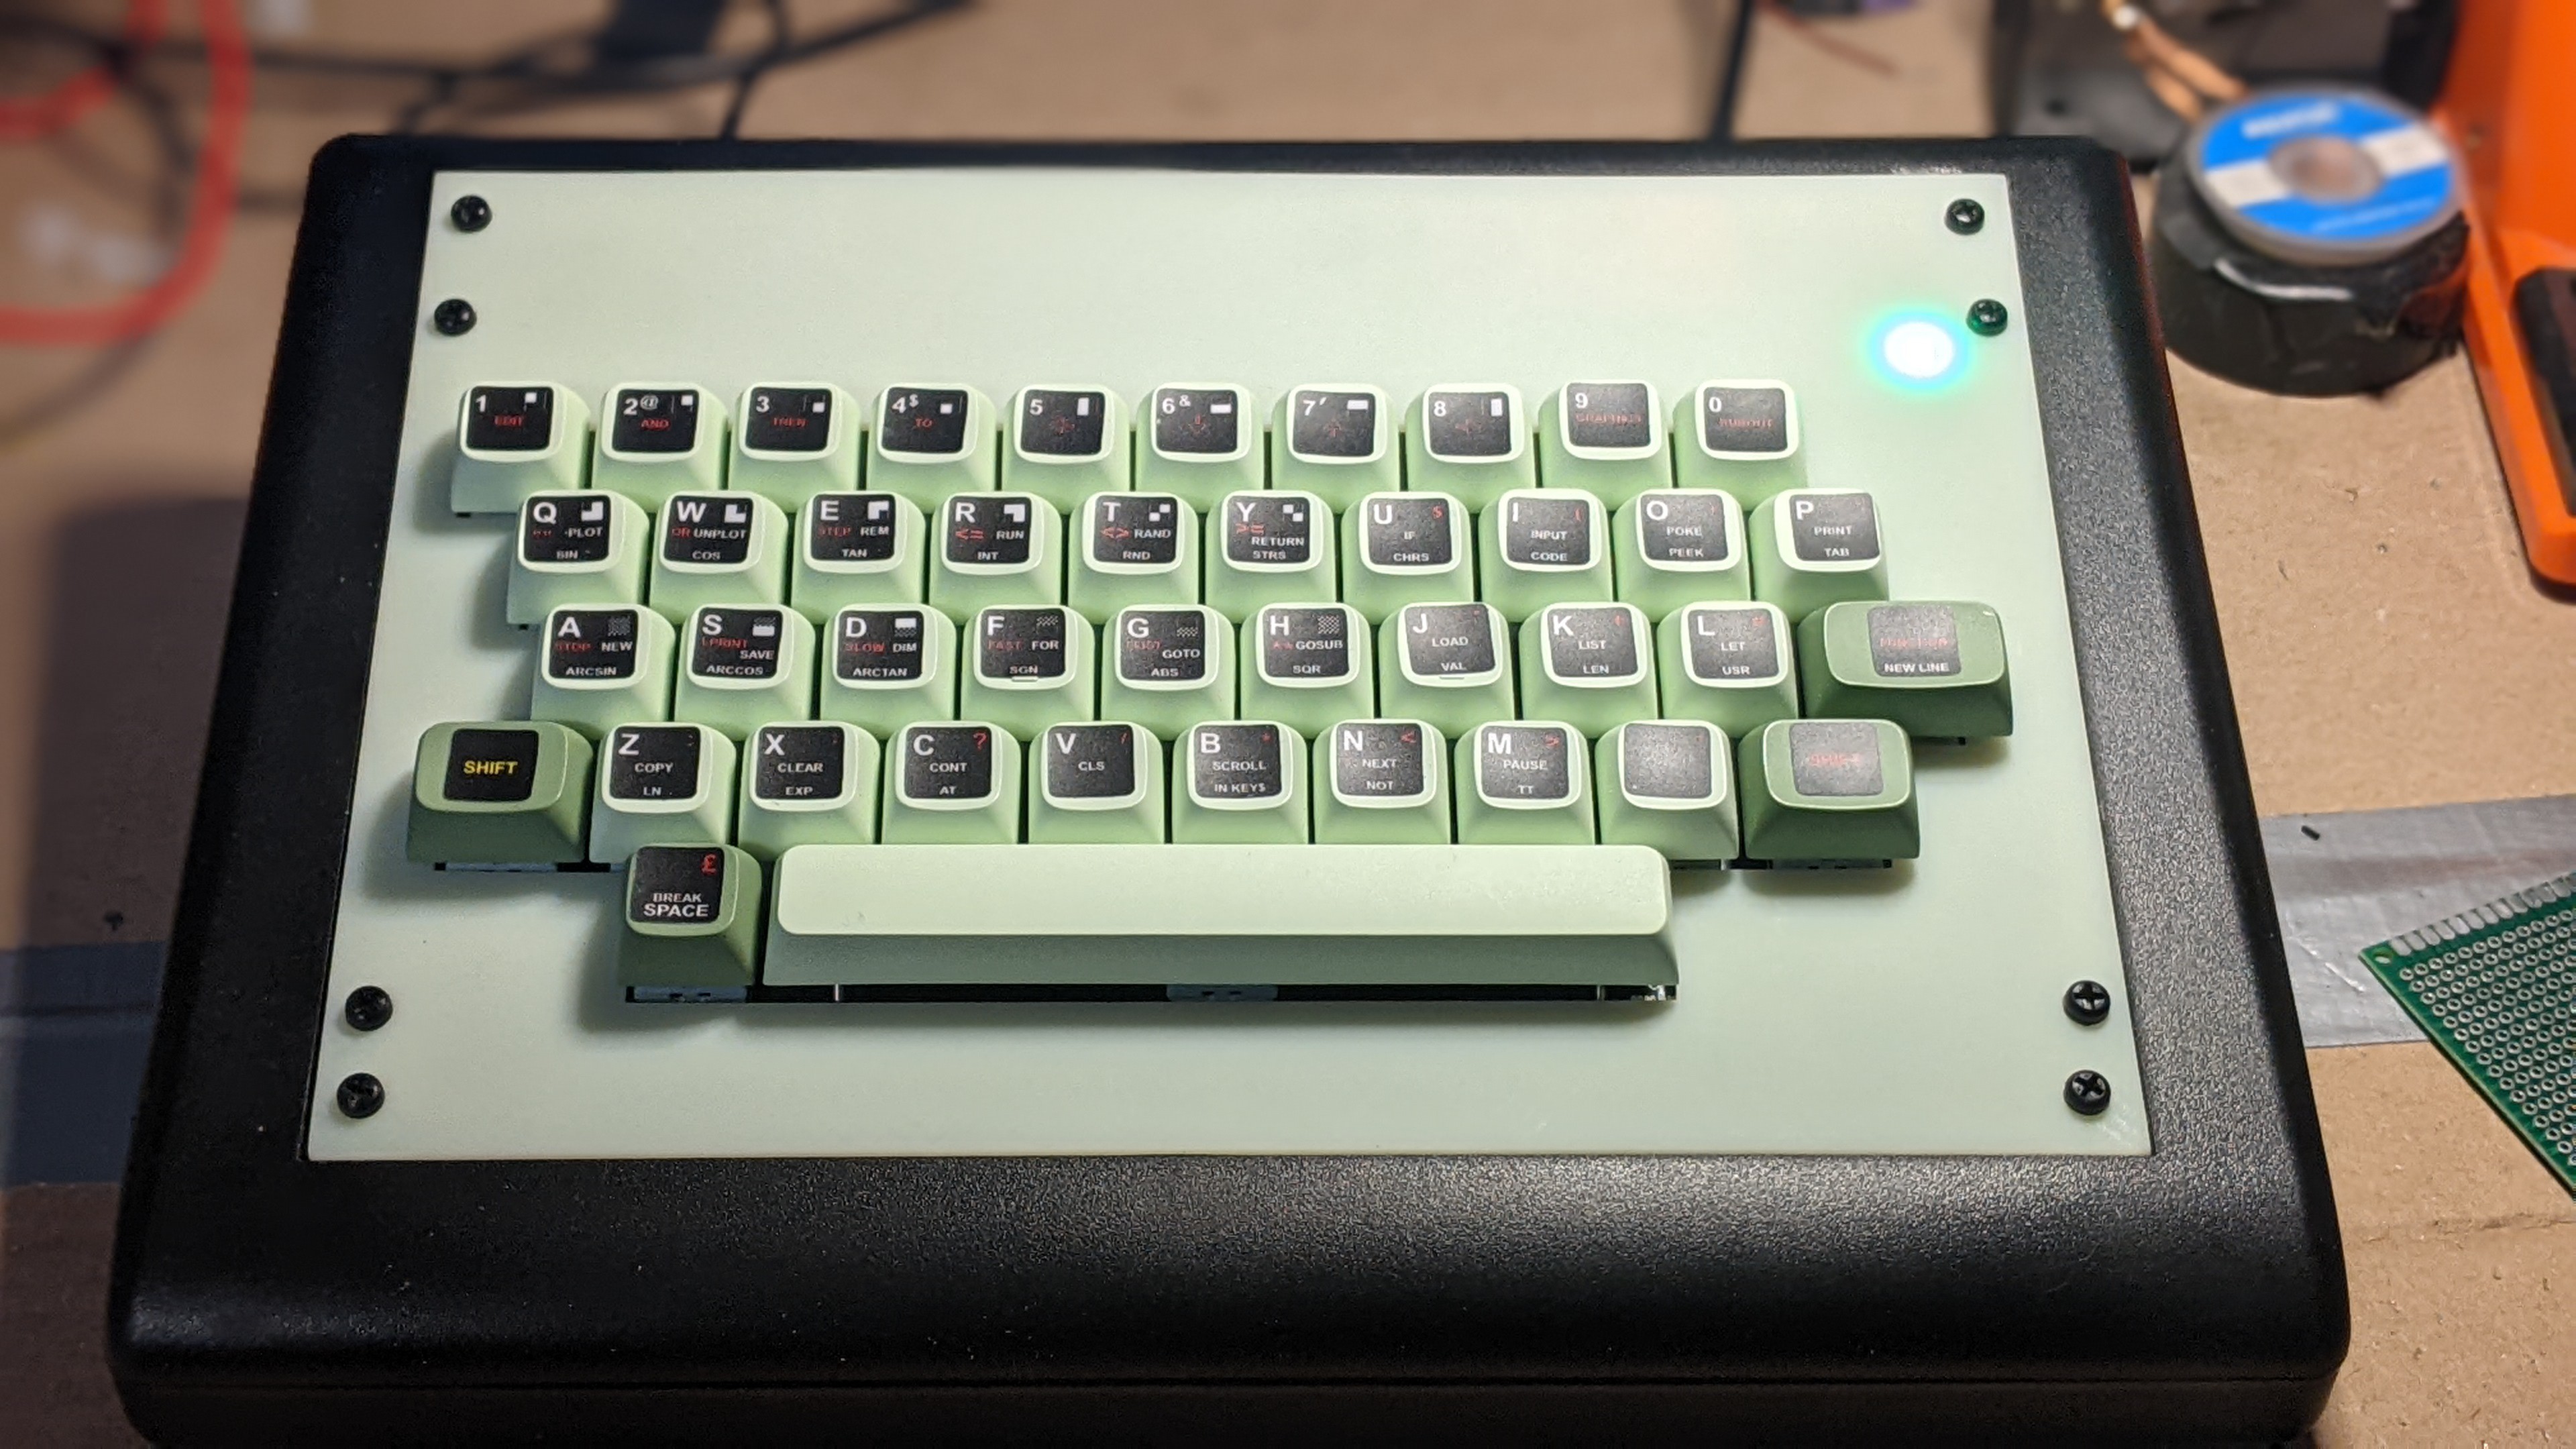
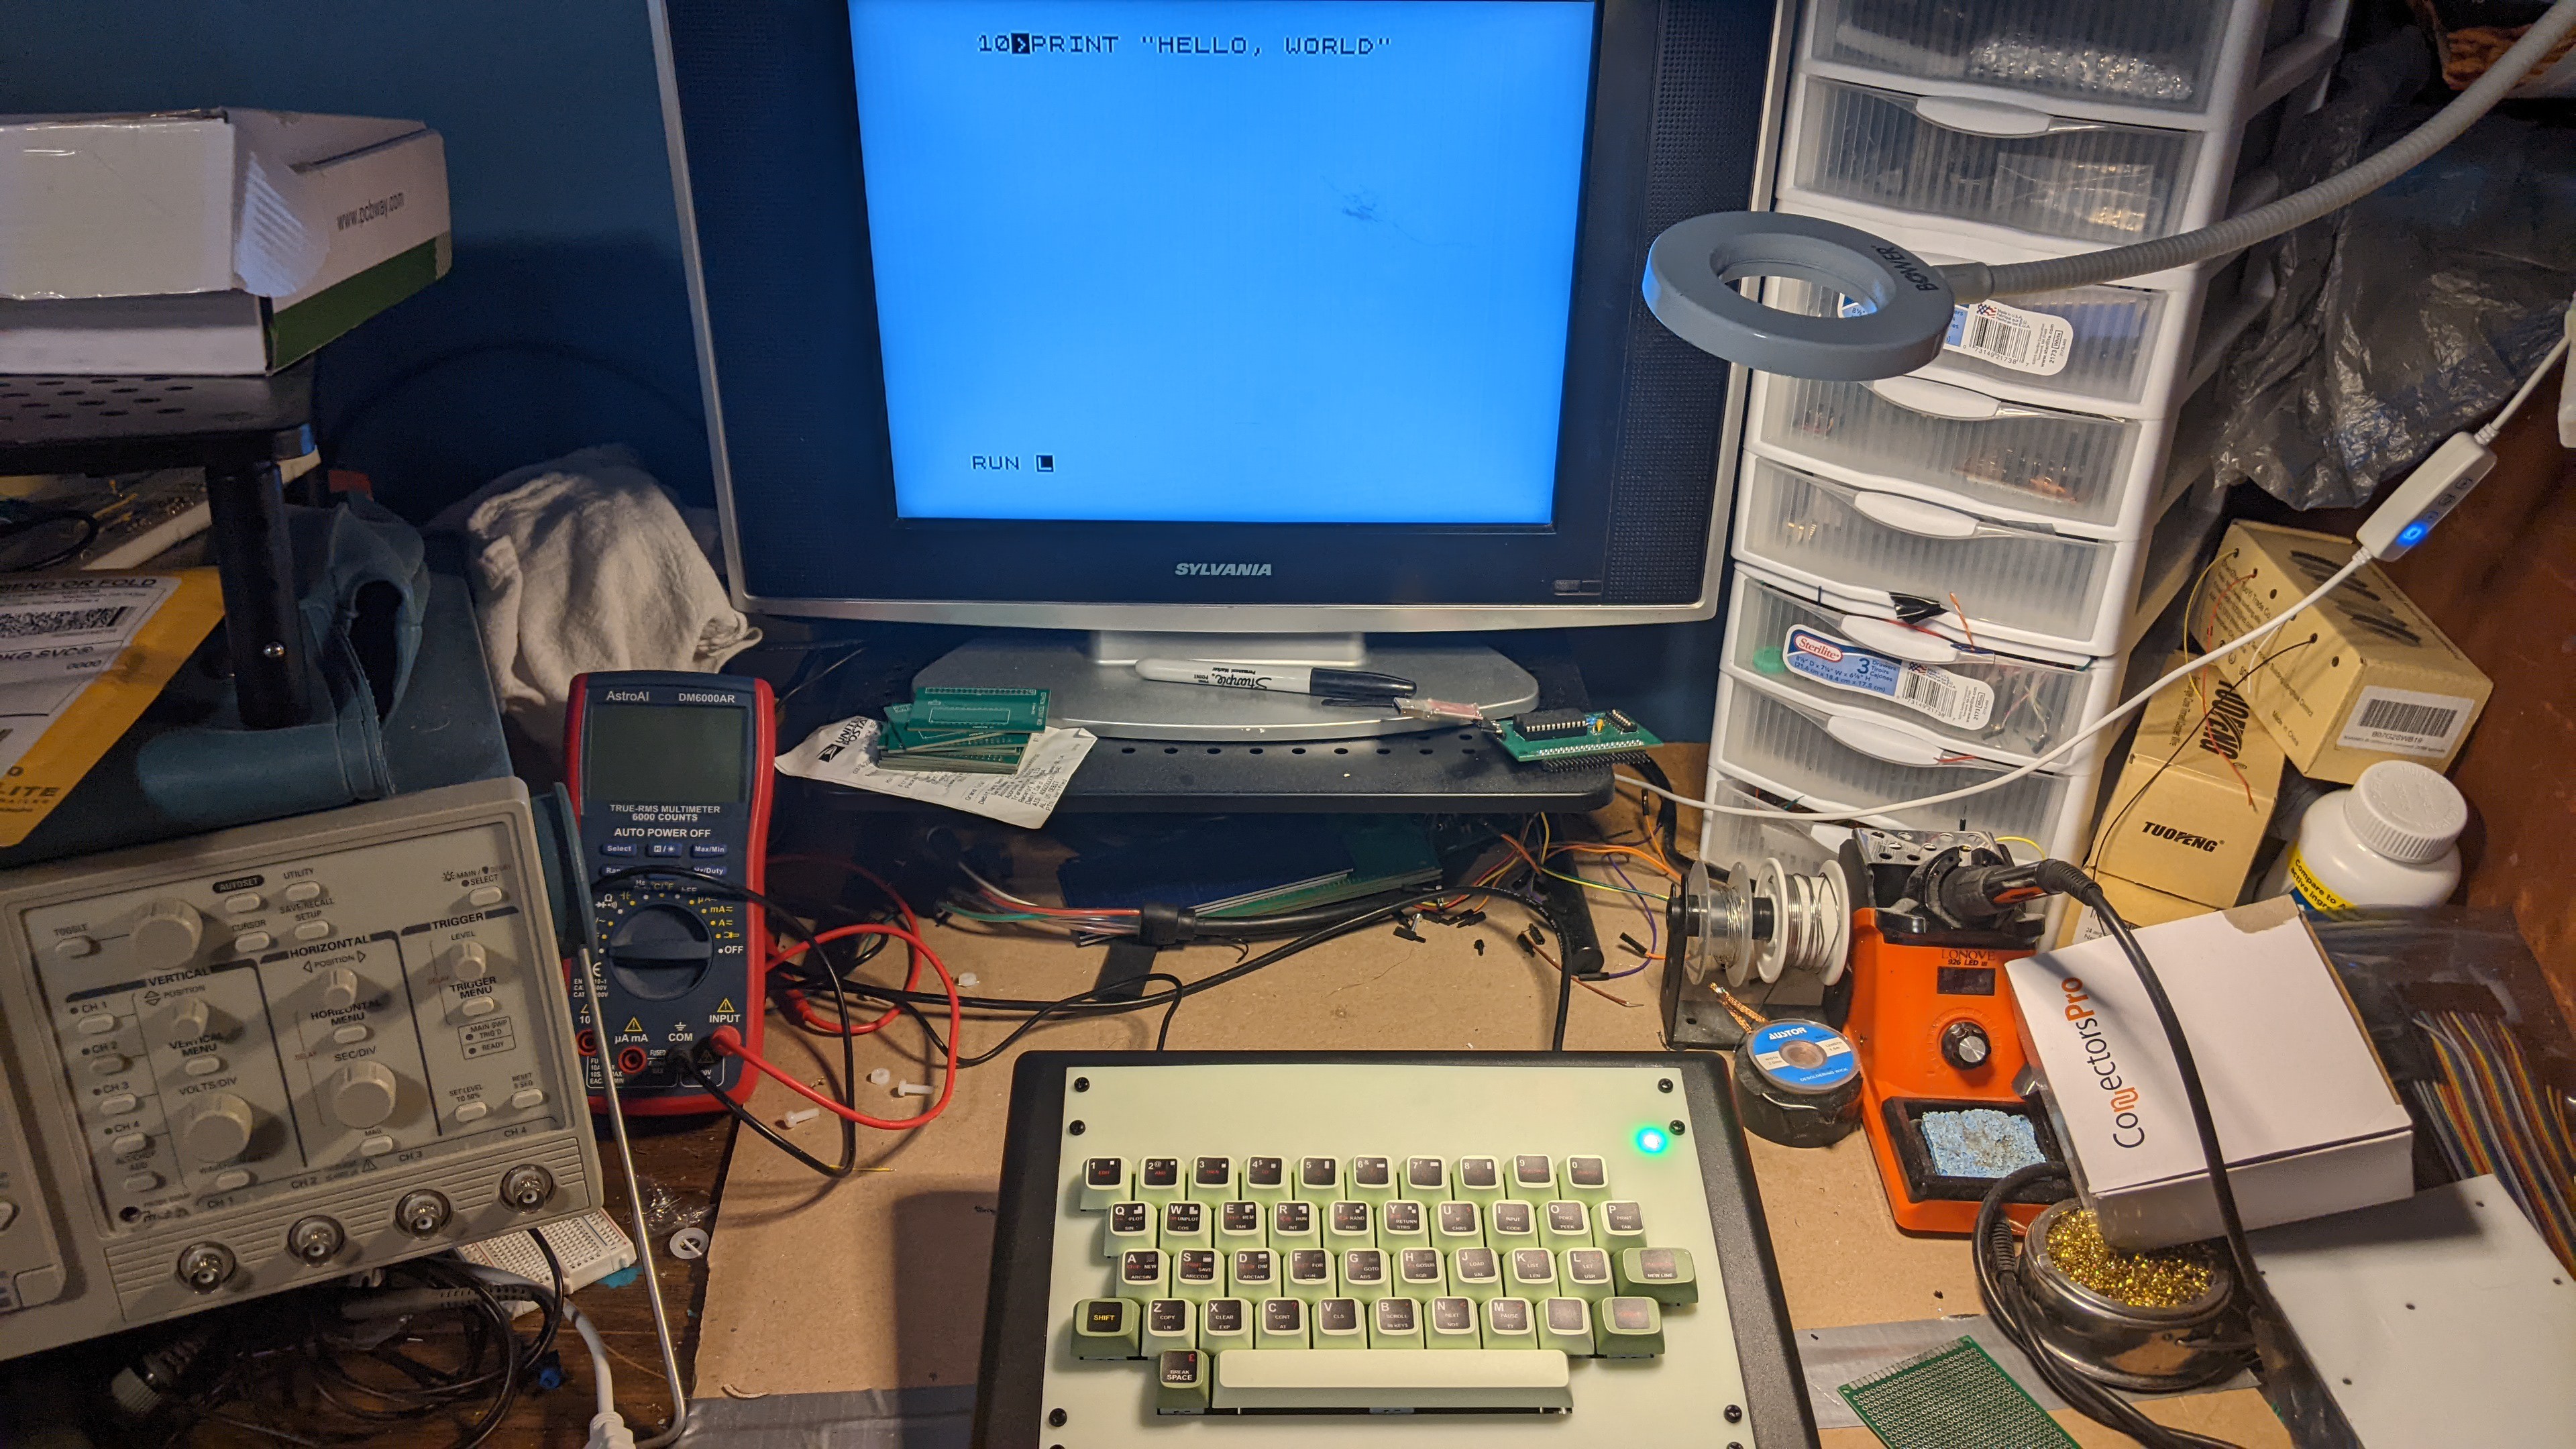
    With the test fit out of the way, a few weeks back I finished off the design drawings for the top and back panel for use with a rapid turn laser cut / fabrication service and I think we all agree the results are breathtaking.  I went right to work finishing up the inside of the case by adding a new DC-DC converter, a ESP32 for a ZXWESPI and a bit more board work to finish off some of the loose ends that were hanging around from the restoration and now I have a fairly satisfying end result:

    I swear to everything that is holy, that is a very nice looking ZX-81 and I am fantastically pleased with it. It looks like something out of everybody's favorite 1980's film about laser bikes.  Typing on the thing hearkens back to entering basic programs into my C64 from the ring bound users guide, and I love it.

    Just for fun however:

    So how did we get here:

    It started out as a simple Christmas gift from a friend from across the pond:


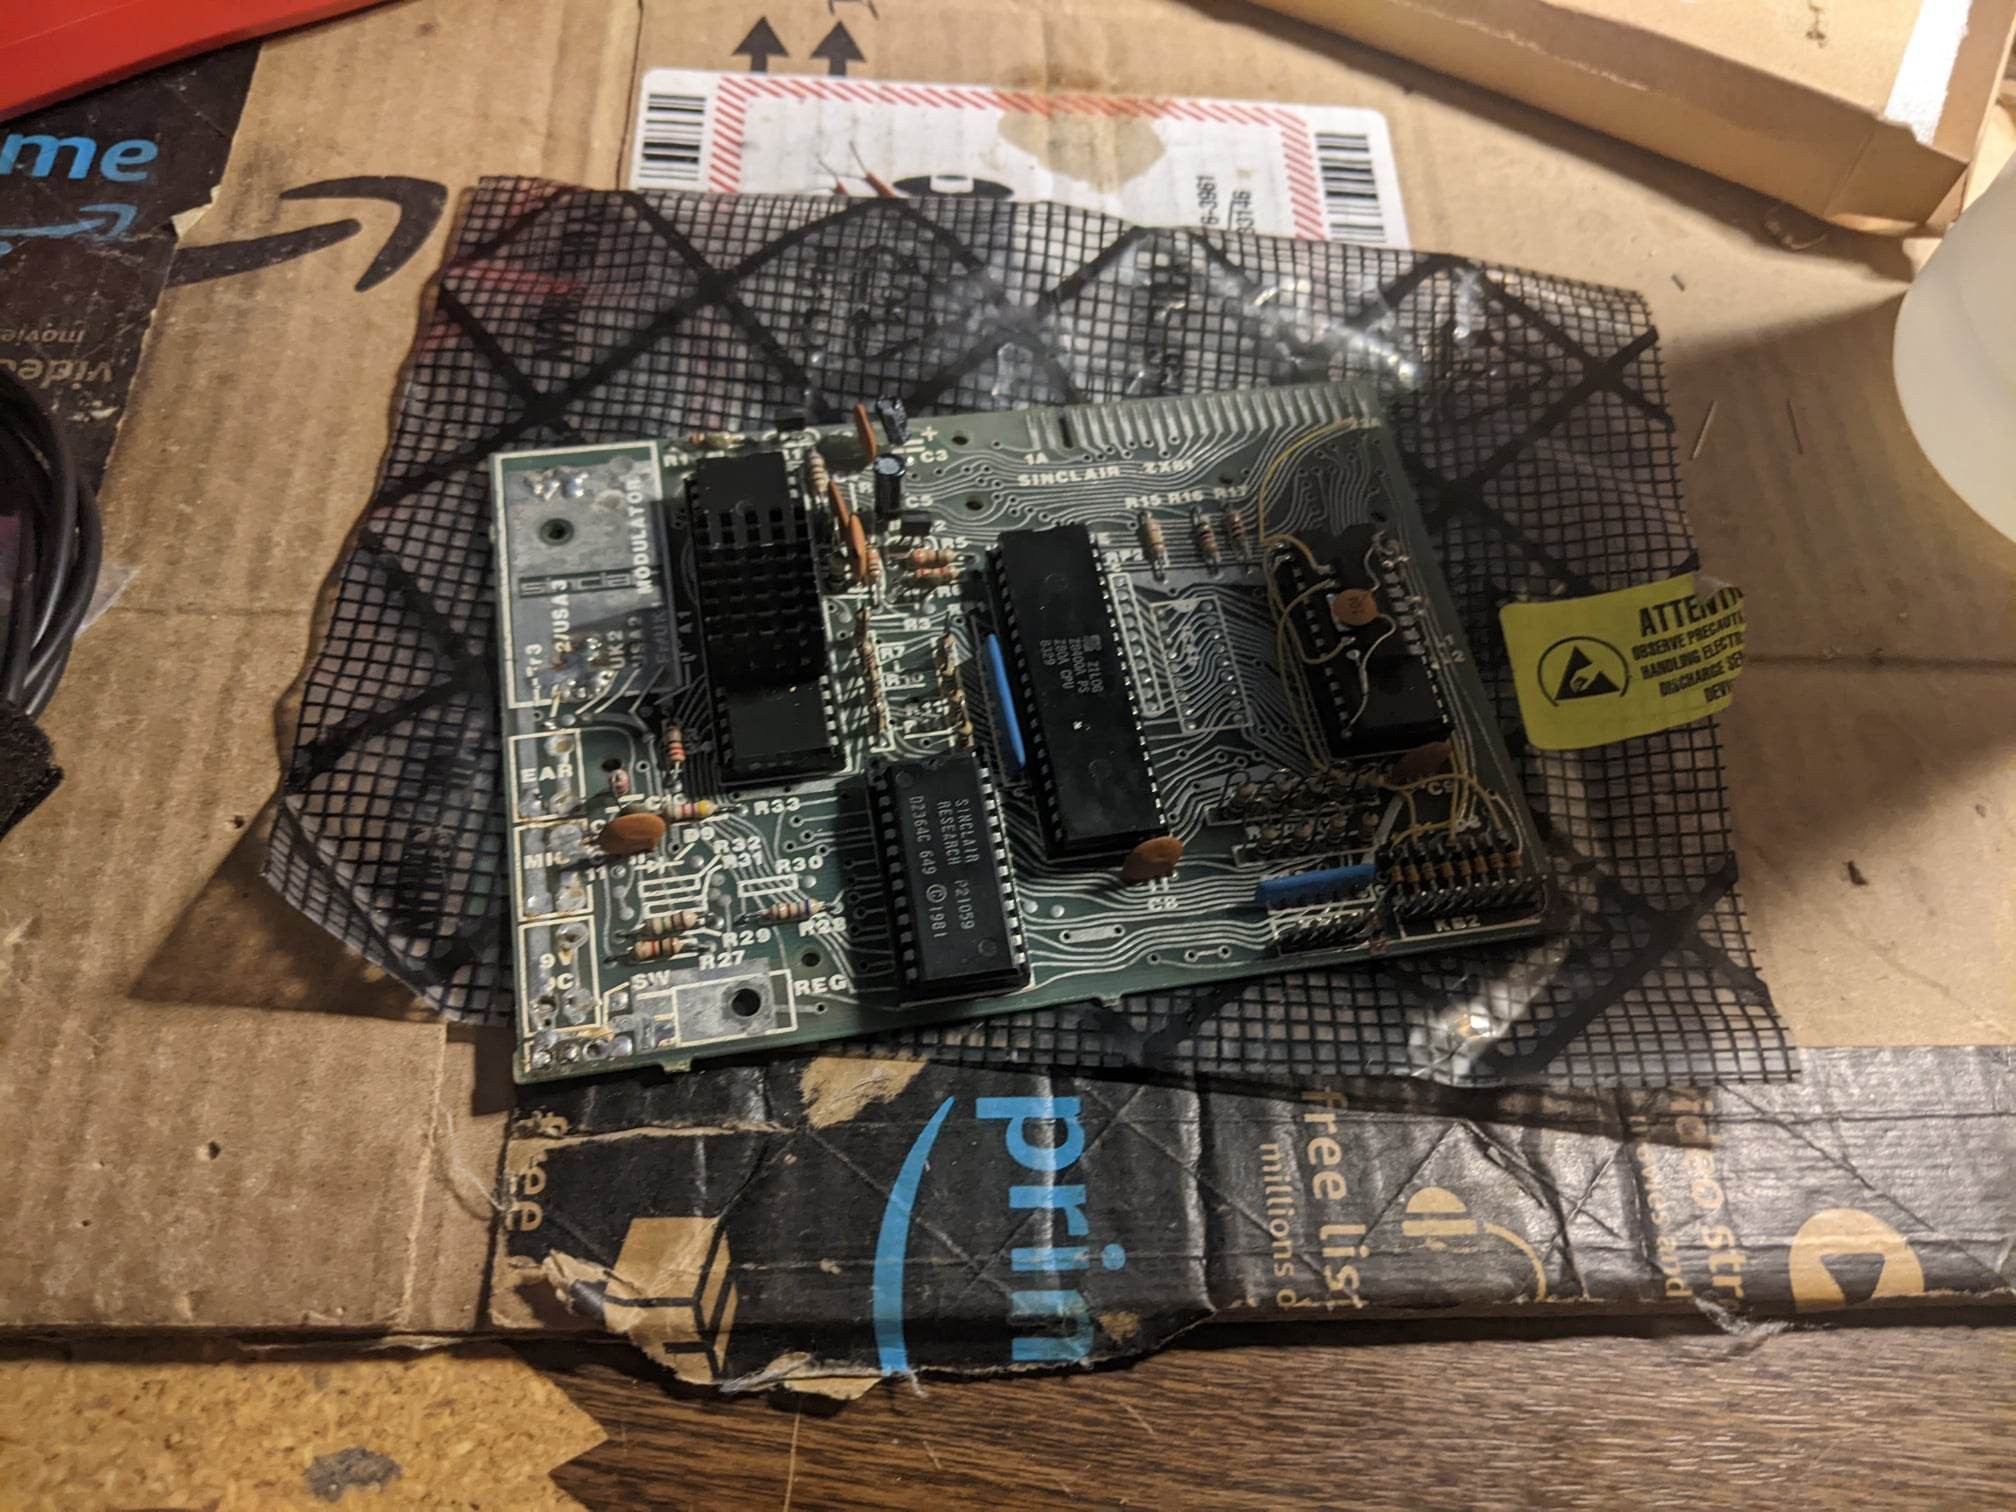
    It needed some heavy restoration work and I love that sort of thing, its kind of cathartic In a way.  Initially I wanted this to be a fun side project, I was going to hand fabricate the mods using strip board and find or build a replacement case and that would be the end of it.  Then i saw iNibleSloth's totally new ZX81 build and I fell in love.

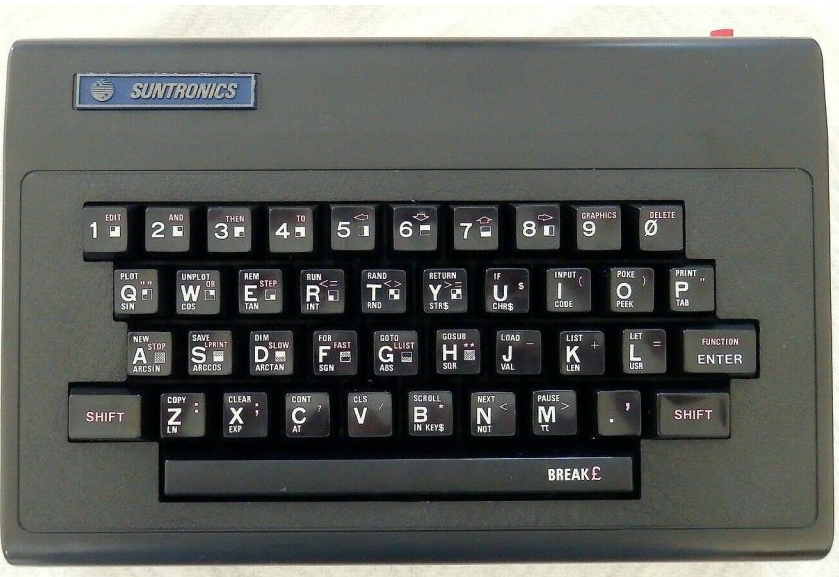
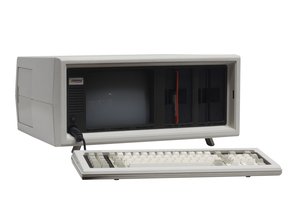
    You can follow along with the early stages of that restoration in my hackaday "pages" blog.   I finally finished the restoration a couple of months later, and started work on the keyboard.  I'd hit kind of a snag at this point however, for start's the cases out there were not really what I was looking for.  iNimbleSloth's keyboard, in fact most keyboards for the ZX81, lack a space bar, offset shift keys and other nice things that I really wanted.  I also wanted a case like the KD-81 from Suntronics: 

    The only trouble was, even with the best of google searches; and asking everybody's favorite language model -- you can't really find one of these things (let alone pictures of the inside.)   I decided with this kind of fabrication, I was going to need some help and I took a shot and asked my sponsor at PCBWay would they like to participate in making something fantastic, and they agreed!

    The fabrication build review:

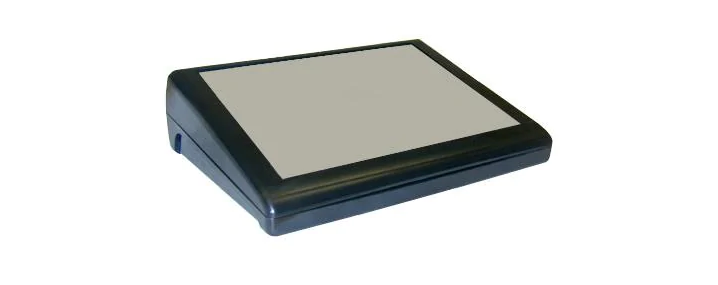
    The HBKD-81 is a set of panels and PCB's for the PT-10 industrial sloped console enclosure.  They end up looking an awful lot like the inspiration, and I love them.   To get all of the fabrication done I used the sponsor of this project PCBWay.com.  PCBWay makes fantastic rapid turn PCB's for prototyping and end products alike.  Additionally, they do injection molding, sheet metal & acrylic fabrication, and 3d printing.  For this project I used PCB Fabrication services for the keyboard, 3D printing services for the test fit for the top panel, and in this part of the project  I did acrylic panels which PCBWay cut and drilled and the results are very nice:

    It took roughly 8 days, that worked out to  be about a week and a half from sending the design, weekends, a small delay for engineering questions (this is standard, more about that later), and shipping.  I was never out of the loop on anything, when they did actually reach out the representative was very kind and asked insightful targeted questions and I was confident it would be handled perfectly, and it was.  The only issue was with my design files, There was a hole that was not clearly marked as a hole. The kind people handing the issue on the other end supposed it was a hole and reached out to ask if that was correct.  I answered the question and production continued; it was very easy.

    The pictures make clear what words can not.  The fit is perfect.  Nothing was cracked scratched or damaged in shipping.  It came packaged along with the other panel and a small PCB I built for testing.  Everything was sublimely easy. I was as always,...

    Read more »

  • Pannels 3d Prints to test for fit

    Dave Collins03/28/2023 at 17:01 0 comments

    Looks like the 3d Test panels fit:


    So after waiting about 2 weeks to get the panels, they came and we have basically a working case!  I won't bore you with the back panel hack job I did getting the switch and the video port mounted, it's basically just drilled holes in the back of the case the switch, power port and the video port fit into.  I had to do a little grinding on the round holes i drilled for the power switch, but if somebody else is doing this -- my recommendation is to go with a round panel mount; this way you don't have to cut a rectangular hole.  On second inspection; it might also be better to build the USB port this way and solder all of the passives point to point.  This is just a large 100uF capacitor which acts as a bypass; and to smooth things out a bit coming off the USB block.  I will most likely have a new panel cut when I do the finished one's  so that I can do exactly this... as I am not super happy with the way the switch looks and I think for sure the power board is overkill (just something I hacked together on a piece of strip board).


    PCBWay Print Review:


    The 3d Prints from PCB way came in about 2 weeks.  This is due to the 3-4 day build time, plus the shipping to my house took a little longer with fed-ex than it usually takes with DHL.  But DHL has gotten ridiculous in terms of price over the last month (at least to my area), so our marketing contact recommended FedEx this time, which was fast enough, and considerably more fair in charms of pricing  

    The print for the upper panel was done using a more rigid resin than the inside panel  In the end I didn't even end up using the panel insert for the interior because the stand offs made the board sit to high in the enclosure.    Additionally some of my measurements were WAY off; and so I ended up just going with that upper panel.   The power LED from the keyboard was a bit large, and so I ended up just drilling out the hole.  I will fix this in the STL I am uploading today but as you can see the panel fits in the top enclosure like a glove.

    The prints provided were almost square to the drawing.  I expected a little sagging but even this was minimal.  All of the screw holes lined up perfectly, and I did not need to do much in the way of anything to get the keyboard to fit in the  space it is supposed to sit.   I know very little about 3d Printing but for my application they just worked, so I can say that for that I was very pleased.  The rigidity of the 2mm panel was not the same as a metal panel but it does not feel like it is going to tear or shatter; if you have to go with 3d prints instead of a laser cut insert they are functional but they do wobble ever so slightly. 

    Over all I was very pleased with the actual quality of what I got.  I would recommend this service for any large format 3d printing you would need.   the prints that I got were very accurate to the drawing, and fit for my application. I don't think you can ask for more than that however, PCBWay delivers on that and so much more.  They will do several finishing steps as well, such as painting the parts in the color of your choice, if you are not confident with a spray can.    I would definitely recommend this as a 3d printing service, especially for large format parts.

    What's next:


    At this point I am happy with the build for the ZX81.  The computer functions, runs basic and the keyboard is more than I could have hoped for.  I'll most likely go for some laser cut panels next to really polish out the case, and I will be fitting a ZXWESPI for loading applications via WIFI.  I think I will most likely do the VGA version, but I still want to think on it a bit.  I will be putting the terminal build on hold for a bit as I re-consider my 6809 build next.  I am going to adapt the ASSIST09 Serial Machine language monitor...

    Read more »

  • Prototyping... 60% of the time, it works every time!

    Dave Collins03/13/2023 at 04:56 0 comments


    Project update:
    What a RIDE this week has been!   Every once and a while you put a thing down into the EDA, shoot it off to production buy all the parts everything comes and the thing comes out working, EXACTLY like you thought it would!

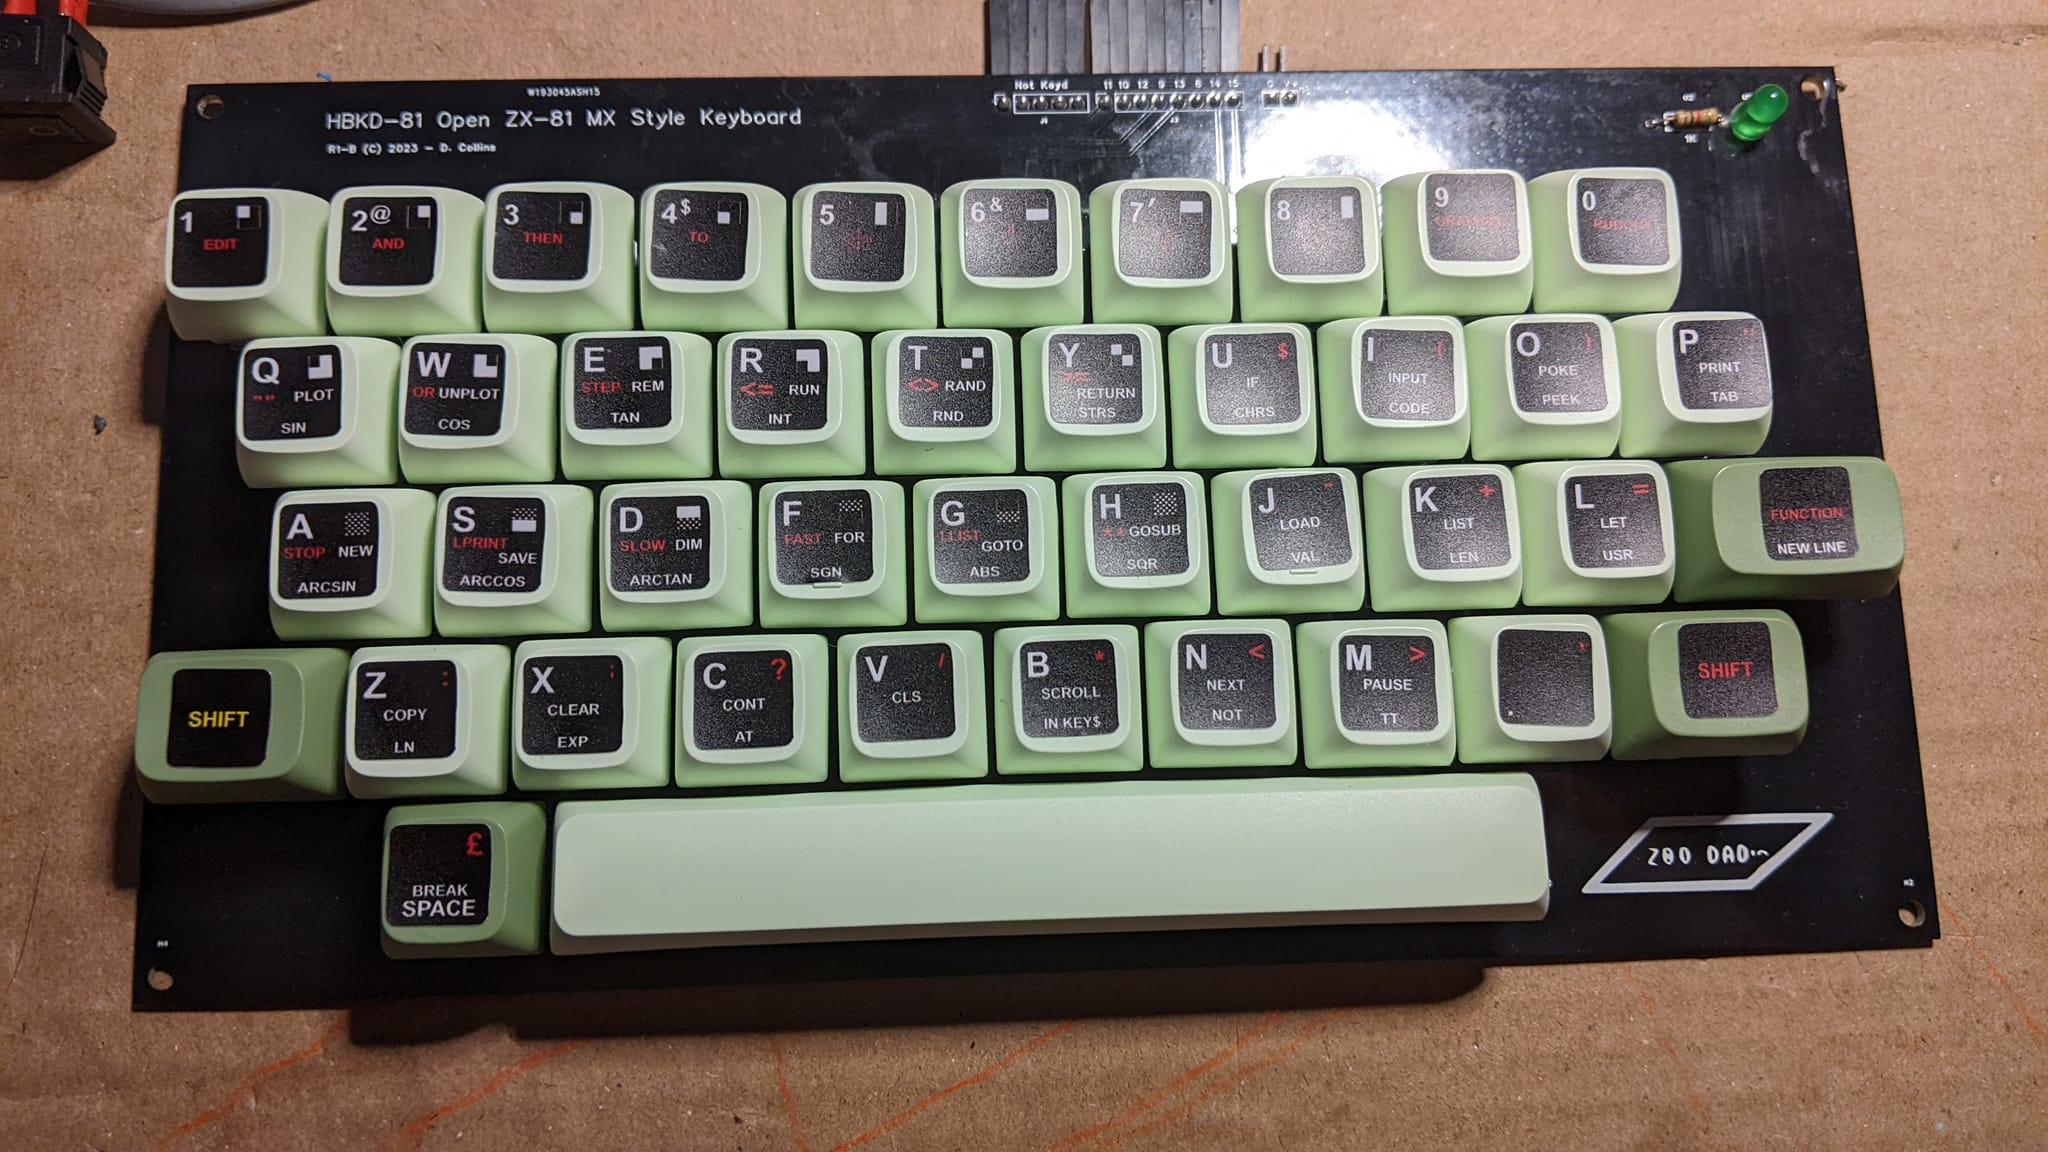
    I can't even begin to hide my excitement!  This week I got to see a lot of great feed back from the community on the ZX81 Keyboard build.  Some of you even started to clone the repository (about 7 of you, lol), and that's real exiting to think about as I only really make this stuff to share it with you.   I made the decision to pull the trigger early and share the gerbers with the ZX81 Community on Facebook, and pretty much whoever has access to GitHub.  And so, I needed to do some finishing touches to the repository to really round out the production files for the keyboard PCB.  This meant the task of creating a BOM spreadsheet for the shared projects website, as well as for hack a day and to include on GitHub.  I spent the last few days doing that as well as applying these very cool stickers from 4keyboard.com (not sponsored, just a fan):


    Board review, black solder mask:

    I am really pleased with how those turned out.  First time with the black solder mask, That looks really great! I was blown away by the quality of the Finnish, sometimes the lower cost non-matte black solder mask can look washed out, but this is beyond sublime.  The mask is so dark you actually have a hard time seeing the traces below; I really like that effect for a HID device it makes it look much less like a PCB and more like a thing that is meant to be touched.  PCBWay did a fantastic job with the boards, and I am continued to be blown away by the level of support I have gotten from project sponsorship. Especially on something as expensive as a keyboard! If the pace of these projects is effected by one thing it is prototyping cost, and so to have a partner like PCBWay assist with that is beyond humbling, and everybody on their team has been an absolute treasure to work with.

    PCBWay has a wonderful array of prototyping options for any project, like metal fabrication which Ill be trying out for the first time on this project.  The panels for the case need to be cut and drilled, and they work with an array of standard materials in various  thicknesses, if you're looking to have something similar made PCBWay has you covered in this department and It is 100% worth a look.  

    Reflections on the project thus far:

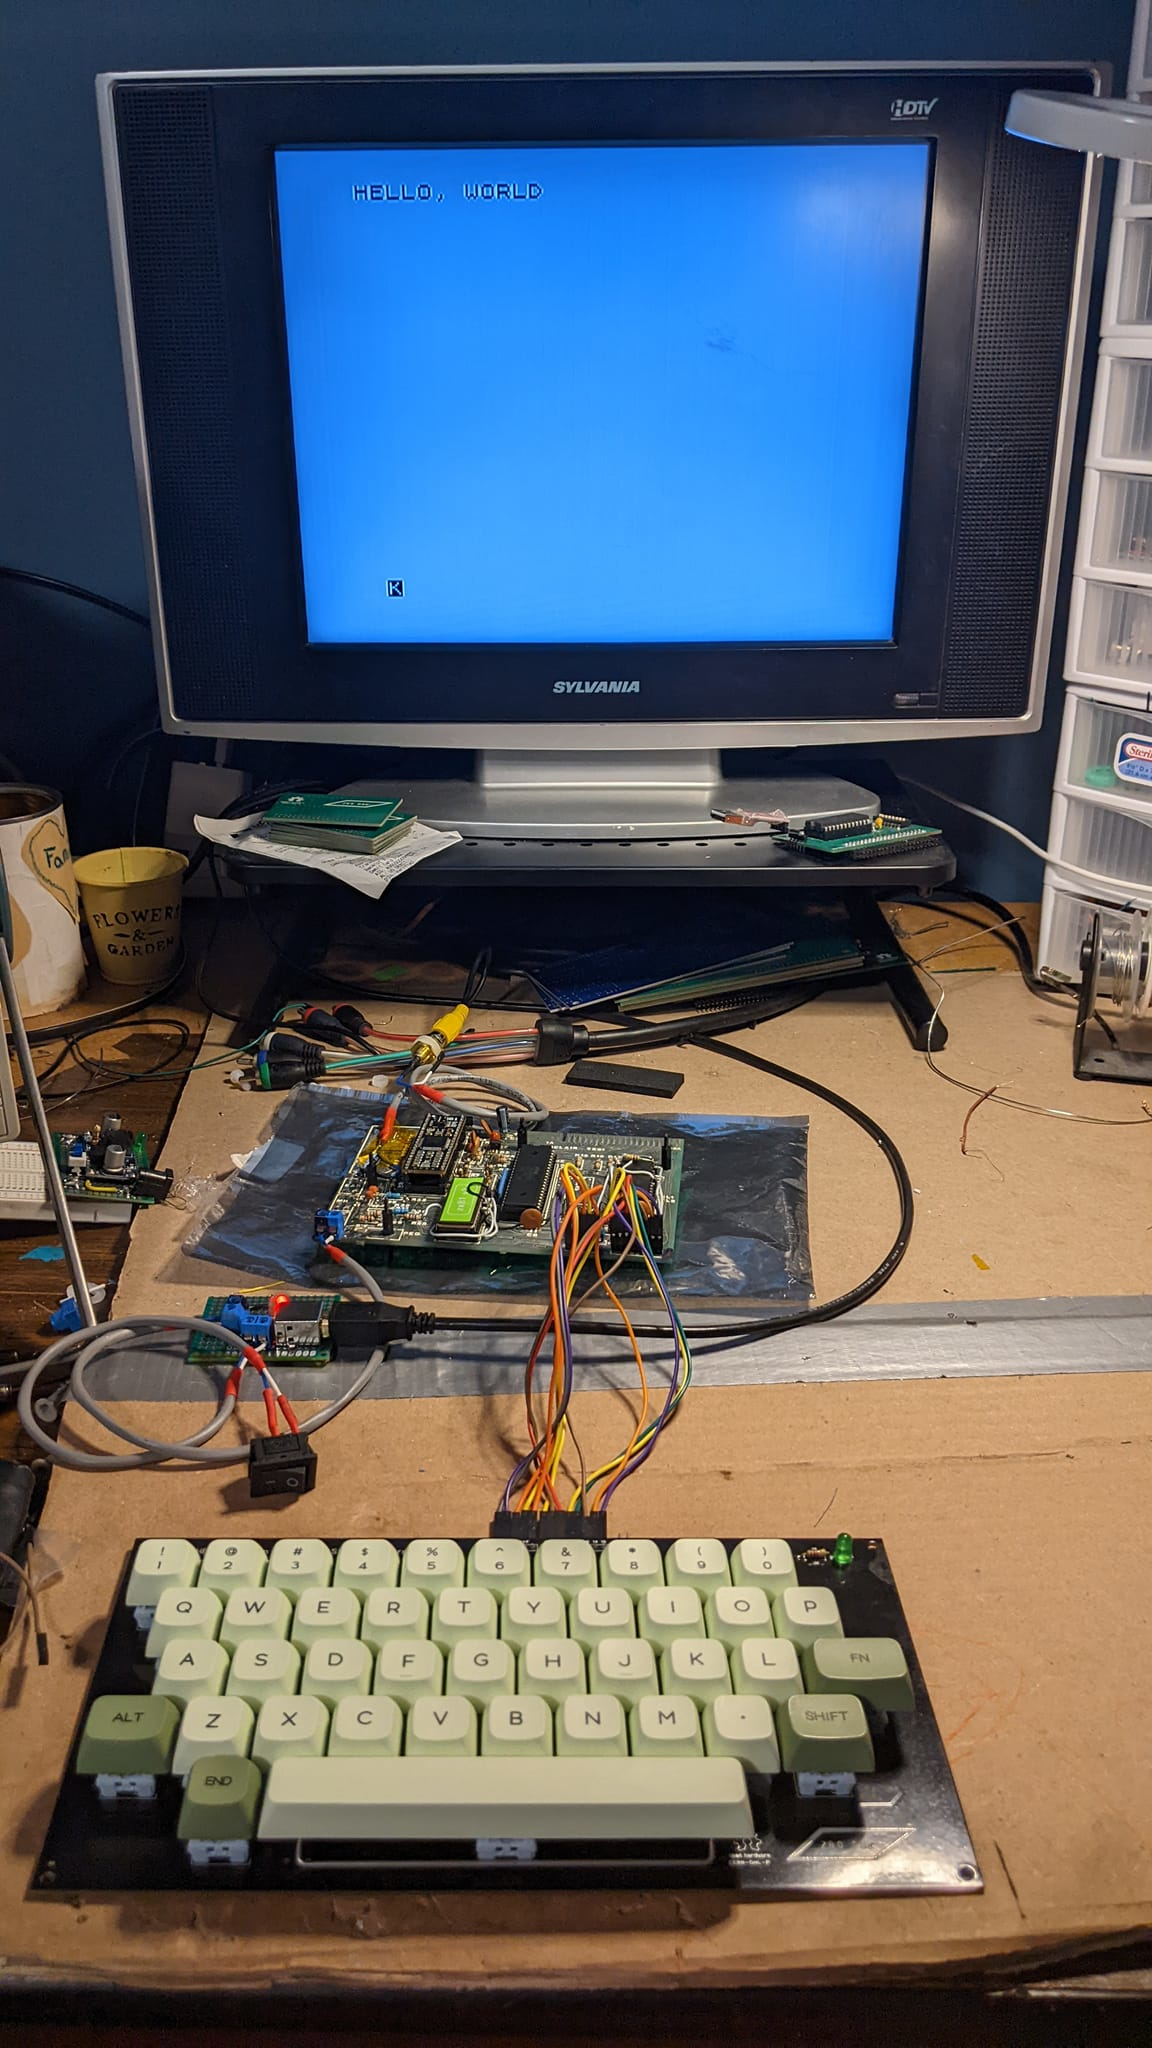
    I spent a bunch of time with this thing just trying out different programs and tests to make sure the computer is more or less in working order as I get ready to put it into its new home.  The first thing of note which probably wont surprise anybody who knows anything about the ZX81 -- all of the keyboards; including the original and mine as well are 100% unbuffered.  This means there's a chance you can type so fast that it will very likely miss a key here and there.  But it does make you be deliberate in your pacing; and so a lot of mistakes are avoided because you have to be so intentional.  This might be corrected by adding a buffer (which when I get around to doing the terminal build I will absolutely do); however I don't think I will on the zx81 part, since a buffer requires a mechanism that clocks out the key presses as they are read, which, unless I am mistaken there's little way to do this on the ZX 81, at least not without modding something. With my board being very modded, I don't think I will be adding anything further at least for the time being.  It might be possible to figure out when the reads happen and create a falling edge clock to use with a standard 40105 FIFO but that would require a bit of research.  

    Parts considerations:

    When I was building the BOM I found that its actually really hard to find, bulk key switches at a reasonable cost.  This is no surprise given...

    Read more »

  • Parts / case selection getting all the bits together.

    Dave Collins03/05/2023 at 03:41 0 comments

    OK, so I settled on the PT-10 from Pac-Tec.  I chose this case because:

    • It is still in production and in the electronics suppliers (at least in the US where I reside.)
    • all of the panels can be defined in 2d cad drawings, which i can later send to production in any material I like, for instance transparent or black plexiglass / acrylic
    • The cost for the case without panels is approximately 19 dollars US (before shipping, which in the continental us is about 10 dollars).
    • the non-production kit with all of the panels installed as blanks (for making the prototype) comes in at approximately 44 dollars + 10 dollars shipping before VAT which is about 2 more dollars.(yikes!)
    • The hope is to get the cost of the case, and pre-cut inserts down to around 50 dollars -- so if you can get the PCB / panels shipped at the same time the total cost for the case with the keyboard should be well under 100, this is pending the cost of fabrication for these things which I am still new at; and have no idea what all the costs are, but the lions share of the price is in the shipping.

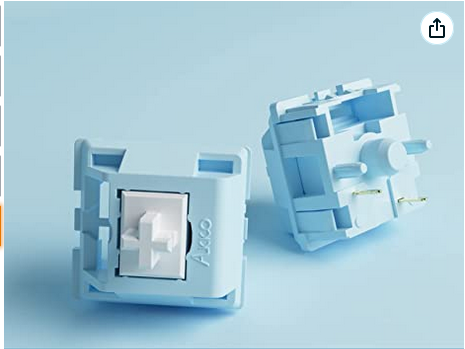
    For switches I piked these interestingly colored knock offs found off amazon:

    These have the plastic PCB mount stand offs, a set of 45 was 18 dollars on amazon.  This is by far the cheapest switch on amazon -- you could most likely source cheaper from the electronics supplier and I am still not 100% sold on through hole switches -  I still think I can find a surface mount switch for considerably less. but doing the routing on a single layer, PCB without some way of managing crossing tracks is difficult.  Consider also the initial membrane was two layers to begin with.

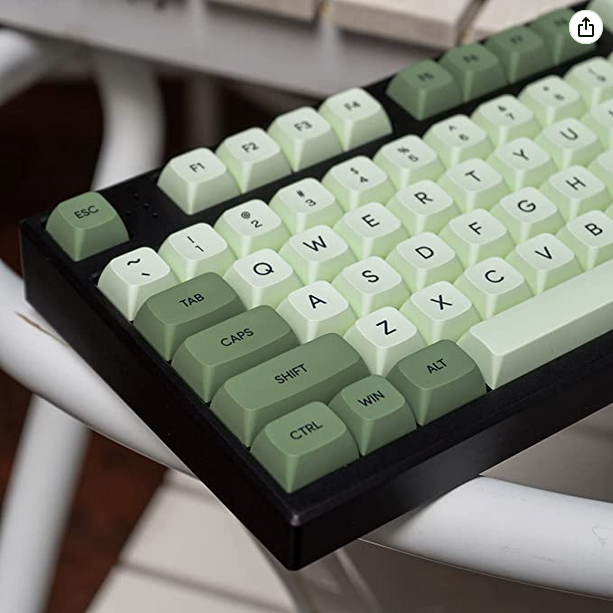
    For the key caps i settled on a simple PBA retro looking switches:

    The key caps have a XDA profile so the key height does not change from one row to the next.  This is super important because we are moving some of the keys from their rows and we want it all to line up properly.  So later on, builders who care about this detail will need source keys with the same profile.  Its a standard so I am certain there are keyboards out there with this particular profile.

    I am still on the fence for my ZX81 build as to weather or not to use a full picoATX power supply (which would have all the niceties like over-volt protection, reverse current protection as well as a real 3.3v rail for mods.   Later on when I do the terminal build I will definitely go for this, as it makes the case considerably more useful for a larger range of single board computers.

    Now it's just sit back and wait for all the parts to come in.   Most of the small bits are here as of today.  The case will be here mid week, and I also ordered a sticker set for the key caps to put over top for the ZX81 build.  hopefully soon as I am chomping at the bit to get the wheels turning on this project!

  • Initial Gerbers / Mock Layout

    Dave Collins02/27/2023 at 06:03 0 comments

    A simple Idea, make a case for my orphaned ZX81.  If you have been following along with my little side project I have been restoring a ZX81 motherboard.  With that task mostly complete I now need a case to keep the little guy in.  searching the web I stumbled across this little gem over at the Timex/Sinclair web site :

    The Suntronics KD-81.  WOW. I fell in love with this little thing, and its a big time on my want list but since searching for KD-81 keyboard on eBay landed me no results I guess I'm stuck with a reasonable facsimile.

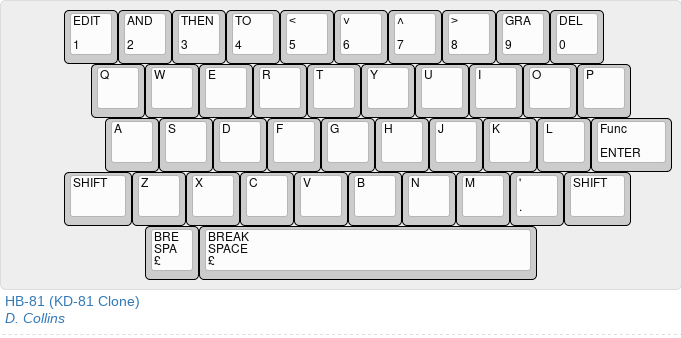
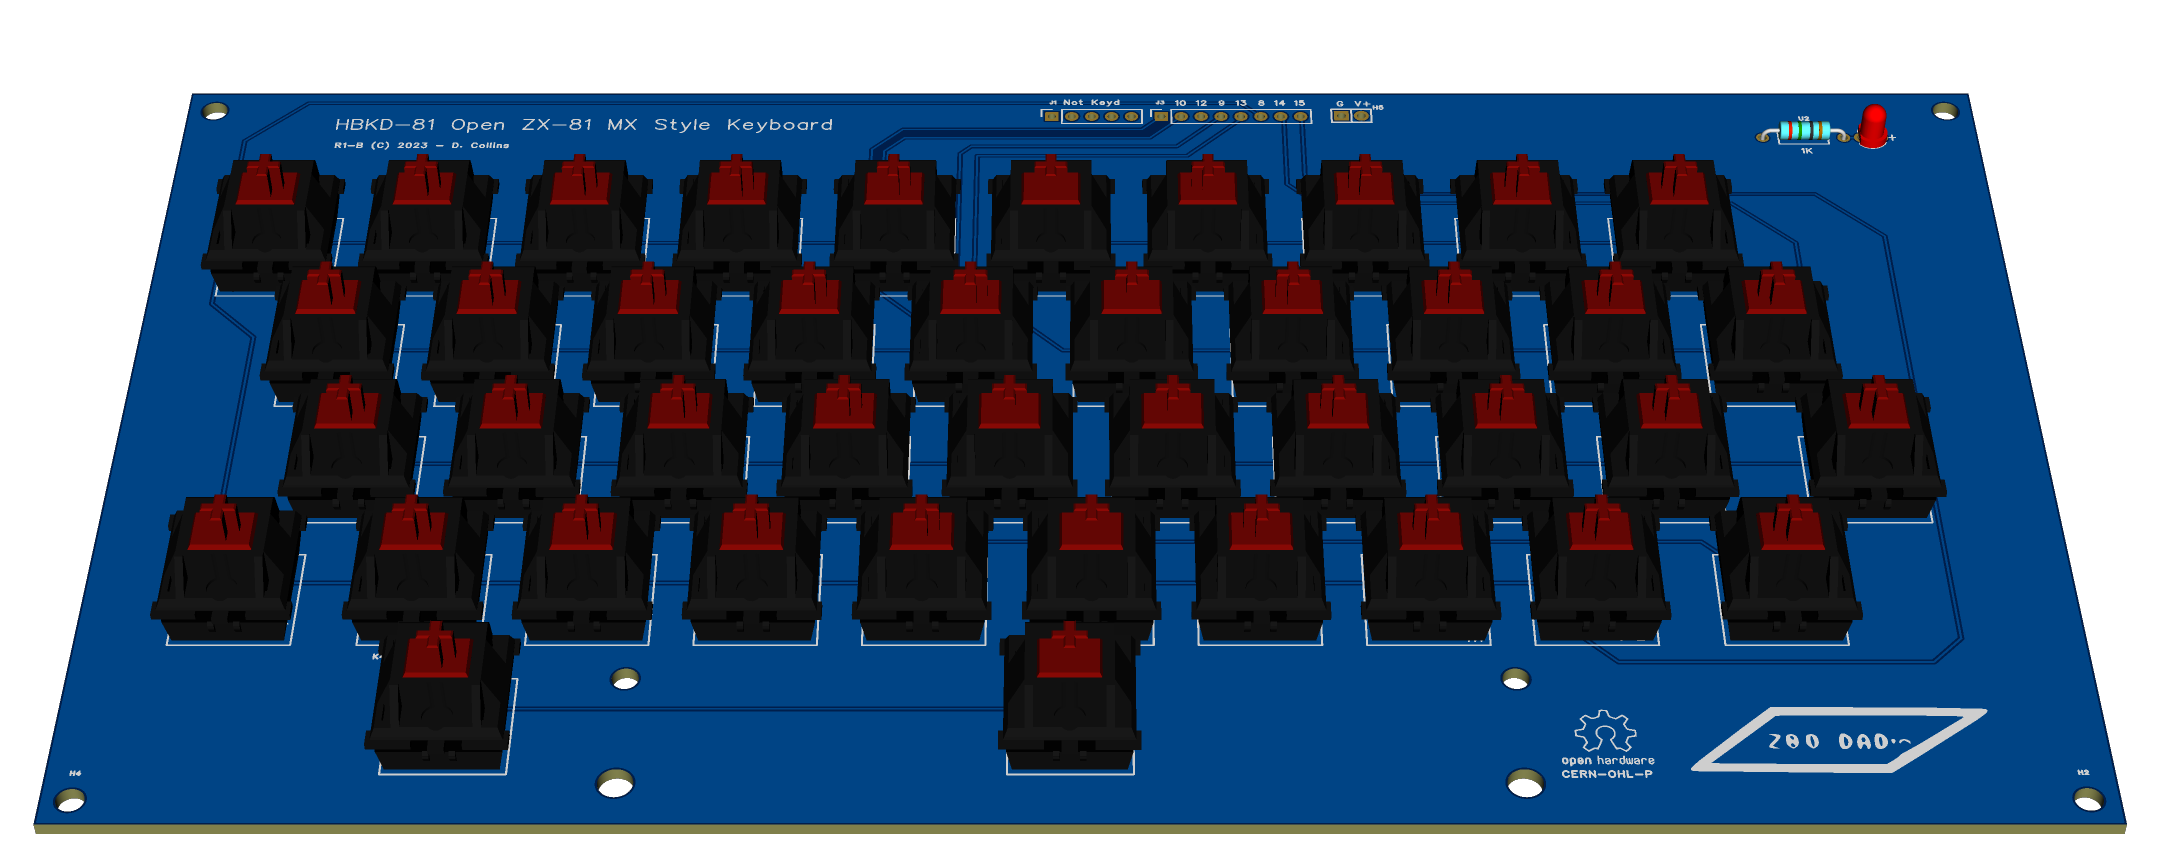
    I knocked this together over the last week and am currently working on getting it to production in order to test things out.  since the ZX81 keyboard is a fairly simple, well documented circuit I won't bore you with the details other than to say it uses MX style switches, has a power led and space for a current limiting resistor.  Additionally, we are using standard sized key caps, in the case that somebody wants to piece together salvaged key caps and go the sticker route.   The larger keys are half sized, SHIFT being a standard size of a ALT key, the ENTER key being the standard size of a tab or backslash "\" key.

     It might be a few weeks till I get all the bits and bobs together on this one, even though its meant to be cost effective, keyboards are still fairly expensive when made in a volume of 1.  The most expensive part being, shipping for anything we don't have to hand and switches.  I want to try to salvage as much as I can from existing tech if I can get it cheaper than just buying on the markets.

View all 5 project logs

  • 1
    Case considerations:
    A few details, The 2d cad files do not specify thickness. The PT-10 Drawings state .062" thick aluminum. If you are doing the top panel, a 2MM (.072") panel was used in the prototype (as that's the actual depth of the cavity.) A 1.6mm panel is going to be weaker and there will be a lip at the edge of the cavity. the back panel is actually a lot closer to .062". If you get ambitious and combine the two panels on the same sheet, you are going to run into problems making the back panel fit at 2MM. I made it work but its very tight fit. If you wind up customizing the panel with cut outs its going to crack if you try to force it with any amount of structural cut outs. For the back panel I recommend using 1.57 to 1.6mm thick material. I pulled all of the factory installed Tinnerman Fasteners off the case, they got in the way. You can use them with machine screws but I just ended up using m3 size screws everywhere. if you just order the case without panels (I recommend this, you aren't using them) It won't come with them installed (or shouldn't). The PT-10 drawings specify this as part 61691-02. I used a standard kit of nylon m3 stand offs and screws off of amazon. I didn't keep track of the sizing. I used a threaded post stand off and nuts to hold the PCB to the top panel with a screw, but there's loads of configurations depending on the height you'd like the keys to be from the top of the panned. Mine sit fairly low. the PCB is just mounted to the bottom of the case with the same nylon standoffs. I put screws through the bottom into threaded stand offs and held the pcb to the tops with nuts. you can do what you feel comfortable with there. A BIG POINTER: use round panel mounts everywhere you can. unless you are very good with a Dremmel its going to be drastically easier to get the holes in, just start with a small bit and step up the size. I would go with point to point wiring here. so much of the design relies on analog concepts, you don't want to introduce noise into an otherwise noisy design adding a whole other PCB is going to add complexity. I put a copy of the PT-10 drawings in the documents folder if somebody needs dimensions for some other reason. The case can be found on mouser here: https://mou.sr/3LkjQmr Mouser #:616-82404-501-000 | MFR:82404-501-000 PT-10 BLACK I believe there's also a listing on digikey. case costs about 17.00 US

View all instructions

Enjoy this project?

Share

Discussions

Martin wrote 05/06/2023 at 16:23 point

Greetings from Cordoba, Argentina. Very good work, you have given me good ideas for a project I'm starting.

  Are you sure? yes | no

Similar Projects

Does this project spark your interest?

Become a member to follow this project and never miss any updates