 Dave Collins
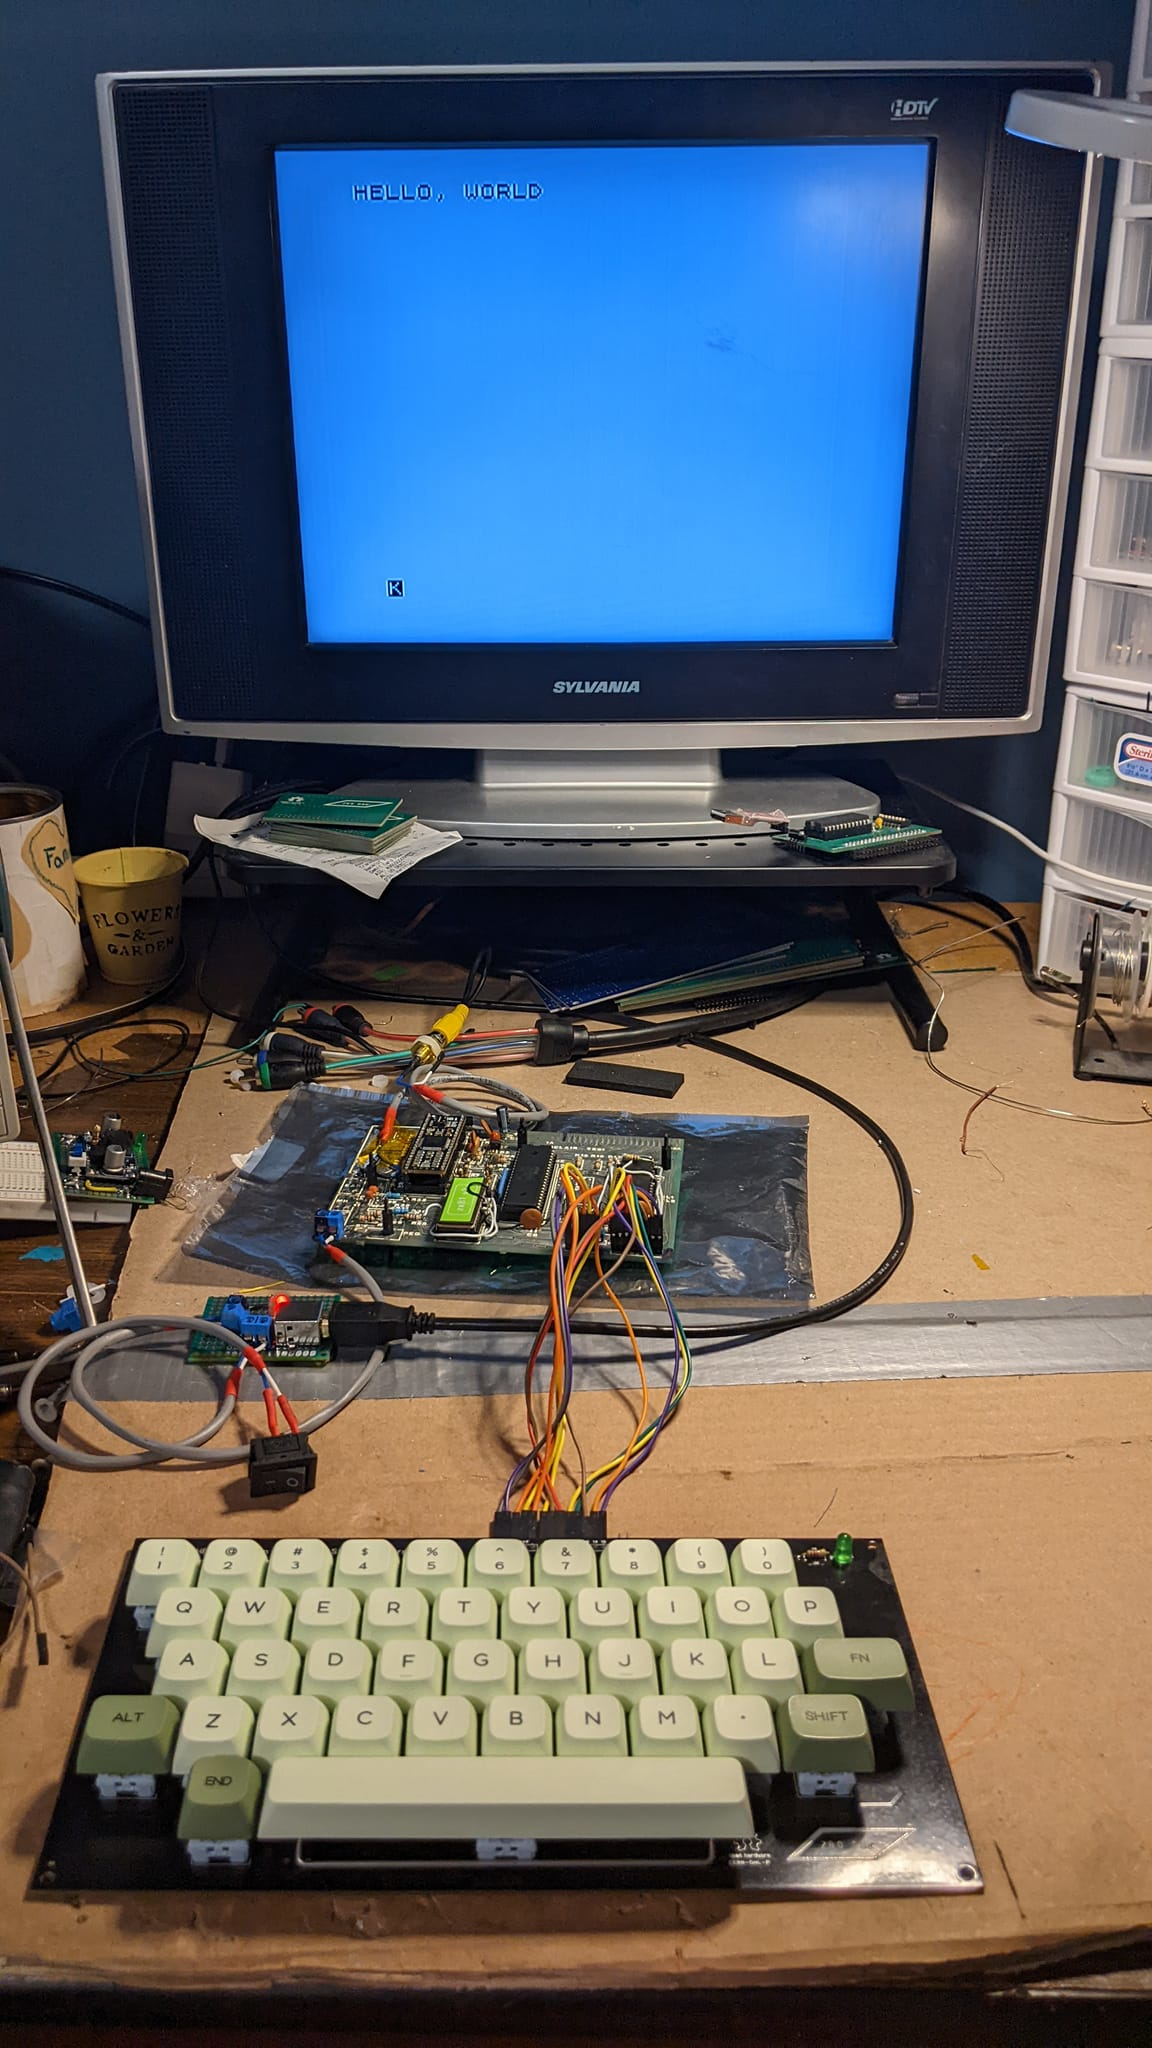
Project update:
What a RIDE this week has been! Every once and a while you put a thing down into the EDA, shoot it off to production buy all the parts everything comes and the thing comes out working, EXACTLY like you thought it would!
I can't even begin to hide my excitement! This week I got to see a lot of great feed back from the community on the ZX81 Keyboard build. Some of you even started to clone the repository (about 7 of you, lol), and that's real exiting to think about as I only really make this stuff to share it with you. I made the decision to pull the trigger early and share the gerbers with the ZX81 Community on Facebook, and pretty much whoever has access to GitHub. And so, I needed to do some finishing touches to the repository to really round out the production files for the keyboard PCB. This meant the task of creating a BOM spreadsheet for the shared projects website, as well as for hack a day and to include on GitHub. I spent the last few days doing that as well as applying these very cool stickers from 4keyboard.com (not sponsored, just a fan):
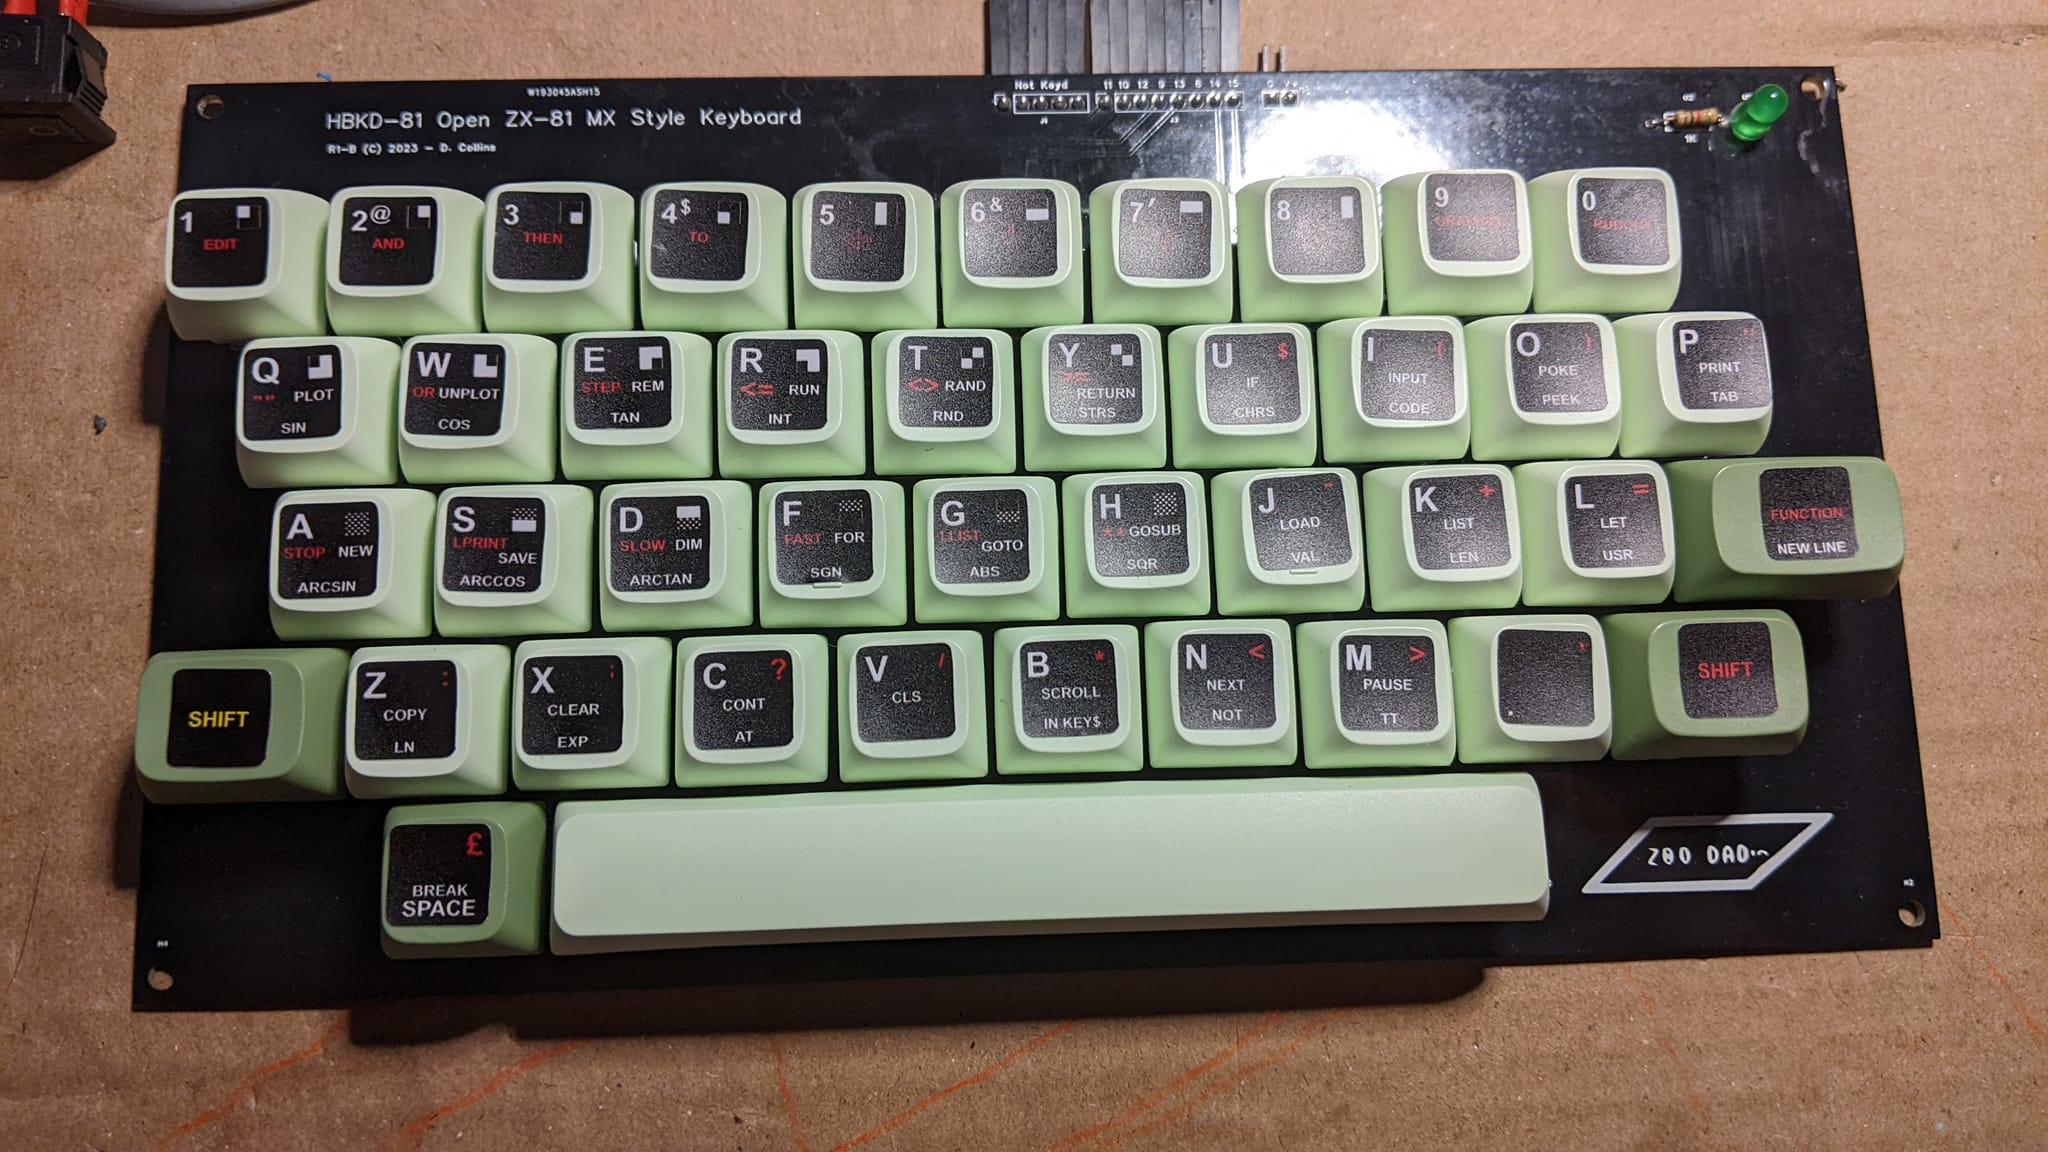
Board review, black solder mask:
I am really pleased with how those turned out. First time with the black solder mask, That looks really great! I was blown away by the quality of the Finnish, sometimes the lower cost non-matte black solder mask can look washed out, but this is beyond sublime. The mask is so dark you actually have a hard time seeing the traces below; I really like that effect for a HID device it makes it look much less like a PCB and more like a thing that is meant to be touched. PCBWay did a fantastic job with the boards, and I am continued to be blown away by the level of support I have gotten from project sponsorship. Especially on something as expensive as a keyboard! If the pace of these projects is effected by one thing it is prototyping cost, and so to have a partner like PCBWay assist with that is beyond humbling, and everybody on their team has been an absolute treasure to work with.
PCBWay has a wonderful array of prototyping options for any project, like metal fabrication which Ill be trying out for the first time on this project. The panels for the case need to be cut and drilled, and they work with an array of standard materials in various thicknesses, if you're looking to have something similar made PCBWay has you covered in this department and It is 100% worth a look.
Reflections on the project thus far:
I spent a bunch of time with this thing just trying out different programs and tests to make sure the computer is more or less in working order as I get ready to put it into its new home. The first thing of note which probably wont surprise anybody who knows anything about the ZX81 -- all of the keyboards; including the original and mine as well are 100% unbuffered. This means there's a chance you can type so fast that it will very likely miss a key here and there. But it does make you be deliberate in your pacing; and so a lot of mistakes are avoided because you have to be so intentional. This might be corrected by adding a buffer (which when I get around to doing the terminal build I will absolutely do); however I don't think I will on the zx81 part, since a buffer requires a mechanism that clocks out the key presses as they are read, which, unless I am mistaken there's little way to do this on the ZX 81, at least not without modding something. With my board being very modded, I don't think I will be adding anything further at least for the time being. It might be possible to figure out when the reads happen and create a falling edge clock to use with a standard 40105 FIFO but that would require a bit of research.
Parts considerations:
When I was building the BOM I found that its actually really hard to find, bulk key switches at a reasonable cost. This is no surprise given the cost of a new mechanical keyboard these days but its absolutely laughable the lack of cloned switches that are available in the major electronics suppliers. This may differ vastly if you look into whats available in the Asian suppliers but I did take a quick glance at LCSC and only really found stuff like that in limited supply. So at this point I figure I can put the base switch in the BOM, and let people know you can get a switch set (or get really lucky and find a keyboard used with PCB mount switches) for much cheaper if you just search places like amazon / ebay / AliExpress. The important piece of this is you need a PCB mount MX style switch:
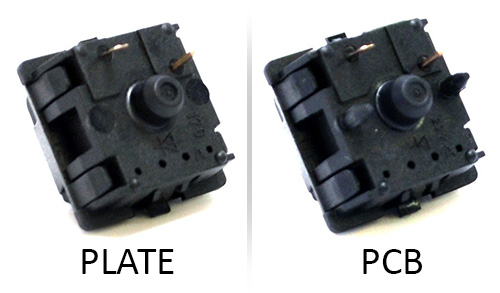
The importance here is that PCB mount switches have 5 pins, and plate mount only have 3. You can get away with plate mount switches but without the 3 point positioning rail across the center you will have a very hard time lining them up; so this detail is very important if you want the keyboard key caps to fly independently of each other. I went with this set of knock off switches from amazon, which came out to about .43 cents per switch, for comparison, bulk cherry MX Black switches are .99 cents, before shipping. Another important consideration is the space bar stabilizer. Again what is required is a PCB mount "snap in" stabilizer:
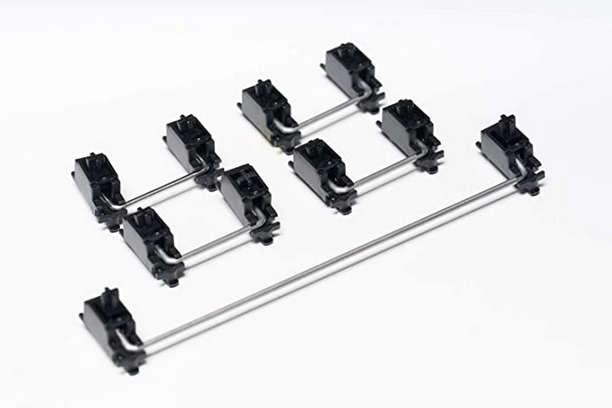
a really good guide from click and switch, explains the ins and outs of stabilizers I found a affordable kit here at amazon, you do have to buy a full set when you only need the 6.25 spring and two stabilizers but I could not find this as a single part on any of the parts distributors. These simply snap in to the PCB, the footprint in the board is correct for snap in cherry type stabilizers but others might fit with some research. If there is a good source of these that I can include in the BOM for assembly it would be very useful to know that, but for now I consider it as part of the key cap set and it comes down to preference.
speaking of key caps, since the design allows for use of a out of place salvaged key caps from a 60% mechanical keyboard, we should talk about key cap profile. The profile of a keyboard defines the height of the switch across a row:
Here, on my prototype I used XDA profile key caps, and the reason is clear if you look at the above graph. Since the height of the switch does not change from row to row - there's little issue with moving two of the keys from the bottom row to the 2nd from the bottom, or the top row to the middle it makes no difference. Since were using the stickers to recreate the key legends we don't actually care what the original key caps say because they will be covered with a high quality sticker / decal. When I ordered key caps for the keyboard that I built I again used amazon but you can use any XDA profile key-cap set as long as they have a 60% reduced space bar, the following table may help:
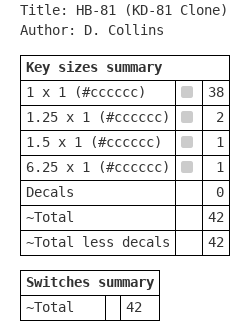
The table was exported from keyboard-layout-editor.com, and was built before I had decided on going with the decal set.
Final reflections and whats next:
So up next is cutting the case for the computer and fitting everything in place so I can make measurements for cad drawings that can be used to send to a manufacturer to have them cut:
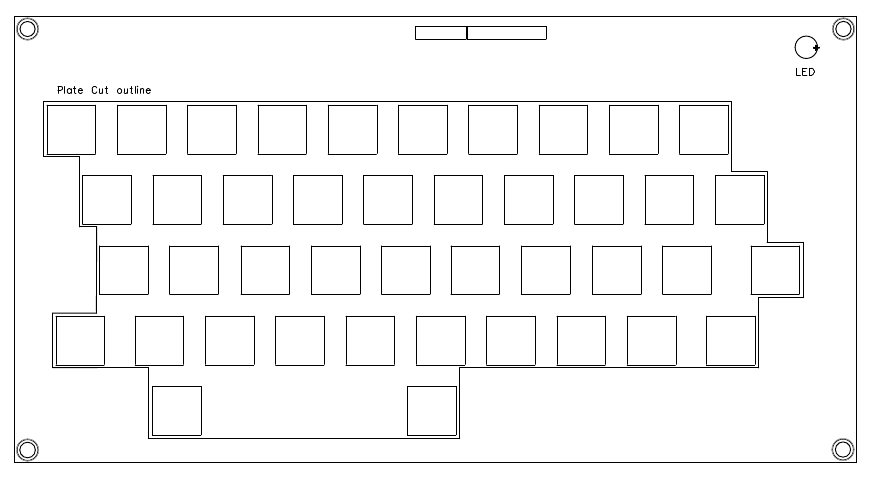
I drew a outline in my EDA software using the documentation layer for the cut lines. Next I have to make my own drill and cut templates so I can lay it all out and mark up the test panels. I'll be working with a Dremel to make these cuts, and to be honest I am kind of dreading doing it but we will get it figured out. Worst case I will go to the hardware store and get plexiglass cut to the correct sizes and make the cuts with a manual hack saw blade.
So far I am very pleased with the way the project has come out. I am excited to work on the panels and learn some 2d cad. I would really like that phase to come out as nice as the last but no project can go off without a hitch, we just haven't found ours in this one yet.
Thanks for sticking it out to this point, if anybody has questions feel free to leave a line here or in the usual places. I'll be updating all of the various places you can get at this project over the next few days. Feel free to let me know if you can't find something but odds are I just haven't uploaded it yet.
Discussions
Become a Hackaday.io Member
Create an account to leave a comment. Already have an account? Log In.