Close
0%
0%

mail2code

Mail your code to my microcontroller and see what happens via webcam.
One hardware setup for many students, availability: Worldwide 24/7

Similar projects worth following
All you need to teach or study how to write code for a microcontroller is:
1.) A computer that can be used to write, save and compile simple text files
2.) A microcontroller.

Wait! You can use my microcontroller and computer even though I live thousands of miles away. All you have to do is:

1.) Mail a text file with your code to my server
2.) Wait until you get an answer mail with an attached video showing what the Arduino does with your code.

You don't even need a classic Computer/Laptop. The oldest smartphone can send text via email and display videos. Compiling the text file is done on my server. The bar to enter the world of "Physical Computing" is as low as can be. Teachers don't have to setup a server/computer farm to teach coding in front of a class.

"Go Green" means reusing old hardware and reducing the amount of computing power to achieve a goal.

mail2code teaches old technologies new tricks to teach new students how to code.

My setup is as follows:

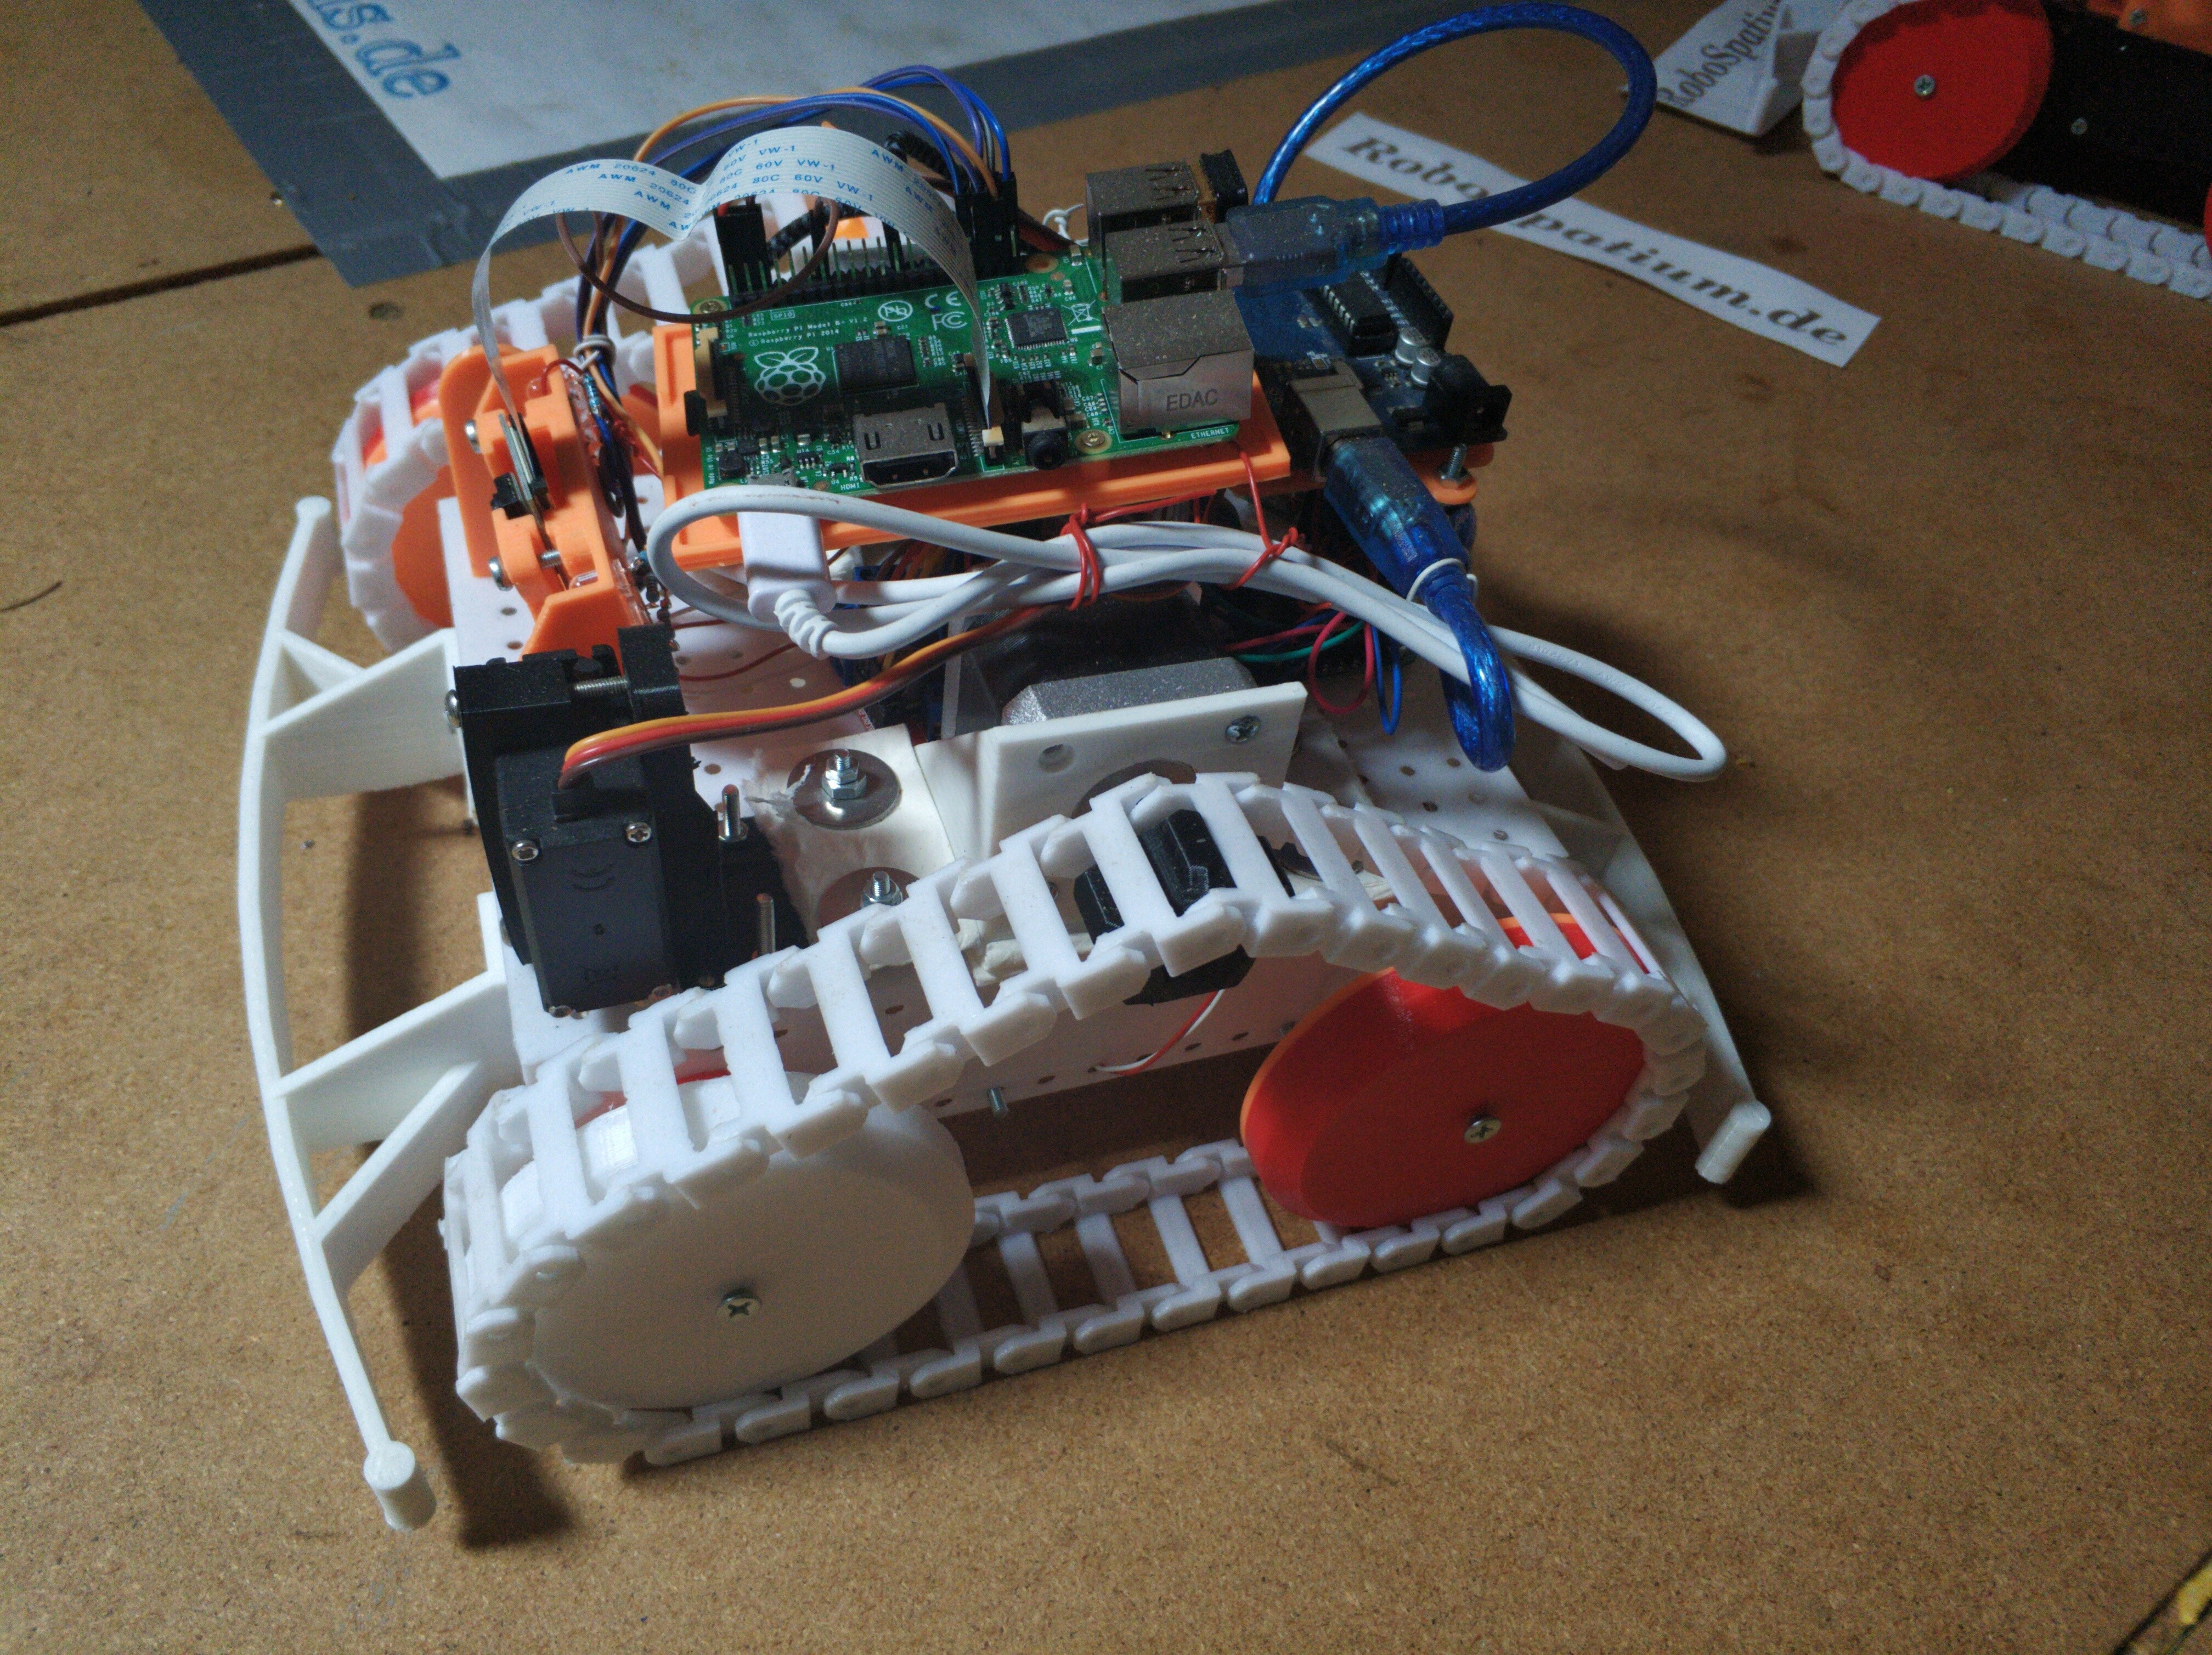
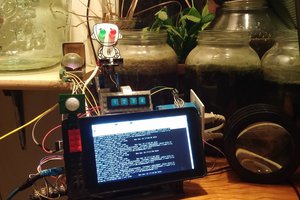
An Arduino UNO (could be any microcontroller that can be programmed via command line tools)  is connected to a Raspberry Pi (could be any computer running a Debian based Linux).

The Raspberry Pi looks for new mail in fixed intervals (2 minutes or so) with "fetchmail".

If an Email with an attached *.ino file is detected, the attachment is compiled and the resulting hex file is uploaded to the Arduino UNO.


In parallel with uploading the code, a webcam is started.

After a given interval (1min), the recording is stopped and the resulting video file is stored on the Raspberry Pi

The Raspberry Pi connects to my Internet server to upload the video file, the original code file and the updated webpage.

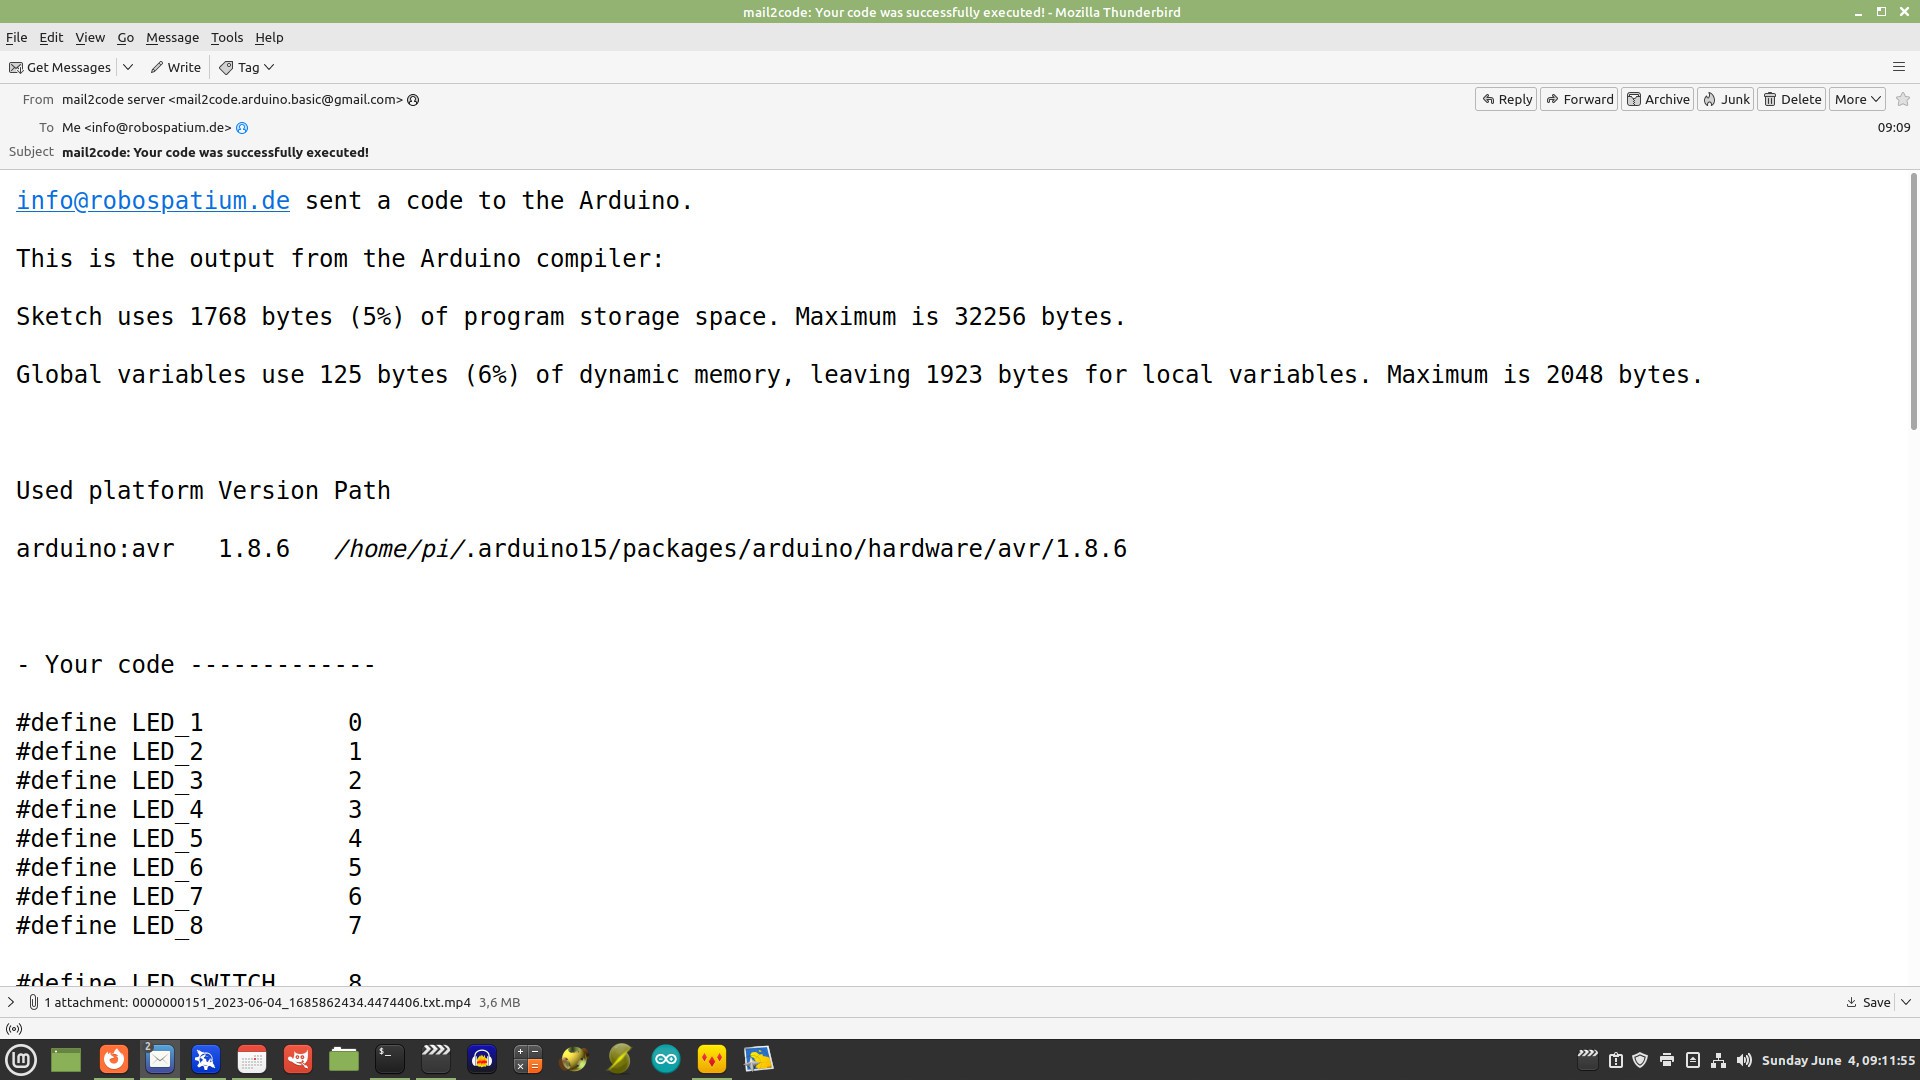
Also the sender gets an answer mail with the video, showing the Arduino in action, attached, if the compilation was successful or with the error message if it wasn't.

Done!

On the website you can see a list of successfully compiled  code with video files, so that you can learn from the coding work of others.

To try it out, visit:

http://h1i1.de/mail2code/ArduinoUnoBasic/ArduinoUnoBasic.html

install.txt

A first, very rough description of the install procedure, including the Quick & Dirty (but working) Python script that does all the work. An automatic install script will be provided in the future - please be patient!

plain - 27.51 kB - 04/25/2023 at 13:09

Download

mail2code.zip

3D files created with openSCAD: Mounts for Raspberry Pi, Arduino UNO, LED dice and parts for a closed loop motor

Zip Archive - 1.02 MB - 04/25/2023 at 13:05

Download

  • A first Rover is waiting for your code lines

    Norbert Heinz10/01/2023 at 11:54 0 comments

    I am still extremely busy with writing on the tutorials, but the practical part of this project also got a bit of my attention. As a result,. you can now drive a first Rover, named "R20", on my attic by mailing code lines to the vehicles address. Have a test run:

    http://h1i1.de/mail2code/Mail2CodeIndex_en.html

    A video gives you an idea of what mail2code and html2code are good for:

  • The Arduino UNO is in version R4 no longer my first recommendation - your thoughts?

    Norbert Heinz06/26/2023 at 18:22 0 comments


    The UNO was always my recommendation for beginners in "Physical Computing" because of its limited resources. With that, beginners quickly recognize that resources are never endless and so have to adopt "efficient coding" in an early stage of learning. With the R4, that unique "feature" has gone and the UNO brand is watered down the river of more and more and more features, competing with countless developer boards on the market.

    Leave a comment what your thoughts are.

  • A first video on how mail2post works

    Norbert Heinz06/05/2023 at 18:42 0 comments

    Also, the first hardware setup shown in the video is now online:

    http://h1i1.de/mail2code/ArduinoUnoBasic/ArduinoUnoBasic.html

    Have a test run and tell me about your thoughts!

  • Implementing an answer mail was tricky

    Norbert Heinz06/04/2023 at 07:42 0 comments

    Starring at a homepage, waiting for a post to appear is a waste of time, so I have implemented an answer mail that is sent by my server as soon as the code file was compiled and the video recorded. Can't be that hard or can it?

    Adding the code lines to generate all files needed for an answer mail was done relatively quickly and first successful test runs made me think of what I could do the rest of the day. But then I sent mails from computing devices different from my Linux machine that I wrote the code on and the results became somehow odd :-( and my coding day ended late in the night...

    I was aware that sending mails automatically is what spammers do, so mail providers implemented more or less creative ways to keep spammers out. One way is to implement an authentications named DKIMS which wasn't an issue as long as I sent the mails from my domain to my domain. After sending a first test from my smartohone, the trouble begun:

    My domain hoster obviously did not implement that correctly, so the answer mails failed when sending them to certain email providers. What should I do: Start a long discussion with the service team or simply switch to a free mail account of a prominent mail provider? On a weekend, the later solution seemed to be the quickest. Unfortunately is wasn't a quick one either: I could not get ssmtp working with the mail provider of my choice and after a lot of research and test runs I ended up with msmtp.

    A benefit of being able to configure the system to use any email address for sending an answer is, that if your mail gets marked as spam by too many providers, you can quickly switch to a new one. Sort of real cloud computing ;-)

    Long story short: You now get an answer mail including your code lines, the compiler output and the video file attached.

    Feel welcome to send a test mail on the mail2code page:

    http://h1i1.de/mail2code/ArduinoUnoBasic/ArduinoUnoBasic.html

    ...and hopefully that won't result in another error message that ruins my daily schedule. ;-)

  • mail2code at teacher's day on Maker Faire Hannover (Germany)

    Norbert Heinz05/10/2023 at 07:08 0 comments

    I got an invitation to display my mail2code project at the teacher's day on the Maker Faire in Hannover on August 19th 2023. I will also lead a workshop in which I will show how to setup a mail2code environment with a Raspberry Pi and an Arduino.

    The teacher that got in contact with me is a fan of my www.RoboSpatium.de so I promised him to bring at least one robot to Hannover. I will adapt the software to make it mail2code compatible, which isn't a big deal since mail2code is in fact a remote controlled microcontroller with a Raspberry Pi camera that observes the environment. I already have a battery powered robot on my attic that is waiting for a new job:

    So if you can't make it to Hannover, you will have a chance to explore the event remotely.

  • Choose between LED bar or LED dice with a GPIO

    Norbert Heinz05/06/2023 at 18:38 0 comments

    Besides the 7 LEDs arranged in a dice pattern, I have added another 8 LEDs arranged in a line:

    The LED bar is good for teaching port programming, bit manipulation or the binary number system. The LEDs in dice pattern on the other hand are good for teaching GPIO assignment, arrays or random numbers.

    The 7 red LEDs and the 8 green LEDs both make use of the digital pins 0 -7. To choose what LEDs to illuminate, you can switch digital pin 8 to either LOW (red LEDs) or HIGH (green LEDs).

    For safety reasons I have added serial 1.5k resistors to the input pins of the light sensors and the magnetic potentiometer. That makes sure the Arduino doesn't emit magic blue smoke in the event these pins are switched to output and set to HIGH afterwards.

    There is currently one GPIO left without peripherals connected. It is pin A0, capable of analog signal reading. Feel free to leave a comment if you have an idea of what sensor to connect to that pin.

  • Stepper motor and analogRead()

    Norbert Heinz04/29/2023 at 09:13 0 comments

    Another module for the Arduino UNO is a bipolar stepper motor with a DRV8825 driver so that the movement can be controlled by step / direction signals. The blue arrow visualizes the movement of the motor shaft:

    On top of the motor shaft I have glued a magnet:

    The position of the magnet and so the motor shaft is detected via an AS6500 Encoder:

    The sensor outputs the degree of rotation by a pulse-width signal. With a low pass filter the pulse-width signal is transformed into an analog voltage between 0 an +5V. With that, the shaft position can be used by an analogRead() statement in your code.

  • Rough installation procedure and 3D files

    Norbert Heinz04/25/2023 at 13:32 0 comments

    As the project is still in an early, experimental stage, the installation procedure is more of a rough description of how it all works for the more experienced Hackaday readers. If you are a beginner in coding, be patient until an automatic script is available that does all the work for you. However if you are curious, fell free to have a look at the text file:

    I make use of common Open Source software such as fetchmail, sftp and ffmpeg. The Python script I have written that does all the magic is far less than the first chapter of Harry Potter in terms of text lines ;-)

    The "install.txt" file is available in the "files" section of the Hackaday project page of mail2code.

  • First run of the new hardware setup

    Norbert Heinz04/25/2023 at 13:03 0 comments

    All wires of the closed loop motor are soldered and the LED dice is now in a 3D printed case. A first quick test run confirmed that it all works as intended:

    Next thing to be done on the hardware side is to screw all components on a base plate and of course add the Raspberry Pi to give the world access to this new setup.

    3 GPIOs on the Arduino UNO are still available, so more peripherals will be added.

  • Closed loop motor under construction

    Norbert Heinz04/23/2023 at 20:22 0 comments

    Blinking LEDs are the introduction into the world of "Physical Computing", but sooner or later you'll want to add movement to your projects. To give you a playground in motor control, I will add a DC motor with sensor discs, so that you can study closed loop systems:

    The sensor discs are green and orange to make it easy to address them in tutorials. However, the PLA filament doesn't absorb the infrared light of the sensors that good, so I had to paint them black on the bottom side:

    The assembled servo motor:


    Of course, in practice there is absolutely no need for two sensor disc, but the mail2code project is for students. With a reduction of 150:7 the orange disc spins slow enough so that humans can actually count the revolutions, which helps to understand how it works.

    The green disc is directly on the motor shaft and generates pulses on the sensor inputs with such a pace that you will have to make use of interrupts on the microcontroller to count them all.

    With that, one setup is good for at least two tutorials on sensor inputs.

View all 11 project logs

Enjoy this project?

Share

Discussions

Similar Projects

Does this project spark your interest?

Become a member to follow this project and never miss any updates