 Mehrdad Majzoobi
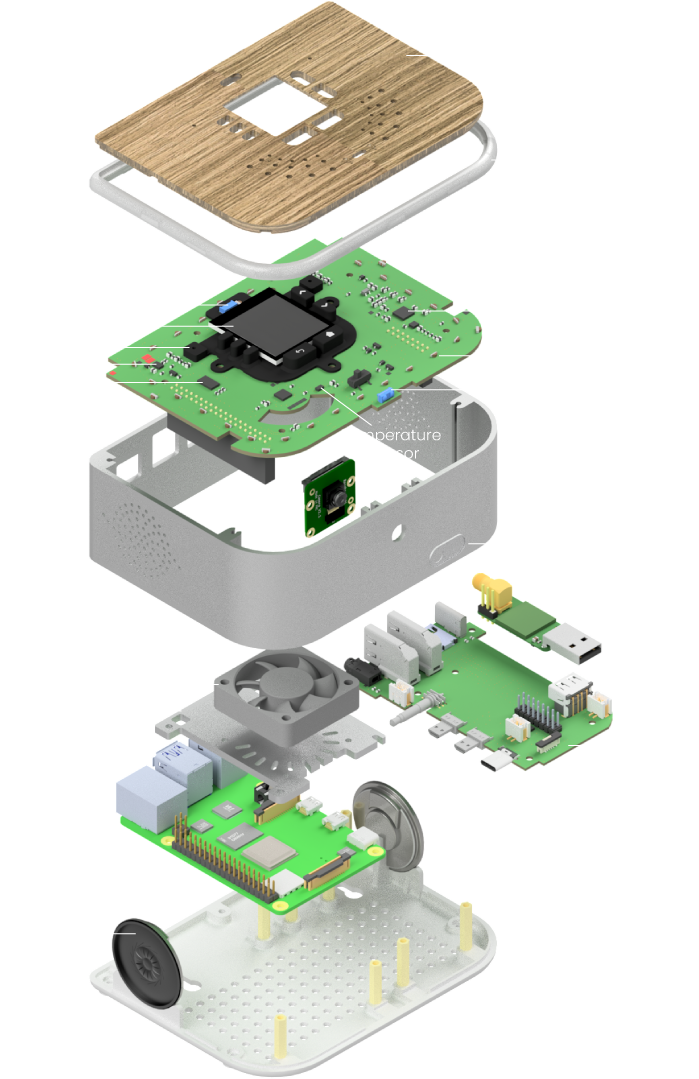
In developing Ubo modular and open source platform, I also wanted to address the following pain points that I personally encountered during many projects in the past.
1 - A polished product that is yet open source
I have found that many open source projects are often not designed with the end-user in mind. In other words, they are not polished enough or suitable for use similar to consumer-grade products. I wanted to create something that can be also shipped to the end user after deploying an application on it.
2 - Rich UX
Raspberry Pi and other single board computers are not equipped with hardware peripherals for headless operation (they require connecting a monitor and keyboard to interact with). Because of that, for any application that requires user interaction of some sort (audio, GUI, etc), additional hardware needs to be added and configured. This can complicate the matters for many developers who just want to focus on building the experience.
3 - A platform for learning and exploring
I wanted to empower other builders to create their own shields by offering base PCB schematics and design guidelines and eventually create an ecosystem of open source shields that serve various functions. I also wanted to system play well with other learning modules such as STEMMA/Qwiic Connect modules from Adafruit and Sparkfun.
4 - Easy of customization
Raspberry Pi cases and enclosures are not designed to work well with the RPi HAT ecosystem. This is mainly due to the challenges in the mechanical design of the enclosures. I wanted to introduce a system for swappable shields that work well with the enclosure design as well.
5 - Making things easier for software developers
I also wanted to offer a pathway for software developers who are coming to hardware development and are intimidated by putting together a hardware system from scratch. I aimed to achieve this by building a self-contained system, abstracting complexities, and hardware layers as much as possible and offering clean API and interfaces in the code to talk and interface with the hardware components.
6 - An extensible and modular system
Although I focused my design primarily around Raspberry Pi, I wanted to keep the design flexible and modular such that it can be easily altered for other single board computers and configurations.
7 - Privacy and Security
One important aspect of the design was to ensure decisions are made to protect user privacy when required and add any necessary hardware security capability to enhance overall system security.
Prototyping journey
The idea for Ubo Pod began in the beginnings of 2021. I had just left my last full-time position and decided to travel to an isolated beach village in Mexico to escape the craziness of COVID lockdown and do some self-retrospection.
One of the things I had always enjoyed the most in my life was to build. To use my skills to craft new things and do deep thinking about design and implementation. I yearned to go back to my design and engineering roots. During this time, I reflected on what to build next. I wanted to build something that lives on and grows by the power of community and the only way I could accomplish that was by building an open source hardware/software product.
I plan to post regular updates for under log section for each phase of the project, outlining the challenges and design decision I made in more details.


High-level design decisions:
In this section, I would like to go through some high-level design decisions that were made in the early stages of product development.
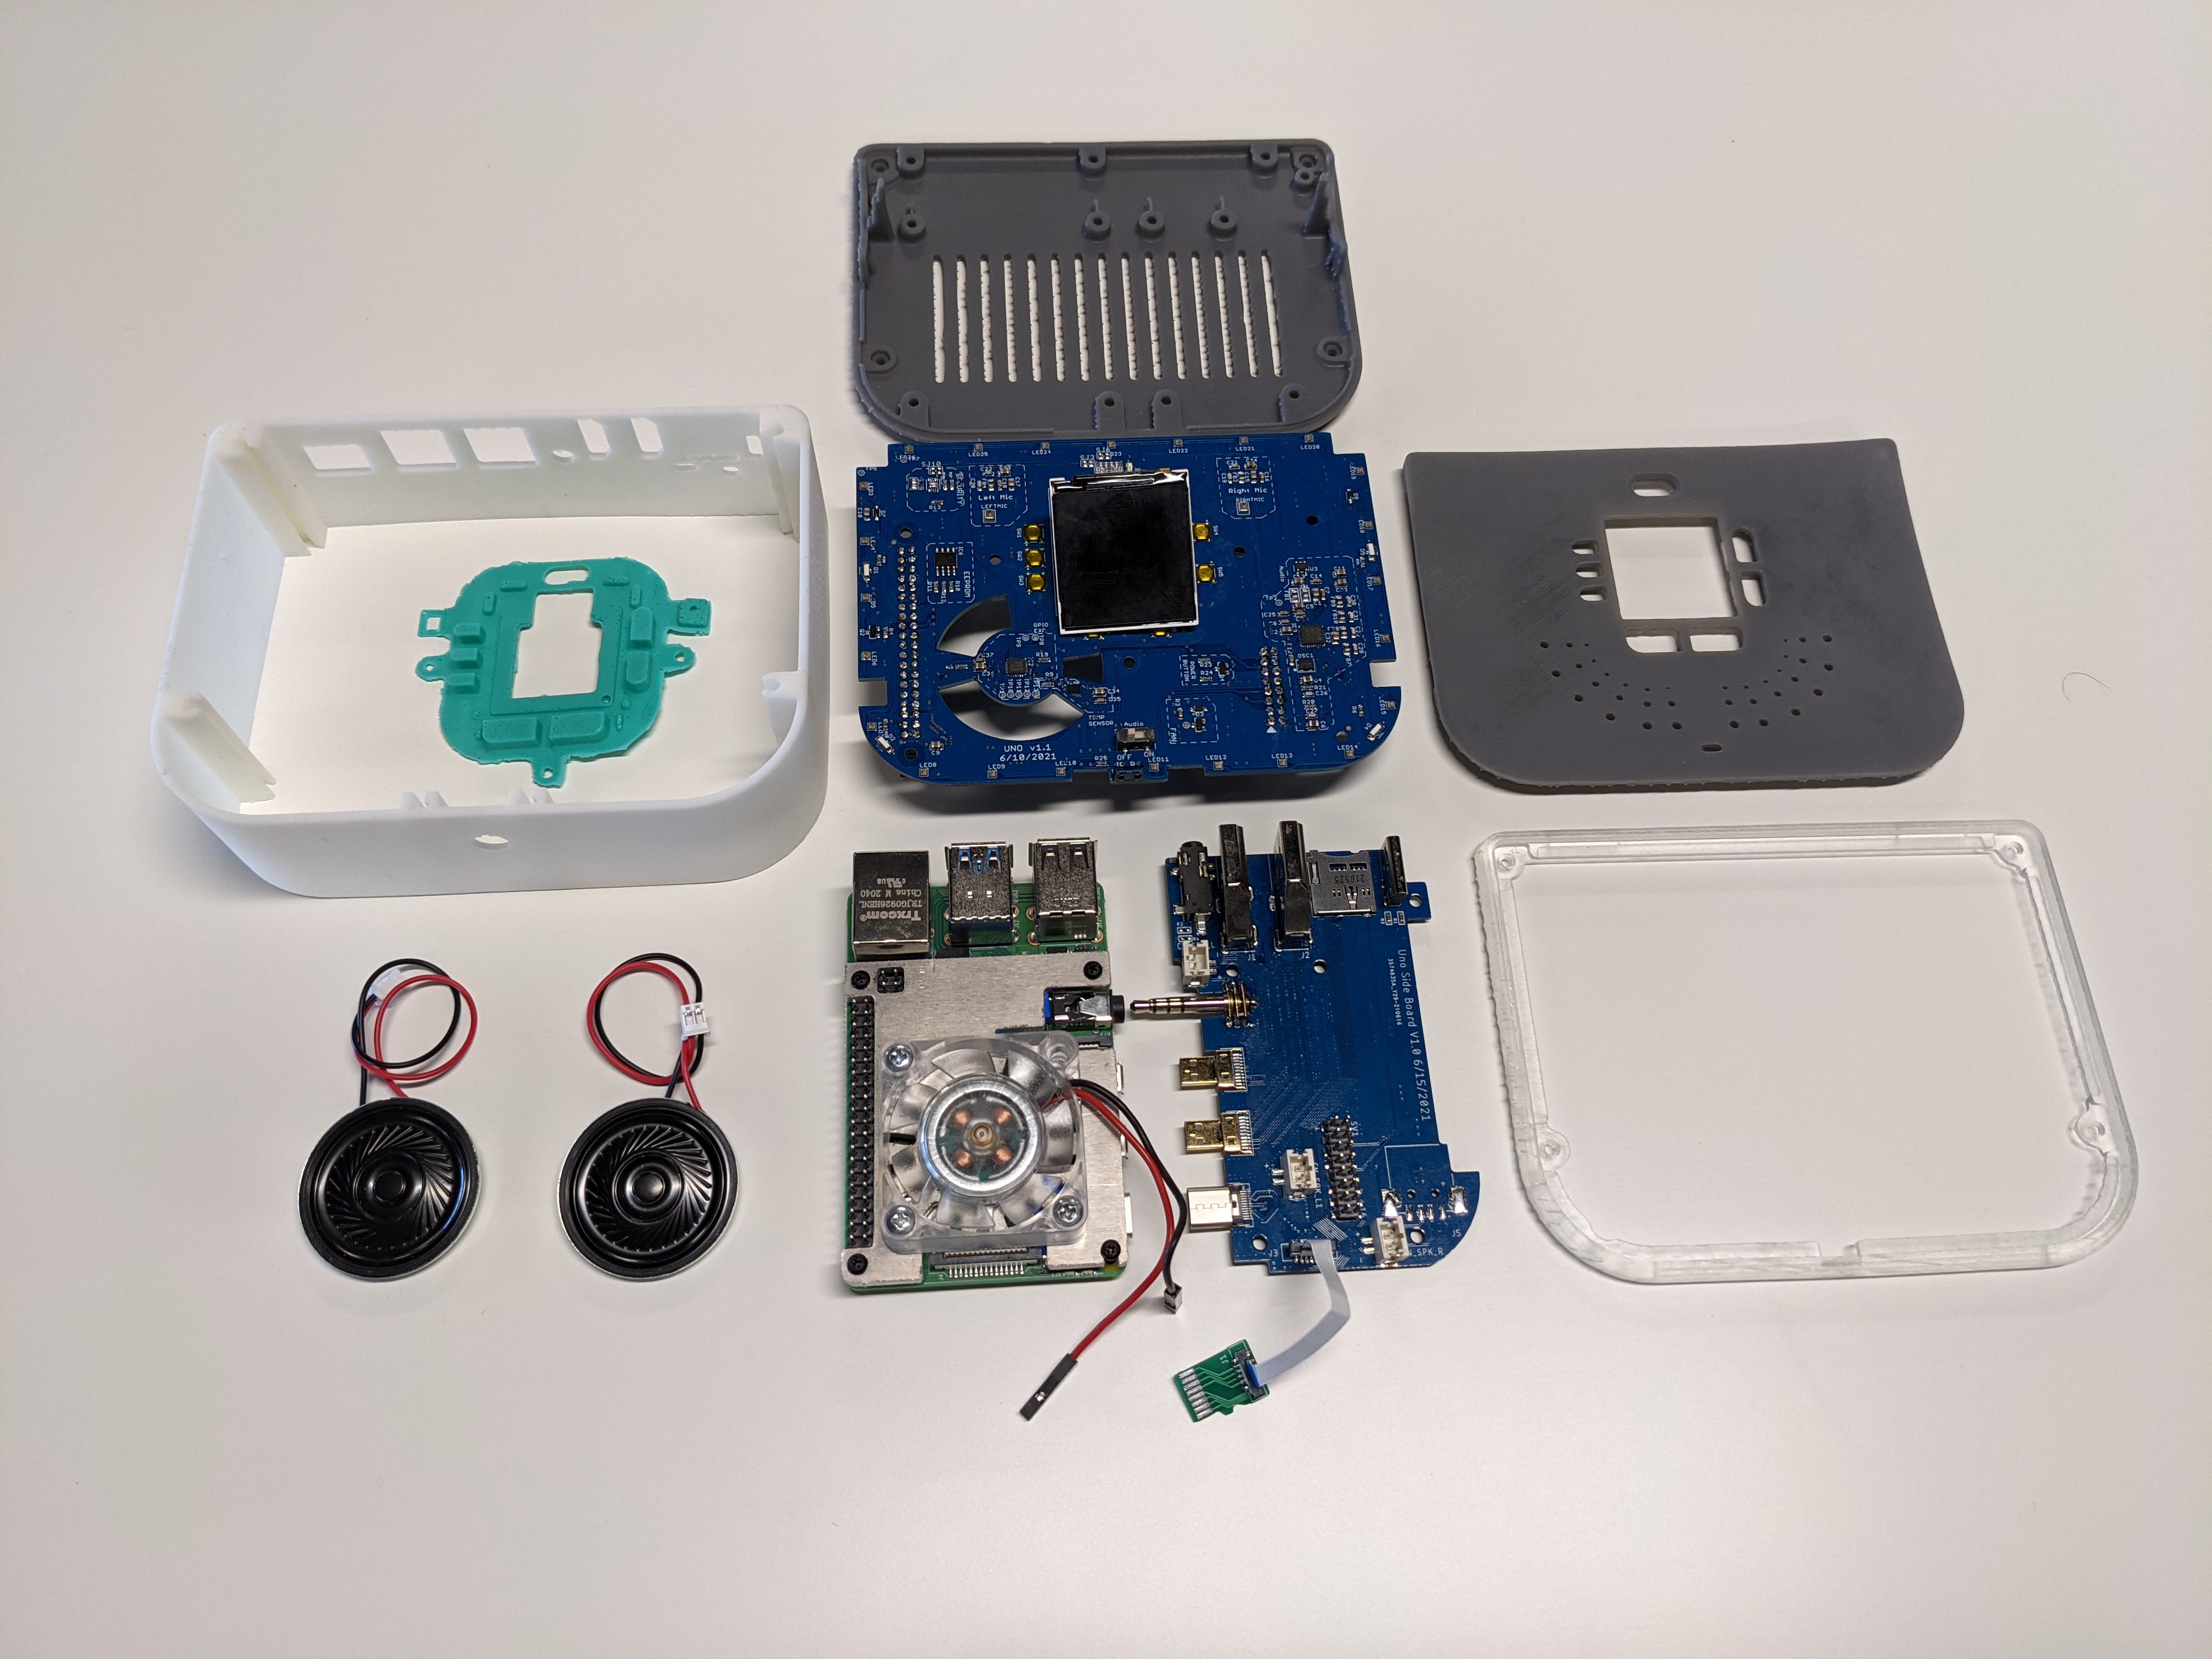
1 - Hardware peripherals:
One of the most important decisions I had to make was to select what hardware peripherals should be added out of the box. Since there are endless possibilities for adding new capabilities, I need to have solid justifications for each added component. The decision was driven by several factors: (a) end-user need (b) cost (c ) supply chain constraints (d) easy-of-use (e) electrical/technical feasibility. This is a rather long topic which I aim to expand over time here in the project page. Below I am going breakdown key drivers for each factors:
- End-user need: this was collected based on several pilots and feedback from users and my own instinct and pain points in developing previous Raspberry Pi based projects / businesses I have been involved in. Overall, I wanted to focus on hardware elements that contribute to a better UI/UX. For example, a GUI is super useful for headless applications that require user input or visual output. An LED light is needed for showing a status / notification. Microphone/Speakers are essential for audio/speech applications. Some basic sensors can be helpful to get some context about the ambient environment (light / temperature). For example, a light sensor can help adjust LED and LCD backlight intensity at night (do not disturb mode?). Beside HMI (human machine interface), I wanted to add some machine-to-machine interfaces as well. For that I settled on IR communications (transmit/receive) and software defined radio transmitter (easter egg).
- The next stage was to search for various components and review them based on capability v.s. cost. It was important to go with cost effective components that were easy to buy and use in new designs.
- It was also important to pick components that were available and possible to purchase given the strain on the supply chain post-covid.
- The selected components must have strong driver support (preferably driver support added to the latest kernel) and a large community of users already.
- The size and electrical properties of the components had to be considered such that I can fit well inside the design.
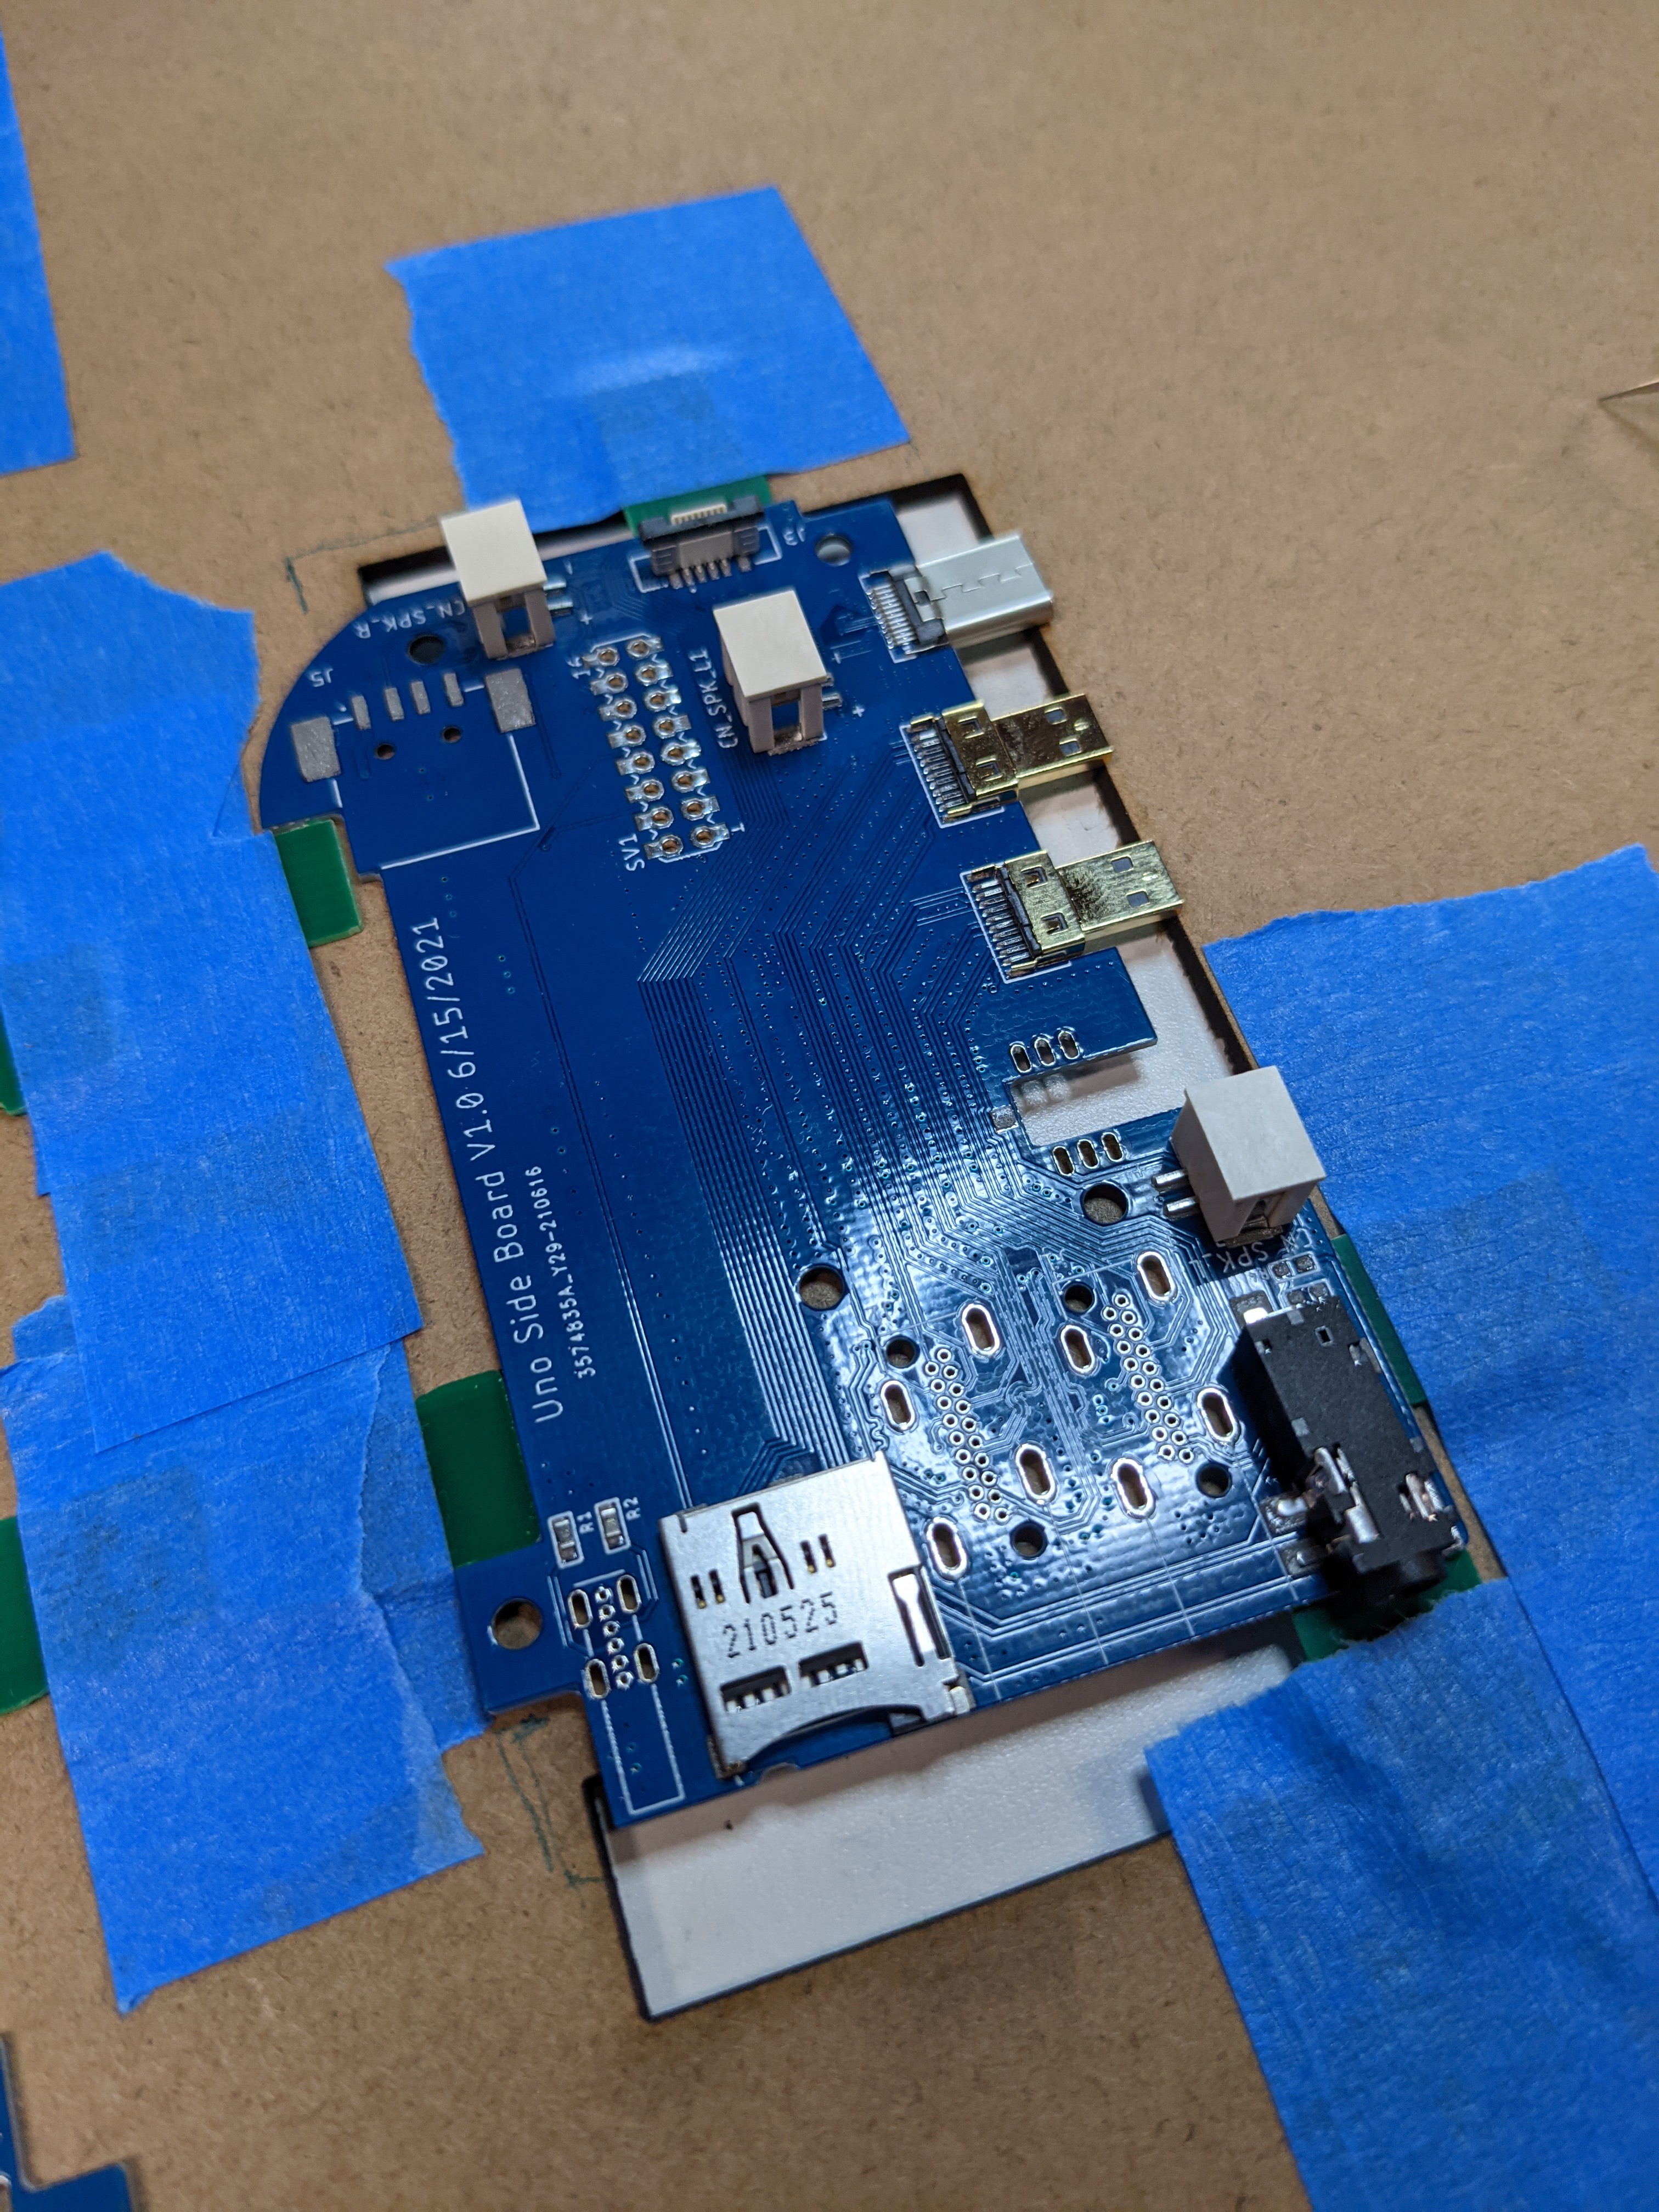
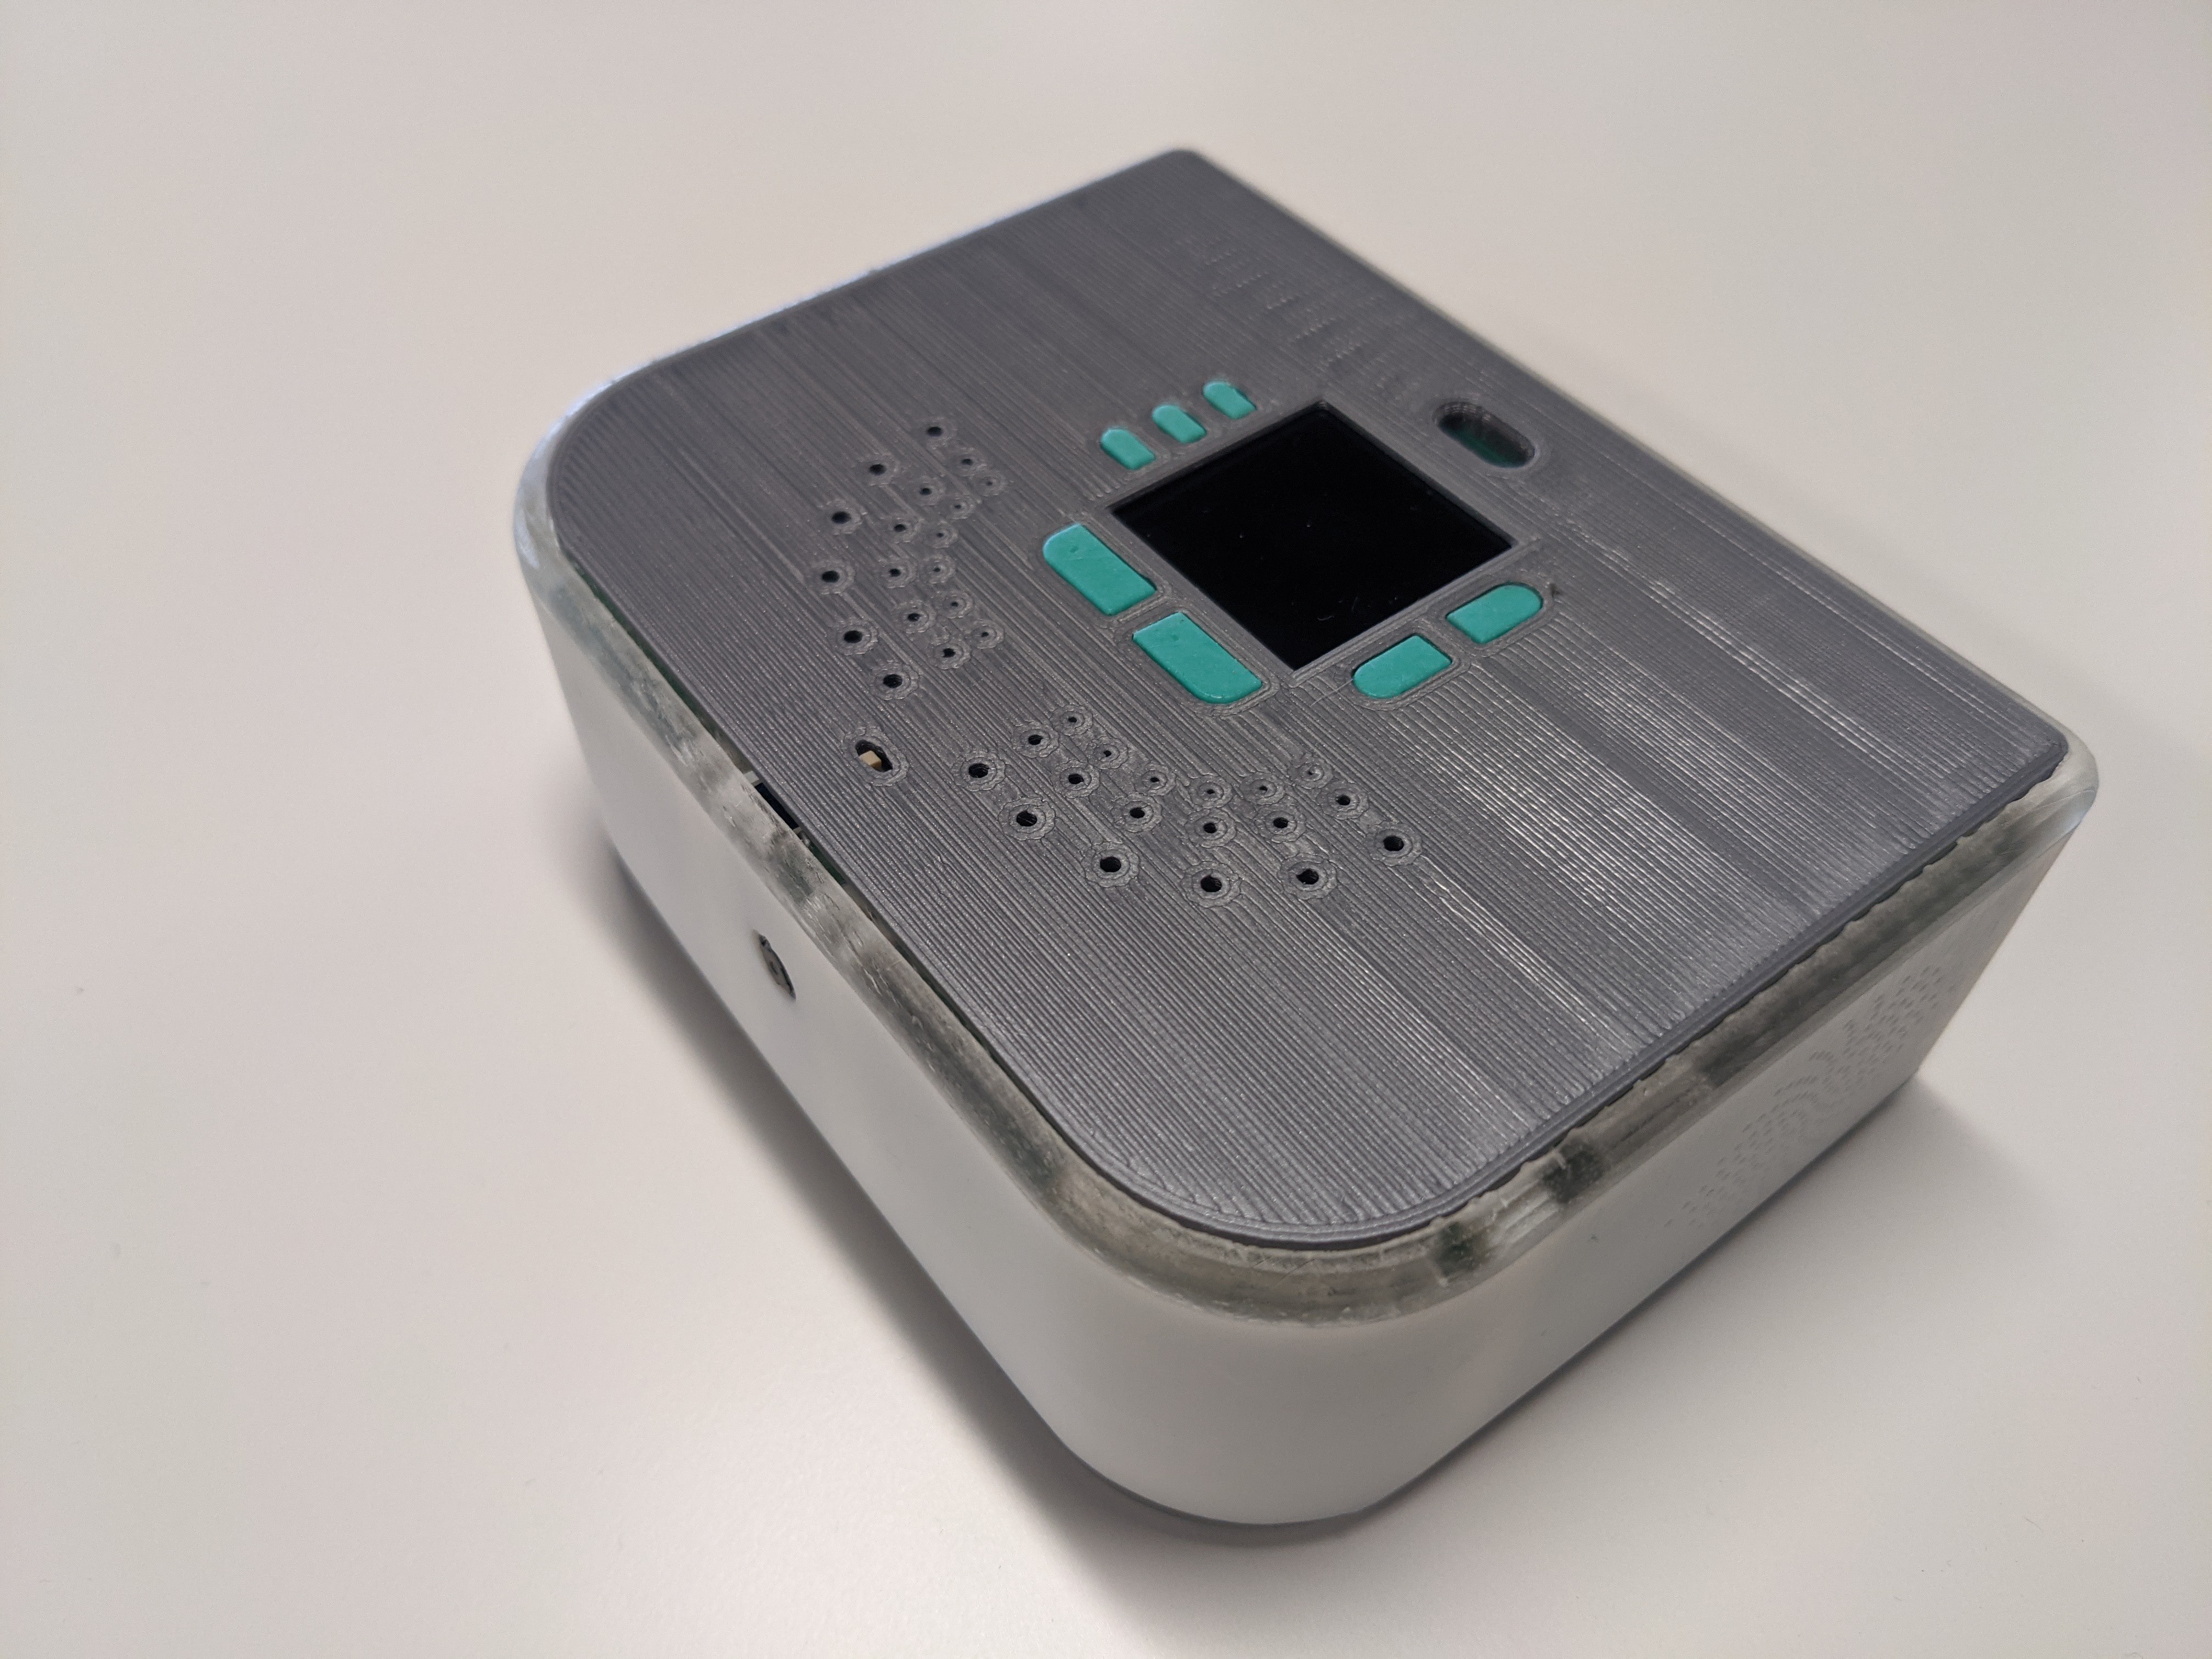
2 - Form factor
When I first started with the idea, I wanted to adhere to the Raspberry Pi outline form factor. However I soon realized that in order to include the functionality that I had envisioned and leave room for future expansion (for example adding aU.2 SSD hard drive in the enclosure), I need to increase the form factor. This was a challenging decision since as a consequence, it required routing the side ports to the back. Also, I didn’t wish to make this a bulky and large device since the idea was to keep the overall size in the range of a mini-PC.
3 - Vision
Since many vision-based applications would benefit from a camera, I decided to add room for including a front facing camera/vision sensor. The design was based on the Raspberry Pi camera module V1.3 and V2 at the time. Introduction of camera module v3 added some mechanical fit challenges that I am working to address.
4 - Extensibility
Since it is impossible to predict what other developers would like to do and build and foresee every use case scenario, I wanted to make the design as flexible and versatile as possible. I have always been excited about the ecosystem of STEMMA QT and Qwiic Connect modules from Adafruit and Sparkfun, especially their modularity and interconnectability. This offered an opportunity to allow developers to easily hook up these modules to the system out of the box. The base cover was designed in such a way that such modules can be mounted using standard stand-offs, daisy chained, and connected to the internal STEMMA connector. I also added an external facing STEMMA connector for connecting modules externally.
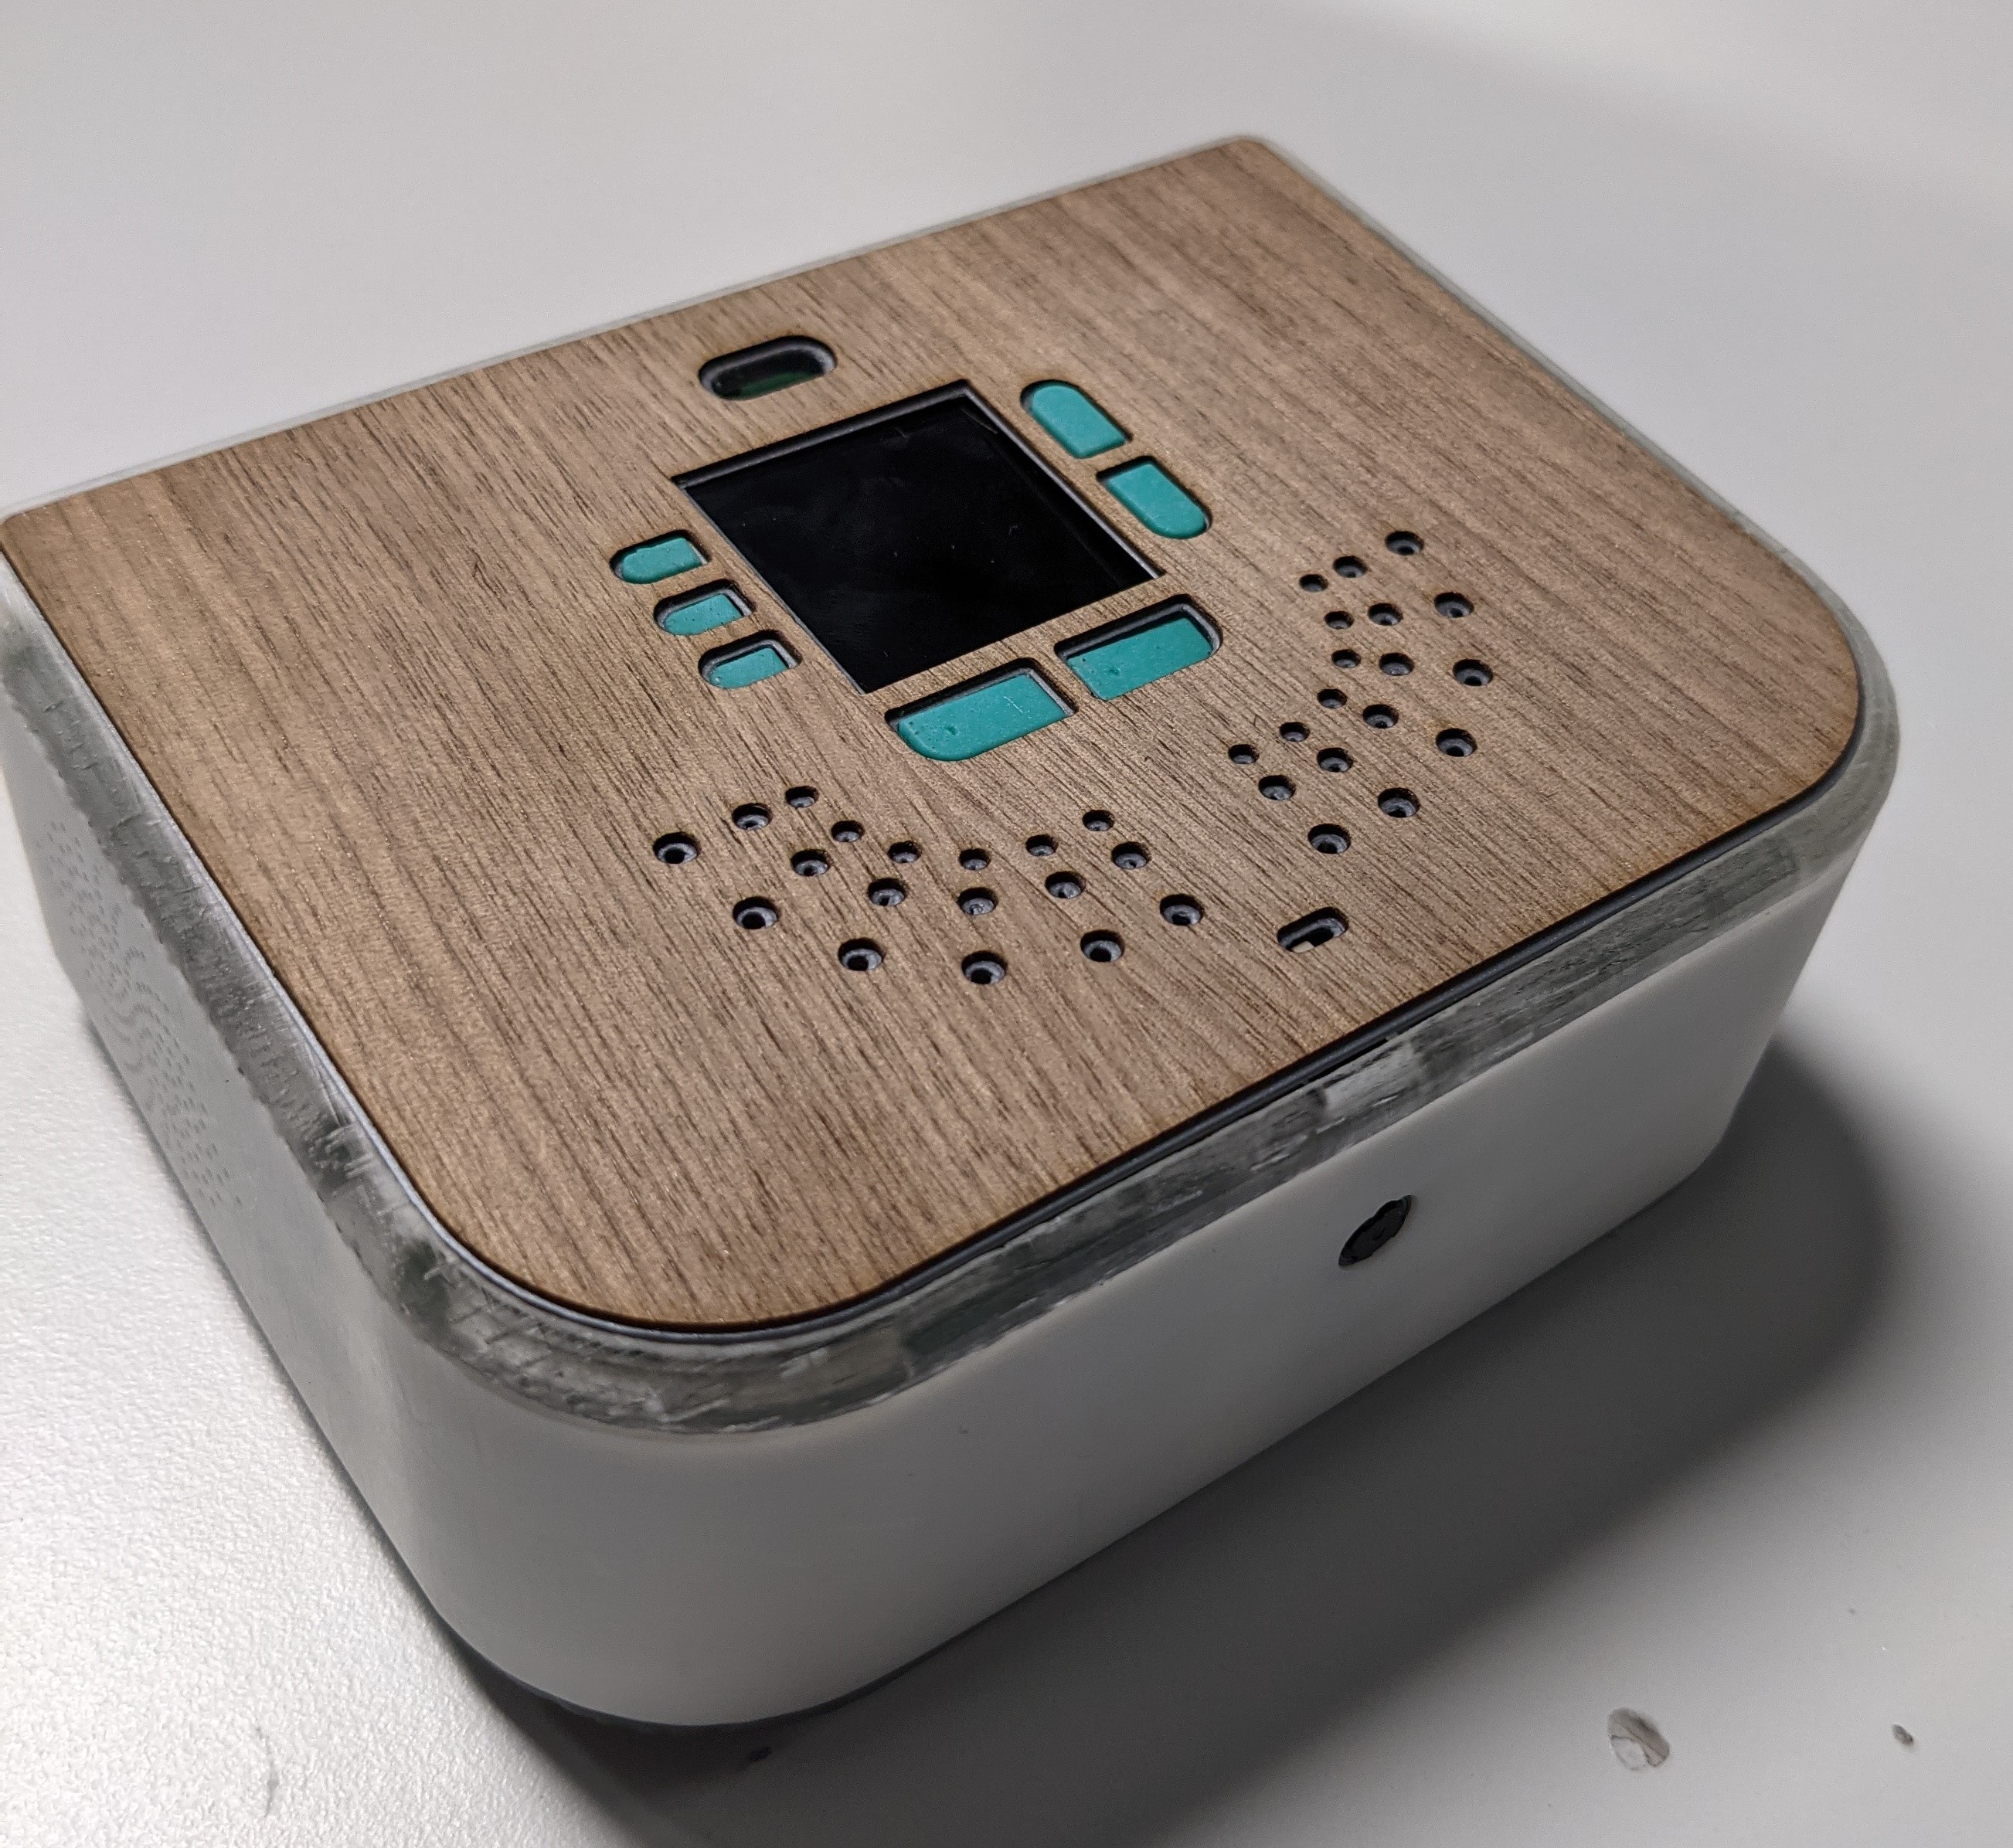
5 - Swappable top
An important aspect of the design was to make the top section (top cover) swappable and interchangeable. Device tree information can be stored on the top shield and the system would recognize the capability of each top shield automatically. This design would allow developers to build their own custom shield and make the design versatile for various functions.
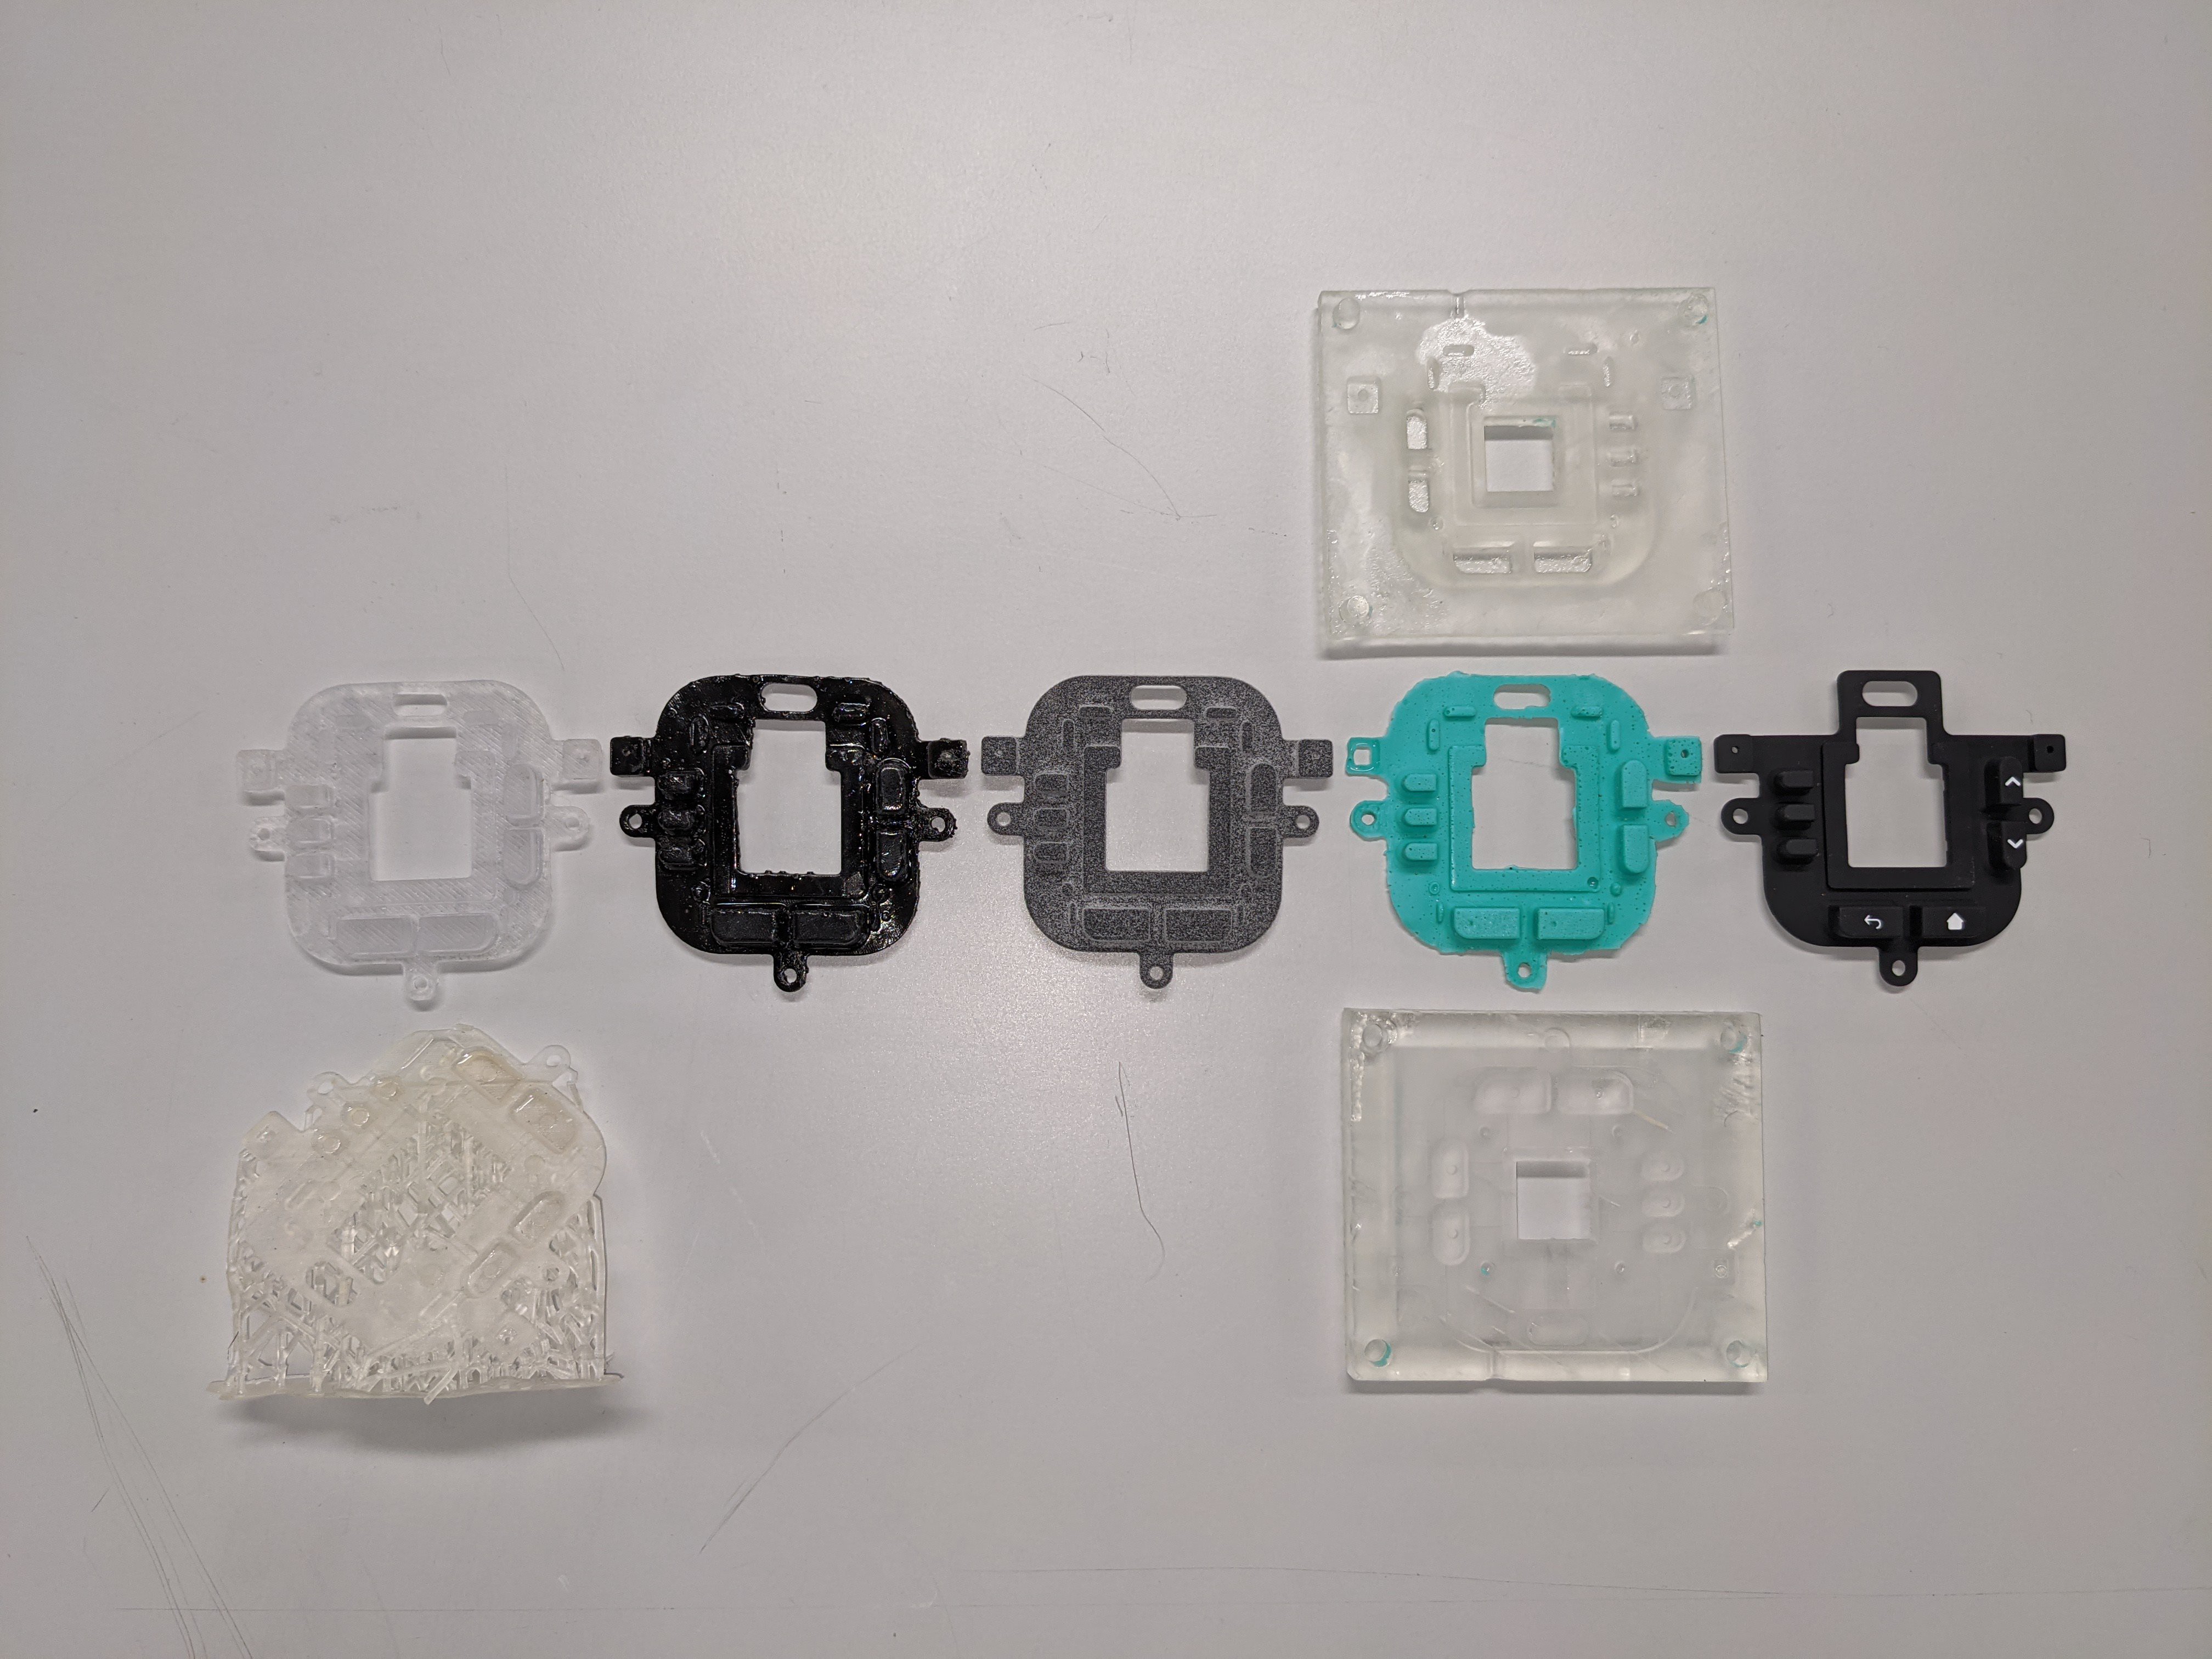
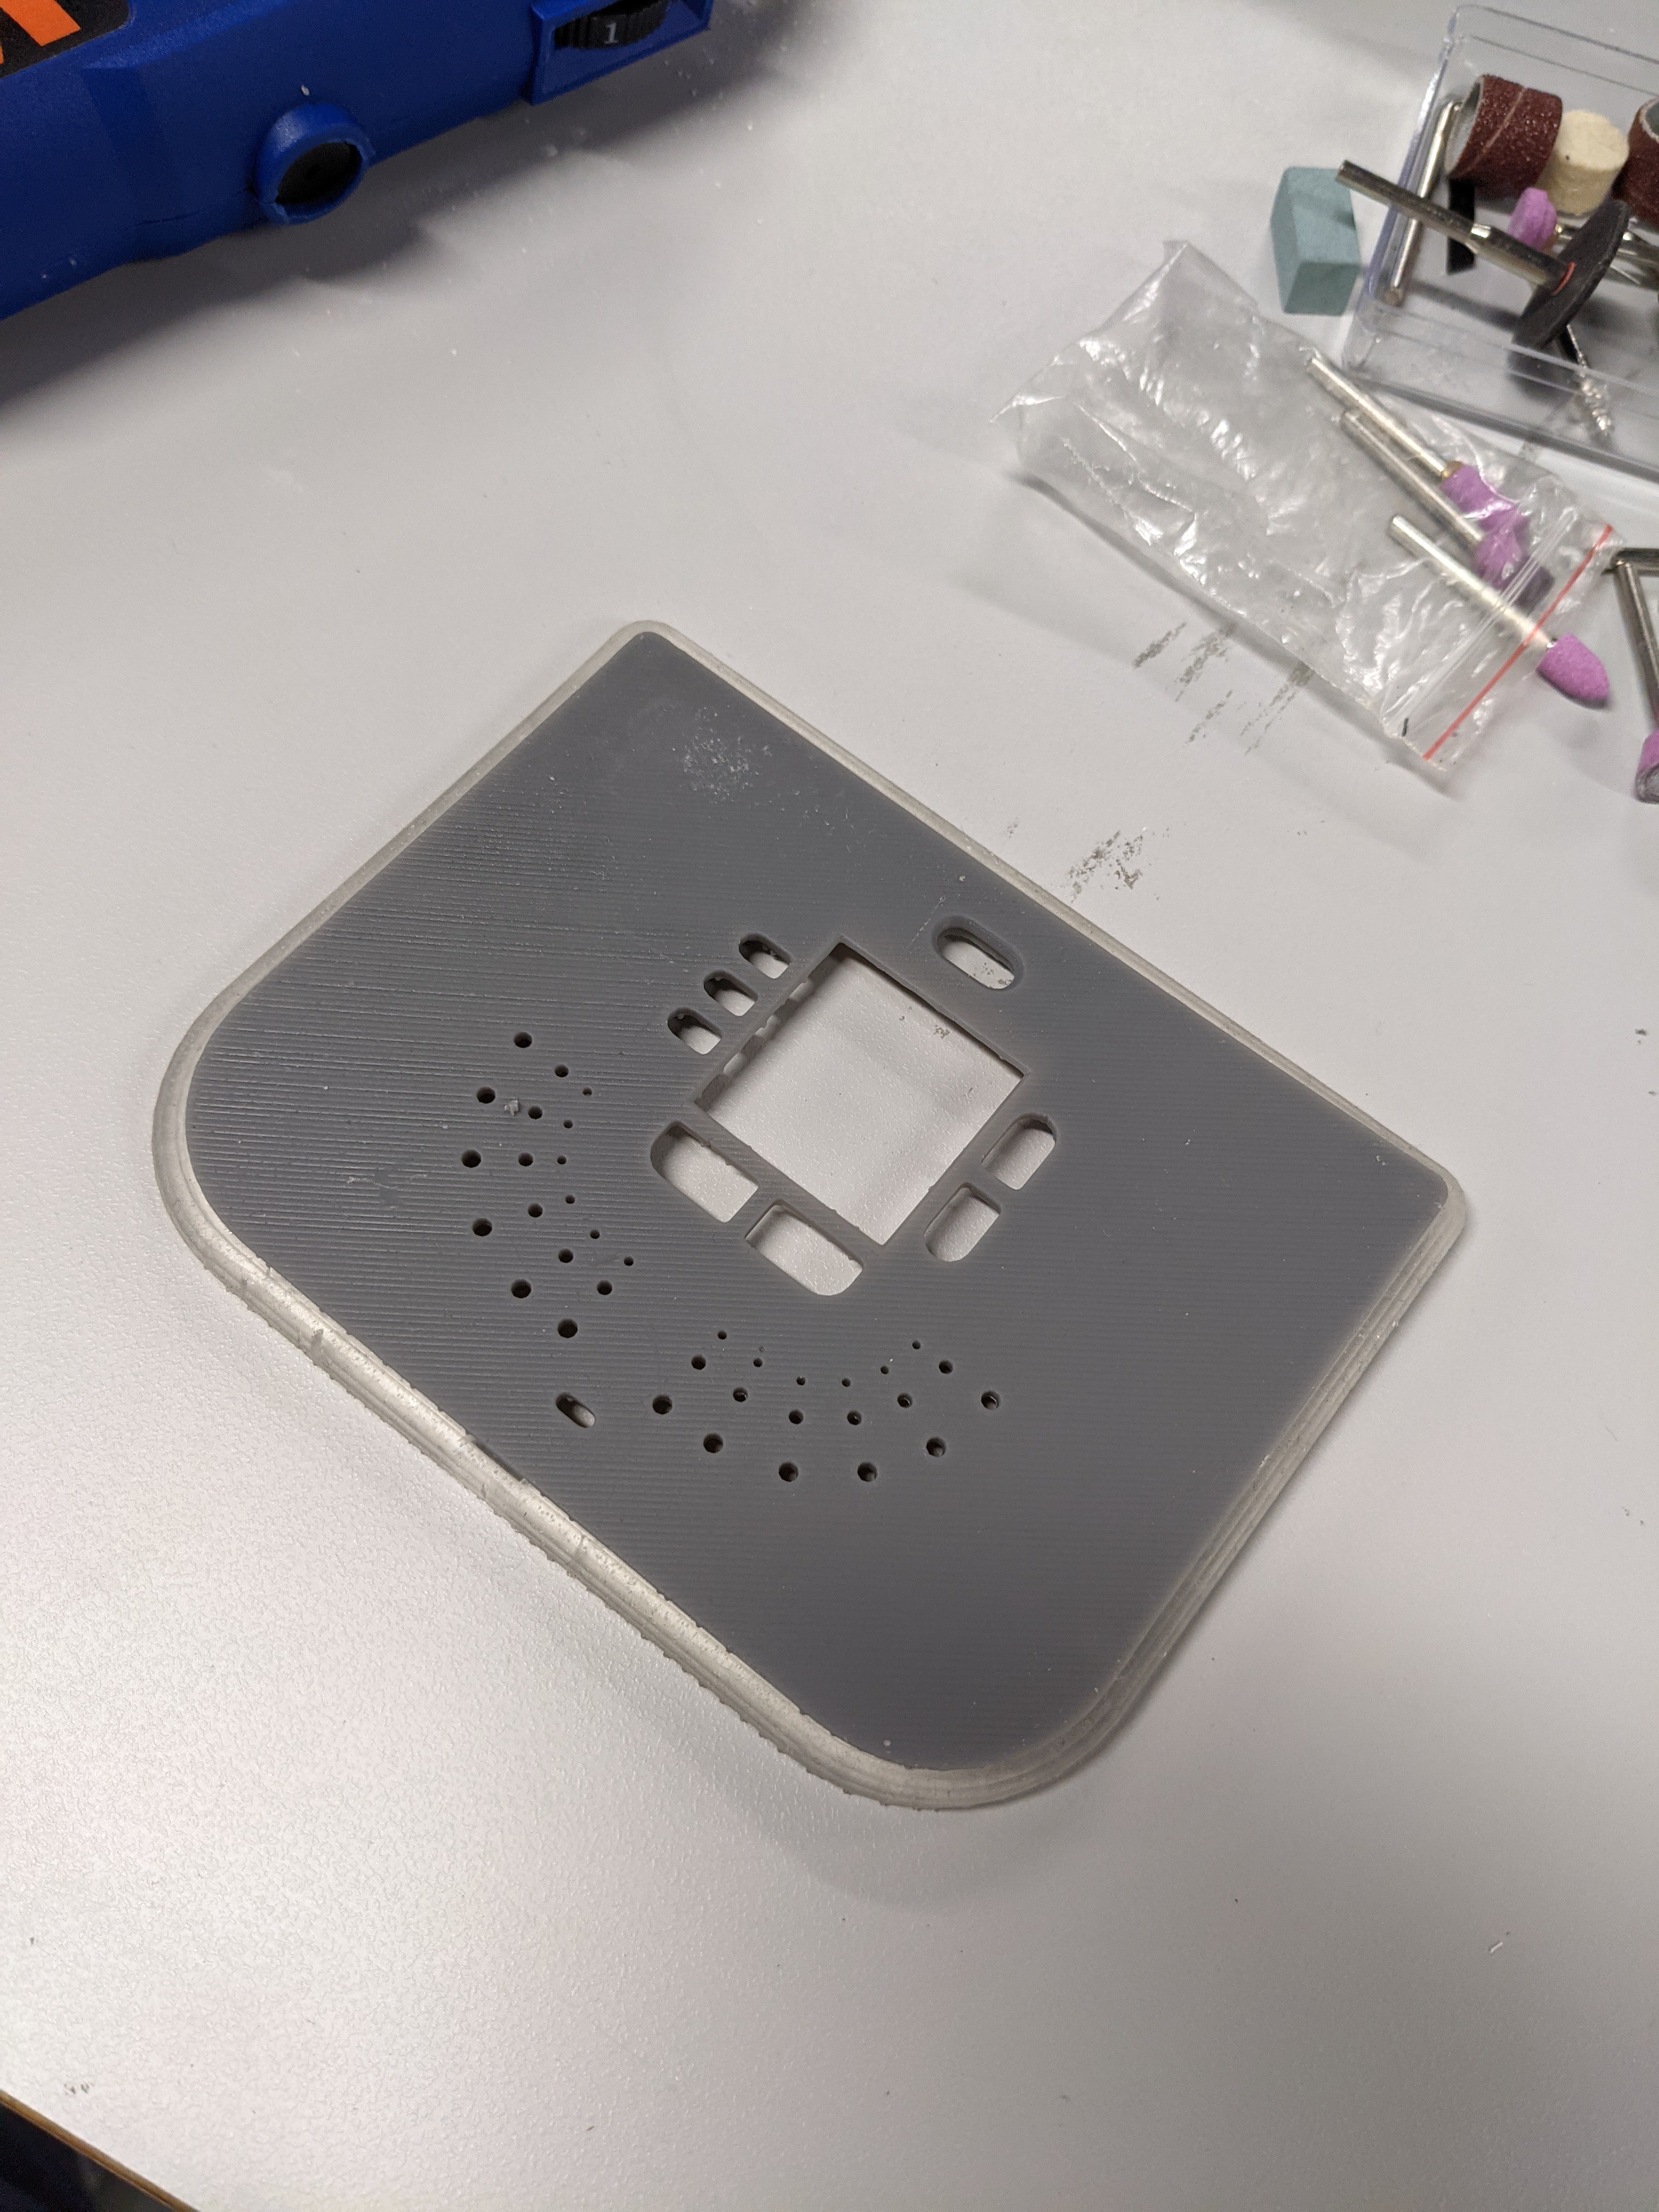
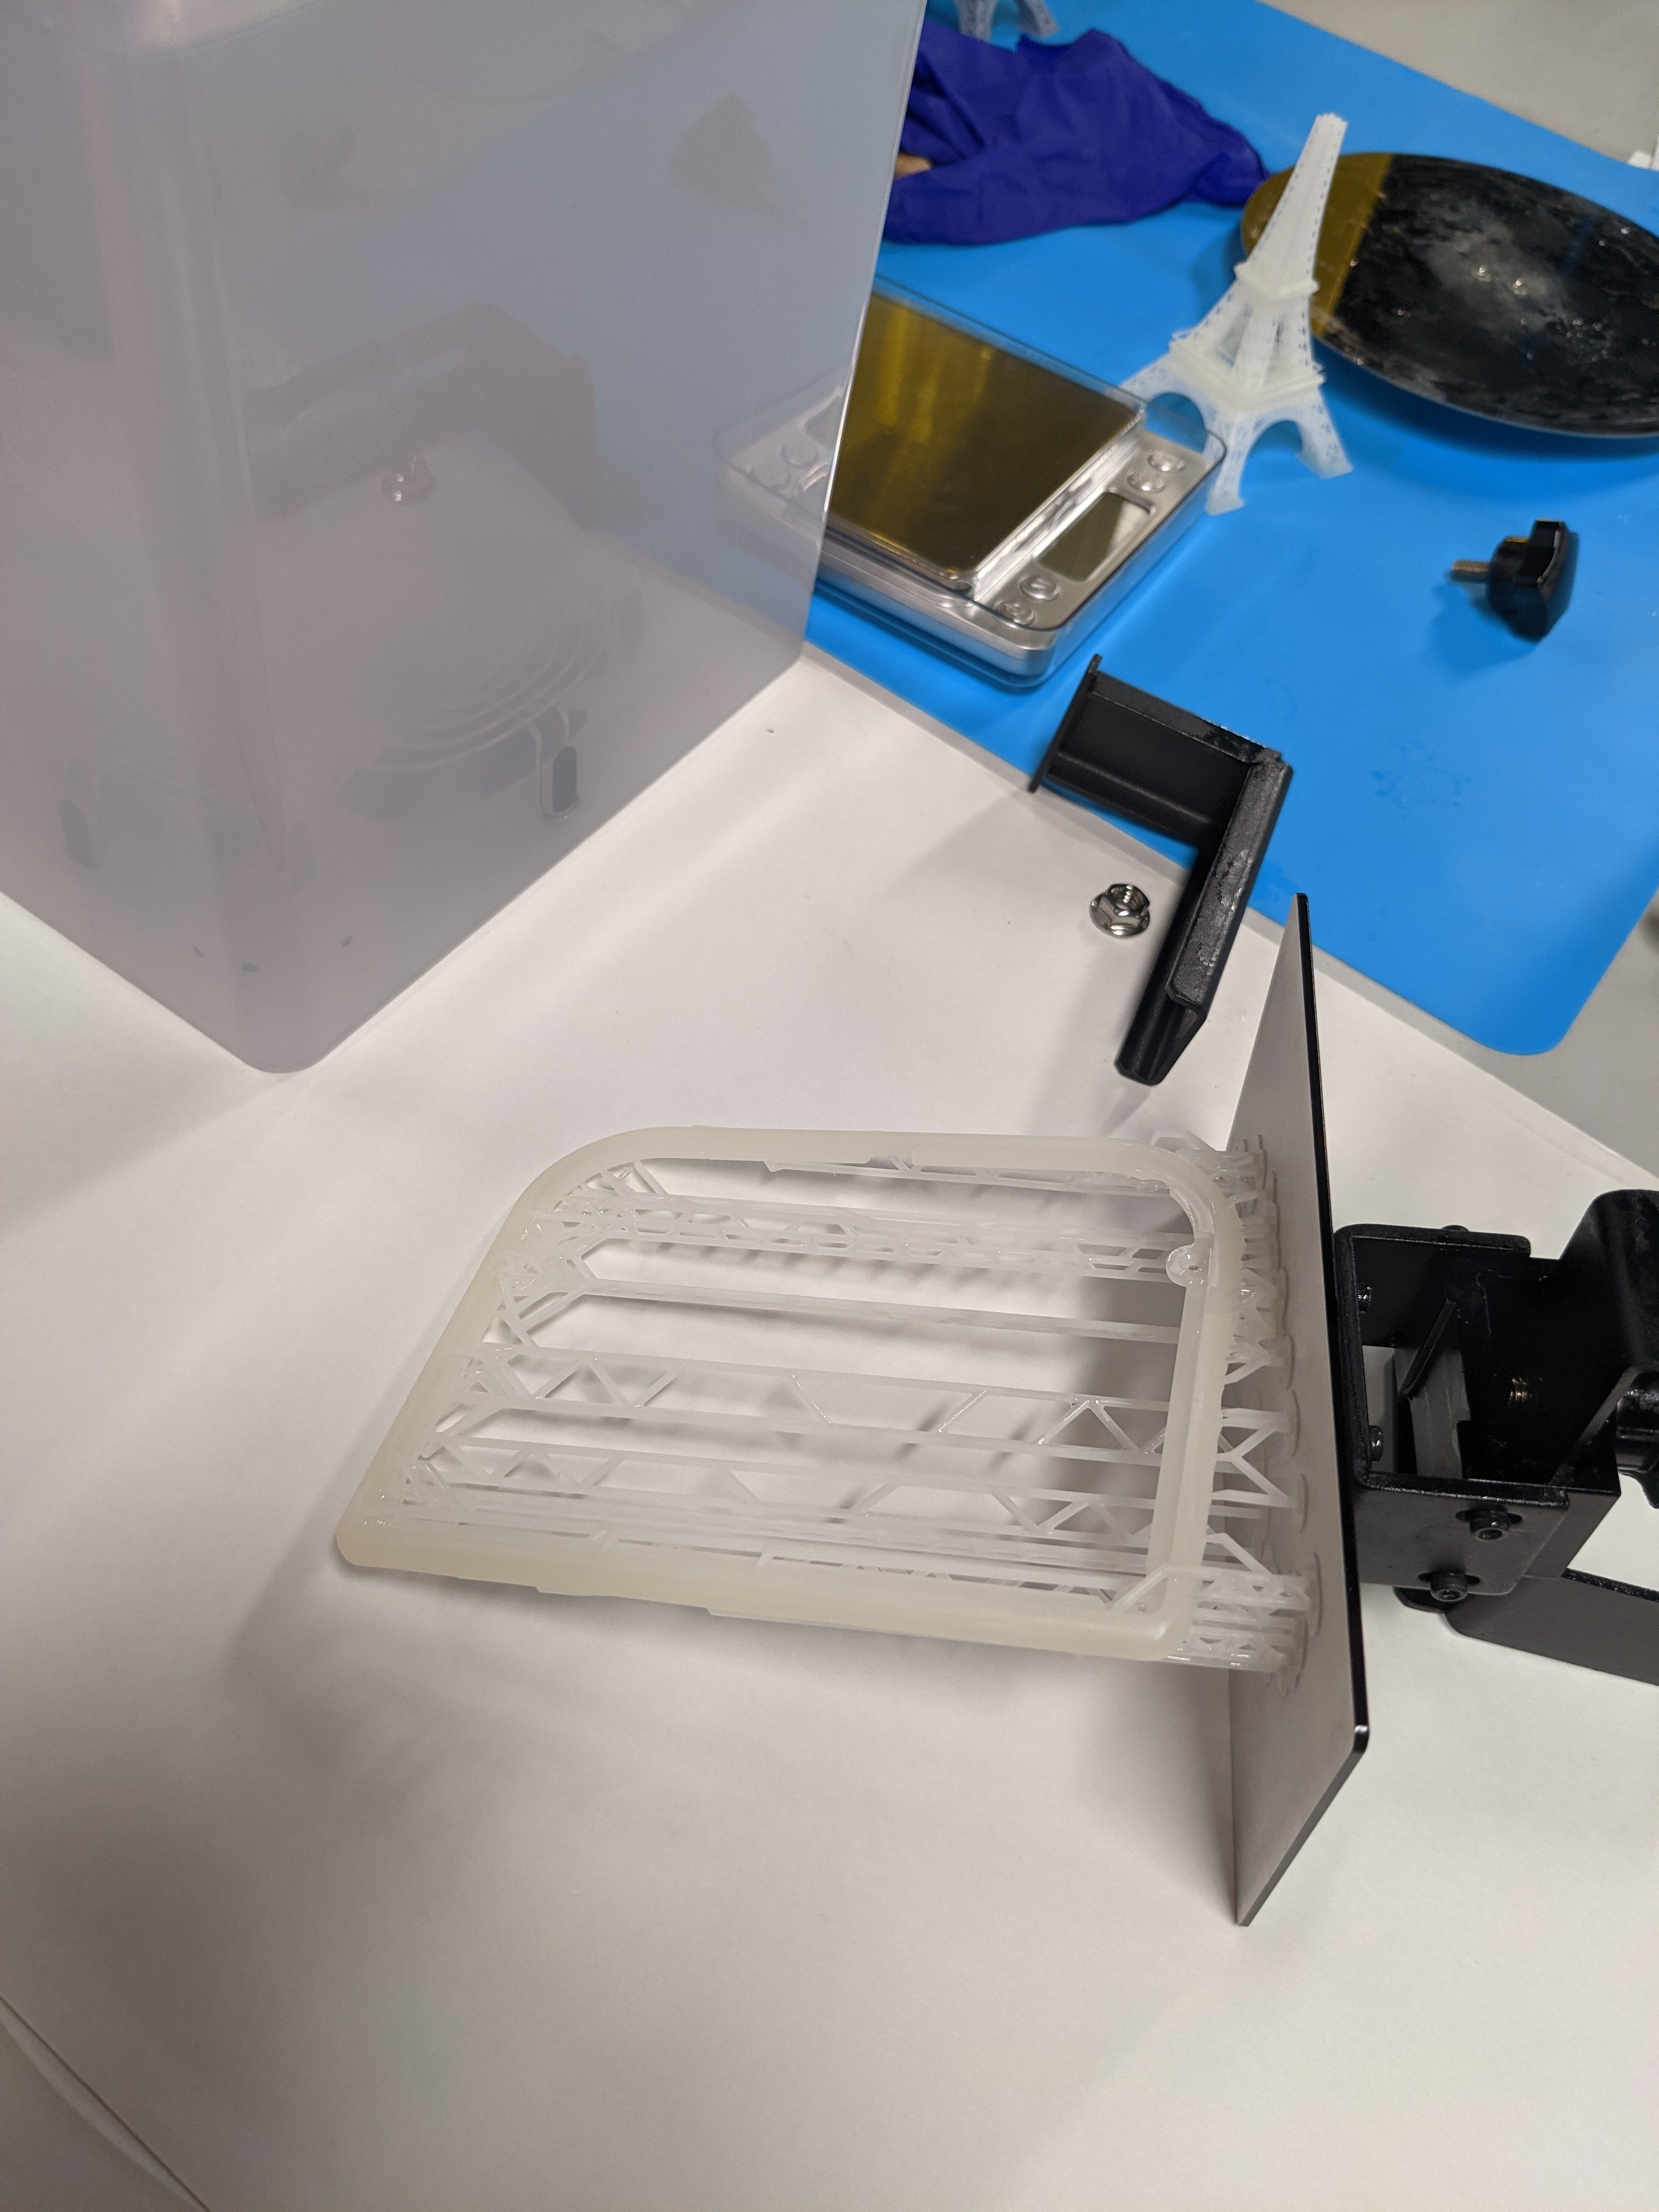
6 - Designing for manufacturability (DFM)
I wanted to make the design manufacturable for scale from the get go. But at the same time I wanted to make it possible to build the hardware with 3D printers. This would also help me build initial models and prototypes with 3D printers before making investment in tooling. However, I did not want to impose too much constraint on the type of 3D print technology used. For example, the LED diffuser ring can be best 3D printed with SLA due to its translucent properties. I also wanted to design the parts such that manufacturing them at scale would entail low tooling fees by adopting a low cost manufacturing method.