 Sebastian
For a long time I wanted to build an SCPI-enabled thermometer to keep track of the ambient temperature in my small lab. The list of requirements was fairly short:
- Reasonably high precision (Sensor with <= 0.3°C max. uncertainty)
- Power and SCPI communication over USB
- Compact enclosure with a display
Design
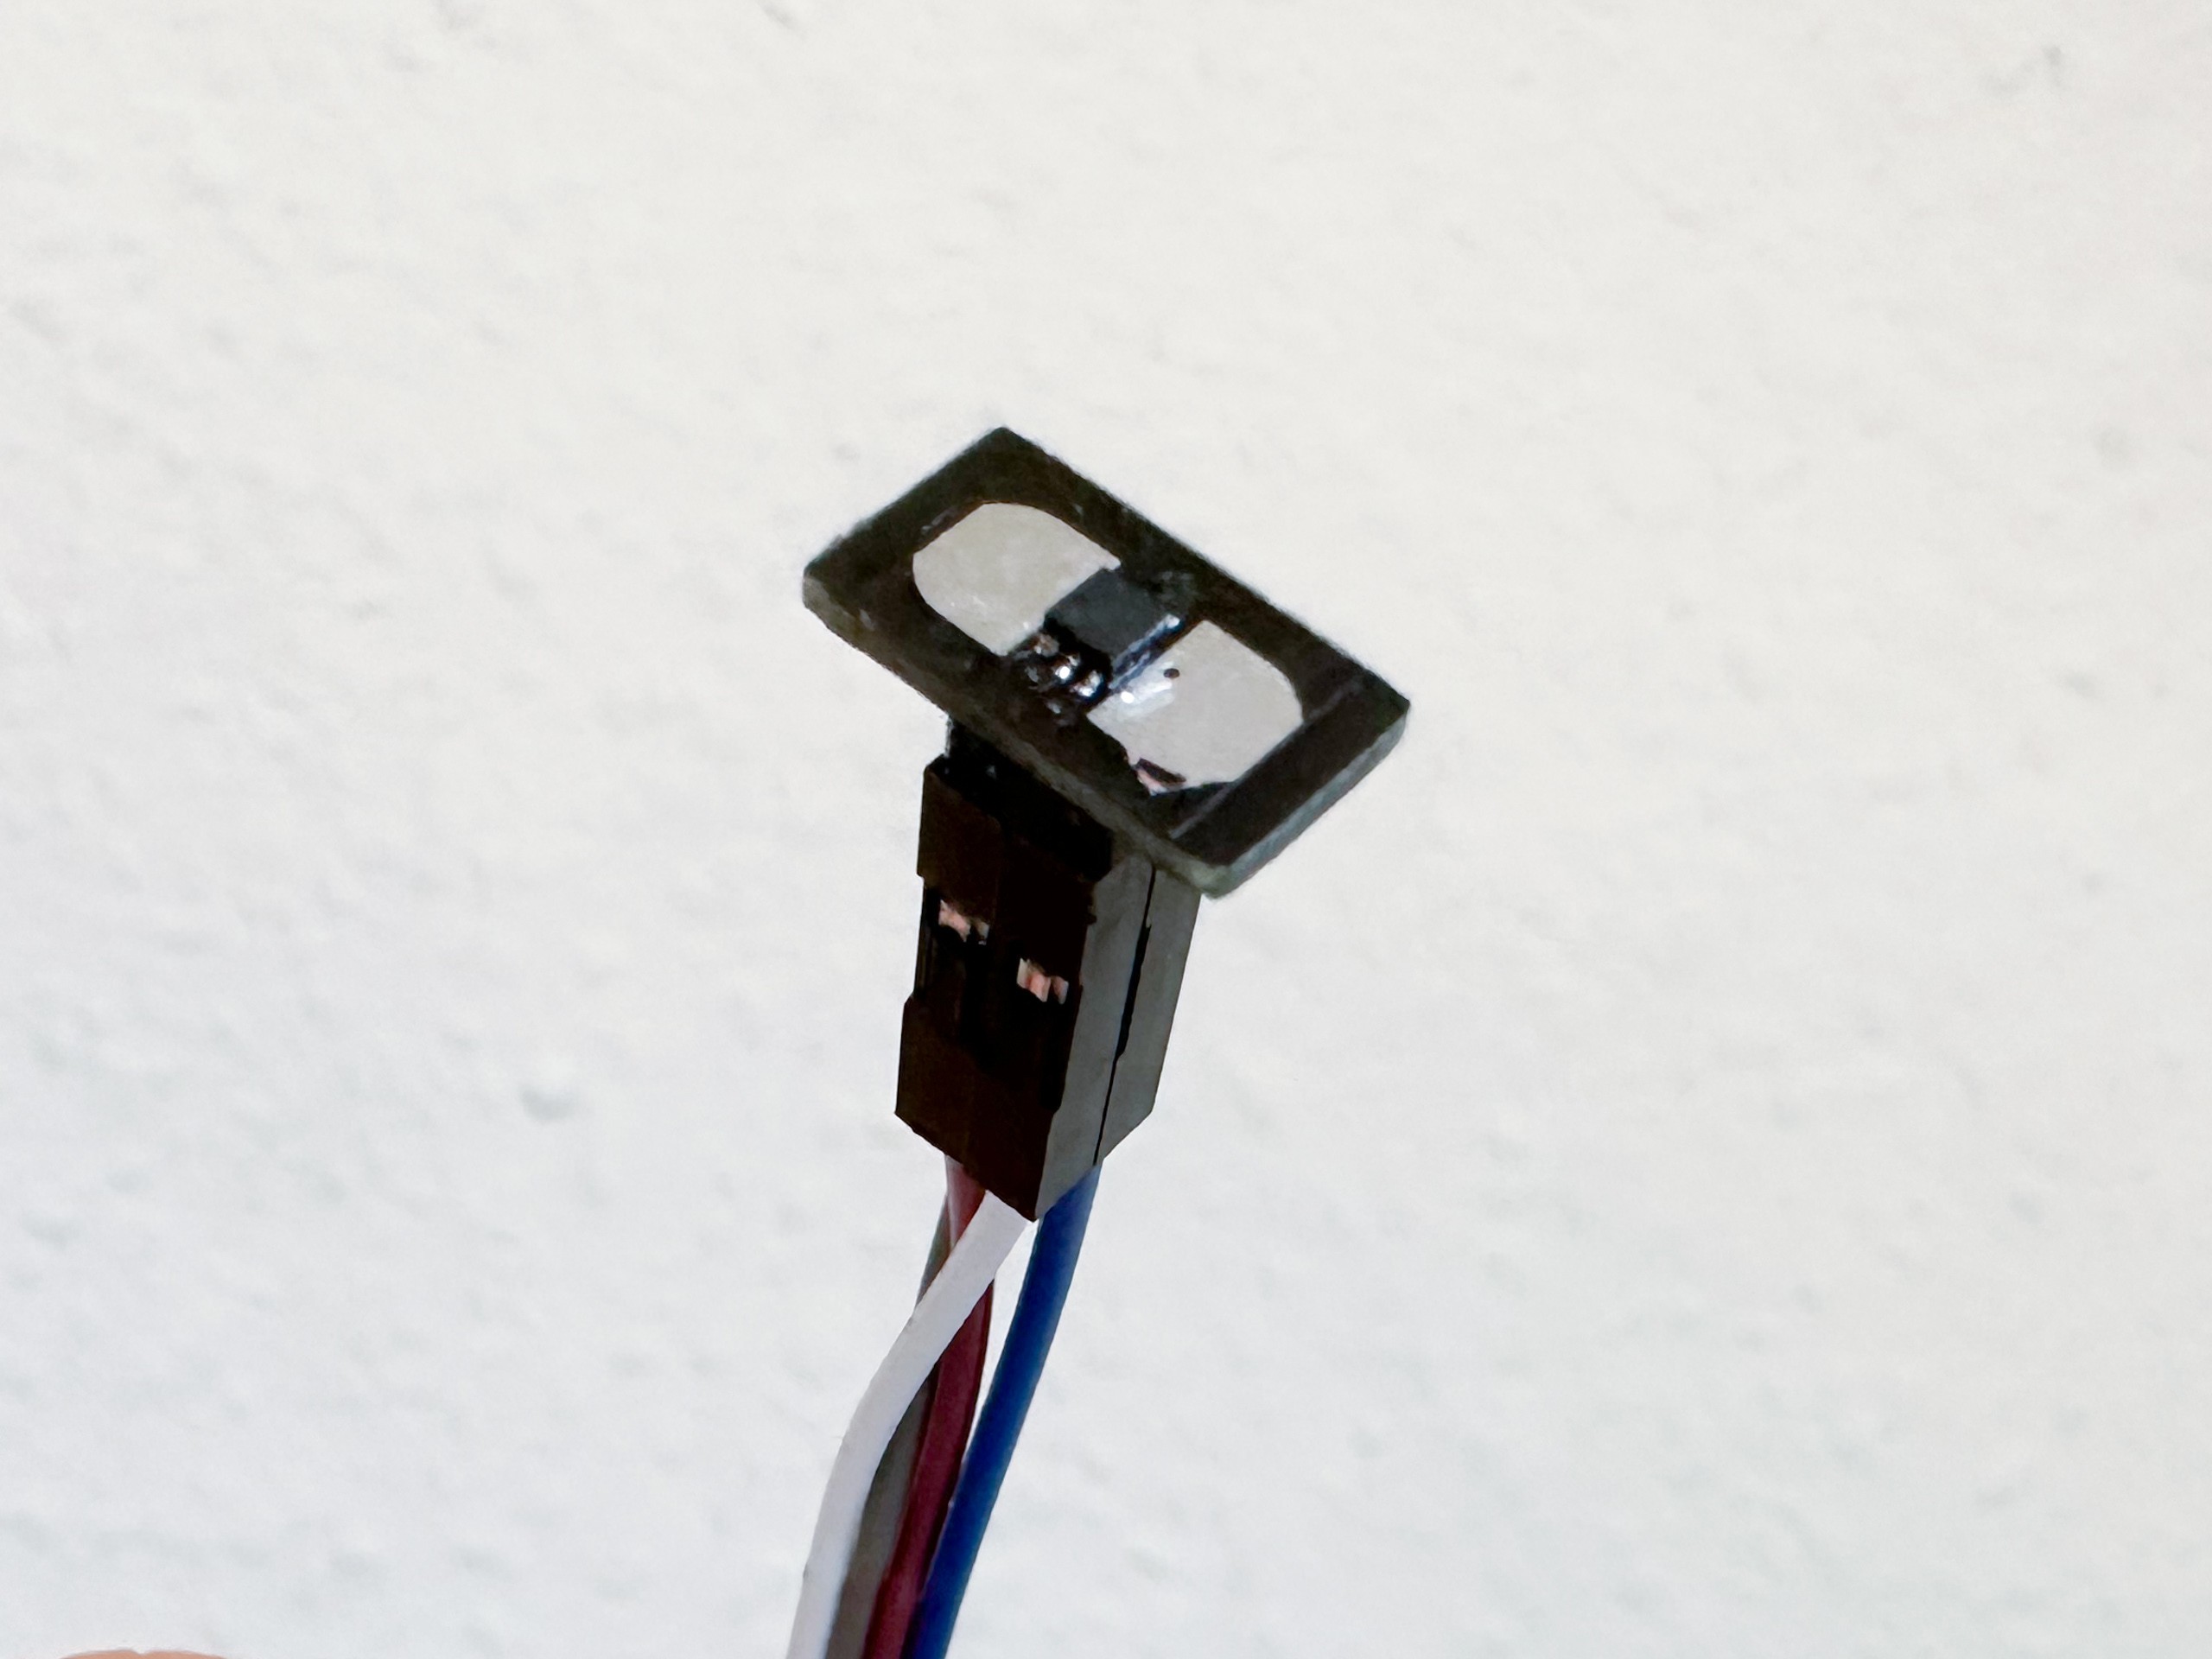
After researching temperature sensors I chose a Texas Instruments TMP117M temperature sensor with quite impressive specs. With an accuracy of ±0.1°C (max.) between 25°C to 50°C and ±0.05°C (typ.) between 0°C and 70°C it is much more than good enough for my purpose, but why not overspec the sensor a bit? Because of the tiny package (WSON6, 2mm x 2mm) I was a bit nervous. As it later turned out, soldering the IC using a hot air soldering station was a bit more time consuming than e. g. a typical SOIC package (preparation), but not that difficult.
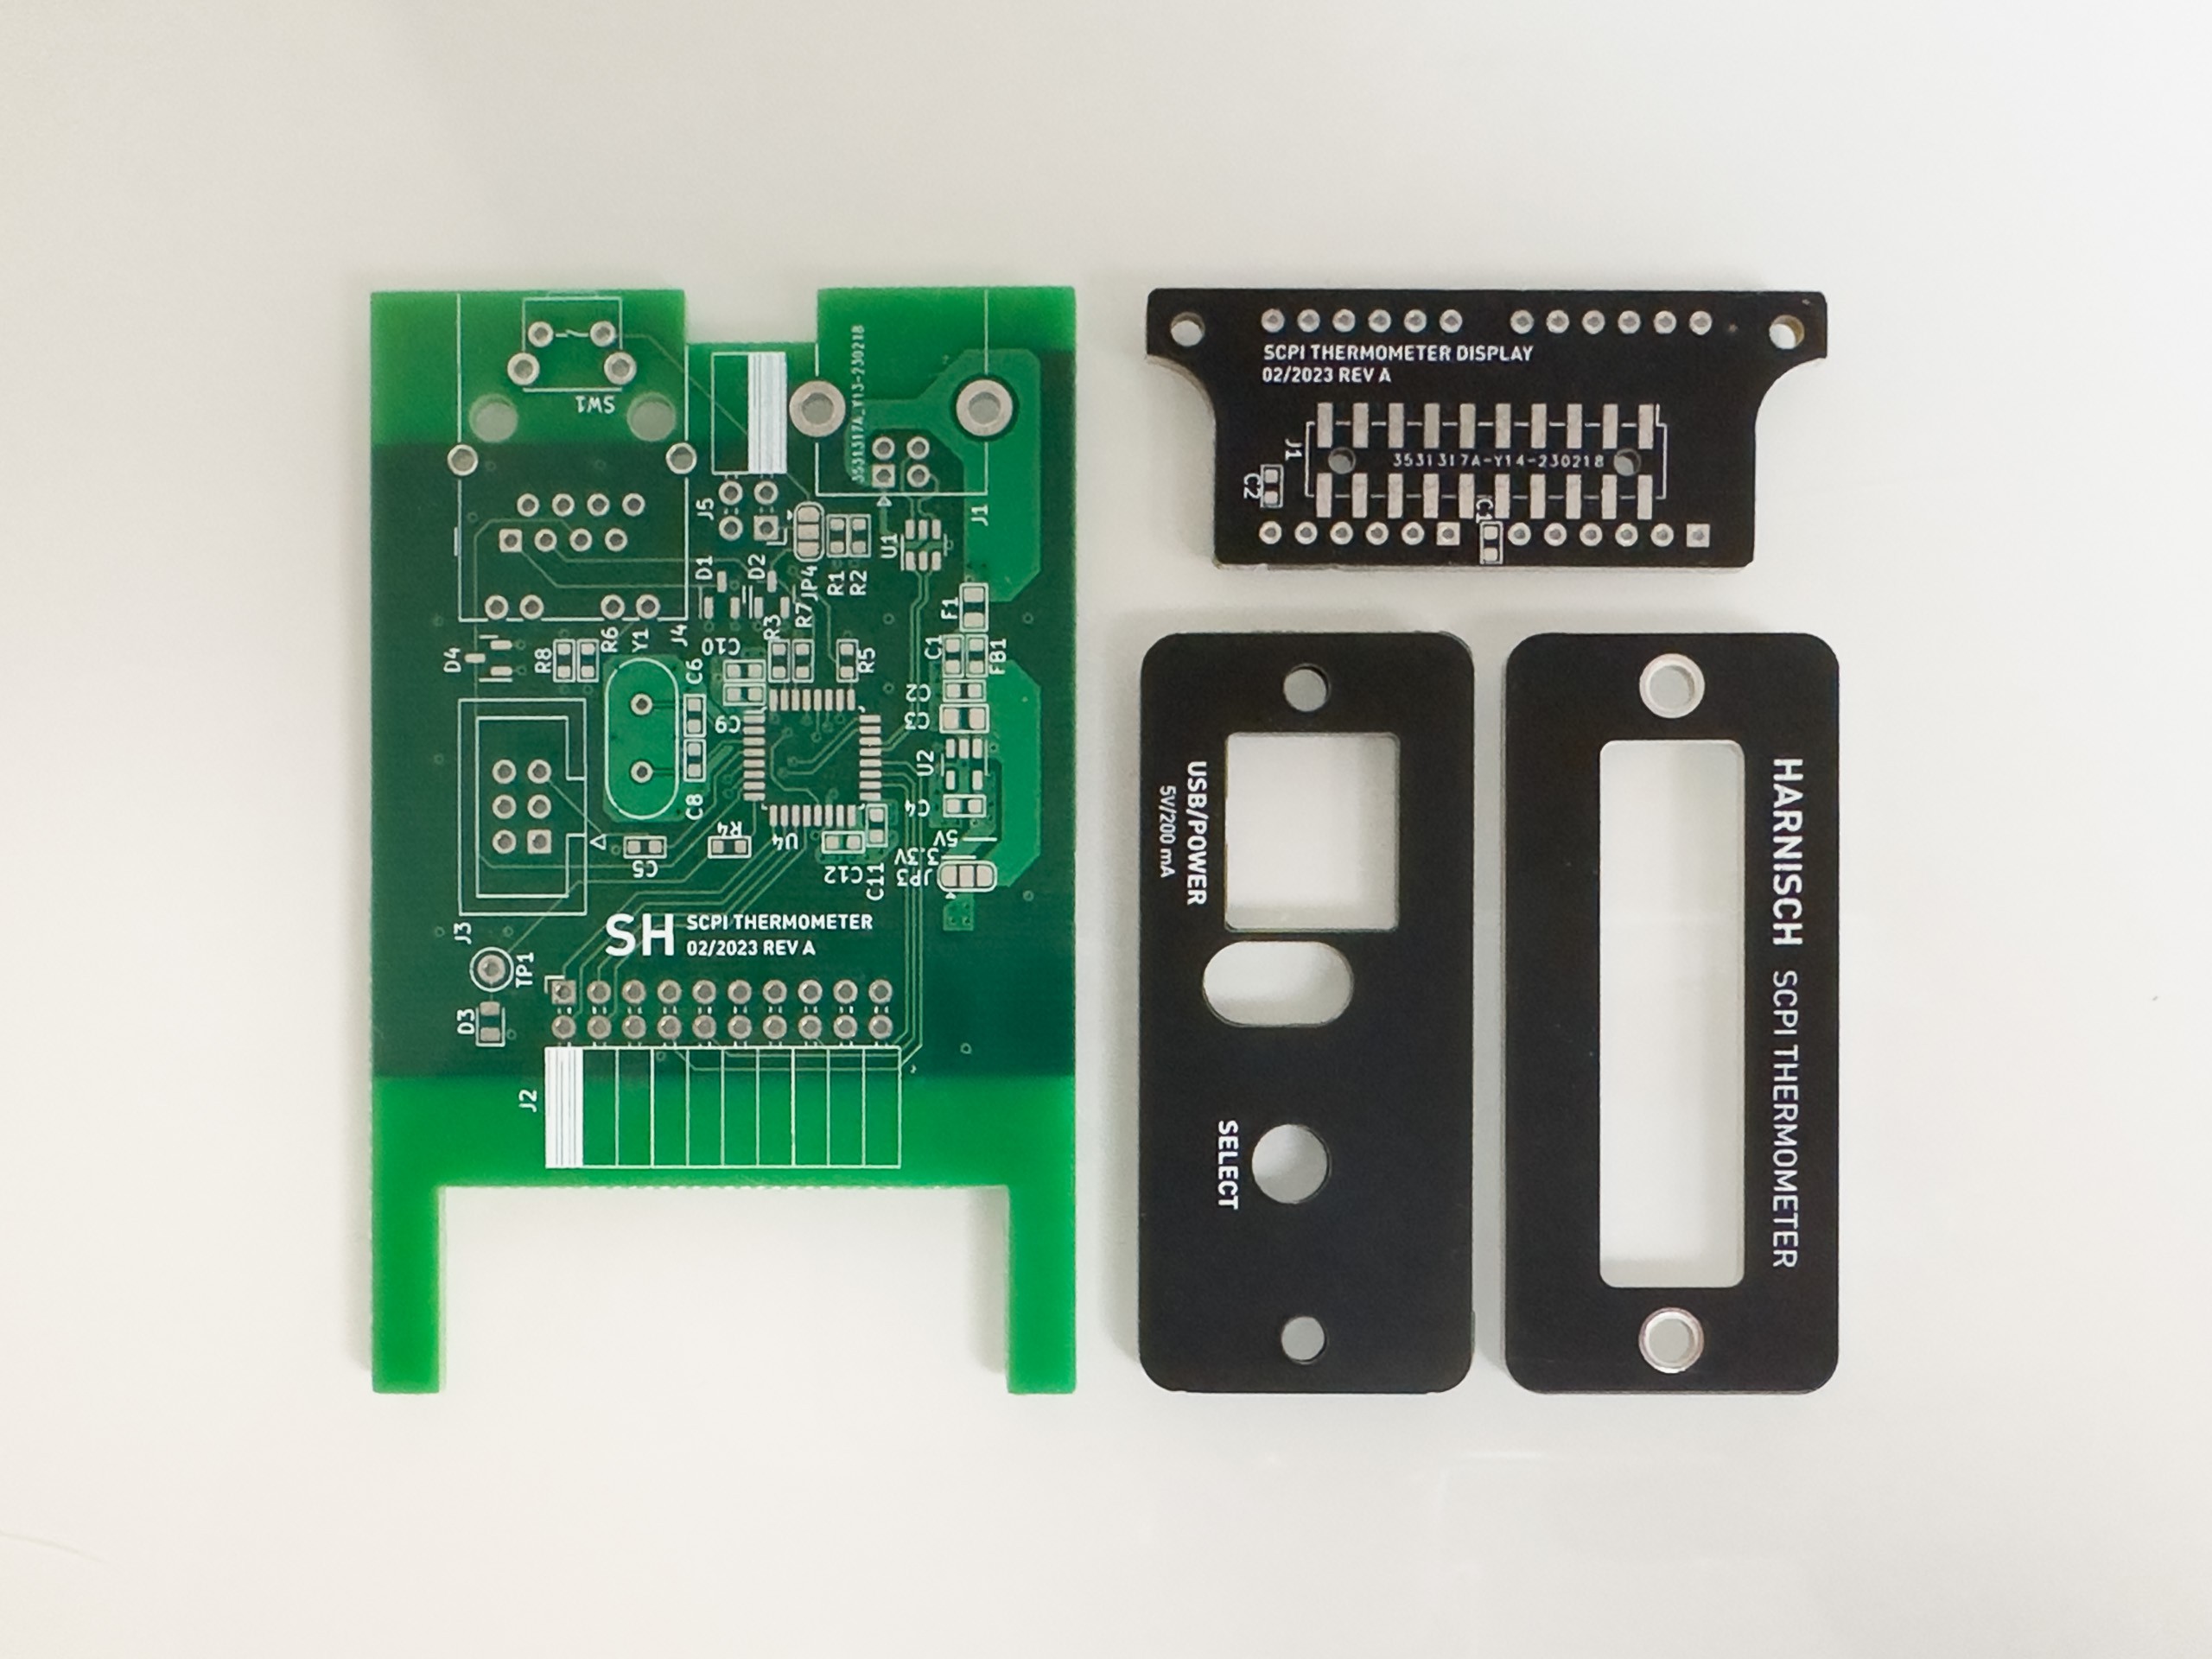
A STM32G441 microcontroller with an USB device peripheral runs FreeRTOS, provides the SCPI interface and processes the measurements. That’s a bit overkill too, but again: Why not?
I couldn’t resist using two “vintage” HPDL1414 alphanumeric displays, mounted on their own vertically mounted PCB. The deep red glow of the GaAsP-LEDs always puts a smile on my face – pictures often don’t do it justice. The issue with these though is power dissipation. If it wasn’t already necessary to position the temperature sensor far away from the electronics because of the fairly powerful microcontroller (didn't bother to use low power modes), it is now completely unavoidable. Therefore I decided to design a separate tiny pcb for the sensor in order to connect it to the main pcb via a cable. Initially I planned to connect the sensor via an Ethernet cable, but ultimately decided for a simpler prototype approach.
A single push button allows the user to toggle between different display modes: immediate, minimum, maximum, average, trigger info. And of course I had to add a buzzer. (The unused through holes of the Ethernet port footprint came in handy, because I didn't think of it at the time.)
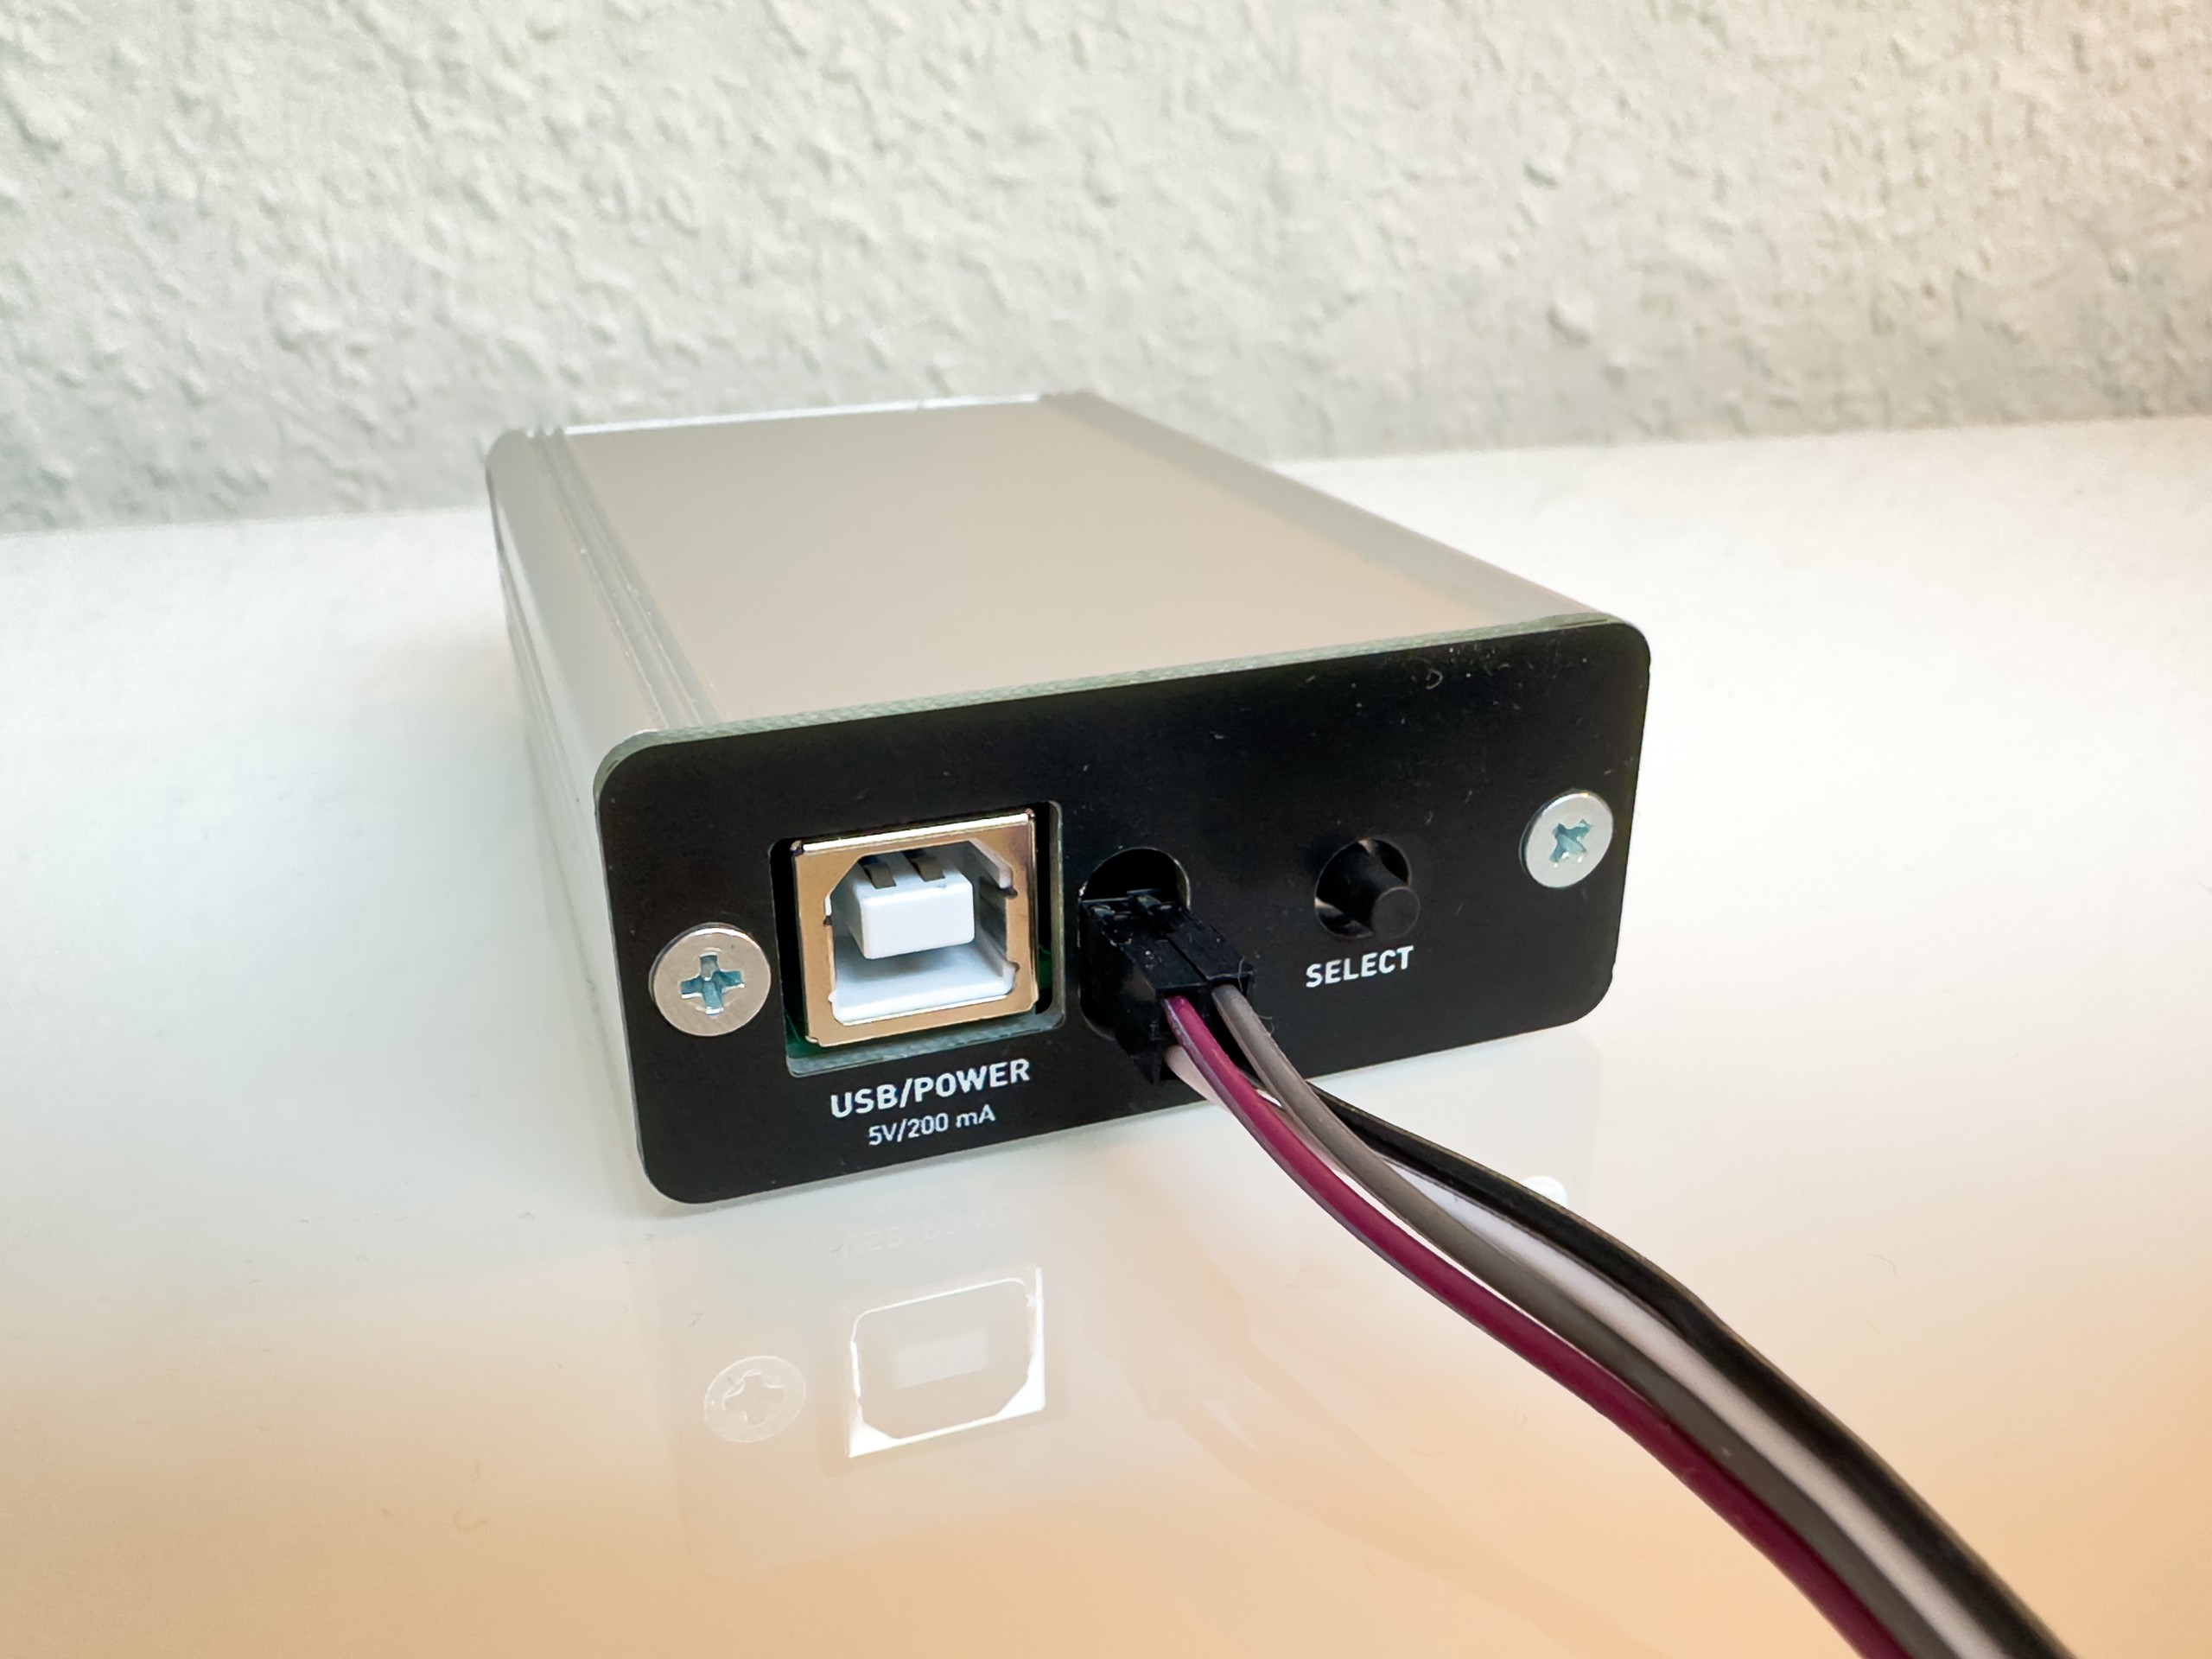
All components – except for the tiny sensor board – share an aluminum enclosure from Fischer Elektronik.
Software/SCPI interface
For the SCPI interface I studied the SCPI specification (1999) and took some inspiration from SCPI implementations found in DMMs (Agilent 34401A, Keithley DMM7500). Available subsystems include:
- ABORt
- CALCulate
- DISPlay
- FETCh
- INITiate
- MEASure
- READ
- SENSe
- SYSTem
- TRIGger
- UNIT
With these commands it’s fairly easy to set up the device and data log to one’s heart’s content.

In the meantime I built a second unit. When bringing the both sensors in close proximity (not thermally coupled), the sensors agree reasonably well – the values differ by less than 0.07°C. Nice!
There are some things that could be improved, but for now the thermometers work perfectly fine.

 Jan
Jan
 Vishnu Mohanan
 tiefpunkt
 ToniTheAxe