 Red Tuka
Idea:
With a homeassistant running and multiple esphome sensors measuring temperature in different rooms, I naturrally wanted to controll them.

Dumb State of Househeating
To understand the benefit of this device we first have to look at a normal underfloor heating system, which is very common in single family houses in Germany and other european countries.
A central heater running on fossile fuels is heating water, which is distributes with a high efficency water pump. The hot (30-60°C) water is distributed with pipes.
The heating system is normally ladder shaped. Meaning the rooms are the steps and the distribution lines are the vertical rods.
For individual room control, a manifold is typically built in the hallway where plastic pipes from each room are connected.
Why there are so many valves you ask? The length of a heating tube is limited. To get enough power into ones rooms, you have to do multiple spirals in bigger rooms. Depending on multiple factors but around 10 m² with 70m tube (max length).
Therefore the manifolds are avaiable with up to 12 tube connections.
Then each room gets a dumb bimetallic locally adjustable switch, which turns on valves. (white cylinders in the picture below).
If you have multiple stories you would have a manifold on each floor.
This is only controlled by the fixed setpoint and a lower overall water temperature in the night.
Frequent adjustments to the temperature settings can be inconvenient, whether it's to account for short absences during the day or unexpected circumstances requiring extended periods away from home.
TL;DR
Most heating is only controlled locally on a fixed temperature and is very dumb and wasteful.
Chatgpt-TLDR:
The biggest shortcomings of traditional underfloor heating are the lack of centralized control, inability to adapt to varying temperature needs in different rooms, and inefficient use of energy. - hell yeah


Hardware:
Main components are:
- ESP8266 based module
- DCDC-Stepdown Module
- MCP23017 I2C io-expander
- NXV55UNR Logic-Level Mosfet
- DS18b12 Temperature sensor
Optional components:
- I2C Display
- Terminal Blocks
- Switch
- State LEDs
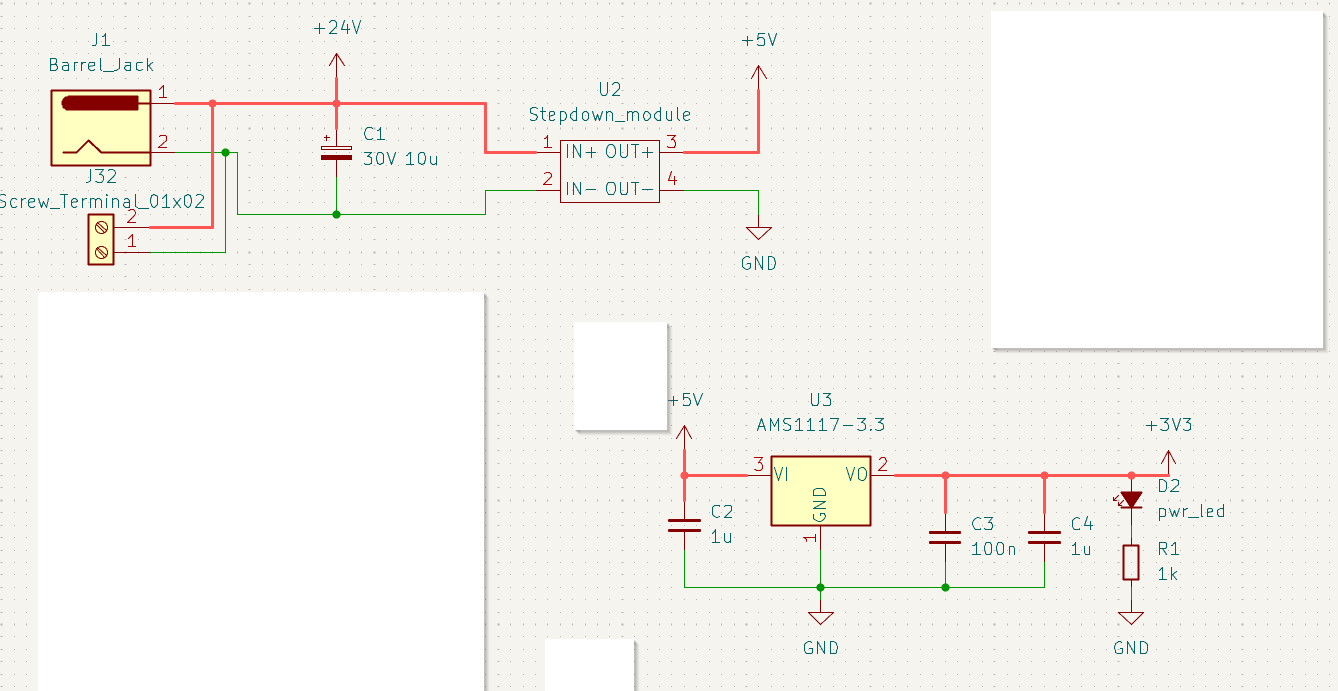
Powering the board
The controller takes a voltage up to 30V on the barrel jack input and converts it to 5V with the stepdown and 3.3V with a LDO.
As I was unsure about the aliexpres dcdc module, so I added a 3.3V LDO in front of the MCU with a power LED.
Control it all
The board is fitted with an esp-12 module sporting the esp8266 in a convinient an cost-effective module.
Necessary I/Os for reflashing are broken out and added a reset and boot button. So you can recovery from most software fus.
The main idea should be to flash it over-the-air with esphome, which is running on your homeassistant.
The MCU has some spare pins, which are avaiable for any shenanigans.
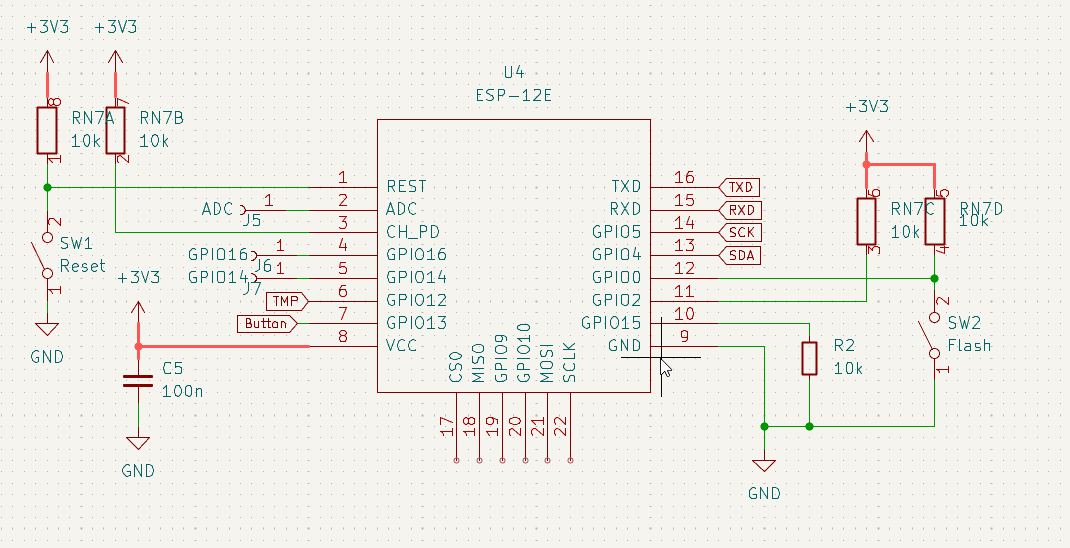
Peripherals
Mosfet channels
The main feature are the 12 channel Mosfets fitted with NXV55UNR, choosen for its low logic level performance and price. The pins are extended with a i2c io expander MCP23017, which also has four spare pins broken out. These can be used as inputs or outputs.
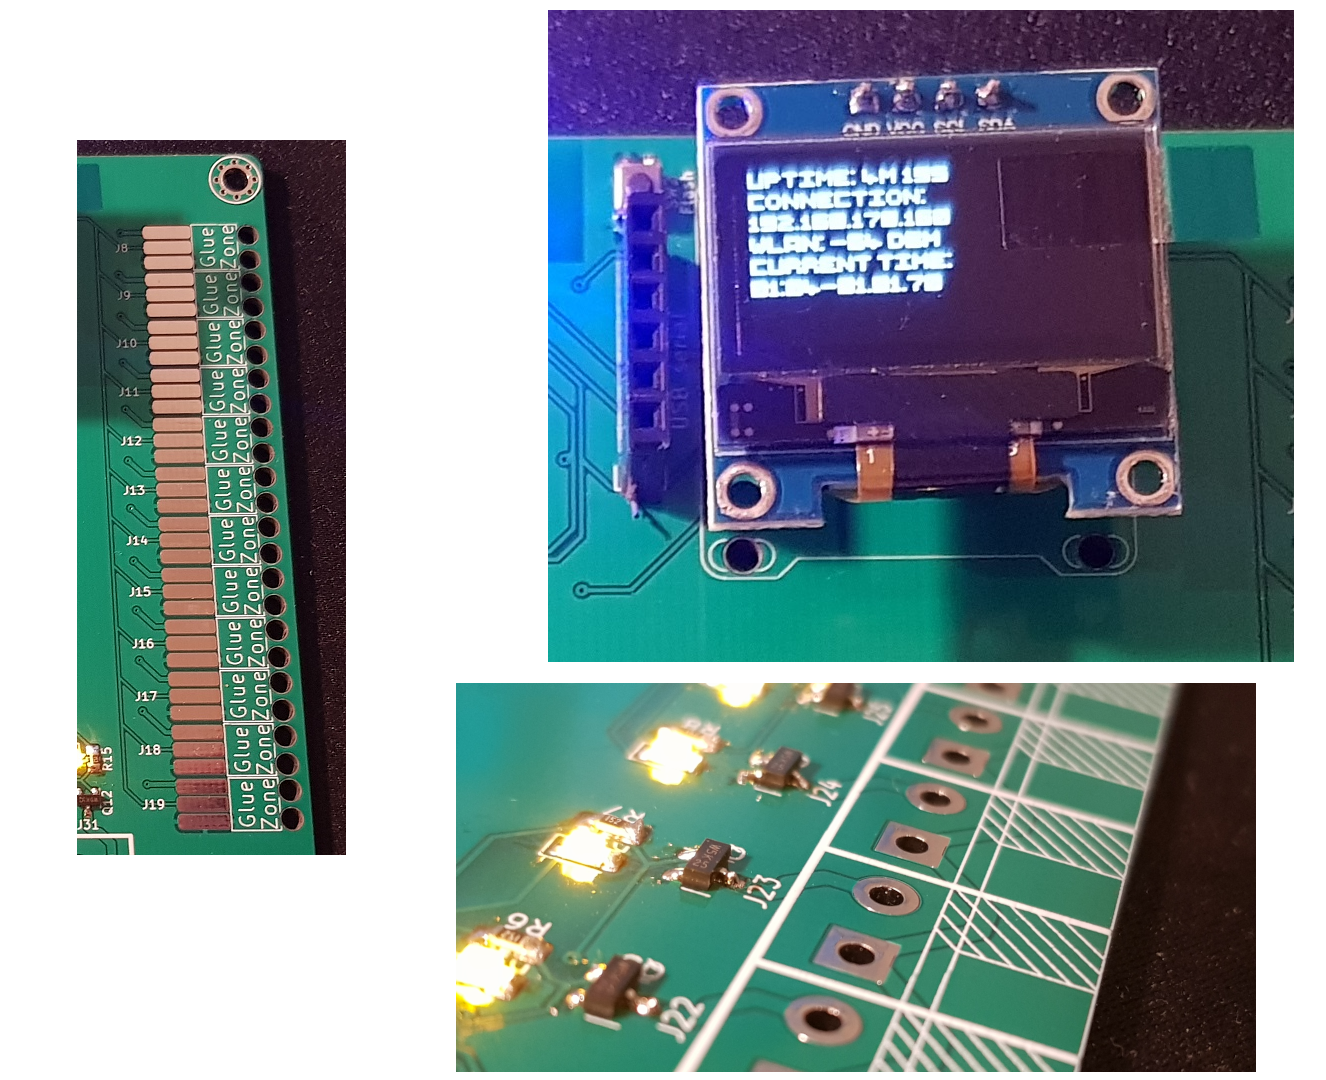
OLED
A simple i2c Oled module can be fitted for testing and debugging. Later it would life in the wall. Could be made visible with some cables, if you are so inclined.
Solderpads for temperature sensors
The revision 2 got solder pads with dedicated glue are to fit ds18b12's three wires. As you can buy ready made waterproof ds18b12 sensors for <1$ now. Just solder them on and make a big old sensor packed wip to spank those wasteful heatpipes.
Button!
Just a button for general purpose. I was using it to turn all channels on for in circuit debugging, as I was testing the maximal load of the valves.
Future challenges and ideas
As efficient heating becomes more and more necessary in order to reduce climate change, the whole system "heating"...
Read more »
 Thomas
 Mild Lee Interested
 Gonzho