 Beko Pharm
Demo playing Elite Dangerous in early 2022:
Another with all the [glorious?] clicky button sounds:
And the same but running with X4: Foundations (enable subtitles!):
:)
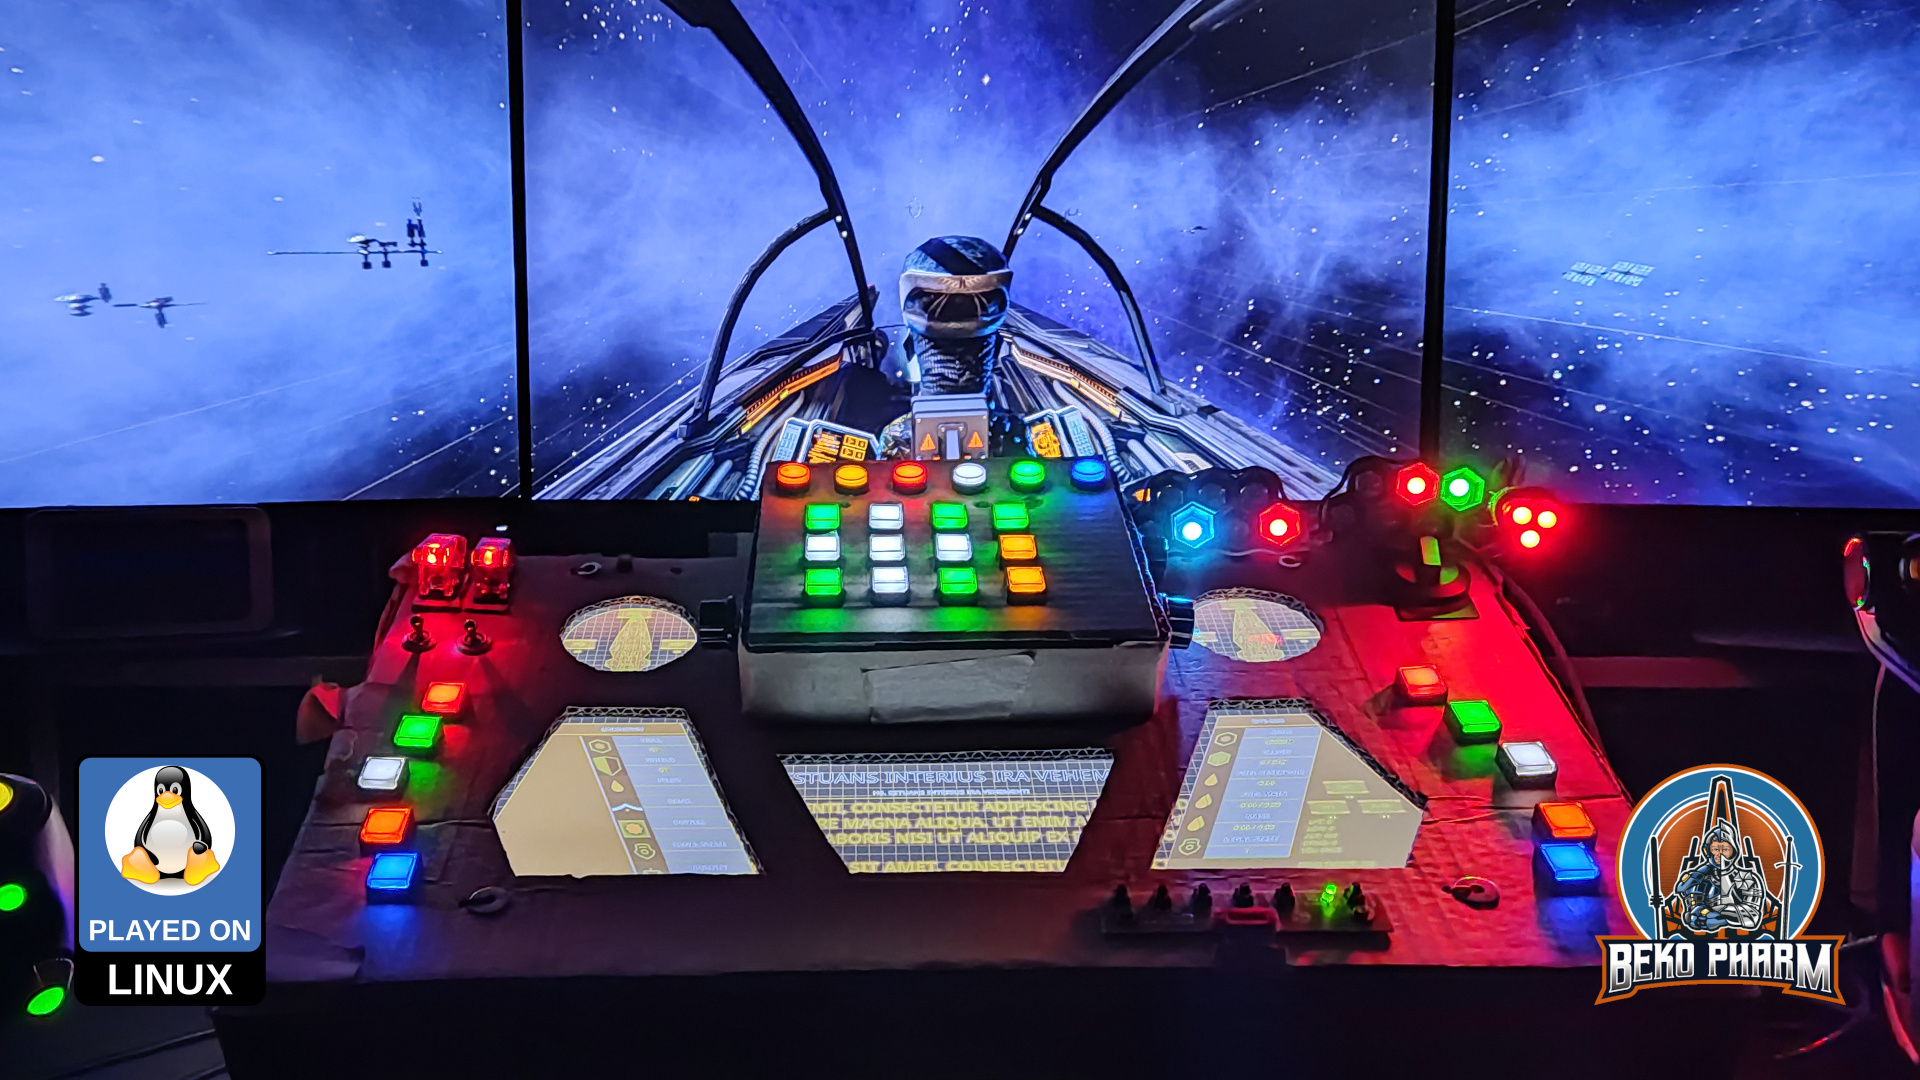
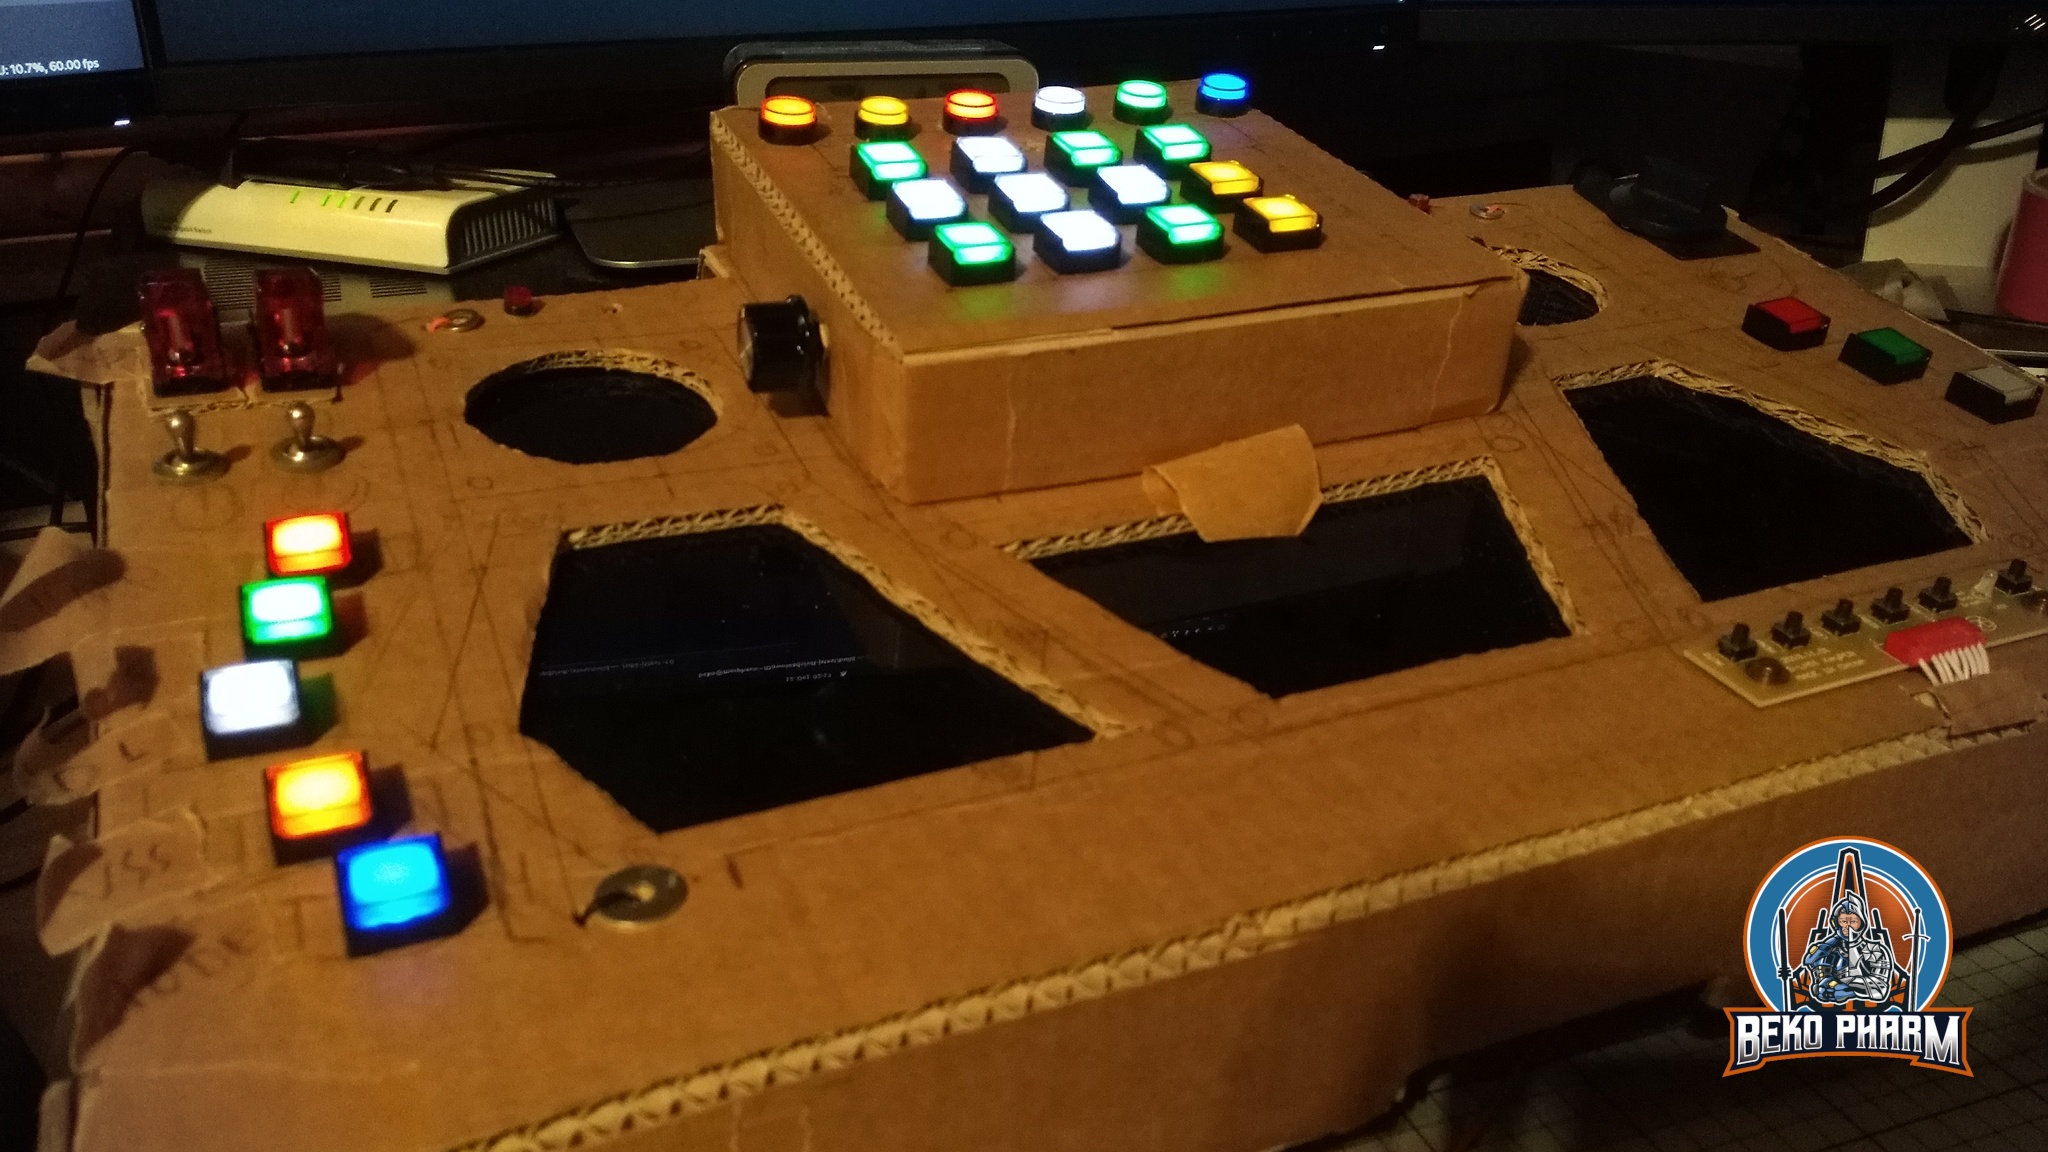
A glorified DIY joystick controller with an LCD ("MFDs") and plenty of RGB.
Already have an account? Log in.
To make the experience fit your profile, pick a username and tell us what interests you.
Demo playing Elite Dangerous in early 2022:
Another with all the [glorious?] clicky button sounds:
And the same but running with X4: Foundations (enable subtitles!):
:)
I was really happy with version 1 and yet, in the end I fell into the same trap as most of the Sci-Fi UI designers in PC games and movies do. All those “little” displays looked great, I had my hexagonal status indicators (nothing says Sci-Fi more like hexagons) but it was not easy to bring any meaningful content on the skewed “screen estate”. And skewed is a CSS literal here.
There was also the thing that I redesigned version 1 inside out so much by now, and moved it around a lot in the house, that it started to fall apart and had to be taped regularly. Yes, the phun of the Primary Buffer Panel falling off happened several times.
Version 2
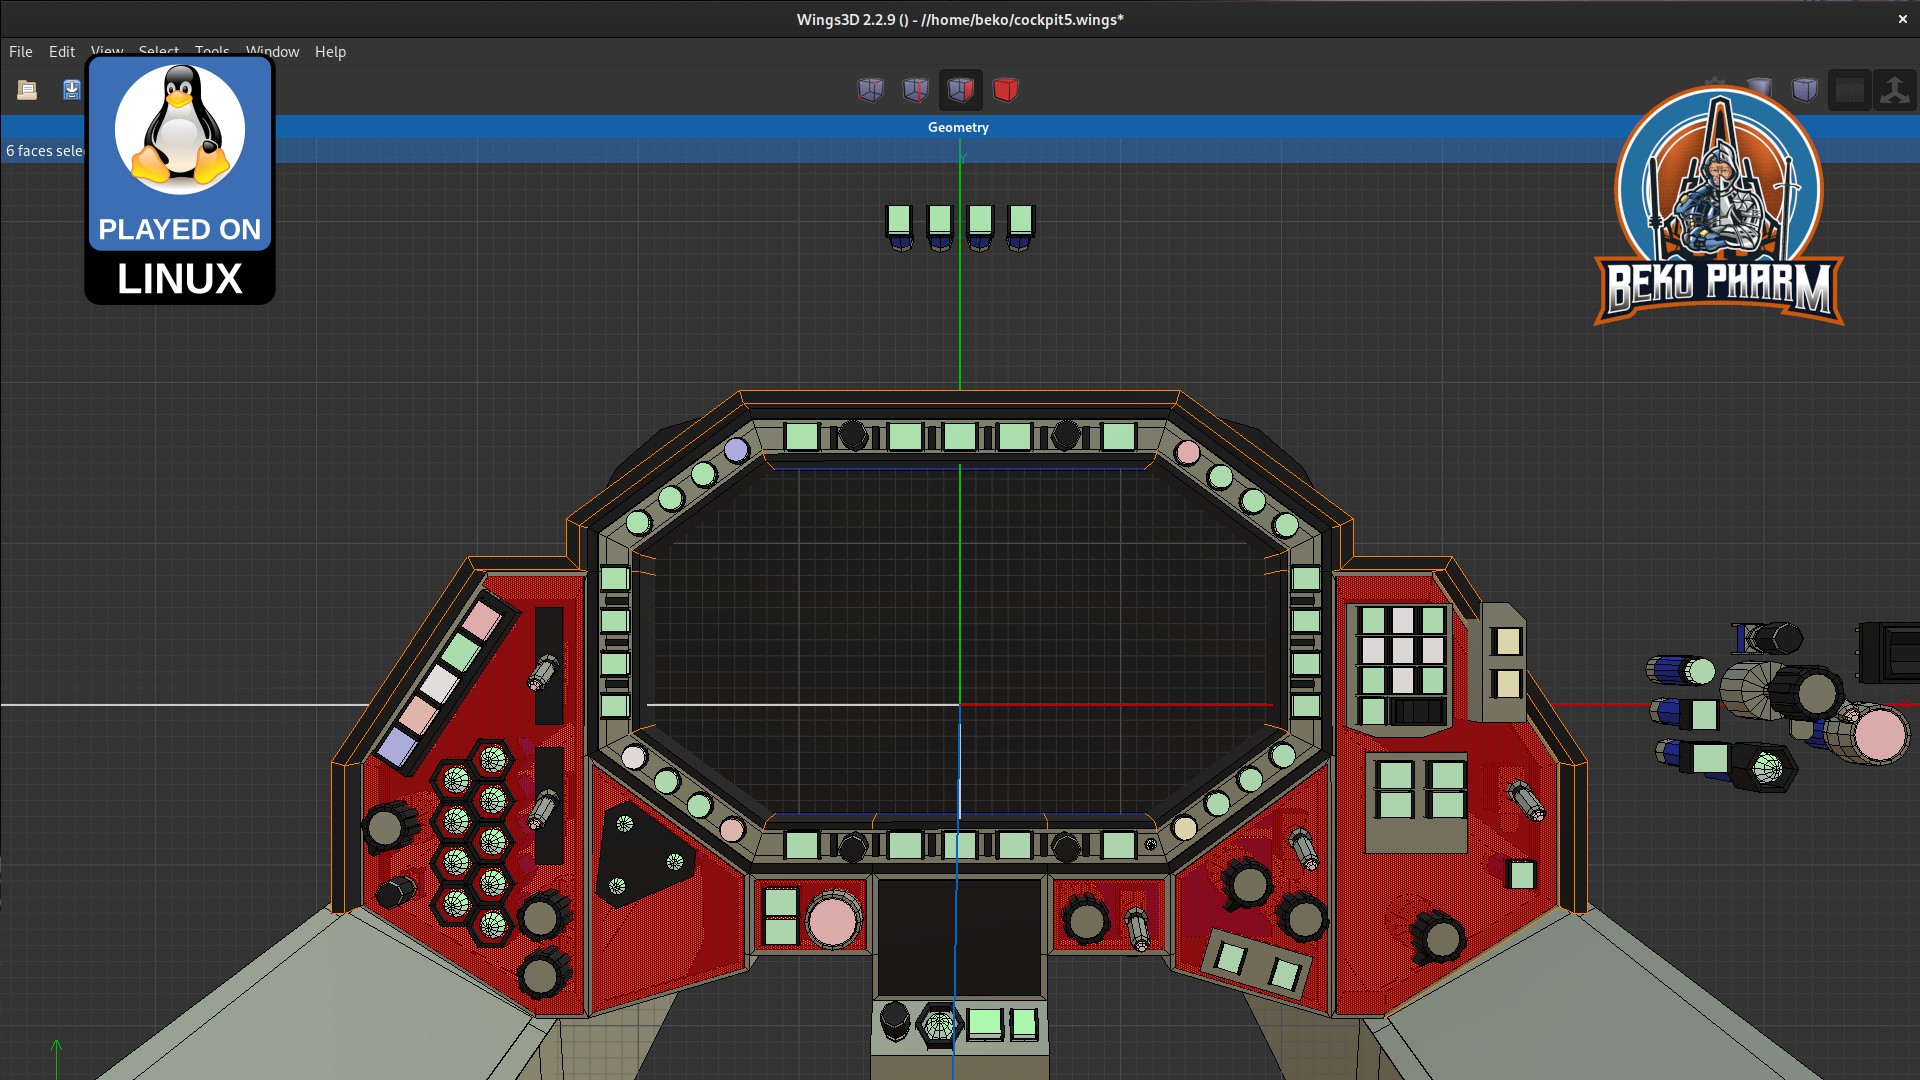
I eventually stumbled over a hand drawn design of a VF-1 Valkyrie cockpit of the Macross franchise while looking for inspiration for something with more “screen estate”.
I created a 3D model of the upper cockpit panel in Wings3D where I started to shove around buttons and switches to my liking while keeping close to the original layout. This way I ended up with way more buttons (can never have enough) and get more “screen estate” out of the box while still maintaining a sane layout that would not be in the way of operating something with it later.
Eventually I started to build version 2 but this time with wood: https://hackaday.io/project/192860-primary-buffer-panel-v2
I also started a website to document both builds in more detail: https://SimPit.dev
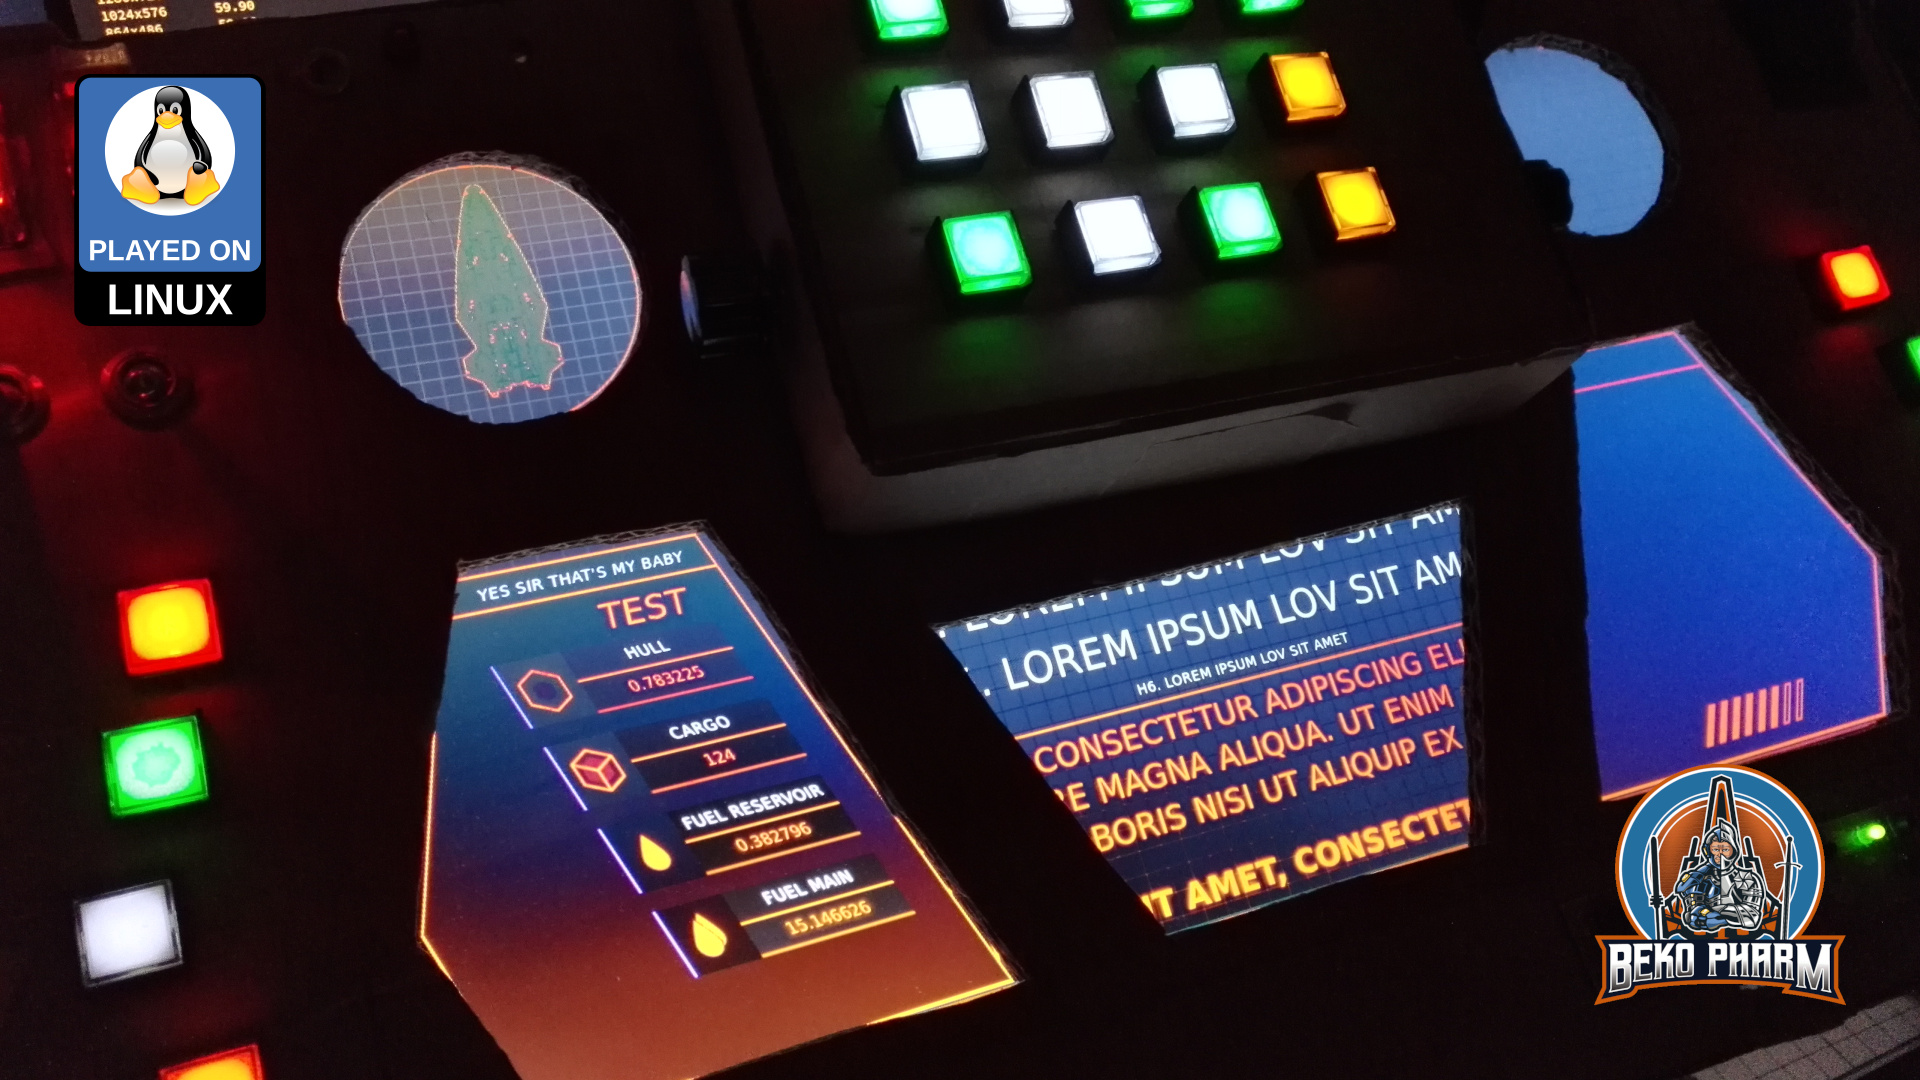
This is a CSS animation effect adding "scanlines" like on some old tv to my SimPit. There's also a tiny octagon grid effect laid over everything. I'm going for a VFD (vacuum fluorescent display) effect here like old electronics used to have it. It's hard to see from the phone camera but it looks absolutely rad in reallife (imho :D)
Low-Sci-Fi!
The UI is written in ReactJS using a demo of the yet unreleased ARWES framework (https://arwes.dev/, a futuristic Sci-Fi UI web framework).
The "scanlines" are a CSS effect I learned from http://augmented-ui.com/ (may only work with Chrome, YMMV).
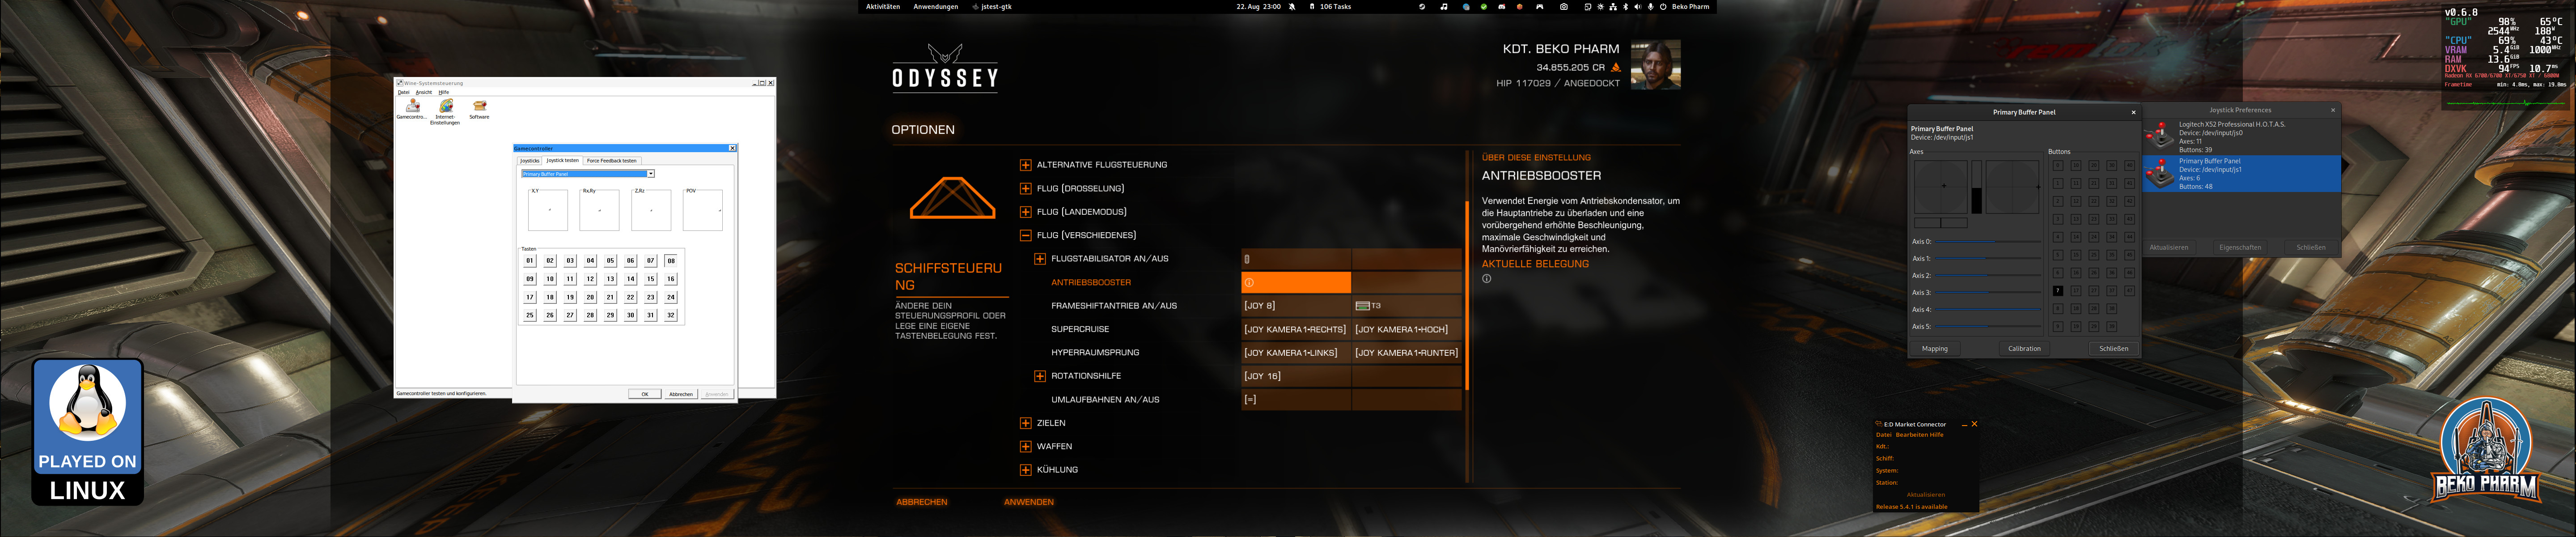
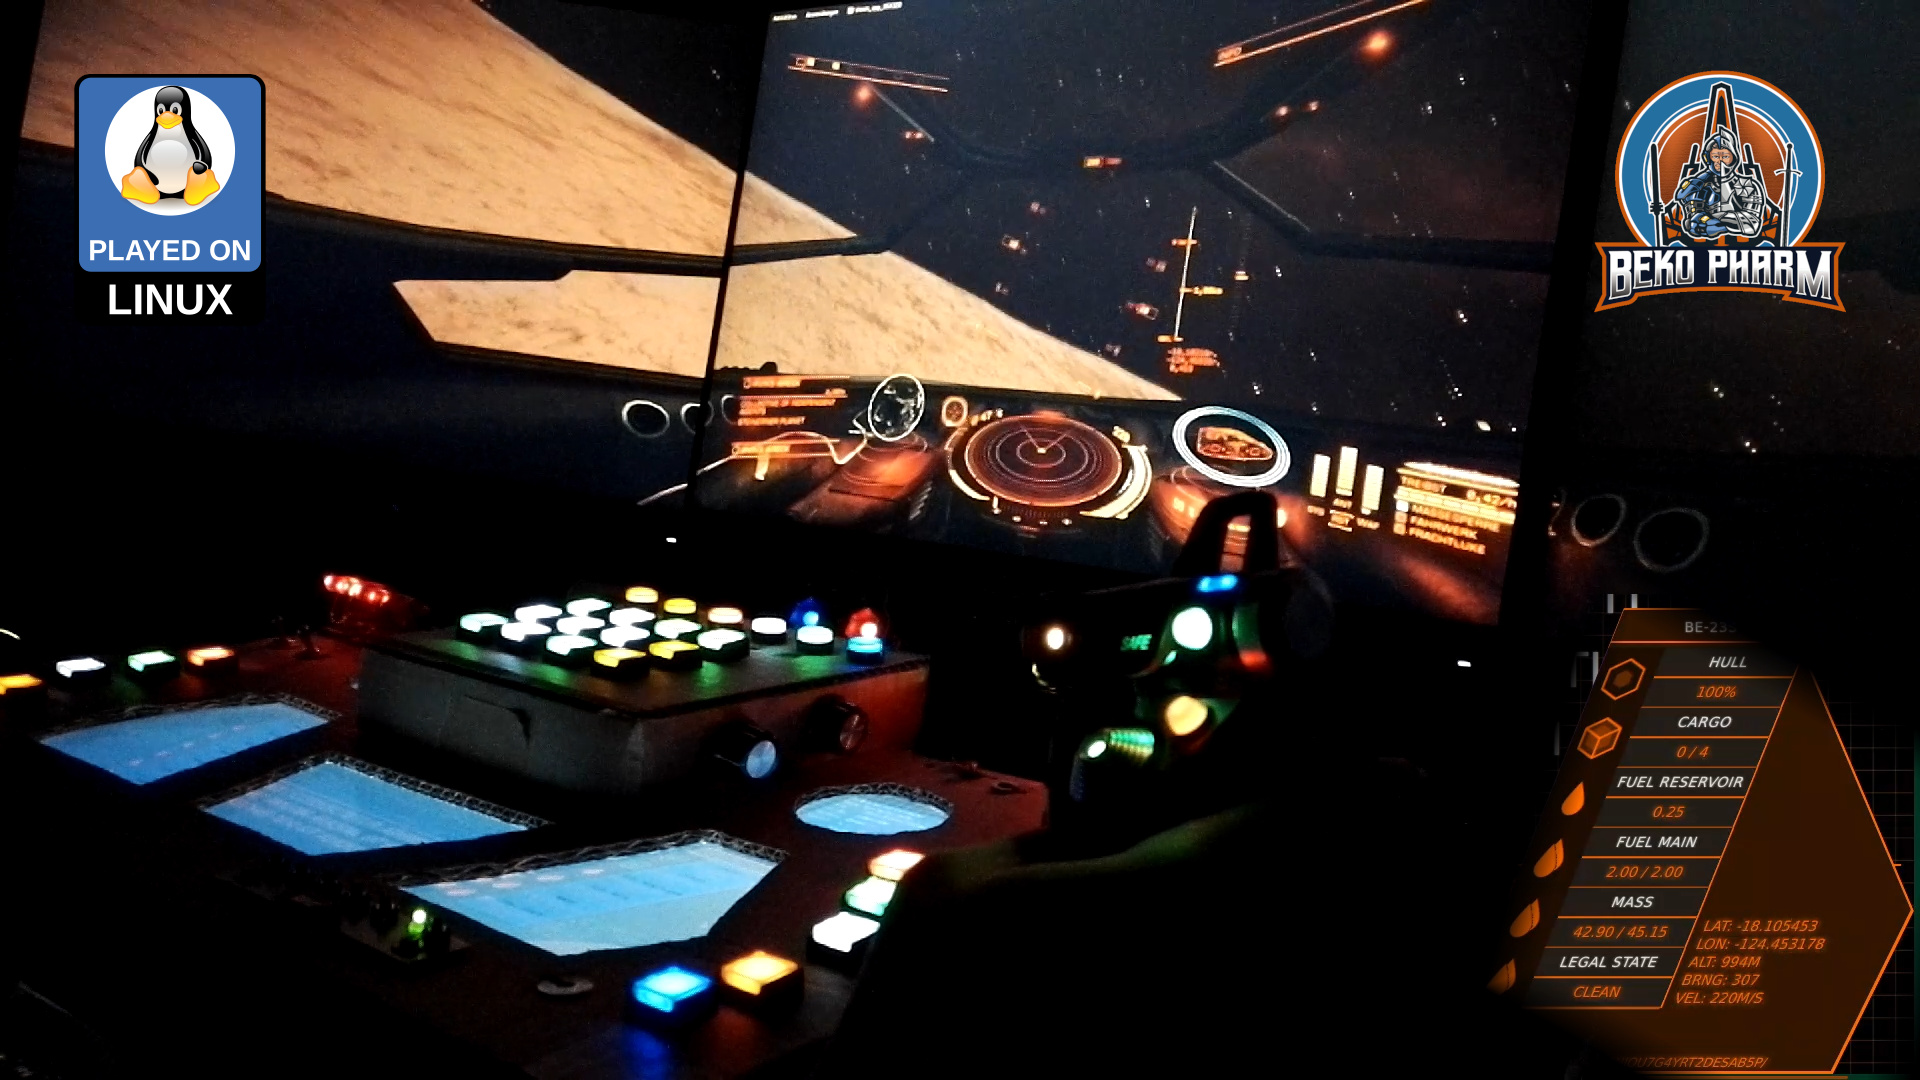
It's currently displaying data from Elite Dangerous (PC game) that it reads via Websockets from a Node-Red flow that does all the plumbing for all the games I play with this.
I hacked a mod for X4: Foundations to get ship telemetry and targeting data to my “Primary Buffer Panel” via a socket. This is a demonstration of my simulated cockpit made from cardboard on a budget usually used to play Elite Dangerous now also used for X4: Foundations. This is work in progress.
This is loosely based on the Python Pipe Server mod for X4 that is sadly Windows only using Named Pipes. I fixed that for Linux PC by side-loading the library LuaSocket and starting a socket server directly in X4. That’s right, the Python Server is simply not needed now and companion tools may directly connect to the socket. It’s a nice bonus that LuaSocket also allows a UDP or TCP server depending on how it is started. That was some piece of work though The very hacky attempt for this is at https://github.com/bekopharm/x4-projects/wiki/Quick-manual. I’m also still looking for testers so if you’re interested get in touch!
So you _still_ think you can’t space pew pew on Linux PC? Think again. I do it all the time: https://beko.famkos.net/2021/10/16/space-pew-pew-on-linux-pc/
Originally posted at https://beko.famkos.net/2023/04/04/running-x4-foundations-with-my-simpit/
27. March 2022
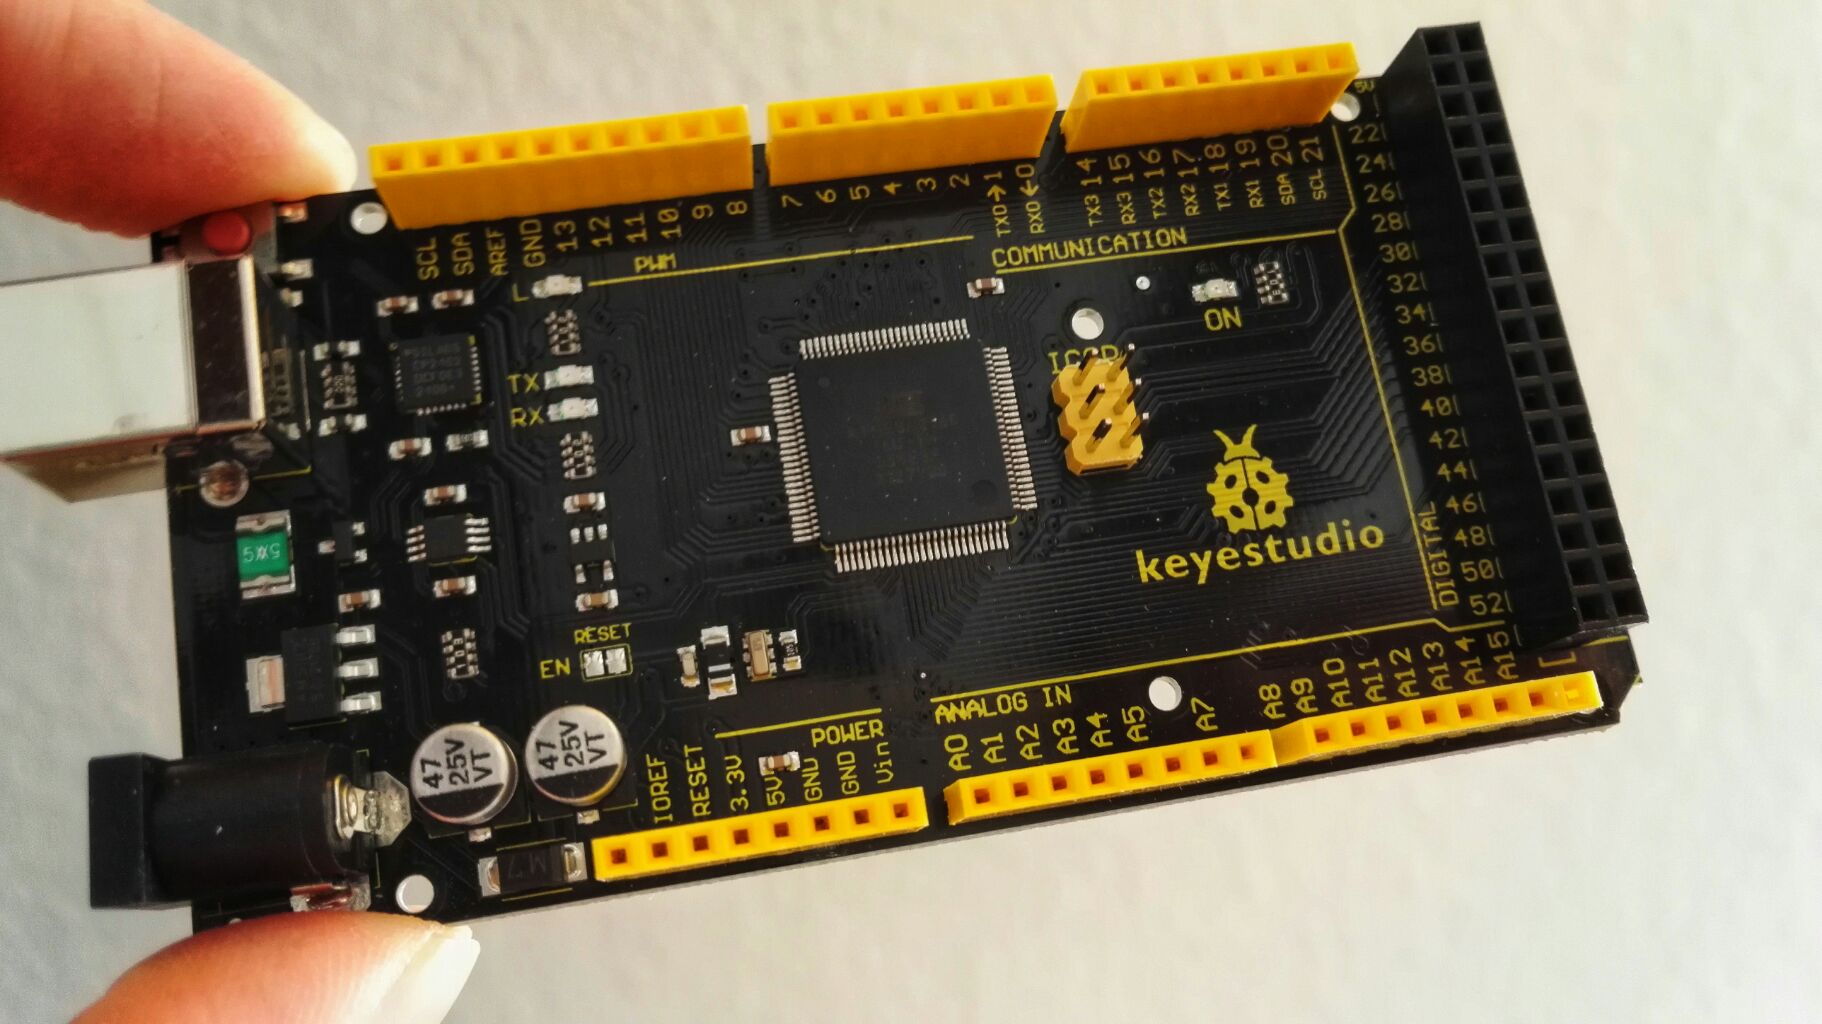
You probably heard about this before: An Arduino can be made into an excellent DIY joystick. Most examples use a Leonardo or Micro for this for a very good reason. They one comes basically with a chip that is recognized as HID (Human Interface Device) hardware on any modern operating system.
This is not the case with a Mega. This one has other perks but HID it is not. It sure shows up as USB device and a ttyUSB is raised where serial communications with the Arduino can be initiated. I’m also aware that some flash the built in programmer of the Mega so it starts operating like the others (which obviously removed the built in programmer). I’m on Linux PC though so I thought it’s basically a job of tricking the system into recognizing it as joystick and call it a day and OMG was I wrong!
My train of thoughts was like this: Linux still supports plenty of old serial joysticks so how complicated can it be to send some bits an existing driver recognizes. Old hardware like this is usually glued to the driver with the tool inputattach of the Linux Console Project. This does basically initialise a joystick on some serial connection and sends it off to a fitting kernel driver. This way even non-USB, or let’s better say non-HID hardware, is mapped to a kernel driver who in return will set-up the joystick subsystem and manage the communication with the stick via a serial connection.
Turns out I’m not the first one with that idea and apparently someone made it work by connecting old Playstation Controller and a Wii Classic Controller to an Ardunio and fake a Stinger device without the use of HID so Kudos to Jarno Lehtinen here and his Linux-Arduino-Serial-Joystick repo – you sure did sent me down a rabbit hole of horror and amazement. I couldn’t even get inputattach to wait for that magic string to be sent with anything else than 9600 baud and aligned stars! I also had to throw socat into this horrible mix because the Arduino would insist on rebooting on init so a timeout was guaranteed! In case you wonder how I did this:
socat -r left.raw -R right.raw pipe:/dev/ttyUSB0 PTY,link=/dev/ttyUSB1,rawer
# and xdd to show me the debug juice
tail -f left.raw | xxd -c4
# and on yet another terminal
inputattach --baud 9600 --stinger /dev/ttyUSB1
This also meant that I had to tear everything down for reprogramming the Arduino. Anyway, in the end I could finally get through that init phase where the stinger related code in inputattach is waiting for the magic key after sending “ E5E5” to finally load the Stinger kernel driver – communication for both ways confirmed!
// "\r\n0600520058C272"; byte byteResponse[] = {0x0D, 0x0A, 0x30, 0x36, 0x30, 0x30, 0x35, 0x32, 0x30, 0x30, 0x35, 0x38, 0x43, 0x32, 0x37, 0x32}; if (Serial.availableForWrite() >= sizeof(byteResponse)) { Serial.write(byteResponse, sizeof(byteResponse)); }
At this point I had a pipe to prevent the timeout due to the resetting Arduino, the _only_ working baud rate 9600 I could figure out with the Mega, a loaded driver that was recognized as joystick and was sitting put and did… absolutely nothing. Null. Nada. Not a single bit made it to the driver and I could not figure out why. My guess is it needs a change in the baud rate to the original 1200 (?) of the Stinger but I have no idea if this is true. I could also not find any way how the stream is controlled and since the driver would fill up 2 bytes all the time and interpret them there is a fair chance that it would simply be one byte off all the time. Speculations tho, I simply didn’t grasp the stinger.c source so this is all just a theory. I do not want to admit how much time I sunk into this and I was pretty frustrated at this point. Reading some stupid serial? Not like this! Too many hoops!
So I threw it all in the bin 🚮
Say hi to /dev/uinput where you can basically raise virtual devices, like a joystick, without [much?] pain. I’m not the...
26. August 2022
A lot happened since my last update on the simpit – under it’s hood. Function wise it changed not so much so the older demonstration video is still better for a quick demo. I still assembled a new video from clips of the first evening with the new hardware:
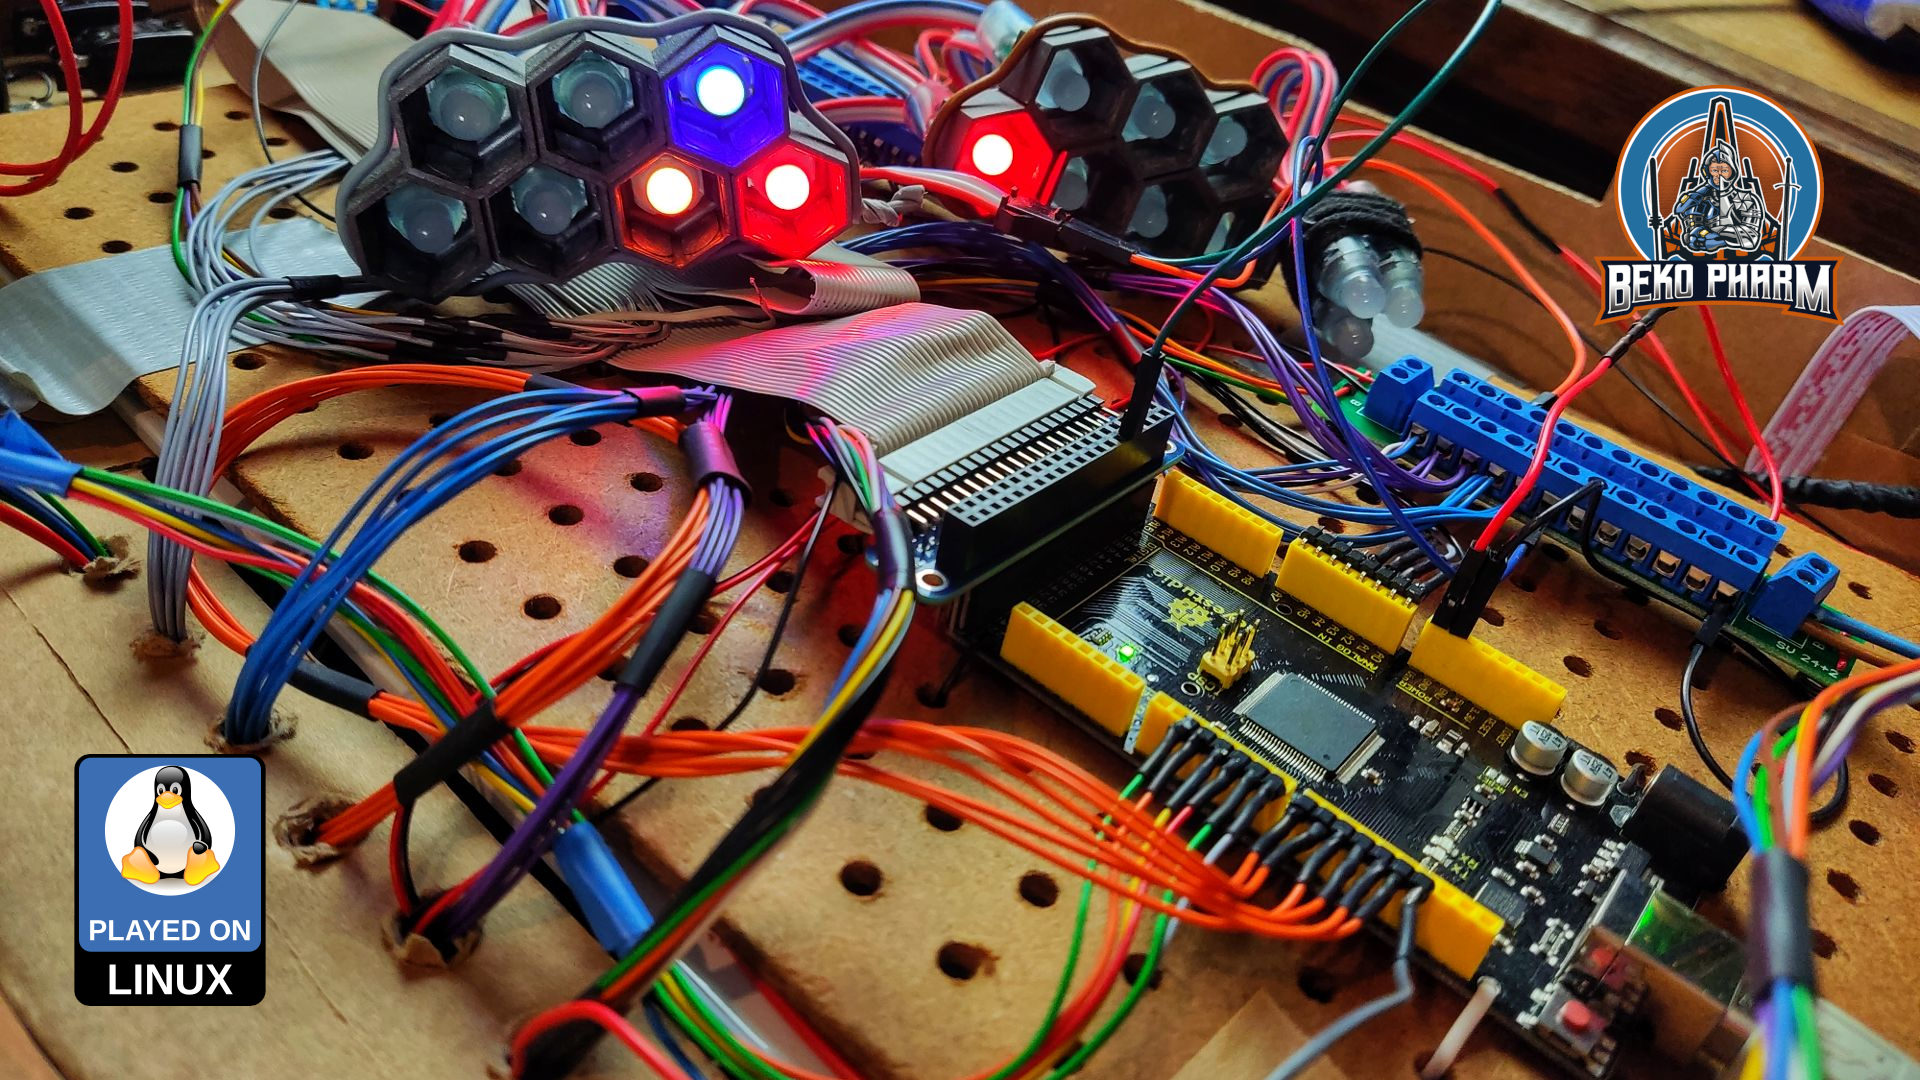
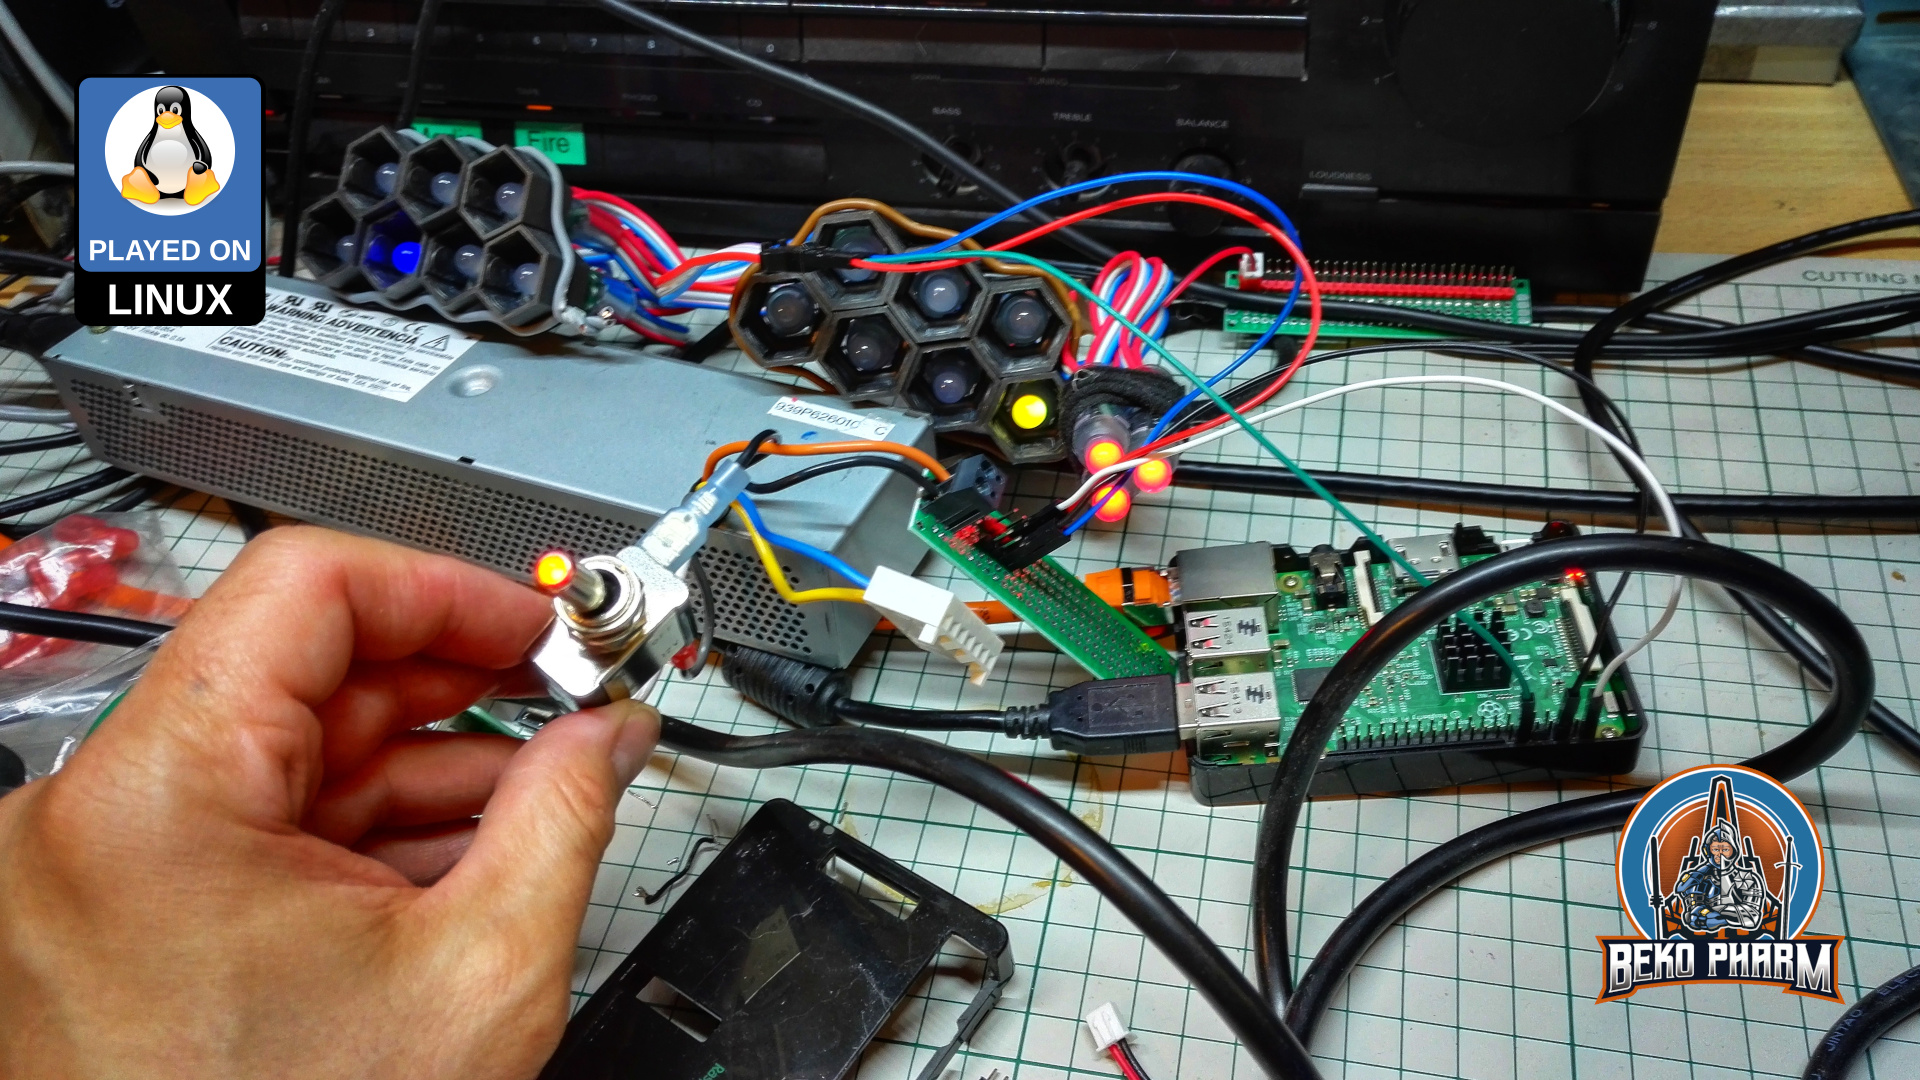
So what changed? I got rid of the CY-822A USB joystick controller that, while good, was also limiting. Especially in inputs and how they would react. The Raspberry Pi, that I used to drive the status indicators, is also gone. This is all replaced by one single Arduino Mega that is connected via serial over USB.
A custom joystick daemon written in Rust is listening for data from the Arduino and feeds back the flags of Elite Dangerous to drive the blinken lights. I also extended the source to add me some rotary encoders (with push button function) and I’m very happy with the result of this. That makes a whopping amount of 48 buttons and 6 axis (where 2 axis make one hat). And it feels _so good_ to have e.g. self destruct or eject cargo save under a protective cover now 😀
The panel also got an external PSU with enough ampere to drive as many LED as I may imagine so I no longer abuse a phone charger for that or risk frying of the PCB / USB.
With all that in place I streamlined my pre-flight check-list quite a lot because way less hardware is involved and most of this is automated by now. It wasn’t all fun n giggles tho and while the new hard- and software “just worked” in e.g. StarCitizen it was EliteDangerous that gave me a hard time to actually use most of the new buttons.
Turns out it had no idea about the device and model identifiers reported by the joystick daemon and that the kernel assumed a gamepad based on declaring e.g. ButtonNorth via the more recent xinput system really didn’t help – because that limited the amount of read buttons via xinput severe! In the end I set it’s identifier to a “vJoy” device. That I found in the DeviceMappings.xml of Elite and since this could be basically anything I gave it a try (and removed all “offending” magic gamepad buttons from the code) and sure enough Elite started accepting the inputs as expected and from there it was smooth sailing – got even the hat working.
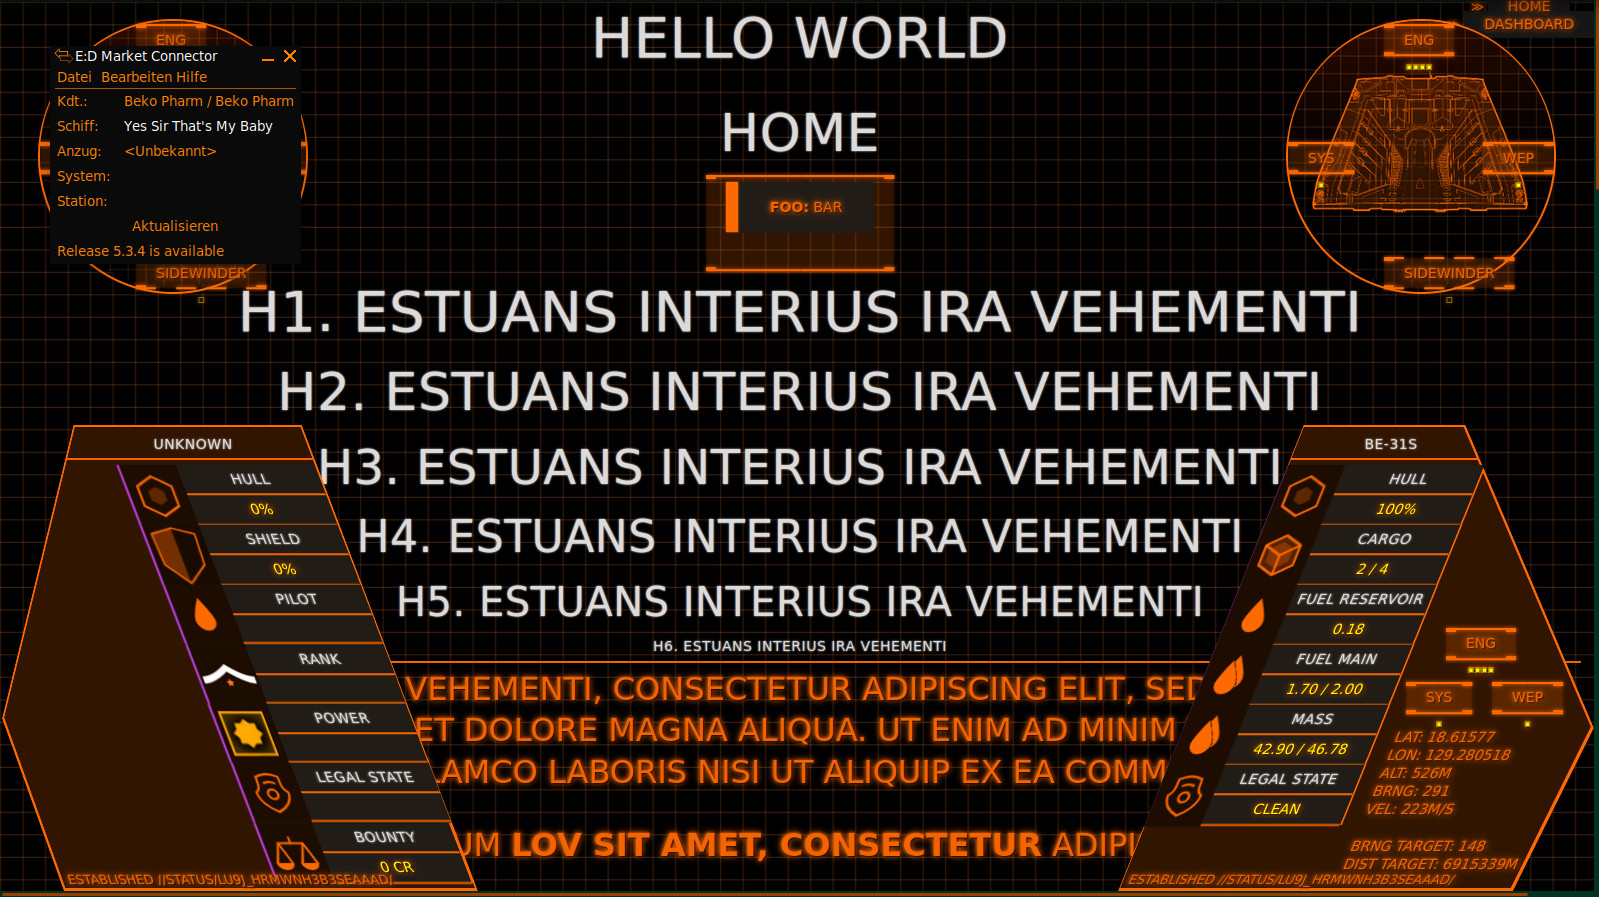
Oh and for everyone who is wondering what exactly they are seeing on the “MFD” when I’m playing Elite: That’s basically a Website using the Arwes FUI framework:
Without the cardboard covering up parts of the screen it looks basically like this:
I also started doodles for a version 2 – now that I have an idea what I really want.
Originally posted at https://beko.famkos.net/2022/08/26/primary-buffer-panel-august-update/
2. March 2022
The last update has been a while. I focused my attention to the MFDs (Multi-function display). This part didn’t get much attention yet and I was caught between the difficult choice to learn yet another fancy framework, like Raylib, that would do OpenGL ES 2.0 without X11 on the Raspberry – or just throw the might of my CoffeeLake at it and go with ReactJS since most of the data was already available via NodeRED anyway. Also… ARWES is just so cool 🤩
I went with ReactJS and ARWES again, simply because I have some experience in this by know thanks to my Streaming Overlay I wrote with it. Hobbling it up to NodeRED was just a matter of installing SocketIO to transport the messages. It’s all a very hacky mess but it gets the job done.
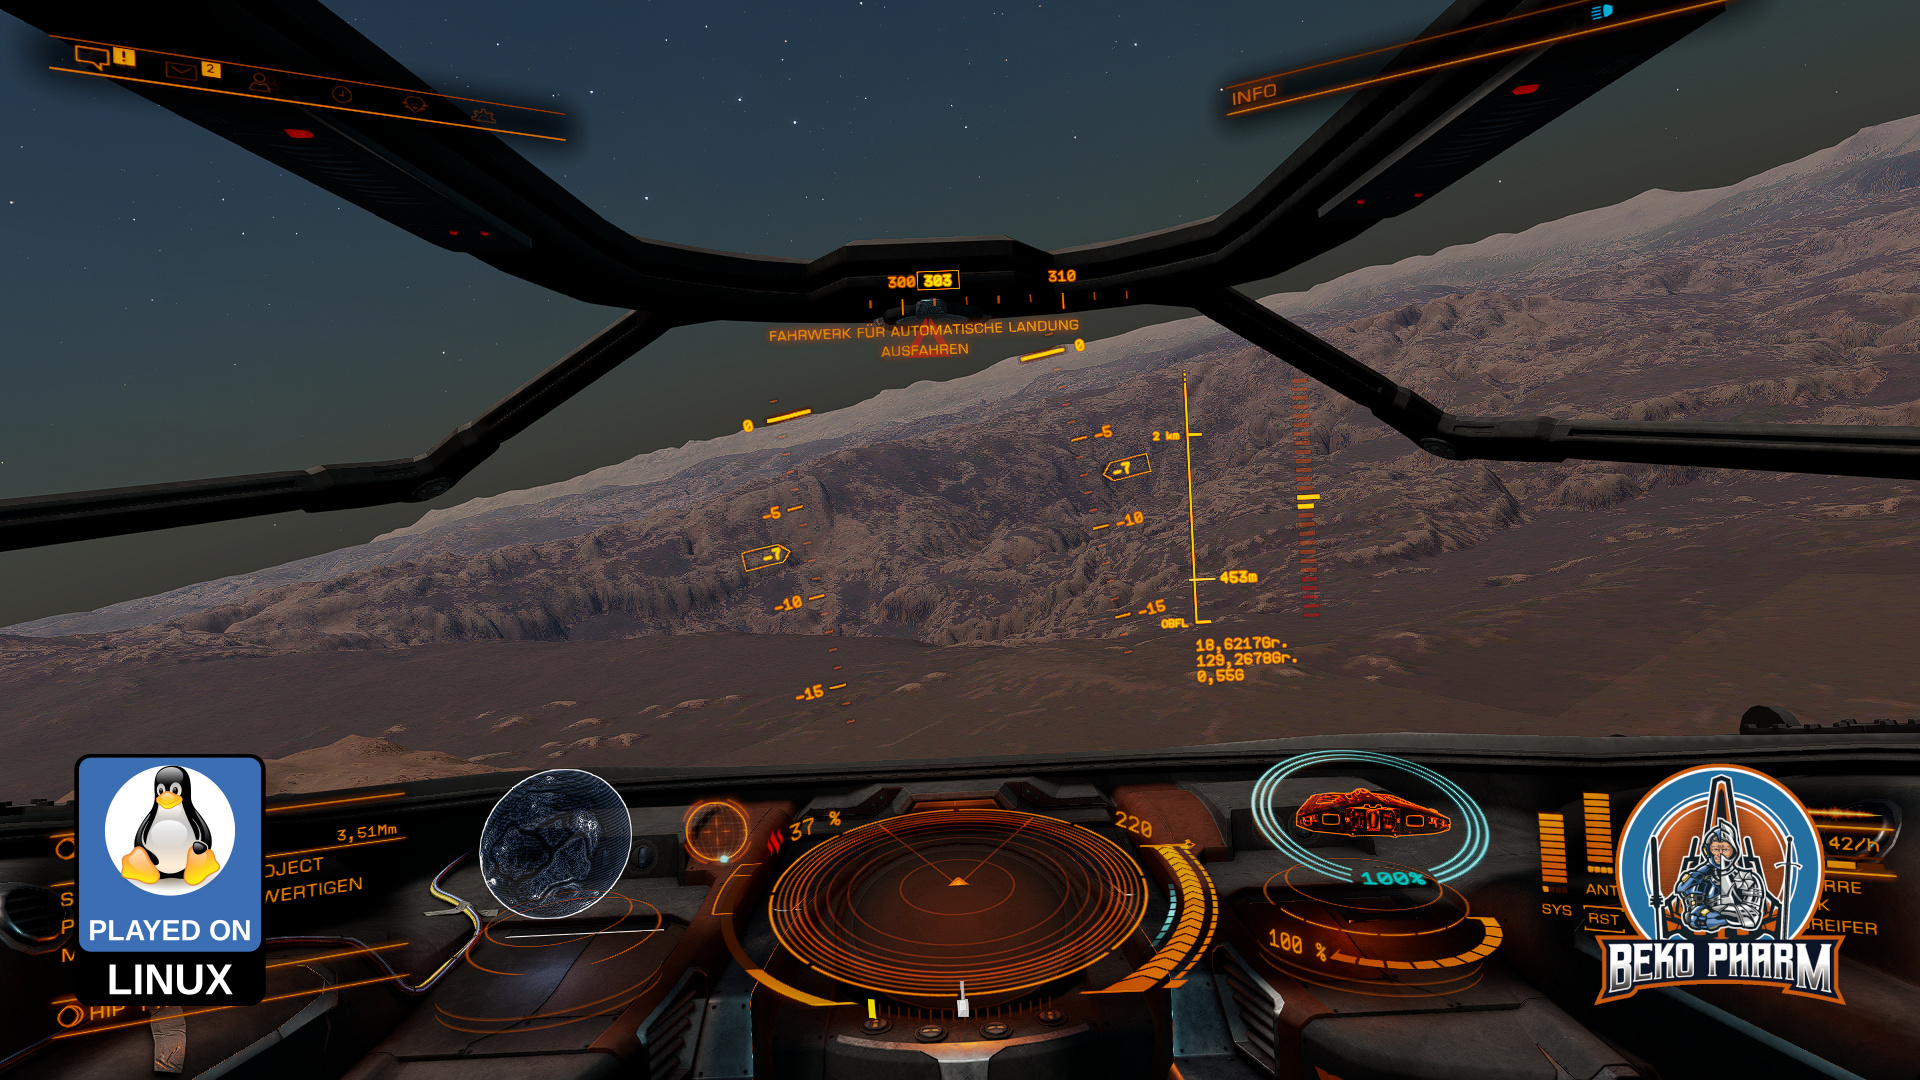
While seeking through the available data I noticed that I don’t get velocity values from Elite. That’s not so important in space but _kinda_ interesting for me in planetary flight to satisfy the flight sim gamer in me as well. I noticed tho that I do get timestamped latitude, longitude and altitude values so shouldn’t it be possible to “simply” calculate this, right? Right?
This was when I dived into the rabbit hole of calculating velocity and heading on planetary objects using a spherical coordinate system and while I didn’t nail it exactly how Elite does it the result is close enough. The game provides the required data to go crazy here – most important the radius of the current object. In _theory_ I could start writing some primitive AFS (Auto Flight System) routines now, which I’m totally going to explore at some point in the future just because 🤓
After spending way too much time with this and the Pythagorean theorem (Yes mum, a game made me do maths. MATHS! 🤯) I settled with some calculations and data for my current ship to the right and targeted ship data on the left. This is sort of tricky because many game events update different parts of the data so timestamps have to be kept in mind and a game specific parsing strategy is required. See the last part of the demonstration video to get an idea how this looks.
Another point to tick off my list was getting the head tracking to work in Elite (again). Now this is very Linux PC specific so you may tune out on this paragraph. On Linux PC I’d usually compile Opentrack with the Wine Glue, patch in my appdata dir for Proton and hope that it’s still ABI compliant to Just work™. Alas recent Proton is sandboxed within pressure vessel and the usual approach of memory mapping is simply no longer working, if I got the gist of this right.
So my _current_ strategy is to download and drop the Windows build of Opentrack into the game folder and chain-load the EXE with the game where the Opentrack EXE would listen on UDP while my native Opentrack BIN would send via UDP. A task not made easy with Proton but it is possible. The following snippet may give you some pointers:
#!/bin/bash
export STEAM_COMPAT_DATA_PATH=/games/steam/steamapps/compatdata/359320
export STEAM_COMPAT_CLIENT_INSTALL_PATH="$HOME/.steam/steam"
python3 /games/steam/steamapps/common/Proton\ -\ Experimental/proton run opentrack.exe
Why running Opentrack twice? The native build performs a lot better with my webcam and every frame really count here. Reading data via UDP is not much of a burden for Proton. This also saves me the trouble of fiddling with Wine Glue, a painful compile process nobody should endure involving installation of many many additional 32bit libraries. Hilarious but it works.
Originally posted at https://beko.famkos.net/2022/03/02/primary-buffer-panel-march-update/
16. January 2022
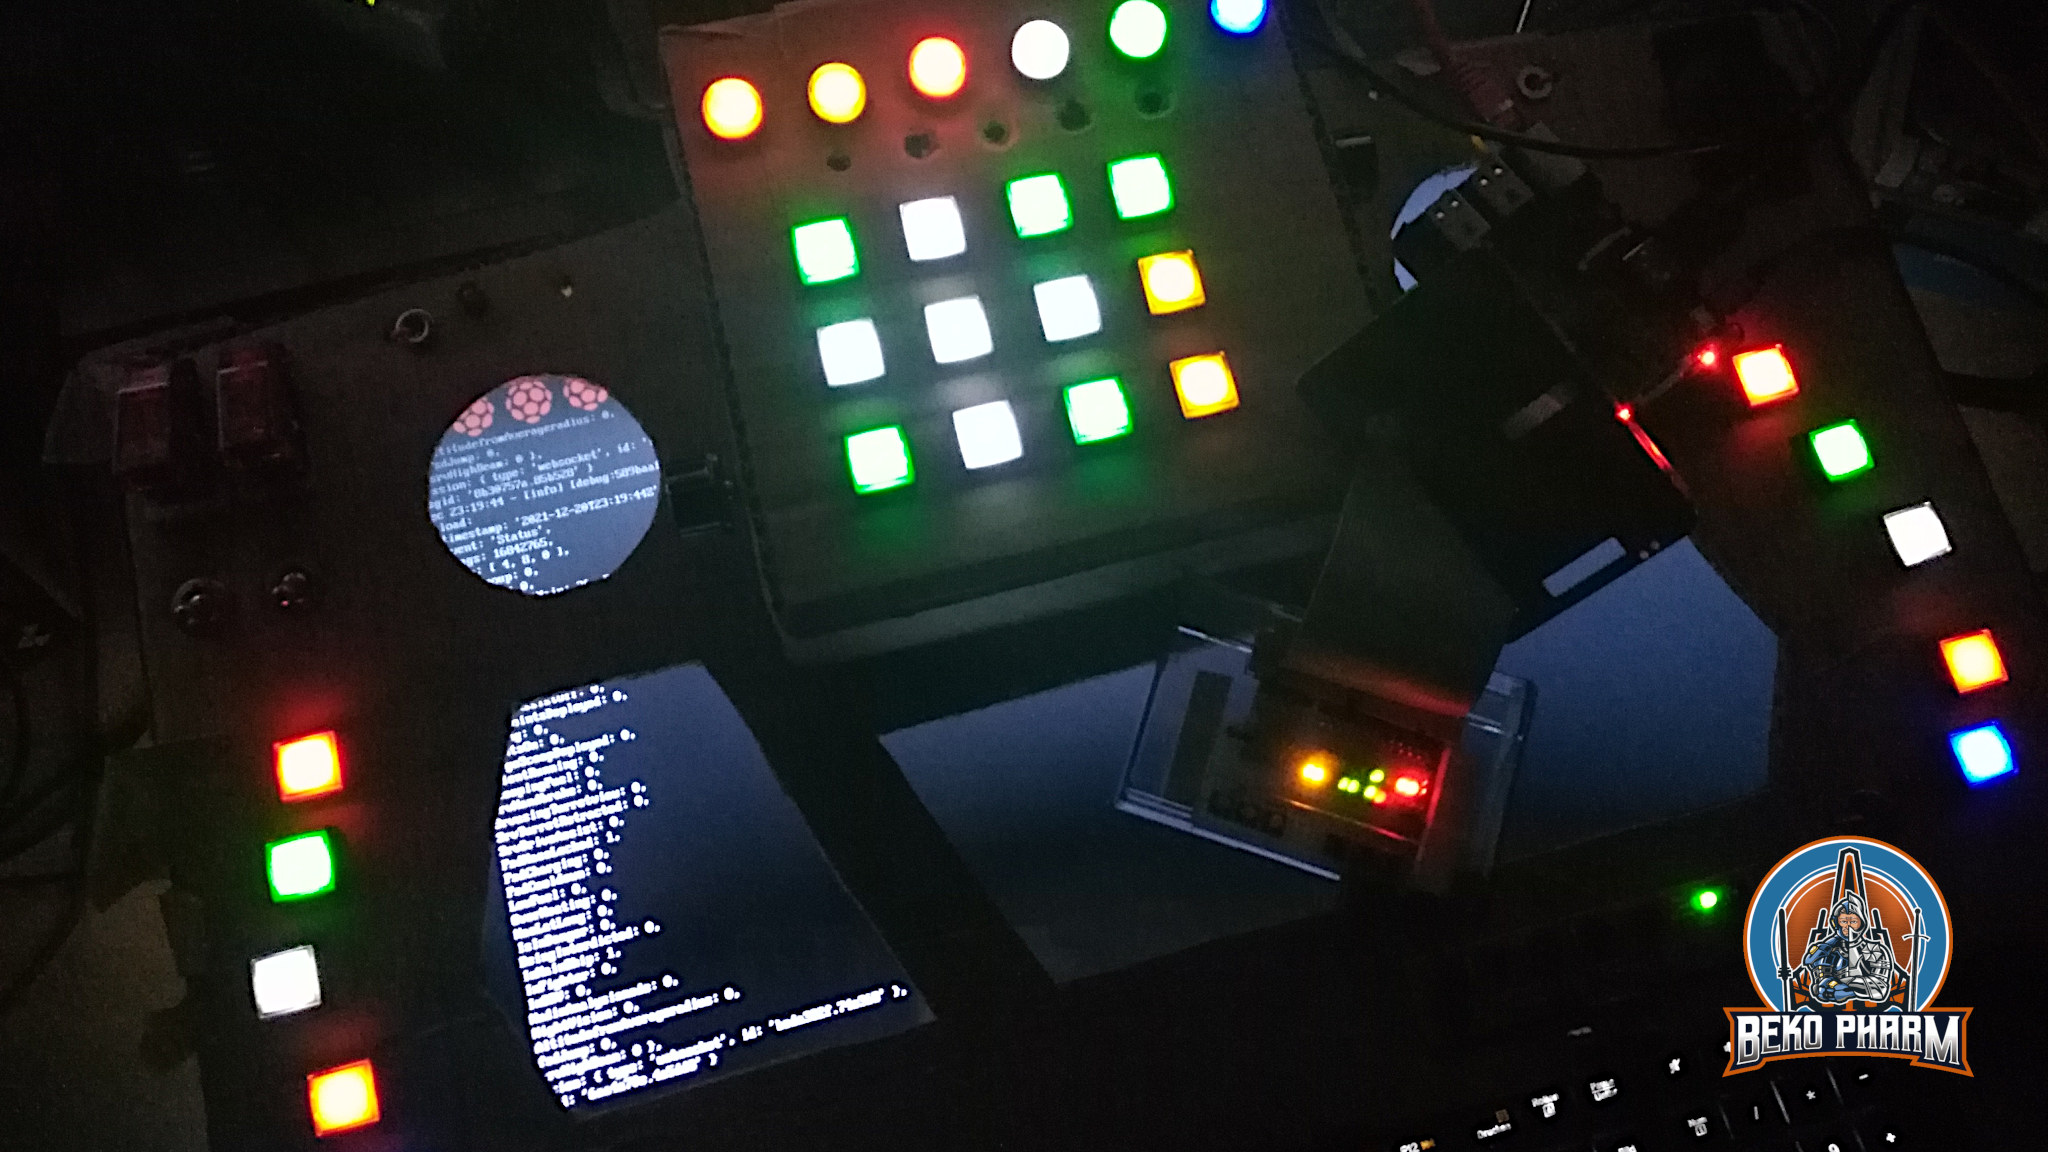
I made some progress on the status indicators and attached three Neopixels for testing. I’m controlling them via NodeRED where I’m faking the Status JSON file from Elite Dangerous so I can play with the flags a little bit.
Originally noted at https://beko.famkos.net/2022/01/16/using-a-neopixel-as-status-indicators-of-elite-dangerous-for-my-simpit/
22. December 2021
Some people asked me for details on how I used Node-RED to get some game status information of Elite Dangerous into my SimPit so here is a more cohesive write-up with a short demo video.
I was looking for a simple way to do this but all the programs I found online are closed source solutions that have to be bought and are – as usual – Windows only. Best it would get is Android support and requires a tablet with touch functions. Nothing of this I want! The idea is to use something system agnostic that can be adjusted easily, because I want to use this for different games and not depend on a single vendor, hoping support will last and the thing work with my setup.
This was when I remembered Node-RED from usage in home automation because this is basically the same. You get a zoo of hardware, that somehow all interacts with a dashboard. All the data is on the wire and can be accessed via a web-browser. Fun enough I wasn’t the first with this idea because when I started searching for “Node-RED for simpit usage” I stumbled over the YouTube channel of Jon Back (https://www.jonback.se/) who did exactly this before (and even also used cardboard for prototyping). Encouraging and big shout out for the pioneer work!
So after installing Node-RED on my Linux PC and on my Raspberry Pi I connected the two installations via Websockets. That’s basically just entering an IP. While using MQTT is probably a better solution this was the easiest one because it doesn’t need an additional service.
Why I installed it twice? Well Elite drops a lot of the current game status in various JSON files, like a timestamped Journal and a Status file that holds most of the ship data I’m interested in most. The file is updated on changes and it’s easy to watch for such a change on a local filesystem. I also intend to make the receiving side as dumb as possible so I don’t have to update the code too often. I’m still uncertain what I’ll use in the end – an Arduino is also in consideration. This way I can hopefully connect other games easily as well by keeping the resulting data structure more universal and let the sender to the hard work of hammering the data into shape.
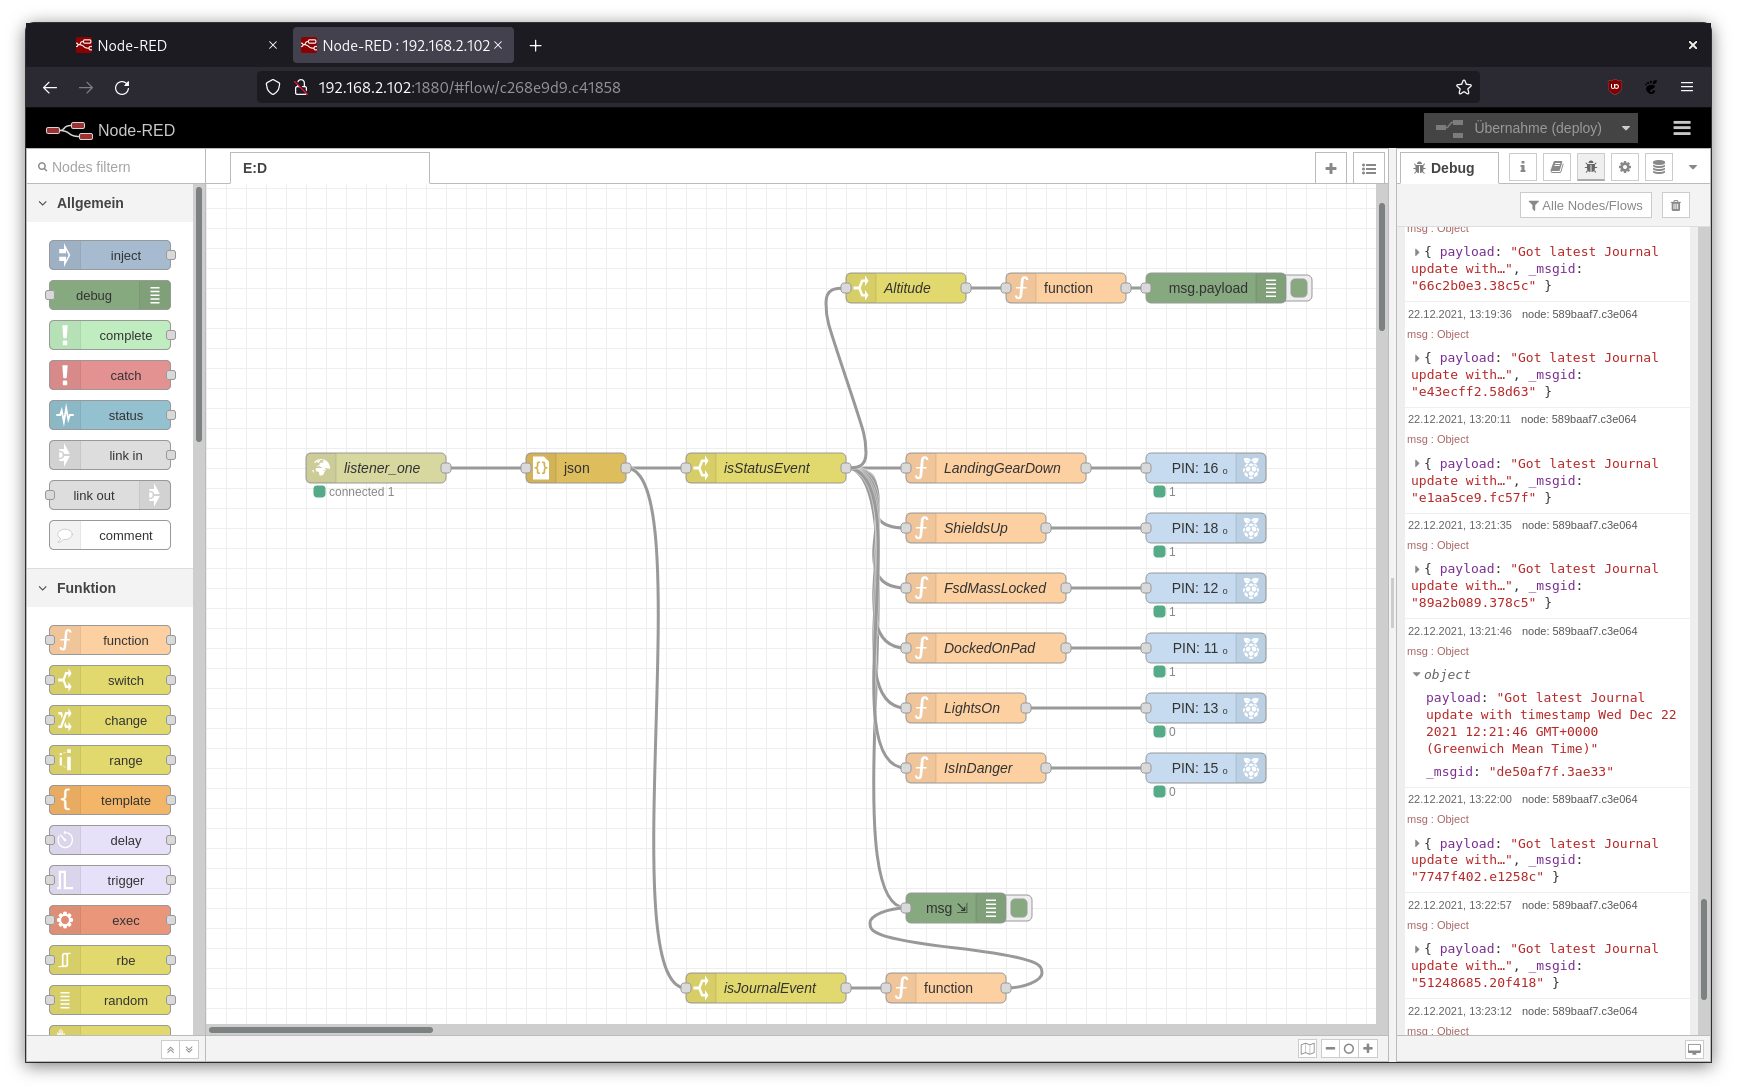
Short explanation what’s going on: File Changes listens for changes in my ED folder where the JSON files are located. Switches check for the file name forward it to a file opener. This one reads the file (Journal line by line) and passes the data to a JSON parser. This one forwards the parsed JSON data to a function that creates the desired data structures. Finally it is send to the receiver.
Most of the magic for Elite Dangerous happens in the function that parses the Status json file, which is explained in detail at https://elite-journal.readthedocs.io/en/latest/Status%20File
flags = msg.payload.Flags;
// https://elite-journal.readthedocs.io/en/latest/Status%20File/
[    "DockedOnPad",     "LandedOnSurface",     "LandingGearDown",    "ShieldsUp",    "Supercruise",    "FlightAssistOff",    "HardpointsDeployed",    "InWing",    "LightsOn",    "CargoScoopDeployed",    "SilentRunning",    "ScoopingFuel",    "SrvHandbrake",    "SrvusingTurretview",    "SrvTurretRetracted",    "SrvDriveAssist",    "FsdMassLocked",    "FsdCharging",    "FsdCooldown",    "LowFuel",    "OverHeating",    "HasLatLong",    "IsInDanger",    "BeingInterdicted",    "InMainShip",    "InFighter",    "InSRV",    "HudinAnalysismode",    "NightVision",    "AltitudefromAverageradius",    "fsdJump",    "srvHighBeam",
].forEach((value, key) => {   msg.payload[value] = flags & 1;   flags = flags >> 1;
});
return msg;
The receiving Node-RED process on the Raspberry Pi does something similar.
The received data is once more parsed as JSON and checked based on the event string what type of message it got. If a status event is found it’s forwarded as 0 or 1 to a GPIO where a LED will be enabled or disabled.
This is a proof of concept so far so it uses only a tiny bit of the available information to drive some LED I have on my custom GPIO breakout board. I ordered an WS2811 LED strip...
Read more »
12. December 2021
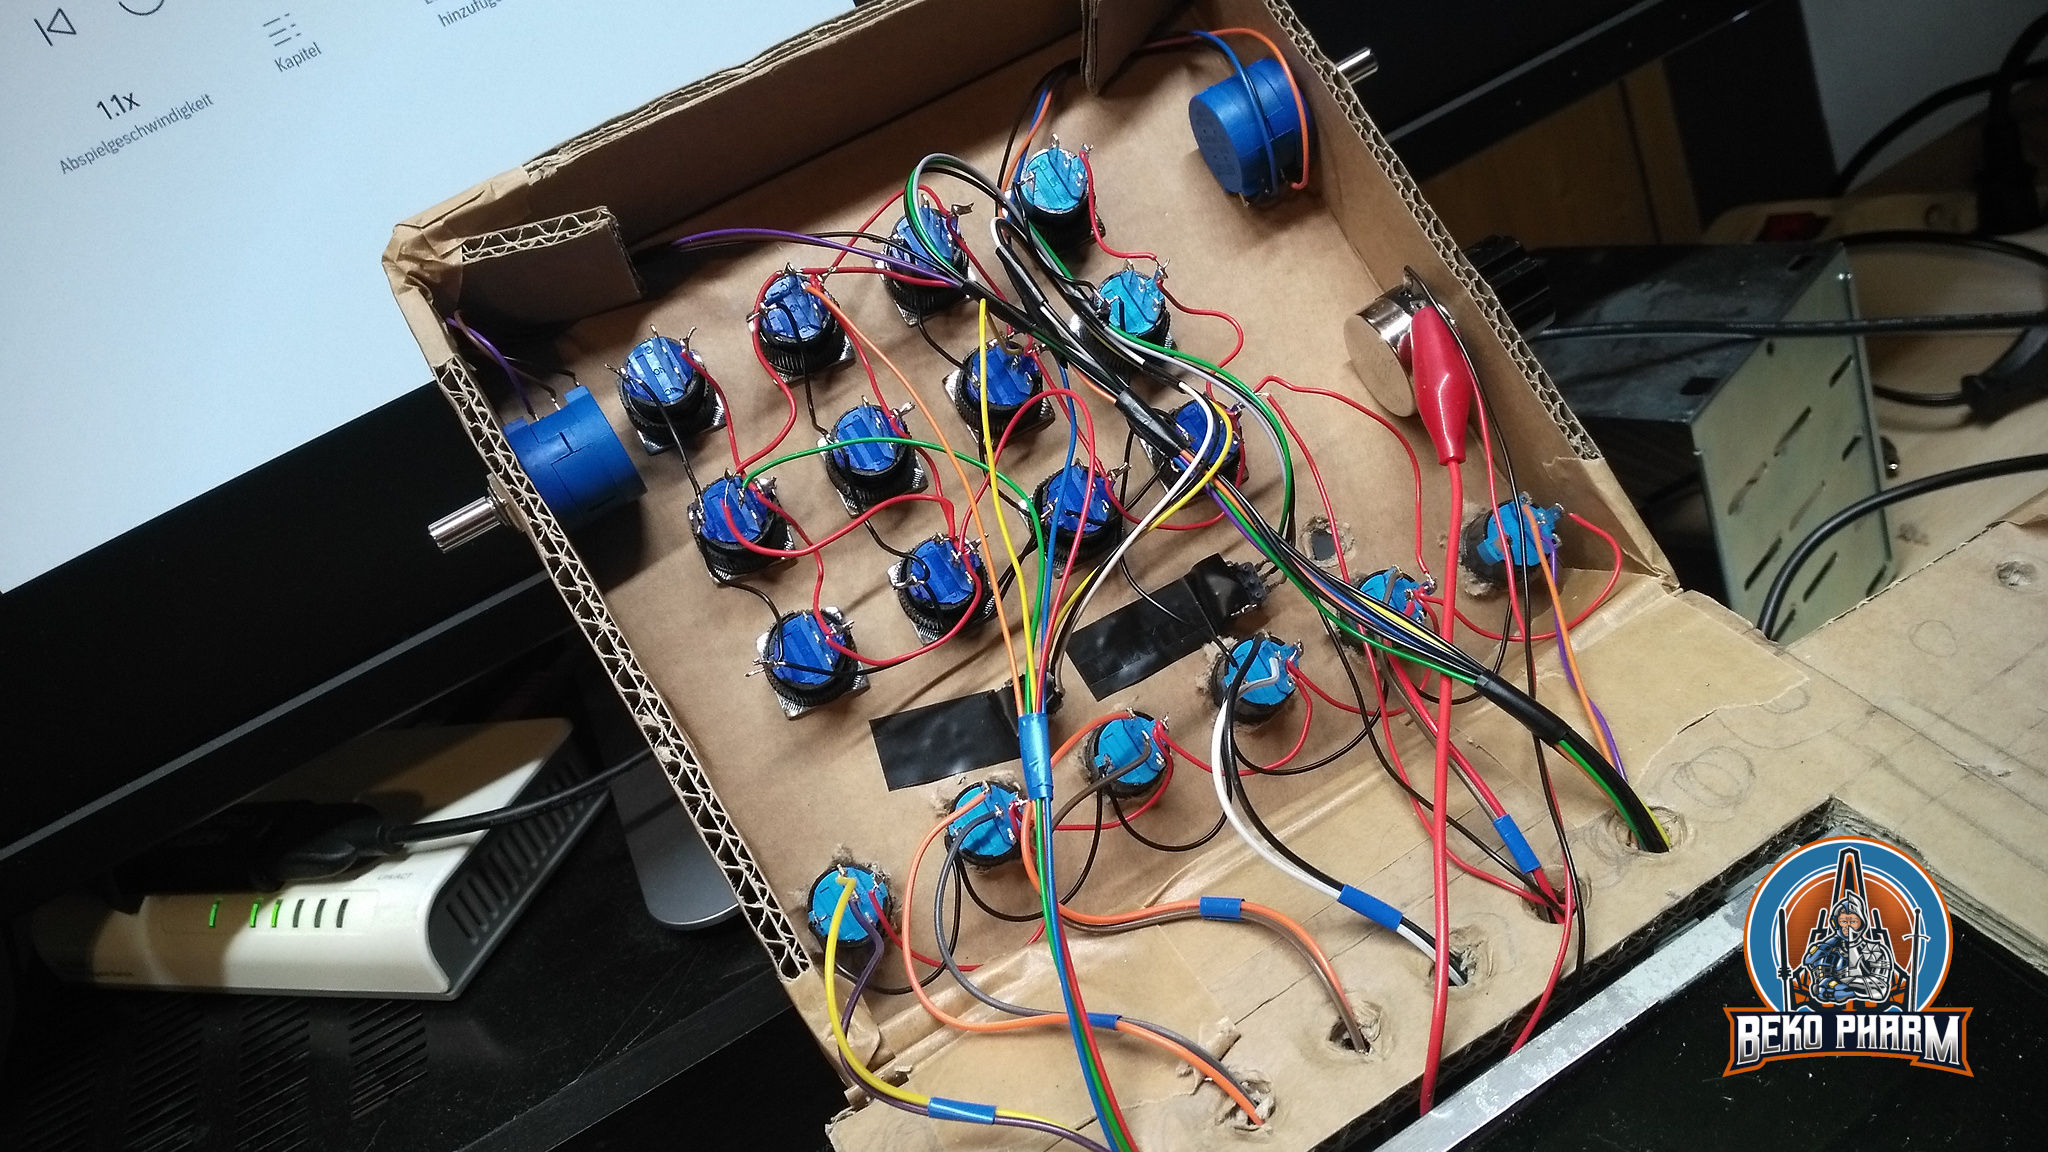
Didn’t have much time since the last update but I got plenty of new push buttons and switches connected. Shipment took weeks for some, which I don’t exactly mind since this is a low priority fun project, but I was still happy when everything finally arrived.
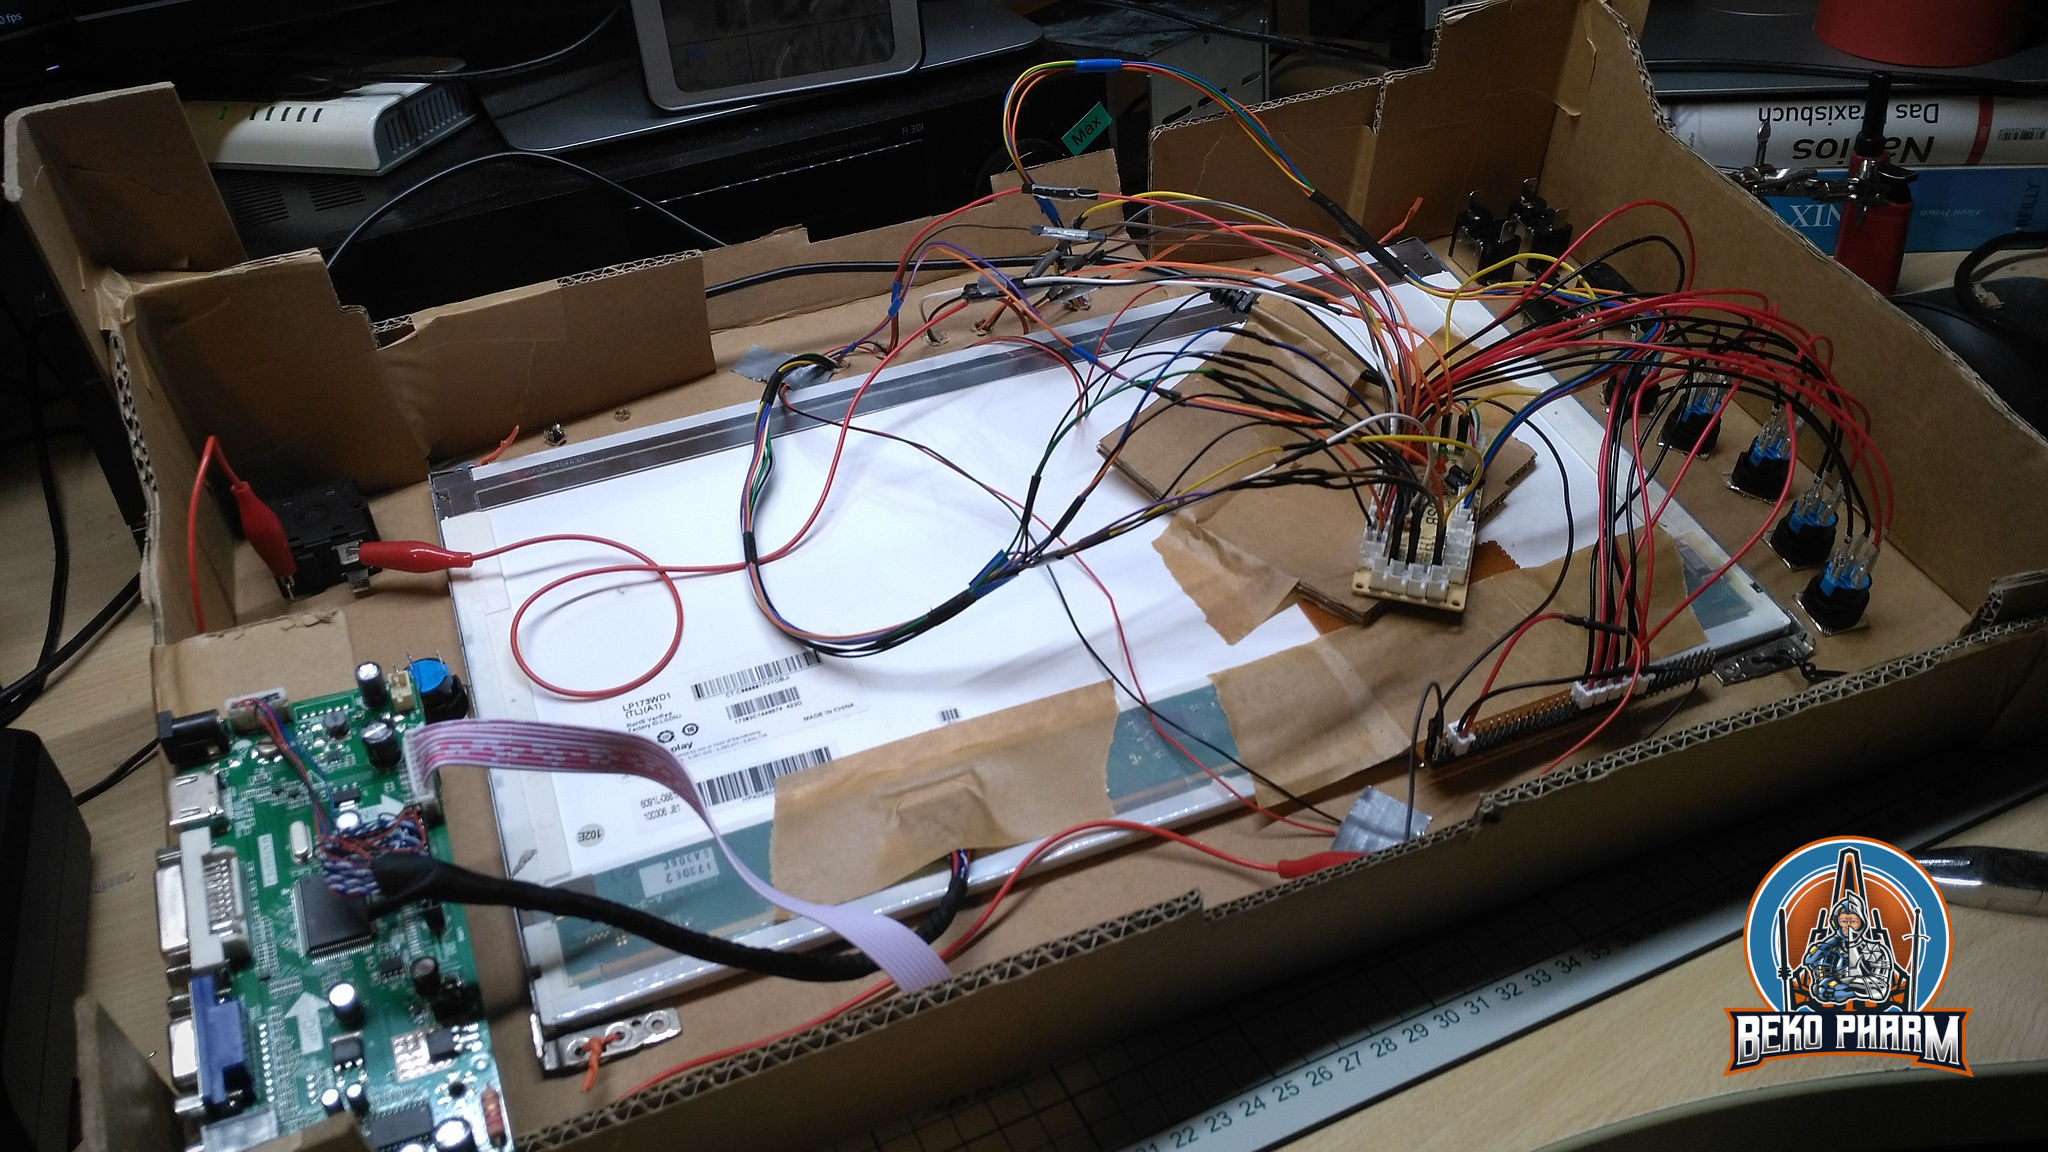
Made a grave mistake also when I jacked into the USB connector to get a read on how many mA I already need here and mixed up VCC and GND during the hot wiring. Good thing that the PCB I use has a fail-safe diode so it didn’t die on me. Phew, close one. I guess USB standards are good for something like this 😅 Anyway, I’m not even scratching the limits here yet so I’m good to go. I can also separate the powering of all LED from the controller any time by design and switch over to the 12V from the LCD panel and/or add a downstepper from that. The PSU for this I have under control. USB is limited and that has to be kept in mind.
Spent most of the rest of the night wiring up a new cable tree for the potentiometers and connect most of the new LED. Got some switches with integrated LED and safety caps mostly for seeing if I like them. I do. So I added them. I’ll make them light up when OFF because I’m going to use them for fire and forget functions like launching a missile or activating self destruct at some point in the future.
Speaking of LED, I got myself a decent LED light bar hanging over my desk so I can finally _see_ the stuff I’m working on. For the first time I was able to identify + and – on the components without the use of a magnifying glass. That’s really a huge improvement.
My soldering skills also improved. I’m still fighting with a way too huge tip on the soldering iron, because it’s the best I have, with temperature all over the place, but I’m slowly getting the hang of it again. Burnt myself only once yesterday too 🤣
The cable job looks like made from a madman. Trying to keep components grouped by type because stuff is still changing position here and there. Worked out okay for me so far. It’s very tedious work to connect all the tiny wires on the fly and it’s getting really crowded in there.
I’m also totally out of options to connect further joystick buttons. The tiny PCB I used so far is saturated so it’s probably time to switch to an Arduino or similar where I can read many more inputs. This brings me to another topic. First of I need some sort of de-bounce logic because a lot of the push buttons are very flimsy and should not trigger multiple times when pushed once. This can be easily done in software but that takes up program space. A circuit for hardware de-bounce (or filtering) isn’t that complex but requires additional components and this is where I really don’t want free flying parts inside the Primary Buffer Panel any more so I guess it’s also time to start making some own PCBs (and try that Aisler manufacturer this time).
The Arduino has also another very good argument to offer: Controlling status LED. At the moment all buttons simply glow but they can not be individually addressed. What can be individually addressed tho is a WS2811 or WS2812 LED stripe. This is basically one long string of LED that forward a data wire so I can power the whole thing with my regular VCC for all the lights and control the data lane with an IC like the Arduino. I found an older type that does not come as SMD but with “real” round LED that can be put on a panel more easily. It’s also RGB 🙋 There is only one drawback: If one LED gives up it usually dooms all the others following from operating until it is replaced. The stripe comes with 50pcs tho so I’ll have plenty as backup. Best of it: This solution is dirty cheap and occupies only one of the valuable pins before I have to go for an additional multiplexer. Not that such an IC is expensive but it adds another part to the free flying mix that is already going on.
Oh yeah, and I could finally put my rotary encoder to use too.
Originally posted at https://beko.famkos.net/2021/12/12/primary-buffer-panel-december-update/...
Read more »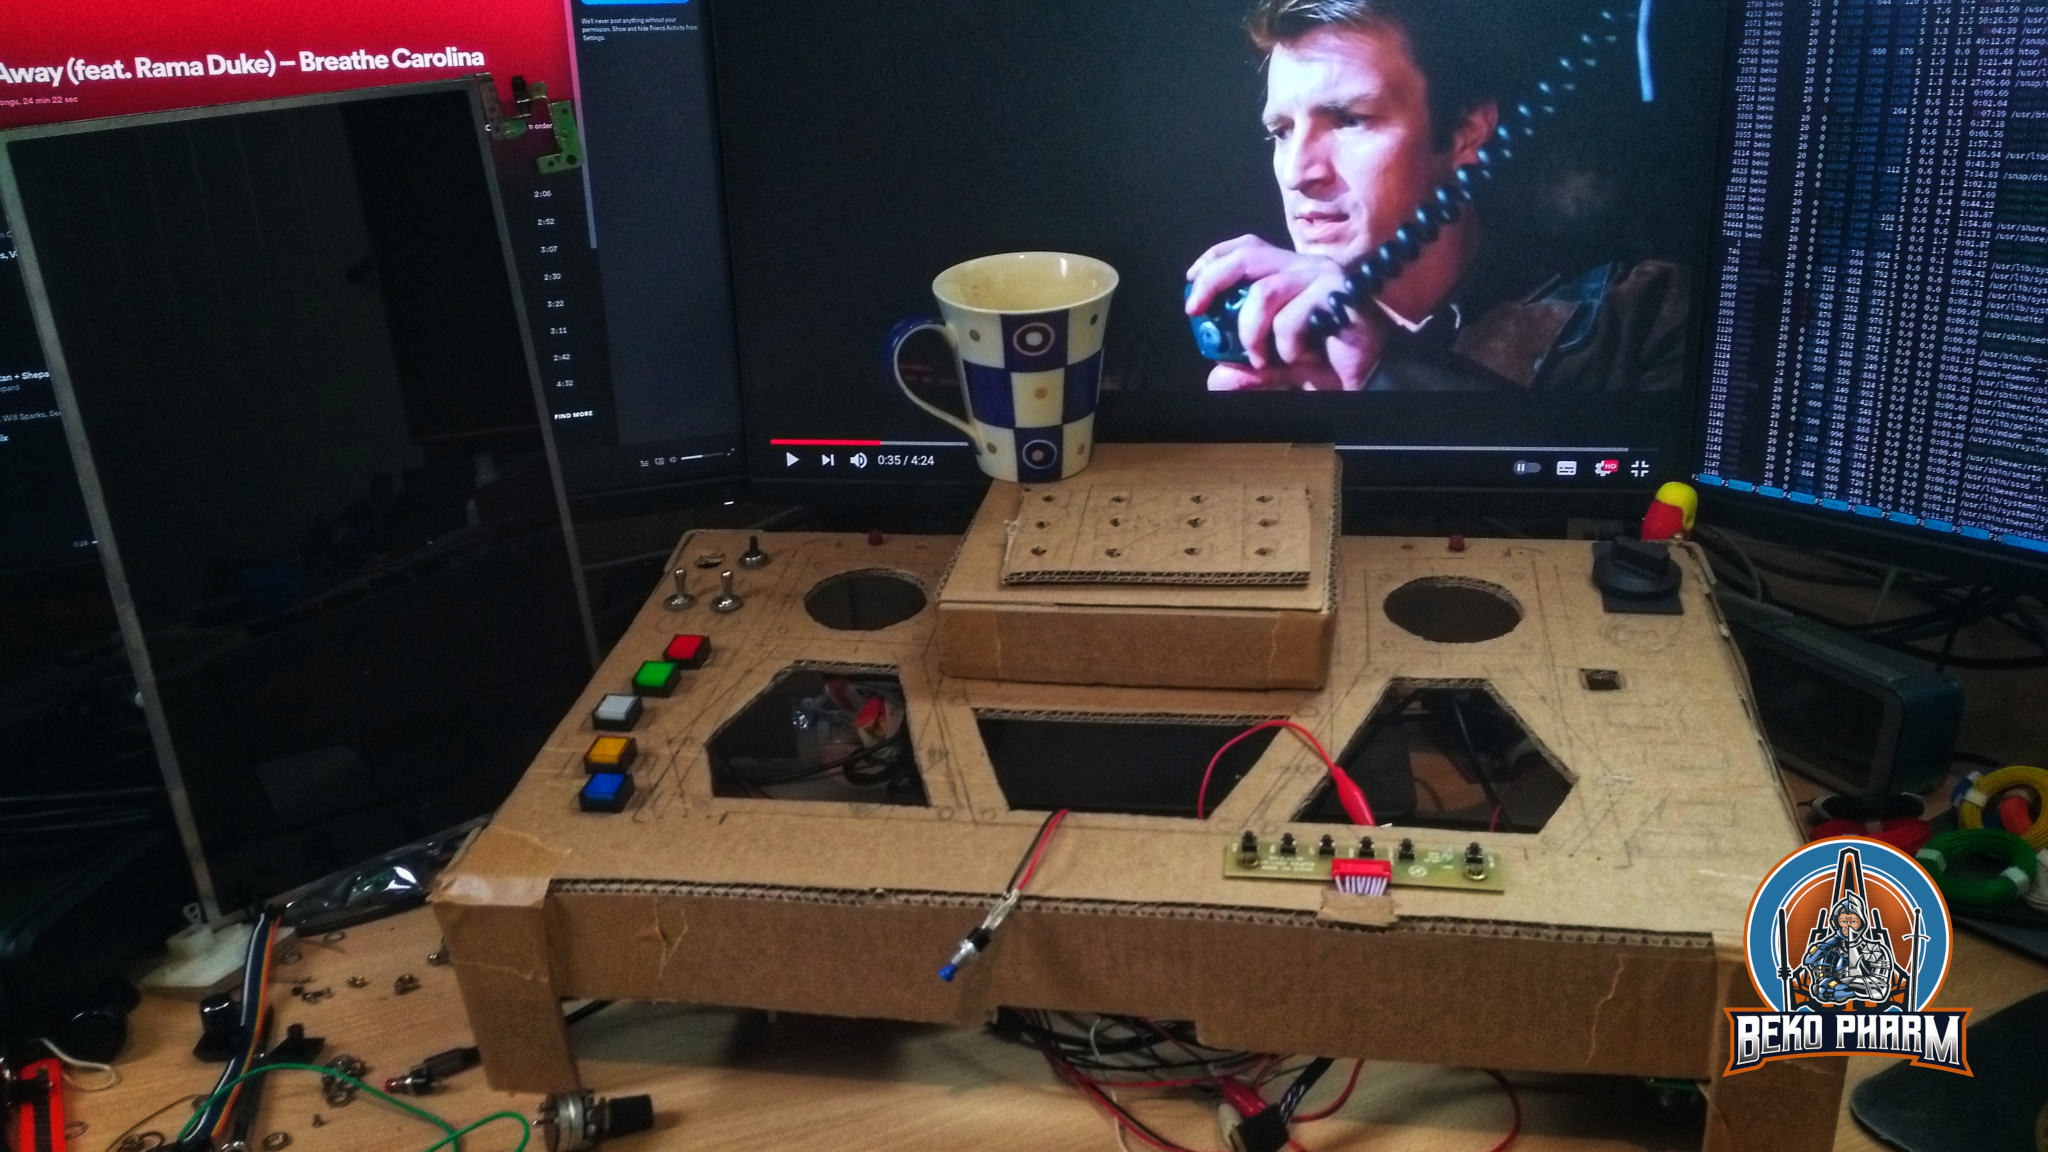
15. September 2021
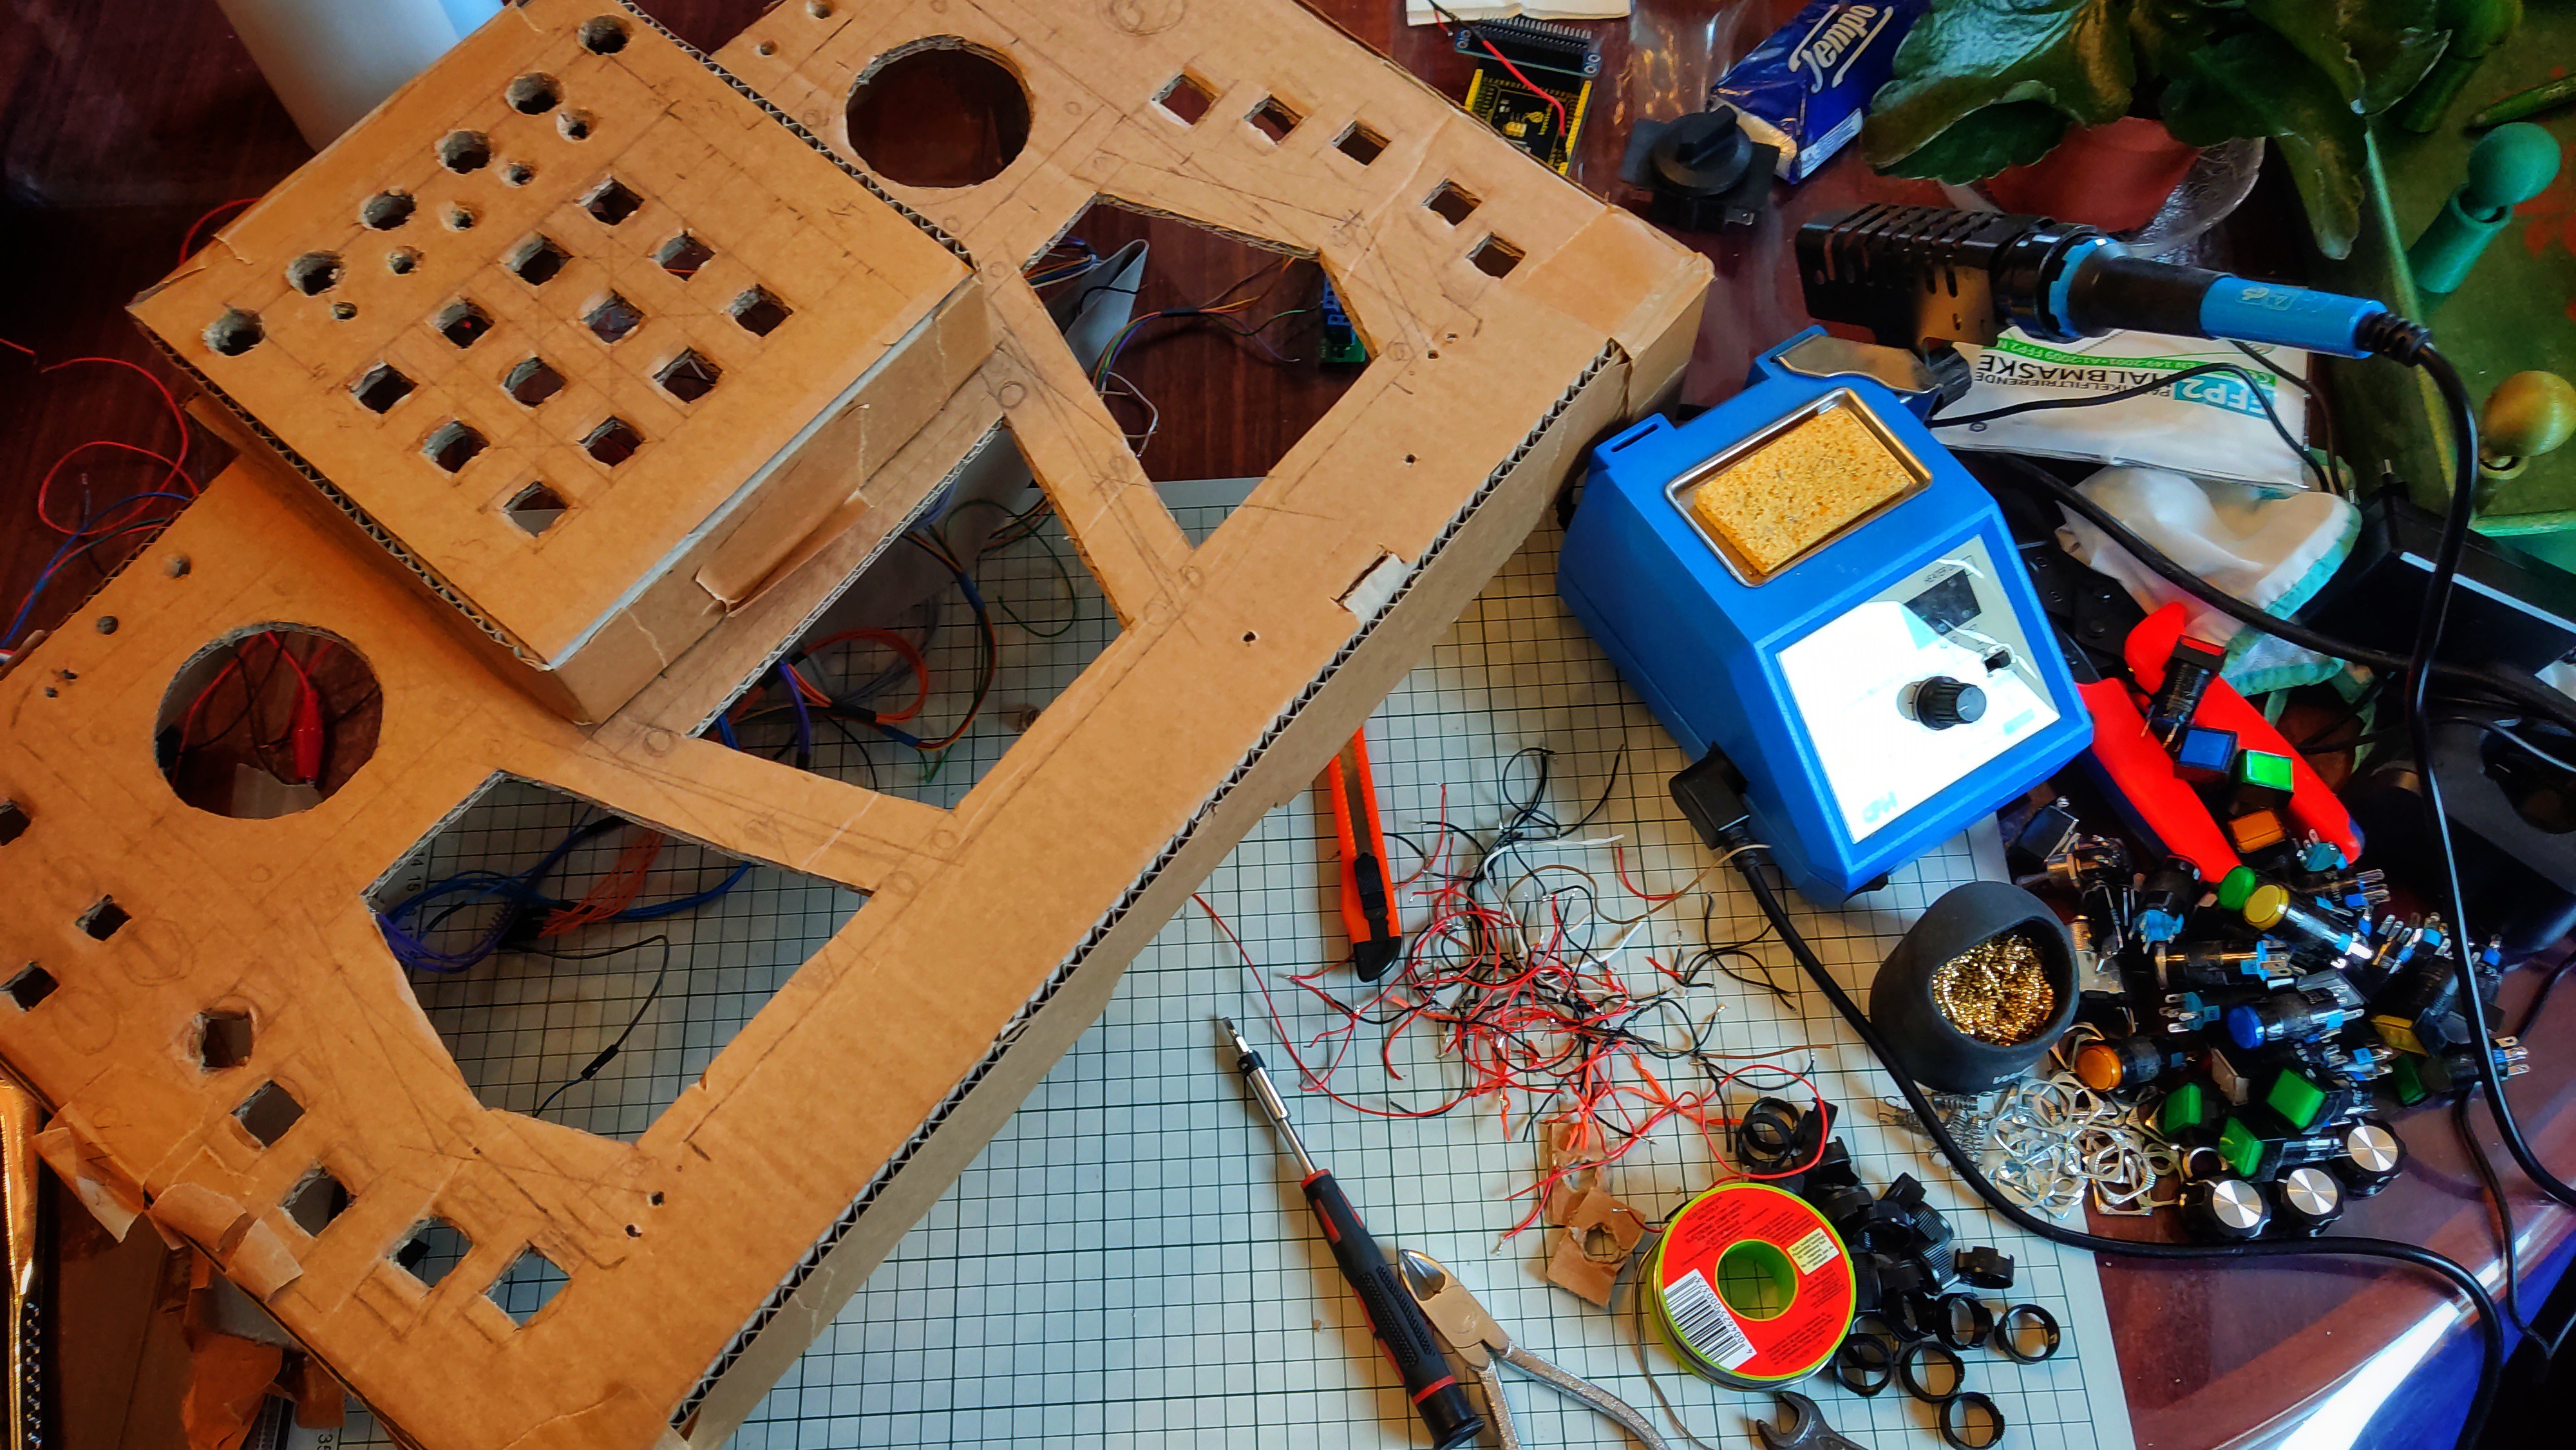
Okay, recap from the last making session of the button box for my Simpit. What I achieved this time: The LCD controller has now a place inside the contraption while the LCD controller buttons are screwed on the outside. This is mostly because I have no buttons laying around to be used instead. I did note down the pin-out of the connector though so I can change this any time. It has a funny LED though that has 3 pins, GND, Red and Green. Uncertain what to make of this.
The button box itself was put on stilts for the extra room required. The LCD itself is prepared to be added to the button box but I’ve to remove part of the former hinges because they are way too sturdy to be removed with a simple cutter knife. I’ll probably need a grinder or a saw and that’s work I will not do at my computer but in the basement.
Next was preparing the ICP in the centre. For this I created a new box of cardboard that is attached to the button box with tape that also acts as a hinge so I can “open” it to work on the switches that go there. I also noticed that my knobs for the rotary encoders or potentiometer are way too big. I could compensate this with more height but I don’t want the ICP to dwarf the button box itself 🤔 So… mebbe I’ll use smaller knobs. On the topic of knobs: Dem, the costs for decent sized knobs are insane. Like ~8 EUR for one knob! So… perhaps I’ll go for spray painted wood here. I don’t know yet 🤷
Yeah, and I got tired of calling it just “button box”. It’s not. It’s a “glorified button box mock-up with a gorram LCD made from cardboard”. So I decided that it needs a name and as a nerd I came up with… Primary Buffer Panel! Firefly fans will know.
It’s also a running gag in the family. My van tended to loose all kind of parts while driving and when Serenity aired my dad yelled at this very specific scene: “Hah, just like your car!” 🤣
Originally posted at https://beko.famkos.net/2021/09/15/primary-buffer-panel/


 Charles Yarnold
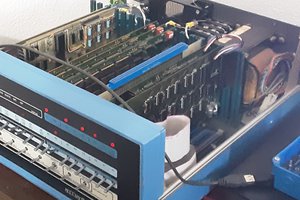
 glgorman
 Jack Flynn
 Eddie
Eddie