 DIY GUY Chris
Why the ATtiny10

The ATtiny10 microcontroller comes in a package size of SOT23 with six pads. Although the ATtiny85 is a more popular microcontroller, it is not as small as the ATtiny10, which is widely available at a reasonable price of around $0.4
At first, it seemed easy to interface with this microcontroller using Arduino IDE. However, it wasn't as straightforward as expected. This is why we made this video tutorial to clarify the appropriate path that worked for me.
Tested Solutions
While searching the internet for ways to program the ATtiny10 microcontroller, I stumbled upon Tiny Core, a popular core for tiny AVR's that makes them supported for Arduino programming. Unfortunately, it doesn't support the ATtiny10 microcontroller. According to the ATTinyCore authors, they have no plans to include the ATtiny10 in their offered core.
Although you can use the Tiny Core with other tiny AVR's.
I also stumbled upon an application called ATTiny10IDE that provides non-volatile memory programming for the ATtiny10 microcontroller. While the name sounds promising, it is not Arduino IDE-friendly. Therefore, it is not the solution we are looking for.
Finally, I landed on a solution that is Arduino IDE-friendly and has already worked for someone. I followed the steps mentioned in an old post by Kasakalab, but even this solution has some tricks, which I will show you.
TPI Programming
Firstly, there will be no serial programming because the ATtiny10 microcontroller doesn't include SPI communication port. Therefore, we won't be using USBASP as an external programmer. Instead, we will use the Tiny Programming Interface (TPI), a specific programming protocol featured by Microchip on some low-end Atmel AVR Microcontrollers, including the ATtiny10 microcontroller.
TPI gives access to device lock bits, program flash memory, the signature, the configuration, and calibration section. In other words, we will get full access to the ATtiny10 microcontroller ports through TPI.
Preapare the Arduino IDE
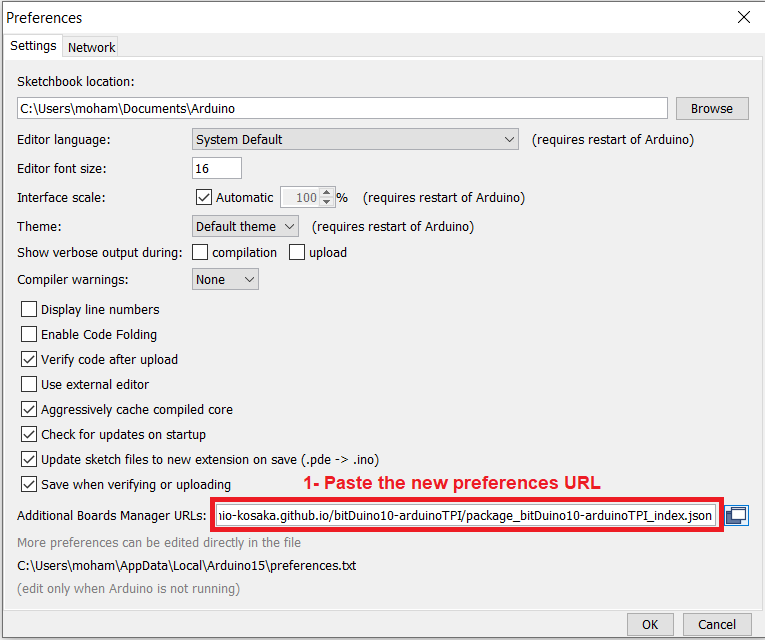
To upload programs to the ATtiny10 microcontroller, we need to add it to the list of boards in the Arduino IDE. To do this, follow this path:
- Add the following link to your IDE preferences URL, File>> Preferences: https://kimio-kosaka.github.io/bitDuino10-arduinoTPI/package_bitDuino10-arduinoTPI_index.json
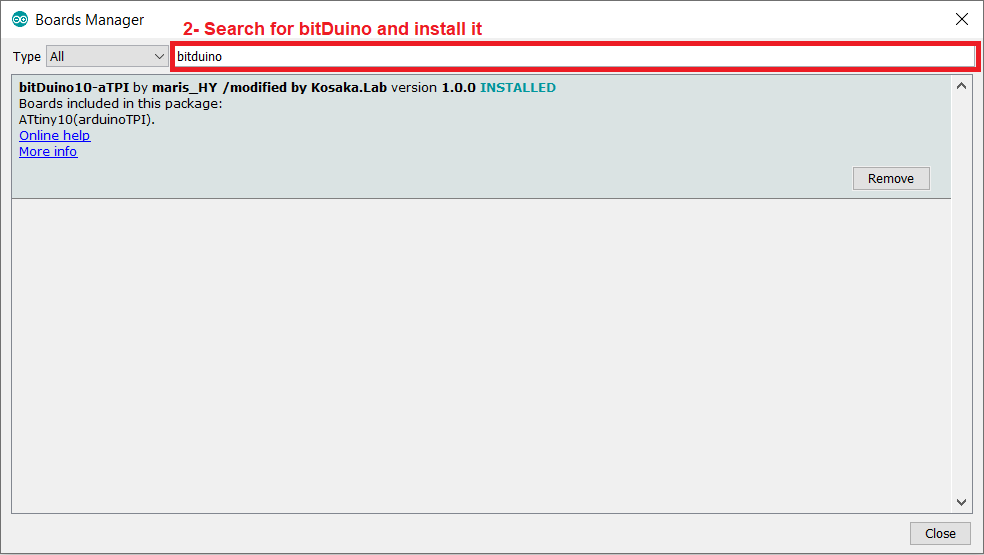
- Add the ATtiny10 board to IDE boards, click Tools>> Board>> Boards manager then search for bitDuino and install it.
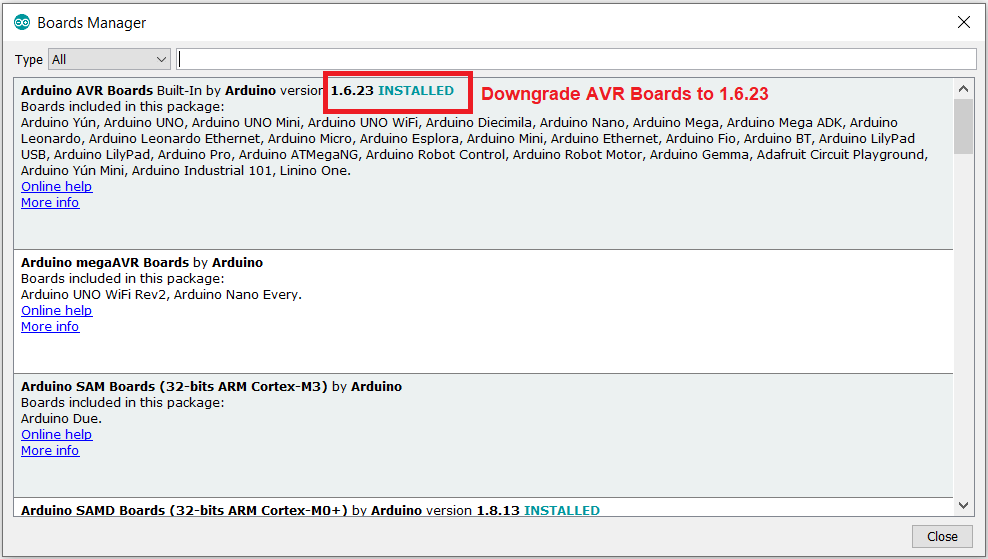
- Make sure that you are using Arduino IDE version 1.8.9 or lower version and consider to downgrade the AVR Boards to version 1.6.23 by clicking Tools>> Board>> Boards manager and search for Arduino AVR Boards then select the 1.6.23 version or lower and install it.
Next, upload the programming sketch to your Arduino Uno to make it the programmer for your ATtiny10 microcontroller.
Wiring the ATtiny10 Microcontroller to Arduino Uno
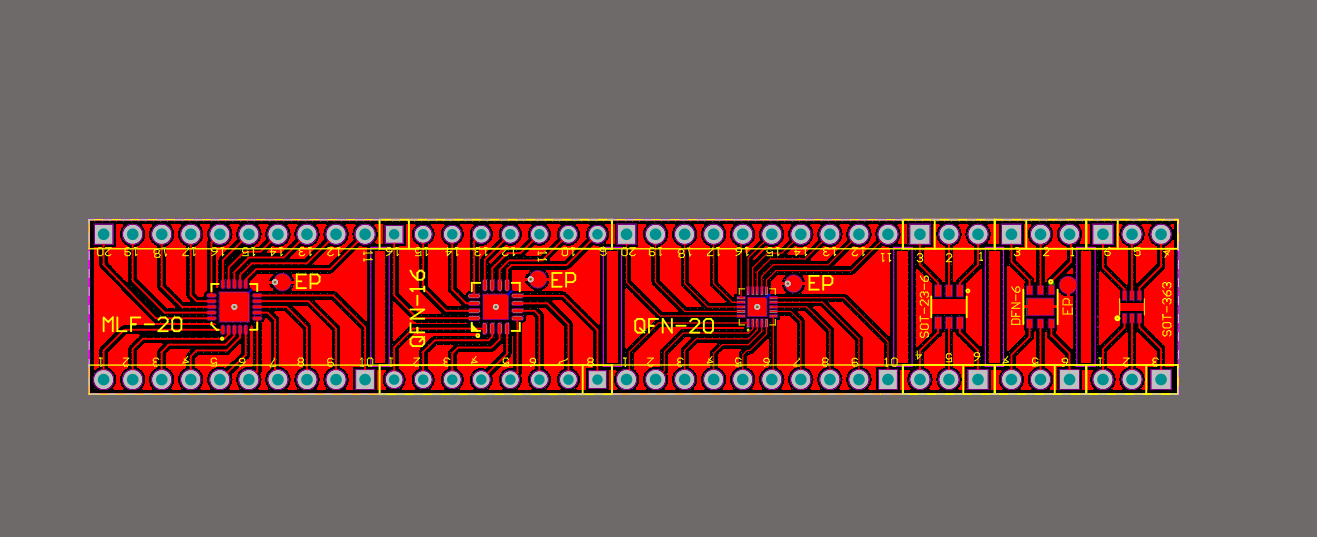
I prepared a breadboard-friendly breakout board for the ATtiny10 microcontroller using Altium designer along side with some other components package breakout boards, which we got delivered for $2 from JLCPCB . I soldered the ATtiny10 to its breakout board and wired it to the UNO for the first program upload.

Based on the Microchip datasheet, we need 220 Ohm resistors placed in between the serial programming pin, connecting MISO MOSI pins of UNO pin 11 and 12 to TPIDATA pin D0 of Tiny10 through 220 Ohm resistors and the same for Clock pin of UNO pin number 13 to TPI CLOCK pin D1 of tiny10 and the same for the RESET pin number 10 of UNO to RESET pin number 6 of Tiny10.
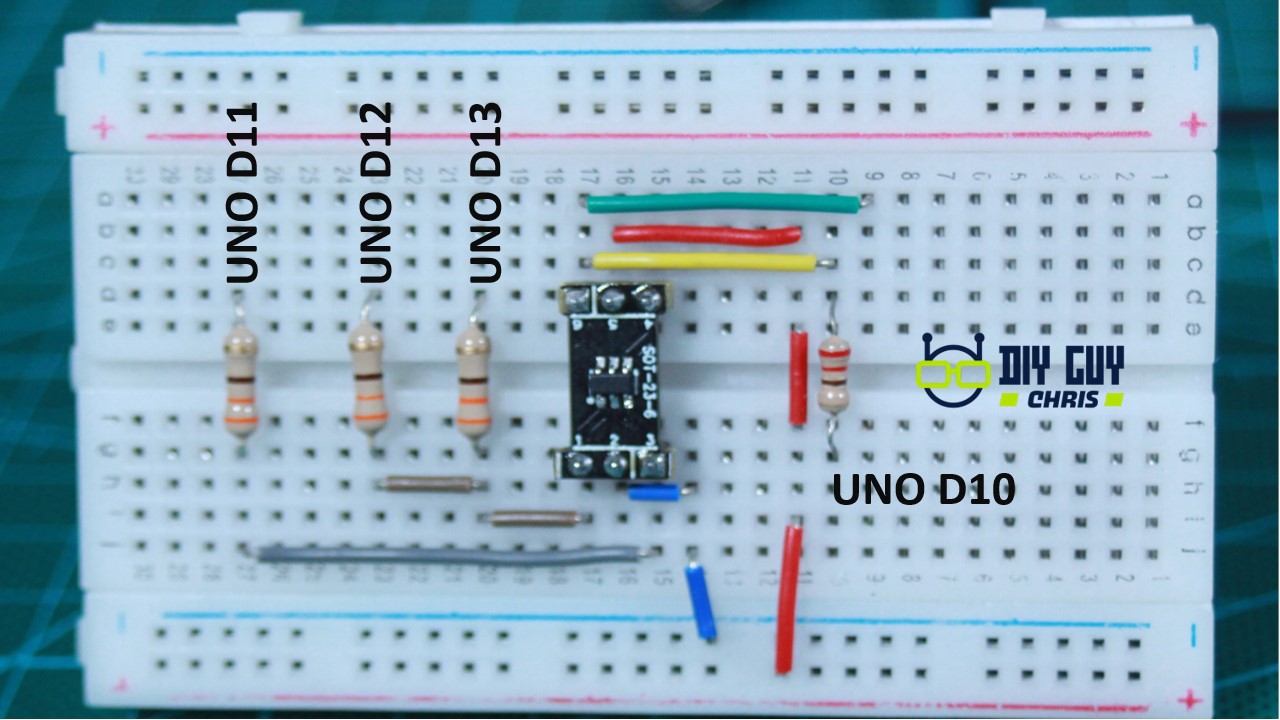
Arduino UNO | ATtiny10
D11 and D12 ---------------> D0
D13 ---------------------------> D1
D10 ---------------------------> Pin6
I used 330 Ohm resistors available in my Lab instead of 220 Ohm resistors and it works well.
Then I connected my UNO to computer through USB and set...
Read more »
 kodera2t
 J3TTBlack88
 doctek
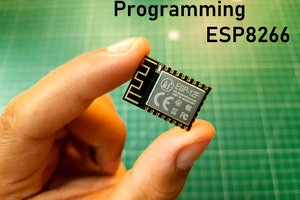
 Sagar 001