Close
0%
0%

Glovraille: another braille Bluetooth keyboard

A prototype of a Bluetooth keyboard in form of glove for braille typing

Similar projects worth following
This is the a prototype of the braille Bluetooth keyboard that is in form of a glove. The project is based on an ESP32 board.
The aim of this project is to help blind people to write directly to a device (PC, Phone, Tablet) using Bluetooth.

Introduction

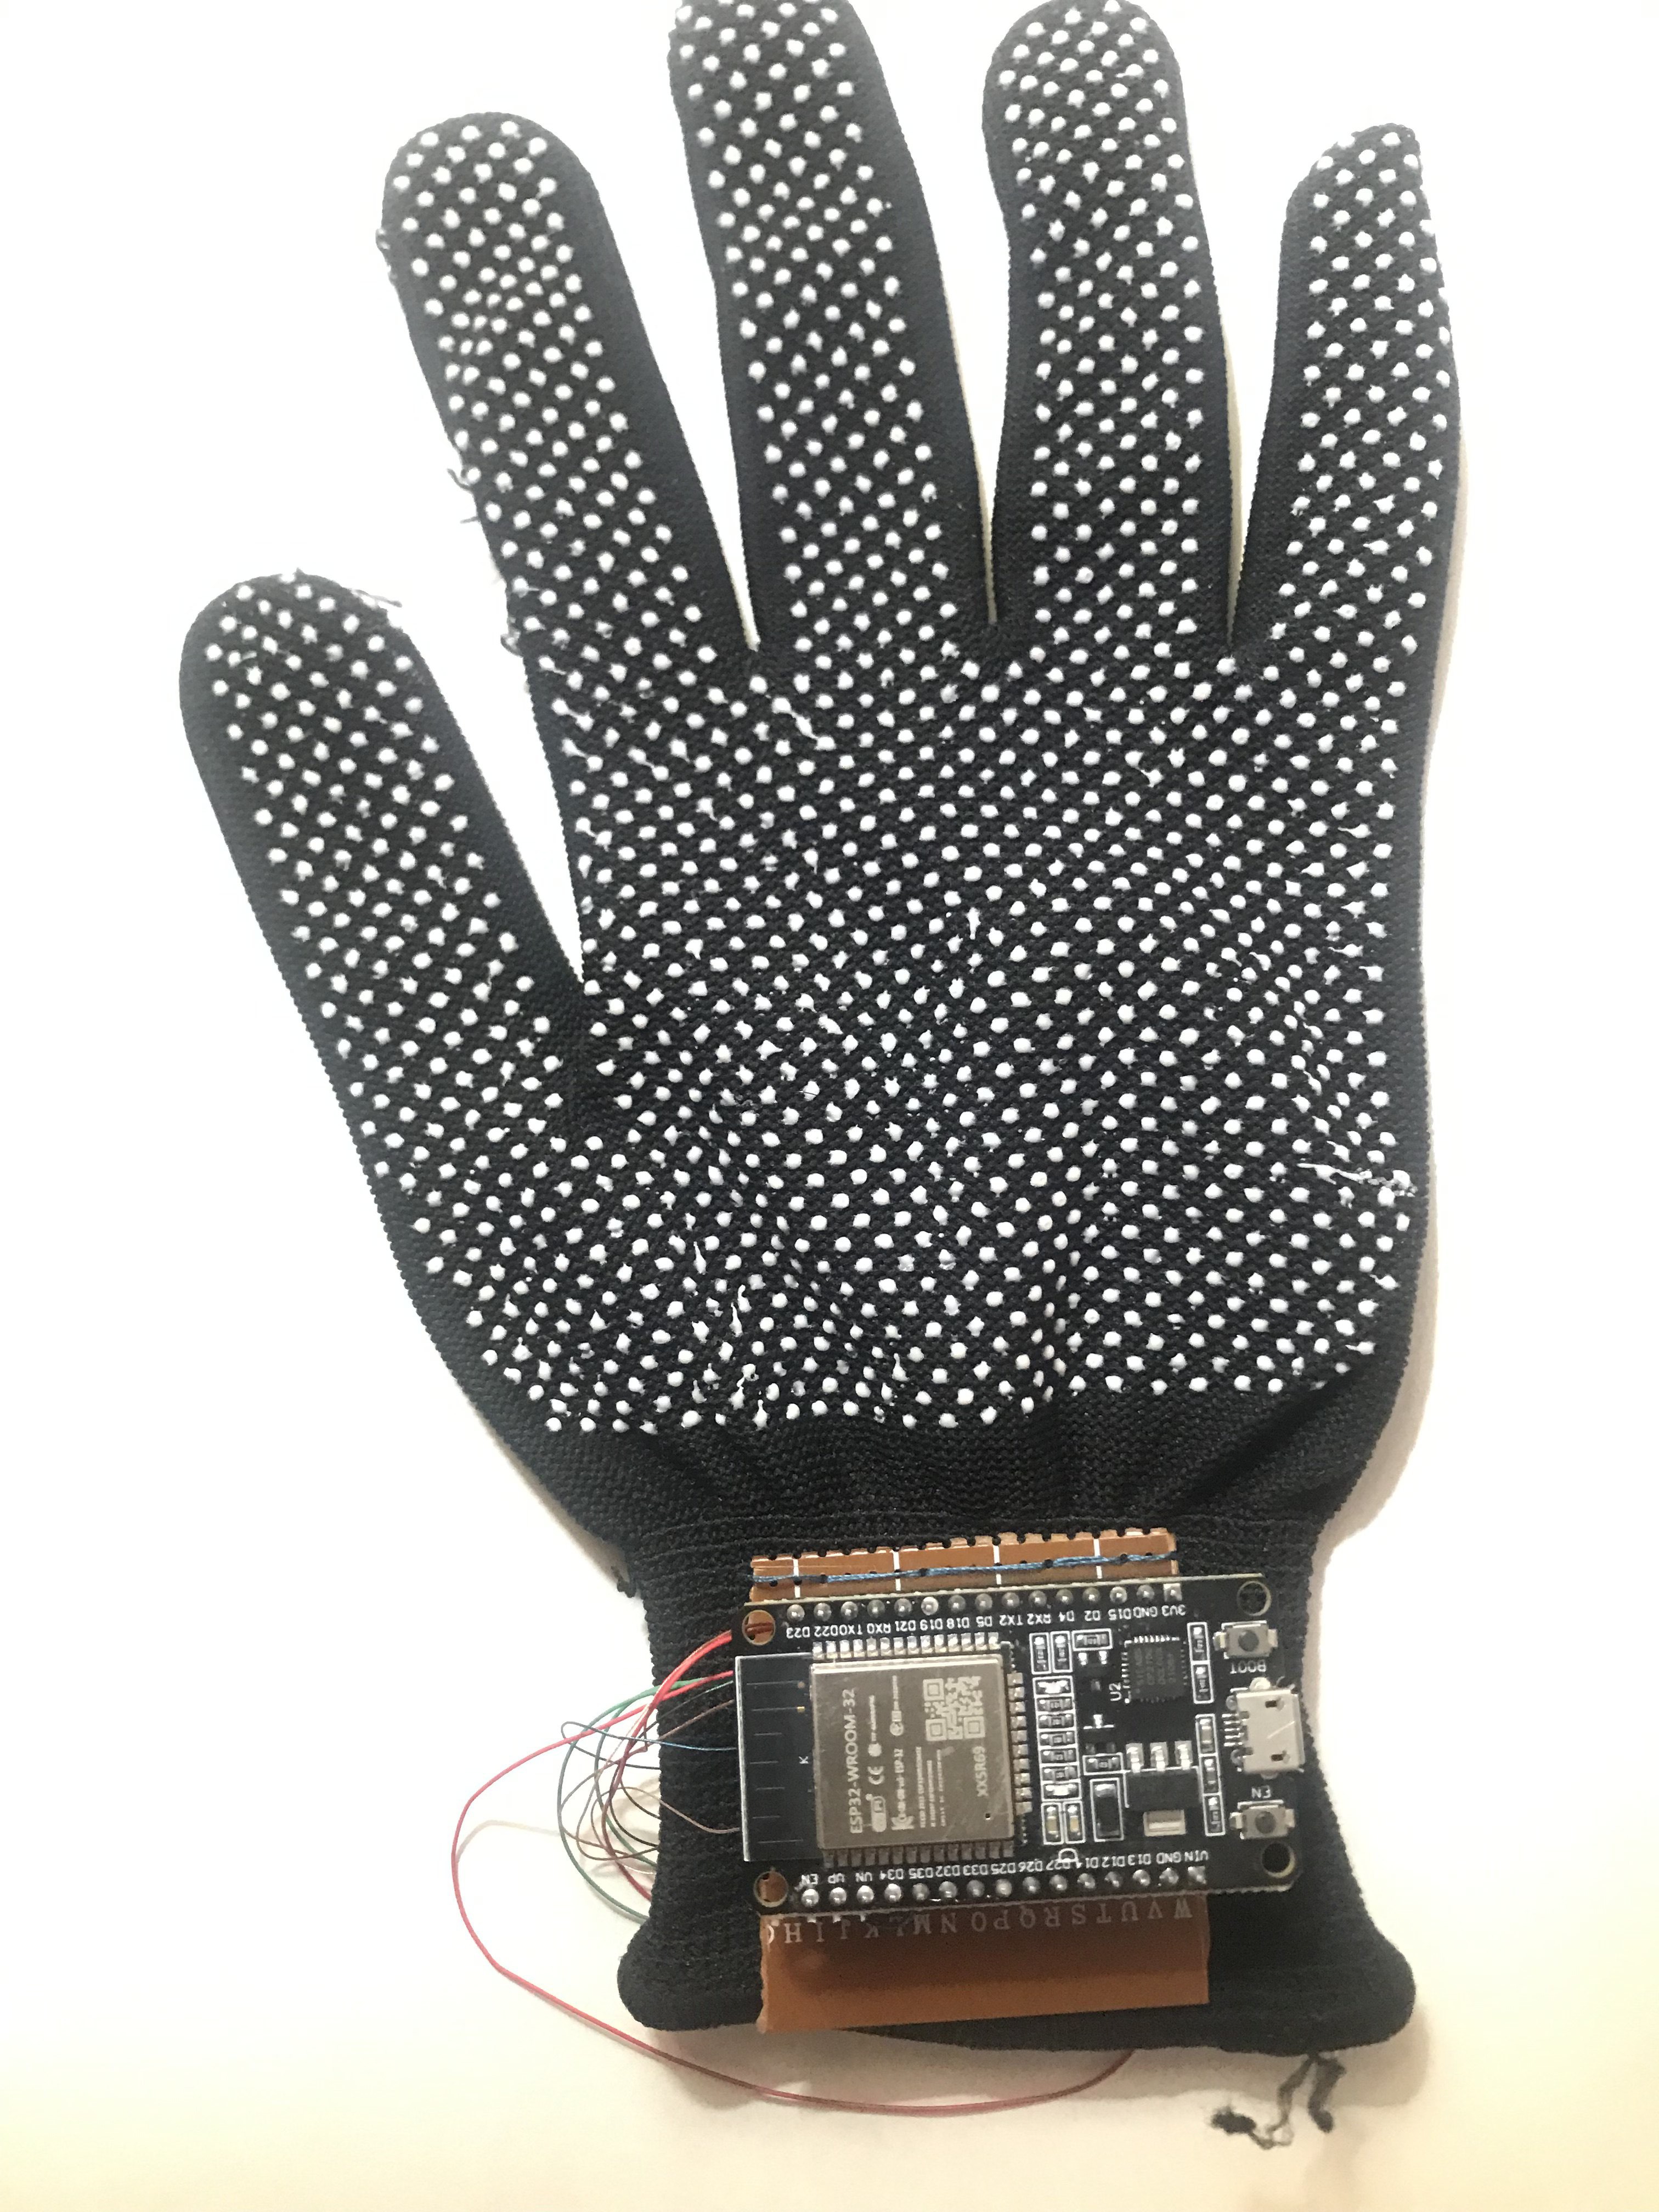
Glovraille is a braille keyboard in form of a glove, the user can wear the glove a start to type in braille with ease. This the third version  (version 1 and 2)  which uses an ESP32 board to enable using it as a Bluetooth keyboard with different devices (pc, phone or tablet) .

Concept

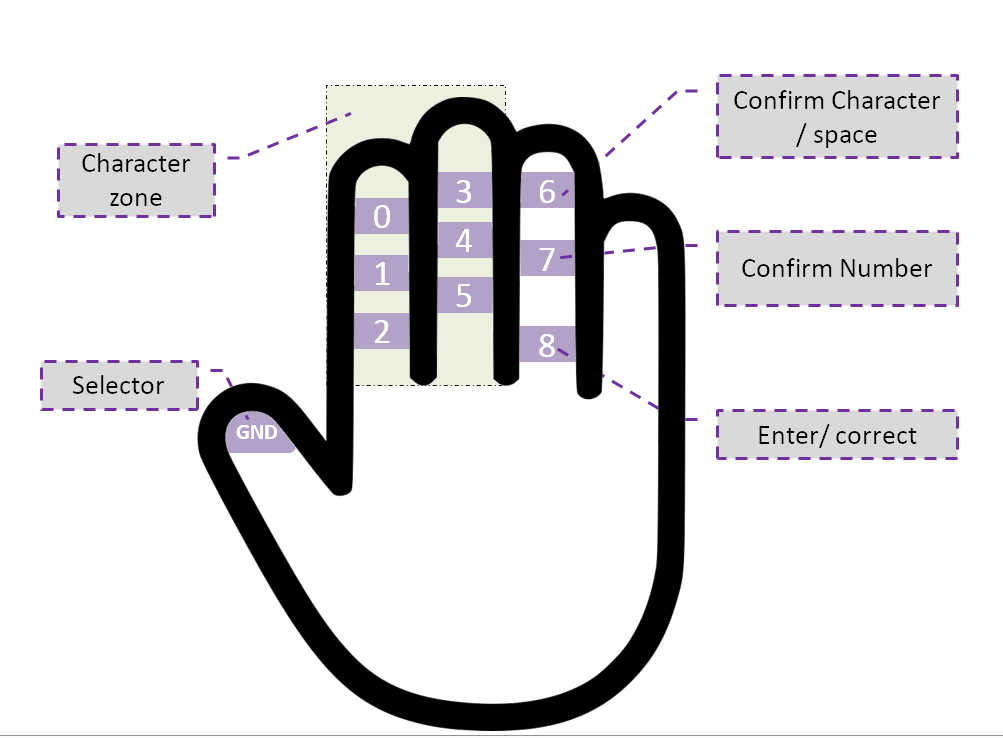
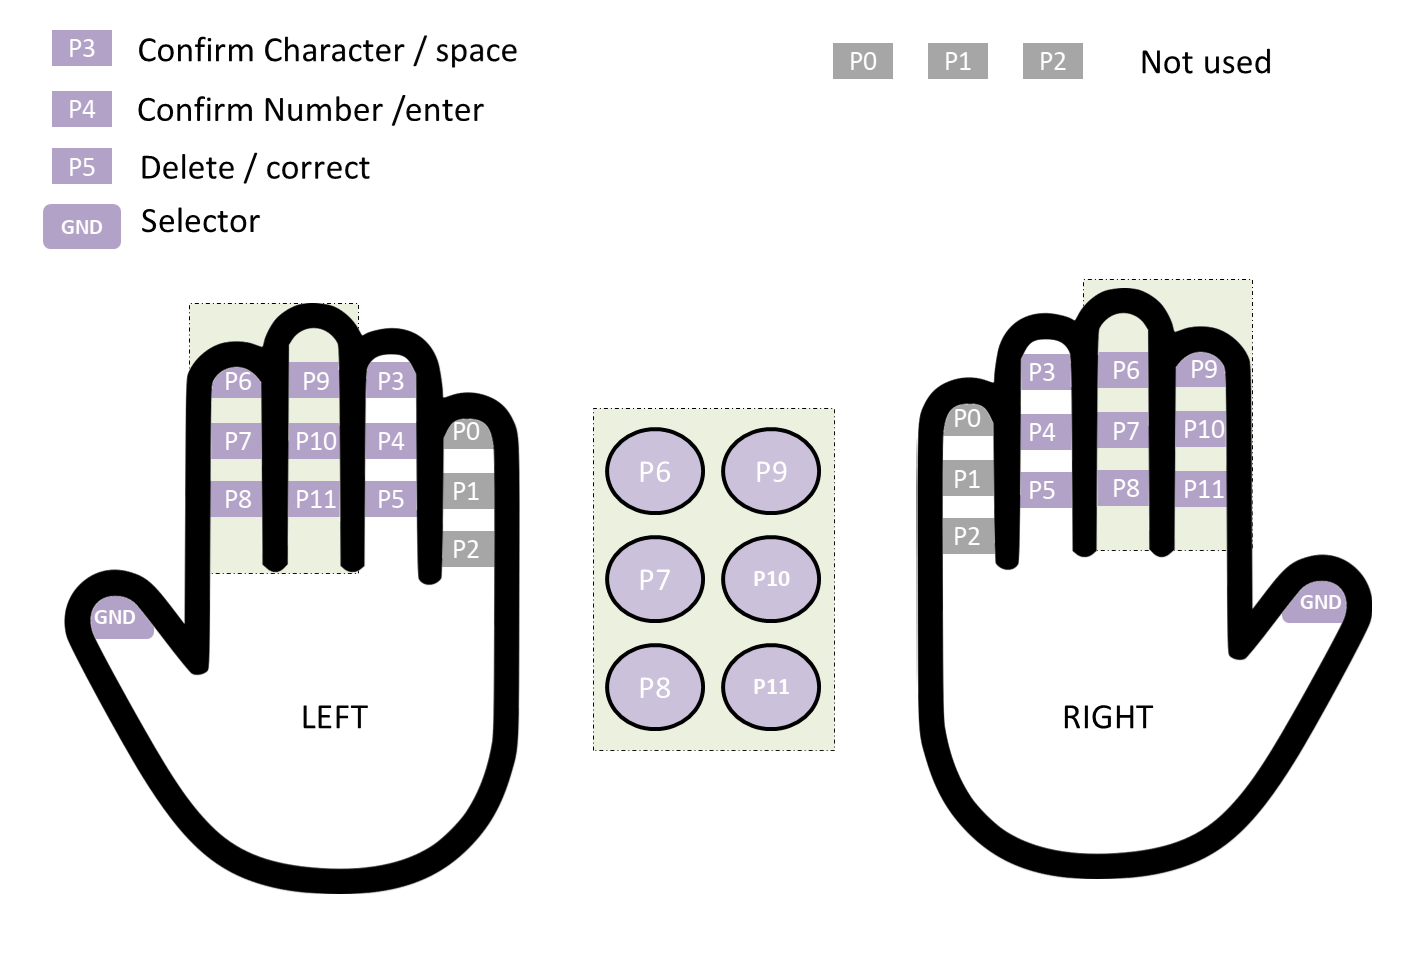
The concept is very simple, as shown in the figure below, the user will type a character using the selector and the character zone, when the user finish typing the character, he can confirm whether it is a number or character using one of the options in the fourth finger(ring finger) , the character is then sent to the connected device (computer, phone or other compatible device) after confirmation. The user can also send space, delete, enter or correct.

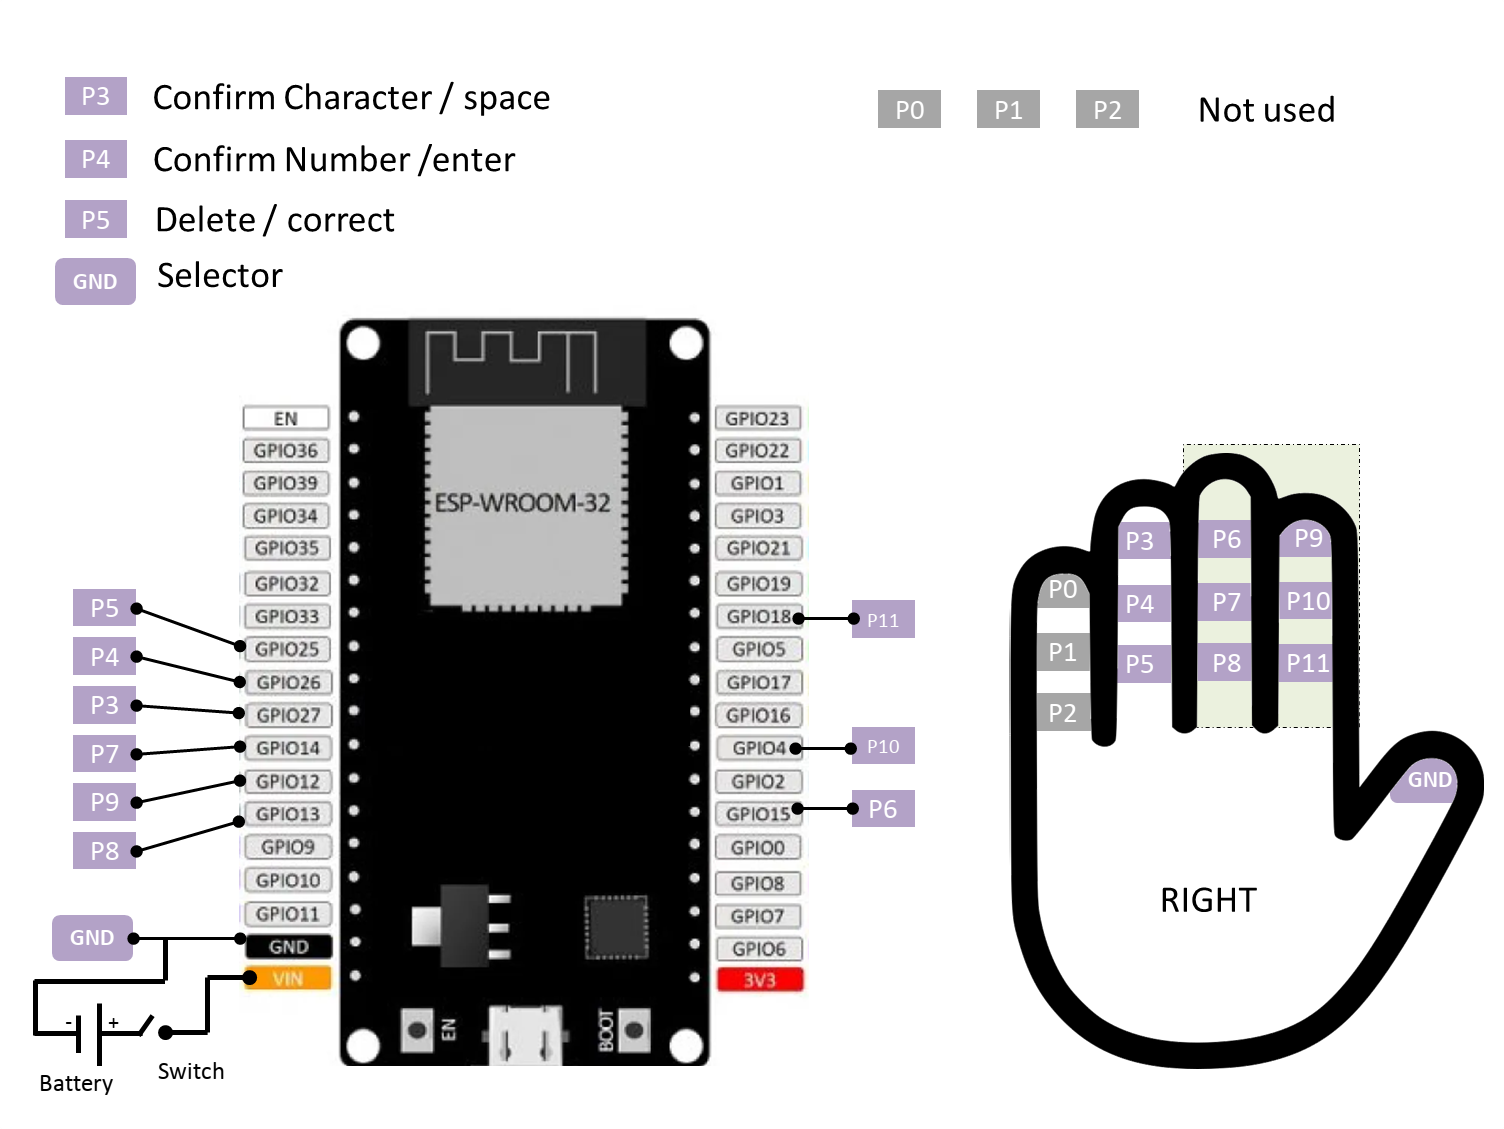
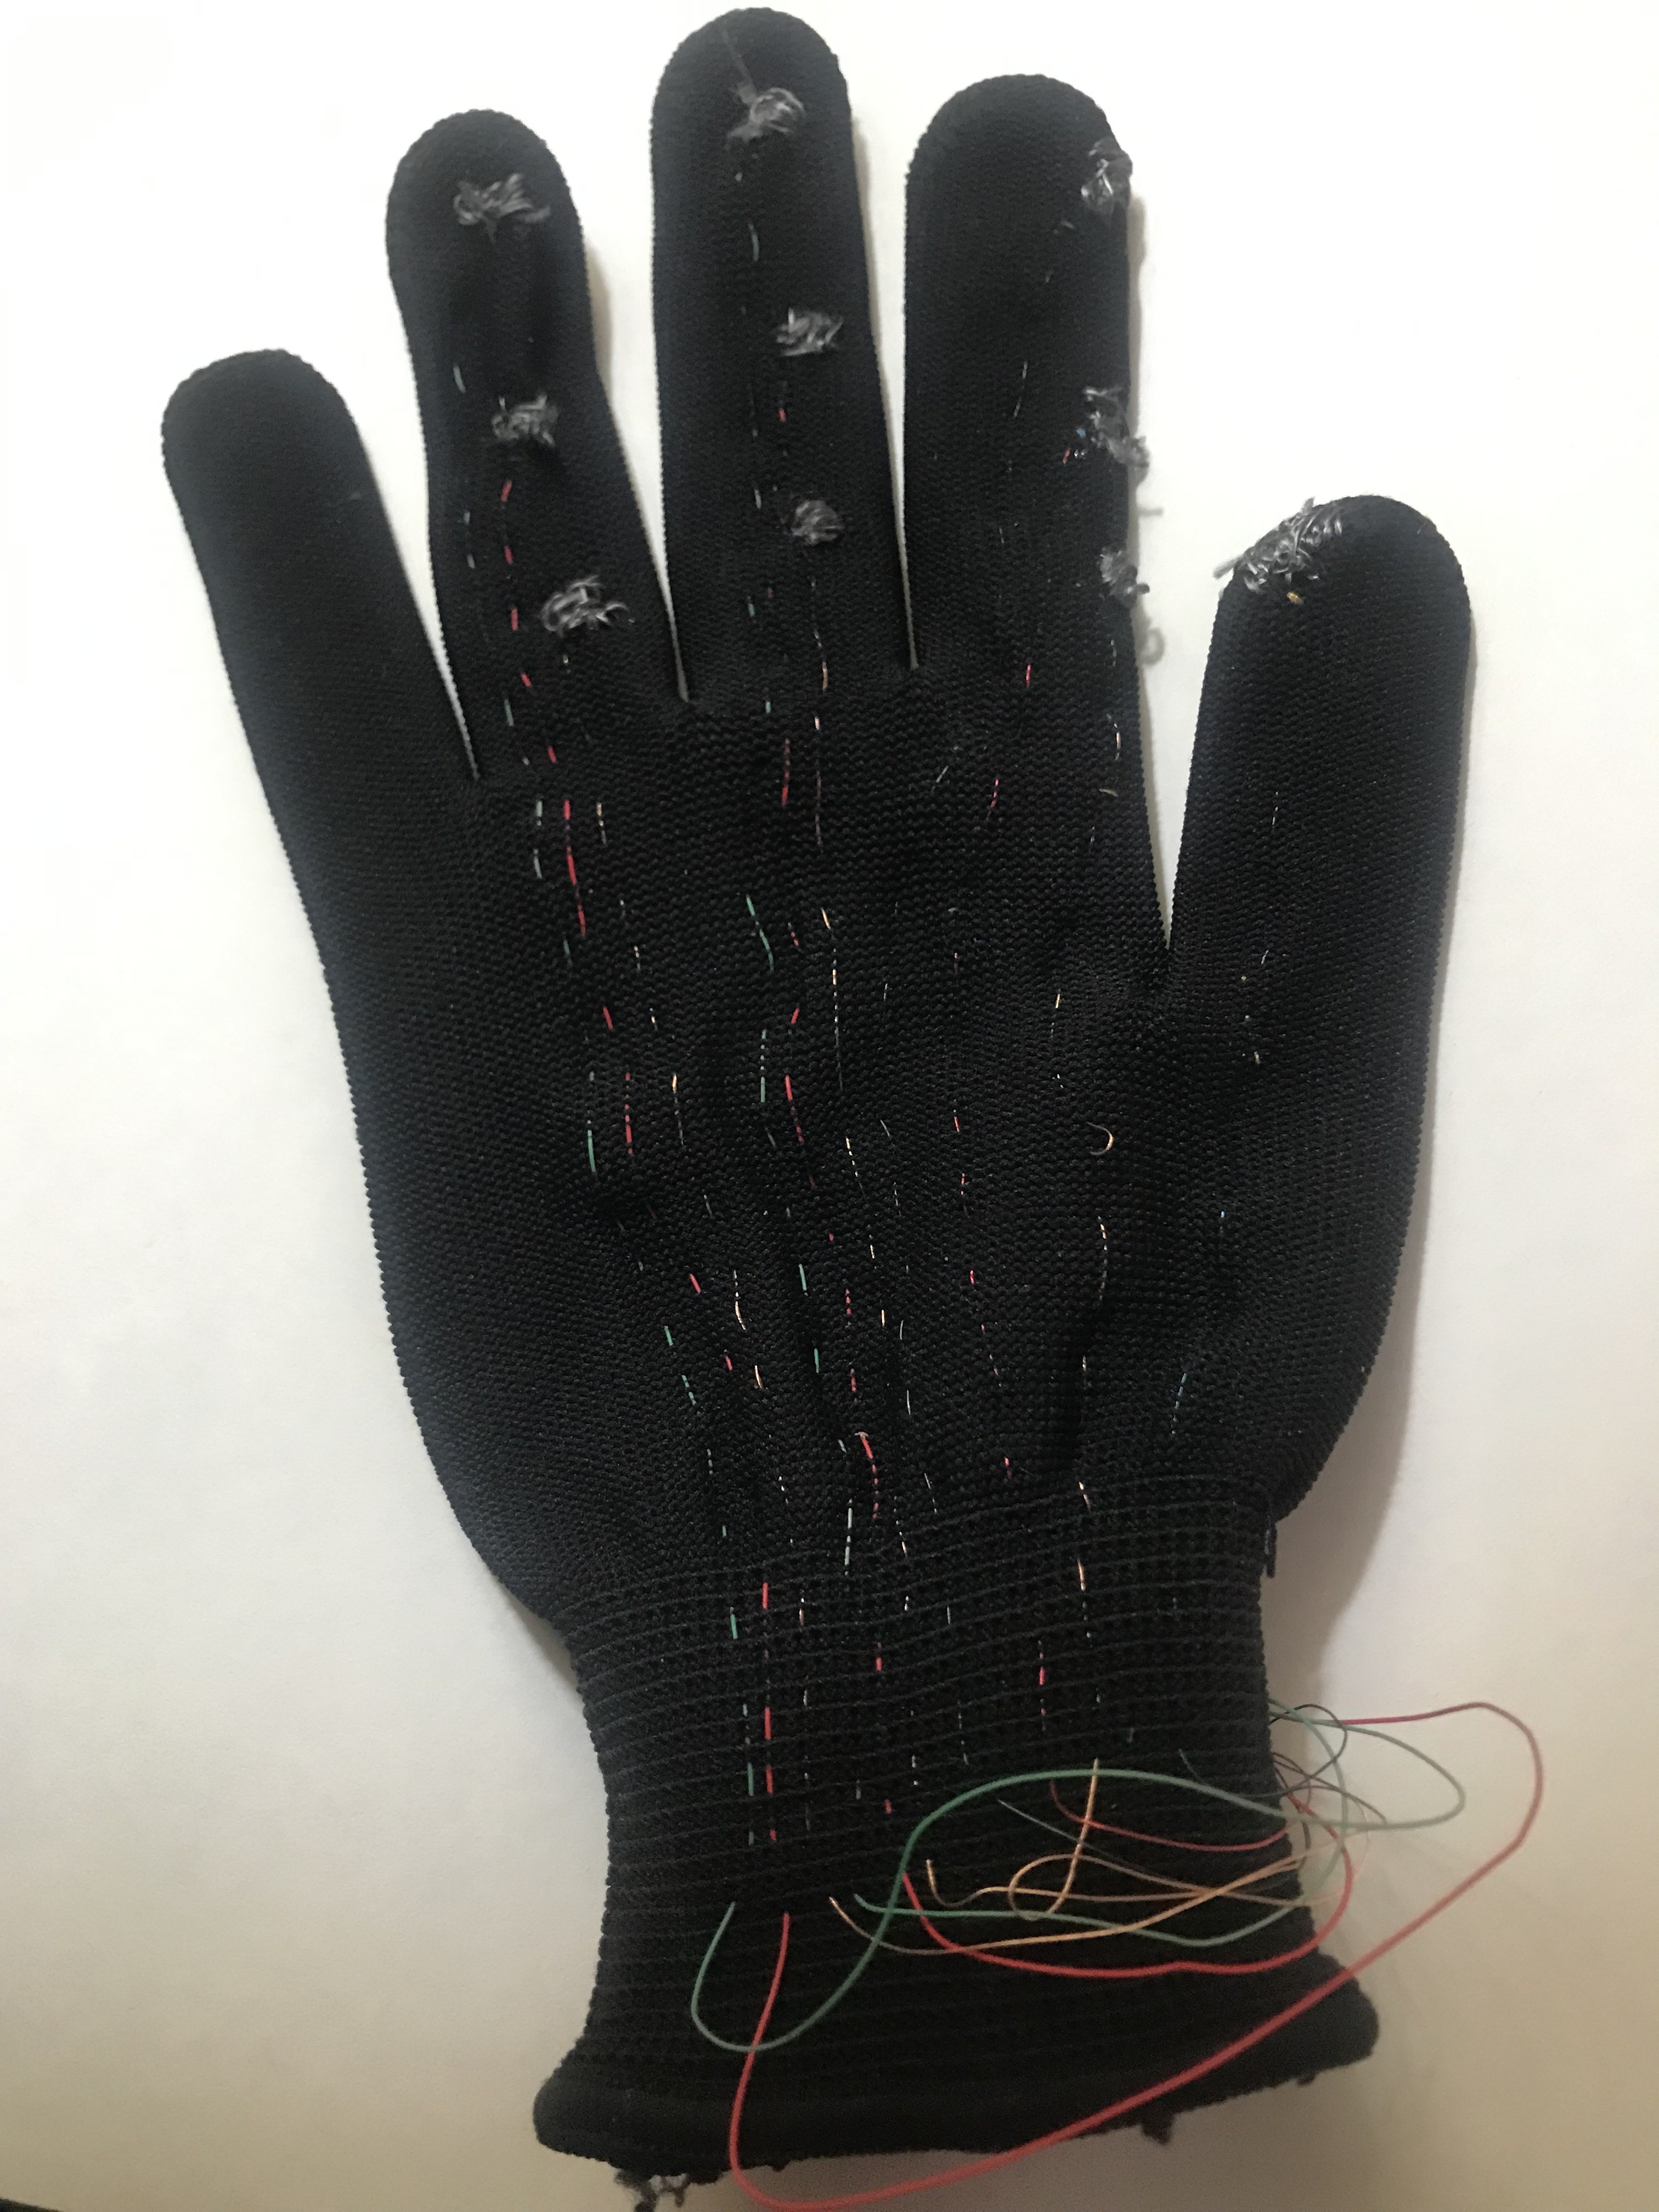
The glovraille consists of 10 pads, 6 for character input, 3 for different options and one pad as a selector. The role of each pad is as follow:

  •  pad GND : the selector ( connected to GND pin of the Arduino)
  • pads from 0 to 5 : character zone, this pads will construct the character 
  •  pad 6: When this pad is selected using the selector, if the user already taped a character, it will confirm the character and sent it to the connected device. Otherwise, if the user did not enter any character, this will send a space to the device.
  •  pad 7: When this pad is selected using the selector, if the user already taped a character, it will confirm the number and sent it to the connected device, else, if no character is typed, the Backspace character is sent.
  • pad 8: When this pad is selected using the selector, if the user already taped a character, it will correct the character, in other words, this action will clear the character buffer and does not send anything to the connected device. Otherwise, if the user did not enter any character, this will send a return character to the device.

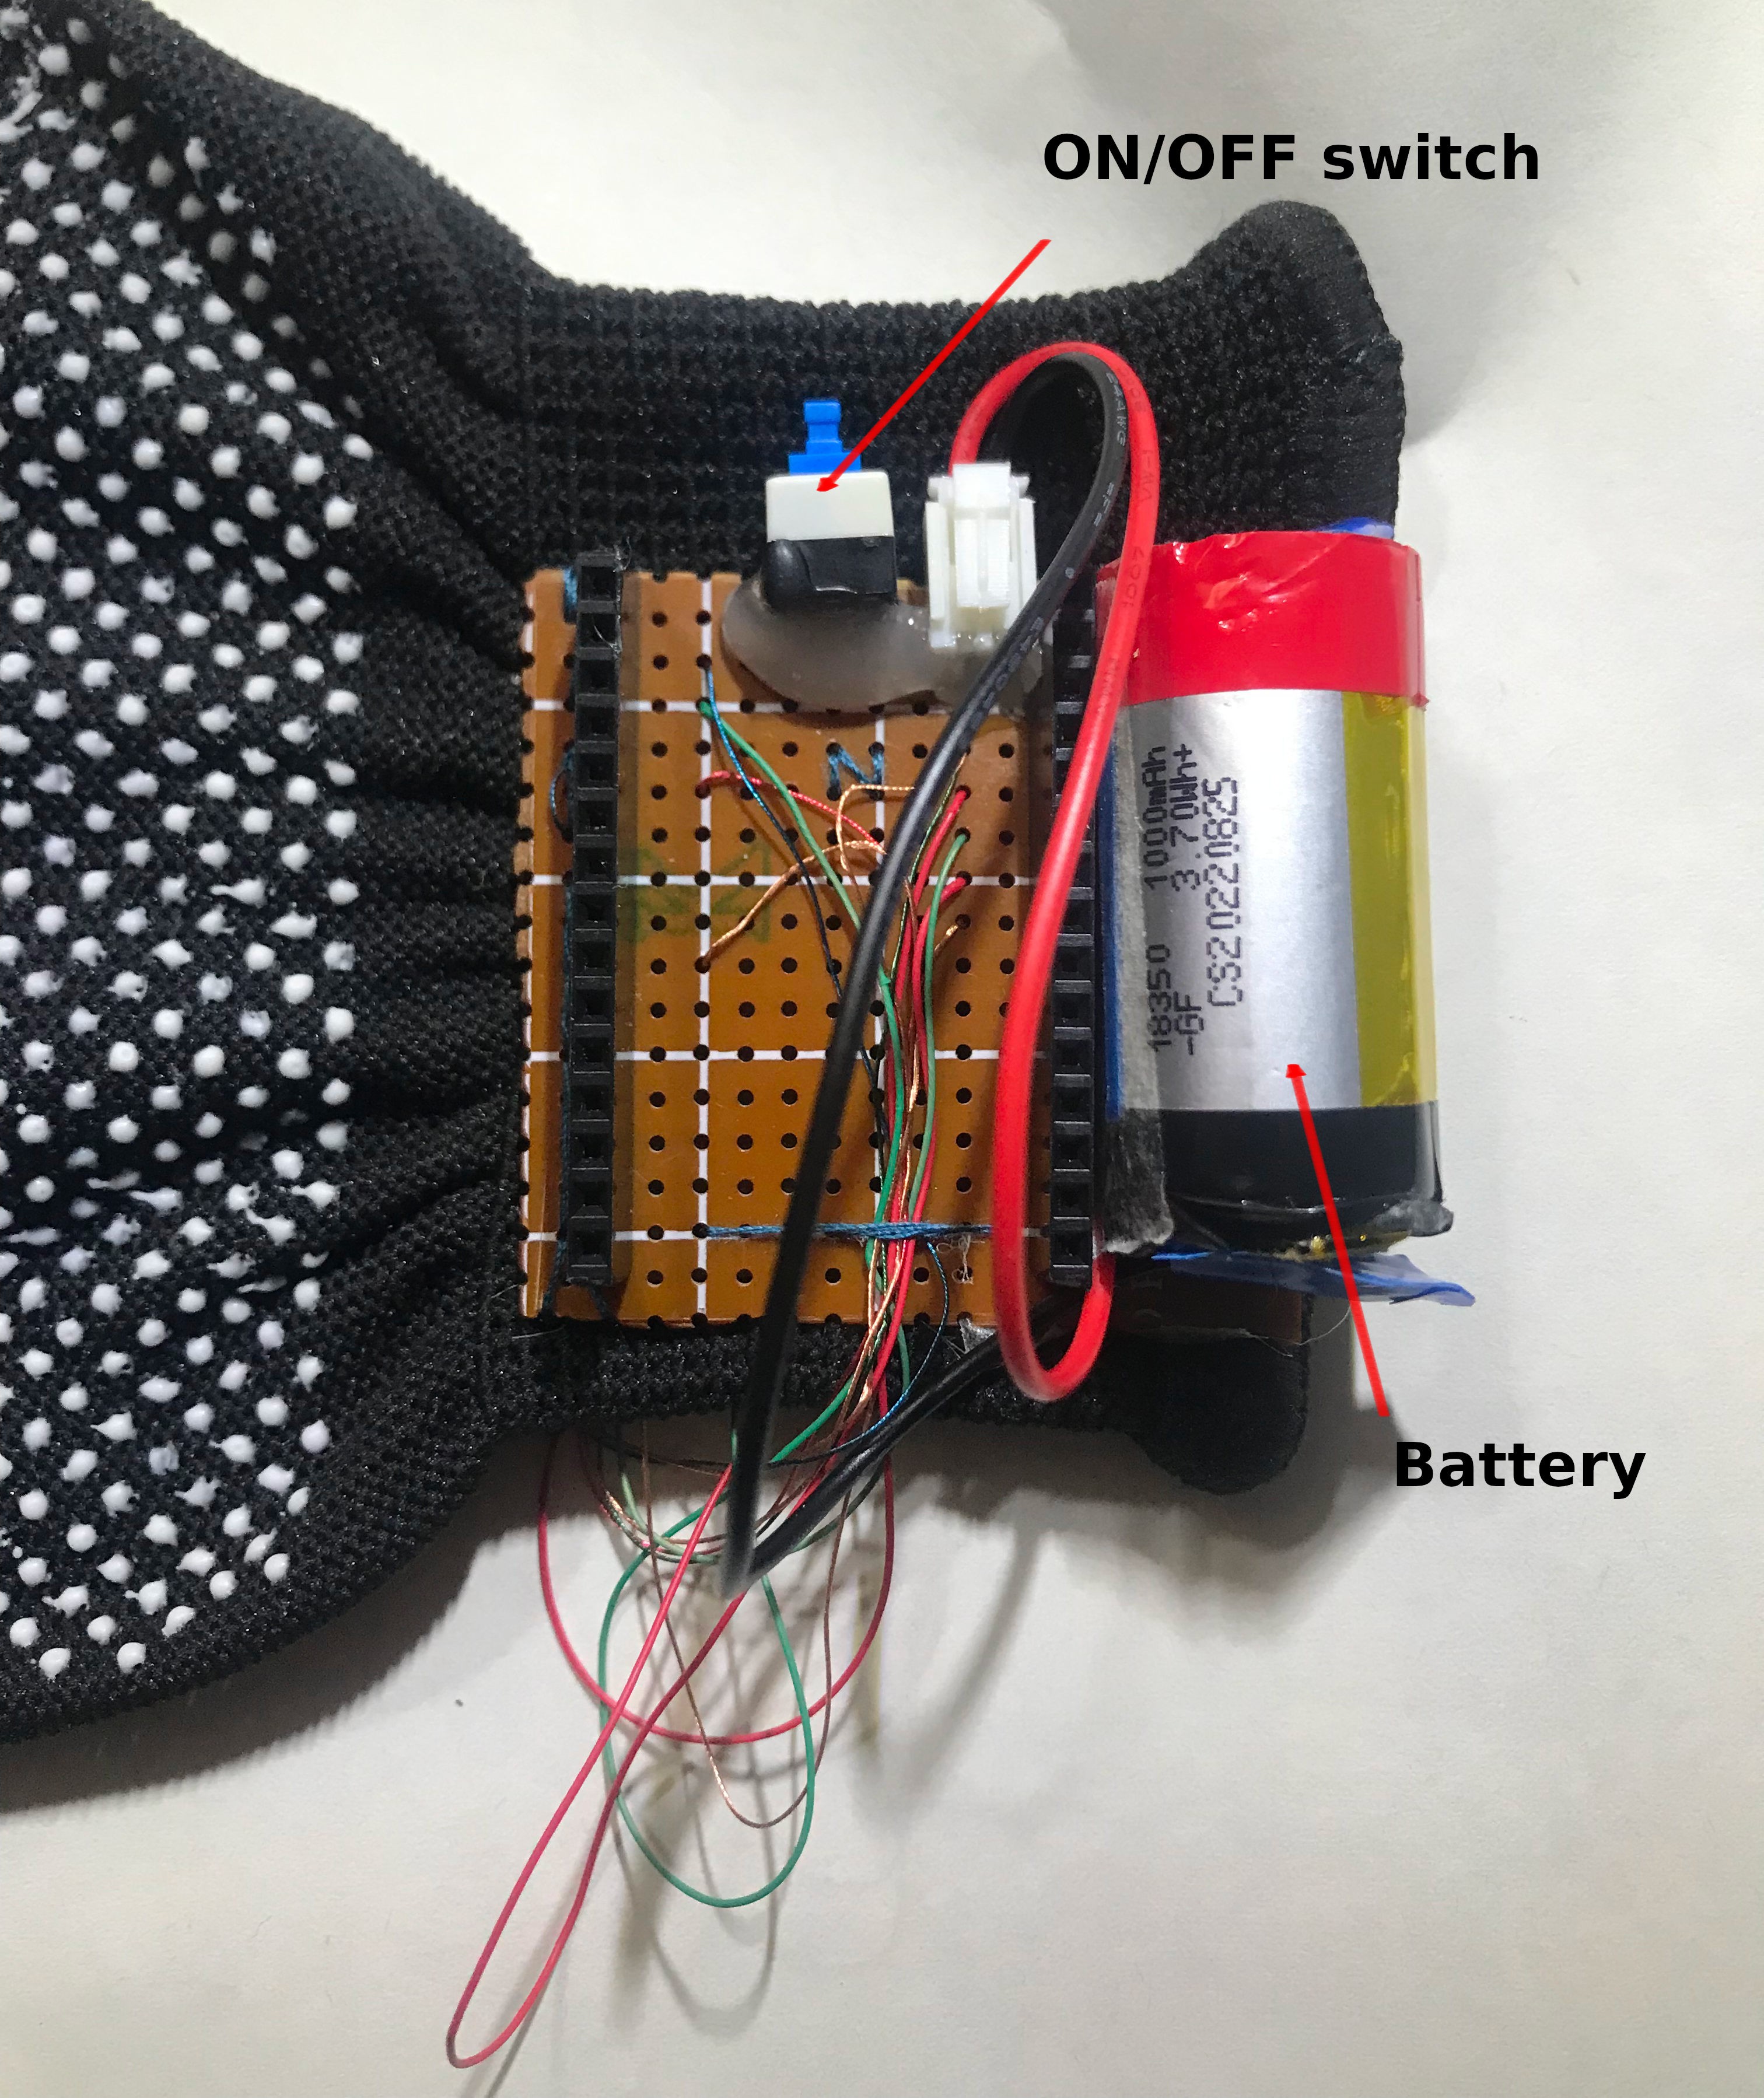
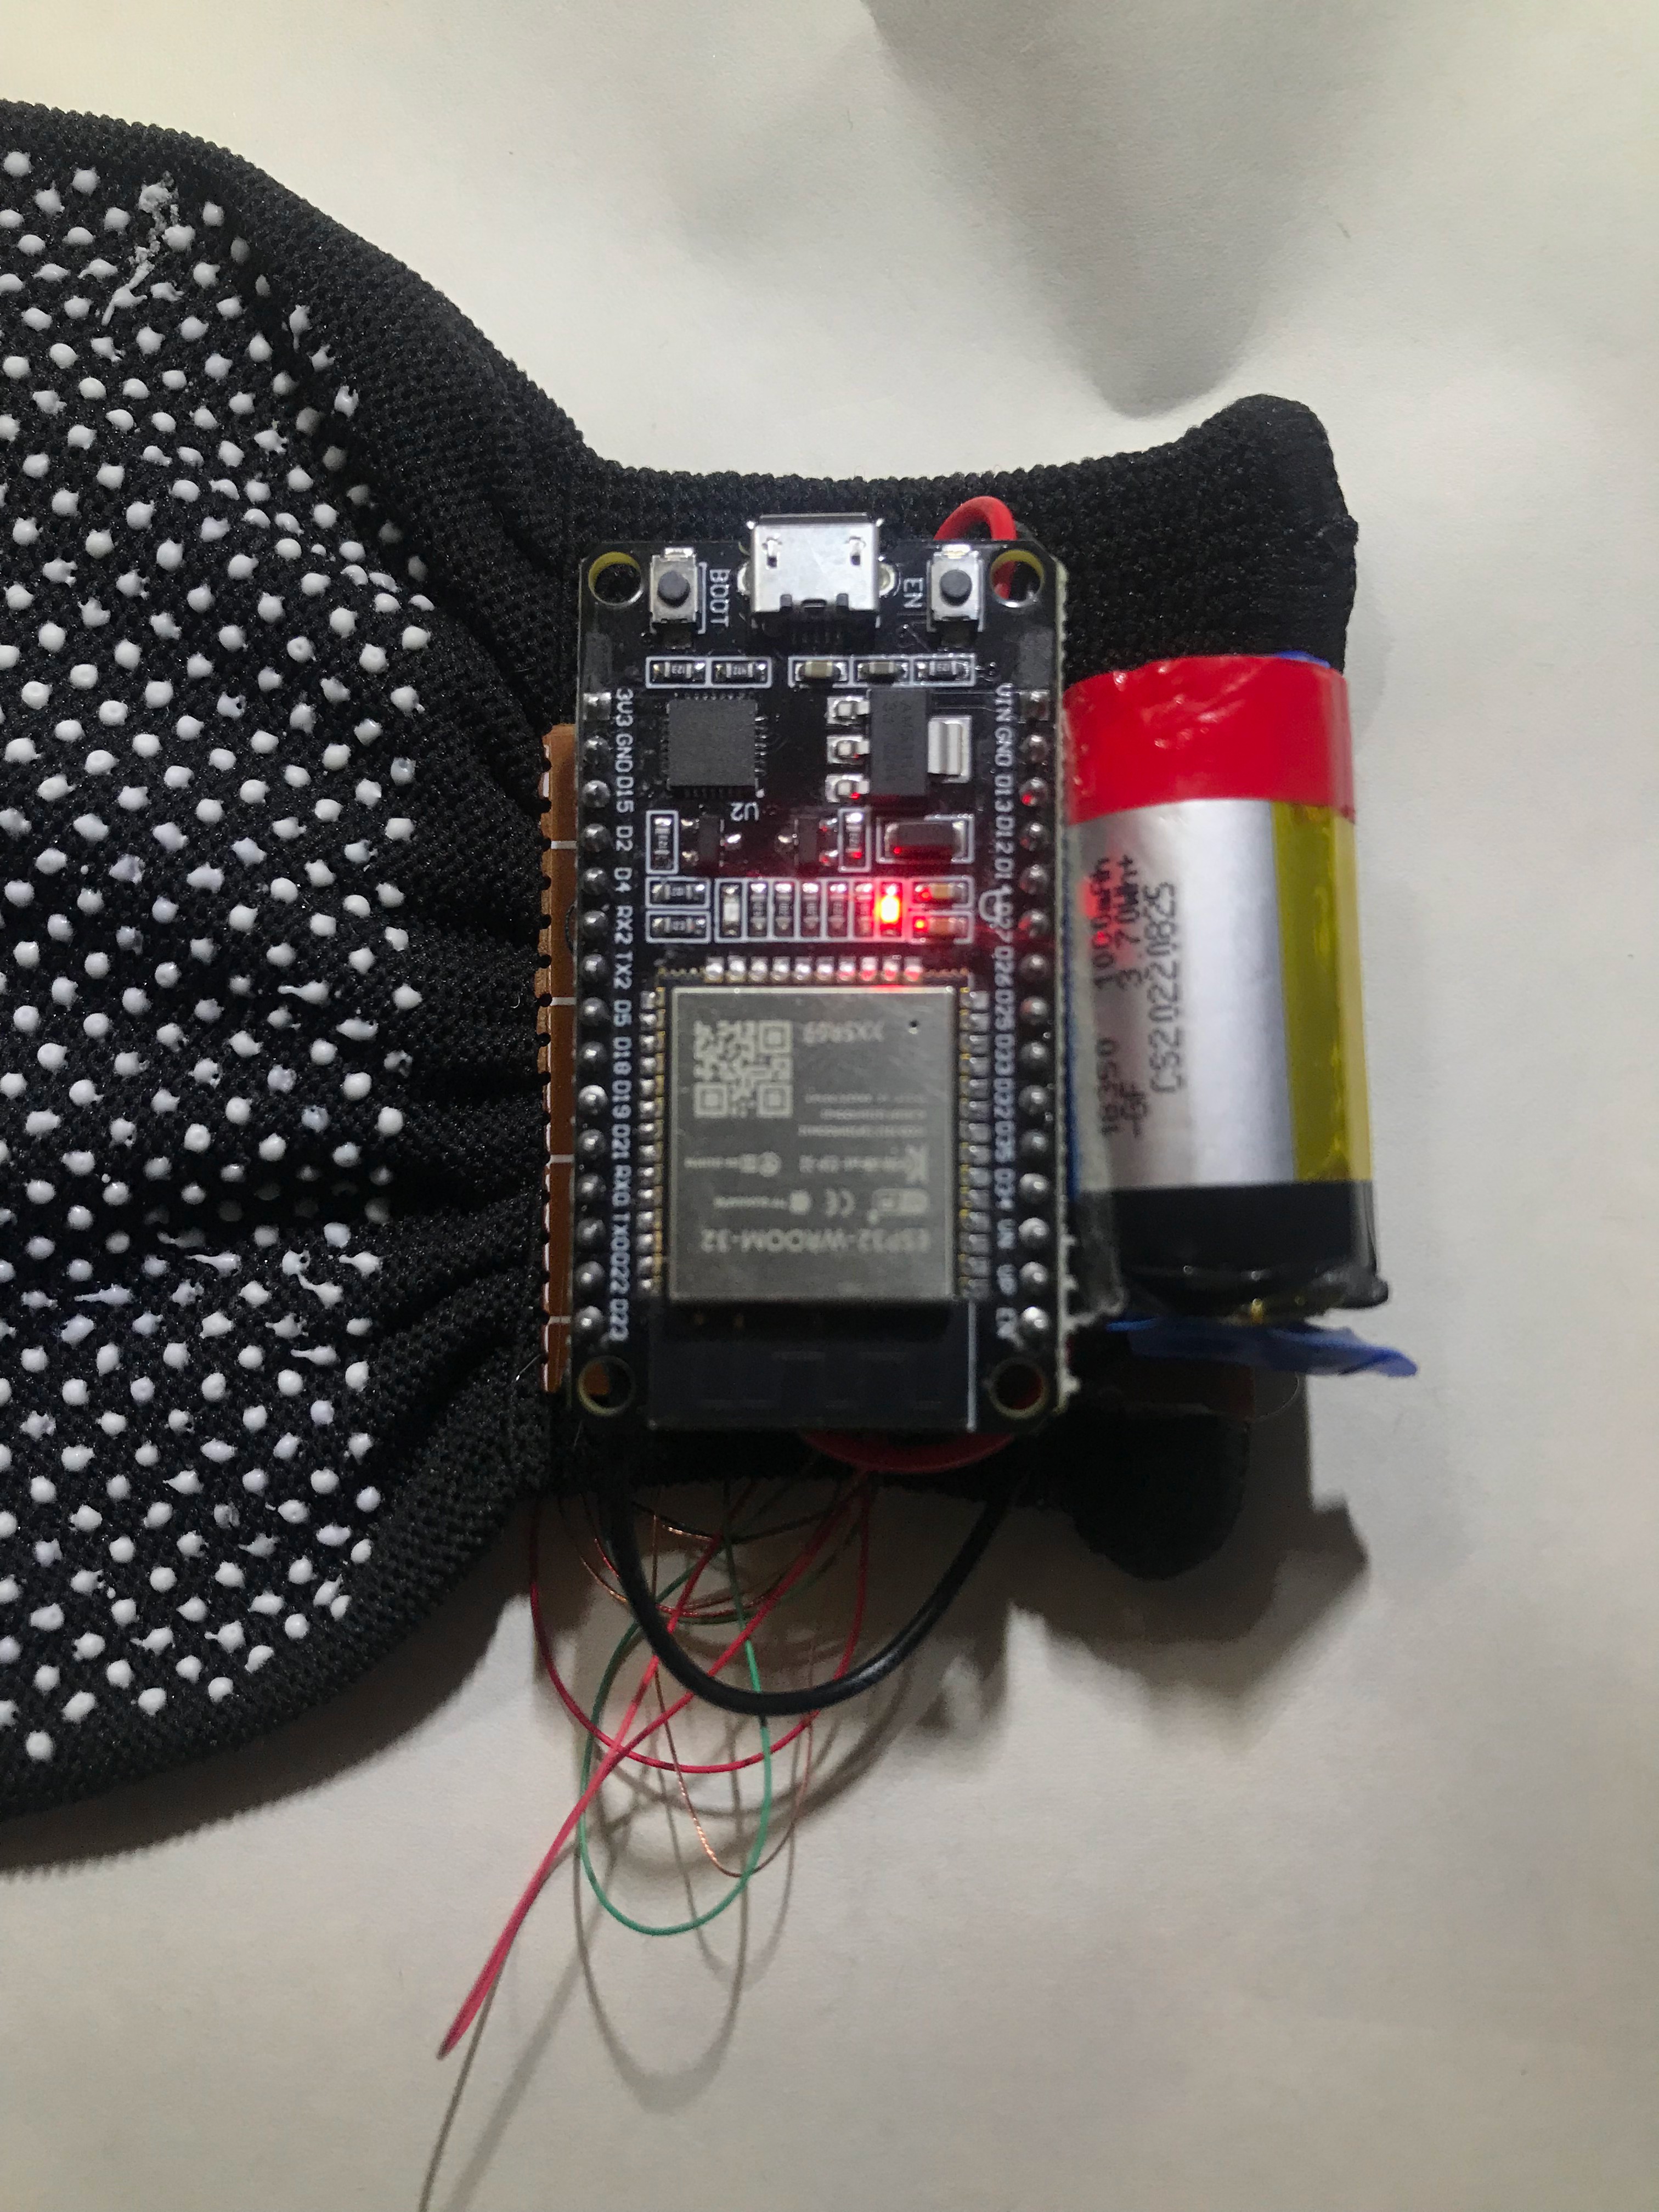
Instruction on how to build this project can be found in the project github repository  and also in the logs of this project.

The videos below shows the prototype in action:

I will update the project with the needed instructions and file in order to build such a device (The code is now kinda messy, it's a midnight project). Also I will add more details on how it works and the alphabet that functionality of each glove finger. The video below is a proof of concept of the project idea.

Version 3 test

Version 2 test

Version 1 test

  • 1 × Glove
  • 1 × ESP32
  • 1 × Conductive thread
  • 1 × Headphone wires
  • 1 × Battery

  • Adding battery

    Nait Malek Youssef05/29/2023 at 14:41 0 comments

    Adding battery:

    The last time, I powered the Gloveraille prototype  using a power-bank since I don't have a suitable battery. A couple of days ago, I found an electric vape from which I salvaged the battery which was perfect fit for the prototype. It was flat but I managed to charge it using a charger I used to have. The battery is 3.7 V and has a capacity of 1000mAh. At this time I did not process the current consumption of the Gloveraille prototype to see if the battery will last longer or not, but it works for now as a charm.

    I also added a switch button in order to turn the Gloveraille ON and OFF as shown in the following picture:

    Wiring: make your own Gloveraille

    The next picture shows the pin wiring  to follow in order to make your own Gloveraille:

    if you want to use your own pin wiring, make sure to change the code in the config.ino file:

    #define P0 0
    #define P1 0
    #define P2 0
    #define P3 27
    #define P4 26
    #define P5 25
    #define P6 15
    #define P7 14
    #define P8 13
    #define P9 12
    #define P10 4
    #define P11 18

     and also  the array in the gloveraille.ino file :

    int pins[9] = {18, 4, 12, 13, 14, 15, 25, 26, 27}; //array with only the used pins
    

    N.B 1: Be careful with the choice of the pins to use. To get the code working avoid using pins from 6 to 11 as input/output pins.

    If you use the given code, after uploading the code to the ESP32, the device will appear in the bluetooth list under the name Gloveraille  if you want to change this name, update the following line in the gloveraille.ino file:

    BleKeyboard bleKeyboard("Gloveraille", "USF111", 100);

     Gloveraille is the bluetooth name,  USF111 is the manufacturer name and 100 is the battery status. For now, the battery status is 100, but later , I'm planing on adding a circuit to the device to determine the correct battery status.

    The functions.ino file contains the functions used in the project. if you want to add another character you can do it by updating the  print_letter function :

    void print_letter(char t){
    //code
    switch(n){
    // update here
    }
    }

    N.B 2: Please note that this is not the final code, I still working on improving the code and also adding more functionalities to it.

    What's next:

    I'm planning on adding more functionalities to the Gloveraille prototype, such as: charging circuit for the battery, sleep mode for energy saving, battery status,  make a case using 3D printer and correct some minor errors in the code.

  • Gloveraille: braille Bluetooth keyboard

    Nait Malek Youssef05/21/2023 at 00:36 0 comments

     Gloveraille version 3
    The Gloveraille prototype version 3 uses an ESP32 development board instead of an Arduino pro mini in version 1 & 2. Therefore the new prototype can be used as a Bluetooth keyboard.

     Make it yourself
    To make you prototype you need:

    • ESP32 dev board
    • Headphone wires
    • A glove
    • A conductive thread or conductive fabric (or conductive tape as in version 1)

     Glove:
    You can follow the steps stated in the first version in order to build the prototype, however, instead of the
    Arduino pro mini, we are using an ESP32, so you need to use the appropriate pins of the ESP32.
    NB: You might know that the ESP32 has pins that support touch sensors. However,  in the prototype I built, the conductive thread is exposed in the inside and always connected to the skin.

     Code:

    The code is divided into tree file: gloveraille.ino, functions.ino and config.ino.

    • gloveraille.ino : The main file, contains the declaration of variables and pins used of the ESP32.
    • functions.ino : Contains the definition of used functions. 
    • config.ino : Config file, used to map the ESP32 pins to each of the pads in the glove. The function of each pad is shown in the following picture:

     Test:
    The following video shows the prototype in action.

View all 2 project logs

Enjoy this project?

Share

Discussions

tormozedison wrote 05/21/2023 at 14:43 point

Gloves of this type wear rapidly. Something stronger and long-life would be preferred.

  Are you sure? yes | no

Nait Malek Youssef wrote 05/27/2023 at 01:11 point

Thank you for your comment, I agree, however this is just a prototype and maybe in the next versions I will use better types. Thanks again.

  Are you sure? yes | no

Similar Projects

Does this project spark your interest?

Become a member to follow this project and never miss any updates