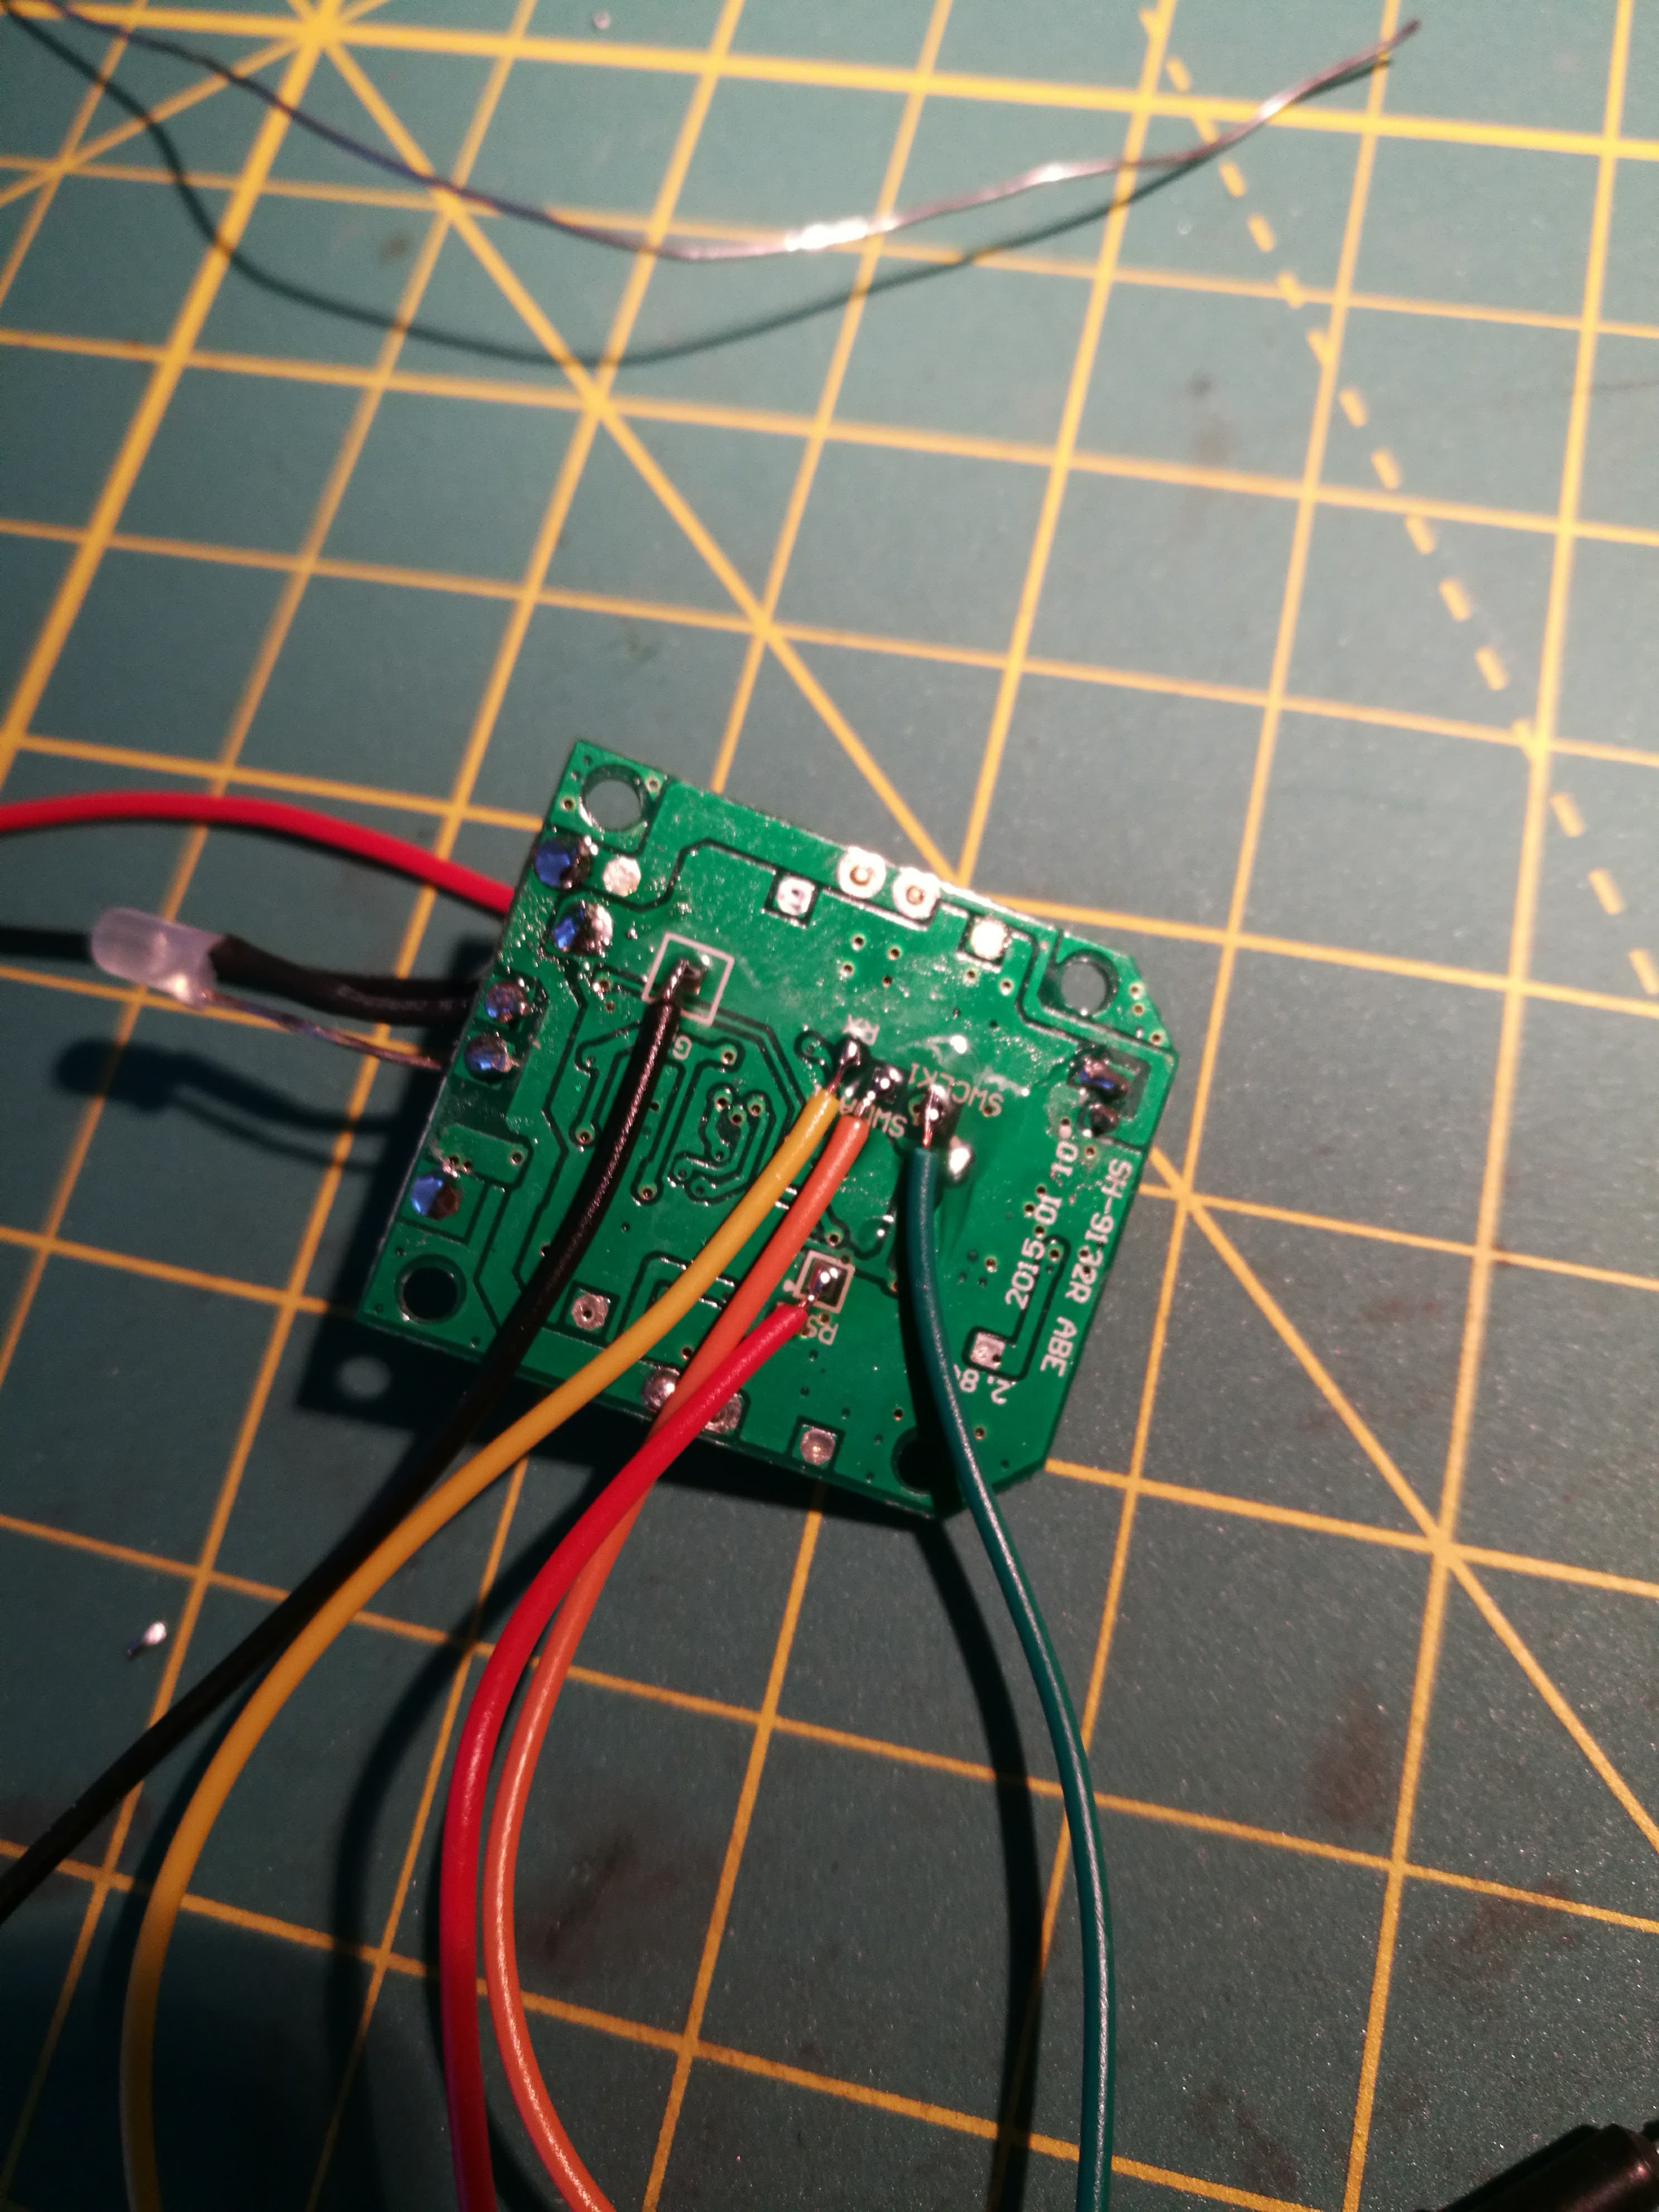
Close
0%
0%

Hacking cheap mini-quadrocopter

Trying to use board from a under $30, off the shelf quadrocopter as a ARM devboard

Similar projects worth following

I bought this toy few years back, and while having a blast with it, I managed to break the motors completely. I haven't found exact replacements so I figured -- I can hack it a little bit as manufacturer thoughtfully left SWD pads on the bottom side of the board. The board is equipped with:

  • STMF031K4 - microcontroller
  • Invensense mpu 6050 - Gyro + Accelerometer
  • HS6200 - 2.4 GHz RF module
  • four transistors, led, and power supply regulator

  • Creating simple code and testing gdb

    lb5tr01/09/2017 at 03:15 0 comments

    Source code on github.com has been updated (71b06b6) and now it contains very basic firmware code. I don't want to exactly describe every file as the structure of project might change in the future, but in general there is a Makefile, linker script (link.ld), initialization code (startup.c) add main firmware code (main.c). Cortex-M0 processor vector table layout is described here. Processor of the MCU will begin by executing reset handle function, address of which is stored at address 0x4.

    I opened OpenOCD session using:

    $ openocd -f openocd-swd.cfg
    As I described in the previous log entry, OpenOCD exposes port 3333 for GDB remote debugging, let's give it a go, shall we?
    $ arm-none-eabi-gdb -q main.elf
    Reading symbols from main.elf...done.
    (gdb) target remote localhost:3333
    Remote debugging using localhost:3333
    reset () at startup.c:67
    67	{
    (gdb) b main
    Breakpoint 1 at 0x80000f0: file main.c, line 12.
    (gdb) c
    Continuing.
    Breakpoint 1, main () at main.c:12
    12	        fun(0xab, 0xcd);
    (gdb) list
    7	
    8	int main(void)
    9	{
    10	    while (1)
    11	    {
    12	        fun(0xab, 0xcd);
    13	    }
    14	}
    As you can tell from the listing above, I started gdb and required main.elf to be loaded (you can also use load command at runtime - for example - to reload symbols), after that using command target I connected to port 3333 of OpenOCD, then I created a breakpoint at function main and requested microcontroller to continue execution.

    In the next episode, I'll try to communicate with GPIO peripherals, and maybe - just maybe - read data from the accelerometer.

    Catch you later.

  • Connecting the debugger

    lb5tr01/05/2017 at 03:18 0 comments

    Few days back I started working on serial debugging. Having access to BusBlaster v3, I used OpenOCD to tinker with the mcu. First things first -- I had to solder few wires to the pads.

    In reality, I ended up using only two wires (except ground) - SWDIO/SWCLK - that I connected to TMS and TCK signals on the BusBlaster respectively. Manufacturer also exposed pads for RX and RST signals, they might come handy later.

    First step is to configure the CLPD on the BusBlaster board with kt-link device. I used ready-to-use svf file from https://github.com/bharrisau/busblaster project.

    $ openocd -f board/dp_busblaster_v3.cfg -c "adapter_khz 1000; init; svf system.svf; shutdown"
    

    After that, I started OpenOCD with configuration for stm32f0x boards (available in the project repository on github):

    $ openocd -f openocd-swd.cfg
    
    OpenOCD exposes two TCP ports:
    1. 4444 - for interactive console
    2. 3333 - for gdb

    Connecting to 4444 with telnet and issuing simple command proved the setup is working as expected.

    $ telnet localhost 4444
    Trying ::1...
    Trying 127.0.1.1...
    Connected to localhost.
    Escape character is '^]'.
    Open On-Chip Debugger
    > flash info 0
    #0 : stm32f1x at 0x08000000, size 0x00004000, buswidth 0, chipwidth 0
            #  0: 0x00000000 (0x400 1kB) not protected
            #  1: 0x00000400 (0x400 1kB) not protected
            #  2: 0x00000800 (0x400 1kB) not protected
            #  3: 0x00000c00 (0x400 1kB) not protected
            #  4: 0x00001000 (0x400 1kB) not protected
            #  5: 0x00001400 (0x400 1kB) not protected
            #  6: 0x00001800 (0x400 1kB) not protected
            #  7: 0x00001c00 (0x400 1kB) not protected
            #  8: 0x00002000 (0x400 1kB) not protected
            #  9: 0x00002400 (0x400 1kB) not protected
            # 10: 0x00002800 (0x400 1kB) not protected
            # 11: 0x00002c00 (0x400 1kB) not protected
            # 12: 0x00003000 (0x400 1kB) not protected
            # 13: 0x00003400 (0x400 1kB) not protected
            # 14: 0x00003800 (0x400 1kB) not protected
            # 15: 0x00003c00 (0x400 1kB) not protected
    STM32F03x - Rev: 1.0
    
    In the next episode, I'll try to build simple blinkenlights firmware and flash it onto the board.

    Catch you later.

View all 2 project logs

Enjoy this project?

Share

Discussions

Similar Projects

Does this project spark your interest?

Become a member to follow this project and never miss any updates