lb5tr
lb5tr-
Creating simple code and testing gdb
01/09/2017 at 03:15 • 0 commentsSource code on github.com has been updated (71b06b6) and now it contains very basic firmware code. I don't want to exactly describe every file as the structure of project might change in the future, but in general there is a Makefile, linker script (link.ld), initialization code (startup.c) add main firmware code (main.c). Cortex-M0 processor vector table layout is described here. Processor of the MCU will begin by executing reset handle function, address of which is stored at address 0x4.
I opened OpenOCD session using:
$ openocd -f openocd-swd.cfgAs I described in the previous log entry, OpenOCD exposes port 3333 for GDB remote debugging, let's give it a go, shall we?$ arm-none-eabi-gdb -q main.elf Reading symbols from main.elf...done. (gdb) target remote localhost:3333 Remote debugging using localhost:3333 reset () at startup.c:67 67 { (gdb) b main Breakpoint 1 at 0x80000f0: file main.c, line 12. (gdb) c Continuing. Breakpoint 1, main () at main.c:12 12 fun(0xab, 0xcd); (gdb) list 7 8 int main(void) 9 { 10 while (1) 11 { 12 fun(0xab, 0xcd); 13 } 14 }As you can tell from the listing above, I started gdb and required main.elf to be loaded (you can also use load command at runtime - for example - to reload symbols), after that using command target I connected to port 3333 of OpenOCD, then I created a breakpoint at function main and requested microcontroller to continue execution.In the next episode, I'll try to communicate with GPIO peripherals, and maybe - just maybe - read data from the accelerometer.
Catch you later.
-
Connecting the debugger
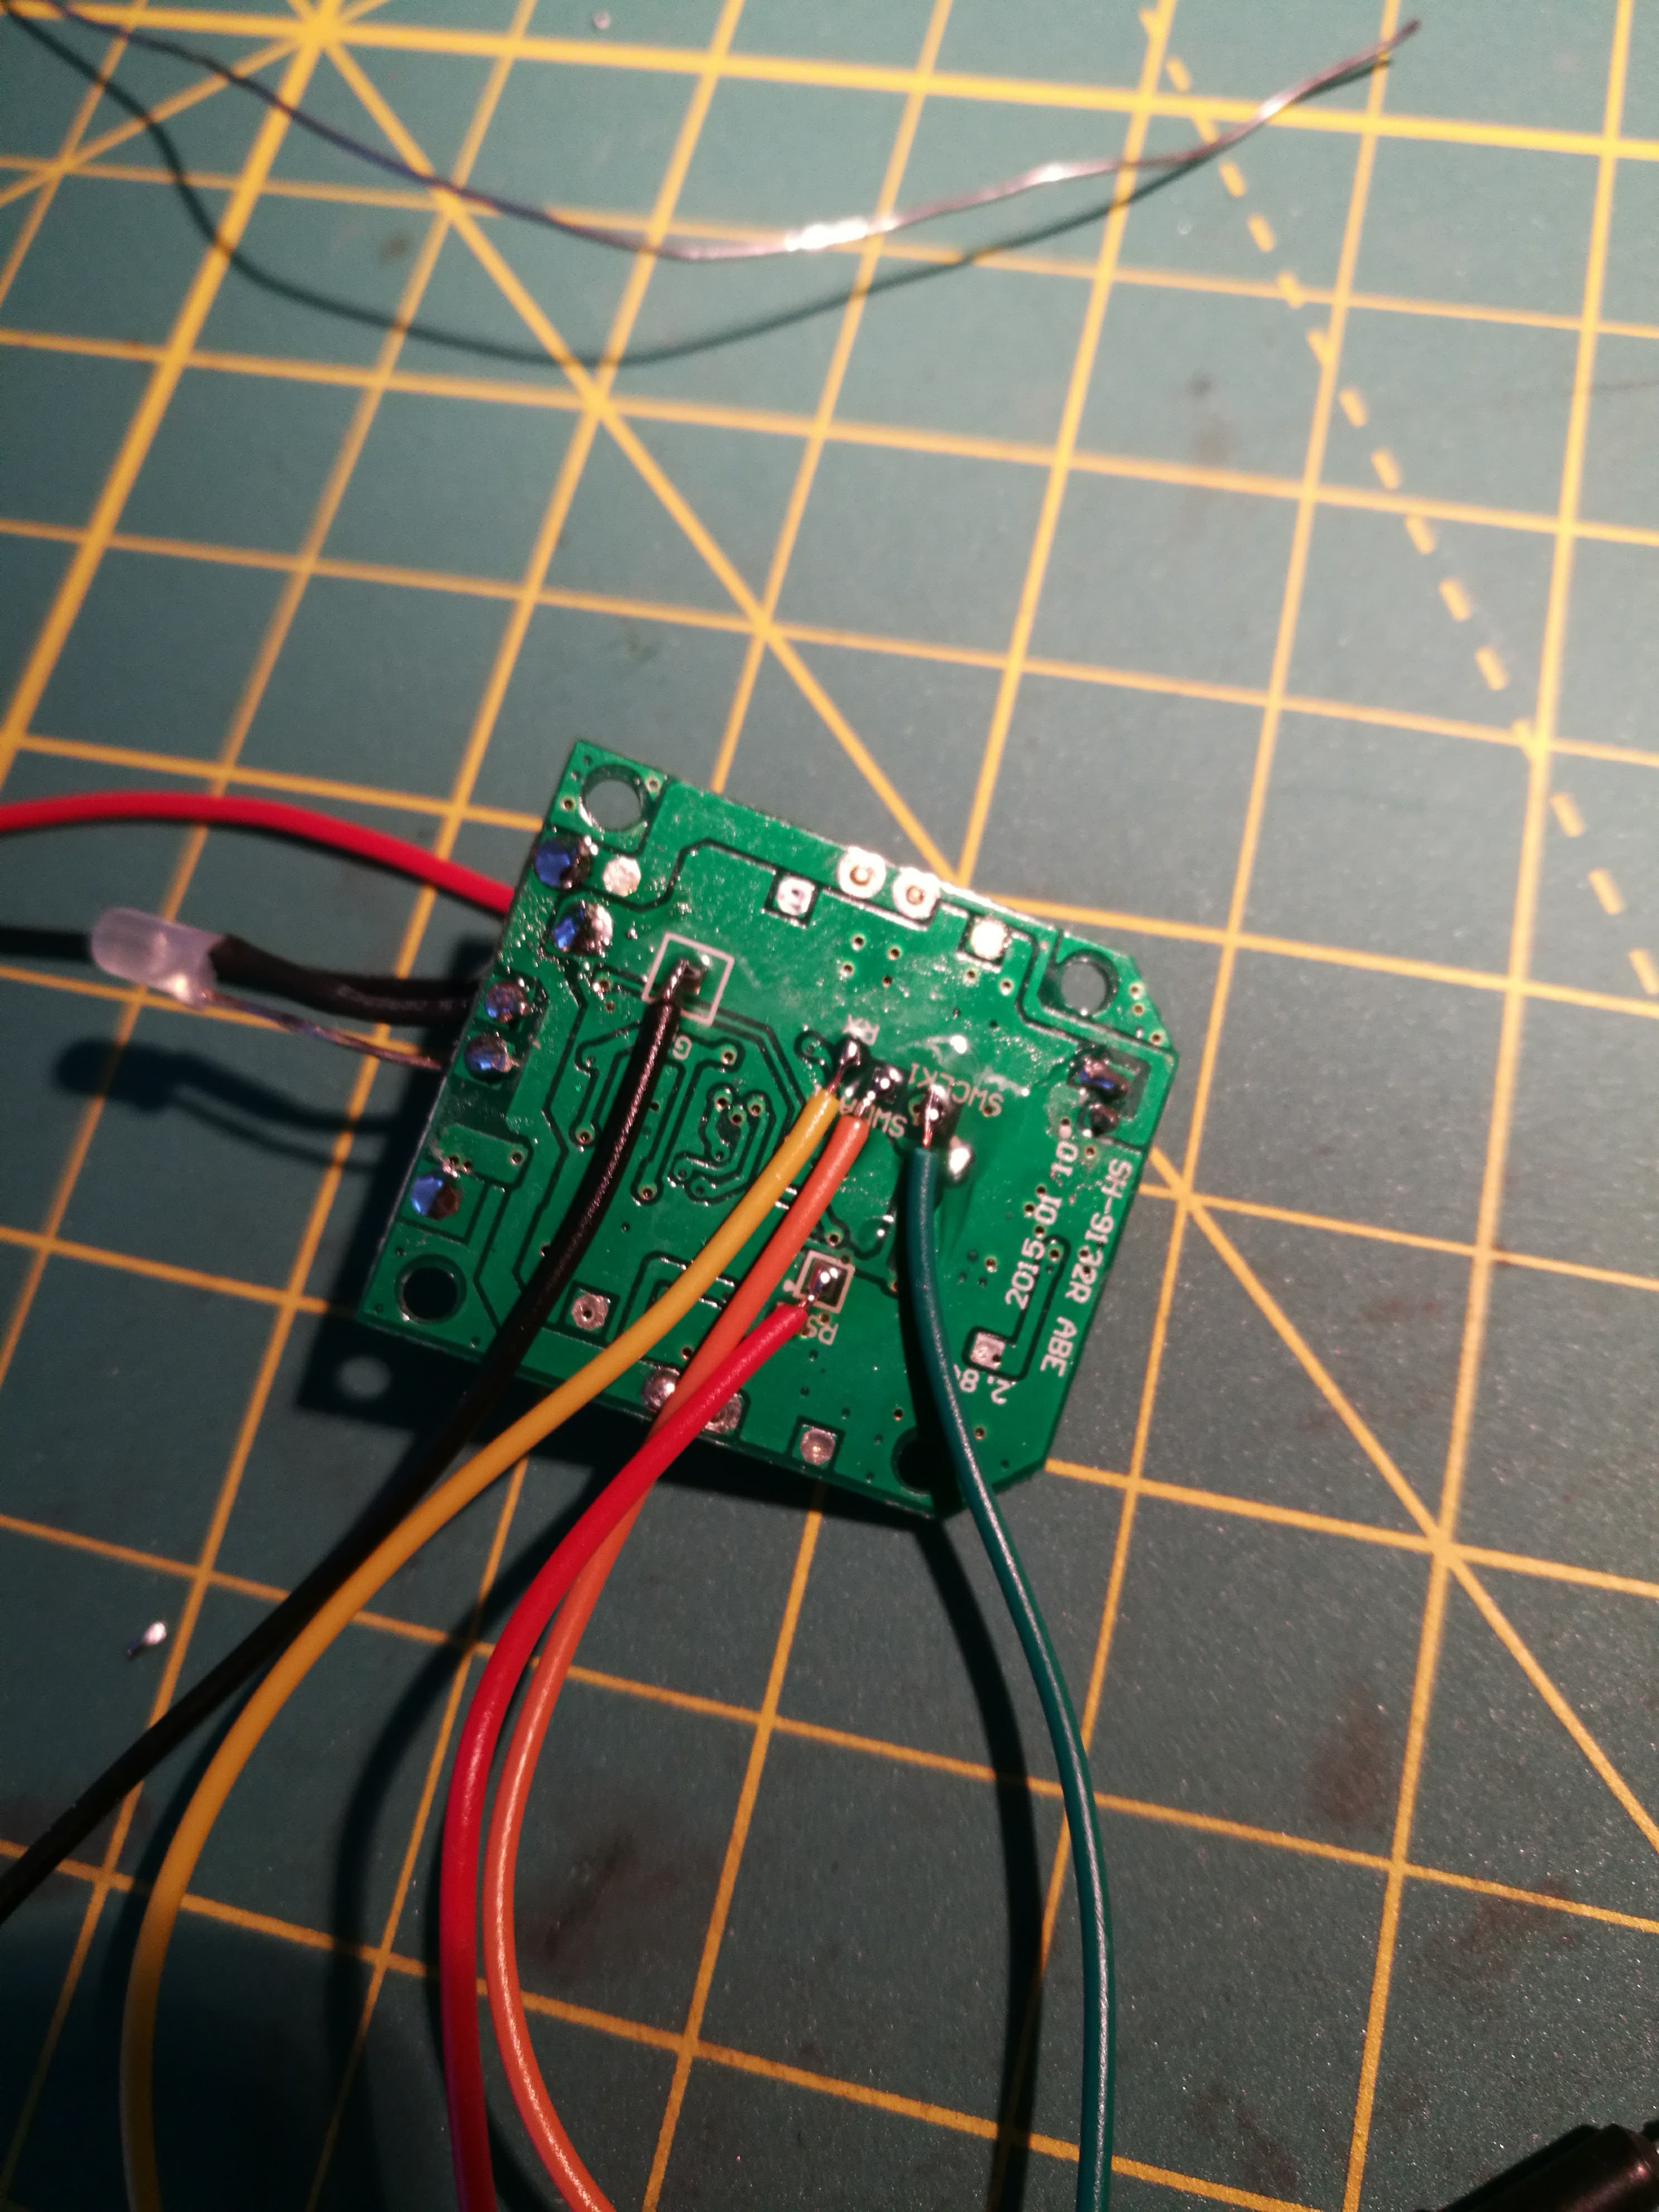
01/05/2017 at 03:18 • 0 commentsFew days back I started working on serial debugging. Having access to BusBlaster v3, I used OpenOCD to tinker with the mcu. First things first -- I had to solder few wires to the pads.
In reality, I ended up using only two wires (except ground) - SWDIO/SWCLK - that I connected to TMS and TCK signals on the BusBlaster respectively. Manufacturer also exposed pads for RX and RST signals, they might come handy later.![]()
First step is to configure the CLPD on the BusBlaster board with kt-link device. I used ready-to-use svf file from https://github.com/bharrisau/busblaster project.
$ openocd -f board/dp_busblaster_v3.cfg -c "adapter_khz 1000; init; svf system.svf; shutdown"After that, I started OpenOCD with configuration for stm32f0x boards (available in the project repository on github):
$ openocd -f openocd-swd.cfgOpenOCD exposes two TCP ports:- 4444 - for interactive console
- 3333 - for gdb
Connecting to 4444 with telnet and issuing simple command proved the setup is working as expected.
$ telnet localhost 4444
Trying ::1...
Trying 127.0.1.1...
Connected to localhost.
Escape character is '^]'.
Open On-Chip Debugger
> flash info 0
#0 : stm32f1x at 0x08000000, size 0x00004000, buswidth 0, chipwidth 0
        #  0: 0x00000000 (0x400 1kB) not protected
        #  1: 0x00000400 (0x400 1kB) not protected
        #  2: 0x00000800 (0x400 1kB) not protected
        #  3: 0x00000c00 (0x400 1kB) not protected
        #  4: 0x00001000 (0x400 1kB) not protected
        #  5: 0x00001400 (0x400 1kB) not protected
        #  6: 0x00001800 (0x400 1kB) not protected
        #  7: 0x00001c00 (0x400 1kB) not protected
        #  8: 0x00002000 (0x400 1kB) not protected
        #  9: 0x00002400 (0x400 1kB) not protected
        # 10: 0x00002800 (0x400 1kB) not protected
        # 11: 0x00002c00 (0x400 1kB) not protected
        # 12: 0x00003000 (0x400 1kB) not protected
        # 13: 0x00003400 (0x400 1kB) not protected
        # 14: 0x00003800 (0x400 1kB) not protected
        # 15: 0x00003c00 (0x400 1kB) not protected
STM32F03x - Rev: 1.0
In the next episode, I'll try to build simple blinkenlights firmware and flash it onto the board.Catch you later.
Hacking cheap mini-quadrocopter
Trying to use board from a under $30, off the shelf quadrocopter as a ARM devboard