I built a clock like this earlier using ancient OSRAM smart displays, but I wondered if the ESP8266 Arduino code was fast and flexible enough to run a six-digit multiplexed Nixie clock. Because I had done this with my earlier clock, I added the a Bosch BME280 sensor via I2C. I had the Nixies lying around for about 20 years and I wasn’t even sure that they would all work, although they were new - but they did.
The clock has no “set” buttons; it accesses the time and date from NTP. There is a setup page where you log into it and connect it to your network, and set up what NTP server you would like to use. You also set up your time zone.
From another web page, you can get your network and time/date/temperature/pressure/humidity from anywhere in your home, or via VPN, anywhere. Frankly, the cost of the ESP8266 is so low I will never build another Nixie clock without web access. If you work it out, it might be cheaper than buttons, holes in the chassis, wiring, connectors, and so on. You don’t HAVE to use the ESP8266 to drive the clock; it could be used much like GPS, possibly even emulating the GPS time string interface with another processor.
The clock is multiplexed 2x3 and uses two 74141’s. I was worried that the Arduino “loop” would cause it to flash but except when it is serving a web page, it is hardly noticeable (that isn’t a bug, it’s a feature).
There isn’t anything groundbreaking here. Much of the code was bummed from other people, notably Andreas Spiess with his code as posted on ESP8266.COM and Github; I also used a modified version of SparkFun’s BME280 code, with settable I2C (Wire) parameters and I2C address. I would submit this modification to Github but my code is so crappy I would be embarrassed to do it.
If you embark on something like this, I modified Andreas' code to use US Daylight Savings instead of European and displayed the date/time/temp//pressure/humidity on the network page. You could:
—set for US or European DST
—display in F or C, set for 12/24 hour clock
—Show when the clock is in or out of NTP discipline
—Allow the time to be set without NTP access (using the ESP8266’s clock)
—Allow the clock to show time only
I wanted the clock to “zero” everything without being set and if the BME280 is removed or missing, the clock would just display time and date.
I may or may not make the above improvements myself, because it’s “good enough”.
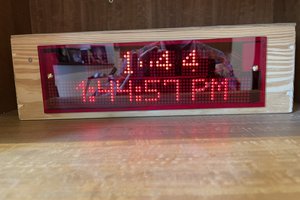
Mechanically, this wire-wrapped project was a little challenging with my tools. I intend to have someone I work with laser-cut a plexiglass lid with holes for the tubes (I tried and failed to do this accurately, hence, the rectangular holes). A few tricks I’ve learned about making prototypes:
0. Build or buy? Almost always, buy - I use any wall wart I can find (although these days I prefer switchers). I used China-sourced DC-DC converters to get 12-23 volts (old laptop) down to 12 and to 5 with them on this project, and I used an LM117-3.3 to get the 3.3. Except for the latter, it's just not worth using linears anymore, period. Although I've built Nixie power supplies before, this eBay-sourced one I had around, and it is powerful to run six IN-18's.
1. Plumber’s epoxy is a nice way to make sturdy, “molded” cables. You can get this at a big-box home improvement store.
2. The grommet for the sensor wire is a drilled-out LED panel collar.
3. I usually use oak and aluminum to build cases. Grooves cut with a table saw allow the aluminum to be removed/installed (especially important in this build). My table saw has lousy “kerf” because the bearing is old. Even if you stink at woodworking like I do, stained, sanded oak with a coat of satin polyurethane steel-wooled covers up a lot of crimes, so to speak.
4 The right-angle “low-profile” connector for the BME280 and power is made from some eBay connectors and plated perfboard.
5. Bang for buck, the Harbor Freight “nibbler” is the greatest tool...
 mircemk
 Andrew Cooney