 Roger
RogerPresenting the second version of the threaded-rod box design!
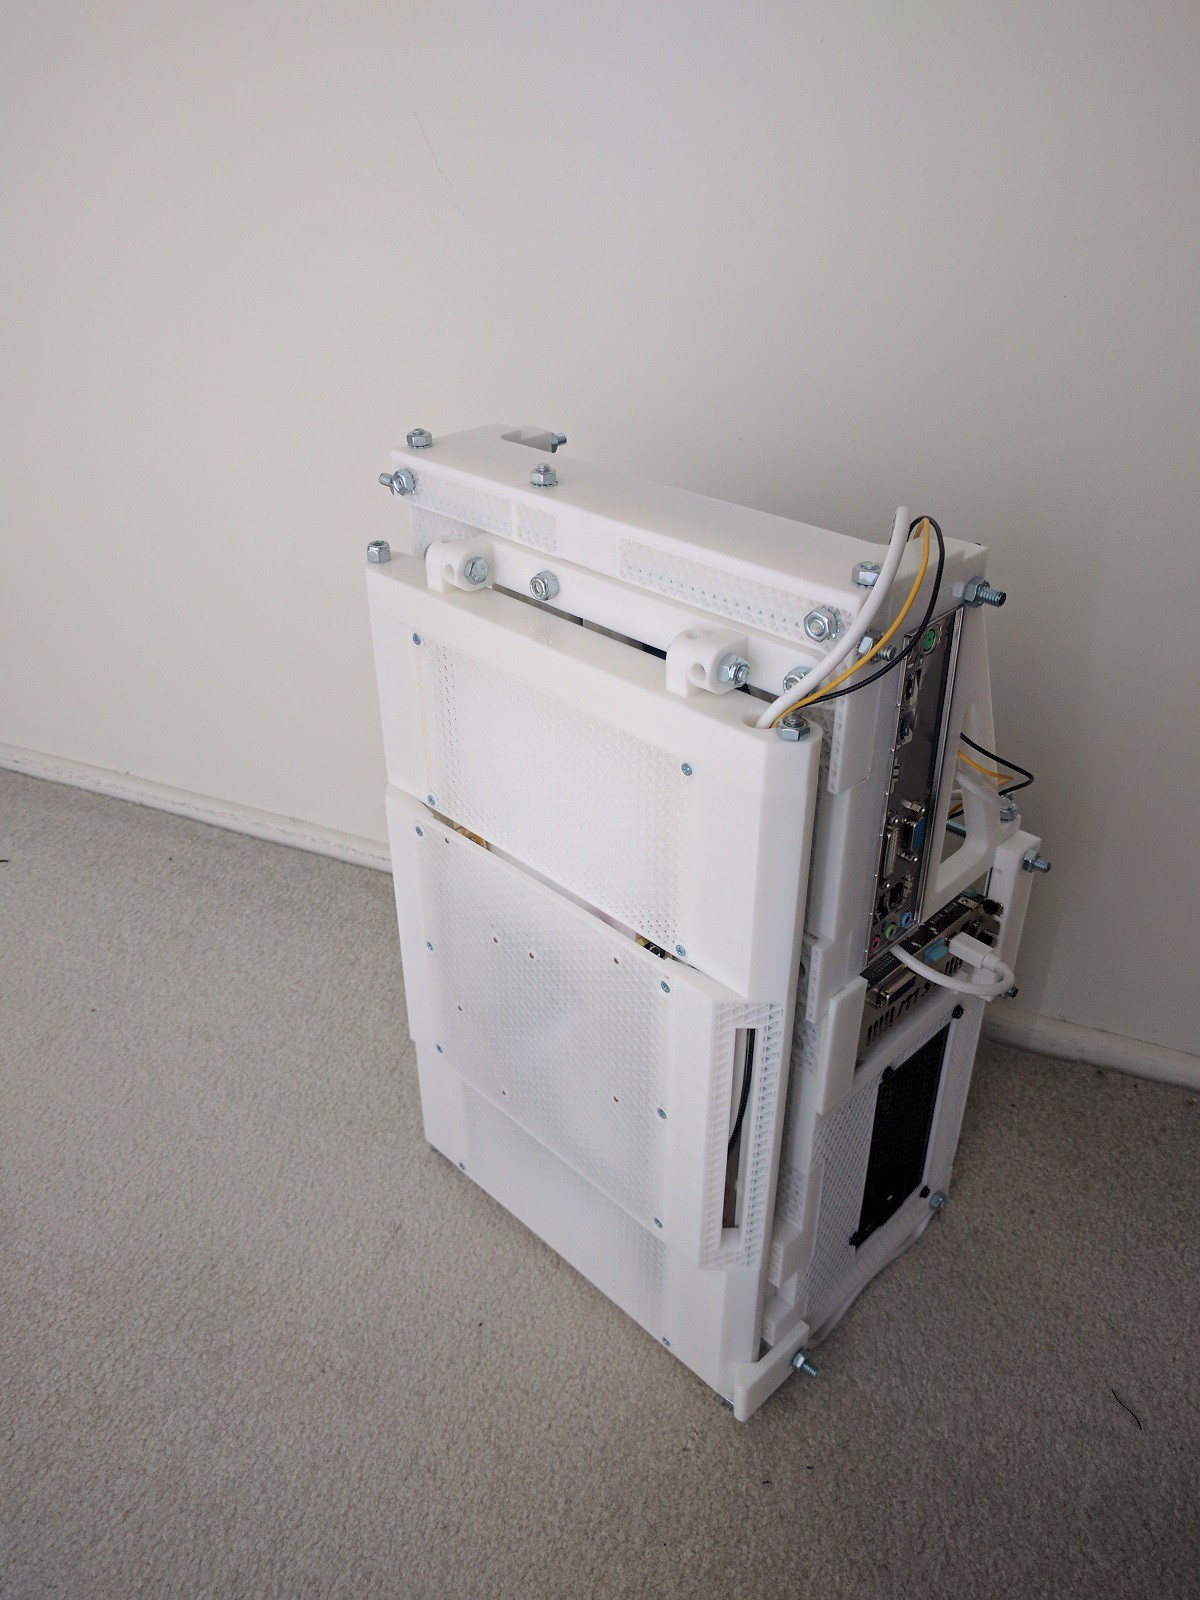
It advanced on the previous version in several significant ways. The most obvious new feature is the screen hinge mechanism. I've already posted an animated GIF showing it in action at the Feb. Hackaday LA meet, here are higher-resolution stills in the open and closed positions:
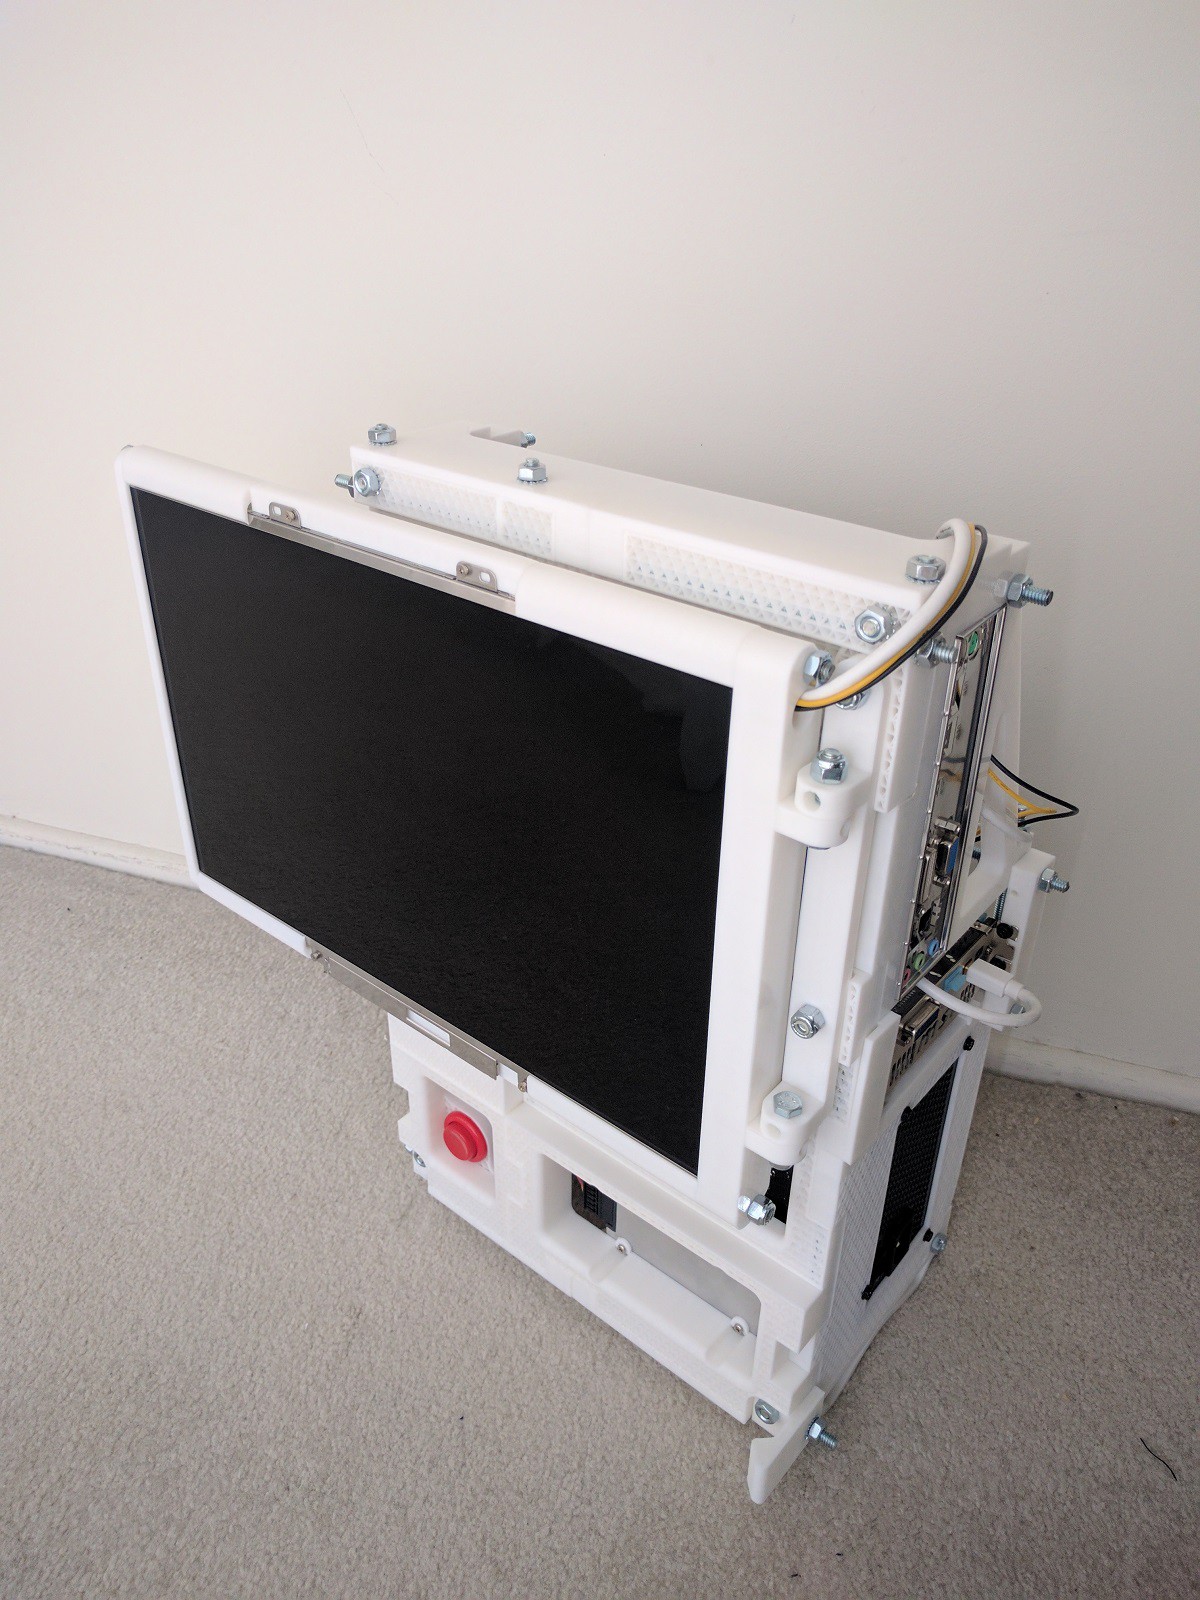
The screen hinge design offers the following benefits:
- When closed for traveling:
- Screen glass is facing inward and protected.
- Screen edge is not sticking out so less vulnerable to damage.
- Vertical orientation minimizes width and depth to increase portability.
- When open for use:
- Screen is at a high ergonomic position. This addresses a peeve of mine against laptops, whose screen (at table height) are too low.
- Horizontal orientation as is typical for computers. (Versus phone/tablet)
- Exposes an area for things like a Big Red Button power switch, which is something I've always wanted in a PC case.
It has the following issues I want to resolve in future iterations:
- The screen wiring is awkward and exposed. Right now it is easy for them to get tangled up and pinched by the metal hinge hardware.
- The hinge needs to move through two axis of movement ("flip" and "rotate") to switch between configurations. This is poor design: It's not obvious to an user if the flip should happen before the rotate, or the opposite, or some combination in between. I want to evolve this design so it has one continuous unambiguous movement between the open and closed positions.
Inside the box, the component layout is identical to Threaded Rod Box V1 but for one significant difference: the motherboard has been flipped around so the backside of the board faces the screen. The space that was previously enclosed and wasted in the box v1 volume is now opened up to a sloped back.
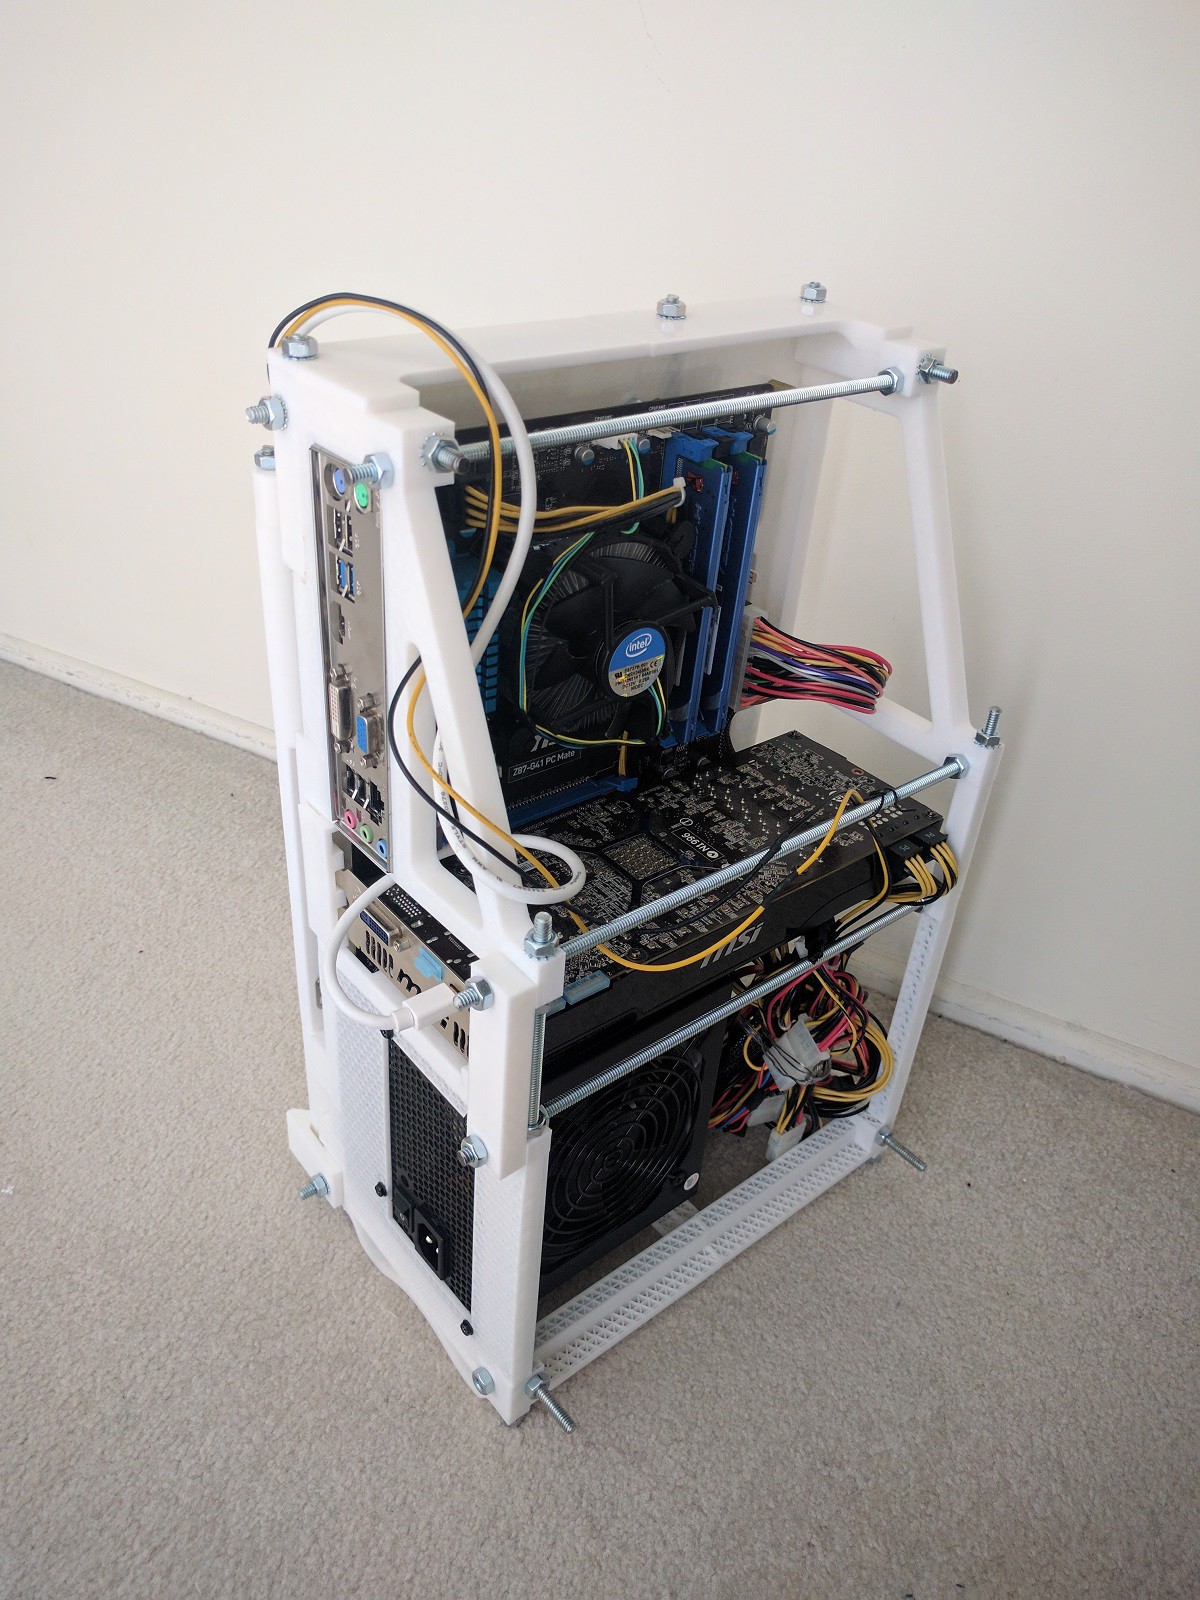
I focused mostly on the front of the box this time around, leaving the back pretty bare and open. I think much of the volume can be reclaimed for productive purposes. Ideas for future iterations include:
- A few hooks that will be useful to coil power and network cables.
- A home for a mouse, probably in the form of a small cubby.
- A way to attach a keyboard, probably in the form of a clip or a tray.
Lastly, I also made a significant change in construction technique. In the previous versions, plastic printed pieces are asked to hold together metal pieces several centimeters apart. Given that distance and plastic's flexible nature, the earlier editions would noticeably bend and flex as I moved them around.
The latest design keeps the metal pieces much closer together. This means less plastic to flex in the corners. The resulting box is far more rigid and confidence inspiring to carry around.
Discussions
Become a Hackaday.io Member
Create an account to leave a comment. Already have an account? Log In.