 Scott G
After some research on the internet, I decided to acid-etch the surface of the concrete before painting. This apparently helps with the pH, and helps mechanically roughen the surface for the paint as well. I don't have any good pictures of this, as I was mostly trying to make sure I didn't acid myself. It was a pain to do, and I'll never know if it mattered or not. I also have most of a jug of muratic acid left over that I'll never use.
Edit: the acid etch may not have been a good idea, per comment from user Martin. Do your own research on that.
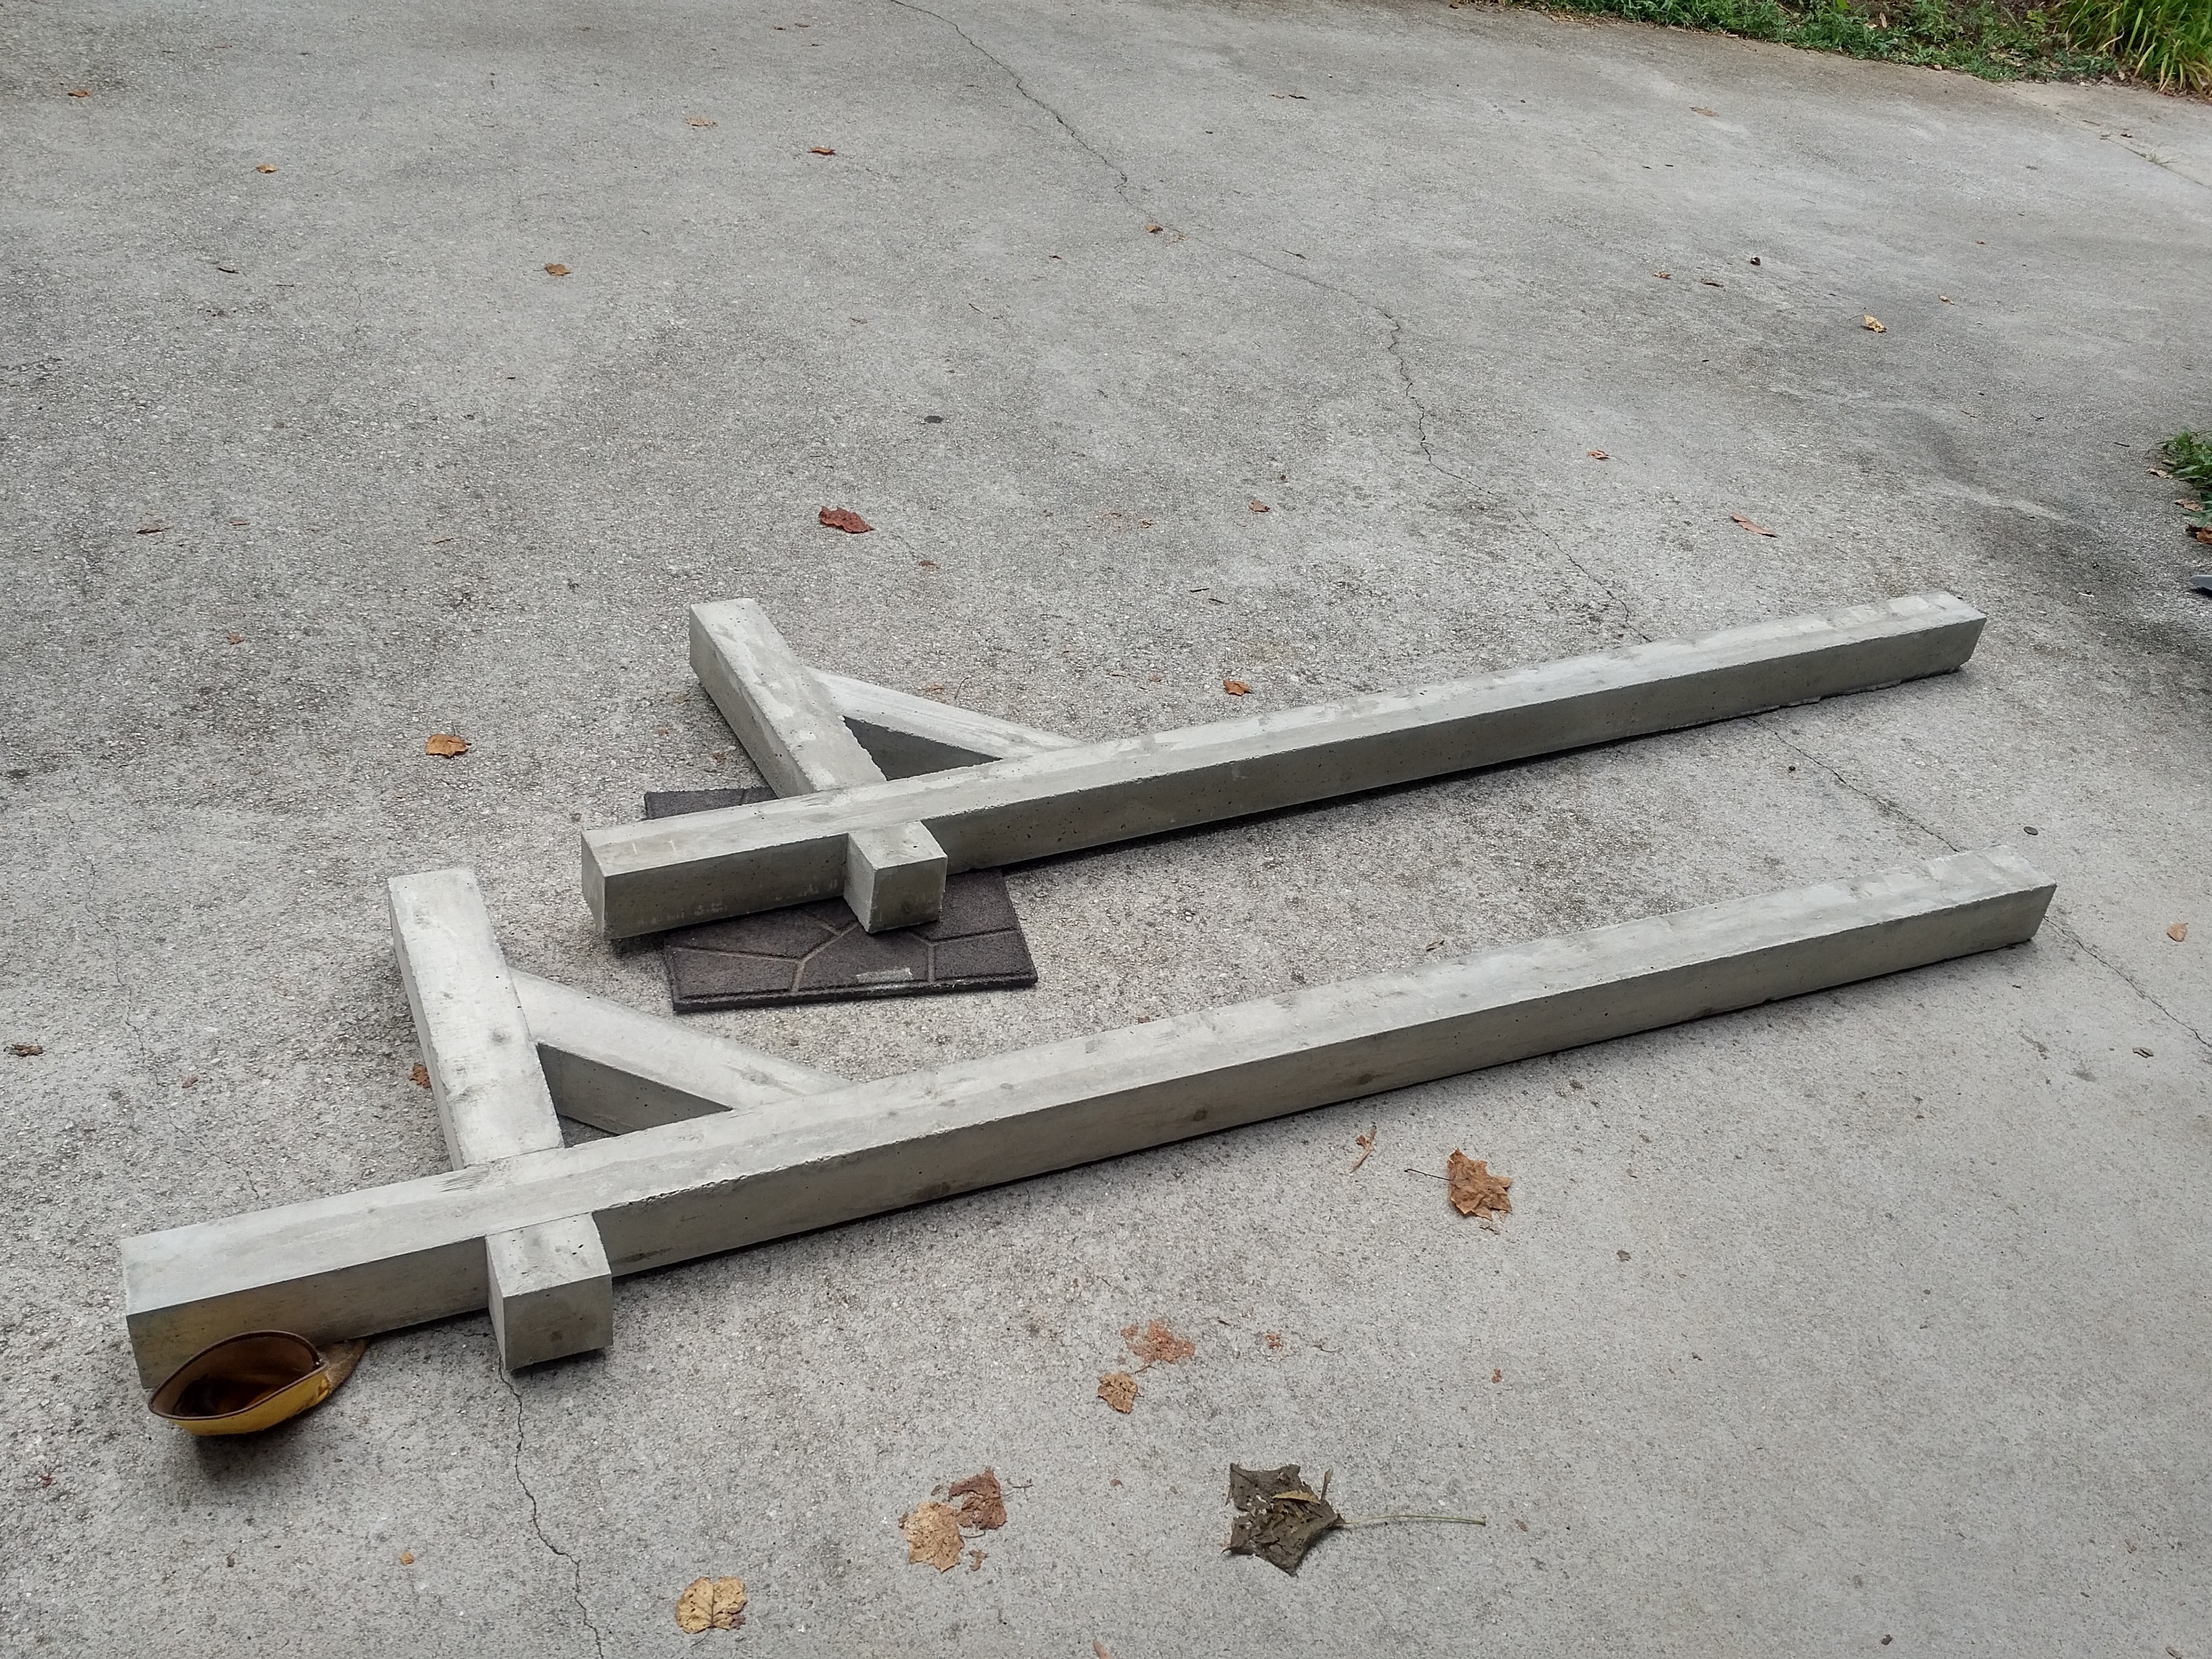
While I was at it, I did a crazy thing - I got the lowest grit beltsander belt that I could find, and set about ruining it. It turns out that beltsanders do work on concrete, but understandably, it does bad things to the belt. It did work long enough to put a nice little chamfer on the edges of my concrete though.
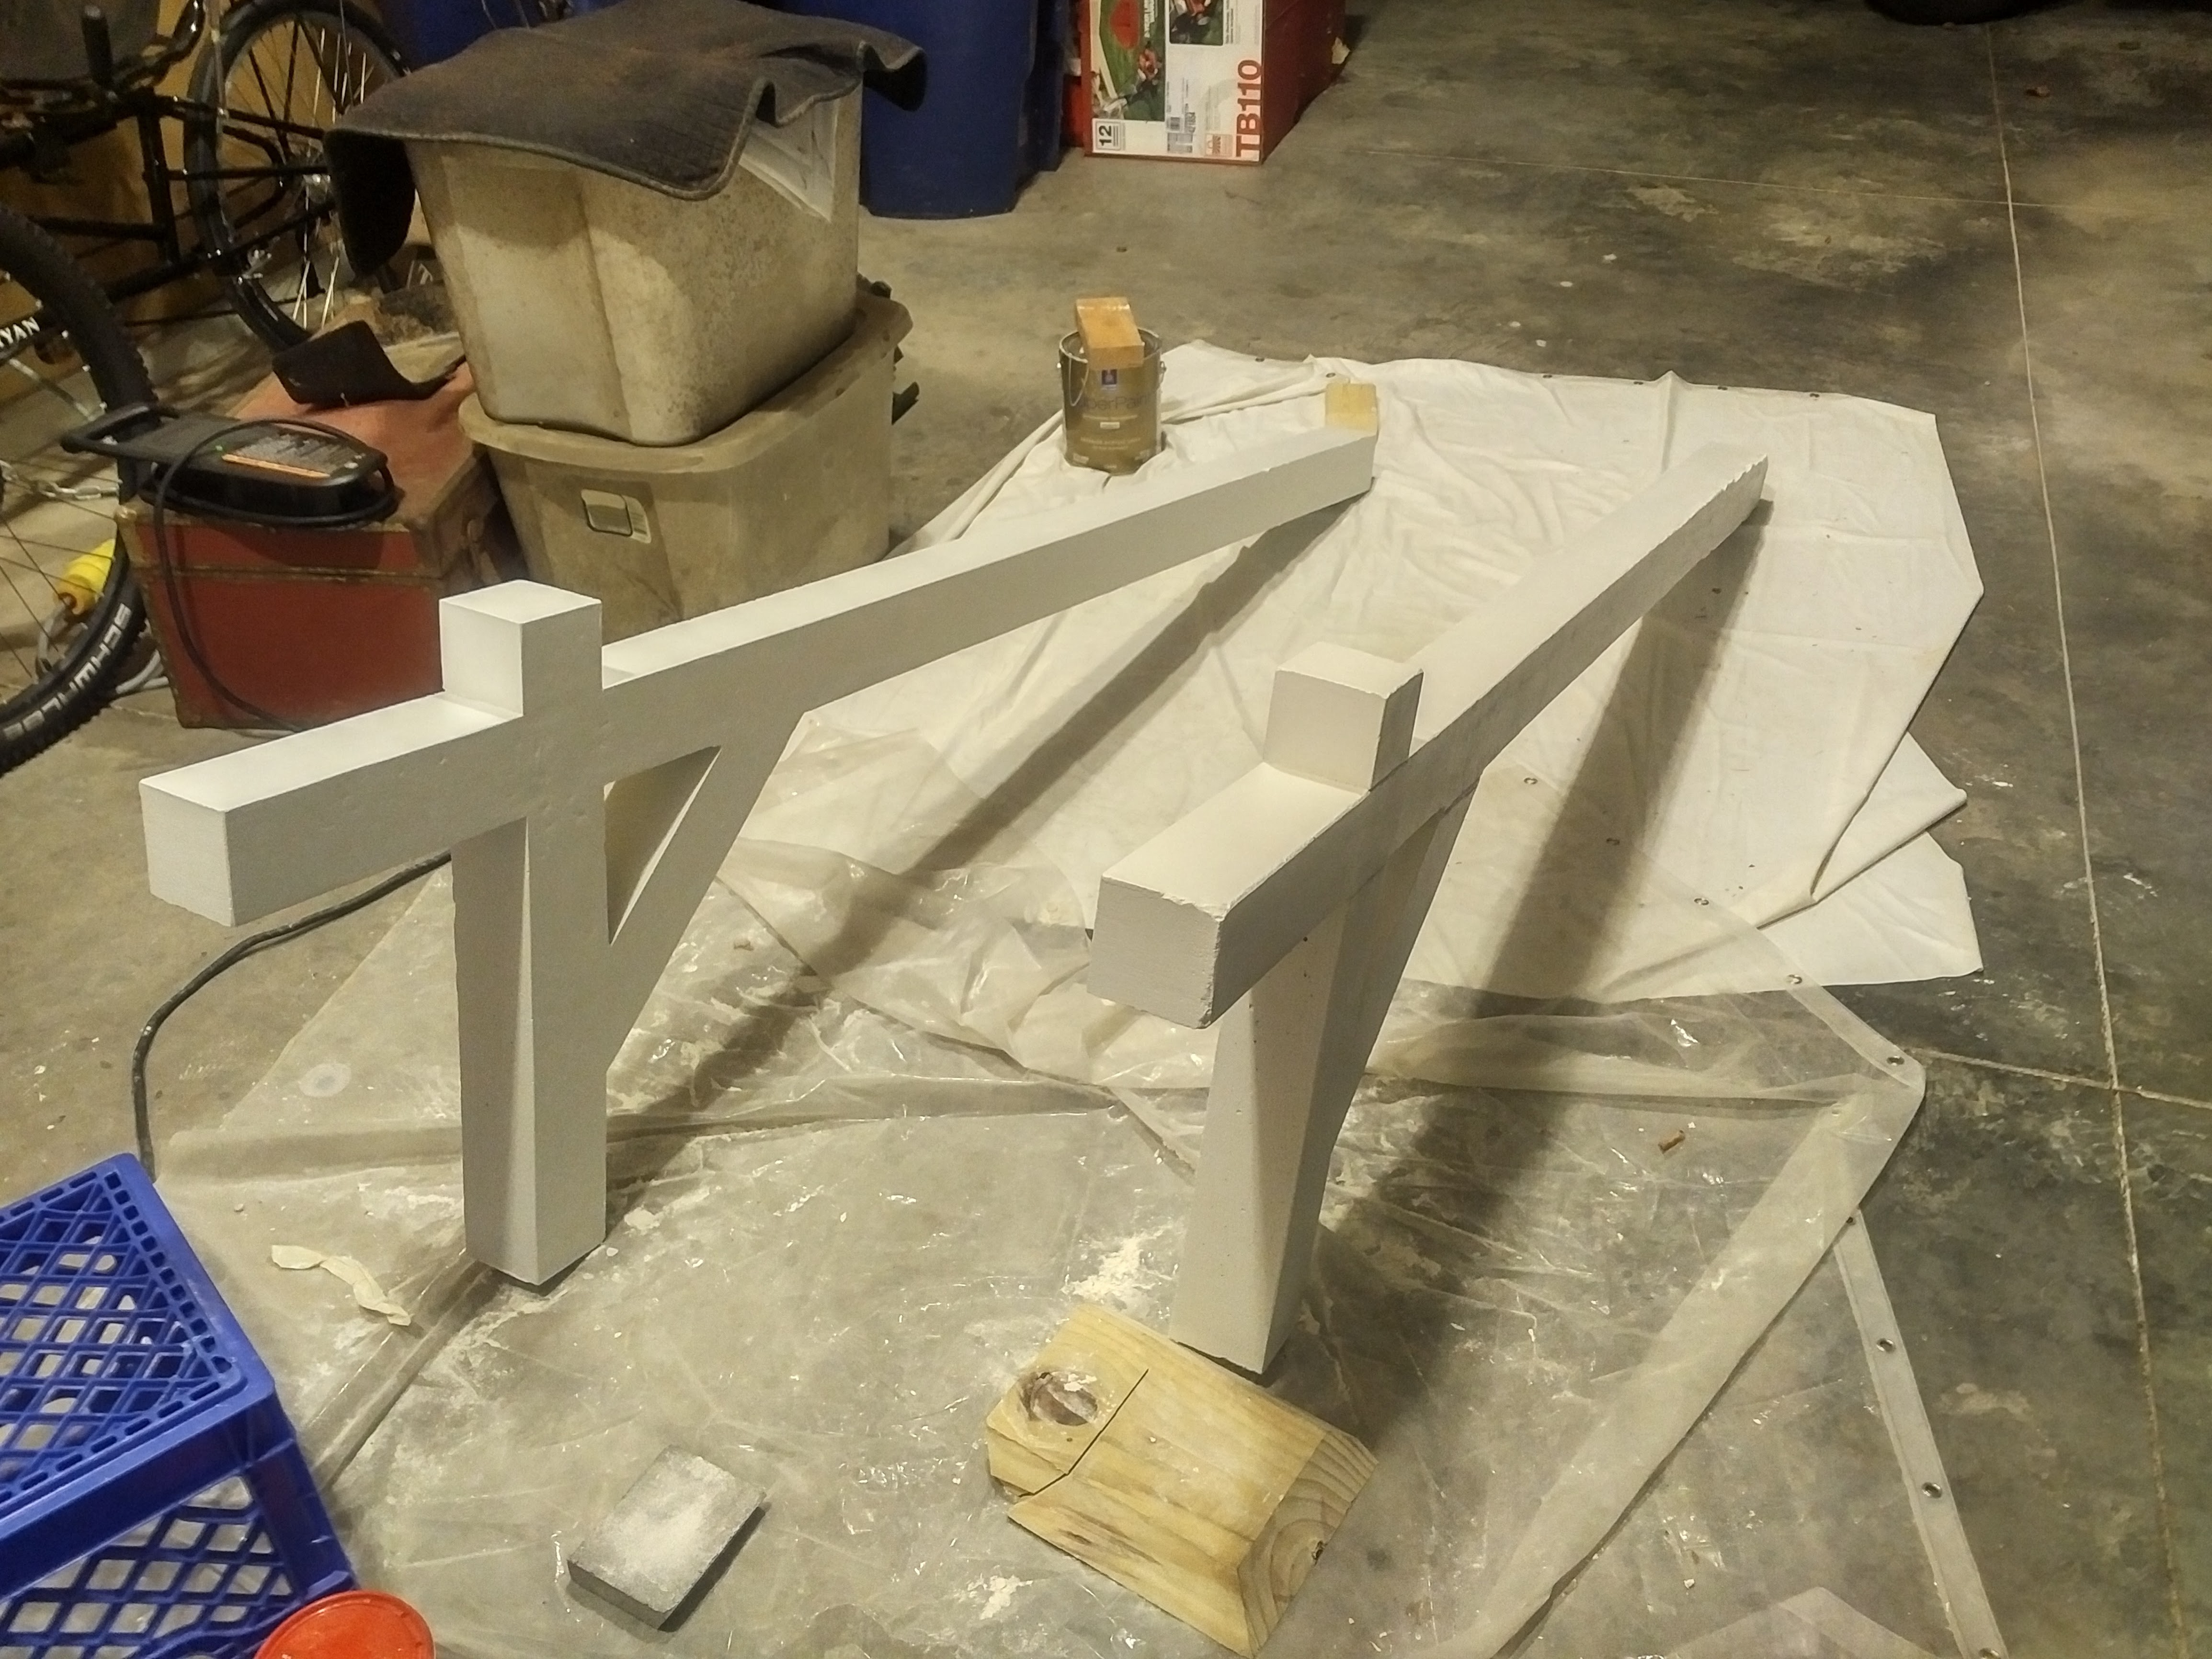
Once the posts were etched and dried, I painted them white. The painting was done to make them look more like a normal mailbox post (although I still really like the natural concrete look), but also to keep water from saturating the concrete every time it rains. I rollered on some paint and realized that my creation... looked like crap.
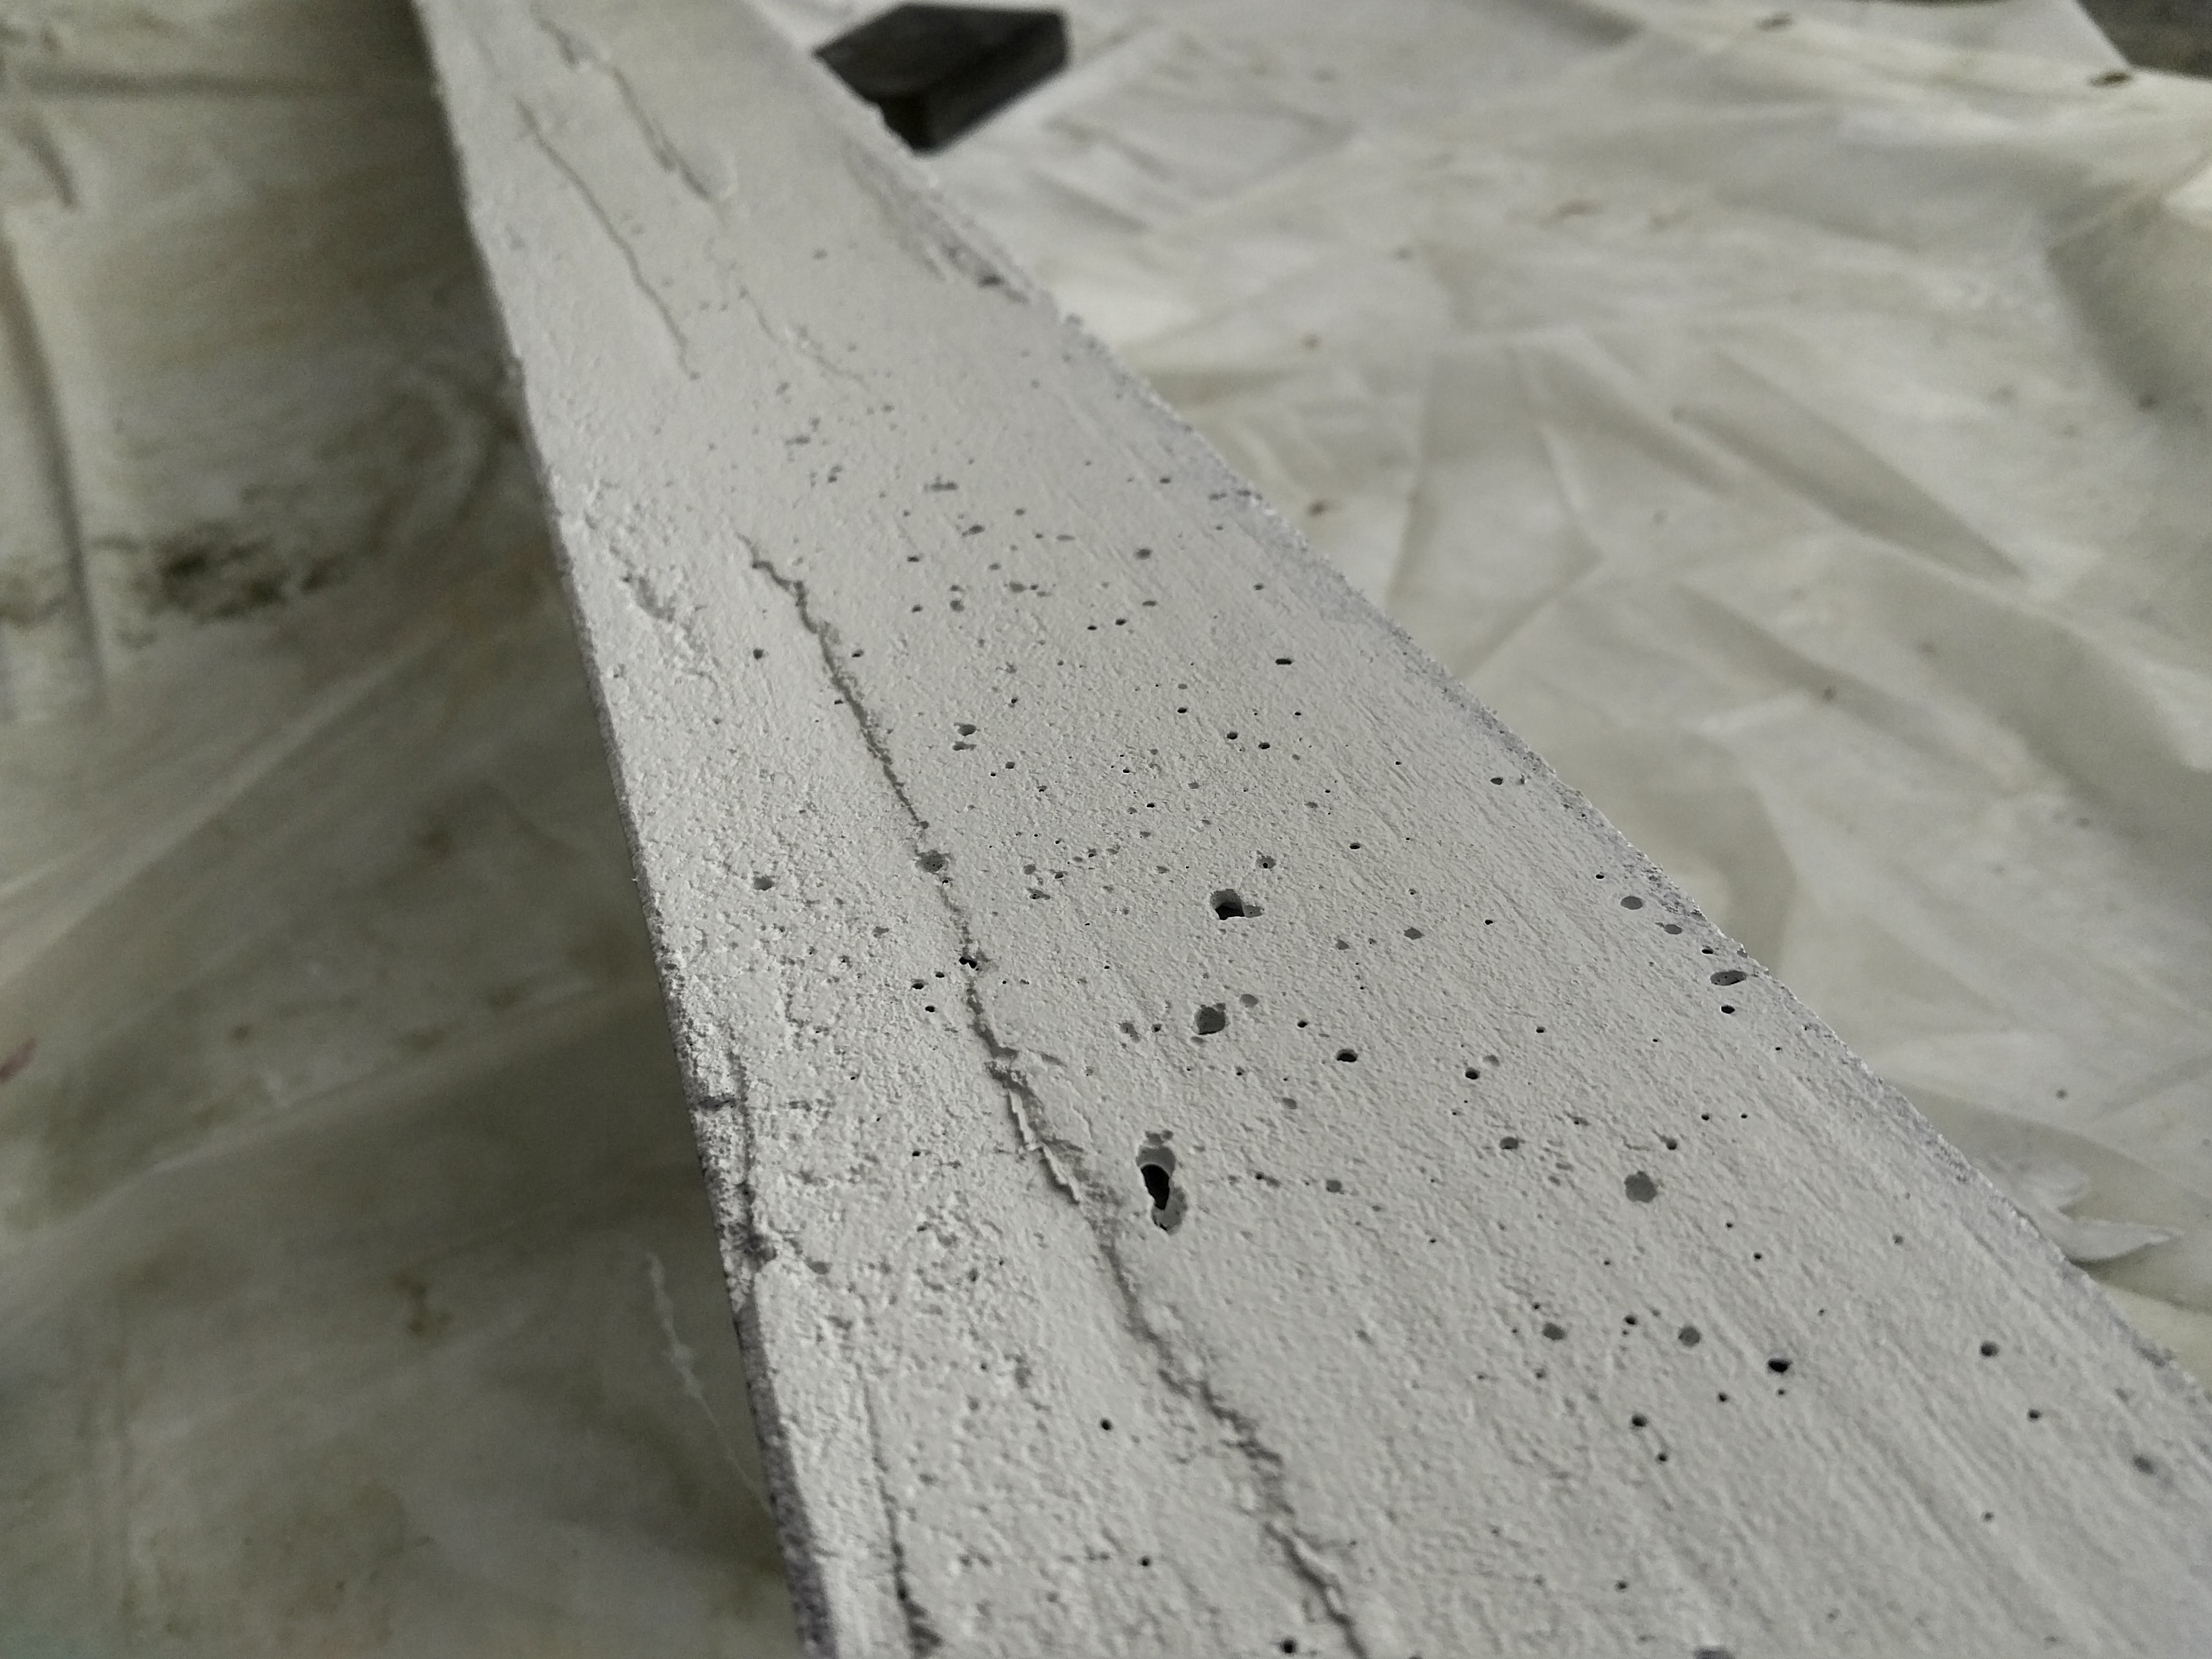
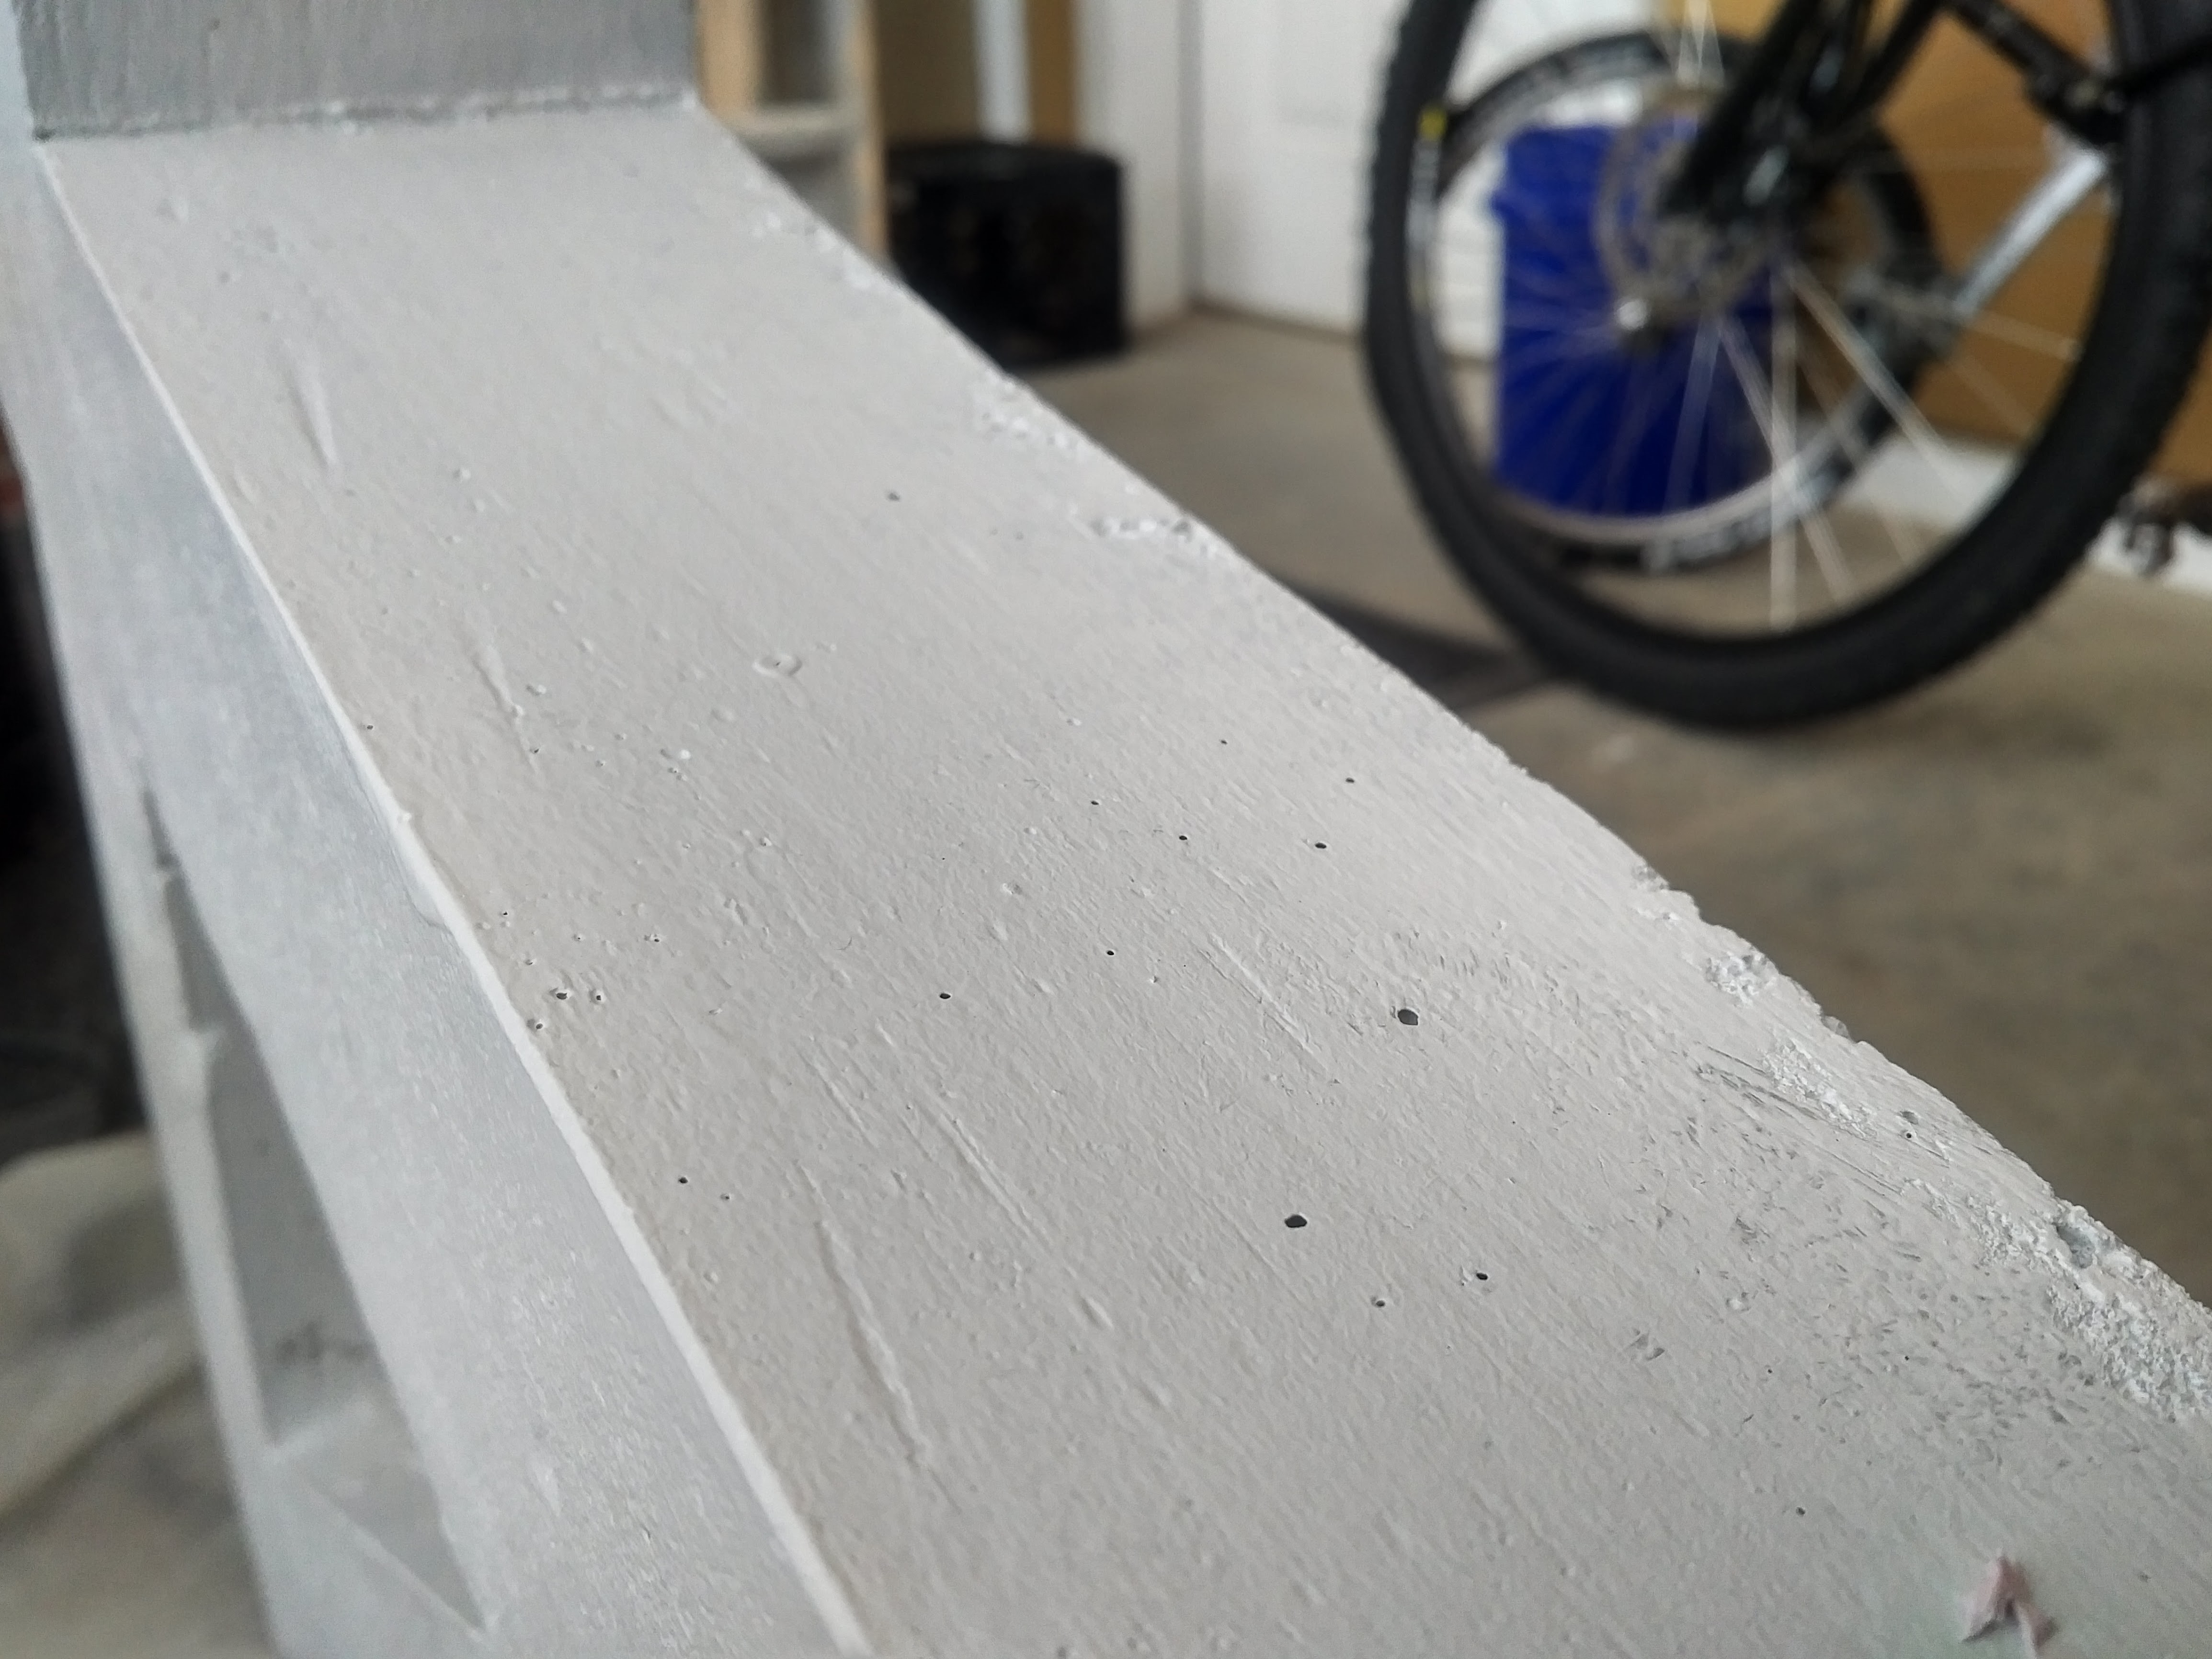
All of the little air bubbles on the surface had blended into the natural concrete color, but with white paint on everything, they visually stuck out and looked bad. I fretted about what to do, and eventually decided to try filling in the holes with drywall spackle. It actually worked really well, and so I spackled and sanded both mailbox posts twice before giving them two more coats of paint.
The overall result is much better with the spackle:
Discussions
Become a Hackaday.io Member
Create an account to leave a comment. Already have an account? Log In.