Close
0%
0%

Kinesthetic Laser Rifle Prop

A laser rifle capable of inflicting little to no damage, but with immersive kinesthetic, auditory, and visual cues that bring realism

Similar projects worth following
If a laser rifle fires in the forest with no one around, does it make a sound? If it is my homebrew laser weapon, then the answer is 'Yes!'. The idea behind adding kinesthetic, visual and auditory output to prop weaponry is to add a layer or several layers of realism to the operator's experience. The Laser Rifle will do just that with vibration, sound and light enhancements.

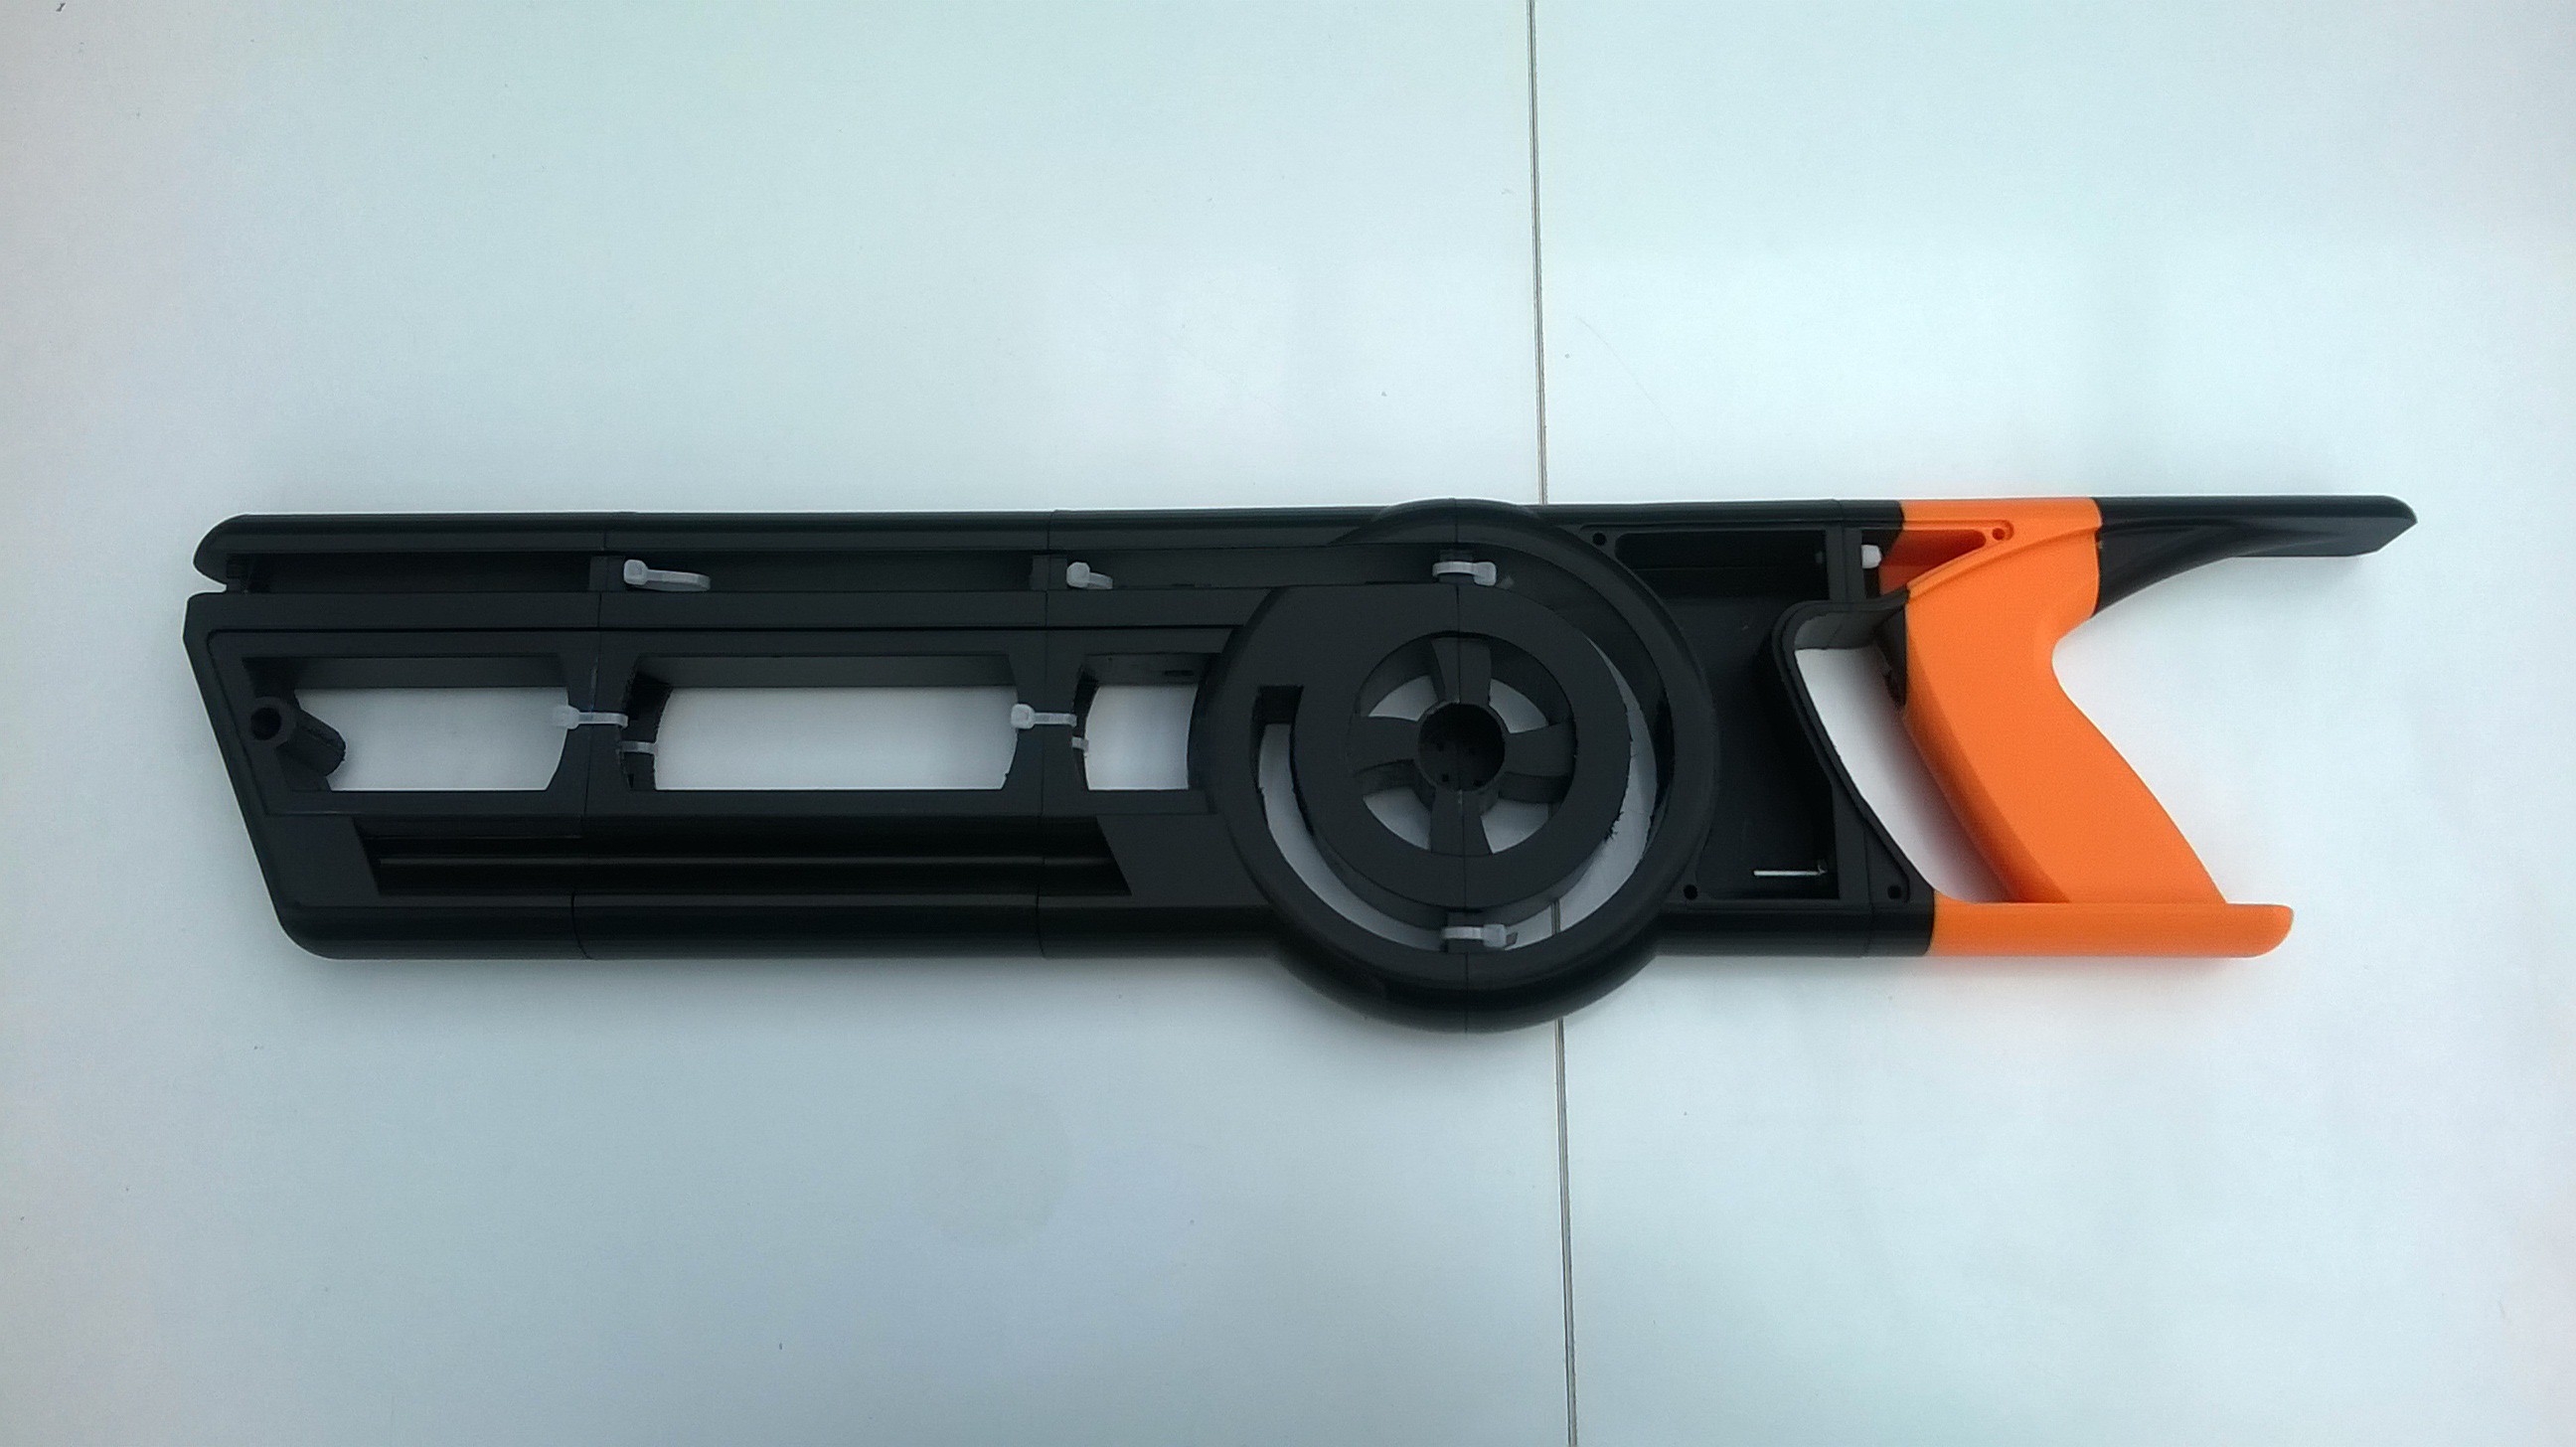
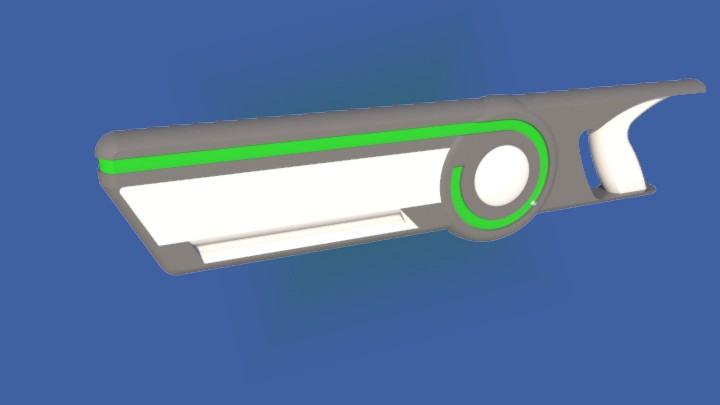
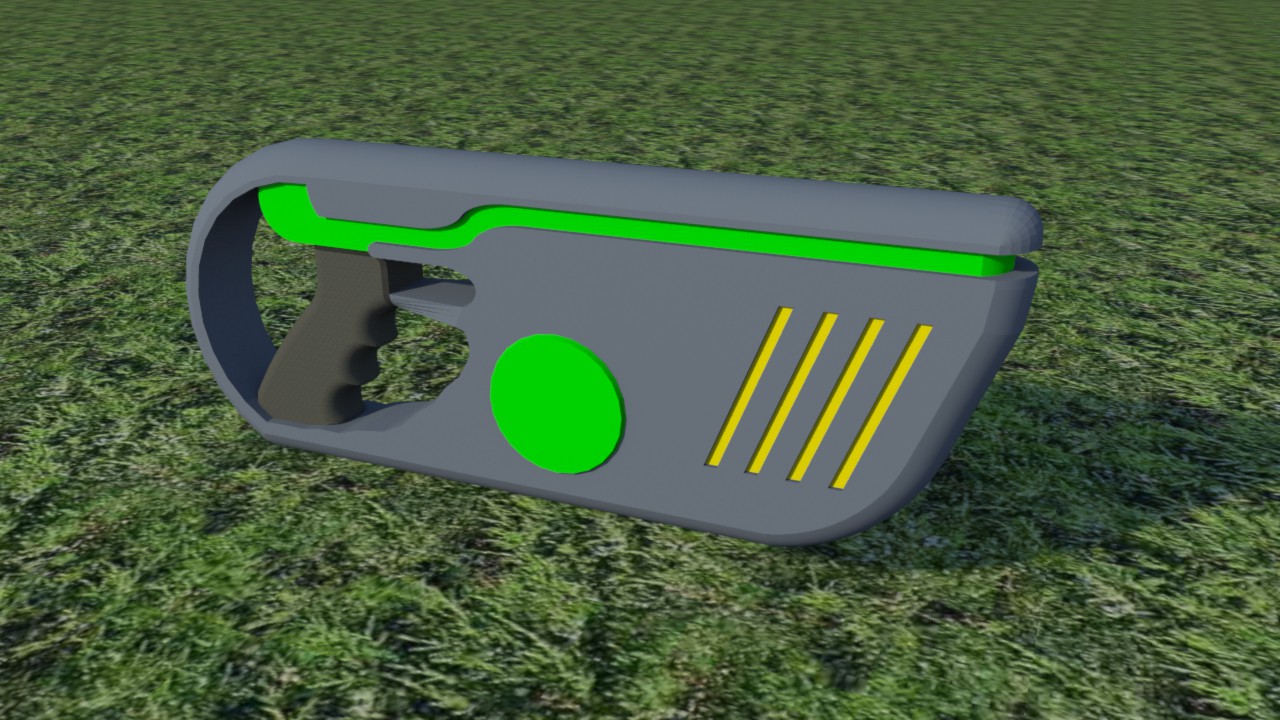
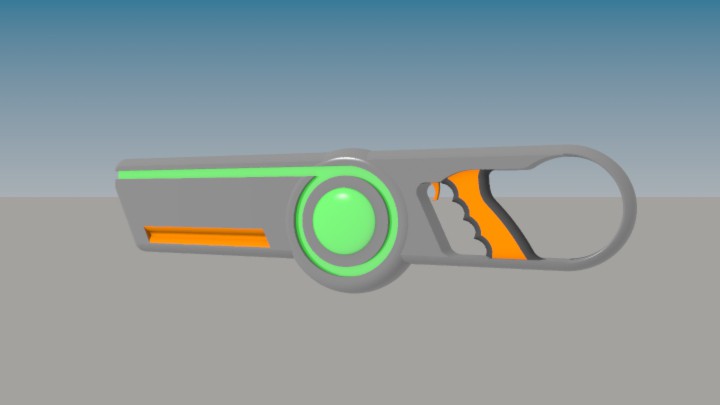
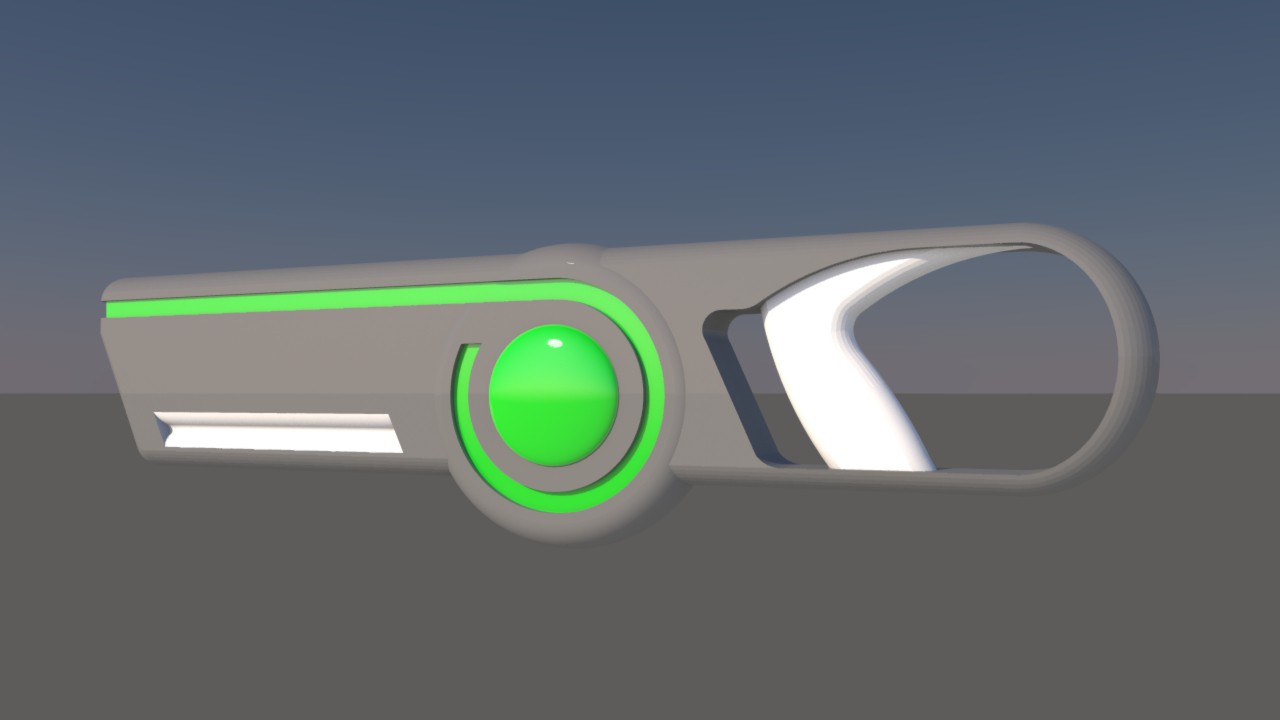
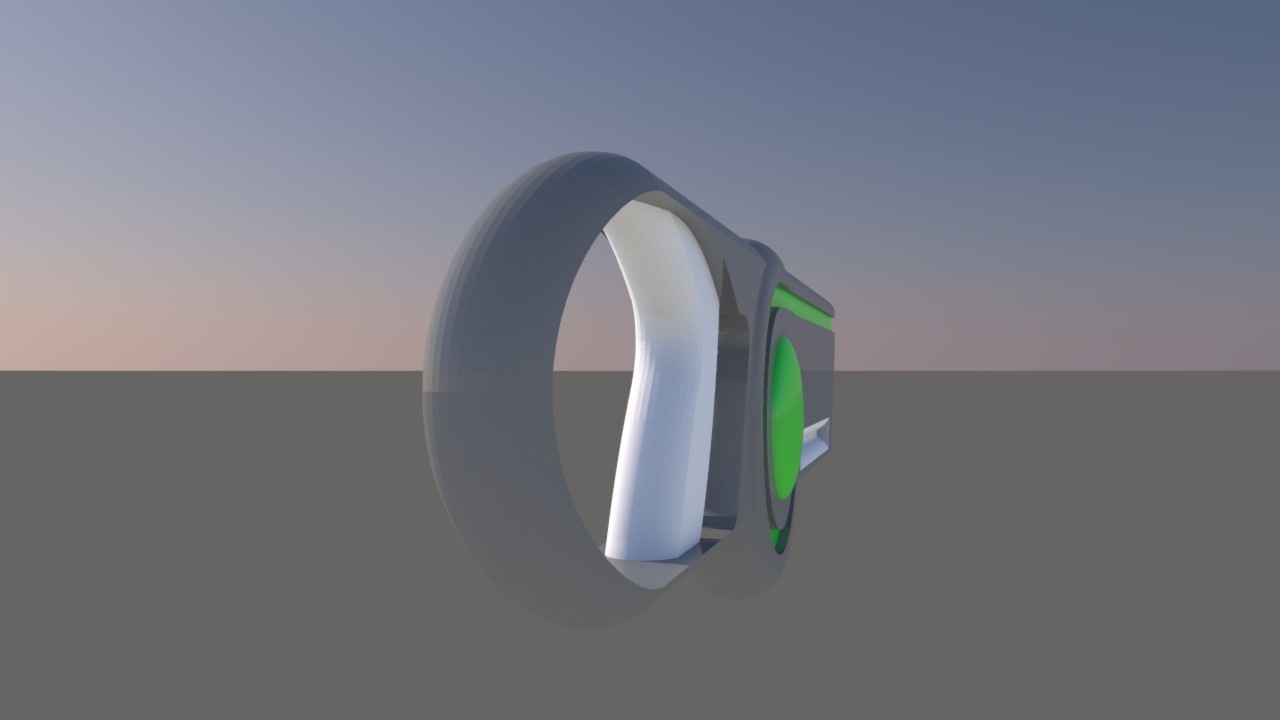
This original design laser rifle has layers of realism (like an onion, but without the smell).

The project itself can be broken down into Steps::

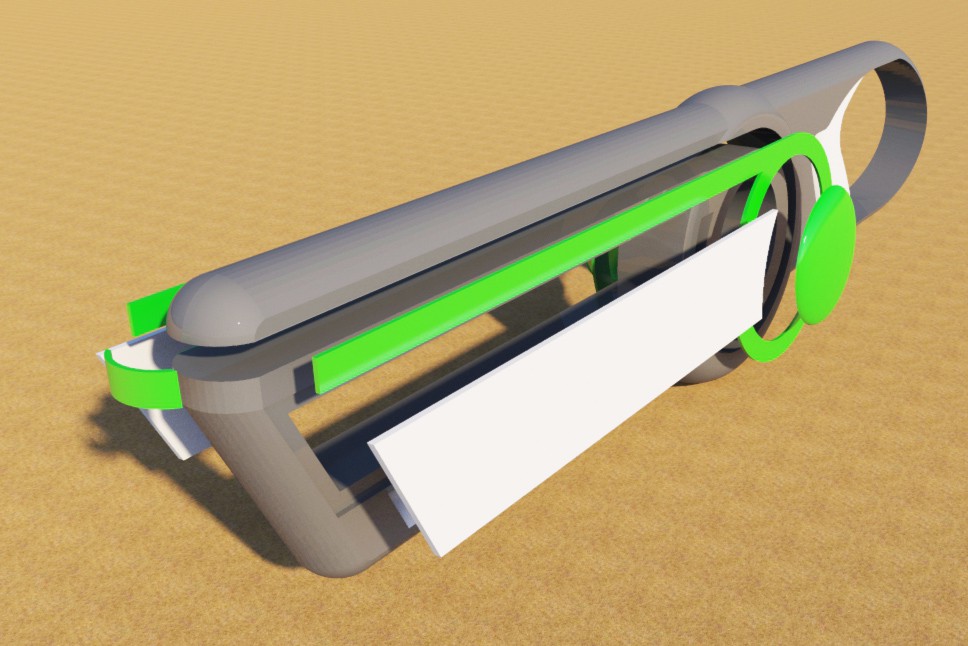
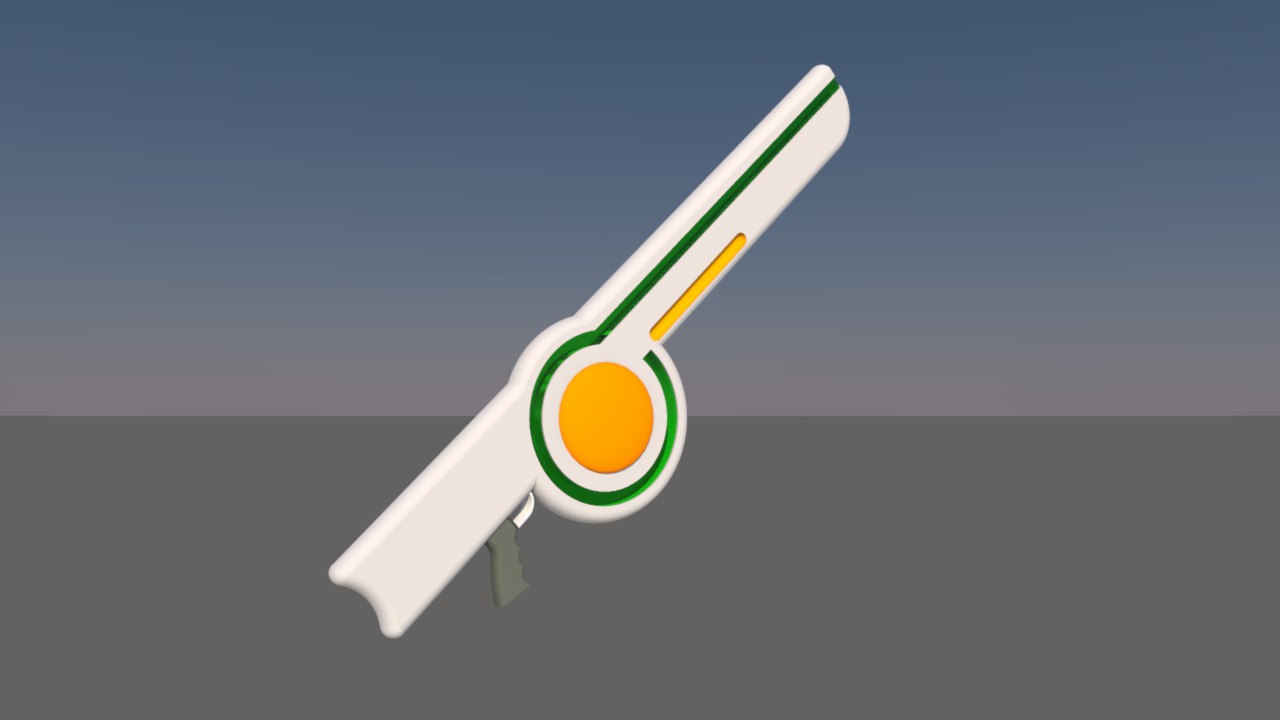
1. design - basic design of aesthetics

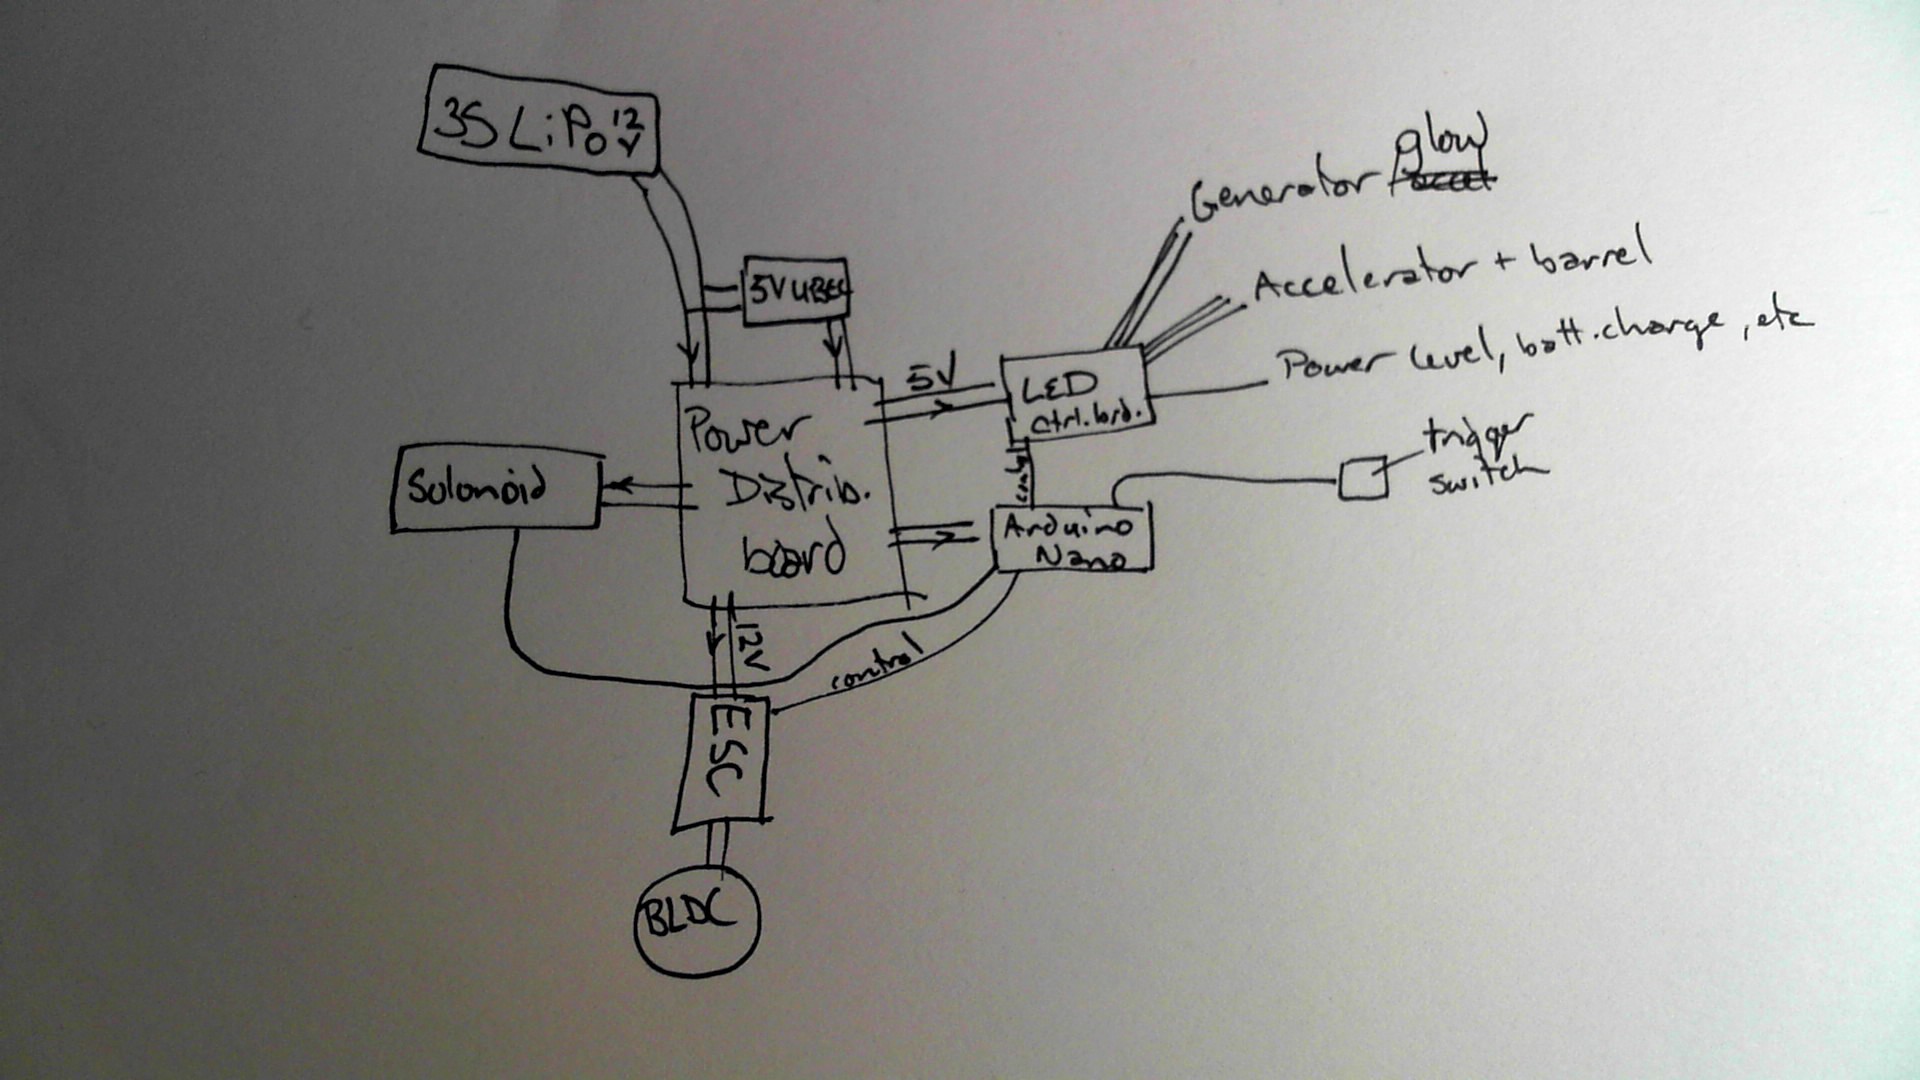
2. electrical and operation systems design - main components and how they are connected with each other

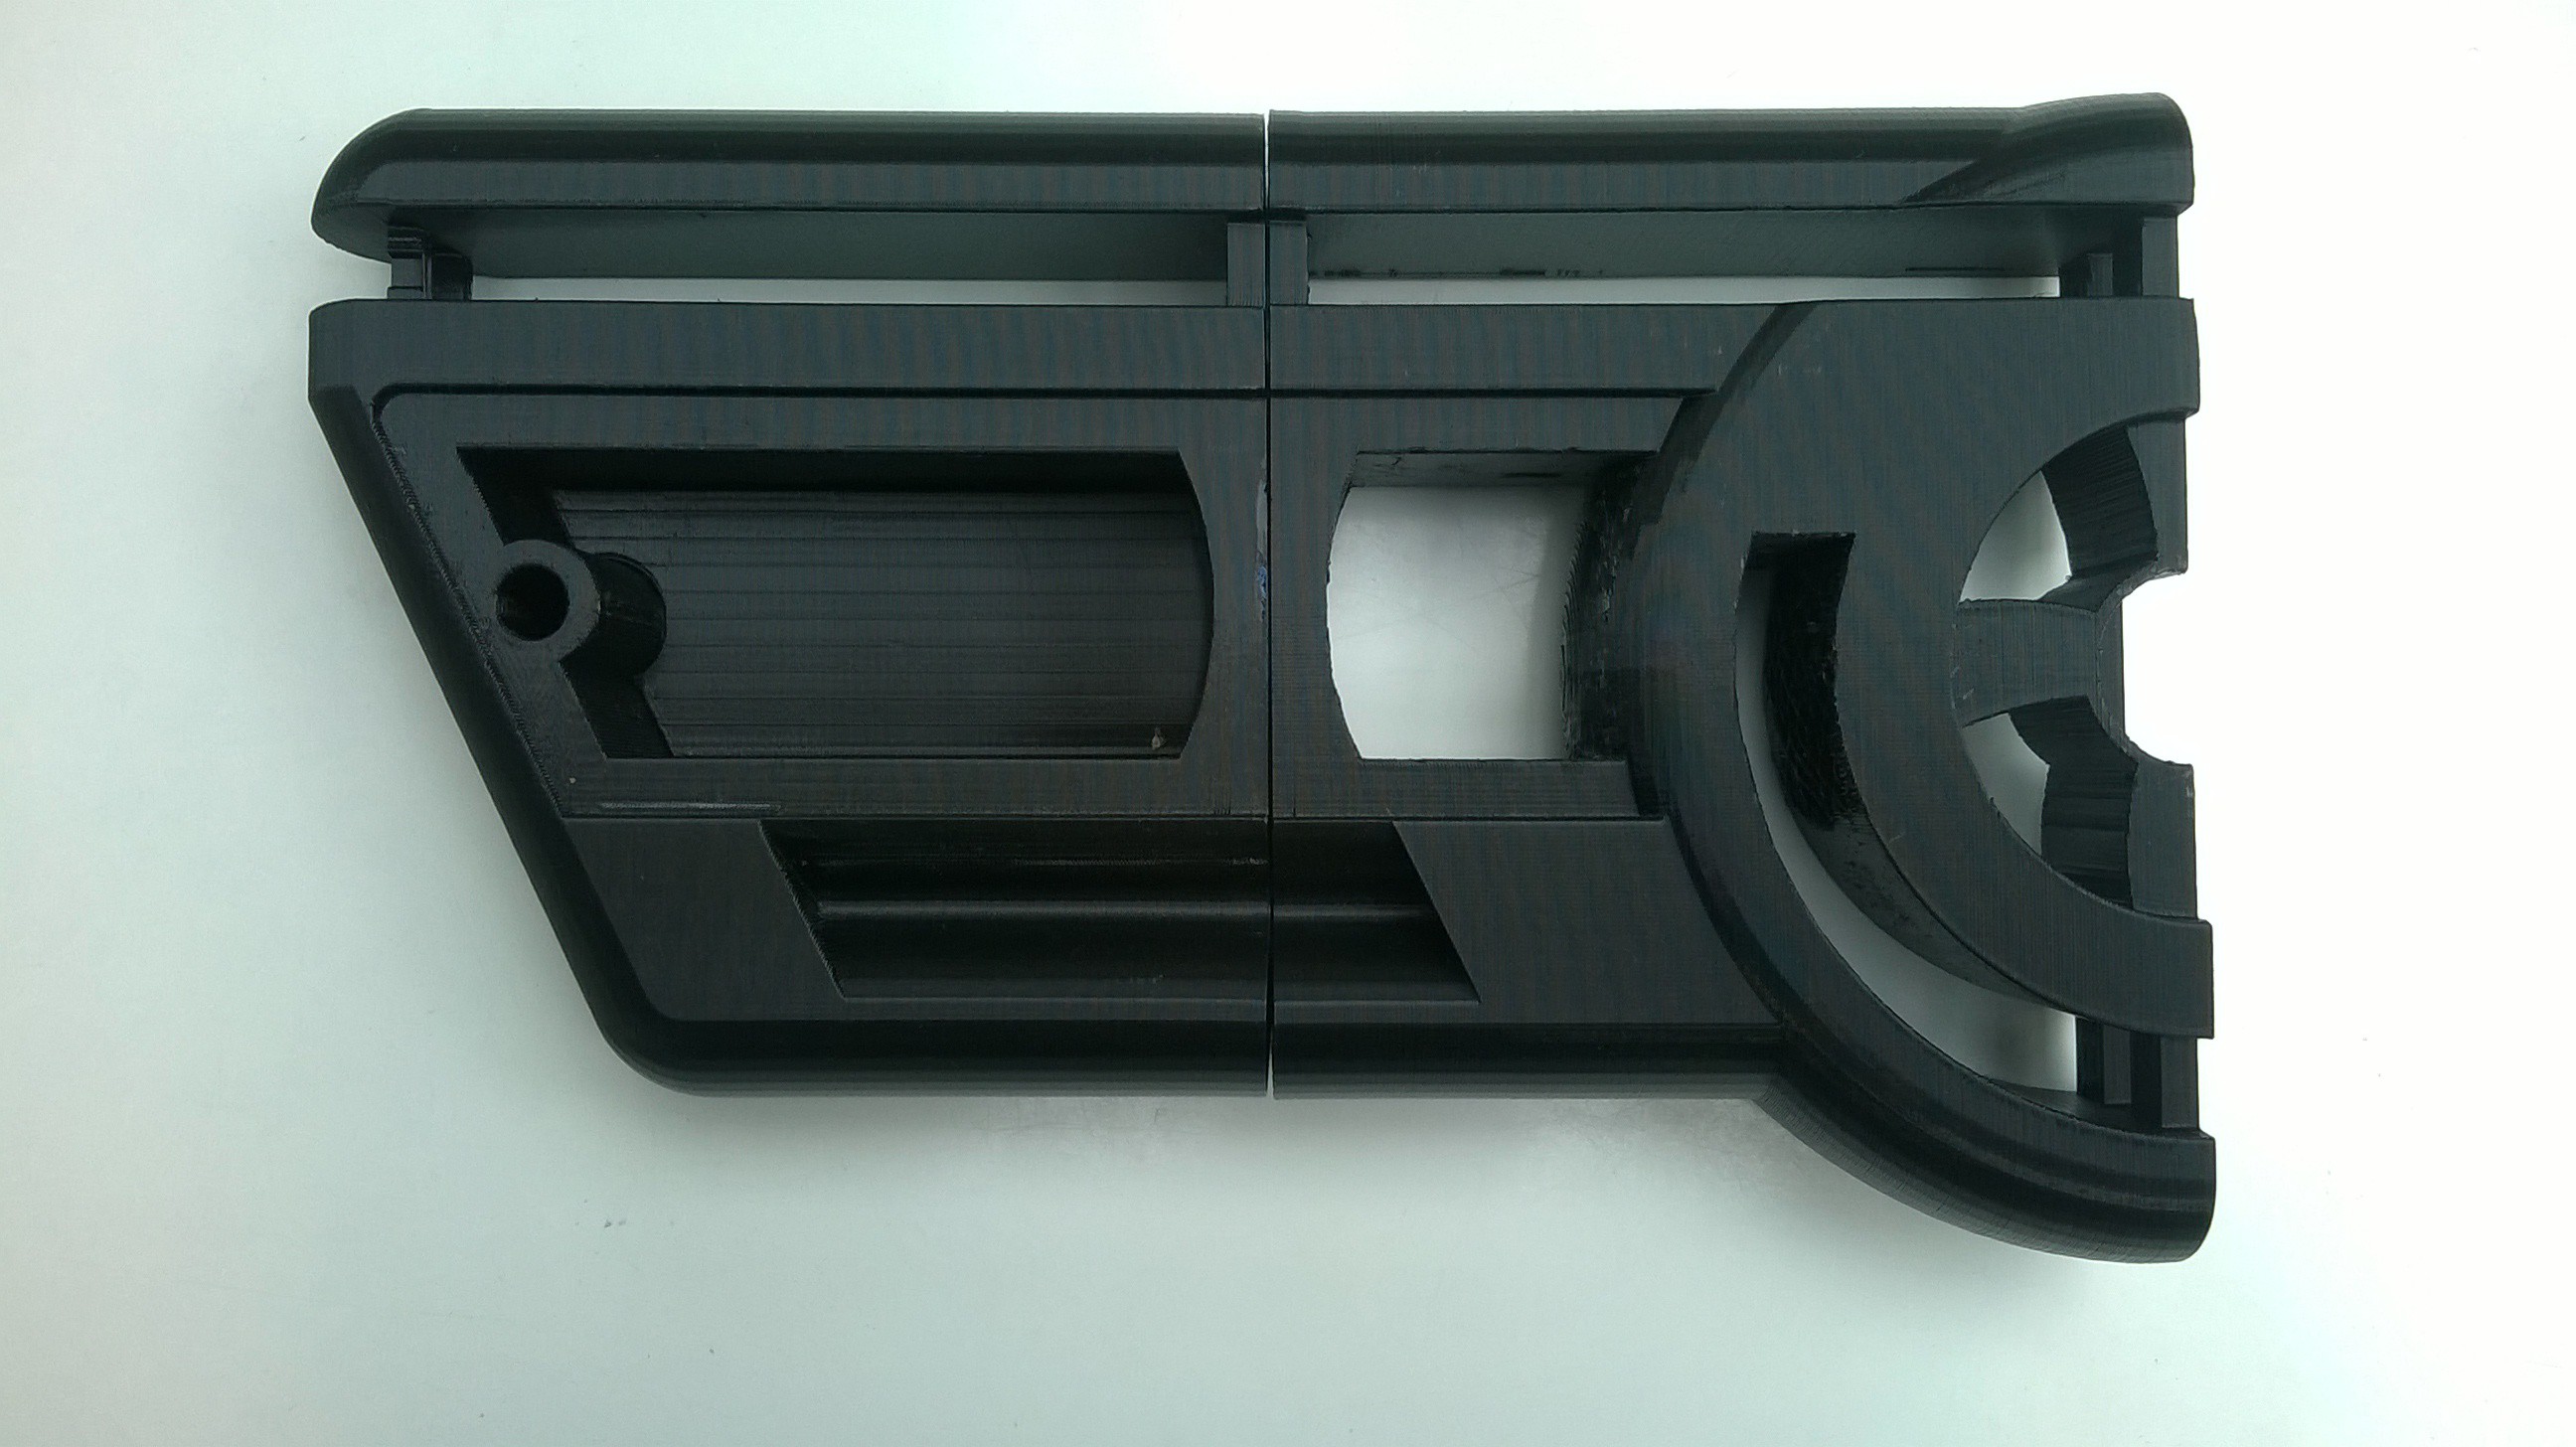
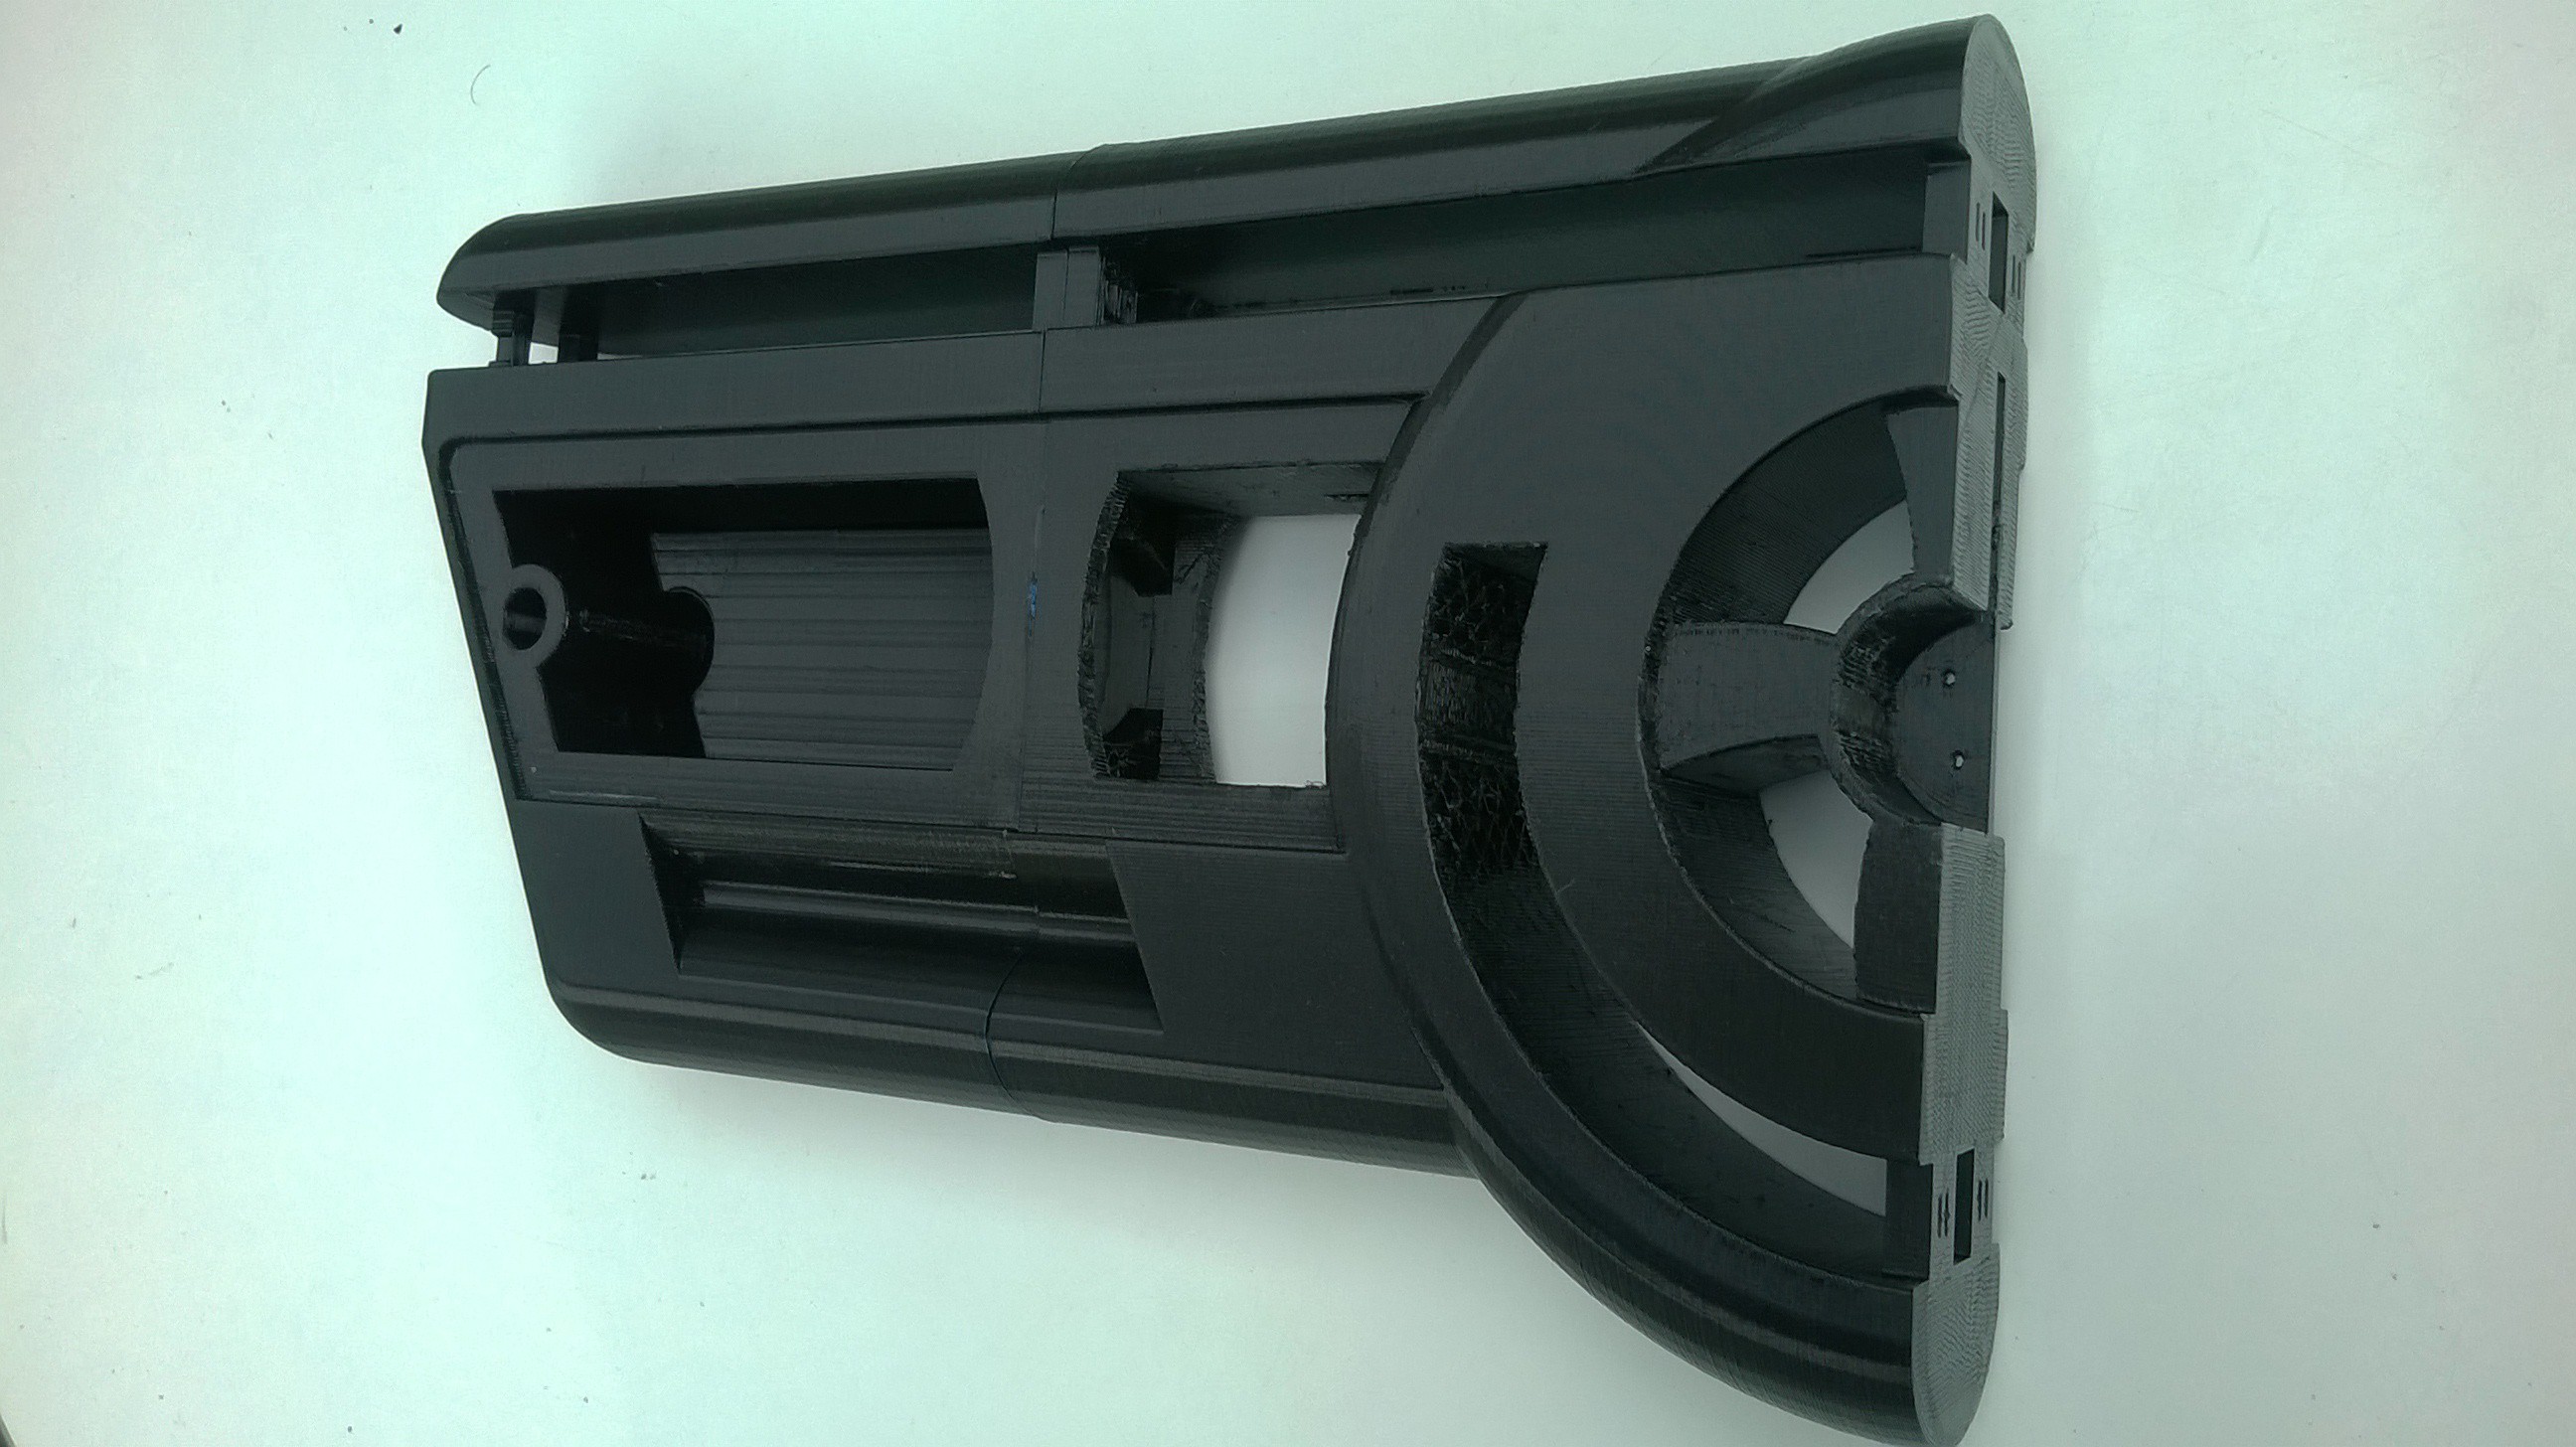
3. design for printing - details required for part fitting and multi-model printing added in

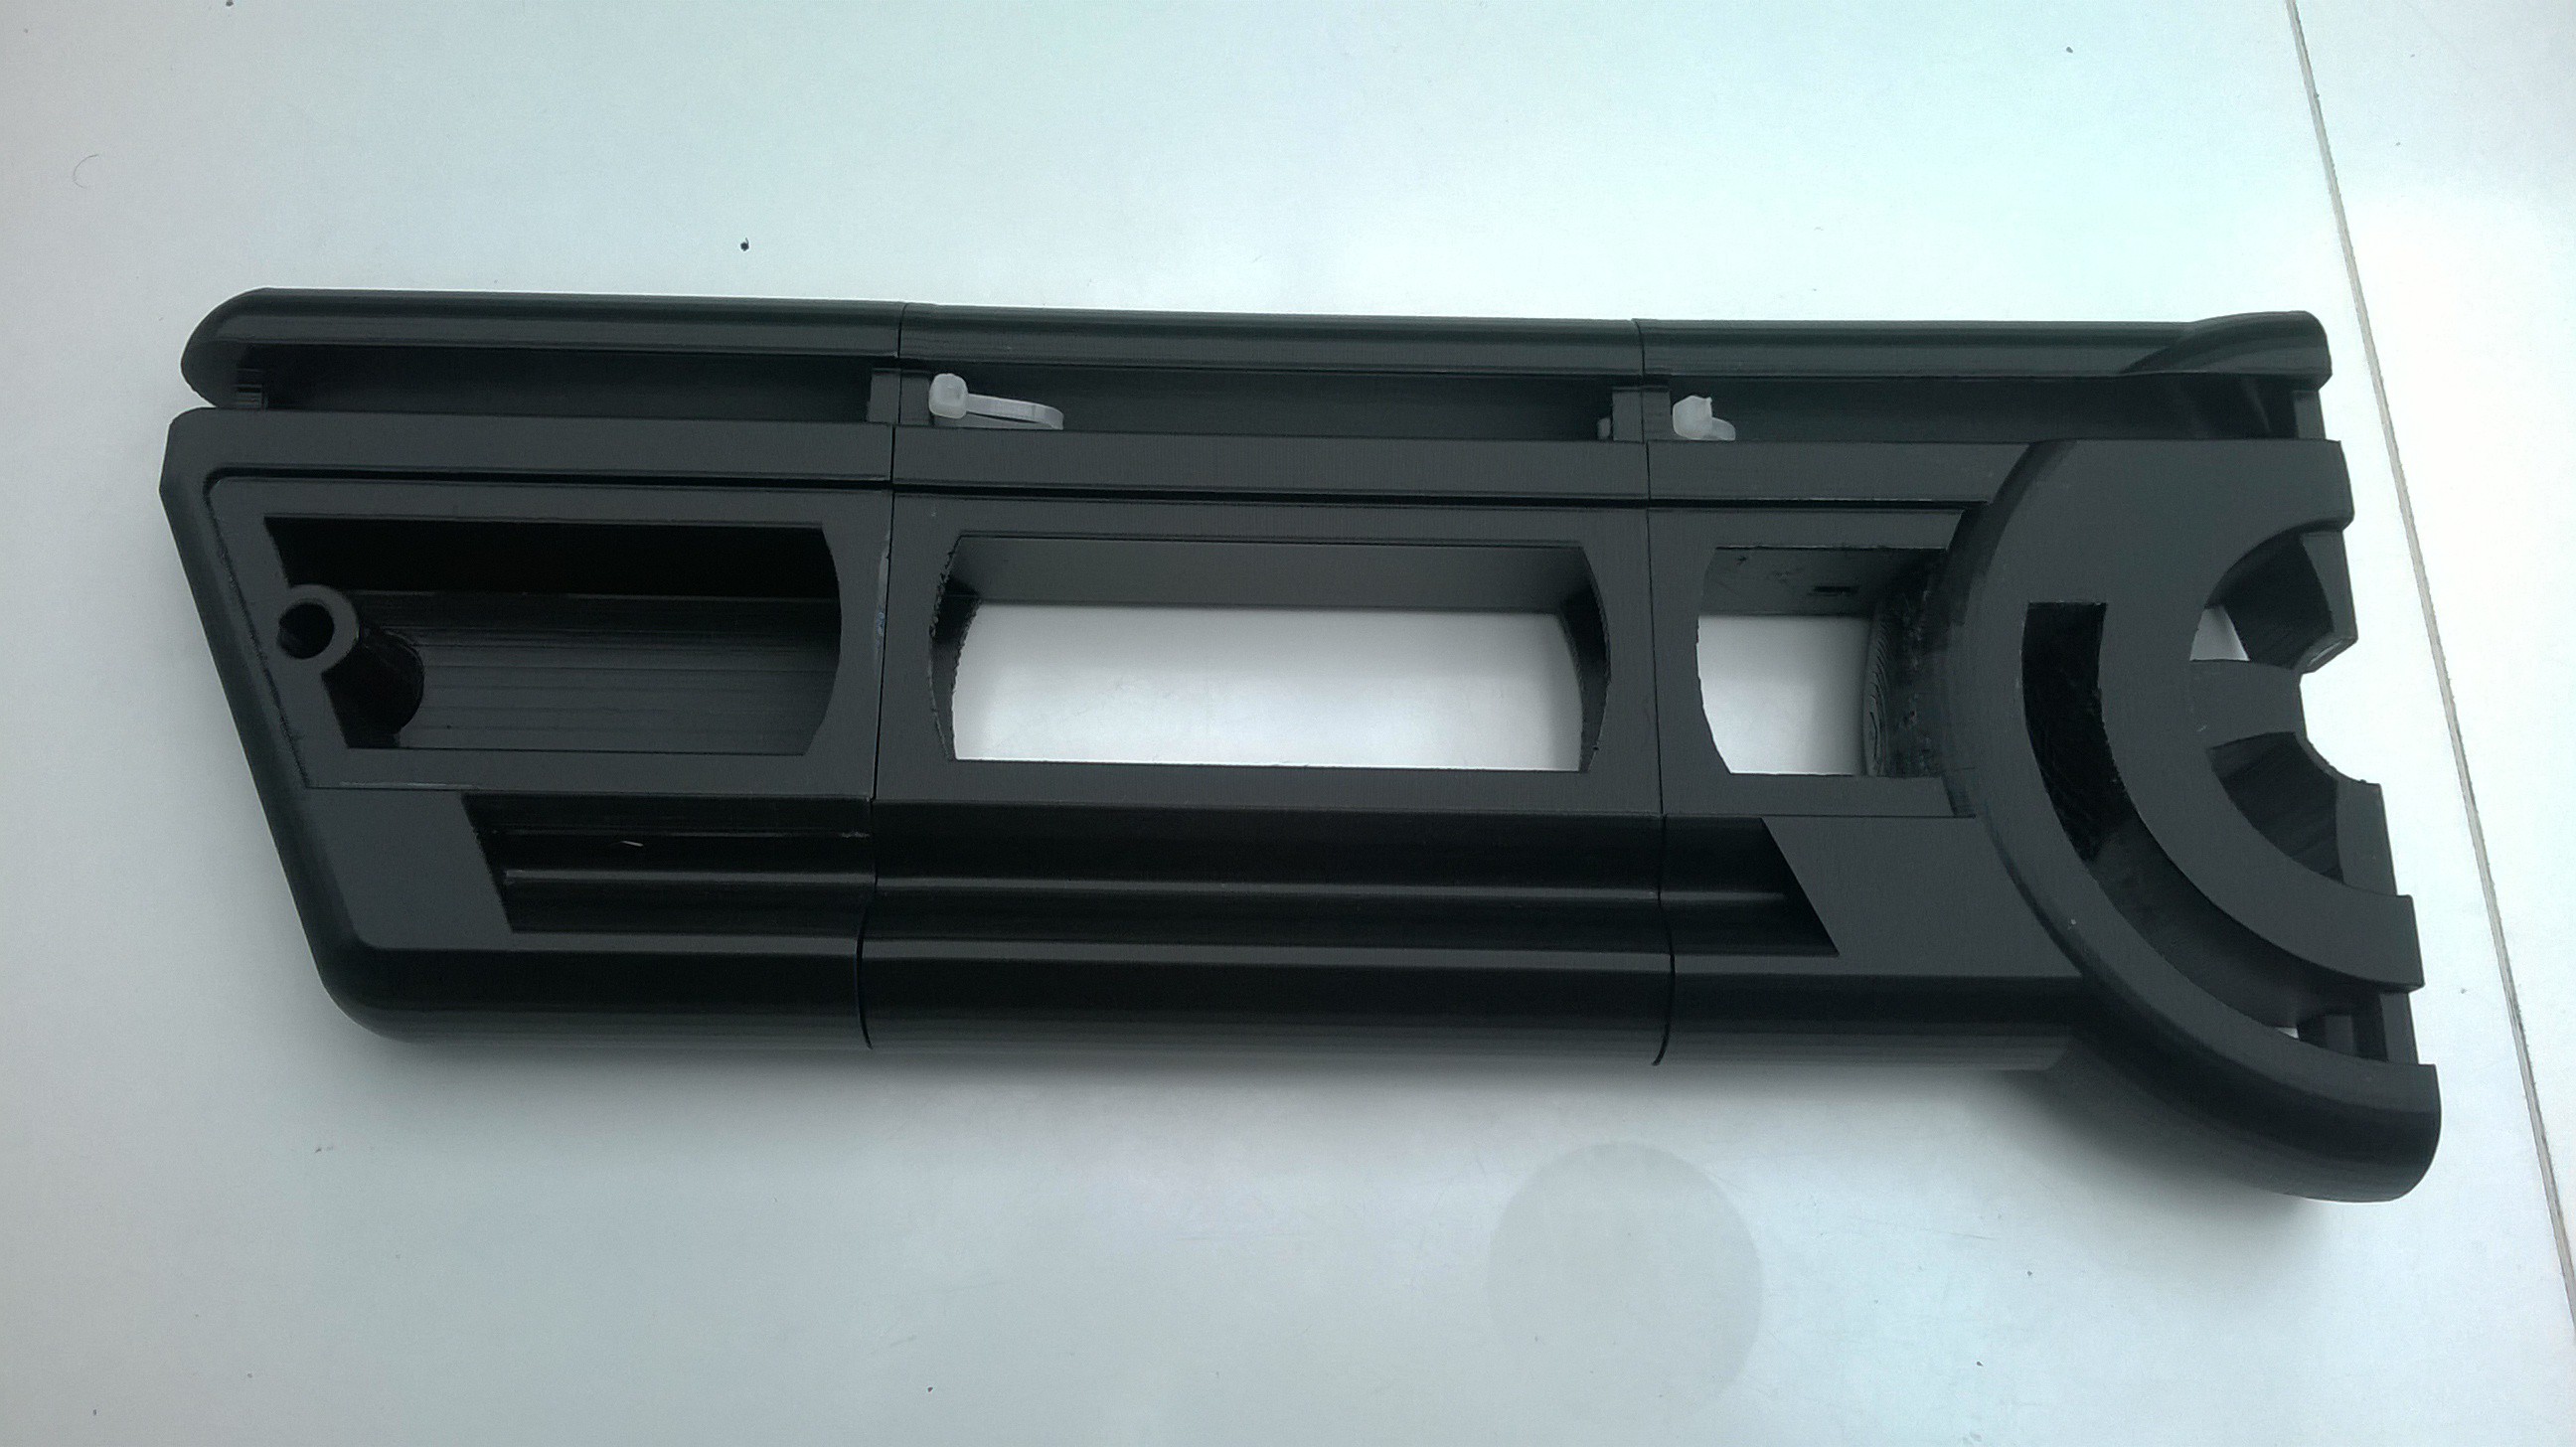
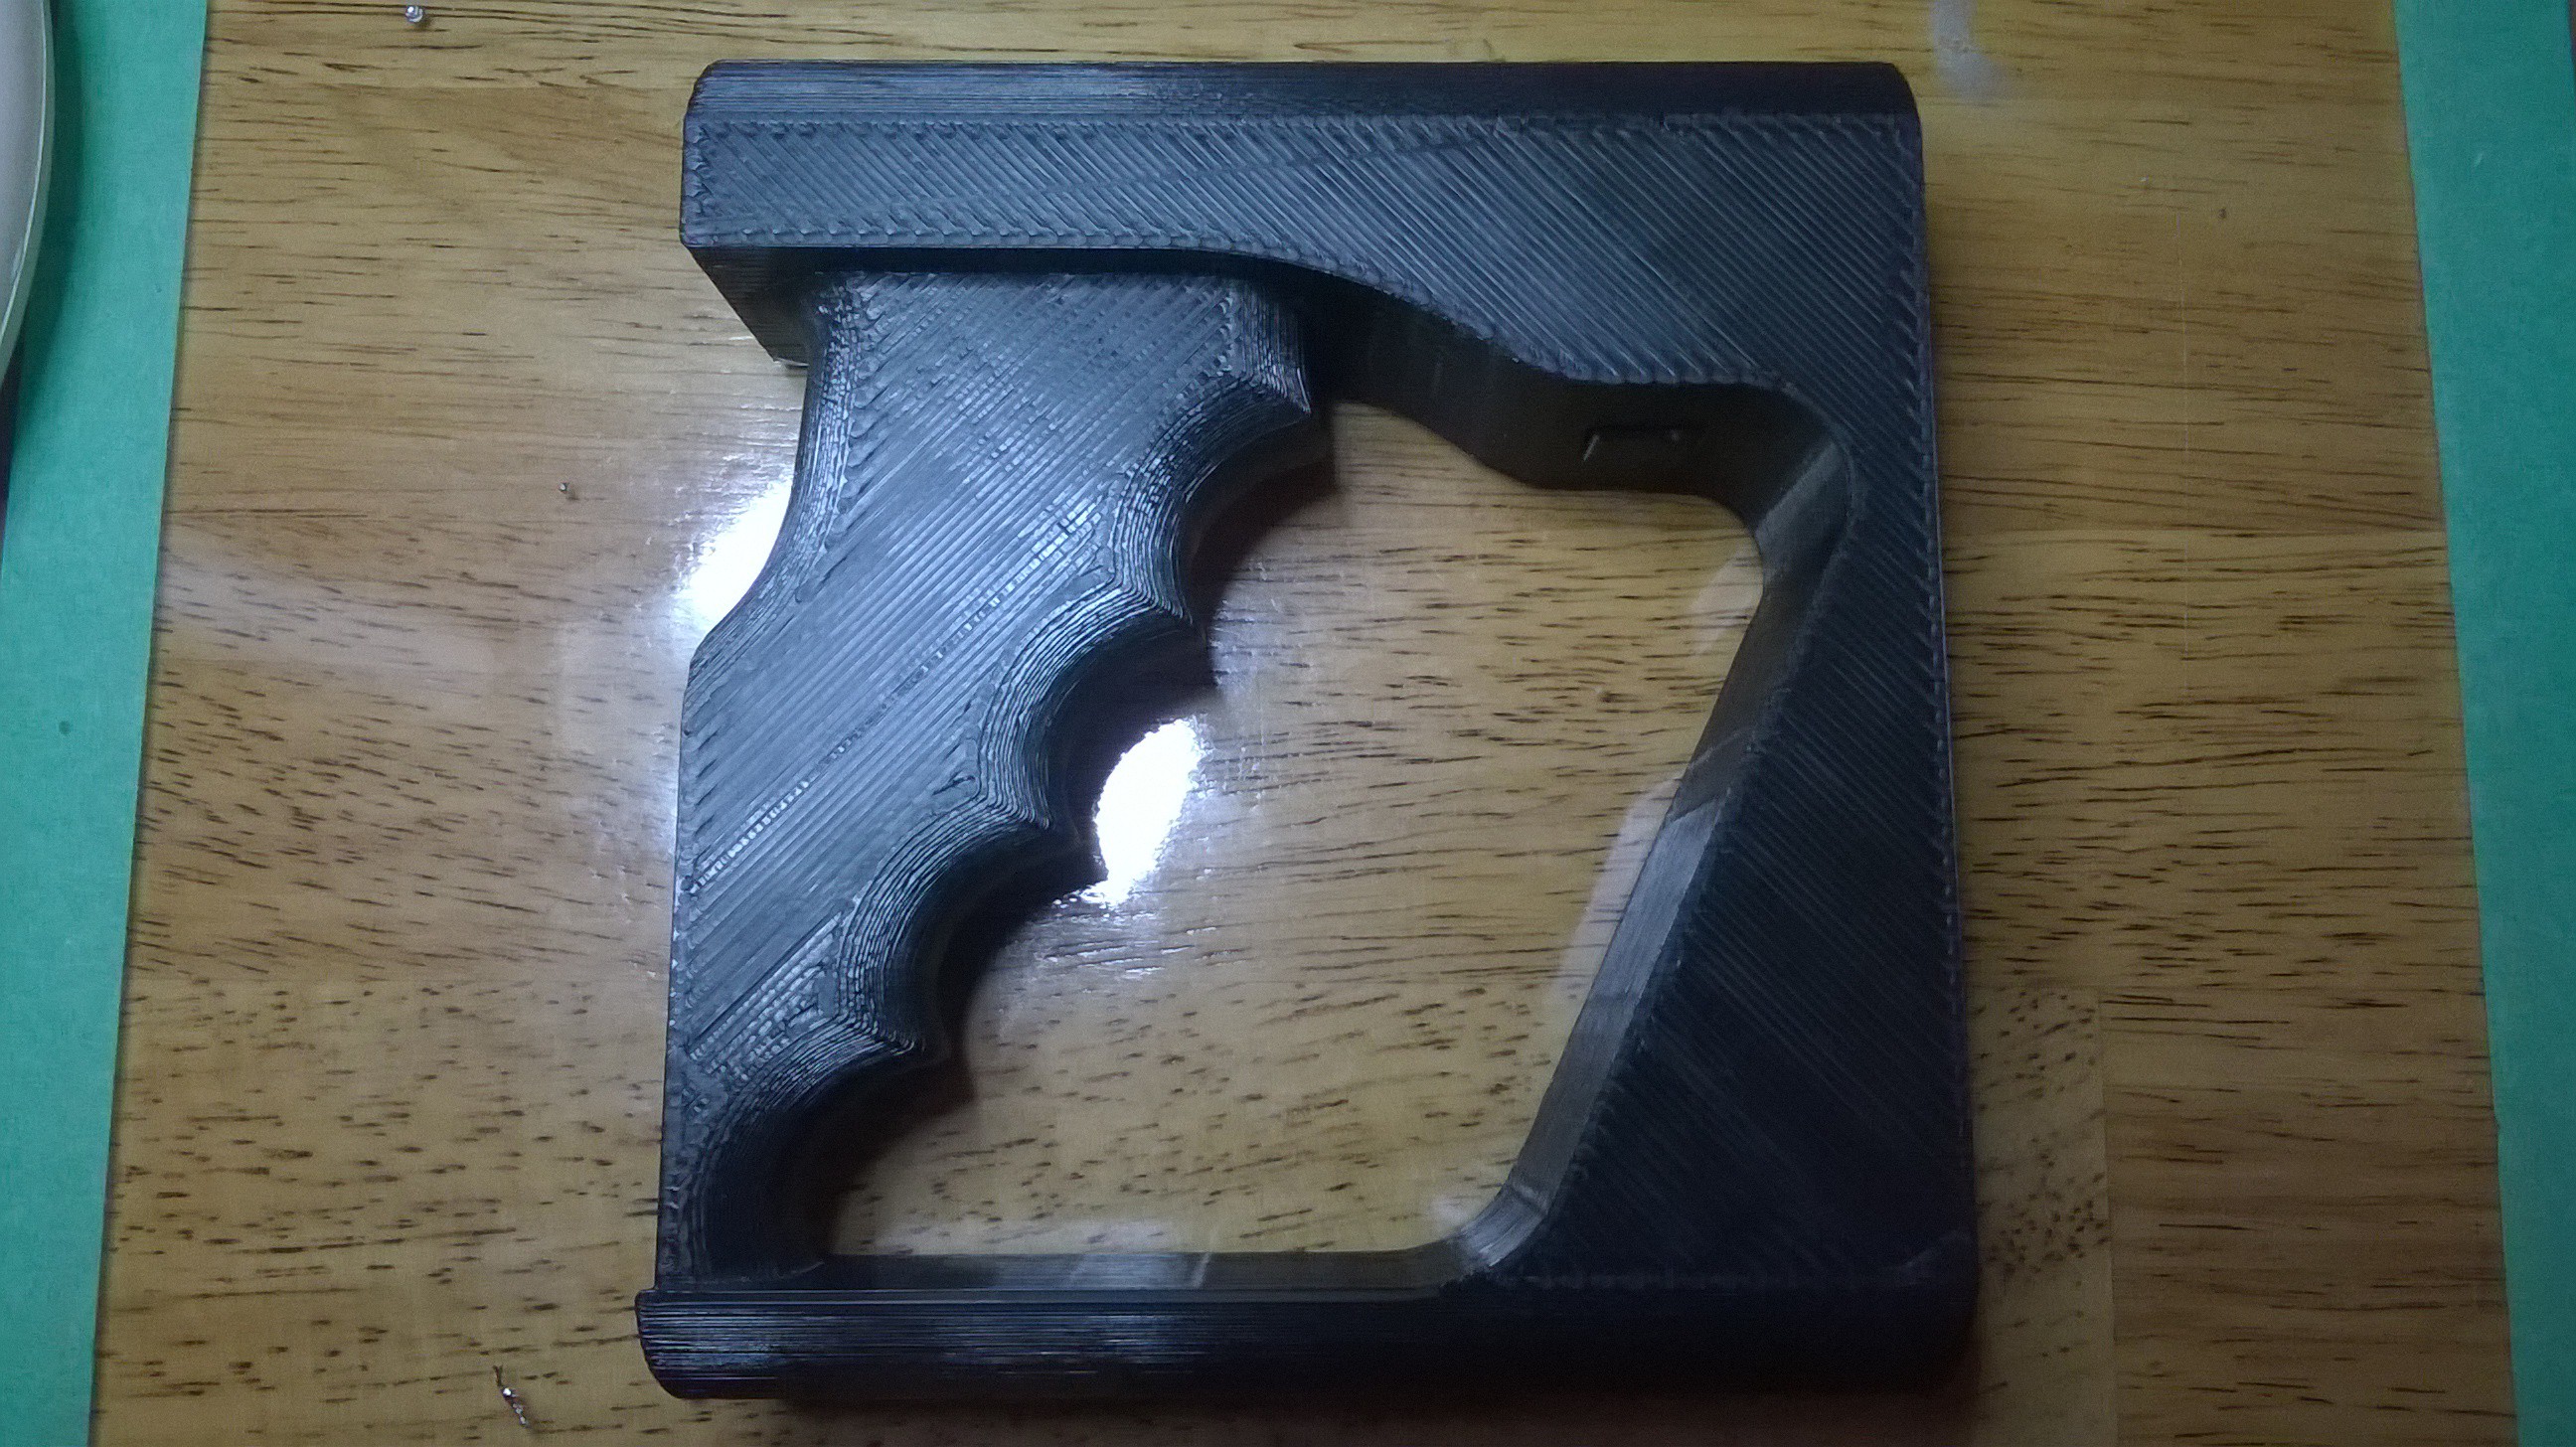
4. print, tweak, repeat - parts are printed, fine tuned and printed again

5. assembly and testing - where it all comes together

These steps will be published in separate logs.

  • Print so far...

    ken.do02/16/2017 at 23:23 0 comments

    Ok, I am never doing that again. I used a Cura 'grid' type support structure. It is awesome when you have easy access for removal, but if the supports are surrounded by the print, it can be a bit... difficult. It took me 2 hours to remove this crap!! And it doesn't look good.

    I used black PLA because it is what I had a lot of...

    This is the business end, and half of the generator/accelerator section.

    *UPDATE*

    One more piece to the puzzle. 'Line' support structure came out nice...

    *UPDATE*

    Finally done!!! Now I can see where made all my design mistakes... :(

    Right now it is just put together with sloppy zip ties. Oh and a bolt that is too long. Just wanted to get a mock up together for further design tweaking, wire routing and component housing.

  • Rebuild.

    ken.do02/10/2017 at 19:16 0 comments

    I had an issue with my 3D model; I designed most of the frame around a misaligned generator... So I tore it down and rebuilt! Better than it was, I give you Mk 5.

    Other notable change is the option to not have a back end/shoulder stock at all. I have also been working on making the frame so it is assembled separate from the side panels of the barrel to give me access to the interior for monkeying around with wires and other electronic components

  • Basic wiring diagram

    ken.do02/10/2017 at 03:15 0 comments

    Ultra-basic wiring diagram just to see what is connected to what, voltages, and what not...

    By 'power distribution board' I may mean 'tangled mess of wires, solder, and electrical tape'... Just saying... LED control board may be of the solderless breadboard type. For now.

    I haven't found a suitable solenoid, but I may end up going with a 12V < 1 inch stroke. It's not much, but it will do until I build a wicked-huge one that actually launches the middle bit at twice the speed of sound. Or not.

    I am ordering the LEDs as soon as I am done writing this log. Everything else I should have.

  • Design Considerations

    ken.do02/07/2017 at 23:18 2 comments

    At first, my plan was to 3D print the whole body of this thing. A lot of plastic, figuring out how to attach the sections without interior access, and a lot of printer hours. NOW I think I am going to 3D print the frame and grips only. These can be bolted together/to each other on the inside

    The side panels can be cut from thin sheet metal, acrylic or thin plywood and screwed or twist-latched. This will make accessing the interior much easier for tweaking/repairing electronics etc.

    The generator bits I haven't figured out yet. Maybe I will print the domey things so they can be screwed on to the frame.

    The channel for the LEDs in the accelerator and barrel could be cut from acrylic sheets and bent with heat when necessary.

    I think thats about it.

  • Electromatronics

    ken.do02/07/2017 at 00:03 0 comments

    To make this 'gun' feel like a GUN, I will require some electronics and other hardwares.

    First, a list! I love lists. Especially numbered lists. They make me feel like I am accomplishing something even though I am not...

    Components by 'function'::

    1. the generator

    2. the accelerator

    3. the barrel

    1. The generator is where it all begins. Here I am going to initiate the sequence - on trigger pull, a bright led in the centroid of the mechanism (the domey part) begins to build in intensity. A sound accompanies the build up; kind of a whirring whine produced by a small BLDC. I will unbalance it slightly to provide some vibration as well.

    2. The accelerator is the round glowy bit that is around the domey bit. When the generator has reached peak power, LEDs chase through the accelerator to simulate travel of energy to...

    3. The barrel. Before the energy heads down the barrel at ever increasing velocity, there will be a sizable solonoid to give you a bit of a kick. I know that laser guns don't usually have recoil, but mine is better. I will also give the BLDC a sharp spike of juice shaped to get a 'fzzzinnng!' noise as the lights zip down the barrel.

    So the trick is to stage and control these main systems:

    - generator LED(s)

    - generator BLDC

    - accelerator LED string

    - barrel solenoid

    - barrel LED string

    My weapons of choice will be:

    - the Arduino Nano

    - a small LED control board that can control the three groups of LEDs

    - a small BLDC and matching ESC

    - a 3S LiPo battery (roughly 12V) with at least one UBEC (5-6V)

    - and of course the LEDs

    - and a laser of course

  • Basic Aesthetics

    ken.do02/06/2017 at 23:37 0 comments

    The aesthetics of this rifle are contradictory like peanut butter... Smooth, yet chunky.

    I like the enclosed, smooth roundy look of retro-futuristicism. This was my basic idea:

    I also designed this pistol with the same feel::

    In the end I decided to combine them:::

    There are inherent ergonomic issues with this basic design, but I am slowly working through them...

    *UPDATE* Feb. 5

    I went with a smooth grip rather than the grooved grip, because no one has the same sized fingers... I also curved the backend for ergonomics.

    It's a little difficult to see in the render, but it's there!!

View all 6 project logs

Enjoy this project?

Share

Discussions

Similar Projects

Does this project spark your interest?

Become a member to follow this project and never miss any updates