 jeromekelty
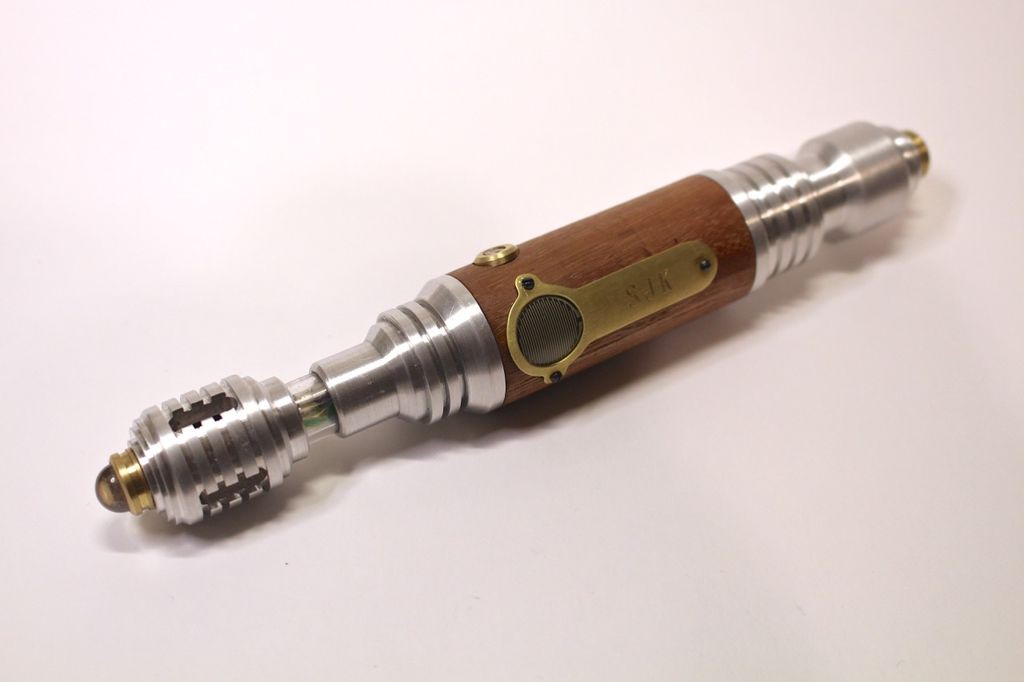
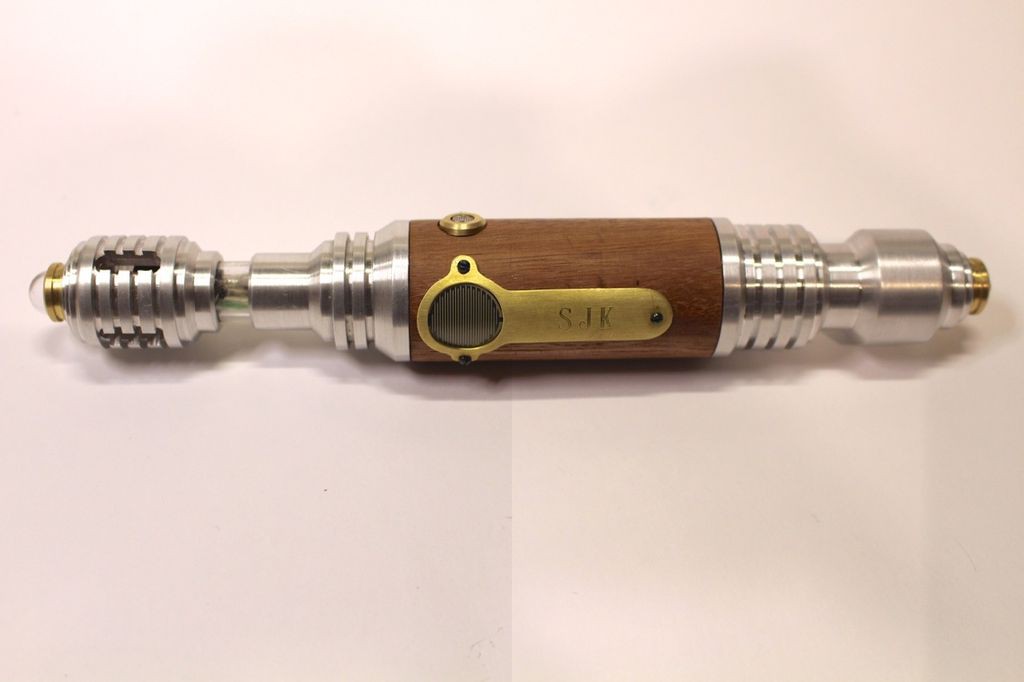
Finished!
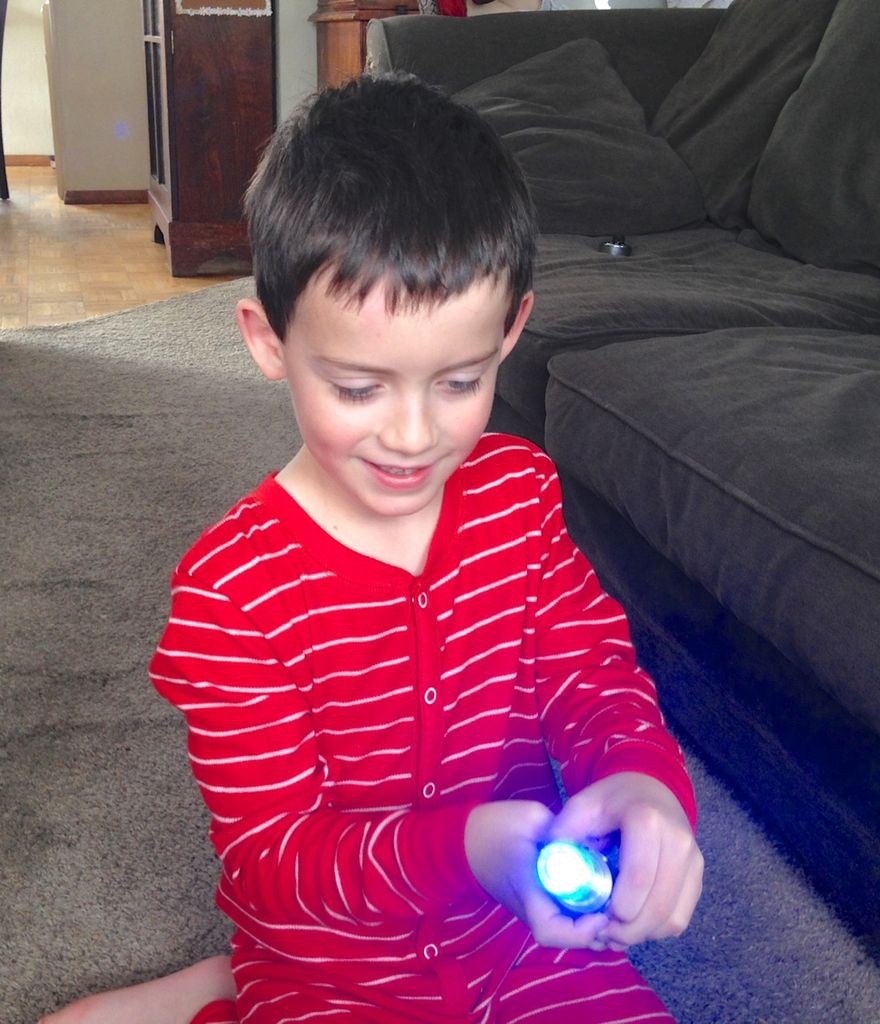
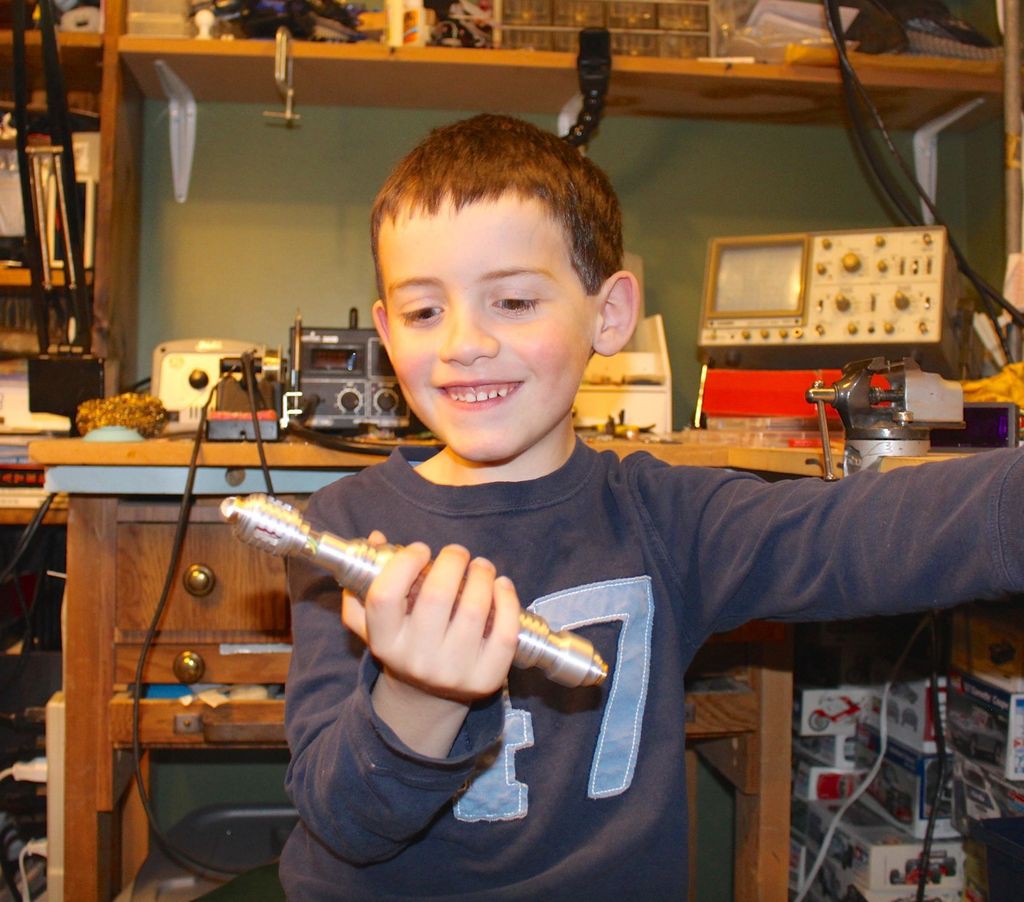
The young Time Lord inspects his new Sonic Screwdriver!
Once I got everything properly tested and fit together I presented the finished Sonic Screwdriver to Sam and he was absolutely thrilled. He had a lot of fun helping build it - he absolutely loves electronics, building things and working in the garage with me. He already has some ideas for improvements to his screwdriver and we spent some time the other day figuring out how to improve the battery charging process. I am very curious to see how he uses it and how long it takes his brothers to decide they want their own custom screwdrivers!
Sam testing the flashlight function.

Testing the "sonic" function.
That's one happy Time Lord!
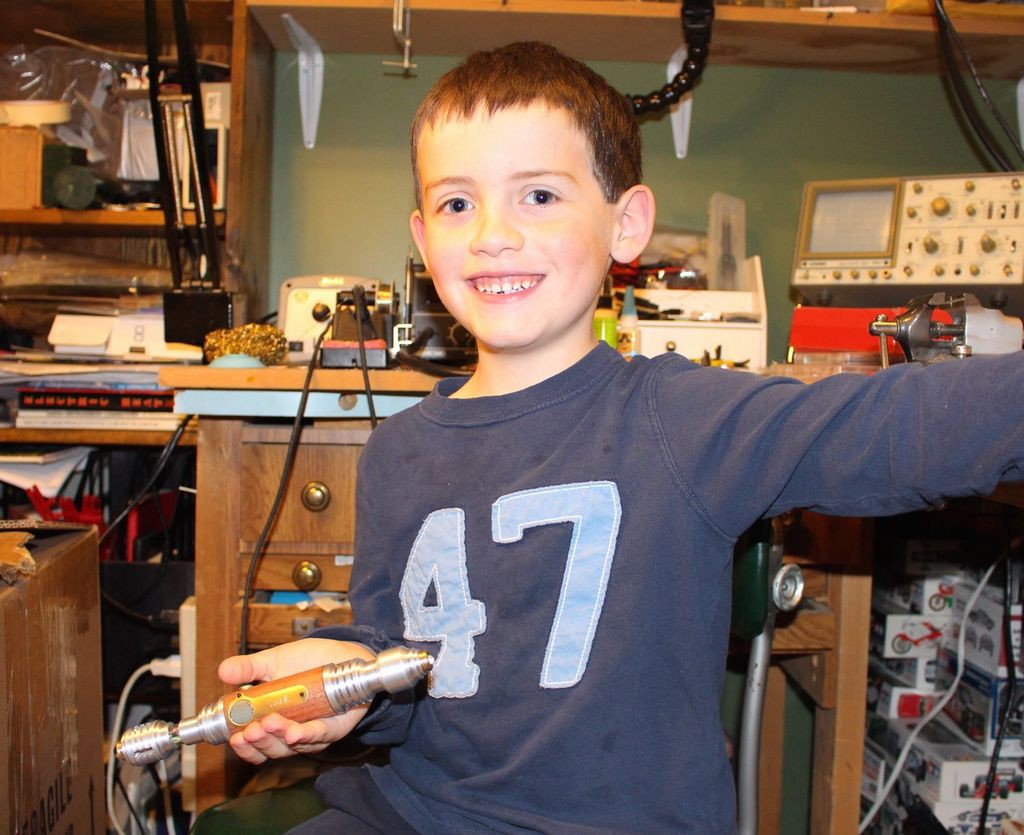
He's already thinking of improvements...
Helpful construction tips:
The biggest mistake I made was not thinking about how much space the wiring takes up. I really didn't want to make the screwdriver body any larger than necessary (it needed to be able to be comfortably held by a child) and even after carefully measuring all of the components and doing a lot of test fitting I still ended up rebuilding the circuit in order to make things fit. If I was to do it all over again (and I probably will) I'd make a smaller custom circuit board using as many surface mount components as possible. This would help to shorten wire lengths and really clean things up.
Test your circuit on a breadboard before beginning construction. Believe me when I say this will help you from ripping your hair out later when doing troubleshooting because something isn't working properly.
When assembling your circuit use a continuity tester after soldering connections/wires in order to make sure your connections are good and you don't have any shorts in your circuit. See the above comment as to why you want to do this. There's a great multimeter tutorial here.
I specifically chose to use analog sensors as I find they are a bit easier for beginners to interface with Arduino boards (compared to i2c and 1-wire sensors.) Adafruit has a fantastic series of sensor tutorials on their Learning System.
Now go forth Time Lords and make your own awesome Sonic Screwdrivers!
This was a really fun project- there are so many cool sensors available today that I can only imagine what people will come up with when making their own Sonic Screwdrivers. As always if there are any questions or you need help making your custom Sonic Screwdriver please don't hesitate to ask!
Discussions
Become a Hackaday.io Member
Create an account to leave a comment. Already have an account? Log In.
Fantastic! Brilliant! I have a 10th Doctor universal remote with a dead power cell.. do you ever make them for sale? I have parts and guts :)
Are you sure? yes | no