 jeromekelty
We made the main body from a section of 1 1/4" hardwood dowel I found in my garage. I bored out the inside to 1" diameter and then turned down the outer diameter. The Aluminum pieces were turned on my lathe. The grooves were cut using a cut off tool and the center holes were drilled and bored out using a boring bar. Four slots were milled in the nose piece using a 3/16" end mill- these slots allow air to circulate around the sensors placed in the nose piece. A 1/2" diameter hole was bored in the front body piece and nose piece so a clear acrylic tube could be fitted. The acrylic tube has a slot cut in it so it can extend and retract- a small set screw in the front body piece locates the slot in the acrylic tube.
The rear body piece was turned in a similar manner as the front piece and it was hollowed out using a boring bar. Both Aluminum body pieces were then drilled and tapped so they could be held onto the wood center body with a couple of small button head screws. After all of the parts were test fitted they were given a brushed finish using a scotchbrite pad. Finally the acrylic tube was glued into the nose piece with super glue.
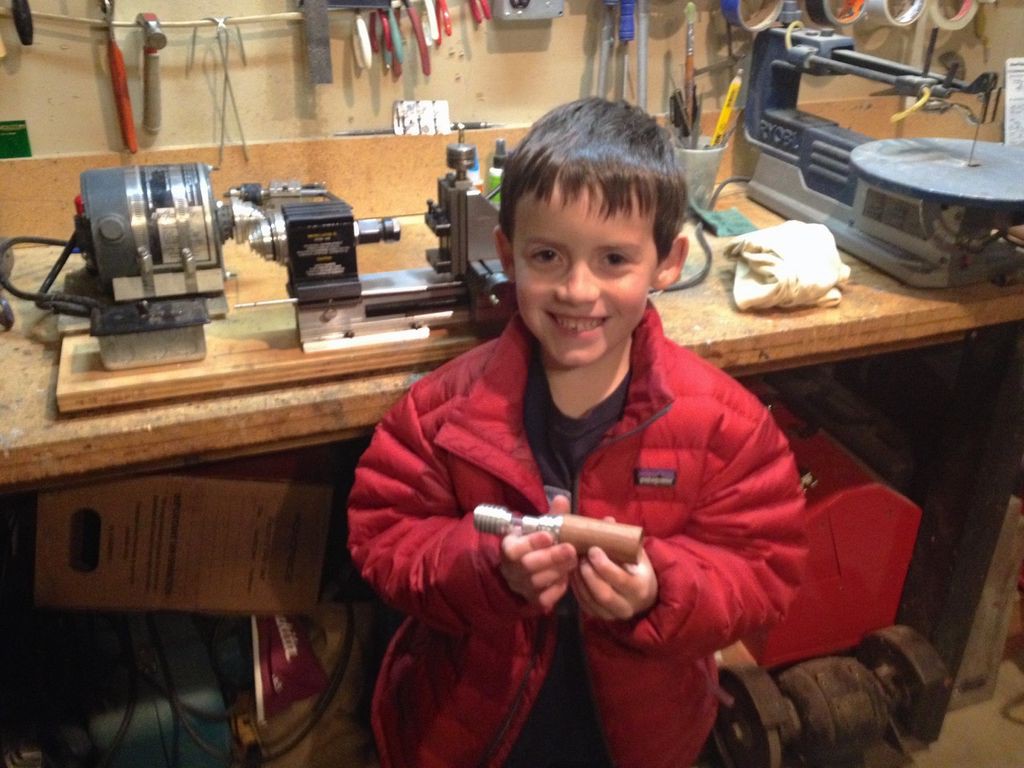
All of the parts were machined on my small benchtop Taig lathe. Sam and I spent many, many weekend hours out in the garage making these parts and he had a blast helping out!
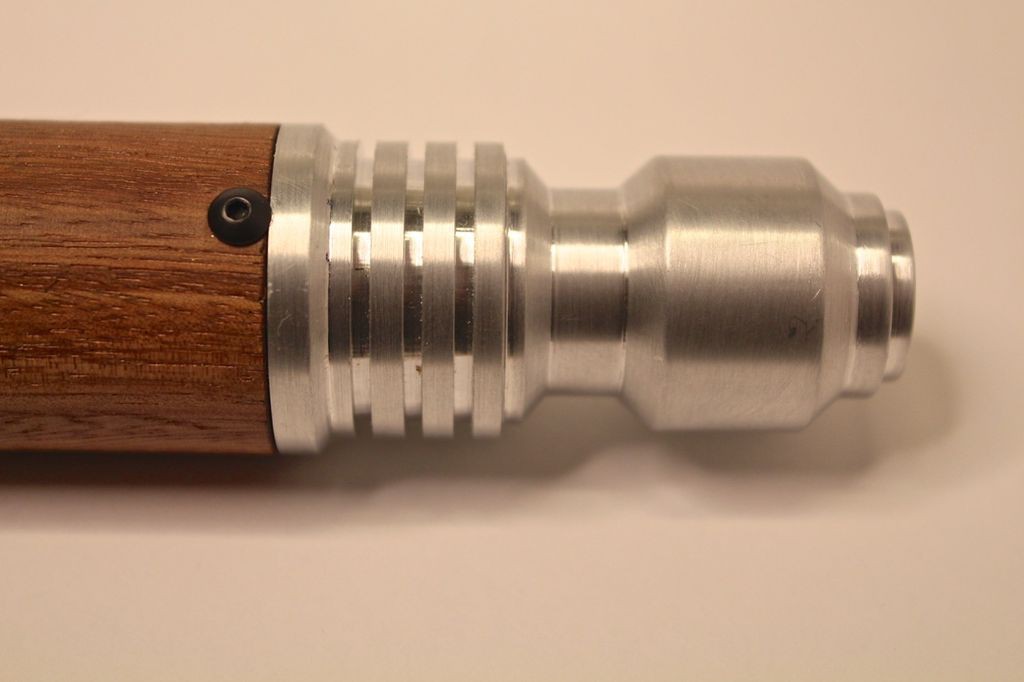
Here's the finished main body assembly. The Aluminum end pieces are held in place with 4-40 button head screws.

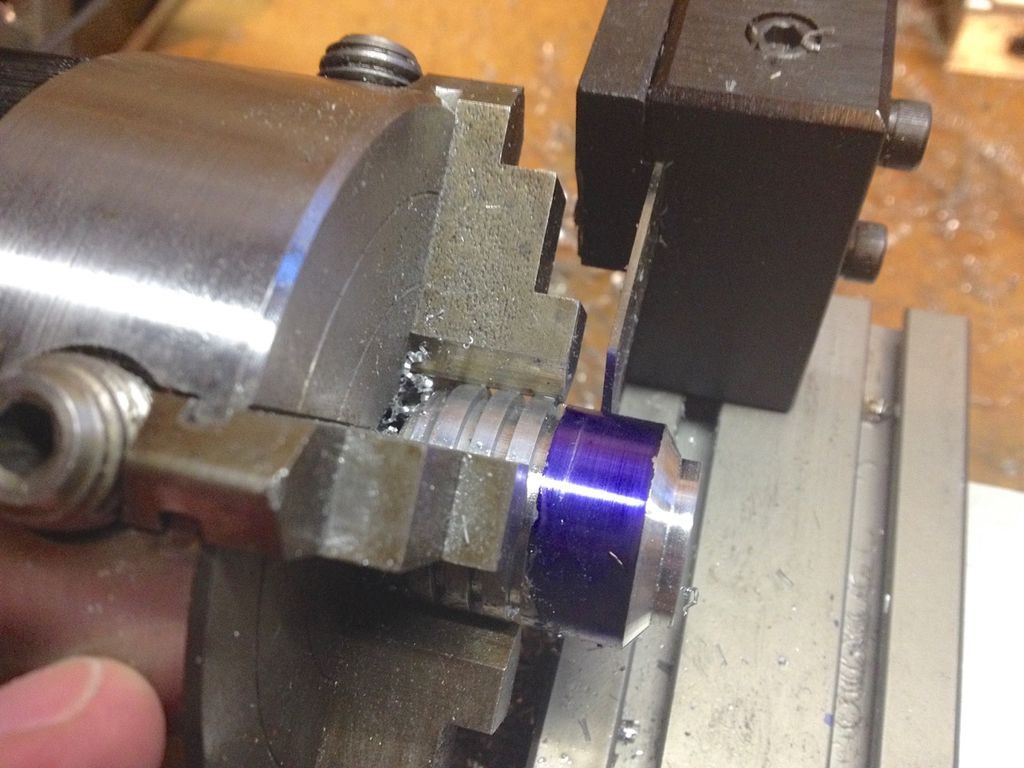
The Alumium end pieces were turned from solid Aluminum round stock. This shows a cut off tool being used to cut grooves in the Aluminum end pieces. The blue dye (Dykem) allows for the marking of scribe lines for cutting.
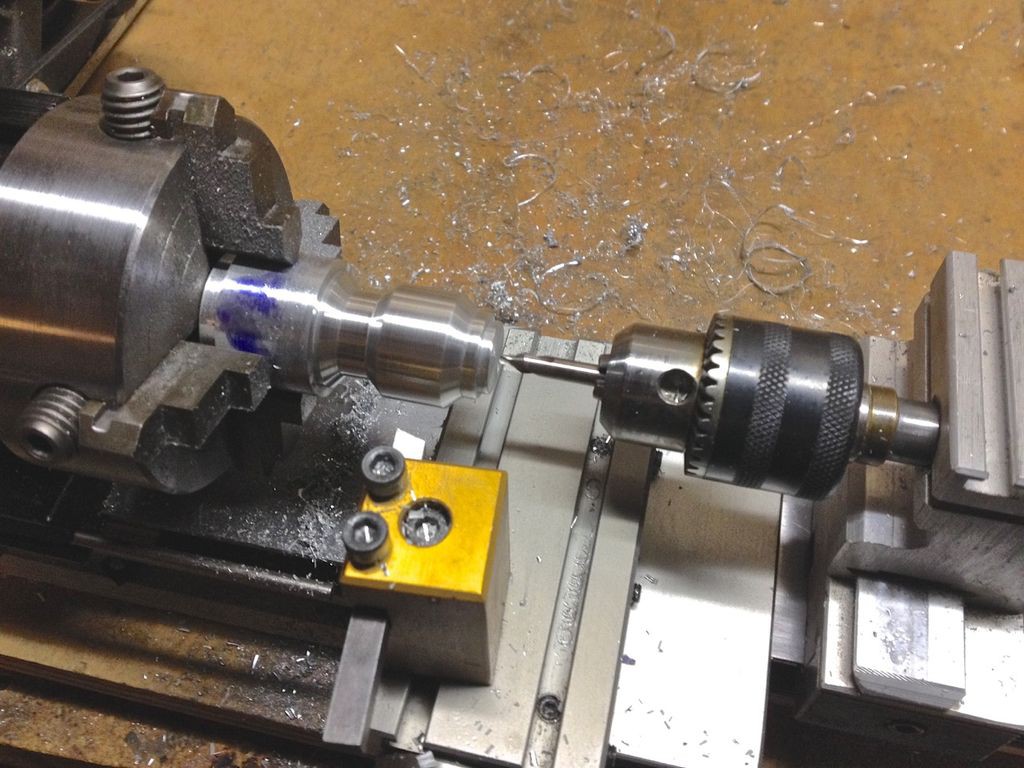
Boring out the nose piece to fit temperature and humidity sensors.

Turning the nose piece on the lathe. A four jaw chuck allows for very precise centering.
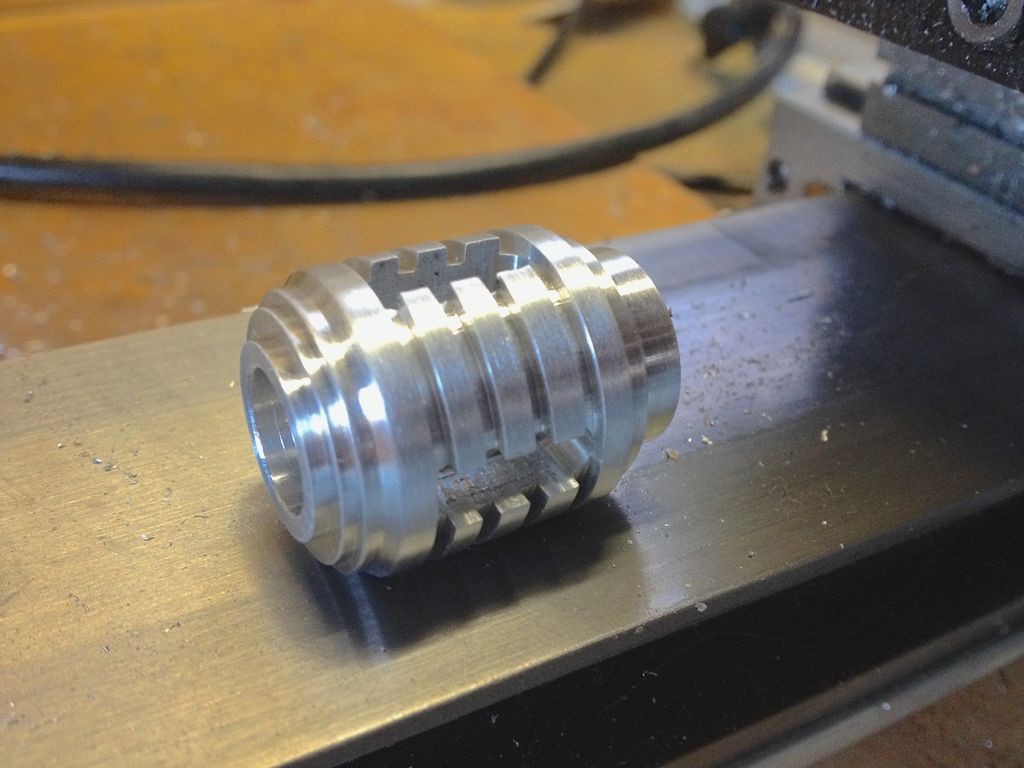
The finished nose piece after milling 3/16" slots with the lathe milling attachment.
Here you can see the 3/16" endmill held in a ER16 collet on the lathe.

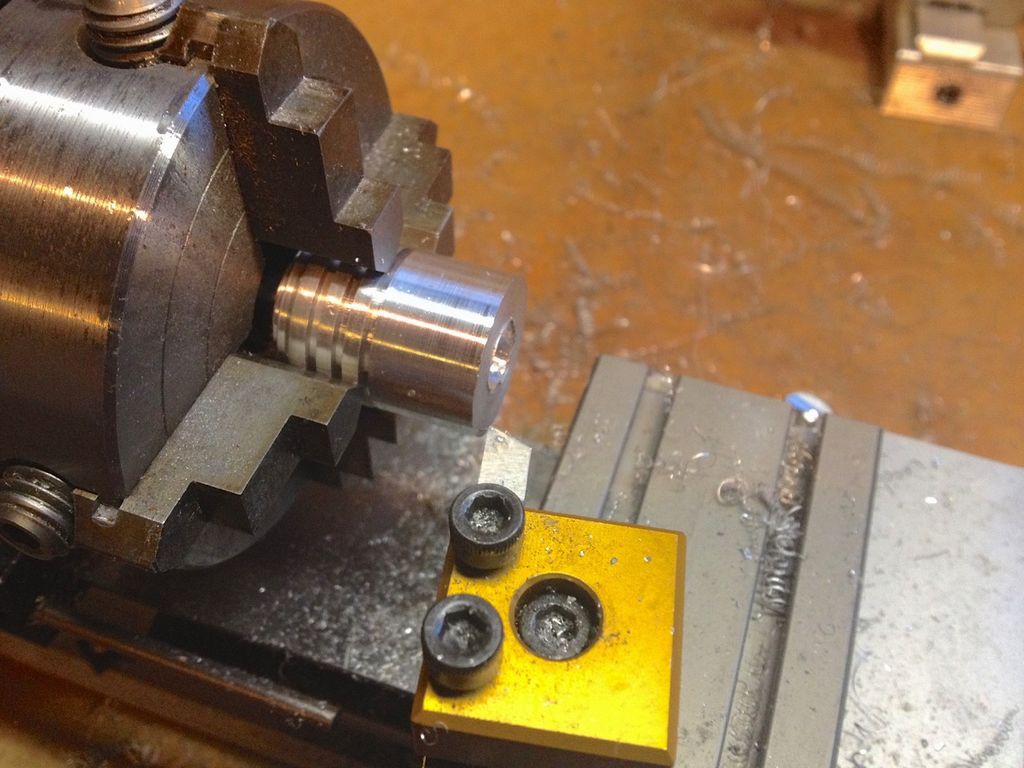
Using a center drill to begin the process of boring out the Aluminum rear end piece.
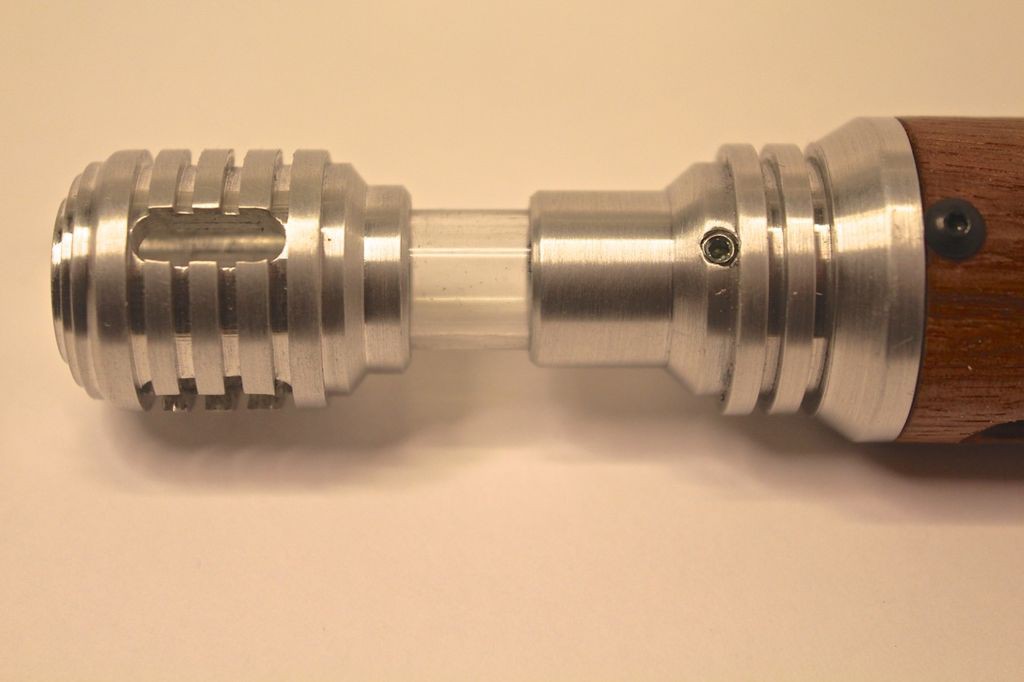
The nose piece with the 1/2" diameter Acrylic tube glued in place. The slot in the tube is for a locating set screw.

This shows the nose piece fully retracted. The small 4-40 set screw extends into the slot in the Acrylic tube and allows the tube to slide in and out and not fall out.
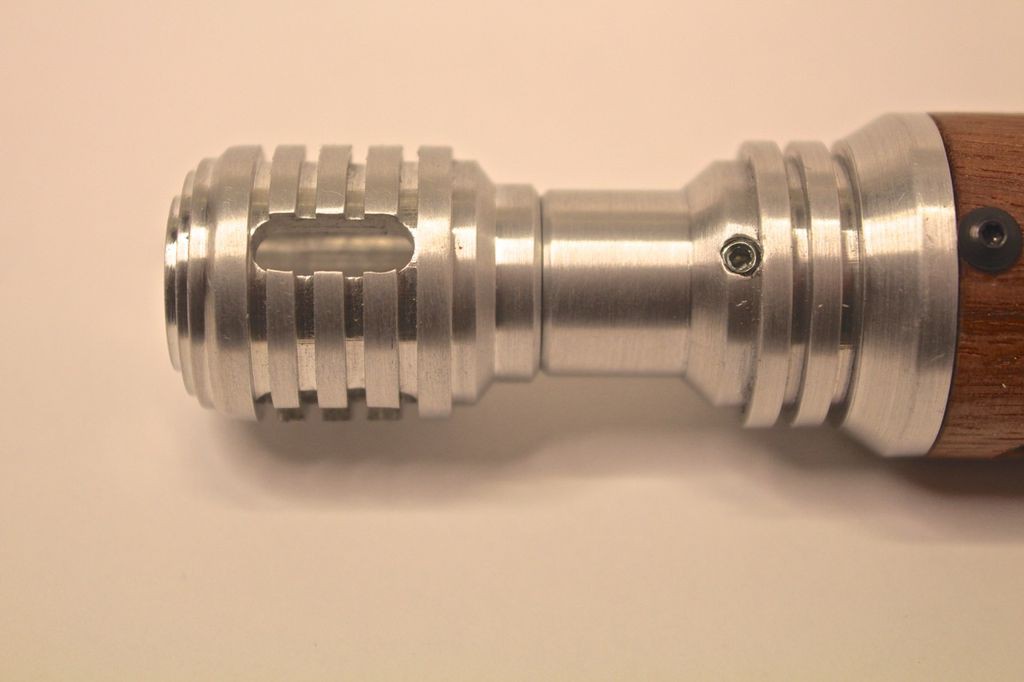
The nose piece fully extended.
A 4-40 button head screw threads into the Aluminum end piece to hold it in place. If I were to do this again I'd probably make an Aluminum inserts bonded into each end of the wood tube and then slide the end pieces into them. It would be much more secure and more durable.
Sam helping machine parts in the garage. He'd probably spend the majority of his day in the garage if he could!
Discussions
Become a Hackaday.io Member
Create an account to leave a comment. Already have an account? Log In.