 Morning.Star
I've redesigned the thigh section to make it simpler and stronger, the lids are now in one section and the bearers tie the sides together with larger glued surfaces. The glue and doubled card will provide better purchase for the servo mounting screws.
I've included details for the hinges, which should be made by wrapping one of the strips tightly round a cocktail stick, gluing with superglue periodically so it doesnt unwind. The finished cylinder is glued heavily to the marking on the thigh section. Use a lot of glue, this needs to be strong... When it is cured it makes a stud with a hole in it the right size to take a small screw.
The yokes are reinforced with a small square of metal or plastic cut from a jar lid or similar. It is glued to the inside of the structure and is pierced to take the screw and stop it from eating the cardboard over a long period of use.
I've corrected all the servo mounting holes. Pierce these with a sharp object before folding. The servo actuator arm is best glued to the inside face of the yoke - it lines up on holes 2 and 5 in the actuator and will eventually be inside the yoke. This will need all the parts re-adjusting for the change in width.
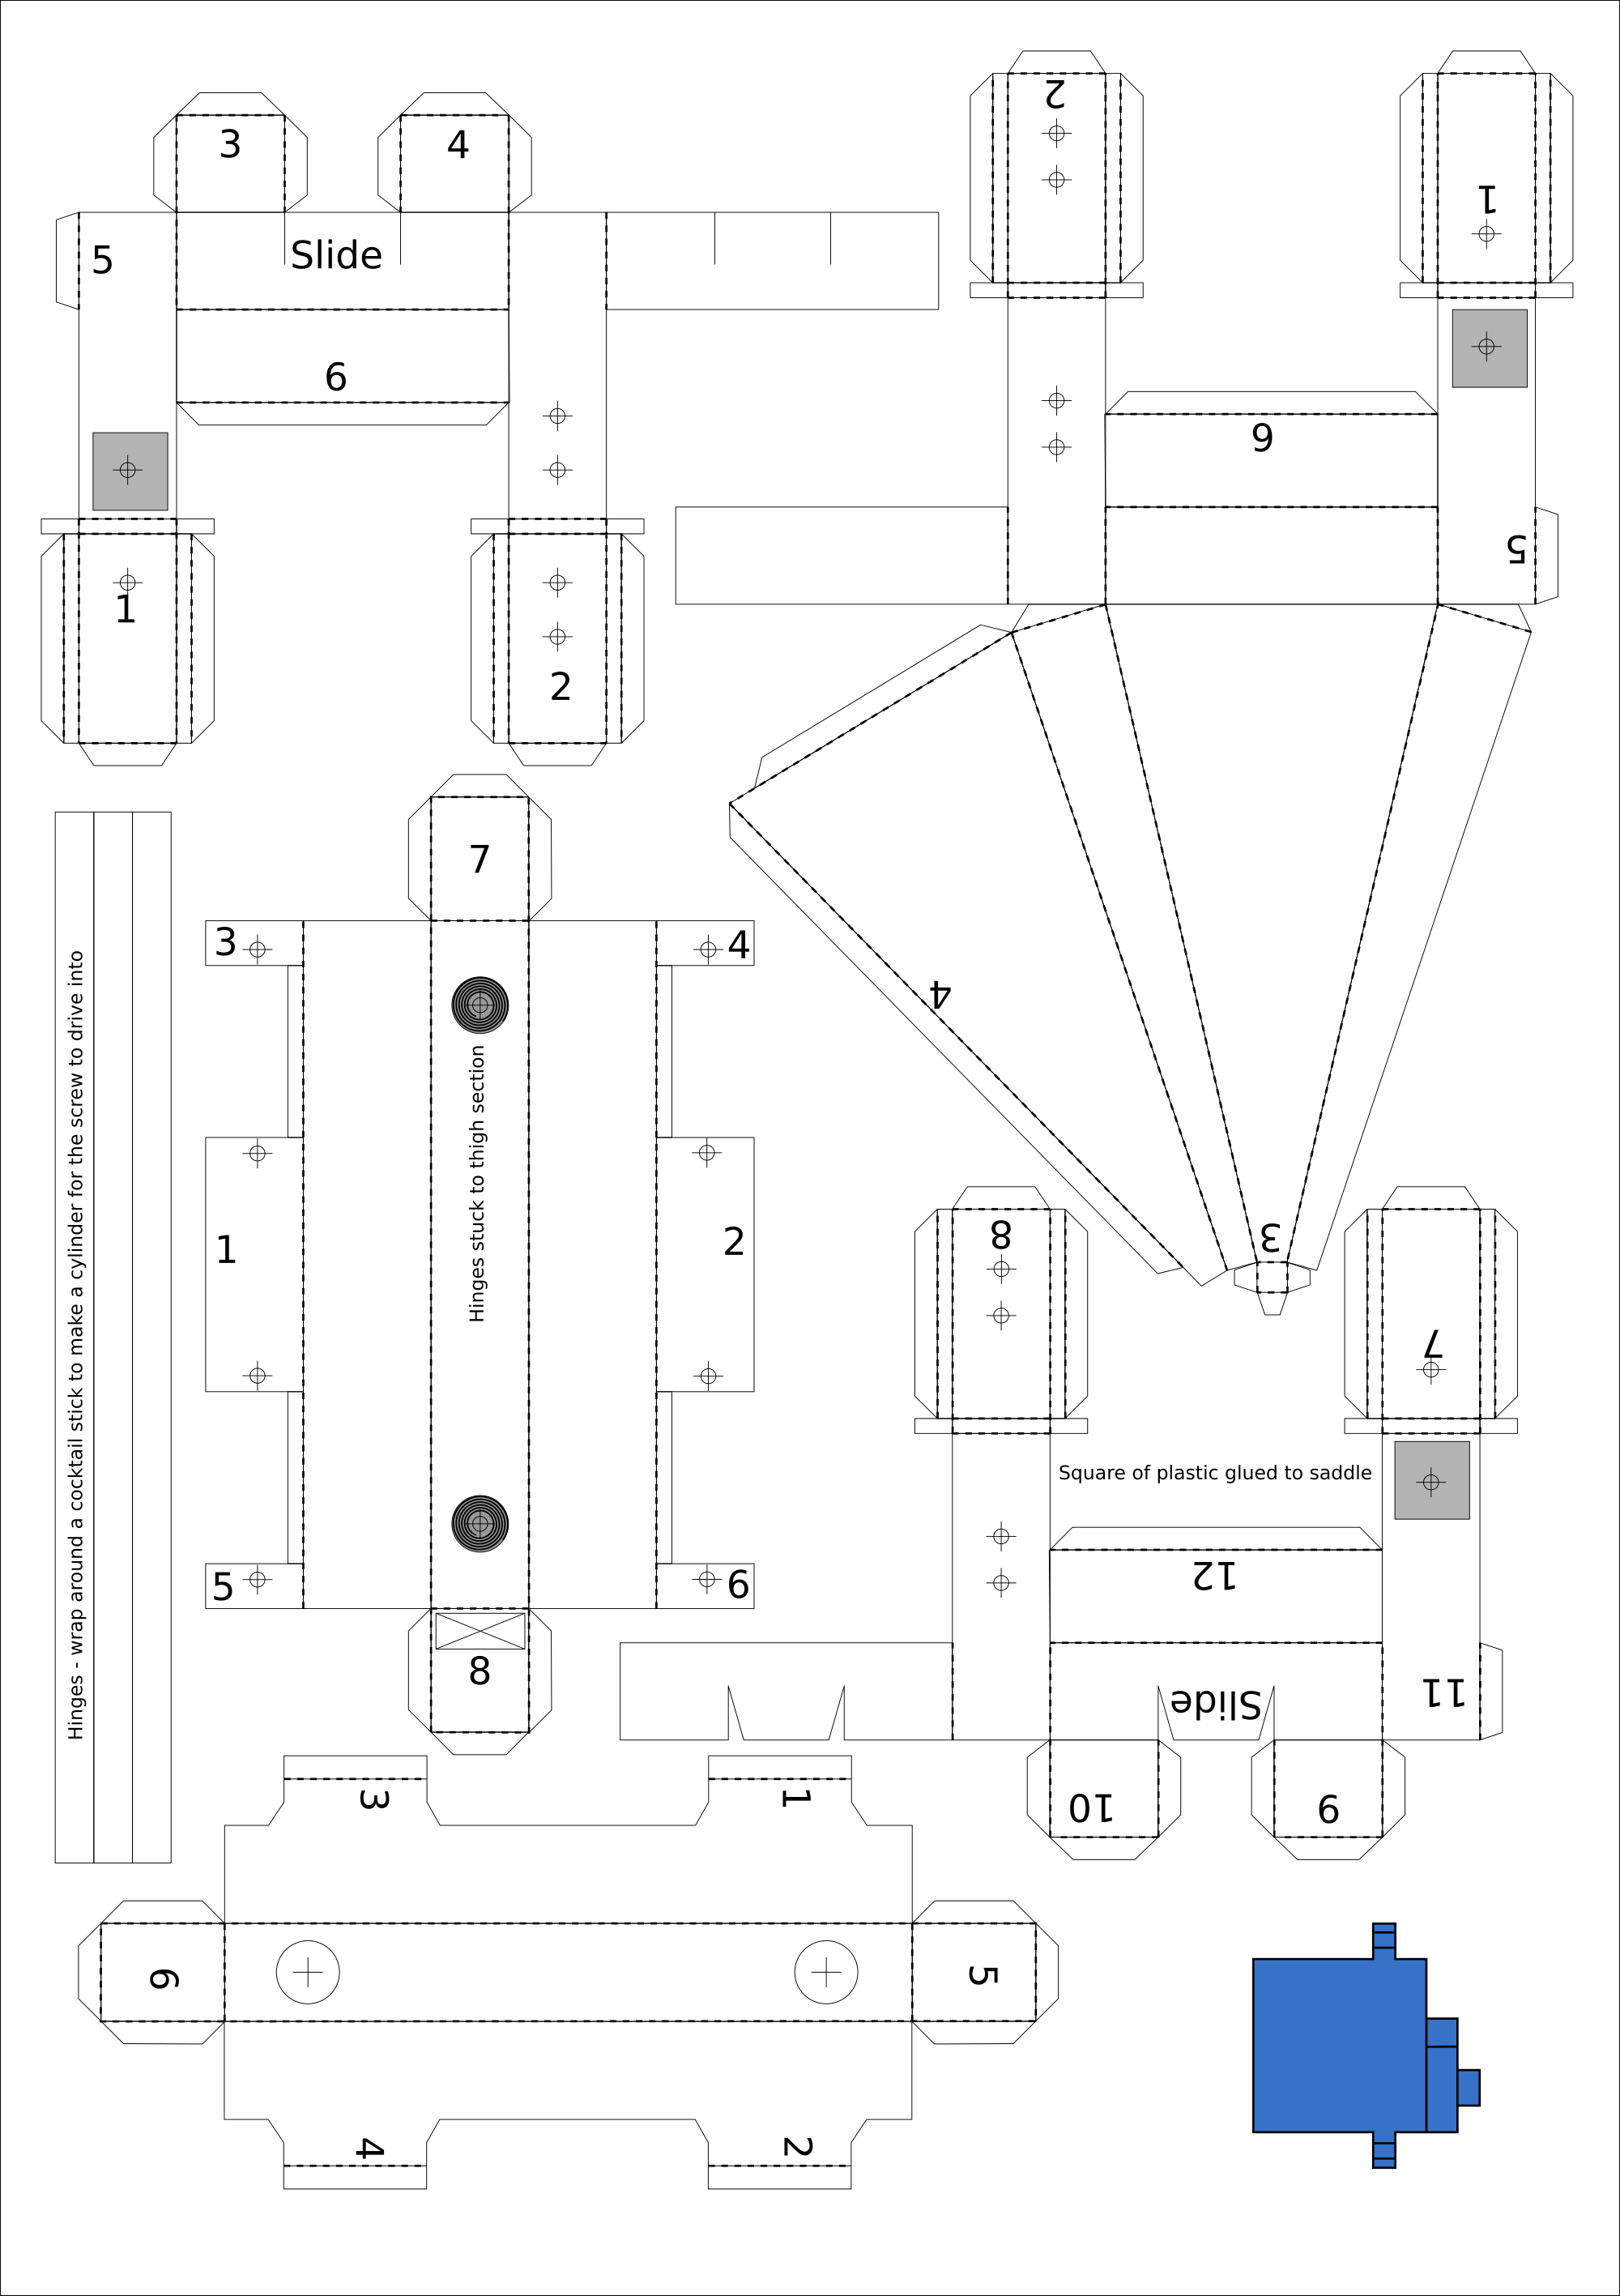
Same again, stretch this bitmap over an A4 page edge to edge to print to scale.
Discussions
Become a Hackaday.io Member
Create an account to leave a comment. Already have an account? Log In.