 todbot
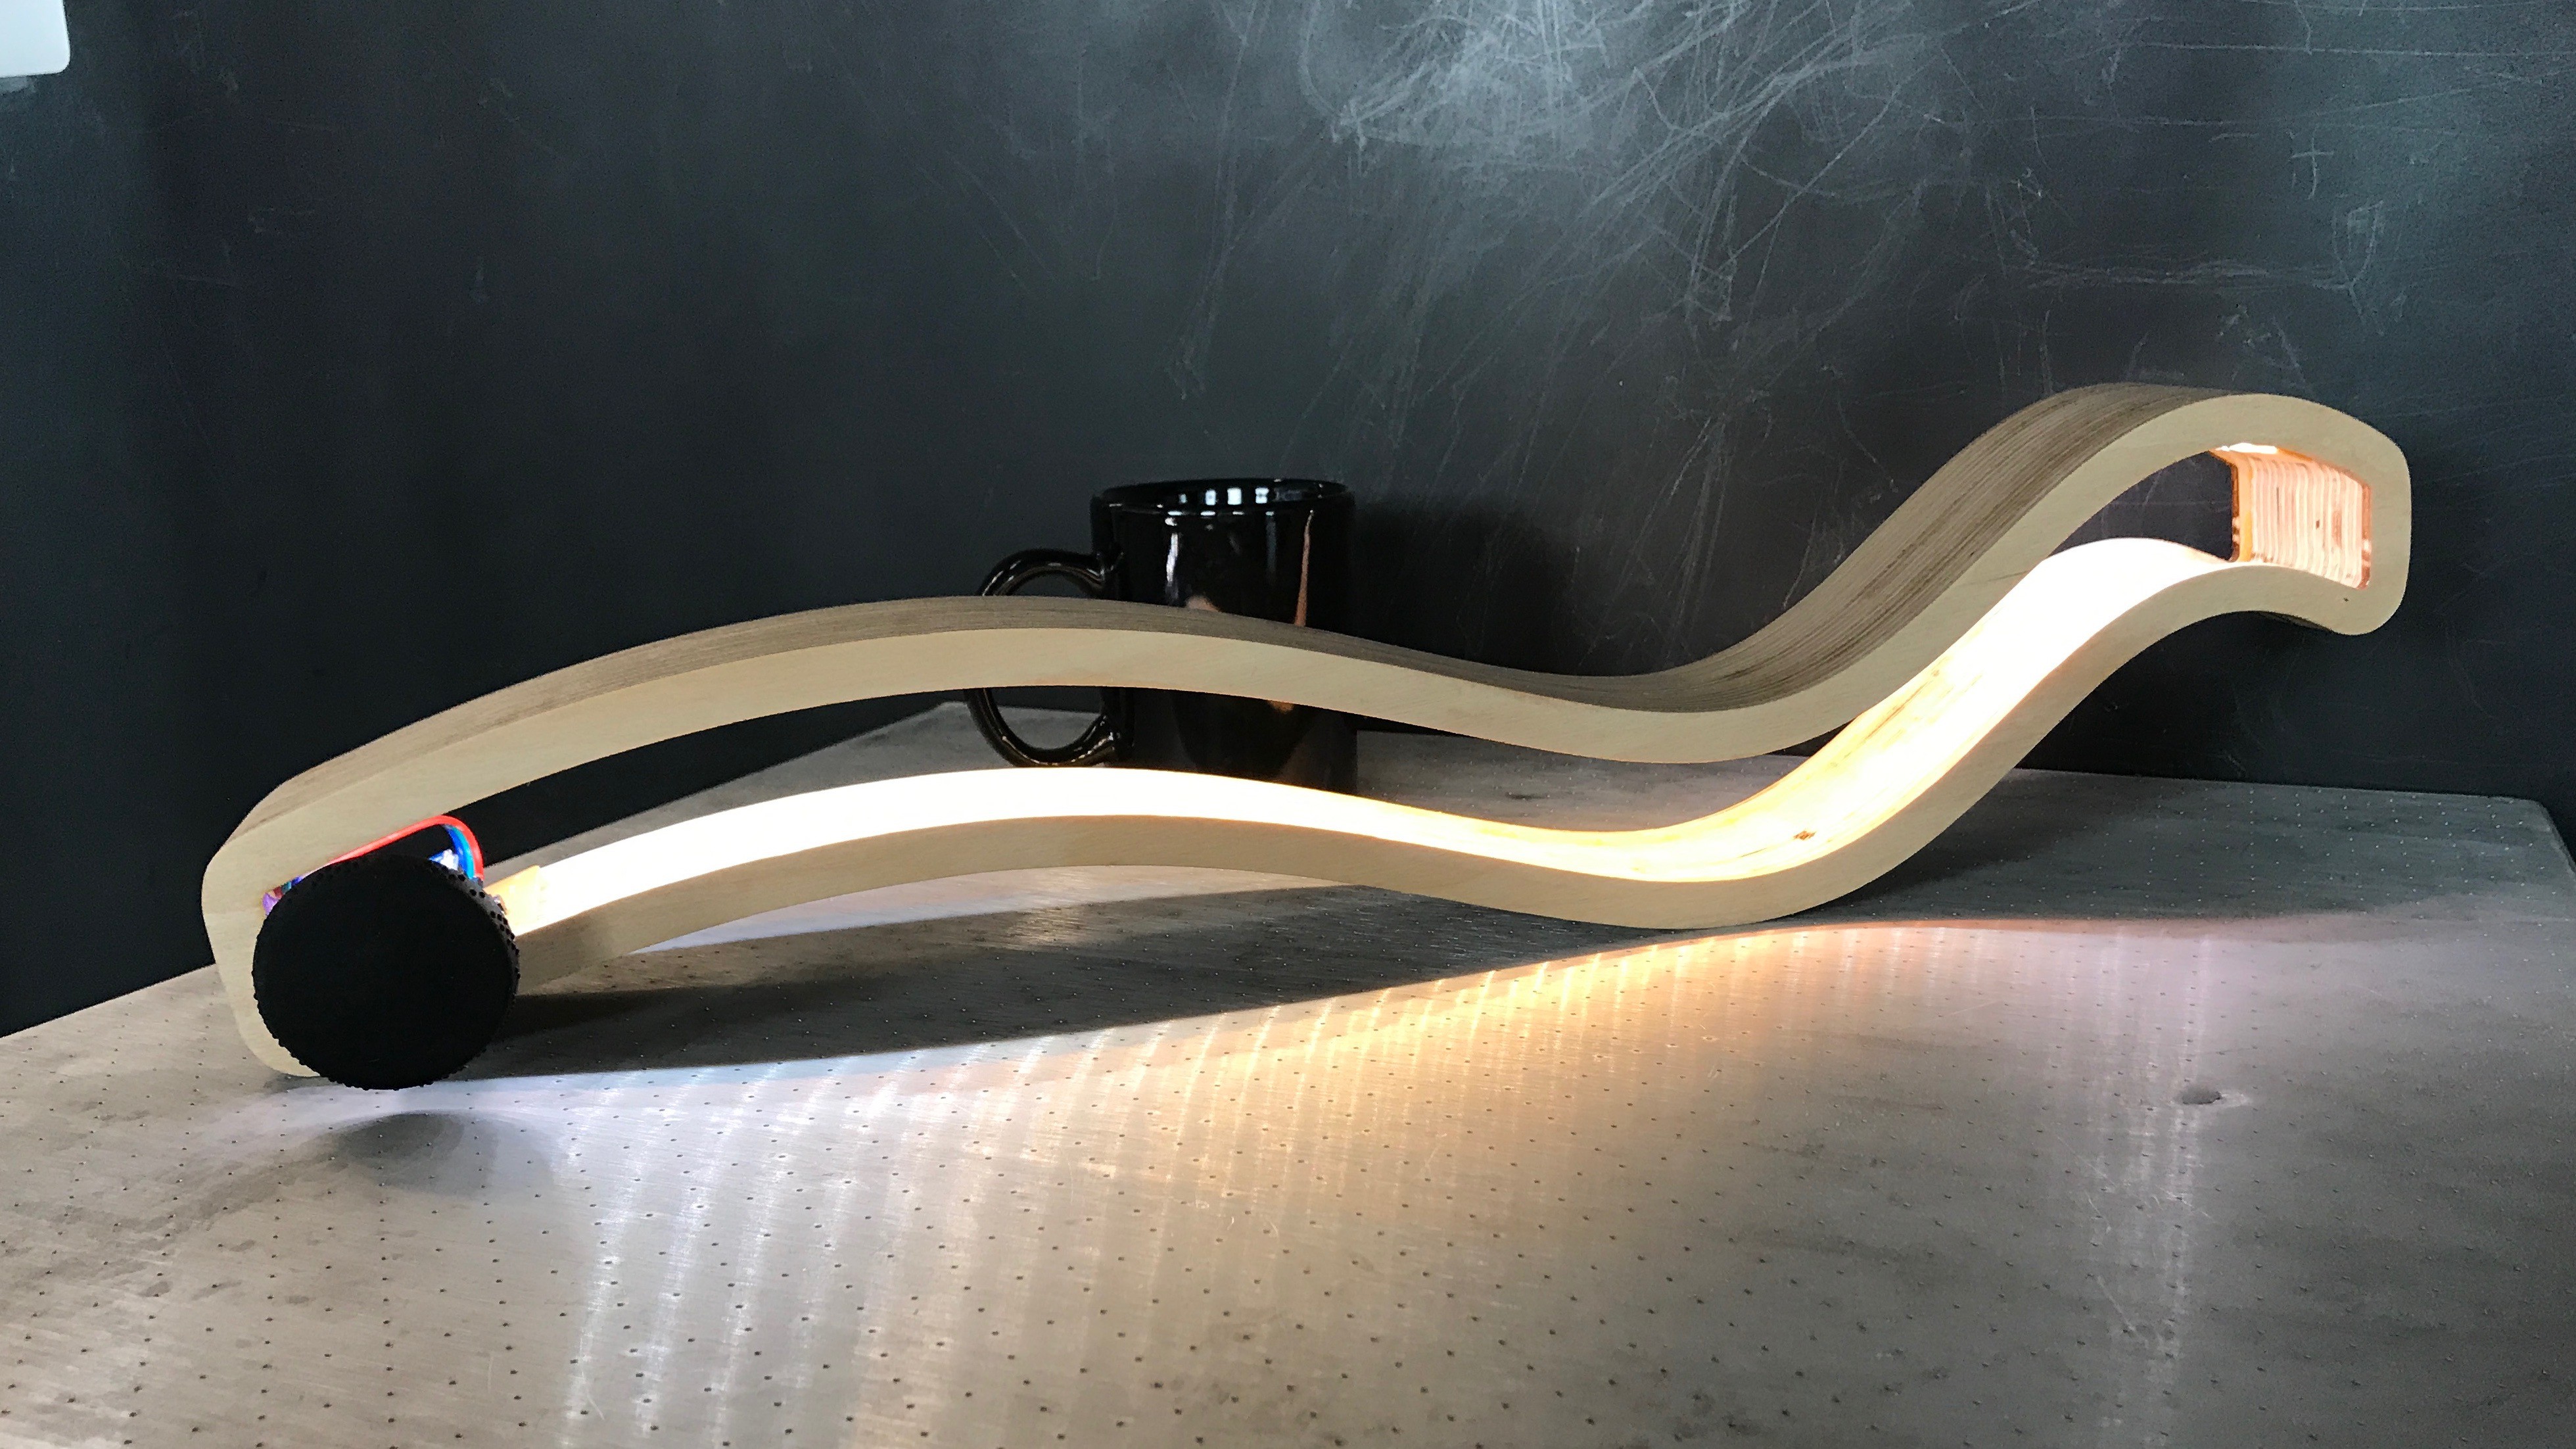
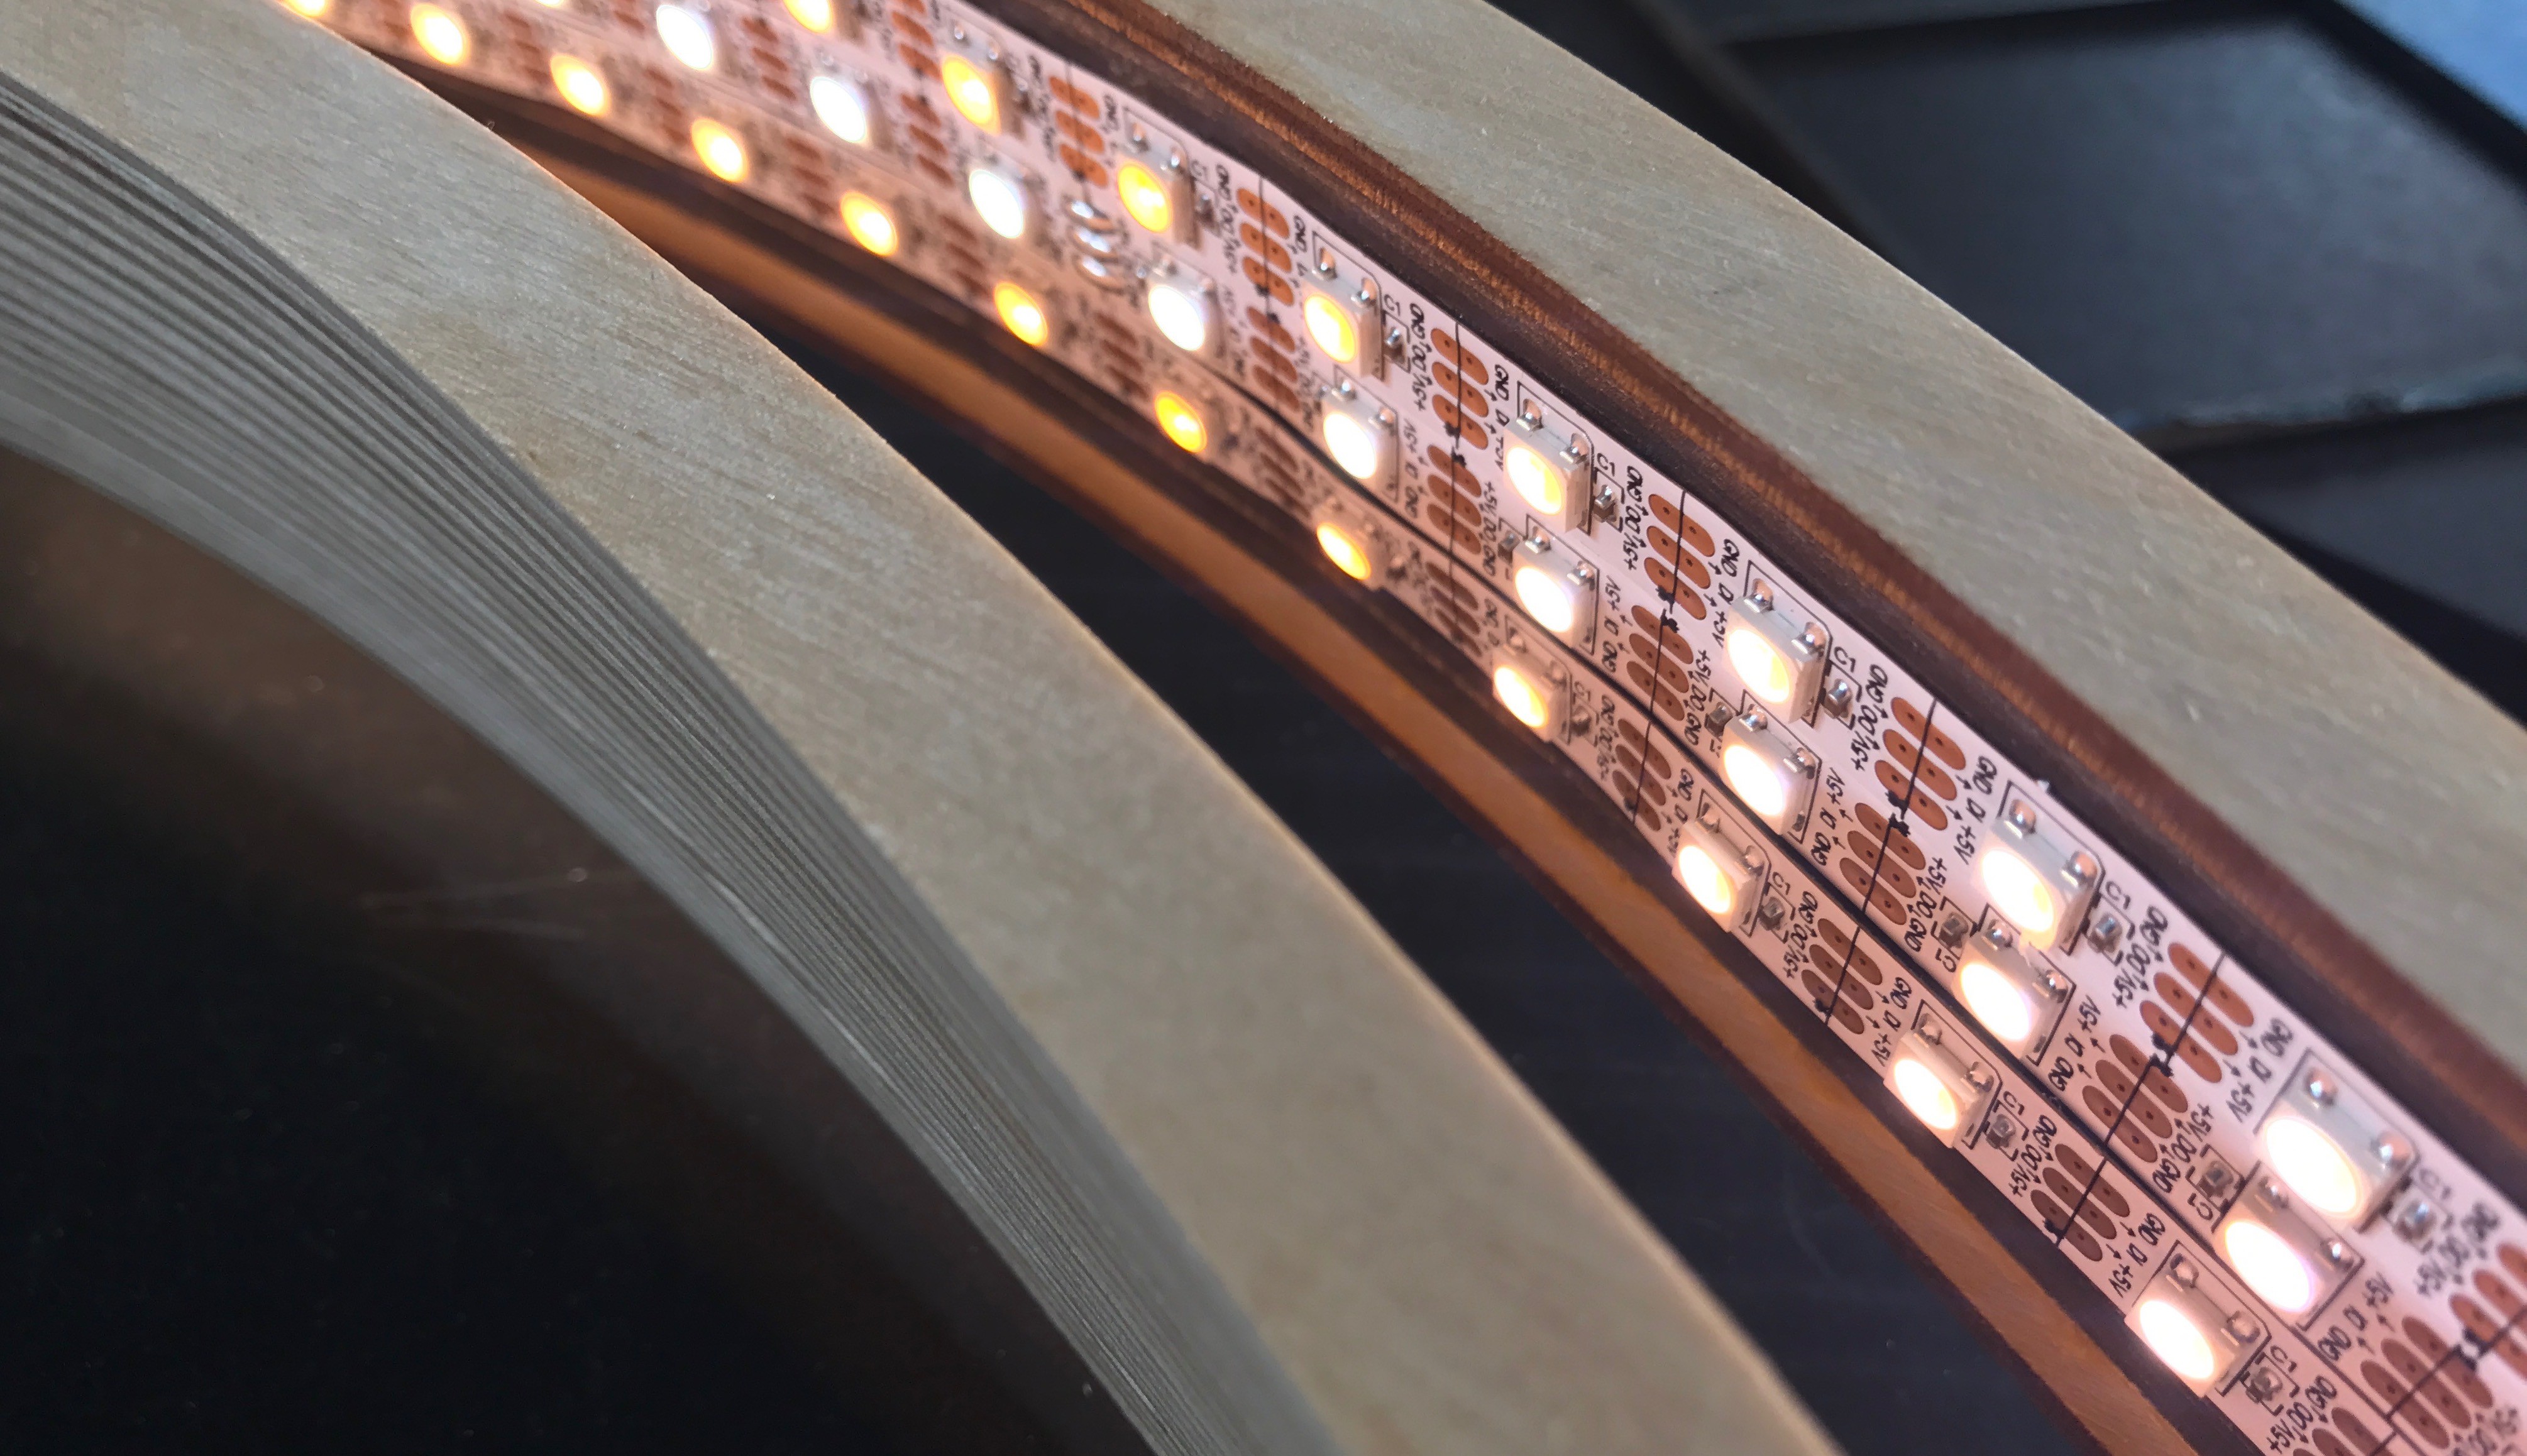
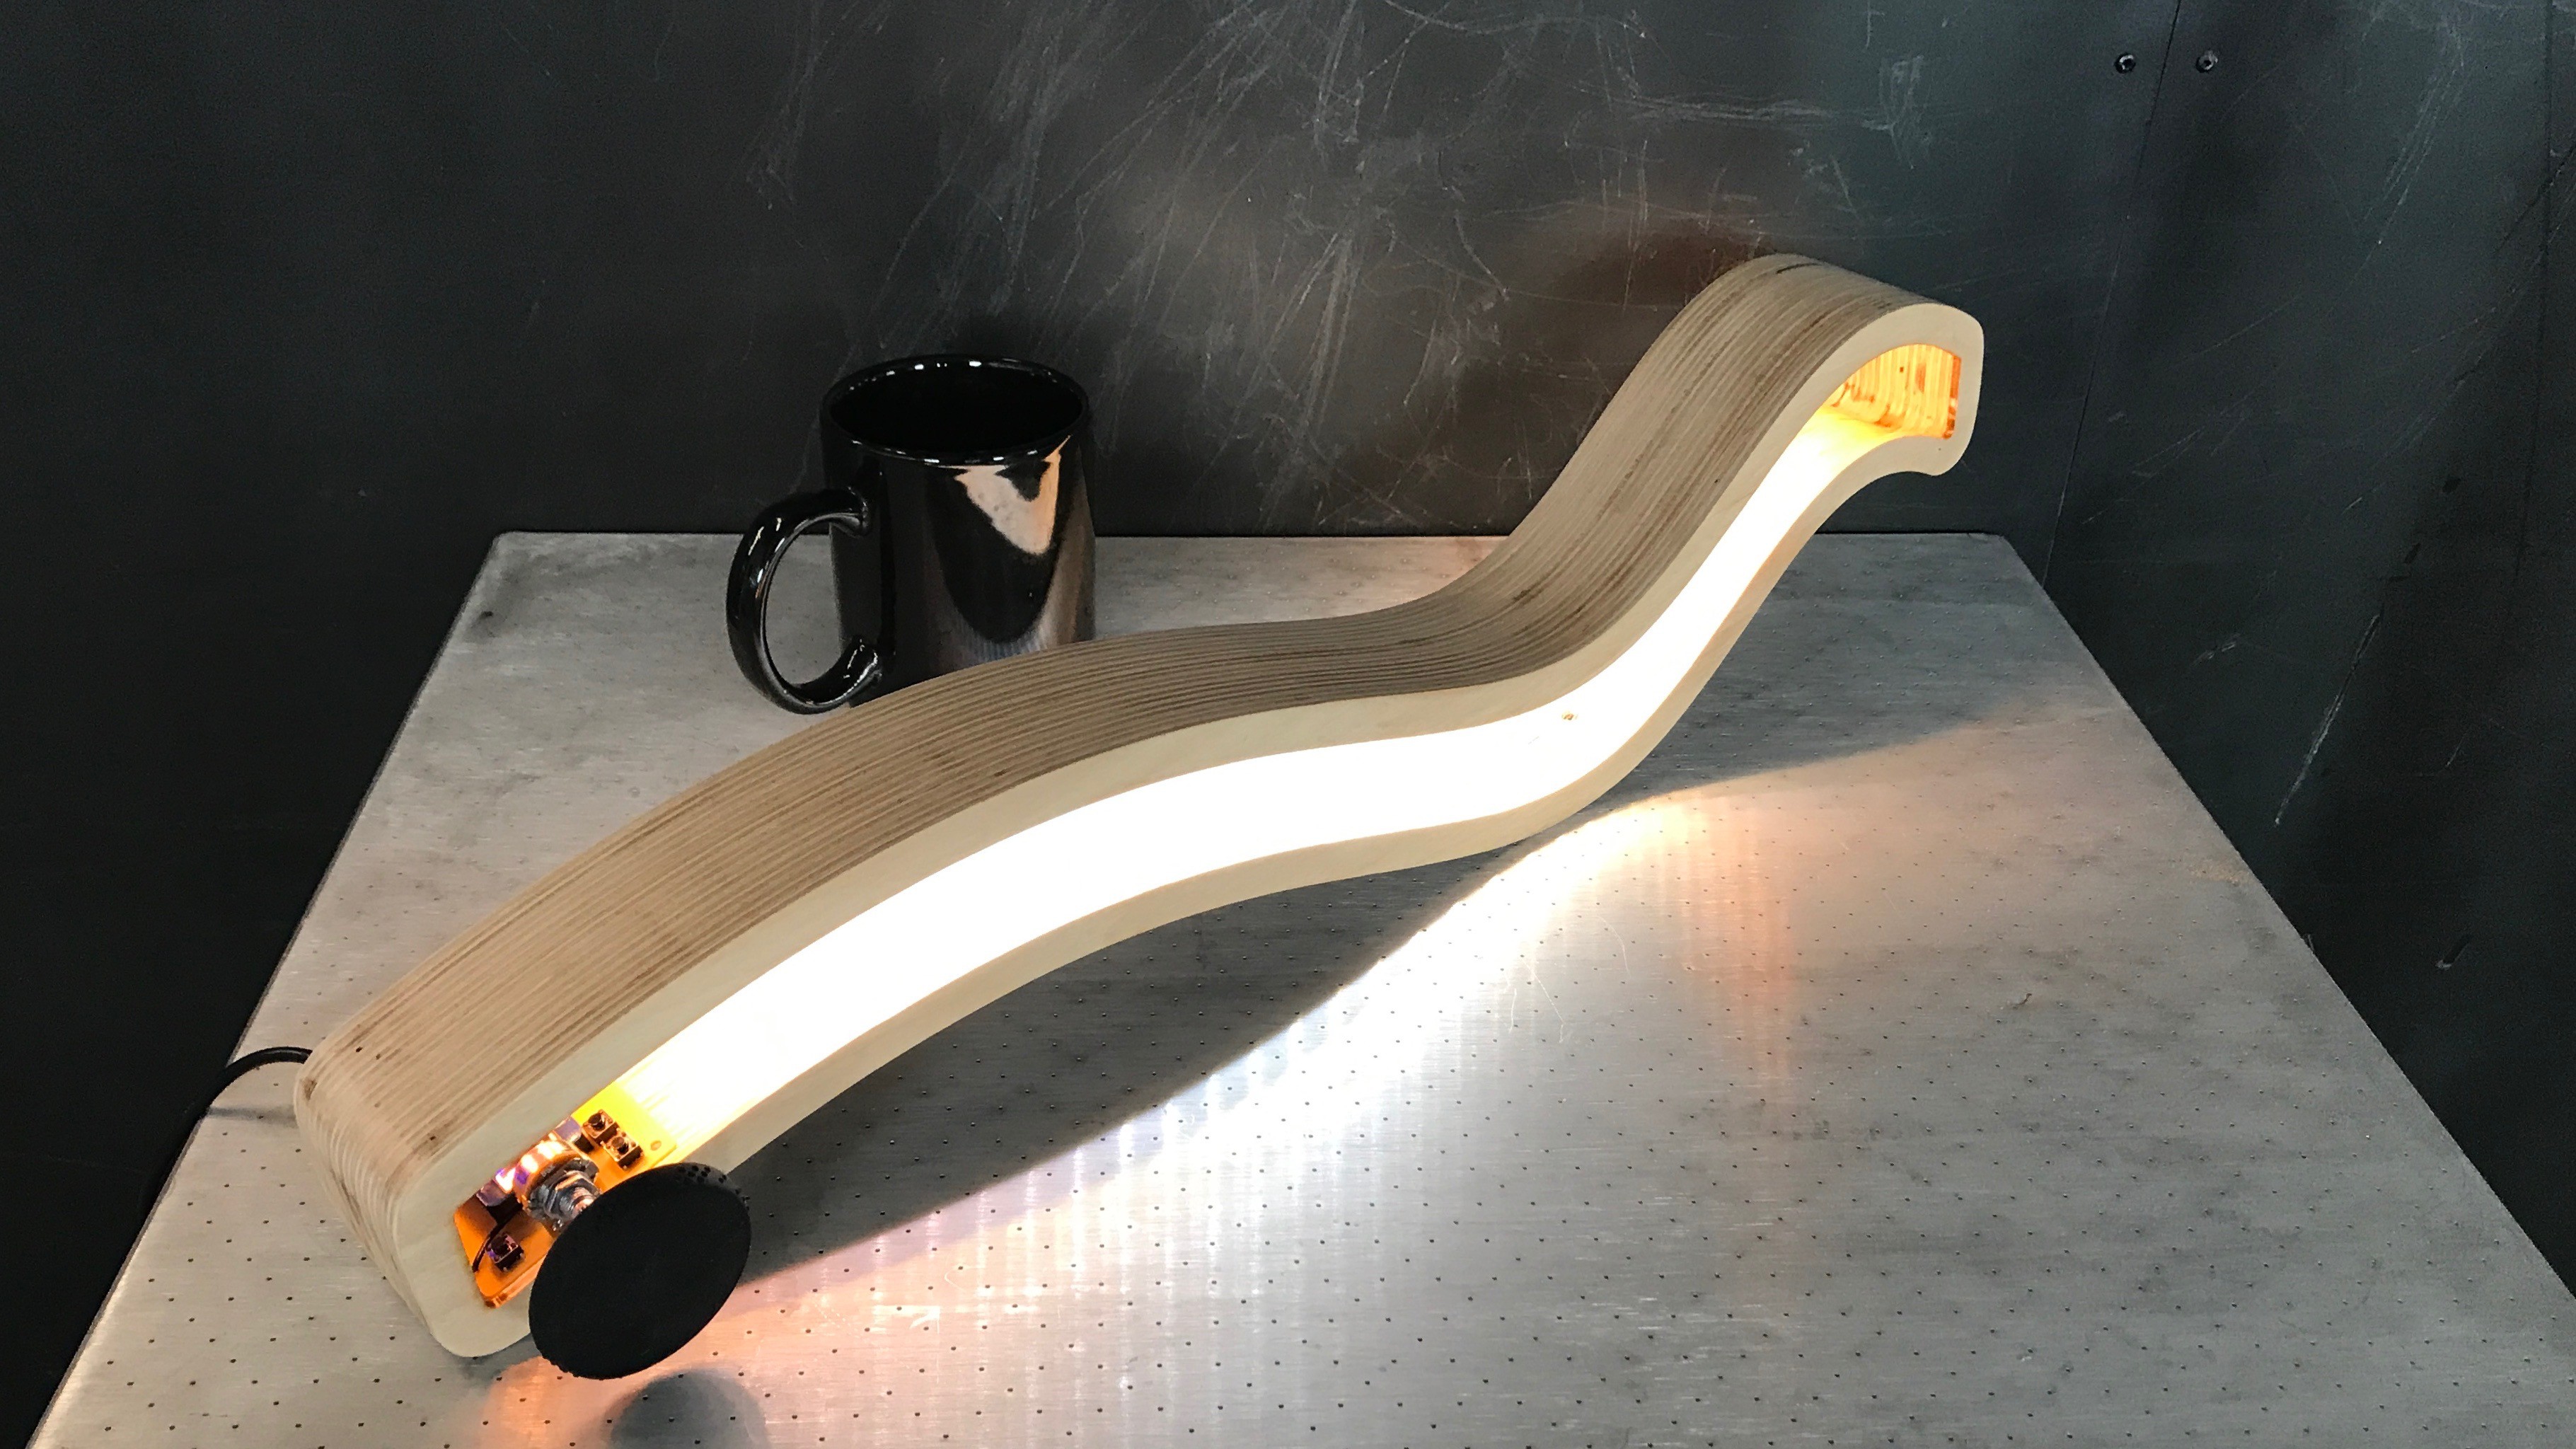
This lamp is "snak2". It is 2" wide by 2 feet long. It is made out of laminated birch and flexible LED strip. The light seems to emanate from the wood, glowing softly and illuminating the table space around it. Here is a video showing it in action.
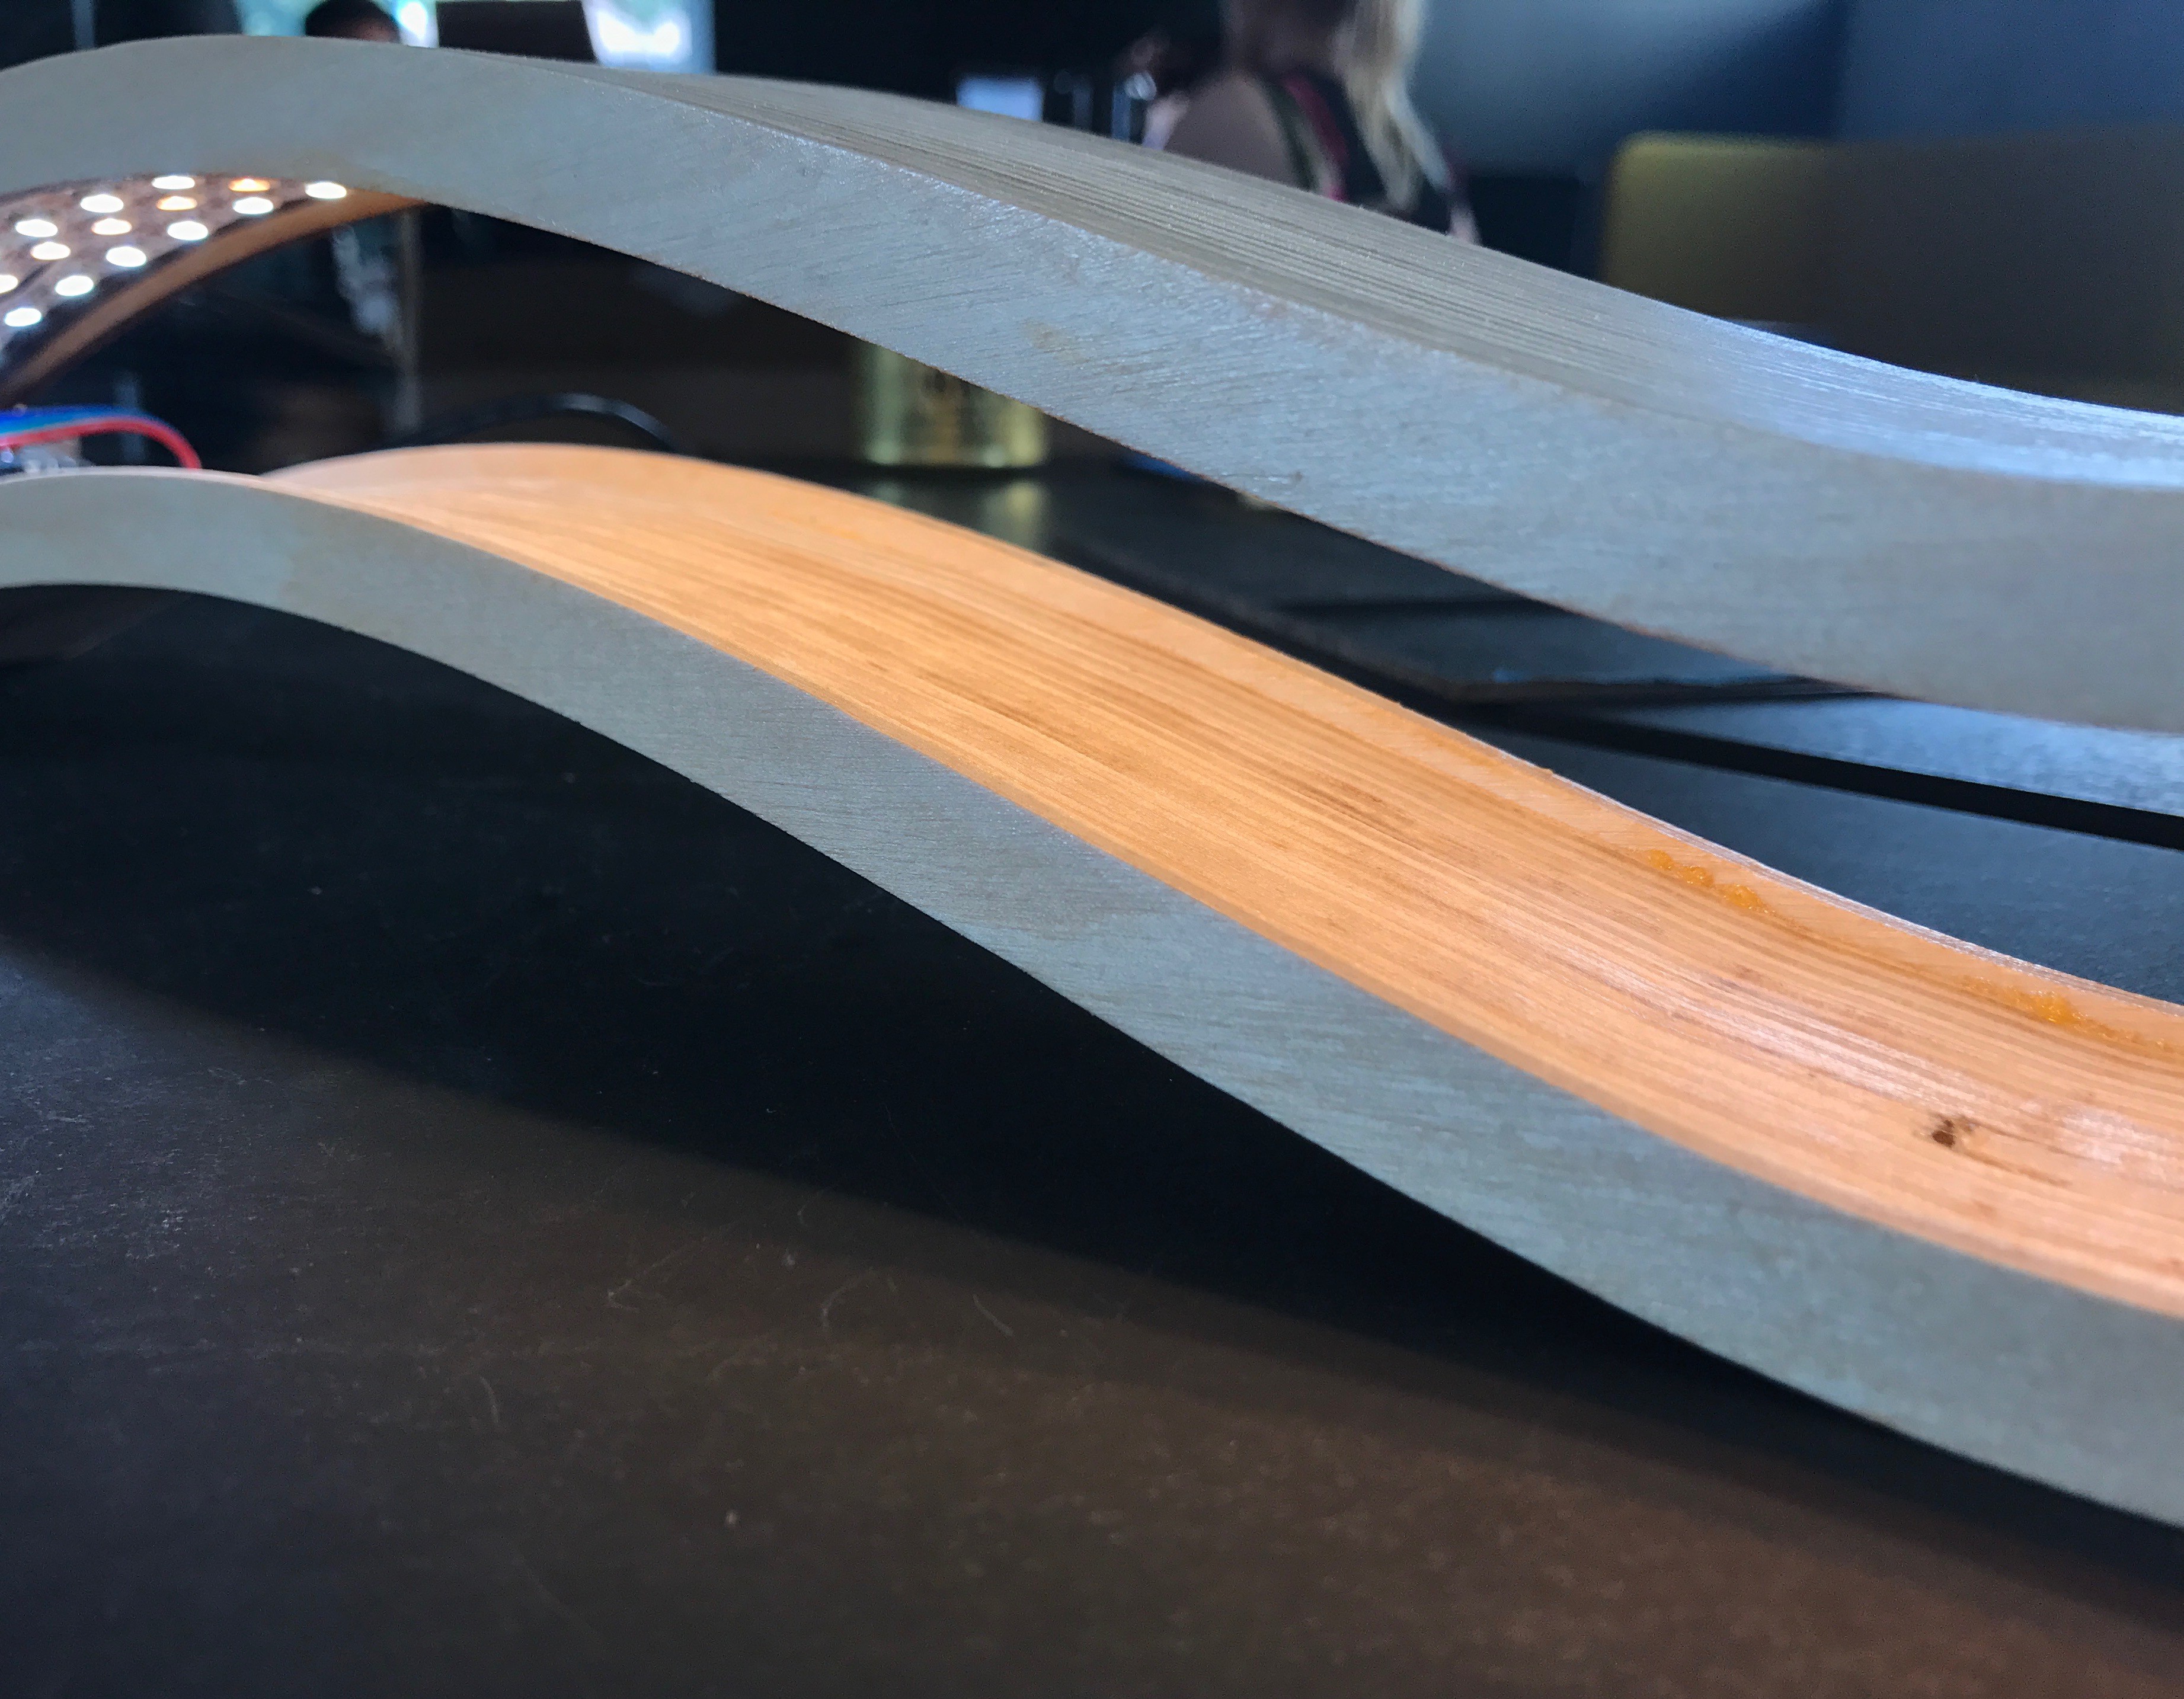
Recently I've been experimenting with trying to create "voids" that emit light. The effect is created by defining an upper and lower surface and placing LED strip on the underside of the upper surface so it reflects off the lower surface.
The previous "snak1" was the first experiment with this. This revision attempts fix the main issue of side-light brilliance by adding a 1/8" lip around the perimeter.
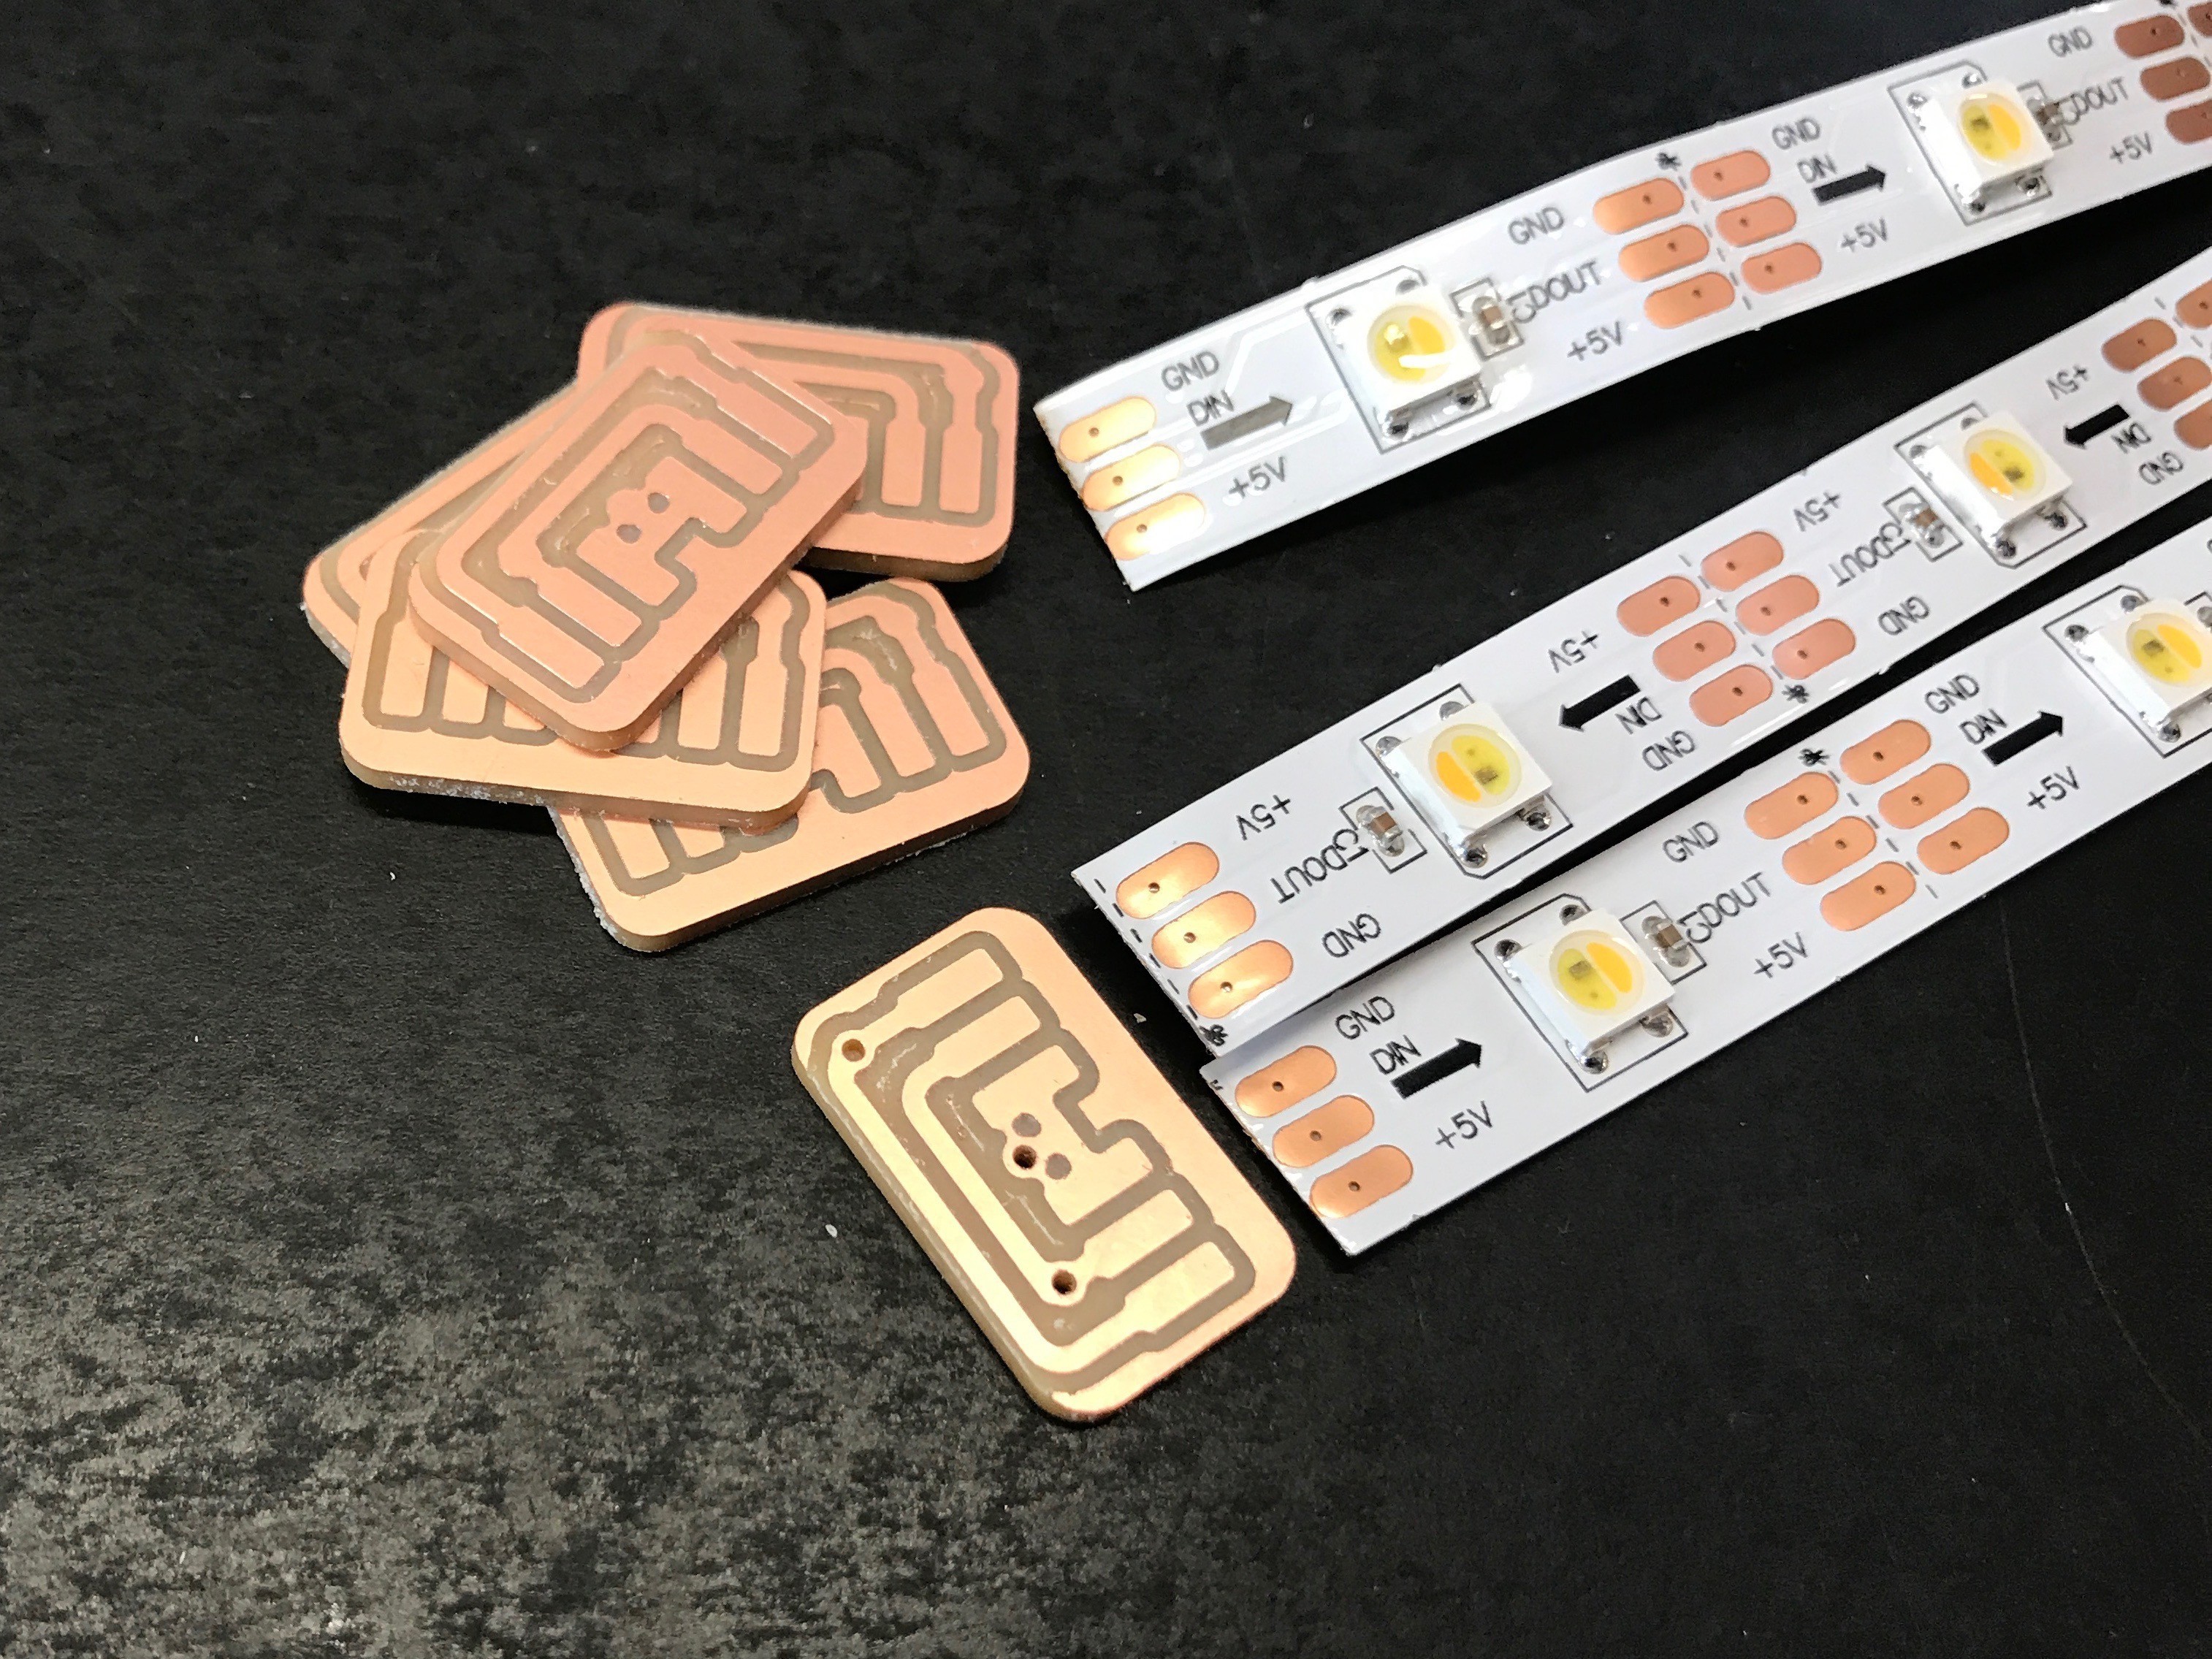
"snak2" also decreases the number of LED strips from four to three, but increases the LED density from 30 LEDs/meter to 60 LEDs/meter. The net result is going from 64 LEDs to 96 LEDs.
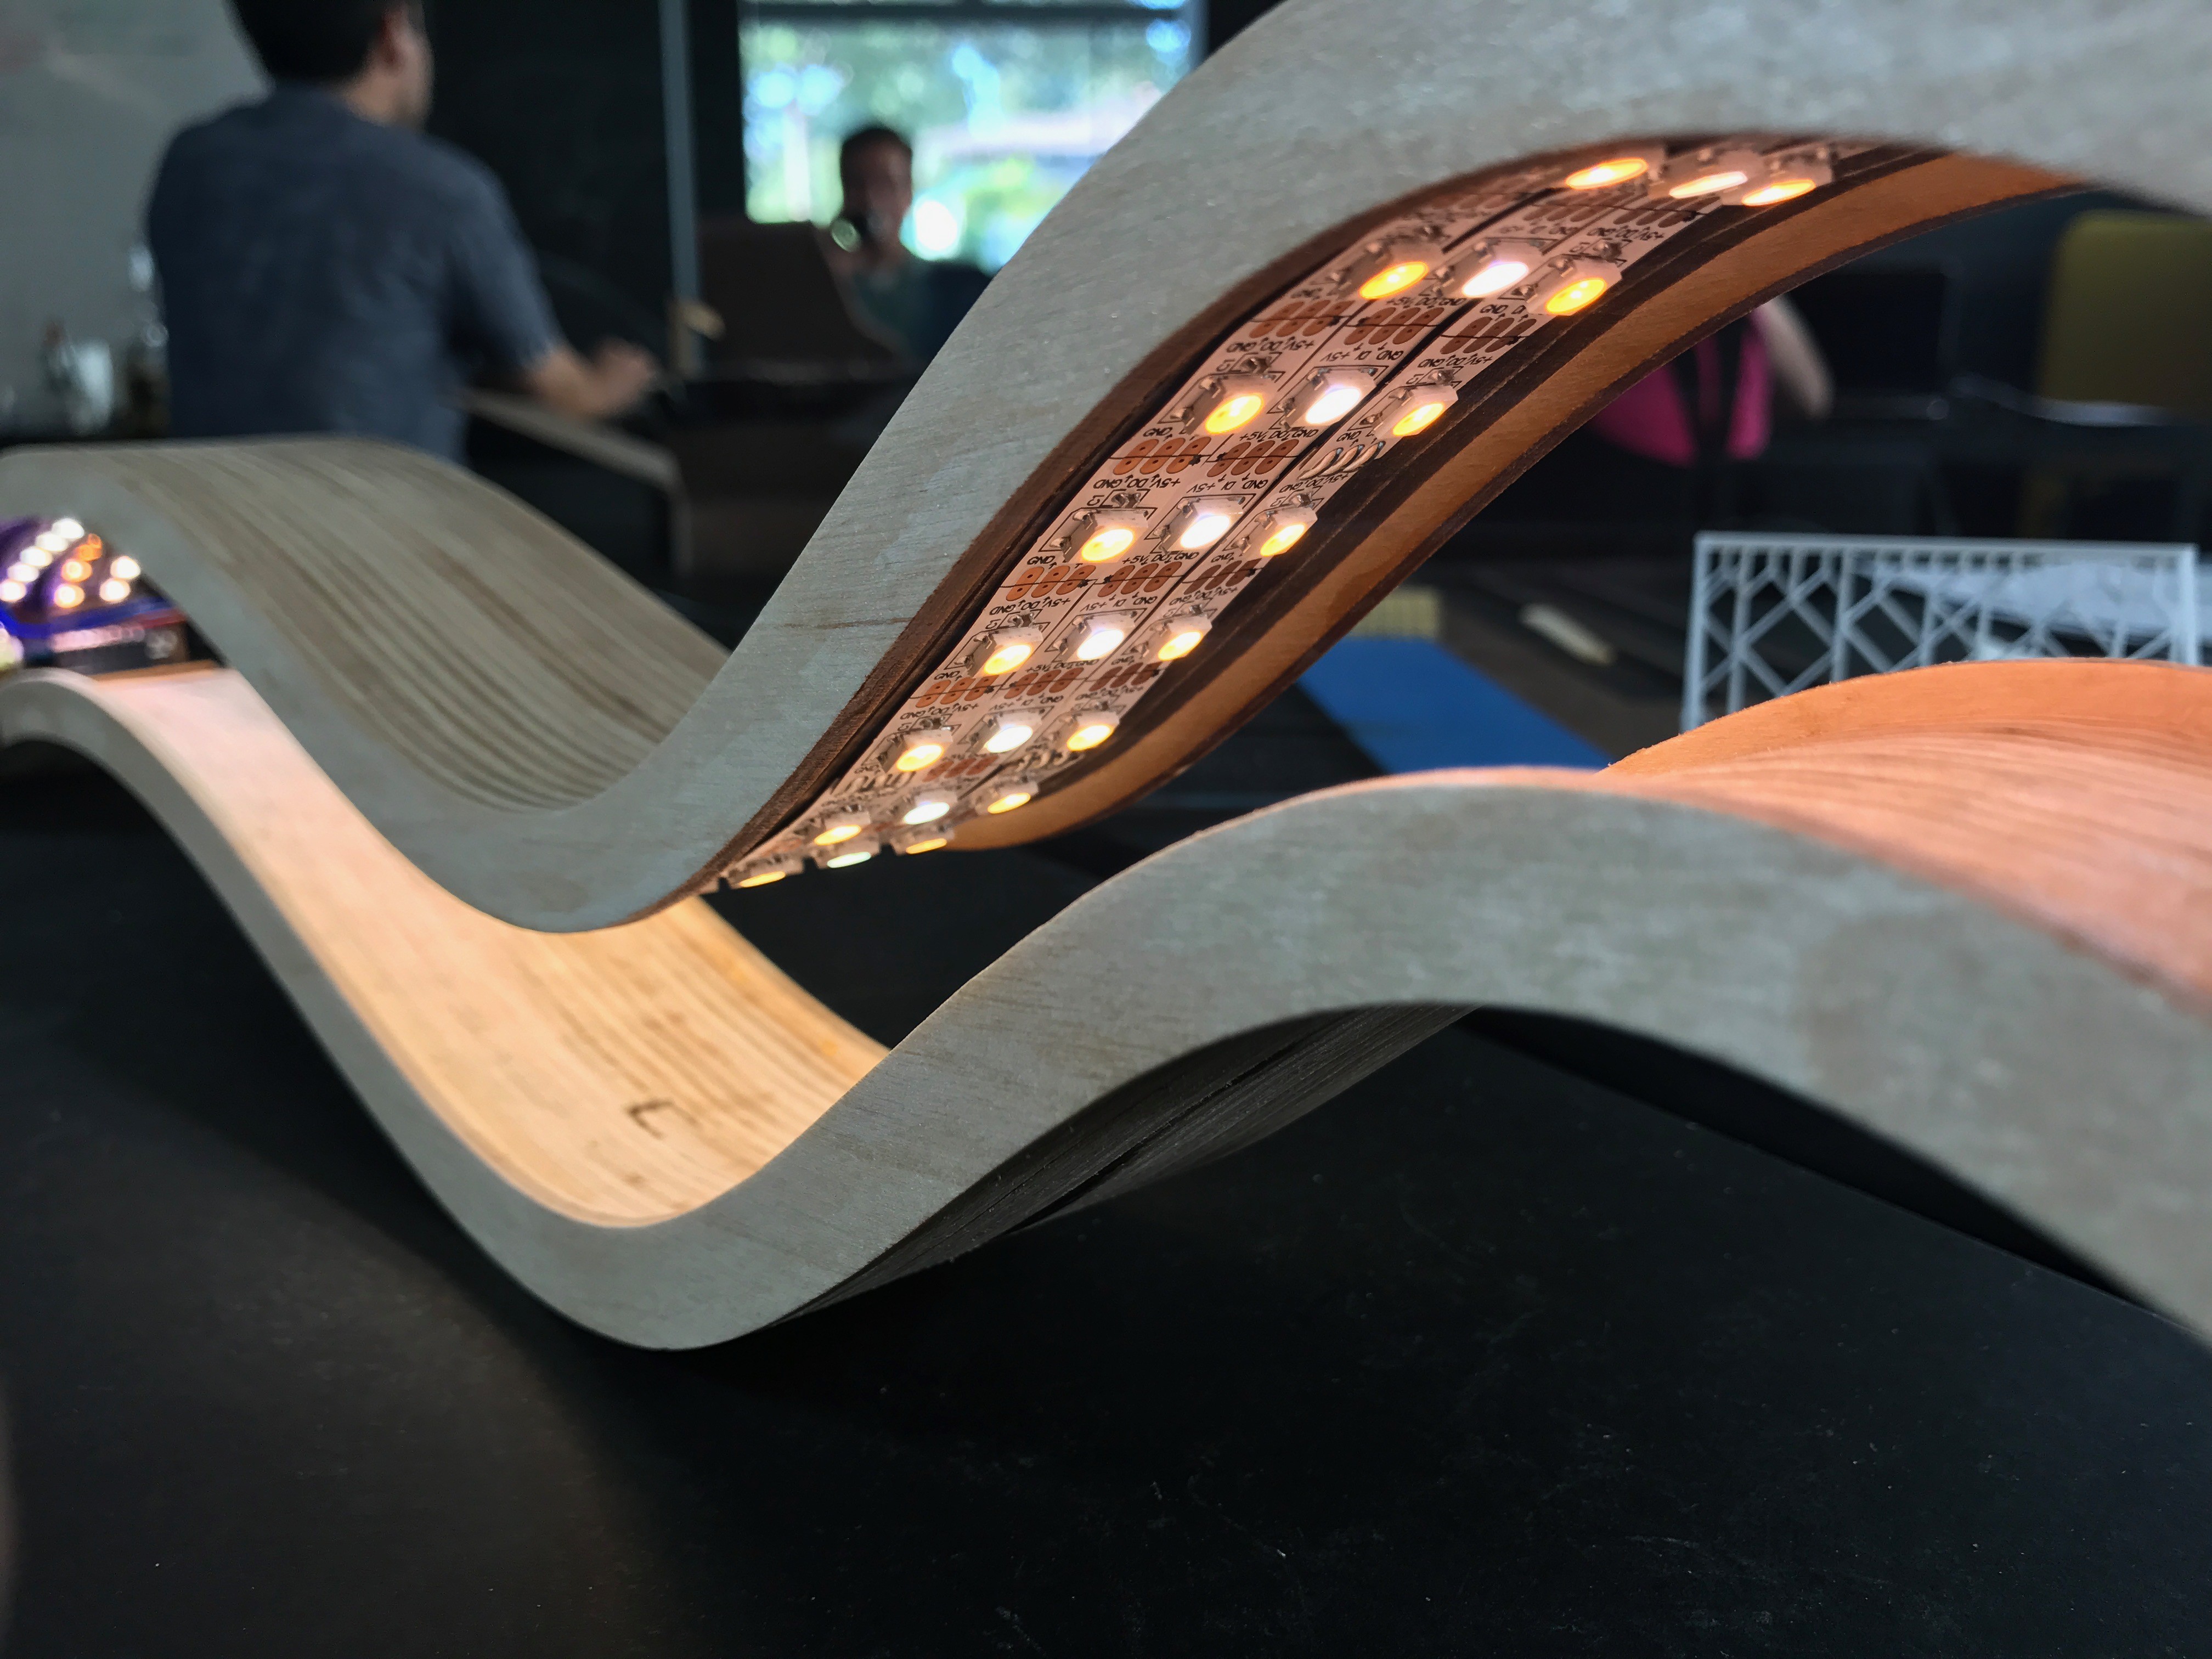
As most of the previous lamps, these LED strips are "SK6812 WWA", WS2812-compatible with three whites of different color temperature instead of RGB.
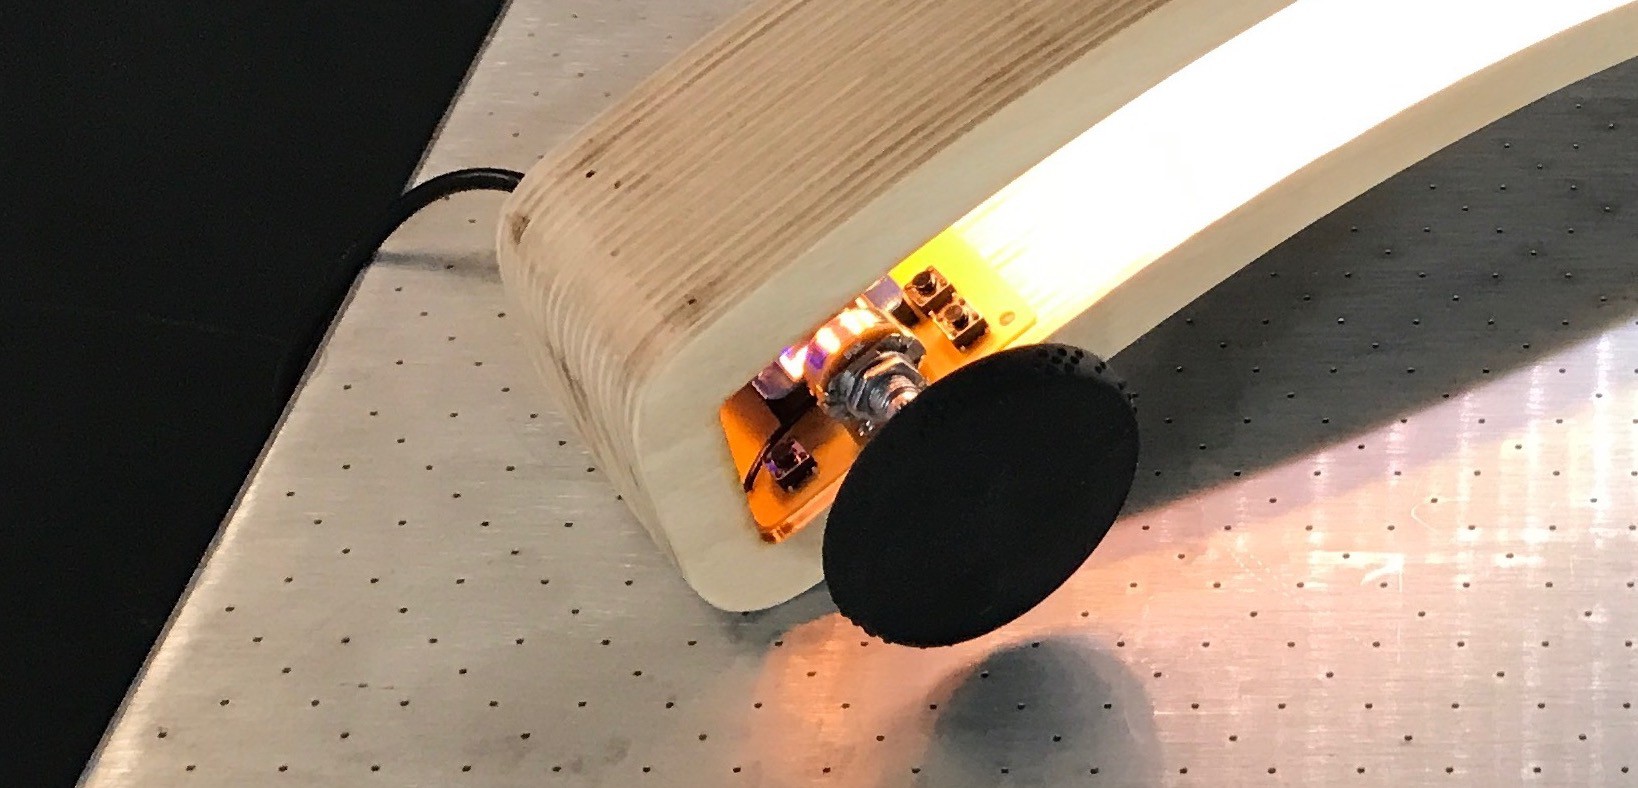
LED Driver Board
The custom driver board is a further iteration of theESP8266 Wemos D1-based board that I've been using for the last several lamps. For this lamp I purposely didn't design in a location for the electronics. But then I decided to see if I could shoehorn in a board into the end. I made a few variations before I found one I liked. (Thank you Othermill!)
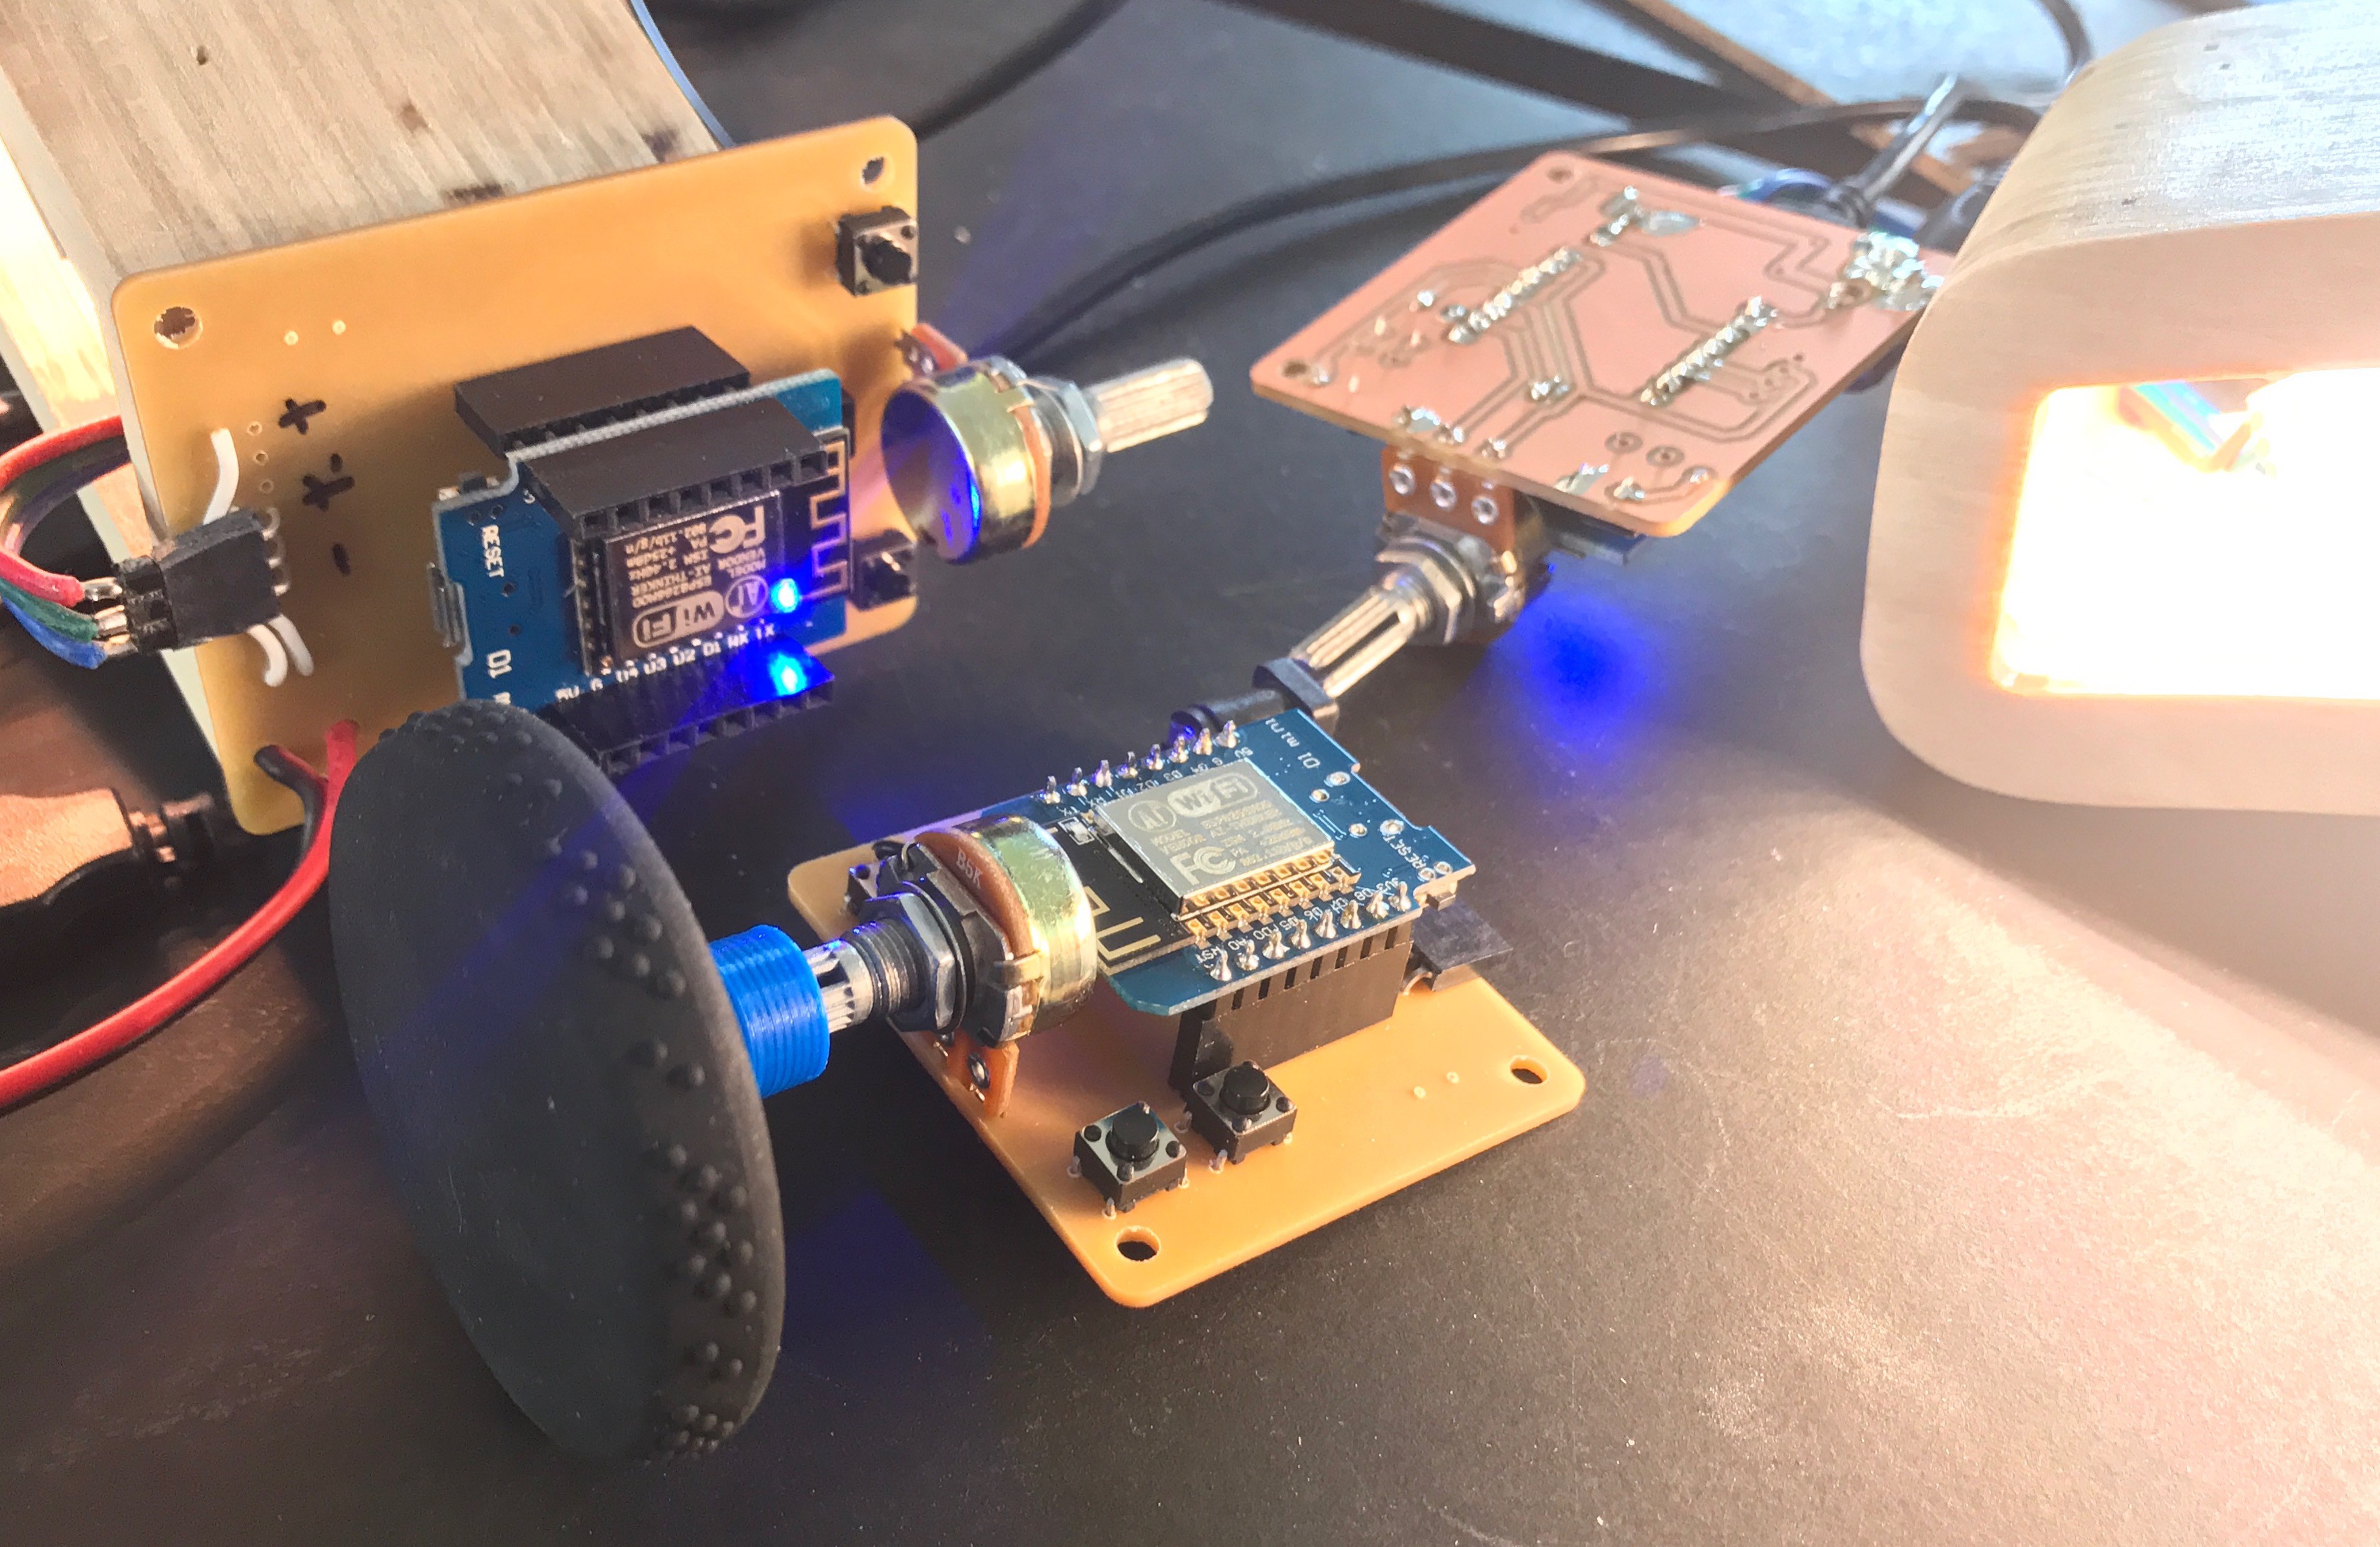
The board design is quite simple, really just a holder for UI elements and sockets for the ESP board, LED, and power connectors.
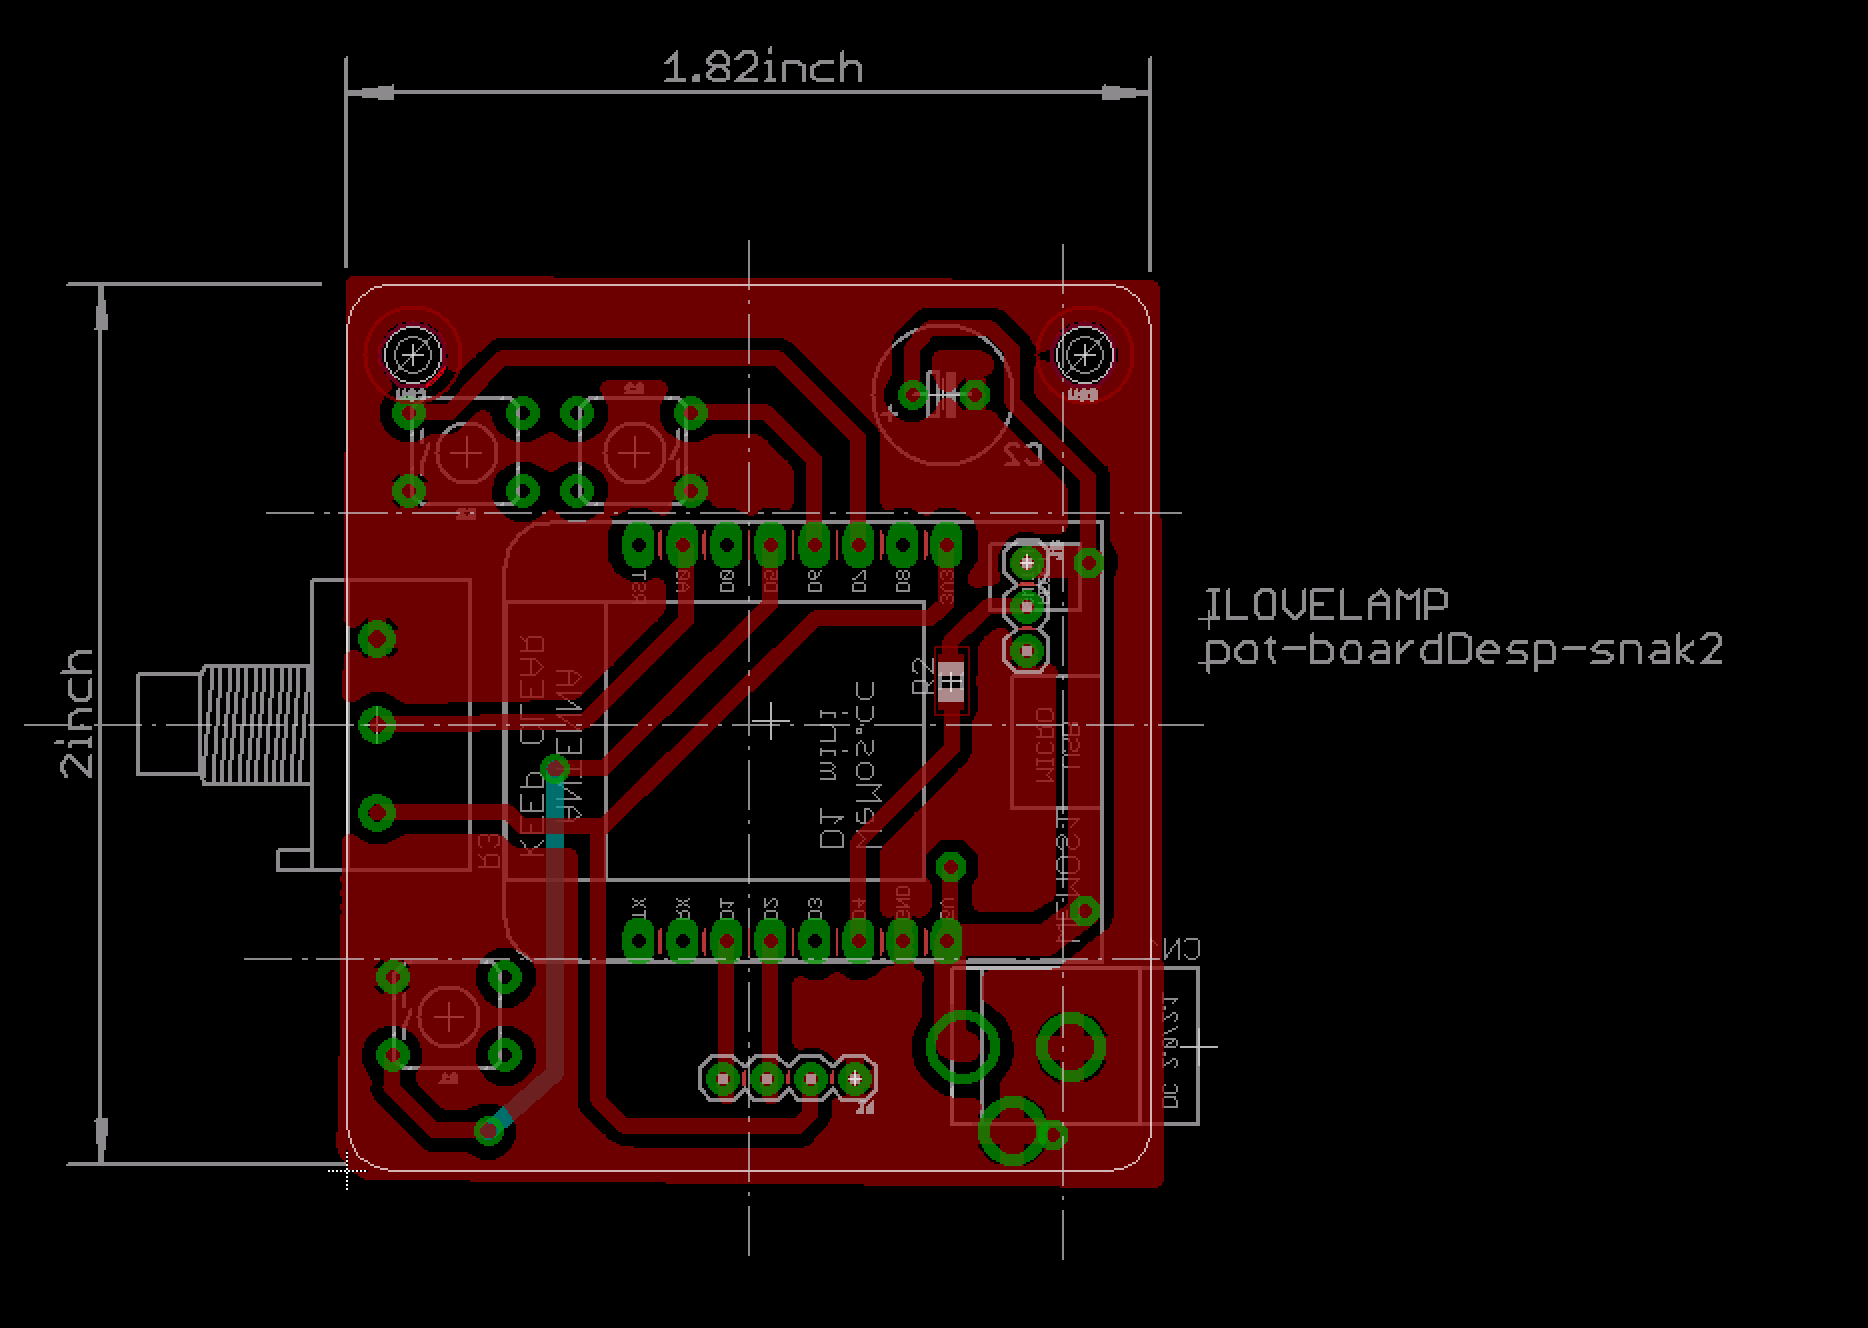
The traces are intentionally made quite thick (0.032") with the ground pour having extra isolate (0.02 to 0.04) to make it easier to mill on the Othermill.
Wood Assembly
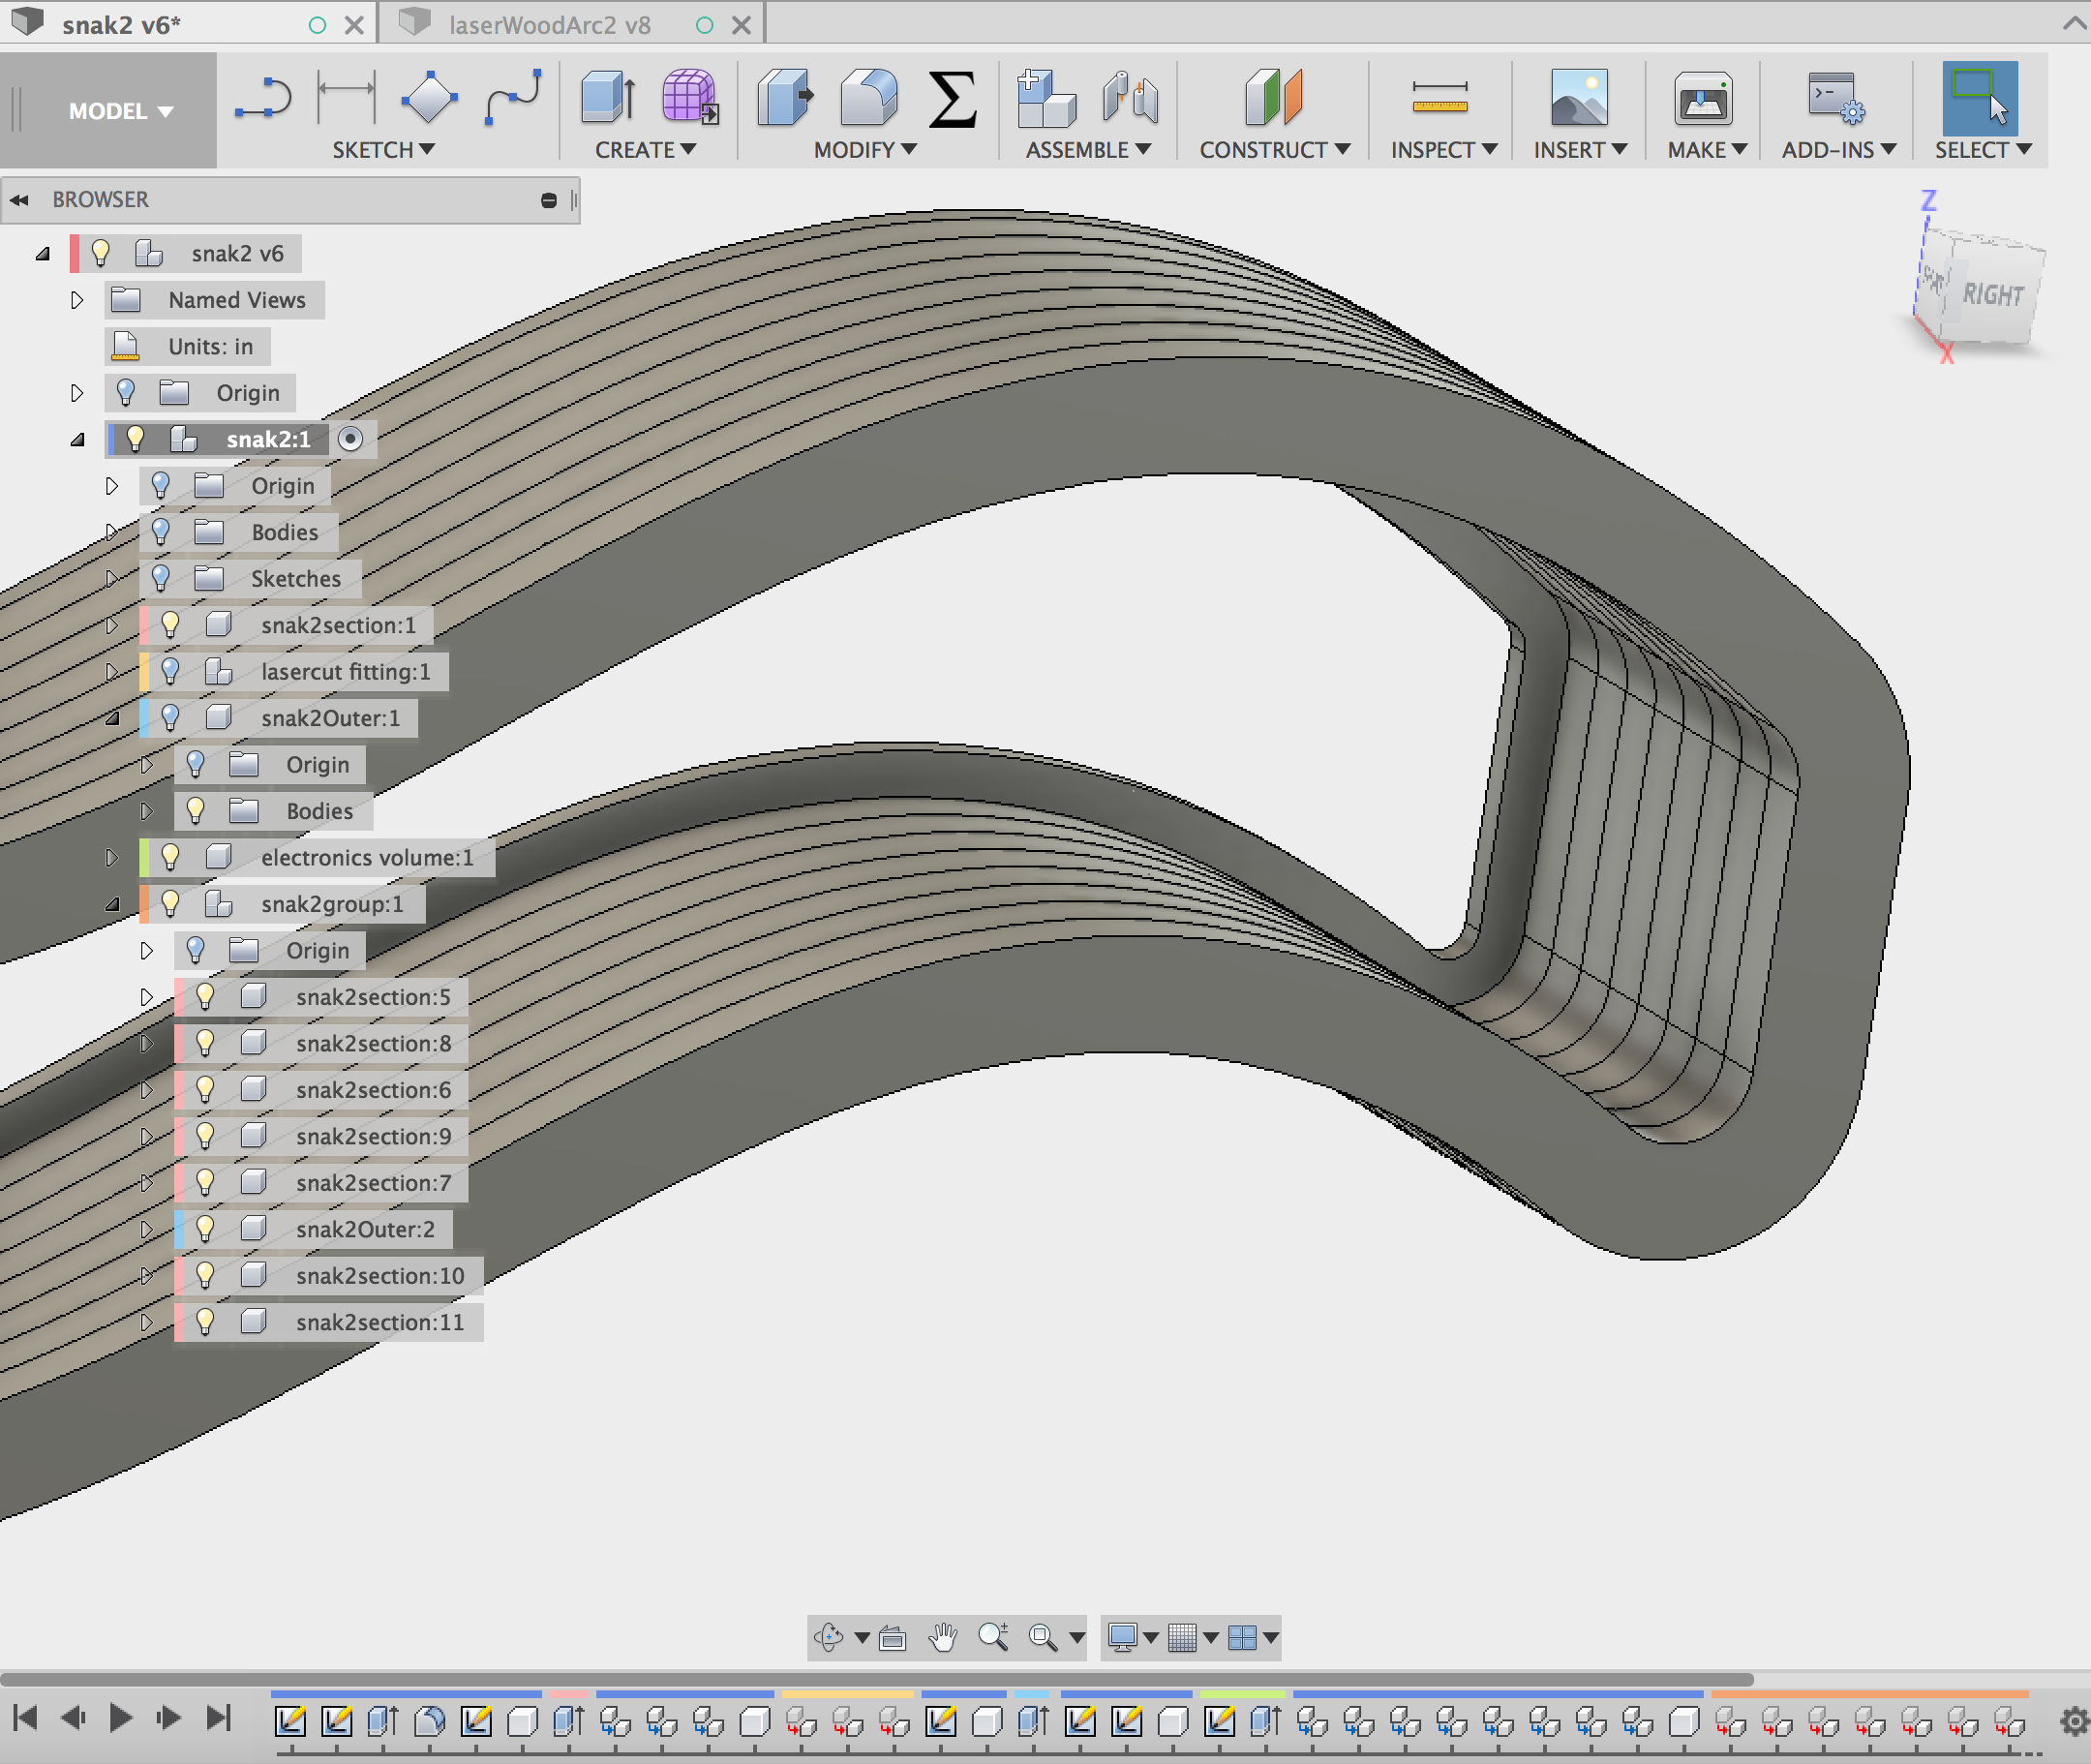
The assembly of the wood form was done as the last several prototypes: laser cut slices of plywood laminated together with woodglue and clamps.
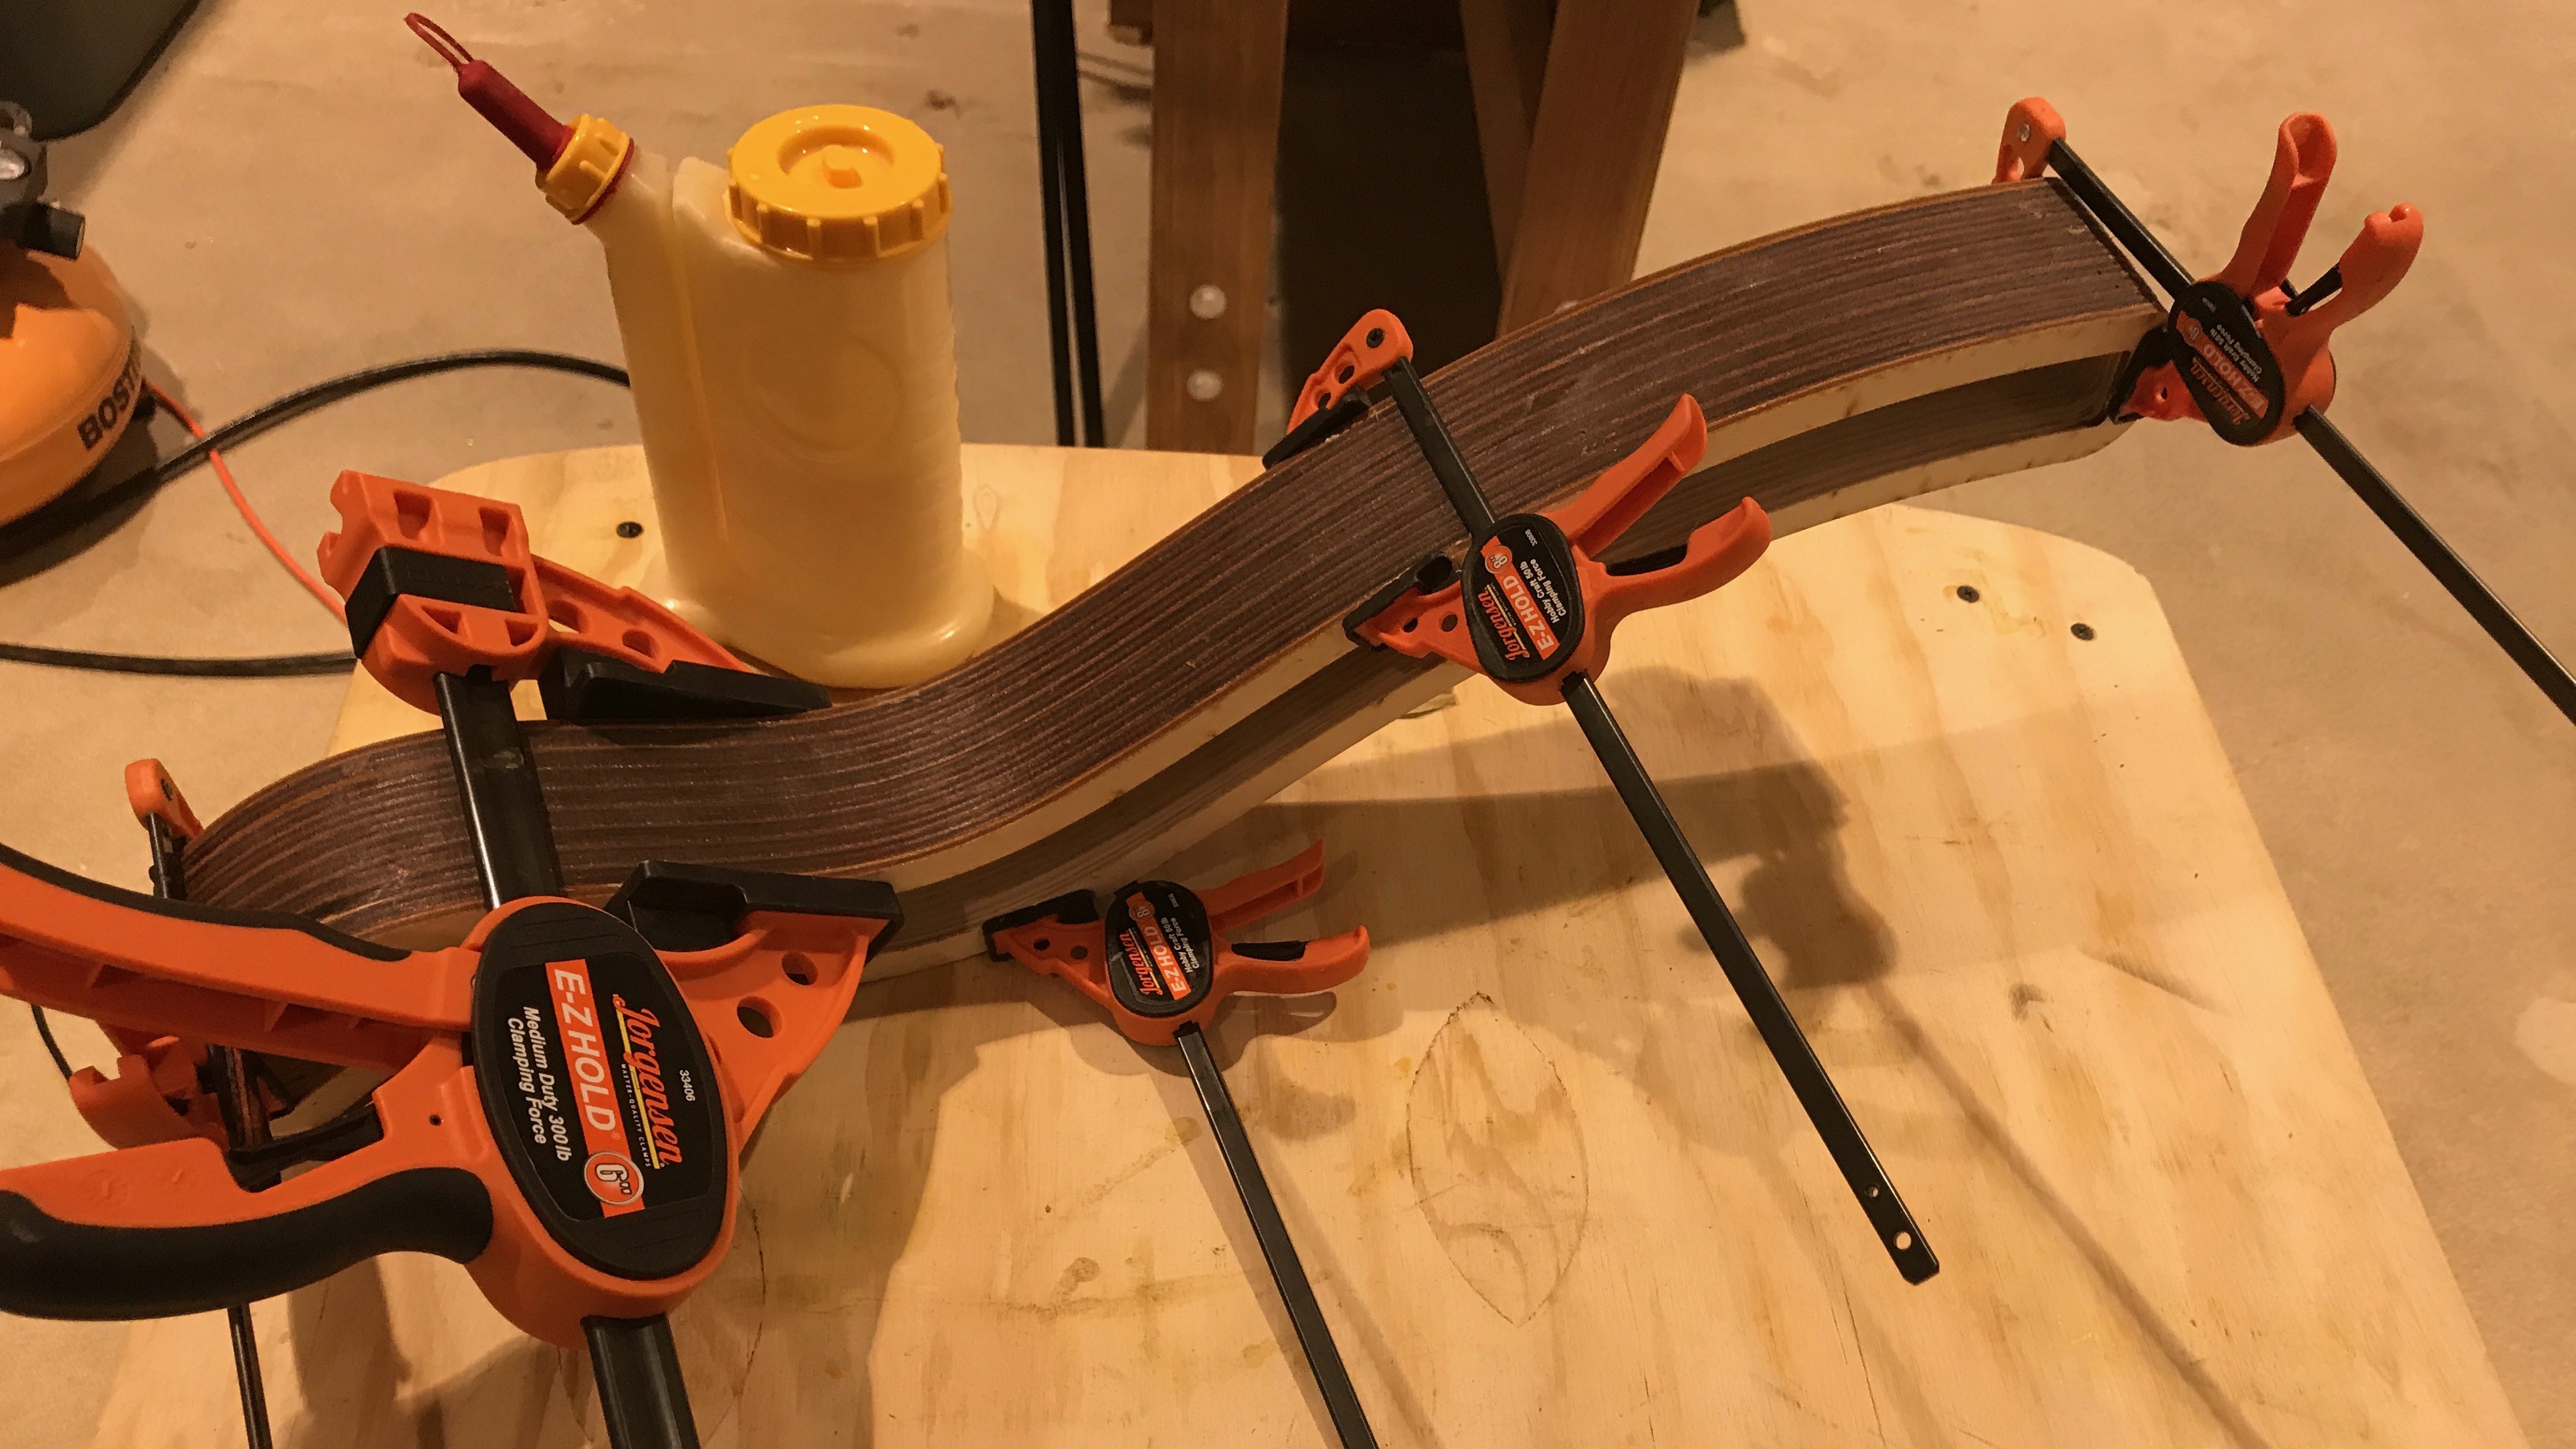
As with my previous experiments with making laser cut wood look like CNC milled wood, a lot of sanding is required to get rid of the laser burn marks (visible in the photo above)
Unlike "snak1", this glue up didn't use registration holes and instead used better clamping. Also, the glue up was staged: first the inner core was glued and clamped, then outer edge pieces were glued on and clamped. The end result was much better aligned, which also made sanding easier. The final wood form was then coated in a bit of wipe on polyurethane to protect the wood.
The LEDs were then wired up using NeoJoints and stuck into the upper section of the lamp.
Finally the controller board was placed inside (with the knob and adapter previously mentioned) This is a temporary maneuver as eventually the electronics will be hidden entirely in the structure (somehow :-)
The end result is pretty interesting looking I think. I'll definitely be exploring this further.
Discussions
Become a Hackaday.io Member
Create an account to leave a comment. Already have an account? Log In.