 Springuin
Prototype pictures!
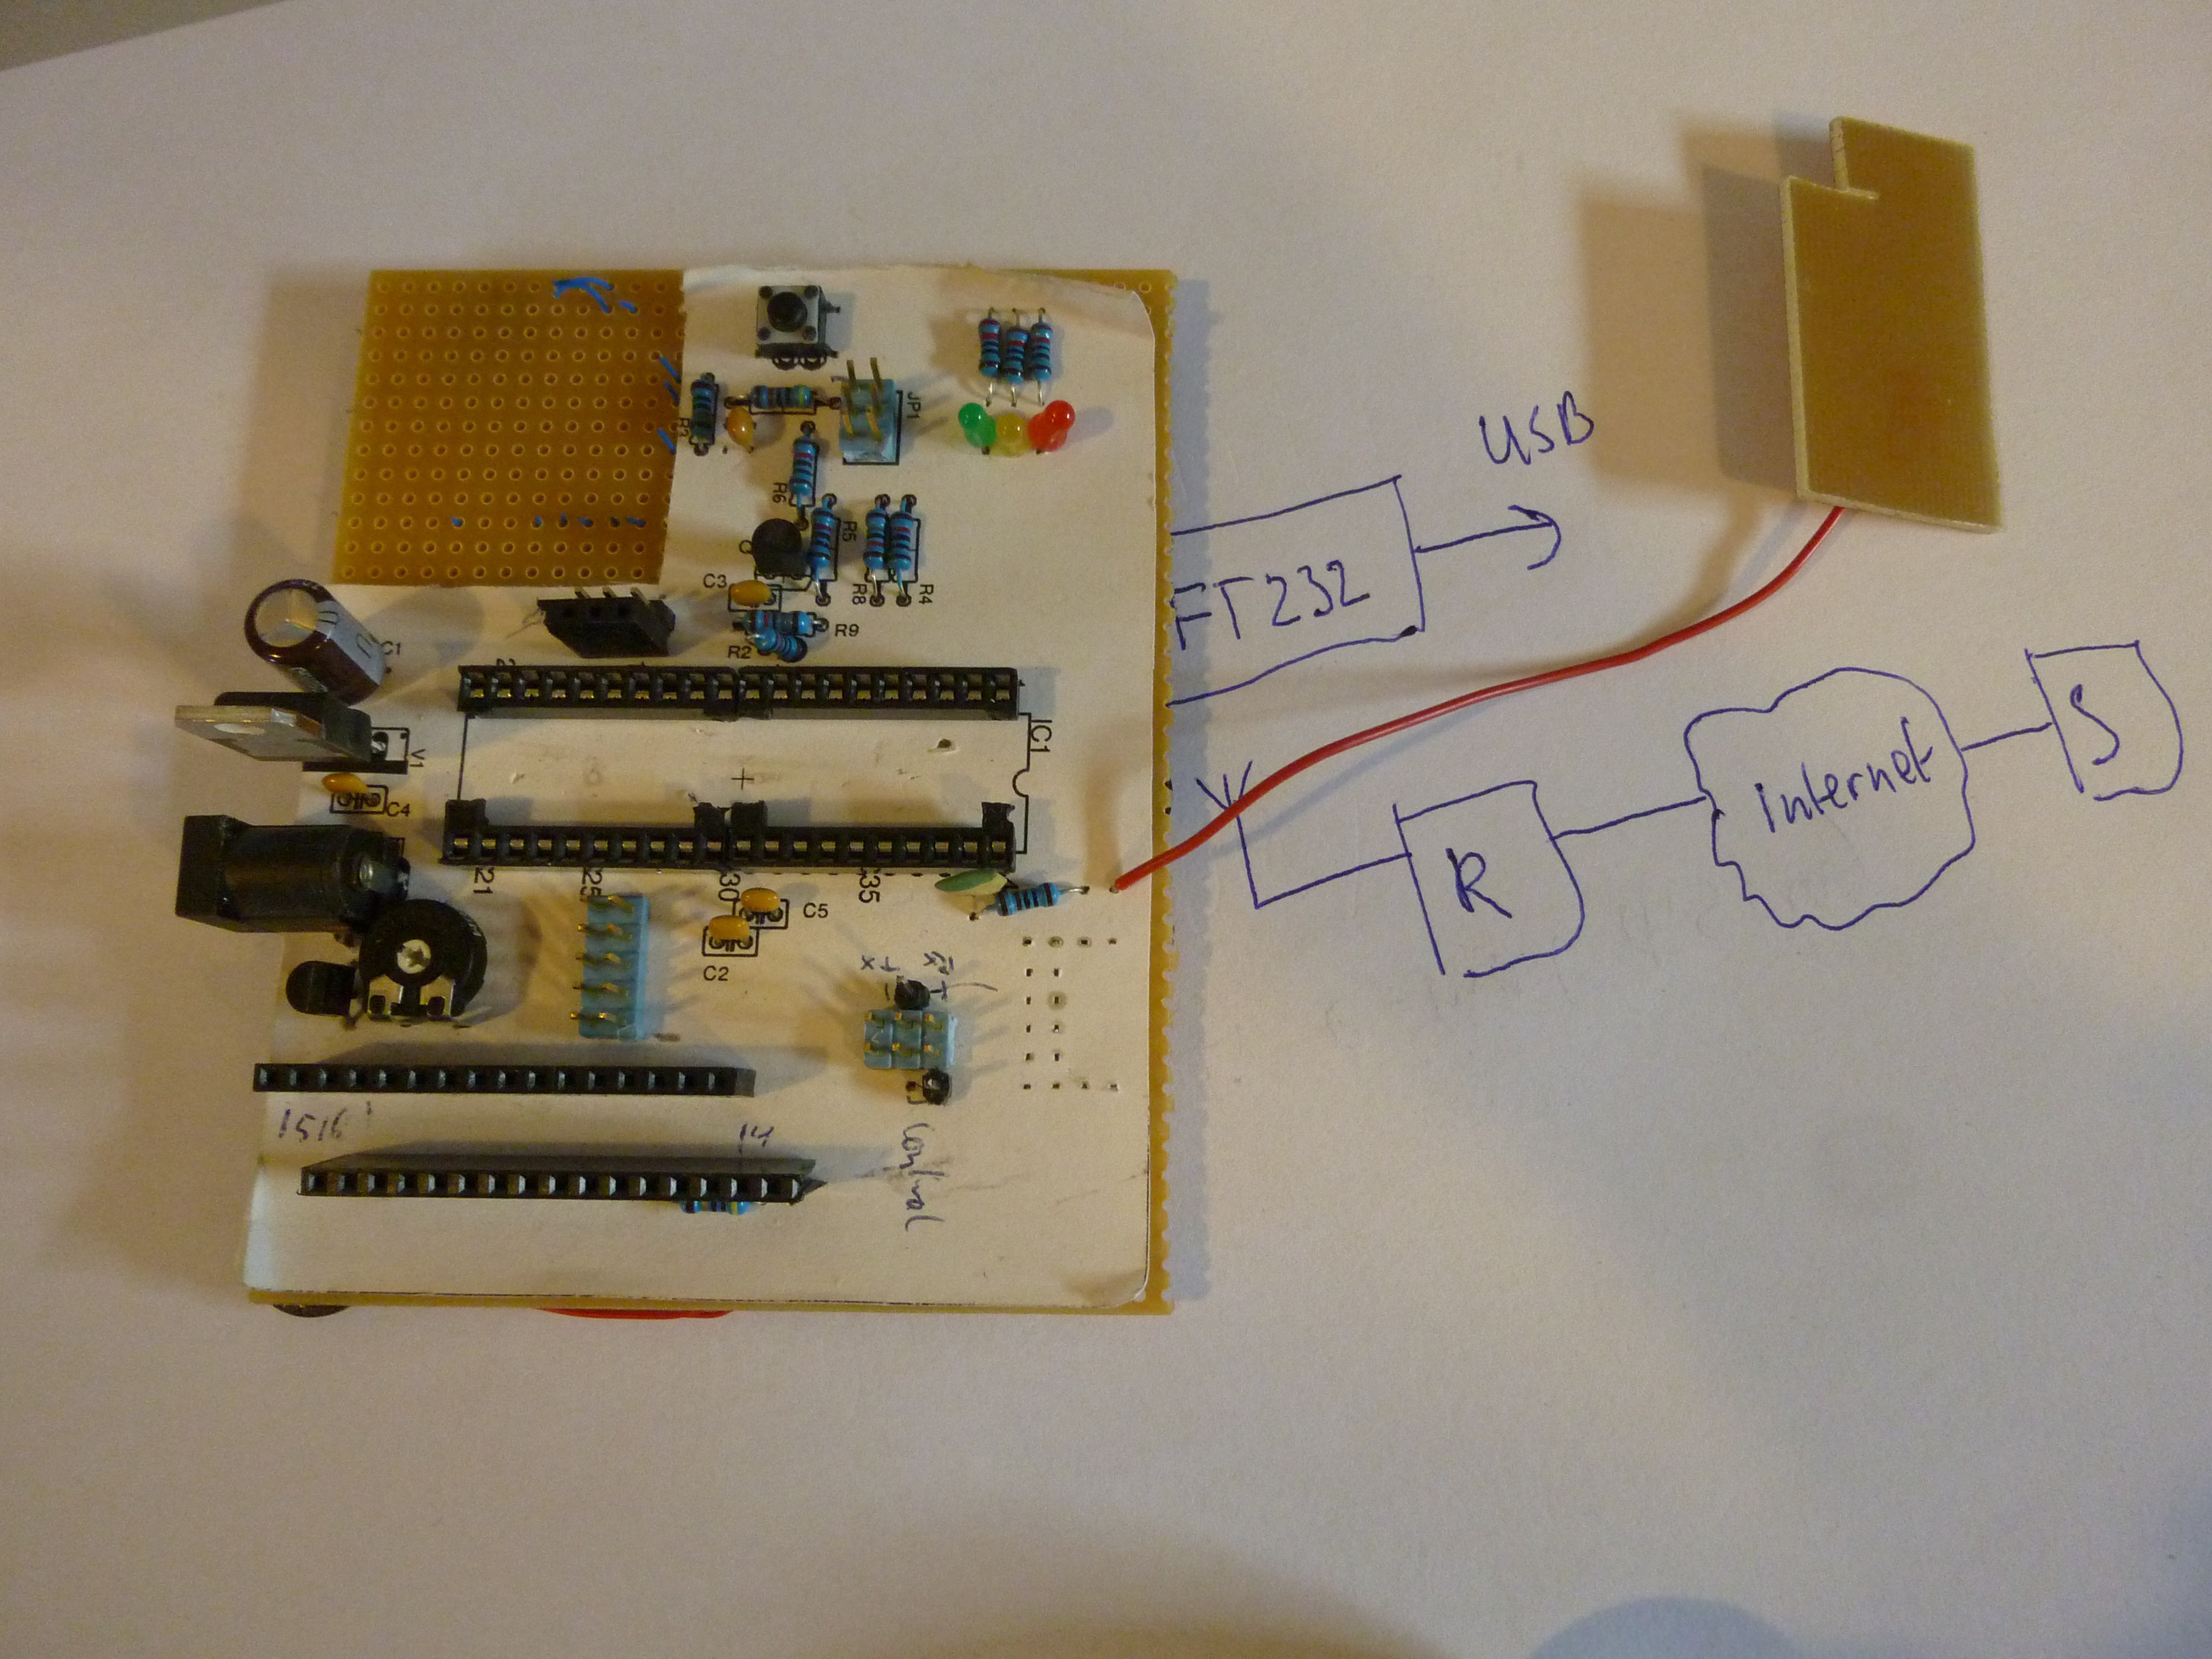
For all devices I make I start with a prototype on these kind of prototype PCB's. Single sided, with separate islands. Some people use stripboard but I prefer this because you don't have to break tracks and are not limited to one direction.
You see the valuable parts are removed. The wifi module was in the top left corner, connected with wires, floating above the PCB. The microcontroller was in the socket in the middle. On the right side, just below the microcontroller you see the holes where the MM232 module was (small module wih an FT232 chip). And the display is also removed. I used most of these parts in one of three units I produced.
The finished device has four touch buttons, the prototype only one. I figured that if one would work, four buttons would work just as well (and it did).
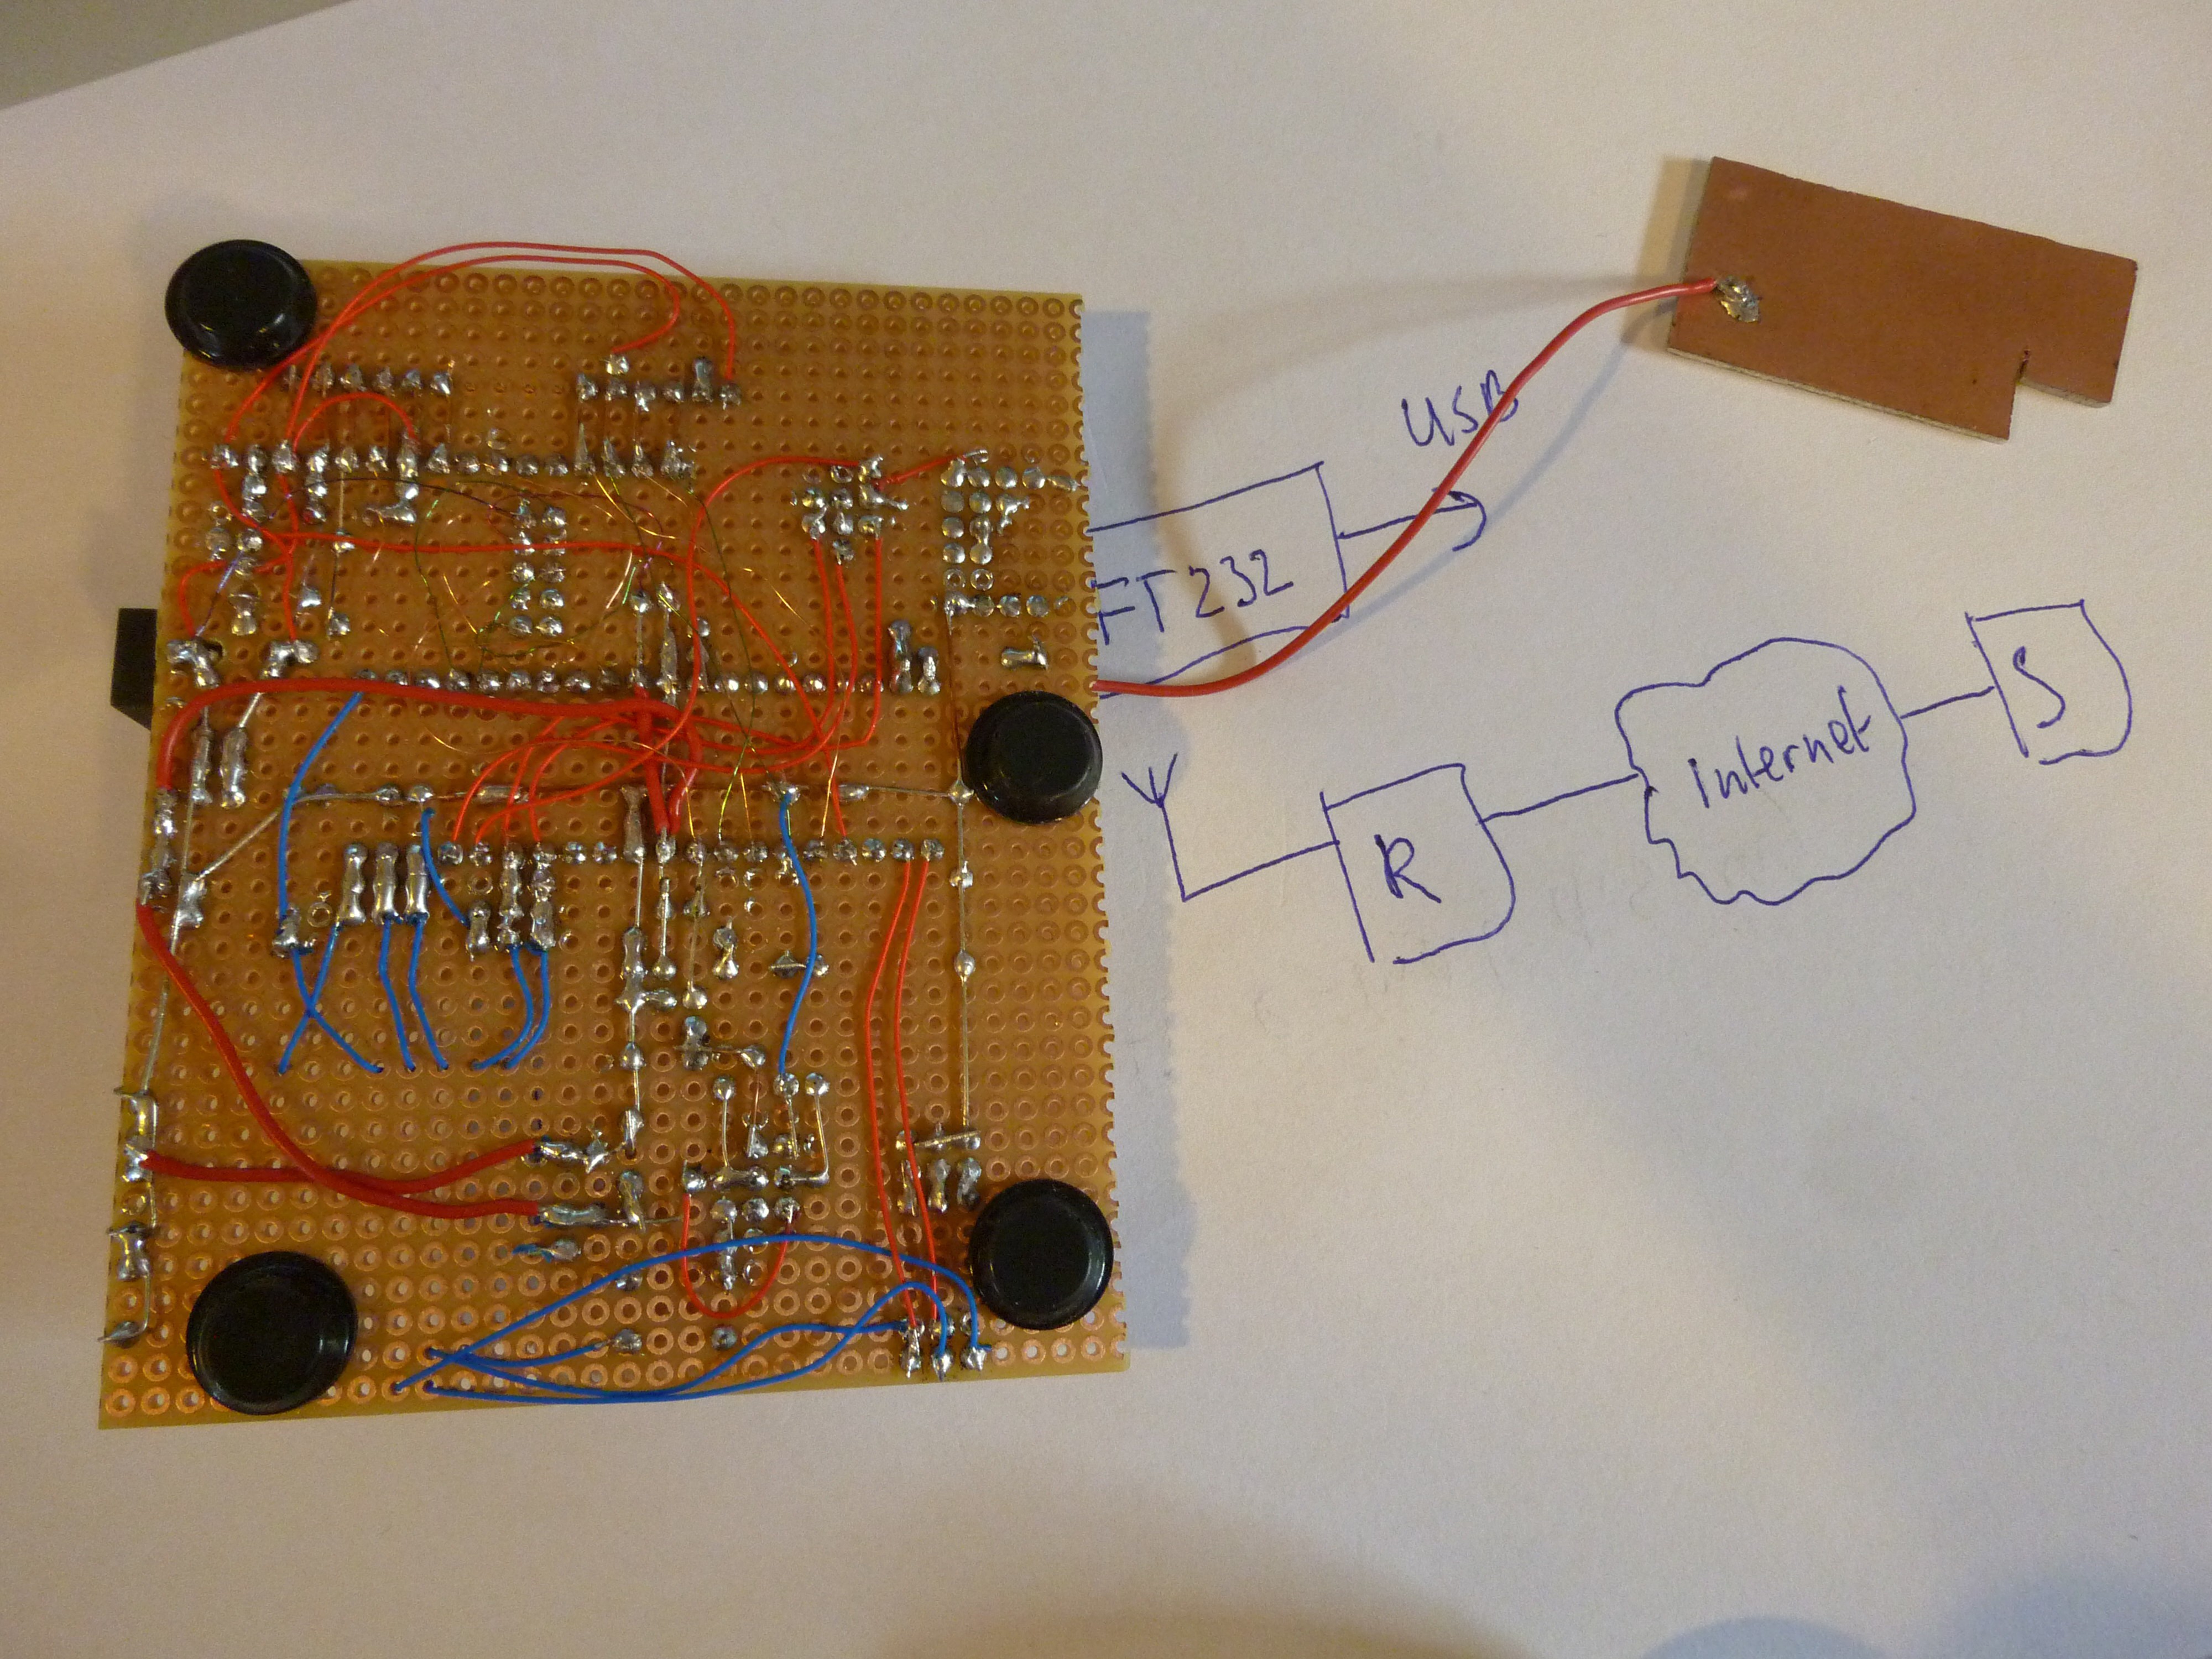
The wires are on the bottom. The red and blue wires are 32awg kynar wires: solid core, really thin and a little hard to strip. The tiny wires are RoadRunner wires: thin wires with an isolating coating. The coating is removed by keeping a drop of tin on your soldering iron and sticking the wire in that hot drop of tin. The coating melts and you can solder the wire.
Nowadays these thin wires are my preferred method of making these prototype boards. It's the fastest solution for me.
Discussions
Become a Hackaday.io Member
Create an account to leave a comment. Already have an account? Log In.